In this guide, you will find out how to change your skin in Minecraft 1.19.3 Java Edition.
1. First of all, you will need to download any of your favorite skins from “https://www.minecraftskins.com/“. Click on the search bar there and search for the skin. In this guide, it is the Knight skin. Select any knight skin and click on the download button on the right side.

2. Now go to the downloads folder of your PC and move the skin PNG file to your desktop.

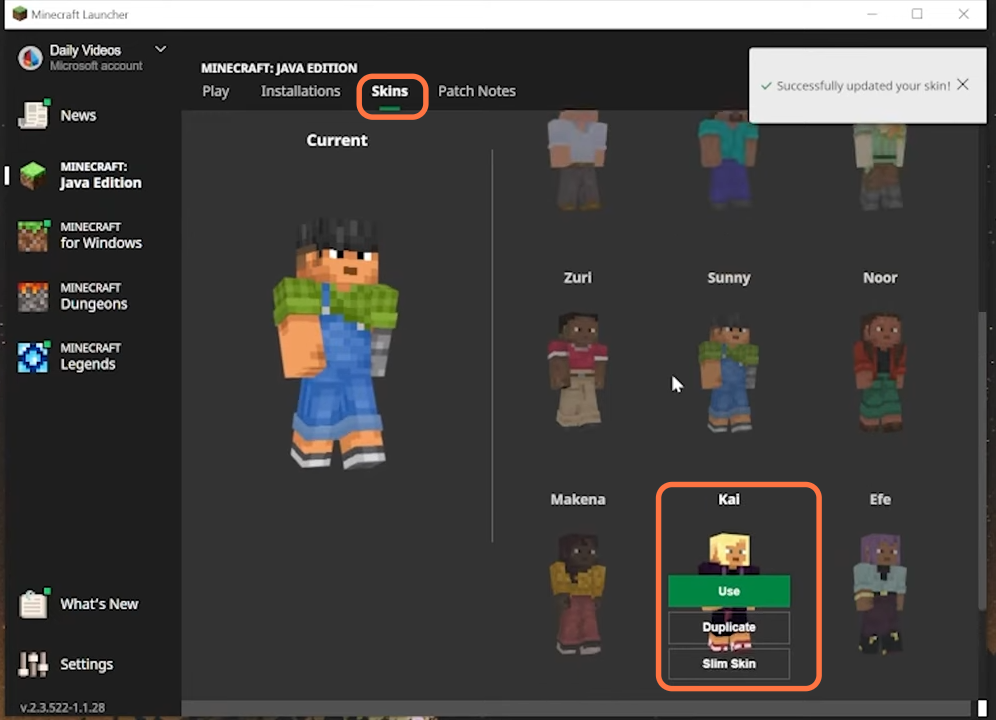
3. Now you need to open up the Minecraft Launcher and go to the skins tab. You will get to see default skins old and new as well at the right-hand side of the window. You can click to select any of these as well.
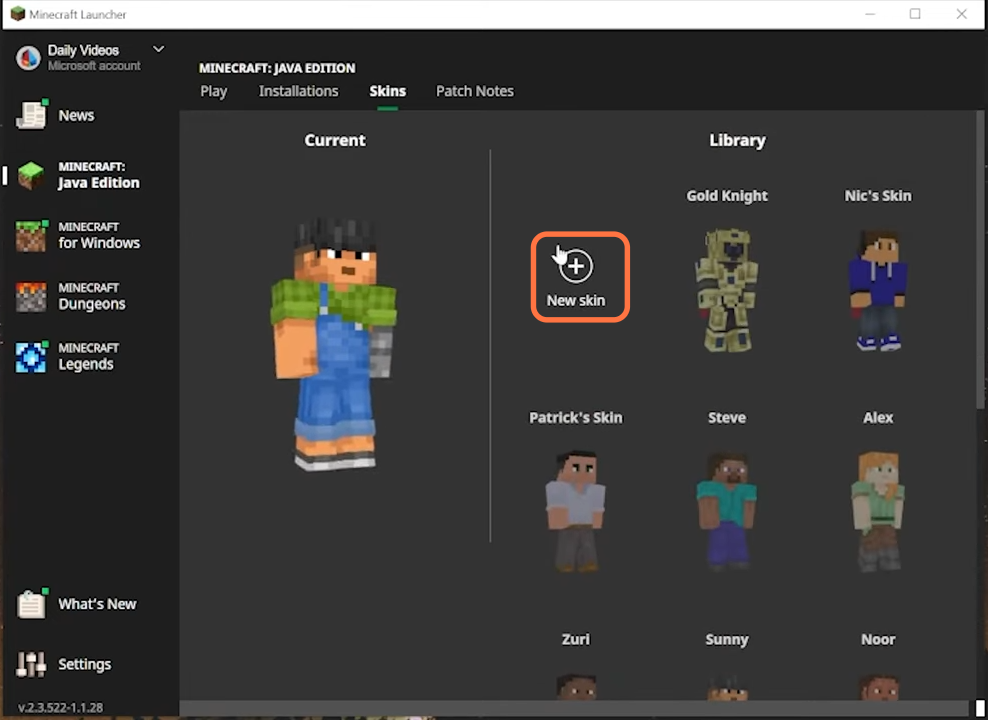
4. Now if you want to use your downloaded skin, then click on the plus icon.
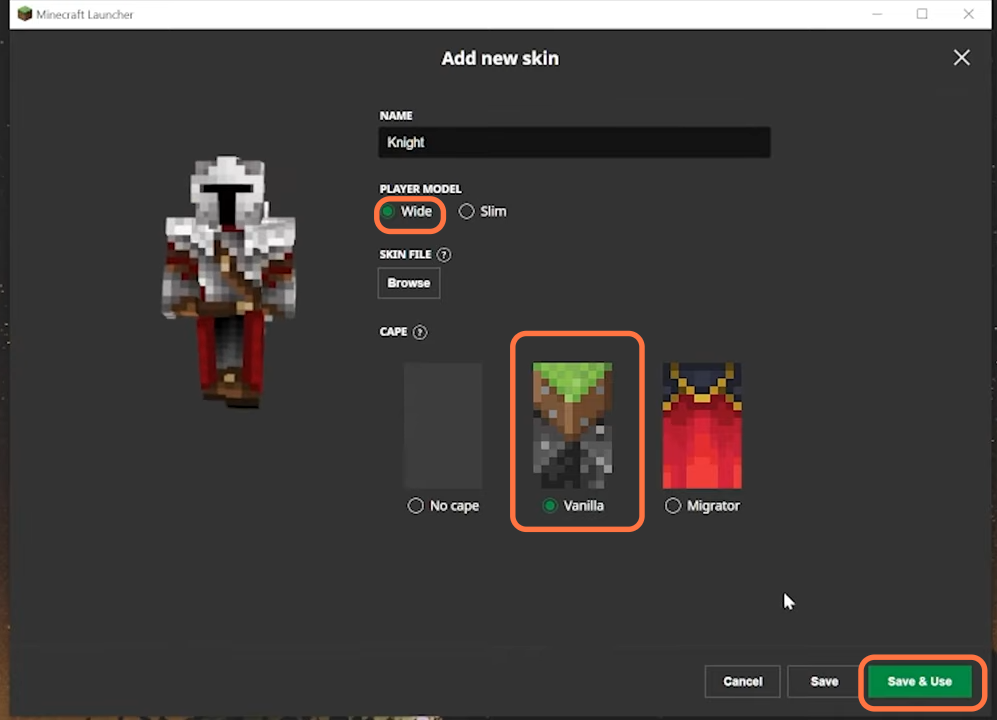
5. On the next window, you need to set out some options like giving the name of the skin and setting the player model to wide or slim. Then click the Browse button to select the downloaded skin file and finally select your cape to vanilla or migrator. Click save and use it at the bottom right to save the settings.
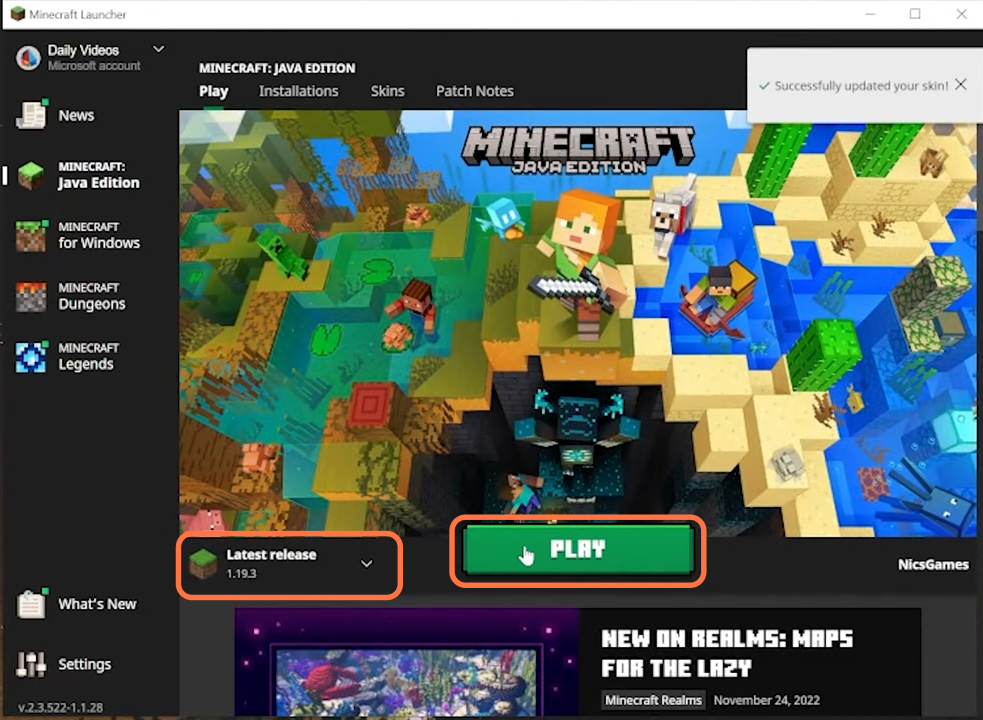
6. Now you can select Minecraft version 1.19.3 and press the Play button to run the game.