This guide will let you know how to create a free Multiplayer Minecraft Server for 1.20 on Macbook. You first have to download Java, then download the Minecraft server: Java Edition, and generate server files & EULA. After that, create server files, and make yourself an operator.
Download Java
In this section, we will take you through the steps to download and install Java on your Macbook. First, you have to check your Mac chip and then click the installer based on your operating system. After that, install Java by following the specific steps.
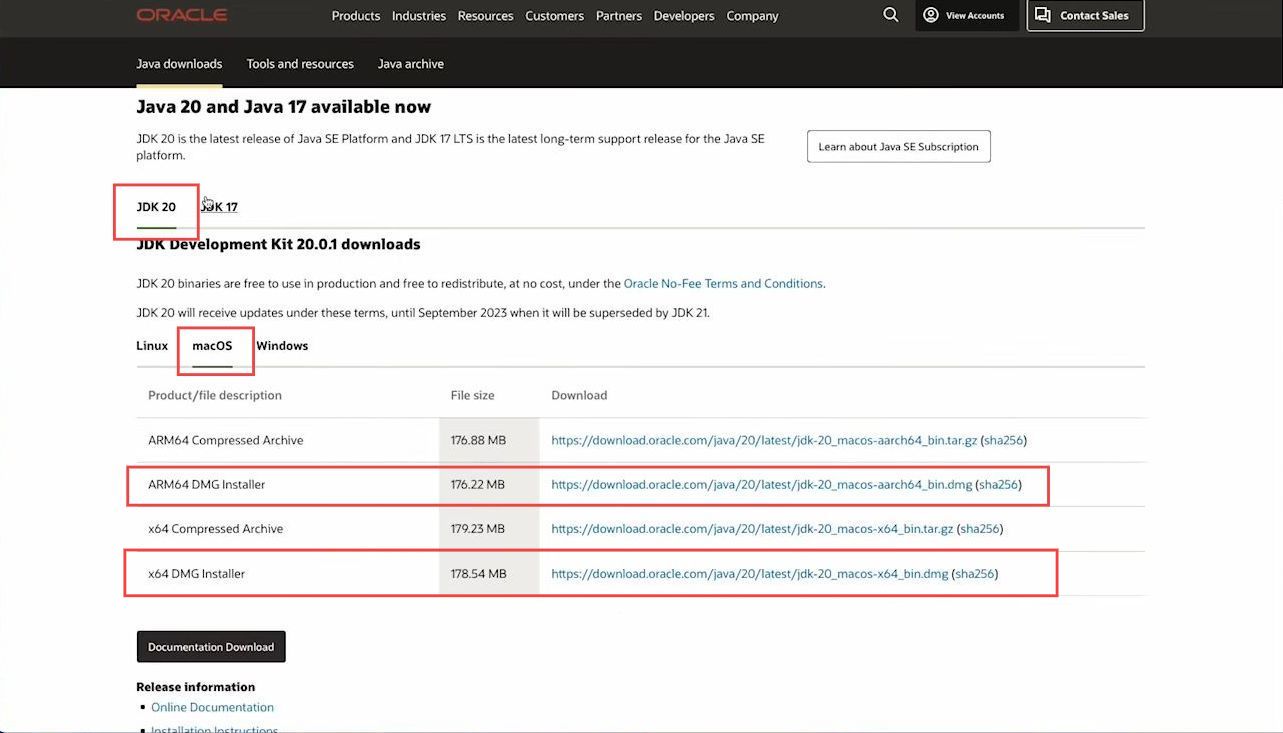
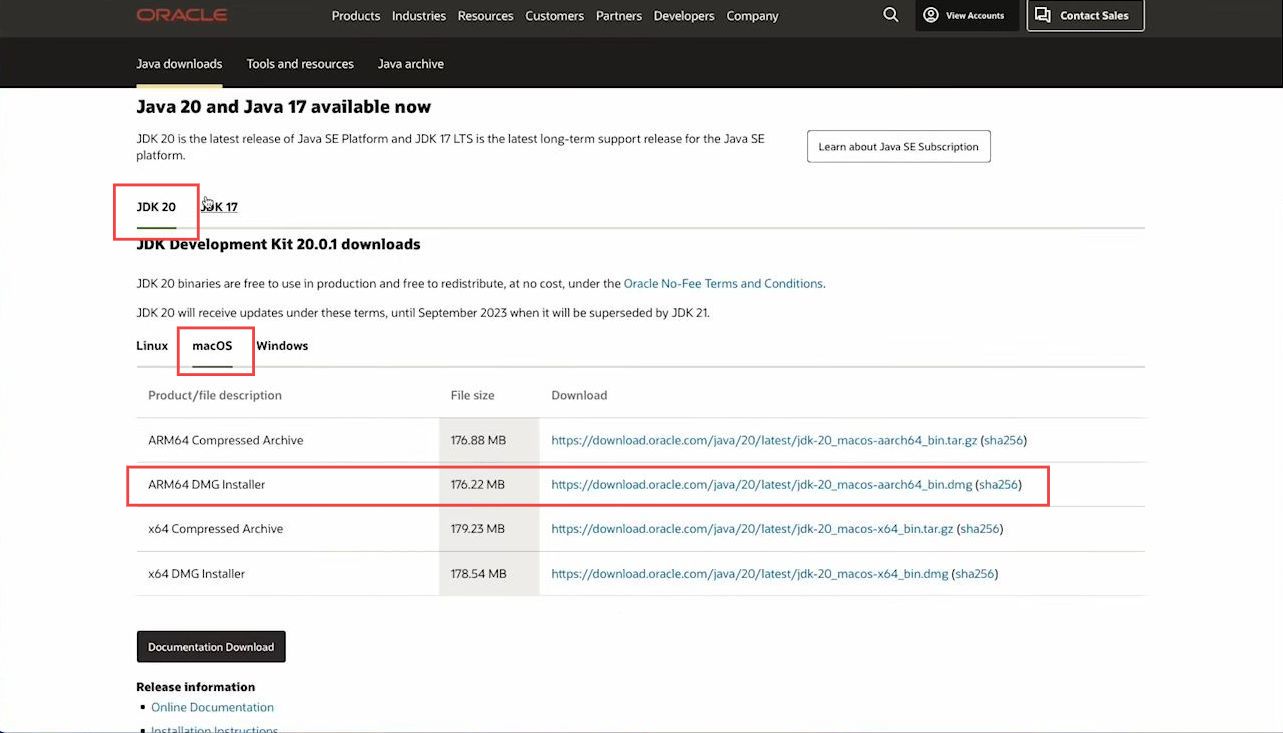
- First, you need to open the browser from your Mac and download Java JDK Development Kit 20.0.1.
- Once you have reached the web page, click the macOS tab from the quick access toolbar of JDK20.
If you have Mac with M1 or M2 chip, then download ARM64 DMG Installer.
However, if you have Mac with an Intel chip, then download x64 DMG Installer.
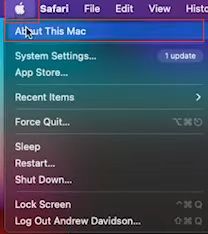
- If you want to check the type of your Mac, select the Apple icon from the top left side.
- After that, click the About this Mac option from the drop-down menu.
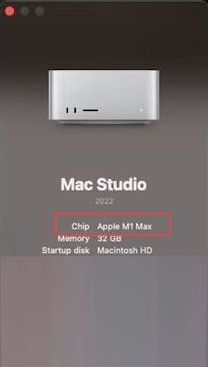
A little pop-up window will appear and you can check your Mac chip.
- After that, navigate to the macOS tab under the JDK 20 section.
- Click on the ARM64 DMG Installer from the listings.
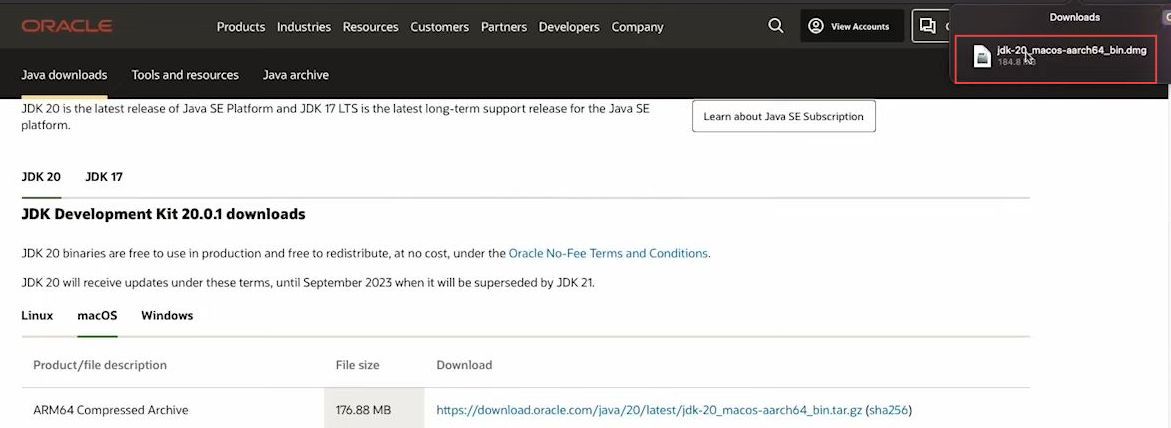
- Once the downloading is finished, click the Download icon from the top right side.
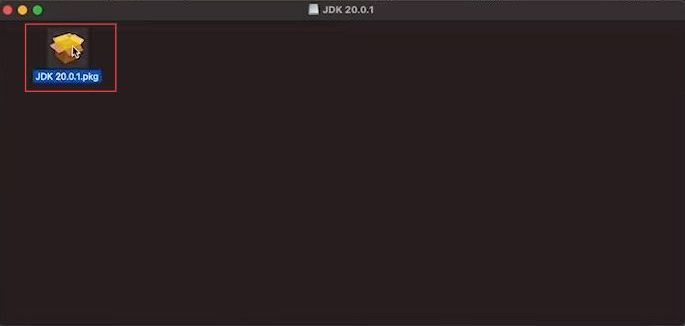
- Double-click the downloaded item from the menu.
- Now you have to double-click the Package from the menu.
- After that, click the Continue button from the window.
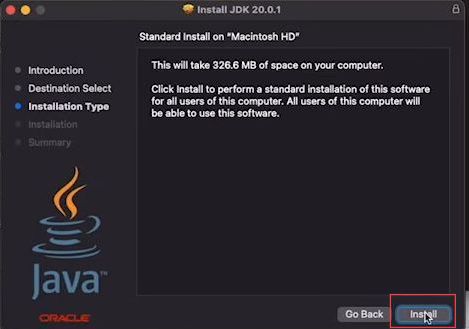
- Upon reaching the next window, click the Install button from the menu.
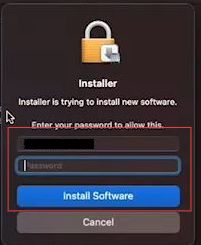
- After that, input the password that you use to log in to your Macbook.
- Click the Install Software button from the menu.
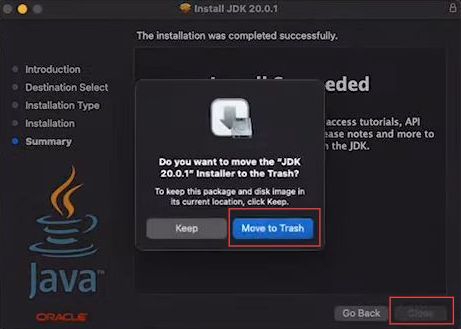
- Once the installation process has been done, click the Close button from the menu.
- Tap the Move to Trash button from the pop-up window.
Download the Minecraft Server: Java Edition
This section describes how to download and install the Minecraft server: Java Edition on your Macbook. First, you have to download the Minecraft Server from your browser and put the downloaded file into the new folder. Open the terminal and write specific commands to connect it with Java.
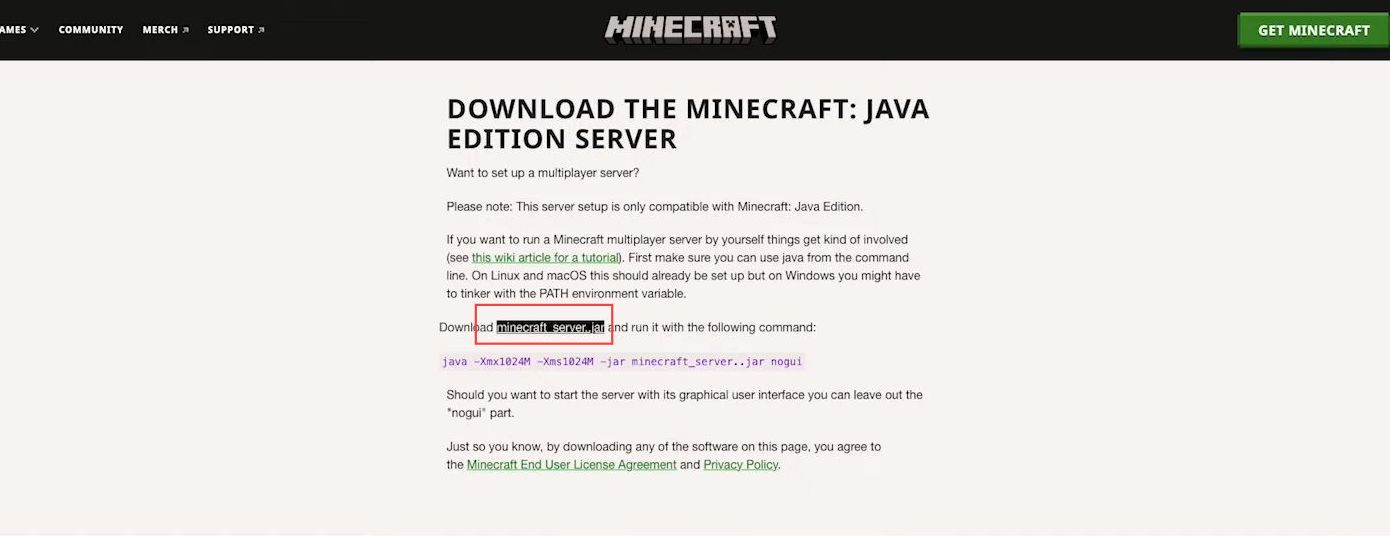
- First, you need to open the browser from your Mac and download the Minecraft Server: Java Edition.
- Once you reach the web page, click on the Download option.
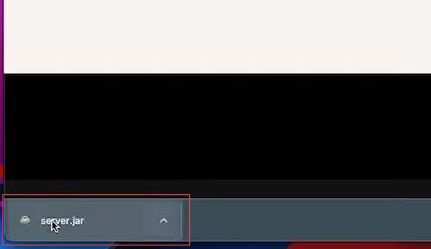
- Once the file is downloaded, drag and drop it to the desktop.
- Now create a new folder on the desktop by right click on it and select the New folder option.
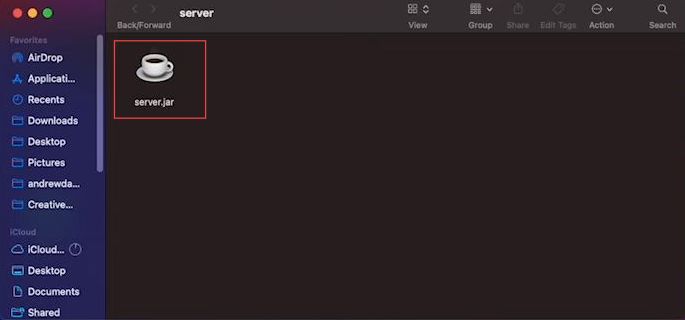
- You have to rename it to the Minecraft Server or anything like that. After that, drag and drop the recently downloaded Minecraft server into the newly created folder.
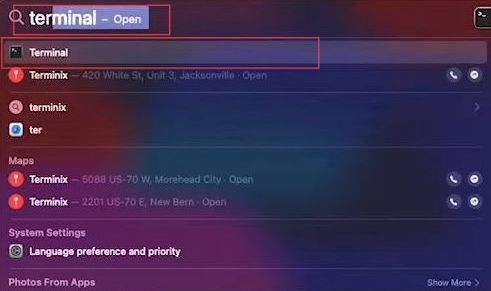
- Search the terminal by hitting the command and space buttons.
- Now you need to click the Terminal option to open the application.
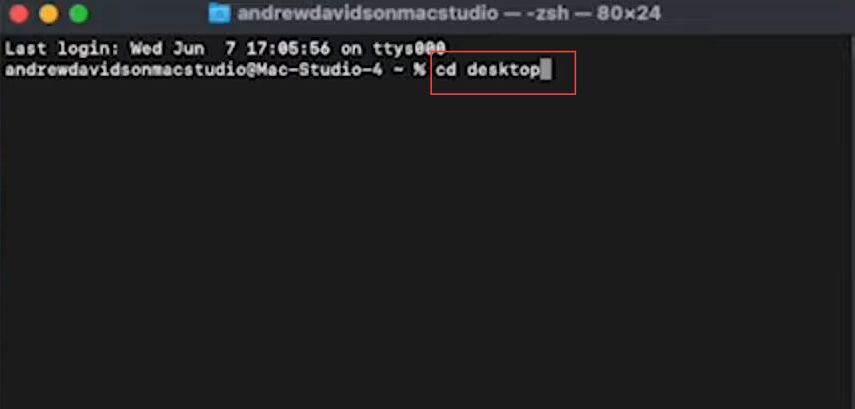
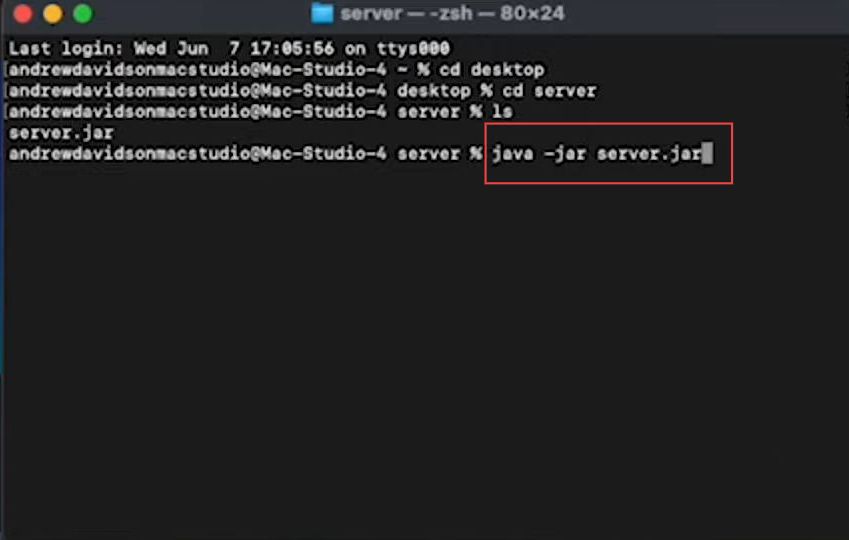
- Once the terminal window is opened, input ”cd desktop” in the box and press enter from your keyboard.
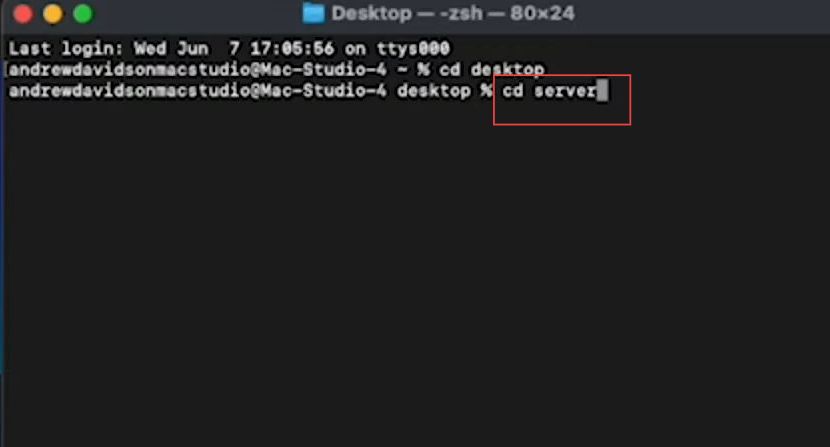
- After that, input ”cd your server name from the desktop” in the box and press enter from your keyboard.
- Input ”ls” in the box which is the listing component and press enter from your keyboard.
- Now write ”Java -jar server.jar” in the run box and press enter.
Generating server files & EULA
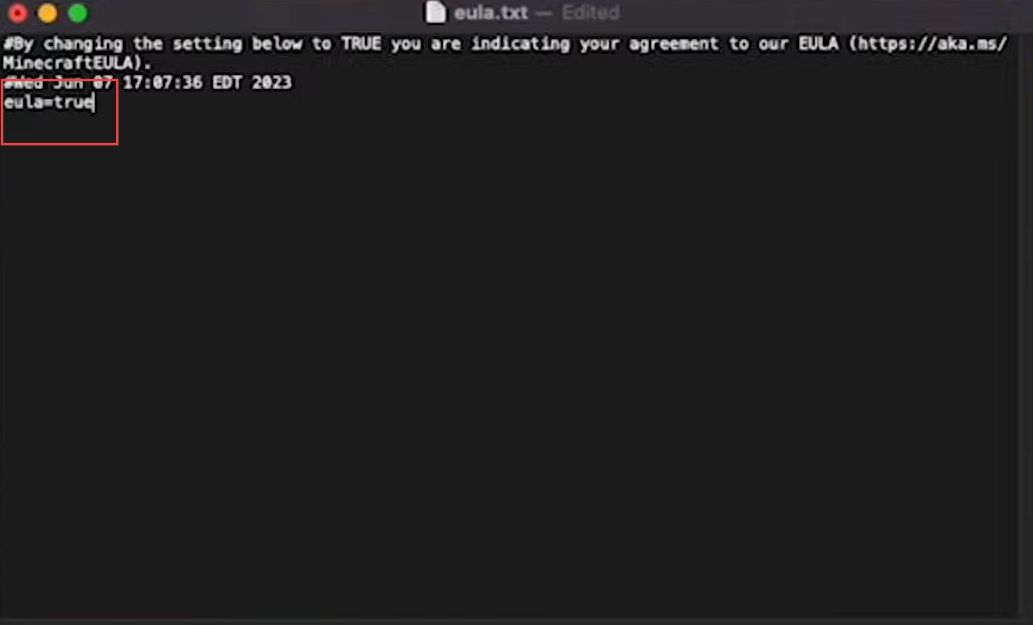
This section explains how to generate server files. For that, you must set up the server and then change the Eula file from false to true.
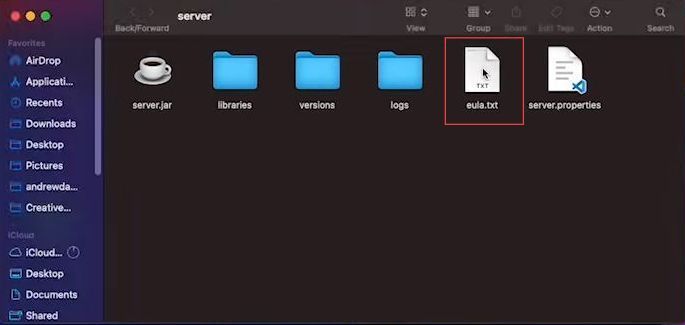
- You will need to double-click the Eula.text file from the server folder.
- Upon reaching this window, remove the word false from the eula row and input true at that place.
- After that, click the File tab from the quick access toolbar and select the Save option.
Creating Server File
This section describes how to create a server file on your Macbook.
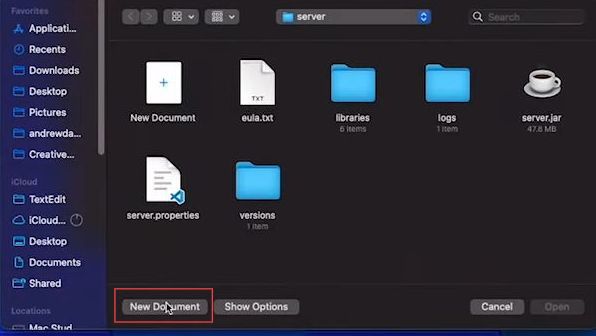
- First, you have to search the textedits application by hitting the command and space buttons to open it.
- Once the window is opened, click the New Documents button from the menu.
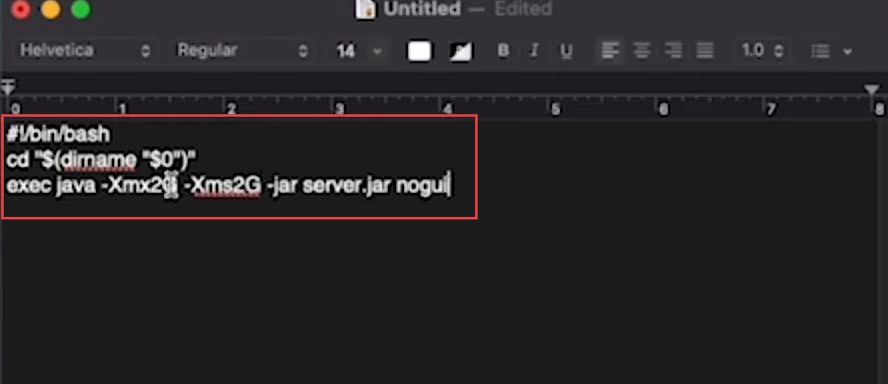
- You have to input the following commands in the terminal box.
Now it is suggested that 2 gigabytes of RAM is enough for the server to run conveniently.
However, you can change the RAM by replacing the number such as 4, 6, or 8 in the third row.
#!/bin/bash
cd "$(dirname "$0")"
exec java -Xmx2G -Xms2G -jar server.jar nogui
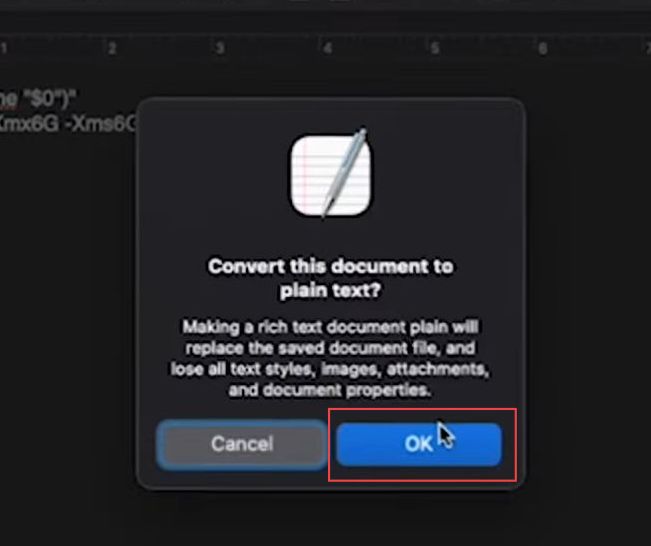
- After that, click the Format tab from the quick access toolbar and select the Make Plain Text option.
- Now once this notification popup, click the Ok button from the menu.
It will convert the text into a command which can run on your computer.
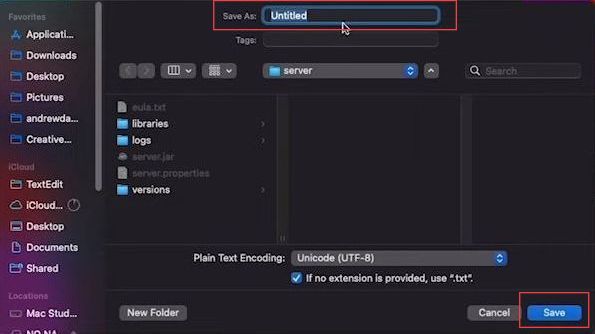
- Now click the File tab from the quick access toolbar and then select the save option from the menu.
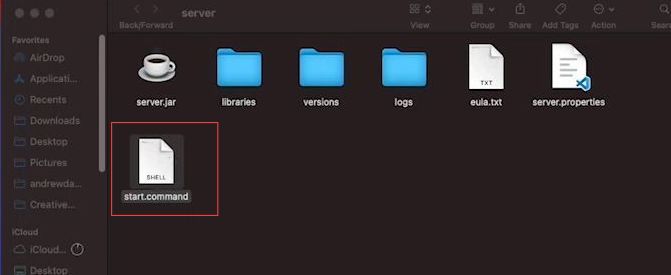
- Save this file in the Server folder that has been created recently on the Desktop.
- After that, rename this file to ‘‘start. command”.
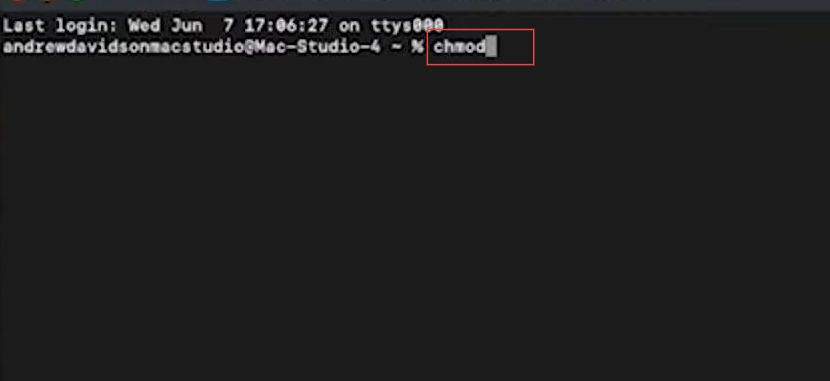
- Now you have to click the terminal from the taskbar to open it.
- Once the terminal is opened, you have to write ”chmod a+x” and drag & drop the start.command file into the terminal application.
- After that, press enter button on your keyboard.
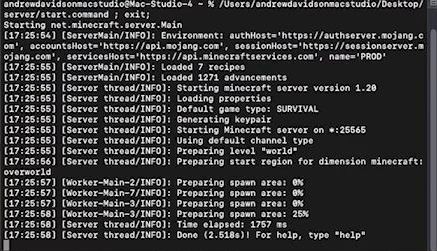
- Now double-click the start.command file from the server folder to open it.
The server will start running and be available for you.
Download Port Map
This section explains how to download and install the Port Map application on your Macbook. First, you have to download the Port Map application from your browser and put the downloaded file into the desktop. After that, open the application and check whether the server is connected.
- First, you need to open the web browser from your Mac and download the Port Mpa and TCMPortMapper.
- Once you reach the web page, click on the Download button.
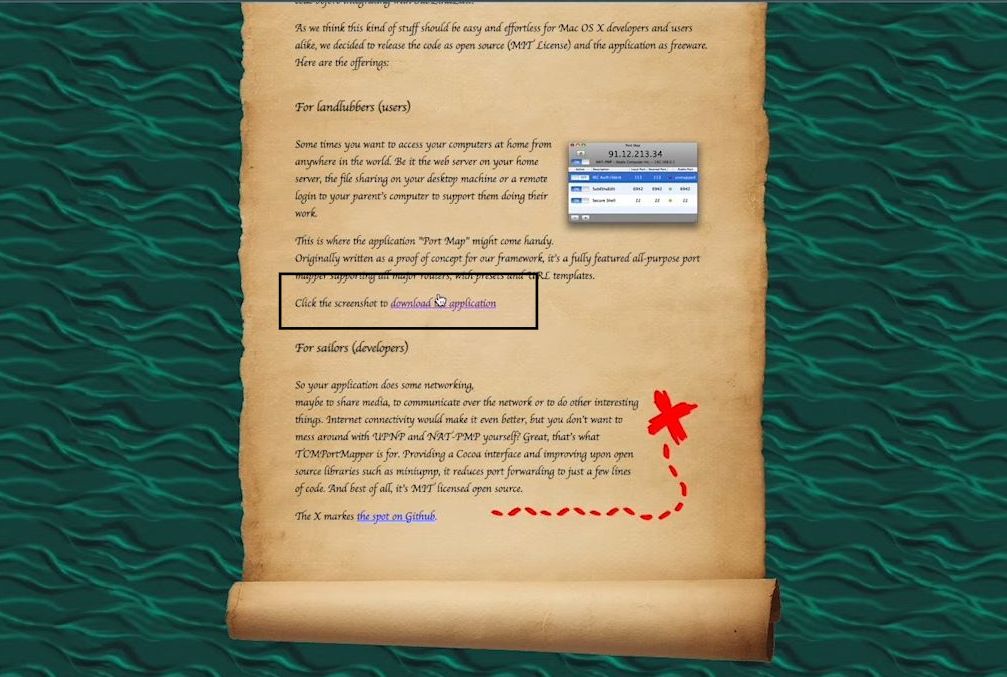
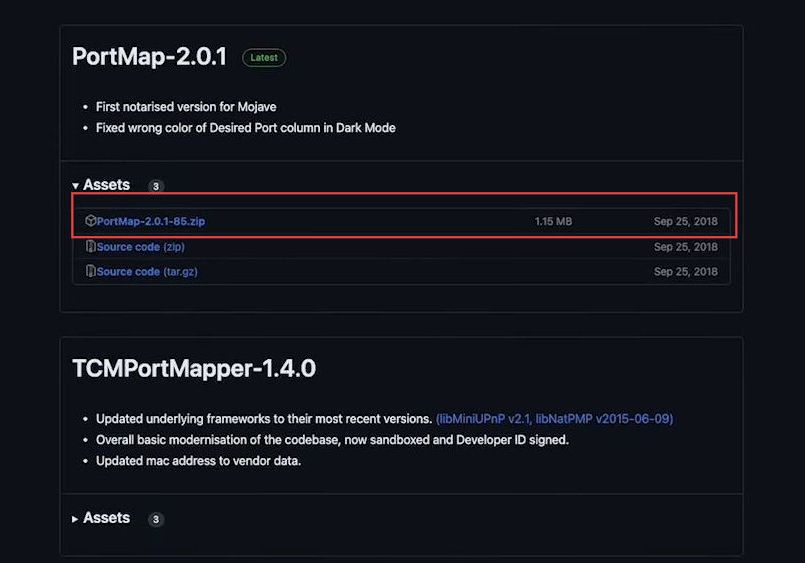
- Upon reaching this window, click the Port Map download link from the section of Assets.
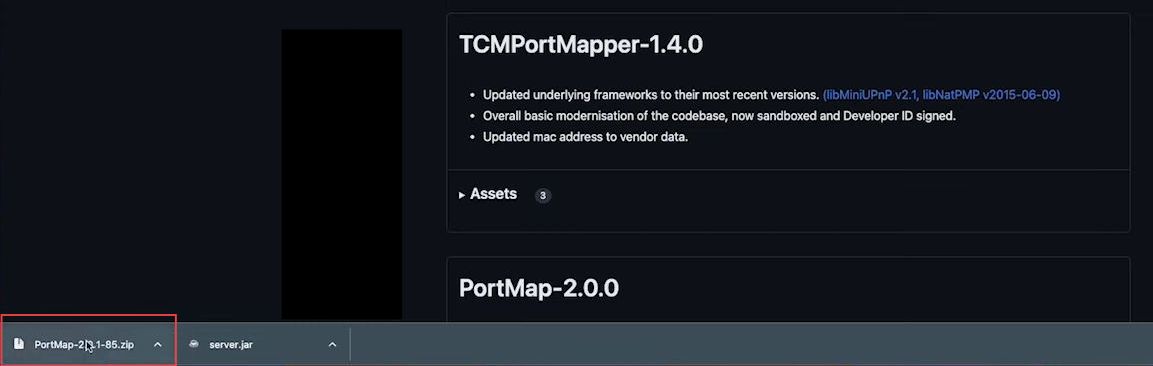
- Once the downloading is finished, click the downloaded file from the bottom left side.
- You need to drag and drop the recently downloaded file to the desktop of your Macbook.
- Double-click the recently downloaded file from the desktop to open the application.
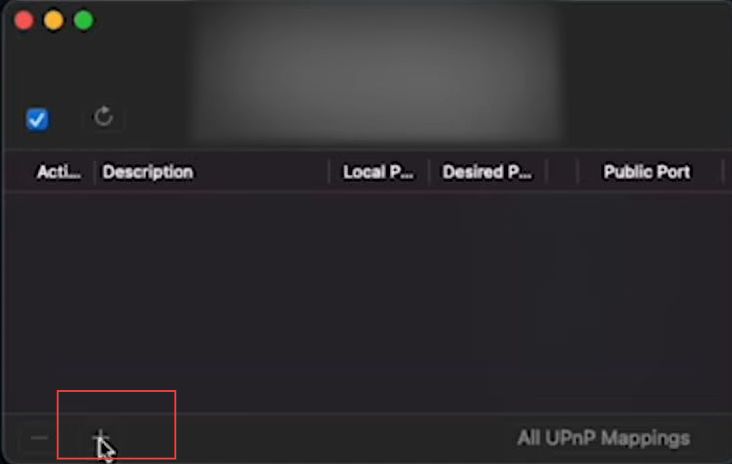
Once the application is opened, there will be your IP addresses that relate to your location on the top side.
- Now you have to click the Plus sign option from the bottom left side of the window.
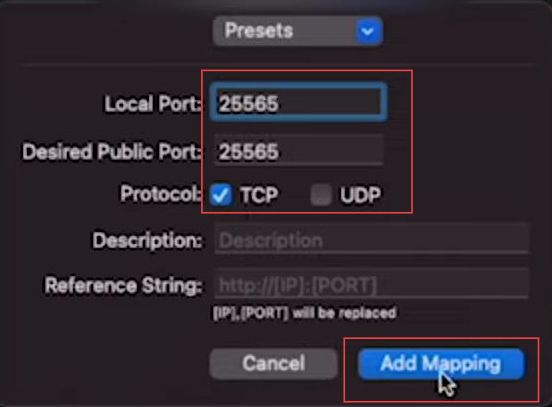
- Input 25565 in the sections of the local port and Desired Public Port and ensure that the Protocol option TCP is check-marked.
- Add anything in the description and reference settings based on your choice.
- Click the Add Mapping button from the bottom right side of the menu.
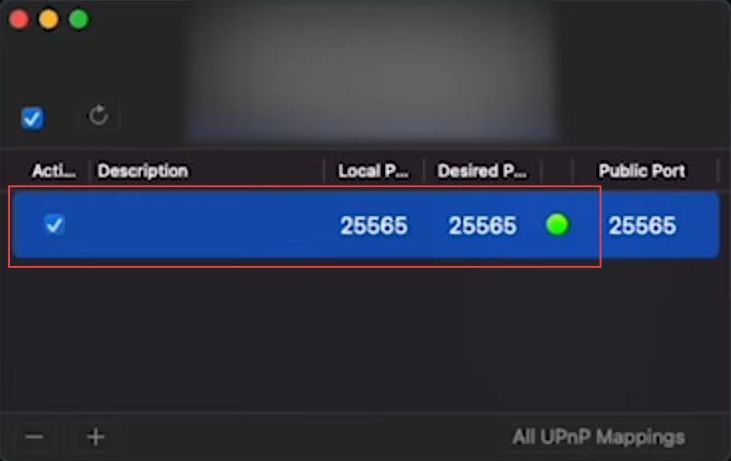
Upon reaching this window, you can see that green light has been popping up in the public section.
- However, if it does not pop up, you have to uncheck the box from the extreme left side and then recheck this option again.
- To add your friends to the server, ensure that the green light is popping up and the server is connected to the Port Map.
Join your Server
This section describes how to join your server with Minecraft.
- Open Minecraft on your Macbook and click the Play button next to the latest release menu.
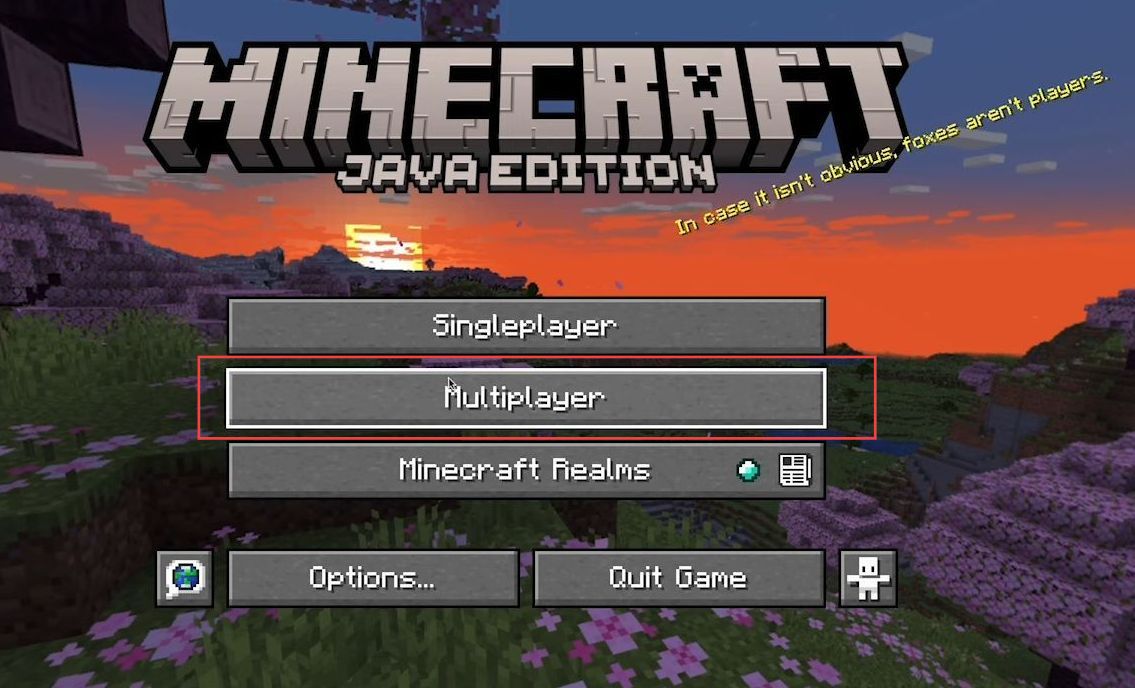
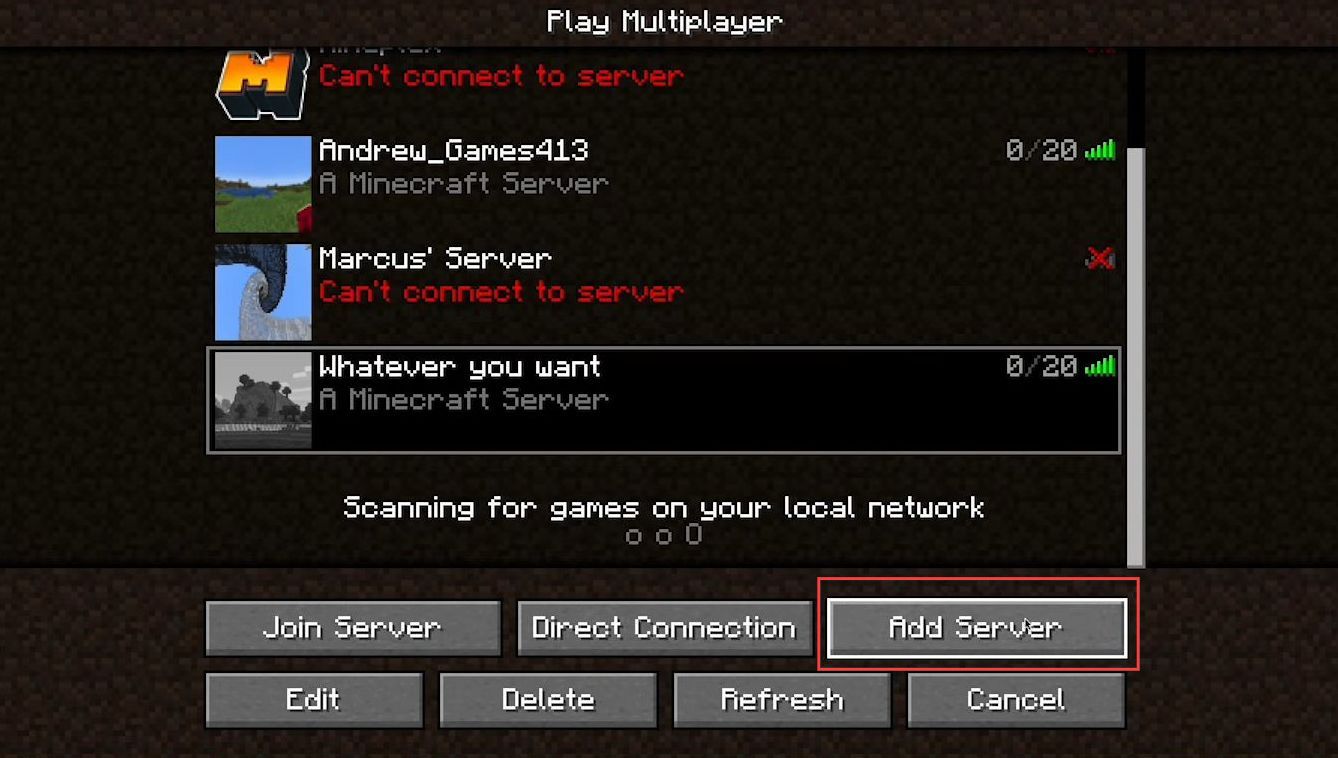
- Select the Multiplayer option from the game menu.
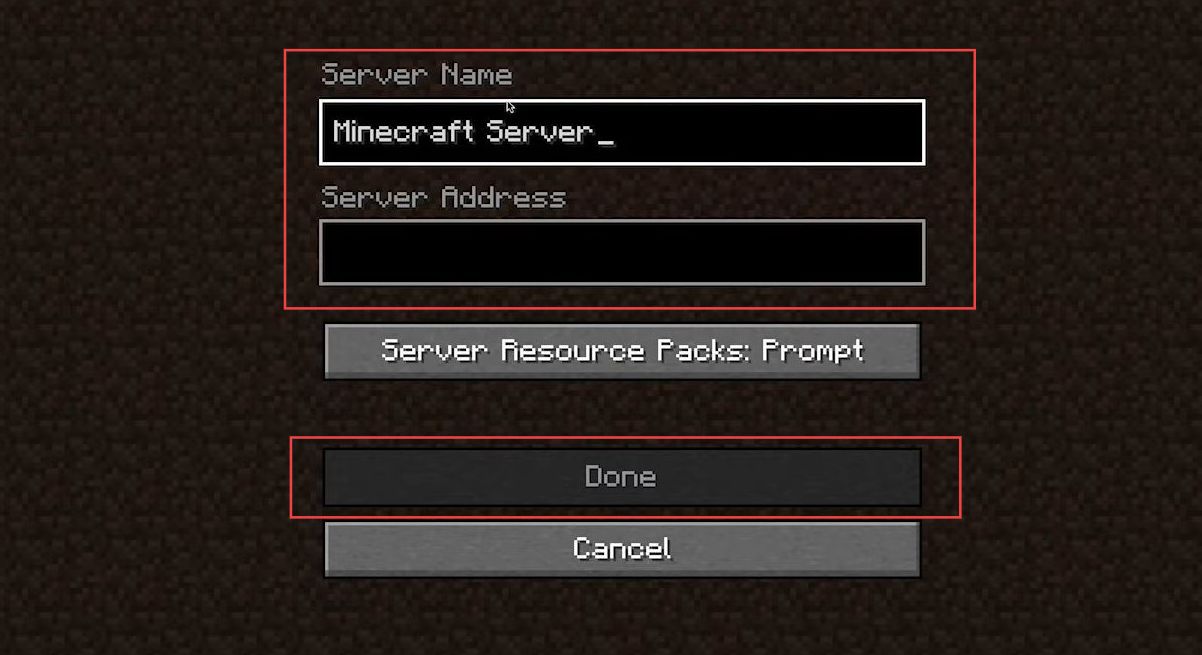
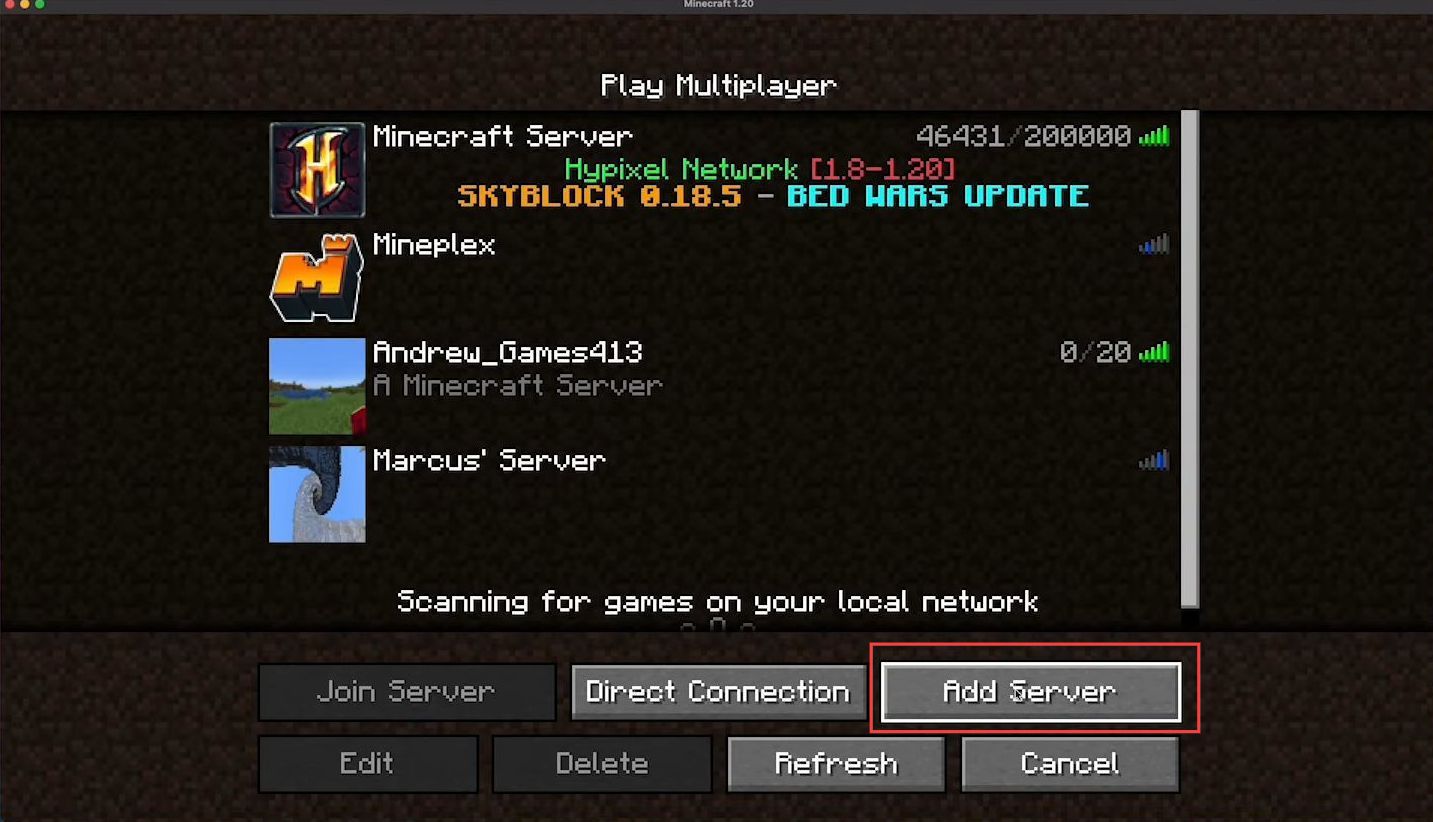
- Upon reaching this window, you have to click the Add Server button from the menu.
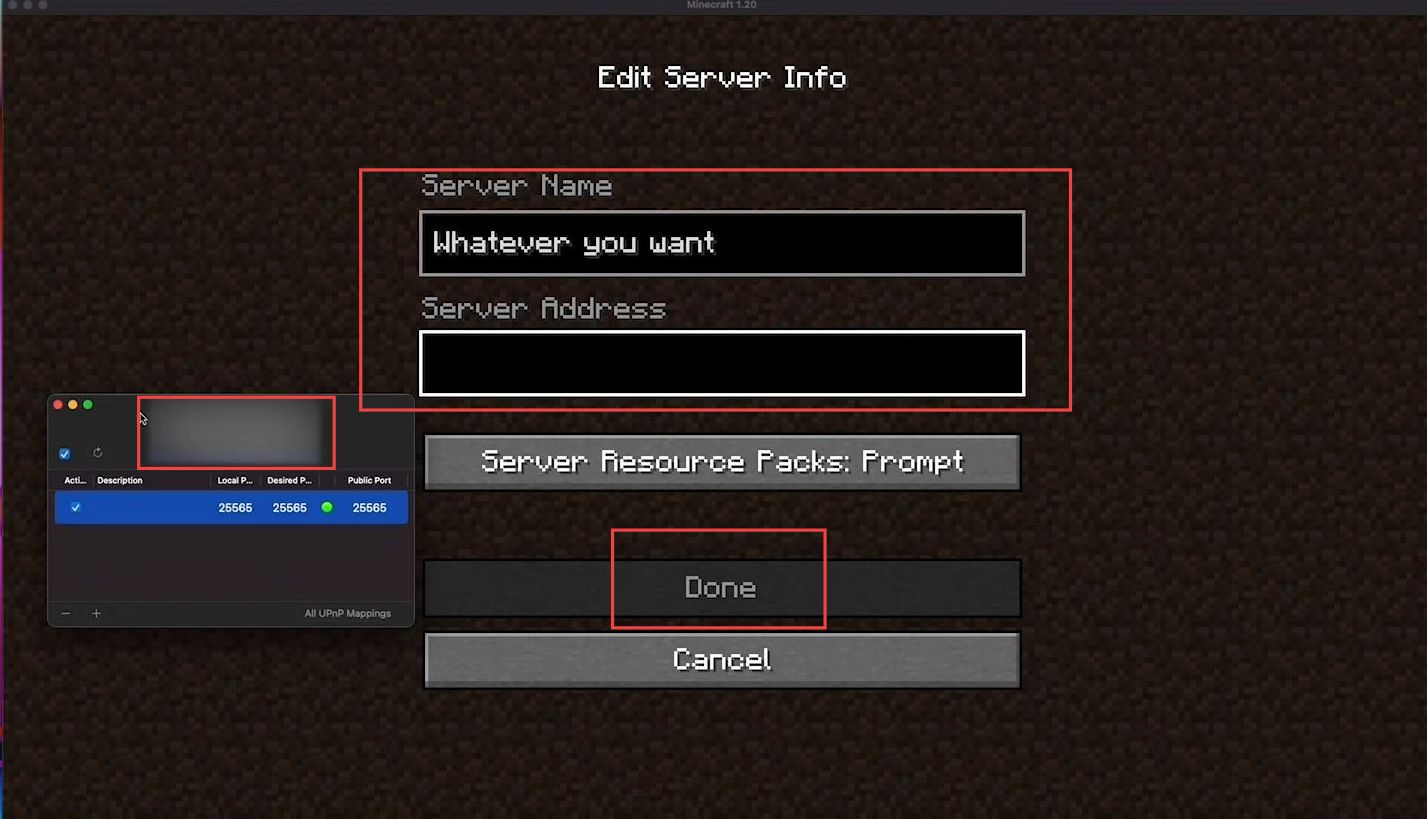
- Once the window is opened, input your server name in the box as per your choice.
- Copy the server address from your Port Map application and put it inside the box.
- After that, click the Done button from the menu.
Now you can see your server is online, you can click it and play the game mode.

Making yourself an operator and exiting the server
This section explains how to make yourself an operator and exit the server. First, you have to write specific commands in the terminal to make yourself an operator in the Minecraft application. Input specific commands to exit and reopen the server.
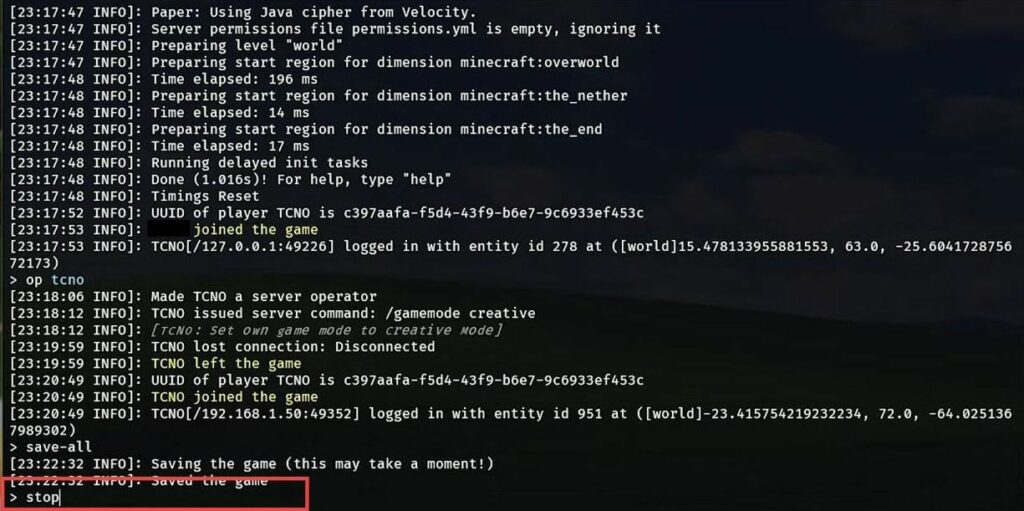
- If you want to make yourself the operator in the game, click the terminal application from the taskbar.
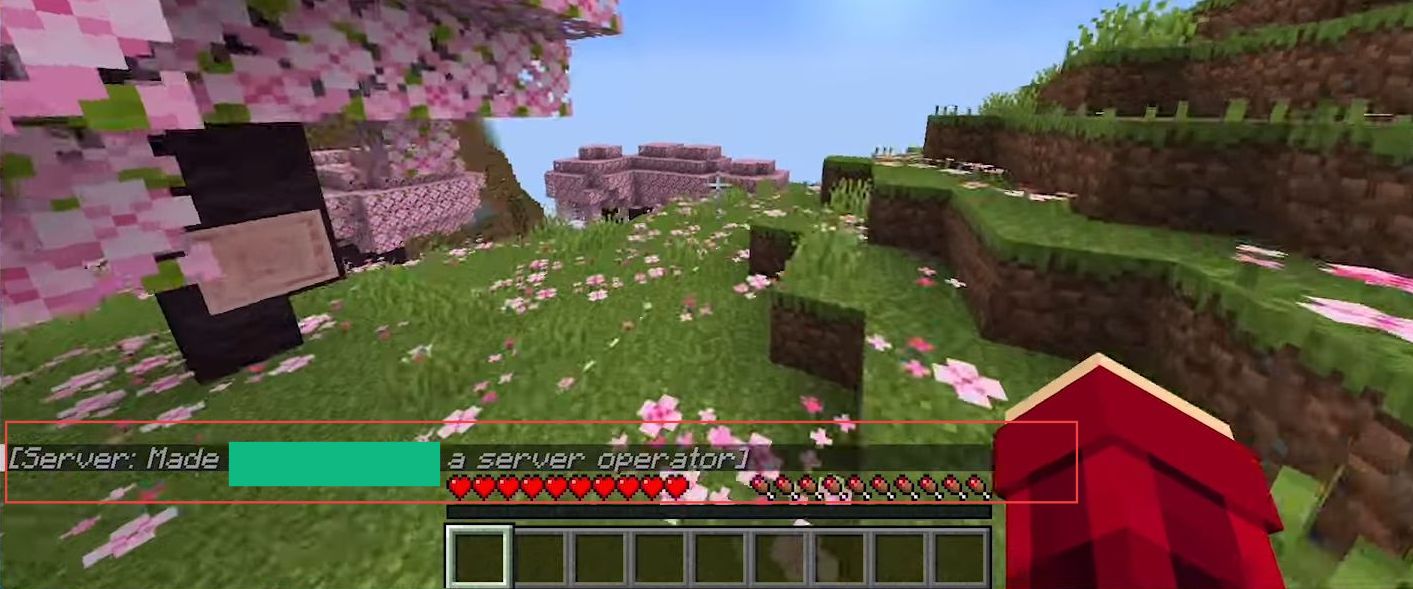
- Now write the ”/space your Minecraft username” command in the terminal and press enter from your keyboard.
It will make you an operator in the game.
- However to stop the server, to completely close the server you must write the ”Stop” command in the console.
It ensures that everything is saved and stopped properly otherwise you may lose some data.
- To reopen the server again, double-click the new document file from the Server folder.
Now the server will start running automatically.
Allowing your friends to join your server
This section describes how to allow your friends to join your server in Minecraft. You have to add the server, then write the server address the same as the operator to join it and play in the Multiplayer mode in Minecraft.
- If your friends want to join your server, then they need to click the Add Server button from the menu.
- Once the window is opened, write their server name as per their choice and copy the server address from your Port Map application. You have to put it inside the box.
- After that, click the Done button from the menu.