In this guide, we’ll walk you through the process of downloading and installing mods in F1 23. You can enhance your F1 23 gaming experience by adding mods that can completely transform the virtual racing world.
Step 1: Search and Download Mods
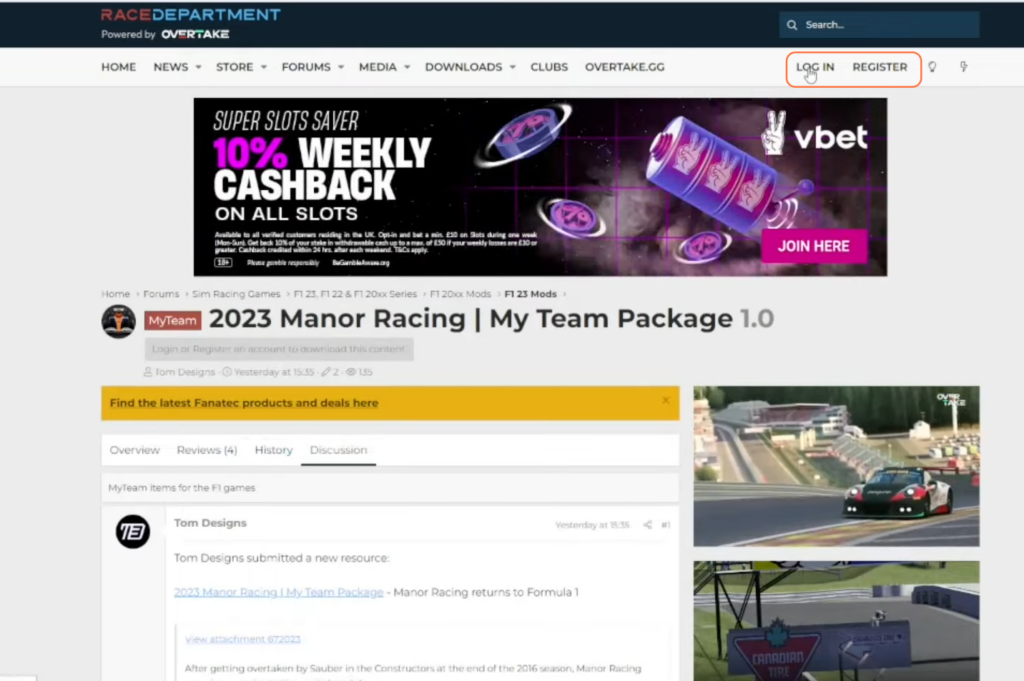
The first thing you need to do is visit the Mods hub to download the latest and most used mods for the F1 23 game. Choose any of your liked mods, go to the details page, and press the Download button. In our case we are going with the ‘2023 Manor Racing | My Team Package’ mod.

Step 2: Register an Account
- If you’re new to the above-mentioned website, click on “Register” (it’s free!) and get yourself in using various social media platforms or a standard registration process.
Step 3: Access Game Files via Steam
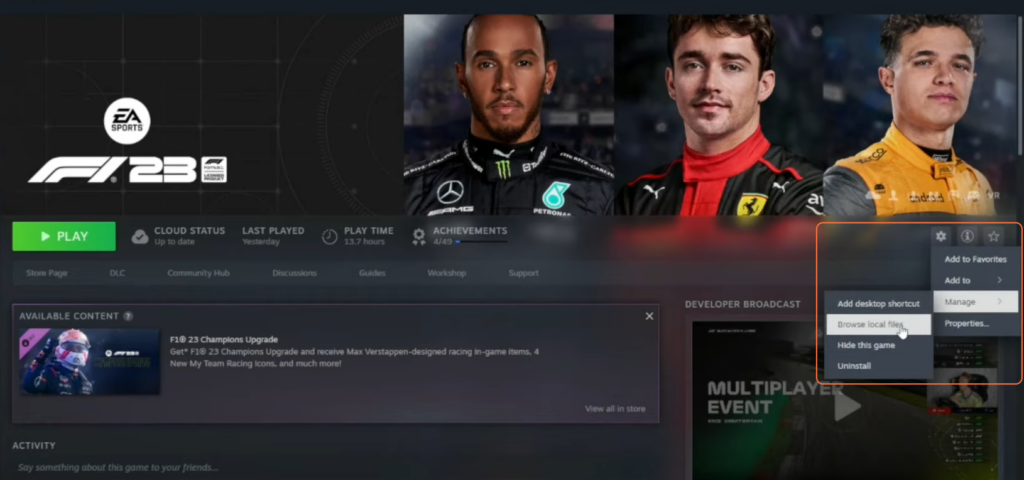
- Launch the Steam application and find F1 23 in your library. Right-click and select “Manage” followed by “Browse Local Files” to open the game folder.
Step 4: Extract Mod Files
- Once the mod finishes downloading, open the downloaded file through WinRAR or any other extraction tool. Right-click and extract the files.

Step 5: Transfer and Replace Files
- Move the extracted files to the F1 23 game folder. Copy and paste the files and should replace the existing ones when prompted.

Step 6: Launch F1 23
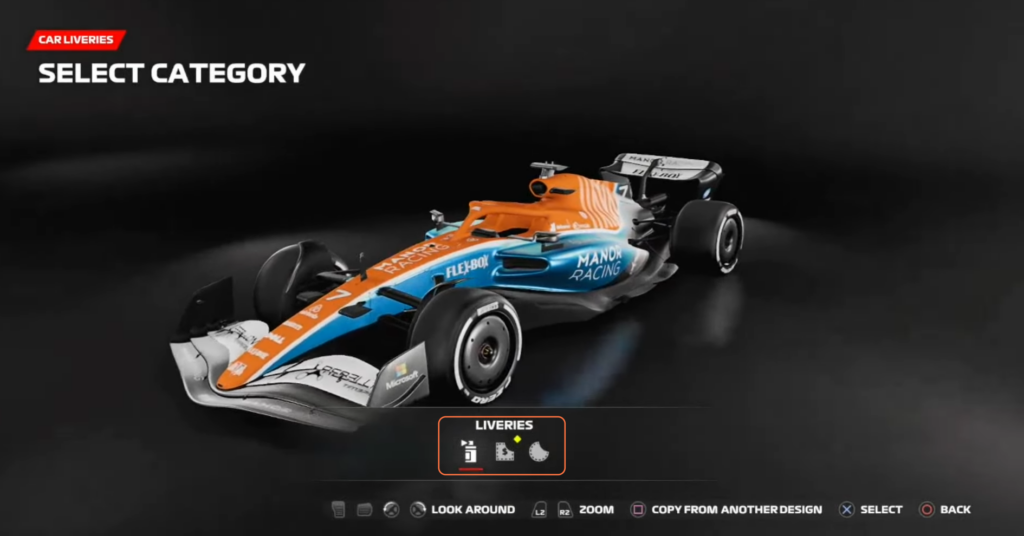
- Start the game through the Steam client. Navigate to “F1 World” > “Customization” > “Car Liveries”.

- Select “Create New” to unveil the newly added livery from the mod. Enjoy using it in single-player modes like Career, Grand Prix, or F1 World.
Step 7: Mod Removal (if needed)
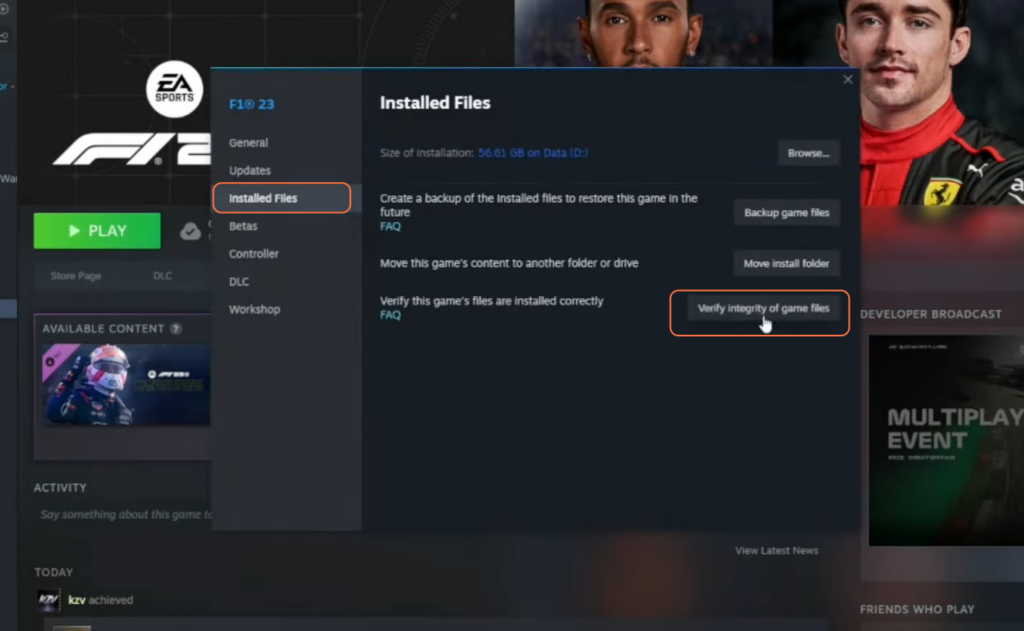
- To remove mods, access Steam, right-click on F1 23, select “Manage,” and then “Properties”.
- Click on “Installed Files” and remove the mod by clicking the ‘Verify Integrity of game files’ button.
By following these steps, you can effortlessly enhance your F1 23 gaming experience with an assortment of mods.