For those seeking to inspire their GTA V characters with unique and personalized tattoos adorning various parts of their bodies, this mod offers a distinctive opportunity. Follow this comprehensive guide for a step-by-step walkthrough on seamlessly integrating the Franklin’s Custom Tattoo mod into your GTA V mod collection.
Step 1: Downloading the Mod
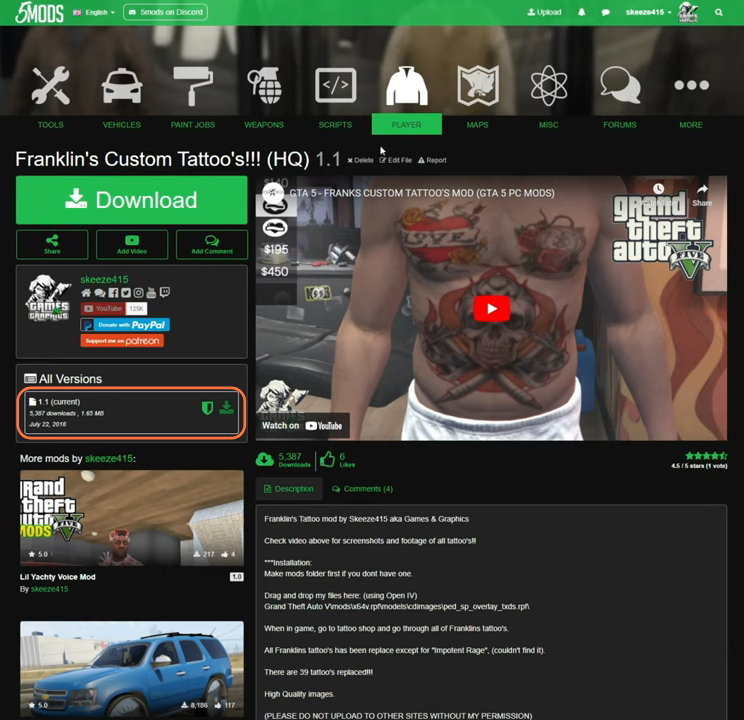
- Begin by downloading the most recent version of the Franklin’s Custom Tattoo’s mod tailored for your game version.
- Head to the designated website, and under the ‘All Versions’ section, click the green download arrow icon corresponding to the current version. This action will fetch the mod’s compressed zip file.
Step 2: Obtaining Open IV Mod Manager
- The mod necessitates the inclusion of Open IV archive manager.
- Open IV provides you with the capability to access and modify GTA V’s game files.
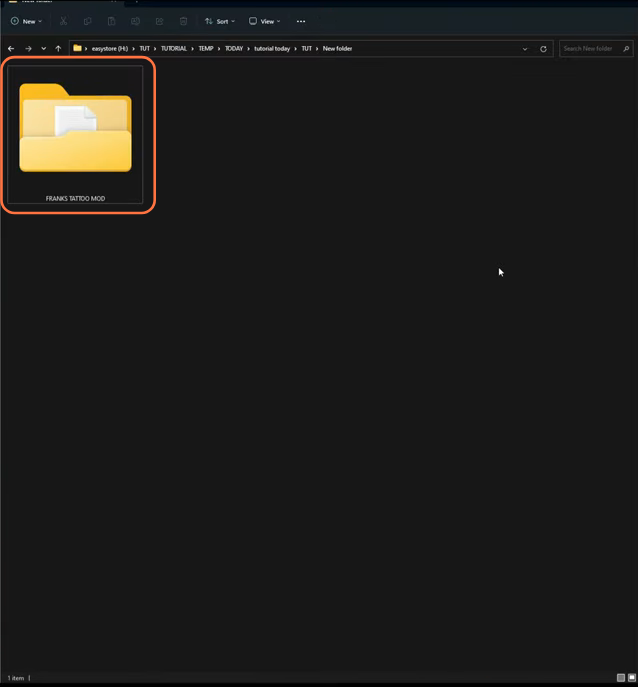
- Once all the files are in your possession, head to your downloads folder for the installation process.
Step 3: Launching Open IV
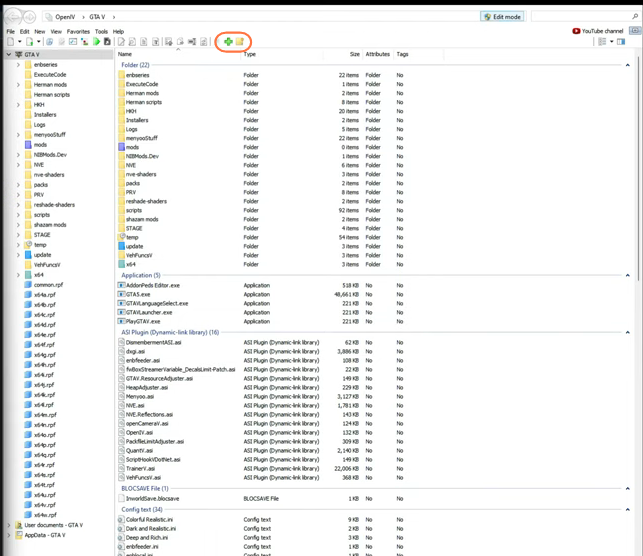
Launch the Open IV mod manager and ensure that you enable the ‘Edit Mode’ by clicking the button situated at the upper right corner of the interface. Then, within your GTA V directory, locate the ‘mods’ folder. In case you don’t already have a ‘mods’ folder, create one by selecting the folder icon with a “+” symbol from the toolbar.
Step 4: Navigating to the Downloaded Mod Files
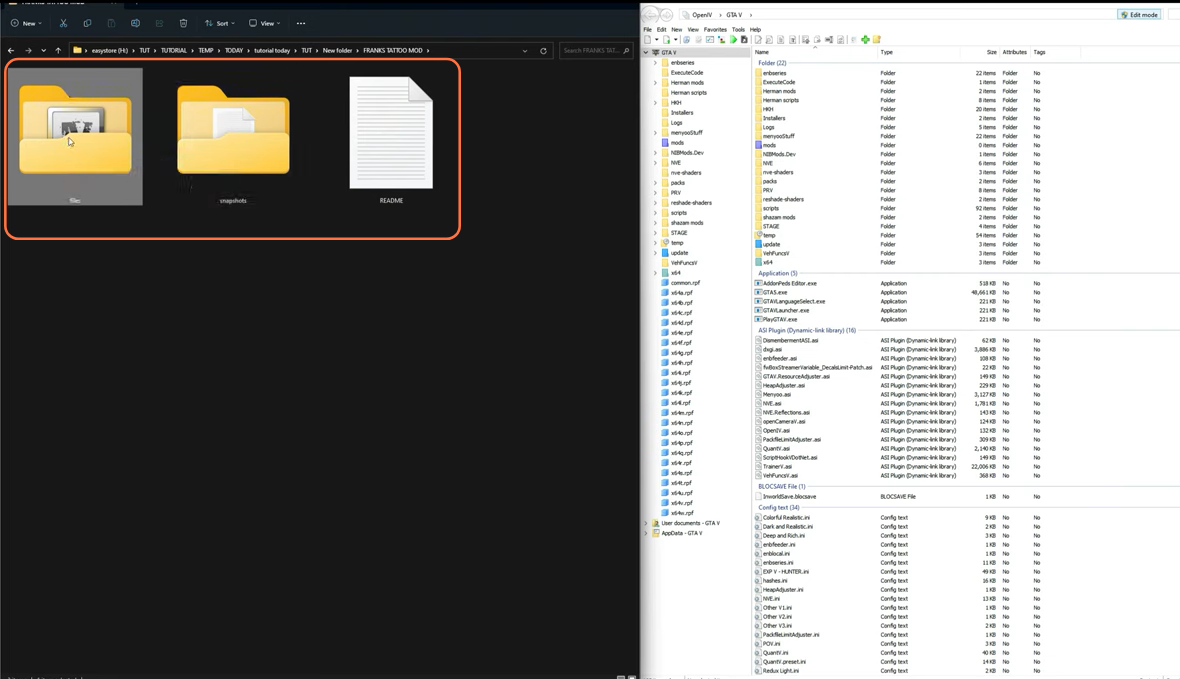
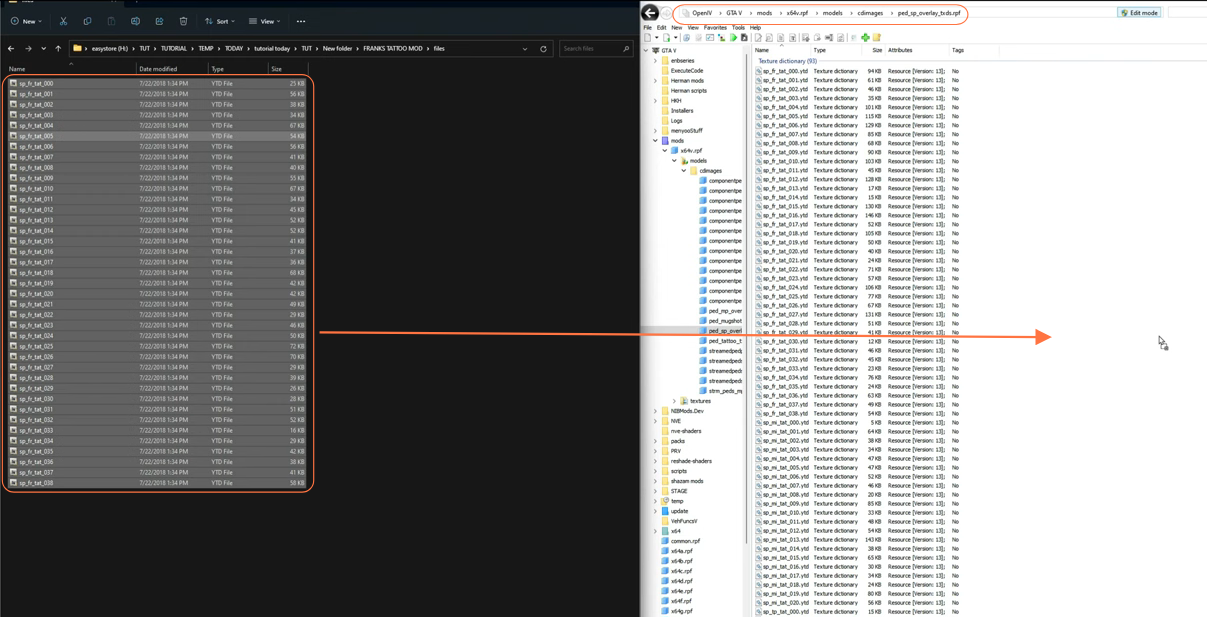
Inside the “Frank’s Tattoo Mod” folder from your downloads, you will encounter two additional folders labeled ‘Files’ and ‘Screenshots’. Enter into the ‘Files’ folder. Here, you’ll find a collection of YTD files.
Step 5: Seamless Mod Installation
Execute the following sequence within the Open IV Editor to seamlessly install the mod:
- Traverse the side column to navigate the path: mods > x64v.rpf > models > cdimages > ped_sp_overlay_txds.rpf.
- If you’re not already within the “mods” folder, a red banner will appear, prompting you to either ‘Copy to “mods” folder’ or ‘Show in “mods” folder’. This is the location where the game files are stored.
- Select all the YTD files from the downloaded folder and simply drag them into the directory shown above within Open IV.
- After completing the installation, proceed to the ‘File’ option in the upper left corner of Open IV and select the ‘Close All Archives’.
Step 6: Testing and Exploring the Mod
With the installation process finalized, you can close all windows and launch the game. Once in the game environment, you have the option to use a trainer for convenient access to the tattoos or visit a Tattoo shop. Apply the tattoos to various parts of your character’s body such as the Torso, Head, Arms, and Legs. Choose the desired body part, then select the tattoo design of your preference to truly customize your character’s appearance.
