In this guide, you will find how to download and set up your own Forge 1.20 server in Minecraft. You first have to download the server, allocate more RAM to the Fabric 1.20 server and then accept EULA & setup server files. After that, join the server and allow other players to join as well.
Download Minecraft Forge 1.20
In this section, we will take you through the steps to download Minecraft Forge 1.20. You need to have Java on your system to open up the downloaded file.
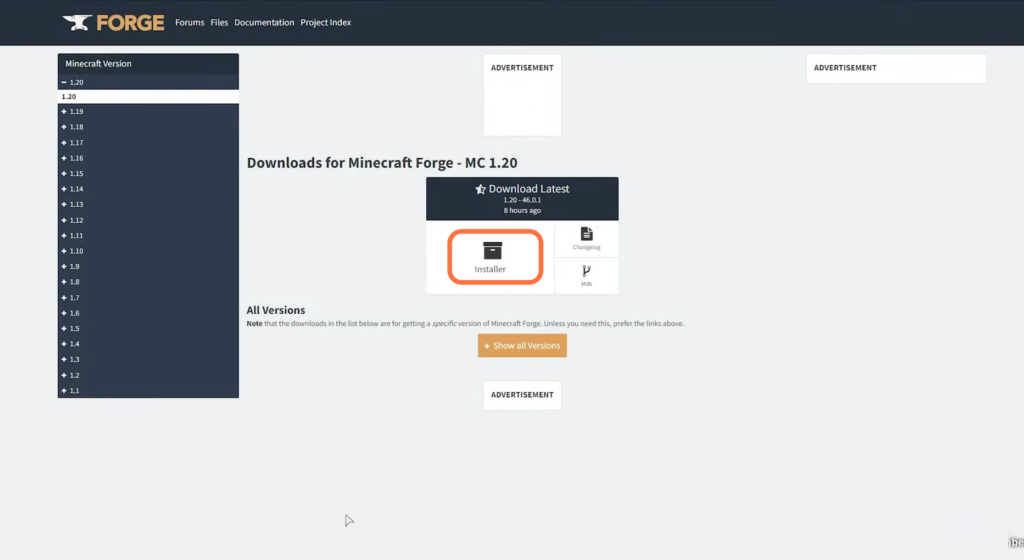
- The first thing you will need to do is open up your web browser to download Minecraft Forge 1.20.
- Once you reach the web page, click on Installer to download the Forge installer.
- Once the download completes, you will need Java to open up the downloaded file. If you don’t have it, then go ahead and download Java first.
- After that, double-click on the downloaded jar file.
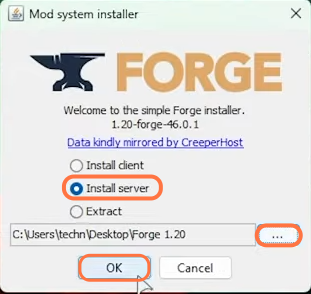
It will open up an installer window. - You have to choose the Install Server option, and then click on the three dots at the bottom.
- The new window that opens will allow you to navigate through your computer’s files and directories.
- Navigate to your Desktop by clicking on it and create a new folder specifically for the Forge 1.20 installation.
- Click on the “New Folder” button at the top of the window to create a folder and name this folder “Forge 1.20“. After naming the folder, select it as the installation location.
- Next, hit the OK button.
It will start installing all the necessary files.
- If prompted, you need to click on OK.
- Next, you need to open the Forge 1.20 folder you created on the desktop and double-click on the run.bat file.
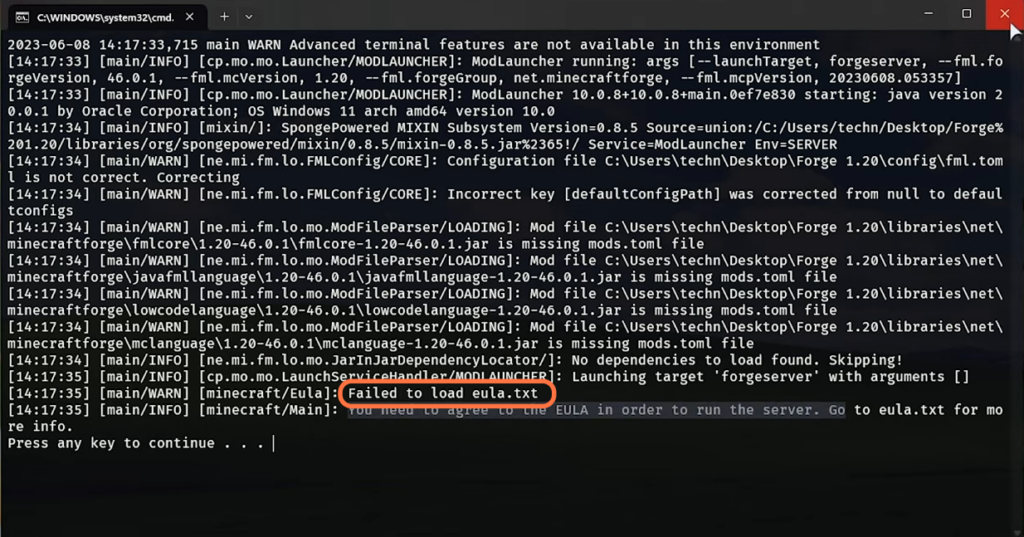
It will start downloading the files. But it will generate an error after some of the downloading.
Accept EULA & Setup server files
This section will take you through the steps to accept the End User License Agreement (EULA) and set up server files.
- Once the error appears, close the file and navigate back to the folder.
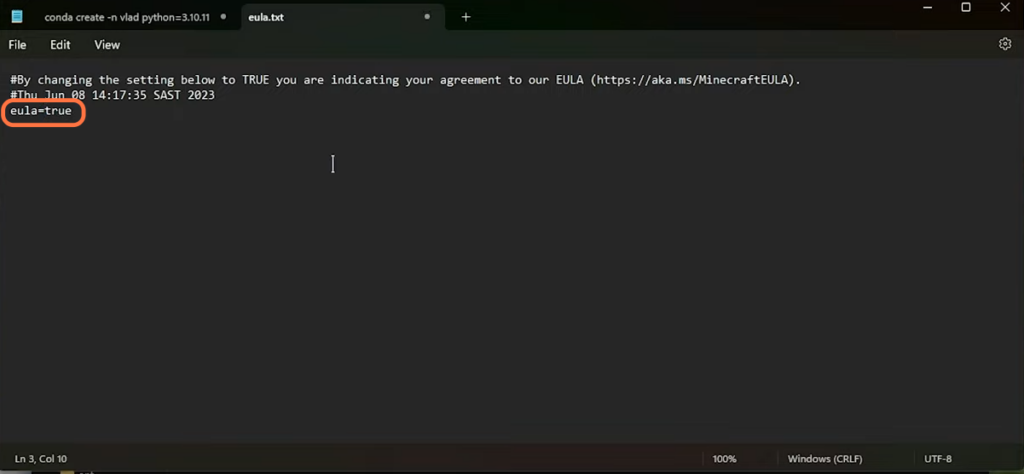
- Locate the newly created “eula.txt” file. Right-click on the “eula.txt” file and select “Open With” from the context menu.
- Choose “Notepad” or any other text editor of your preference to open the file.
- Look for the line that reads “eula=false” and change the value from “false” to “true“. It will accept the End User License Agreement (EULA).
- Press Control + S to save the changes and then close the window.
Allocate Forge 1.20 server more RAM
This section describes how to allocate more RAM to the Forge 1.20 server. This setting is important for the server’s performance, especially if your PC has more RAM available.
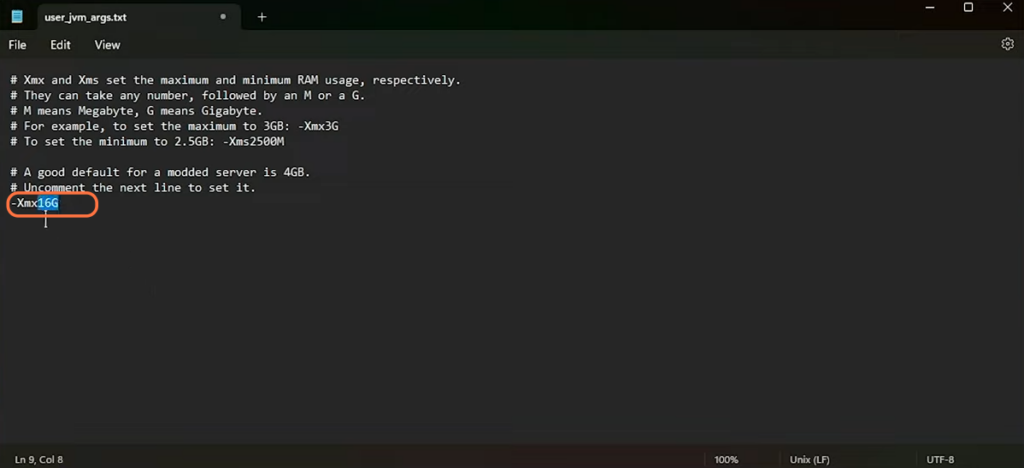
- After that, open up the user_jvm_args.txt file. Look for the line that allows you to allocate more RAM to the server.
- Increase the amount of dedicated RAM for the server. If the current value is set to 2GB, increase it to a higher value based on the available RAM on your PC.
- Ensure that you only allocate the amount of RAM that you can spare without affecting the overall performance of your computer.
- Once you have adjusted the RAM allocation, save the changes and close this file.
Run Forge 1.20 server
In this section, we will take you through the steps to run Forge 1.20 server. By following the steps below, you will be able to join the server after running it successfully.
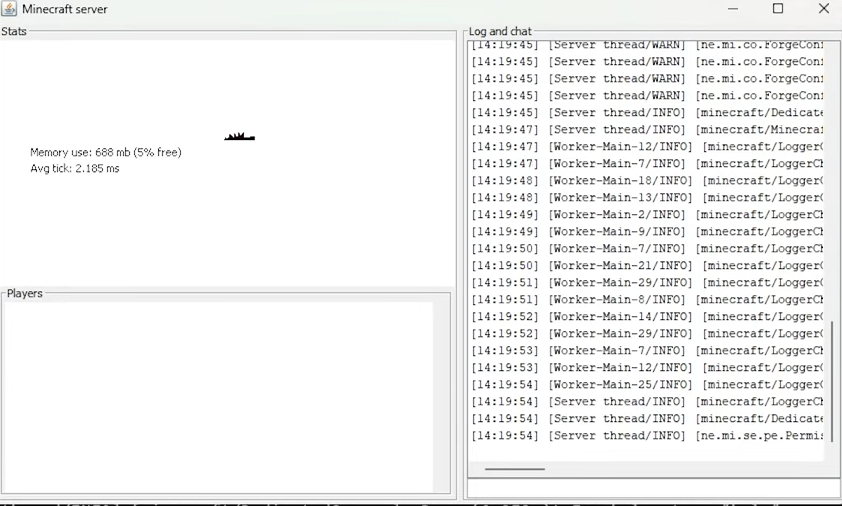
Open the “ Forge 1.20 ” folder and double-click on the run. bat to run it.
This action will initiate the server startup process and will start to run after generating some files.
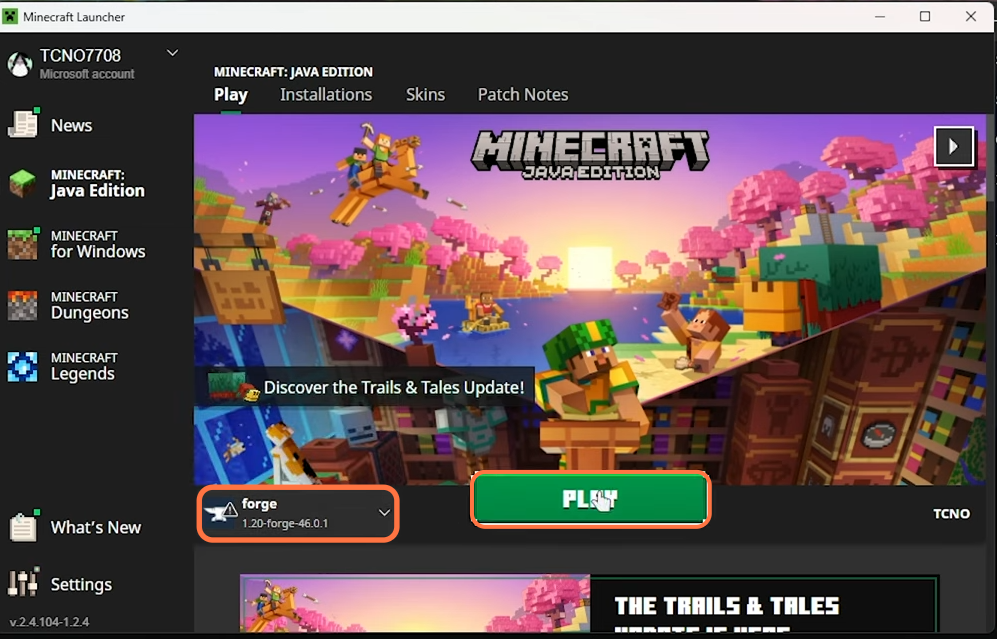
- Open the Minecraft launcher on your computer and click on the version selection dropdown.
- Scroll through the list and select “Forge 1.20“. After selecting the Fabric Loader version, hit the “Play” button in the Minecraft launcher.
- After Minecraft launches, navigate to the “Multiplayer” tab and click on the “Add Server” button.
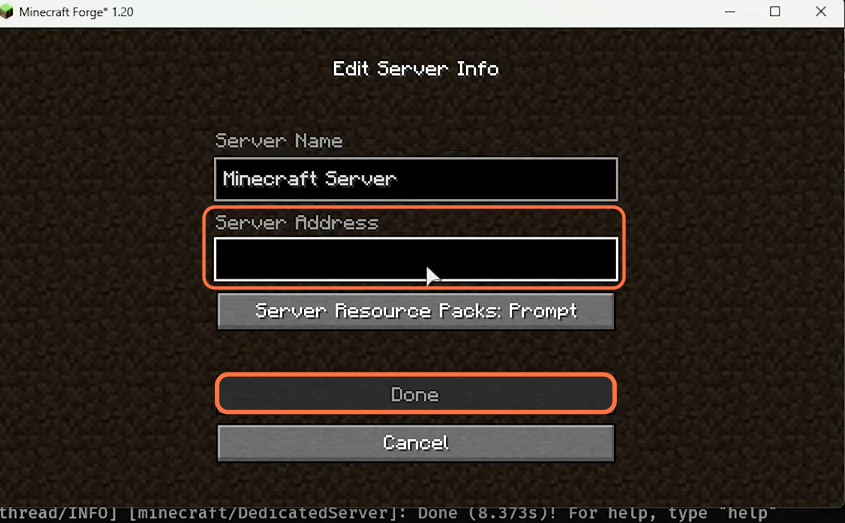
A new window will appear with a “Server Address” box. - In the “Server Address” box, enter your local host address as the server address. After that, click on the “Done” button to save the server information.
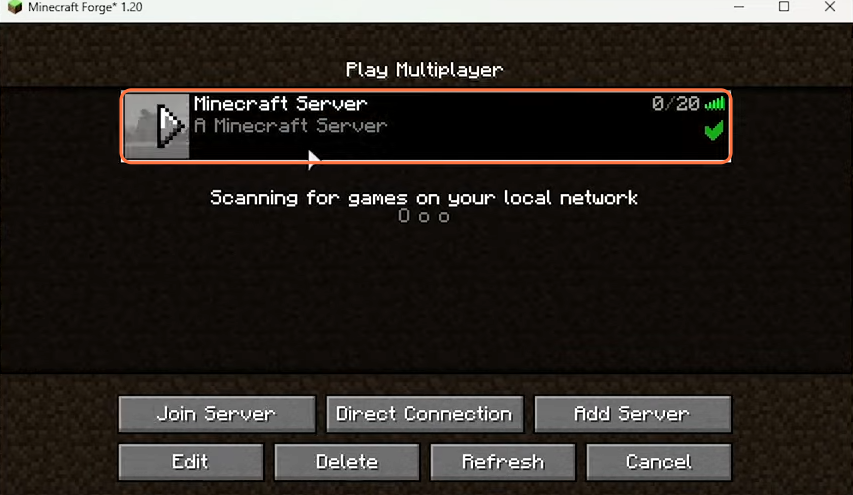
Now you can click on your brand new server to join it.
- After that, go to the console and input the command “op (your username)” without the parentheses and press Enter to execute the command.
This command will grant you operator privileges on the server.
Allow Forge 1.20 Server through the Firewall
This section describes how to allow Forge 1.20 Server through Firewall. The step involves running Powershell or Terminal as administrator and inputting the commands in it.
- You need to open the Start menu on your computer and search for “Powershell“. Right-click on “Powershell” and select “Run as administrator” from the context menu.
This will open Powershell with administrative privileges. - If you have a terminal other than Powershell, open it as an administrator instead.
- Once the terminal or Powershell opens, verify that “Powershell” is written on the first line.
- If not, click on the drop-down menu located at the top of the window and choose “Powershell” from the available options.
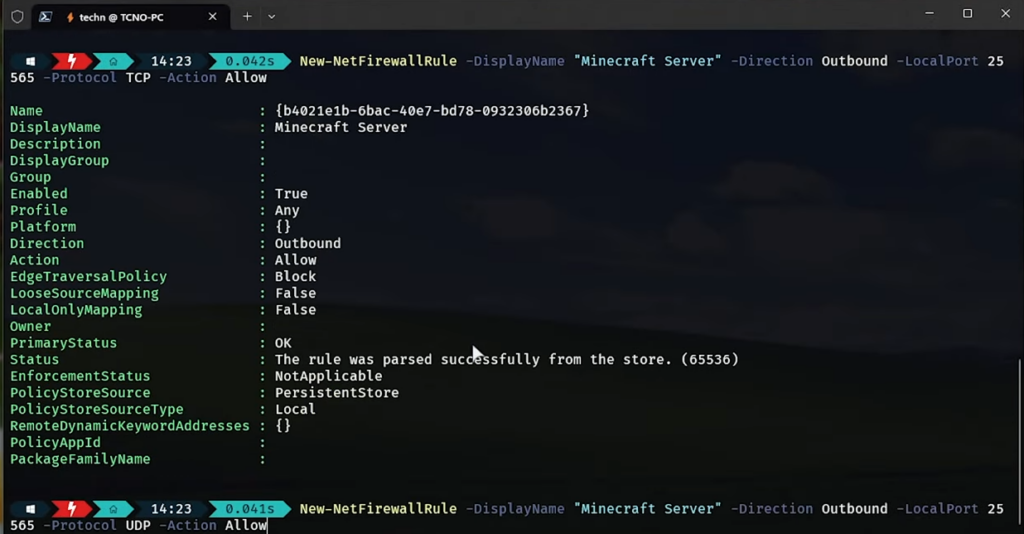
- In the terminal or Powershell window, input the following four commands one by one. Press Enter after each command to execute it.
| New-NetFirewallRule -DisplayName “Minecraft Server” -Direction Inbound -LocalPort 25565 -Protocol TCP -Action Allow |
| New-NetFirewallRule -DisplayName “Minecraft Server” -Direction Inbound -LocalPort 25565 -Protocol UDP -Action Allow |
| New-NetFirewallRule -DisplayName “Minecraft Server” -Direction Outbound -LocalPort 25565 -Protocol TCP -Action Allow |
| New-NetFirewallRule -DisplayName “Minecraft Server” -Direction Outbound -LocalPort 25565 -Protocol UDP -Action Allow |
- After that, hit the Enter button a few times.
The commands will add firewall rules to allow incoming connections for Fabric Server, both TCP and UDP protocol
Allow other people to join
This section will take you through the steps to allow other people to join your server on the same local network. You need to provide them with your local PC’s IP address to join.
- Open the Start menu on your computer and open the Command Prompt application.
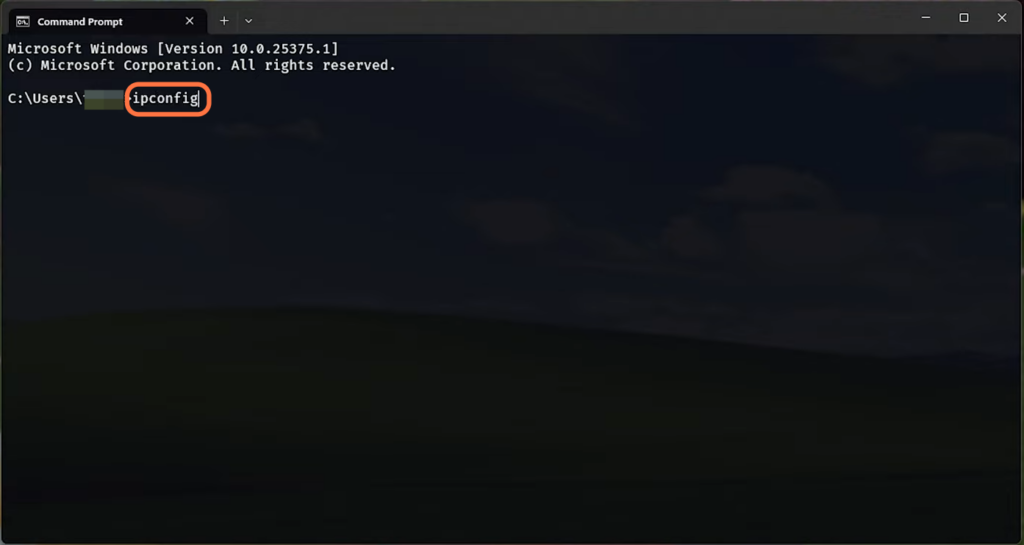
- Once the Command Prompt opens, type the command “ipconfig” and press Enter.
This command will display network configuration information. - Look for your active network connection in the Command Prompt output and find your local IP address.
- You need to provide this address to your friends and they need to enter it into their game to join your server.
Port forwarding (global friends joining server)
This section describes how to set up port forwarding to allow players from outside your local network to connect to your Minecraft server.
- If you want to allow players from outside your local network to connect to your Minecraft server, you need to set up port forwarding.
When someone tries to connect to your router from outside your local network, the router receives the connection request. The incoming connection request specifies a particular port, in this case, Port 25565, which is the default port for Minecraft servers.
- The router needs to determine where to direct the incoming traffic for Port 25565. The router forwards the incoming connection just as requested, directing it to your computer.
Once the incoming connection reaches your computer, it establishes a connection with your Minecraft server.
If there are multiple routers between the incoming connection and your computer, the traffic will pass through each router in sequence. Each router along the path will perform its own port forwarding and direct the traffic to the next router until it reaches your computer.
Finally, the traffic reaches your computer, and the player trying to connect from outside your local network is successfully connected to your Minecraft server.
Save and exit Forge 1.20 server
In this section, we will take you through the steps to save and exit Fabric 1.20 server.
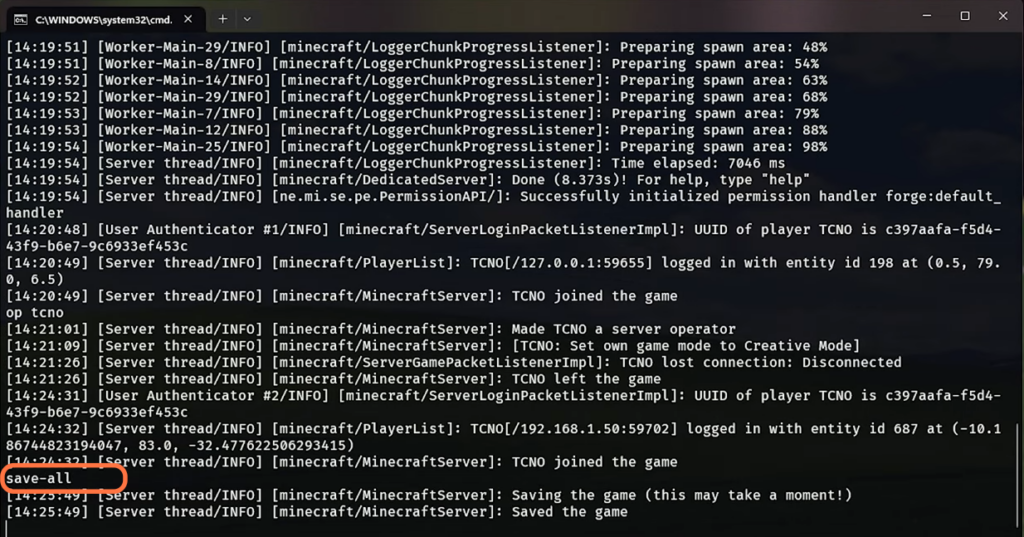
- To save your current progress in the server, you need to input the “save-all” command in the console and hit enter on your keyboard.
It will save everything in your current world. - You have to type “stop“ and hit enter to close your world.
While your server is shut down, players won’t be able to connect to play with you.