If you are looking to fix common issues like broken windows and doors in the Sims 4 game then this mod would be rightly helpful. Installing the Sims 4 Studio can help you address these problems and even create exciting new mods. In this comprehensive guide, we will walk you through the step by step installation process of the Sims 4 Studio on Mac PC.
Step 1: Downloading Sims 4 Studio
To begin, visit the official Sims 4 Studio website. If you are using a Windows computer, go to “https://sims4studio.com/thread/562/sims-studio-windows-wishes-open” to download the software. For Mac users, follow the link “https://sims4studio.com/thread/6065/sims-studio-candy-apple-open” instead. Once on the website, scroll down to find the download links. Before downloading, make sure to review the system requirements to ensure compatibility.
Step 2: Installing Sims 4 Studio on Mac
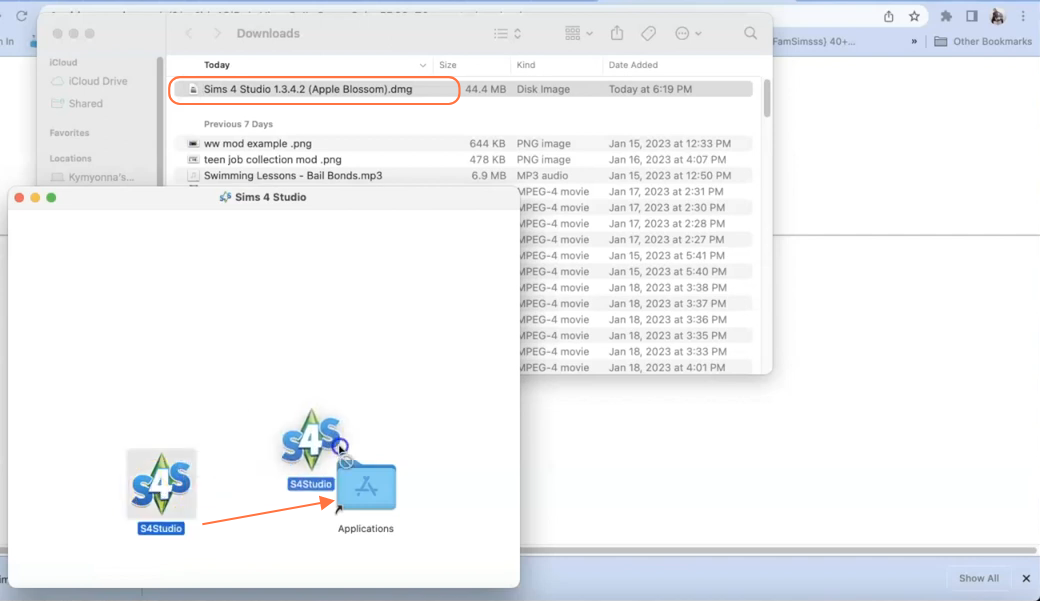
After downloading the file, open the Finder application on your Mac and navigate to the “Downloads” folder. Locate the downloaded Sims 4 Studio file and double-click it. Then, drag the file into your Applications folder to install Sims 4 Studio on your Mac.
Step 3: Resolving Installation Issues
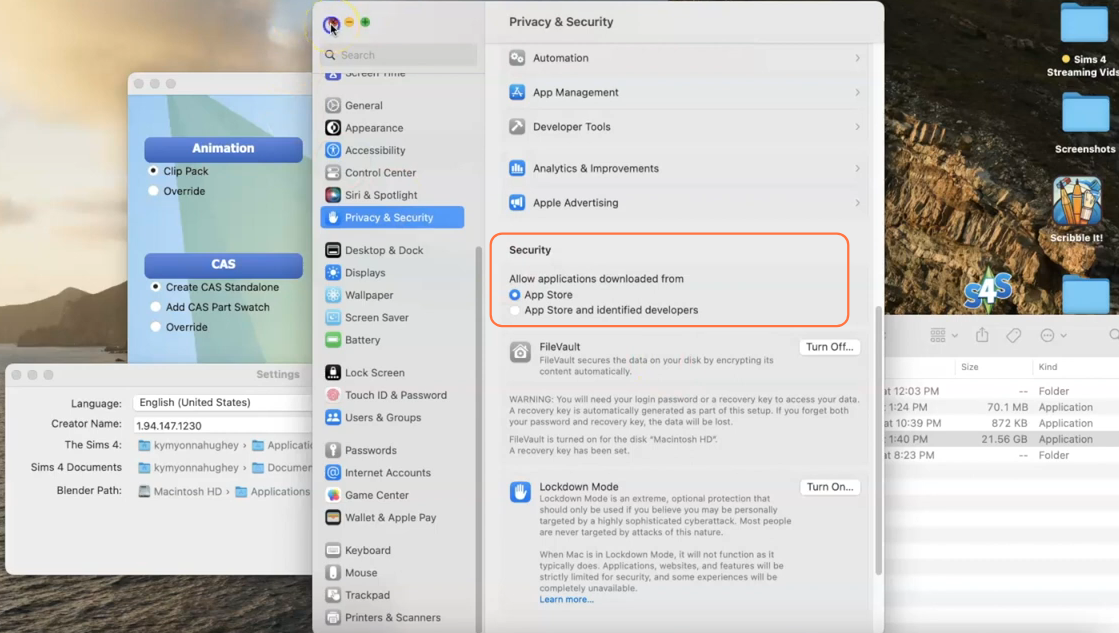
Upon launching Sims 4 Studio from your Applications folder, you may encounter a security prompt indicating that it is not a safe download. To resolve this, go to your Mac’s System Settings, select the “Privacy & Security” tab, and choose the “App Store” radio button under the “Allow applications downloaded from” in the security section. Once done, exit the settings window.
Step 4: Configuring Sims 4 Game Location
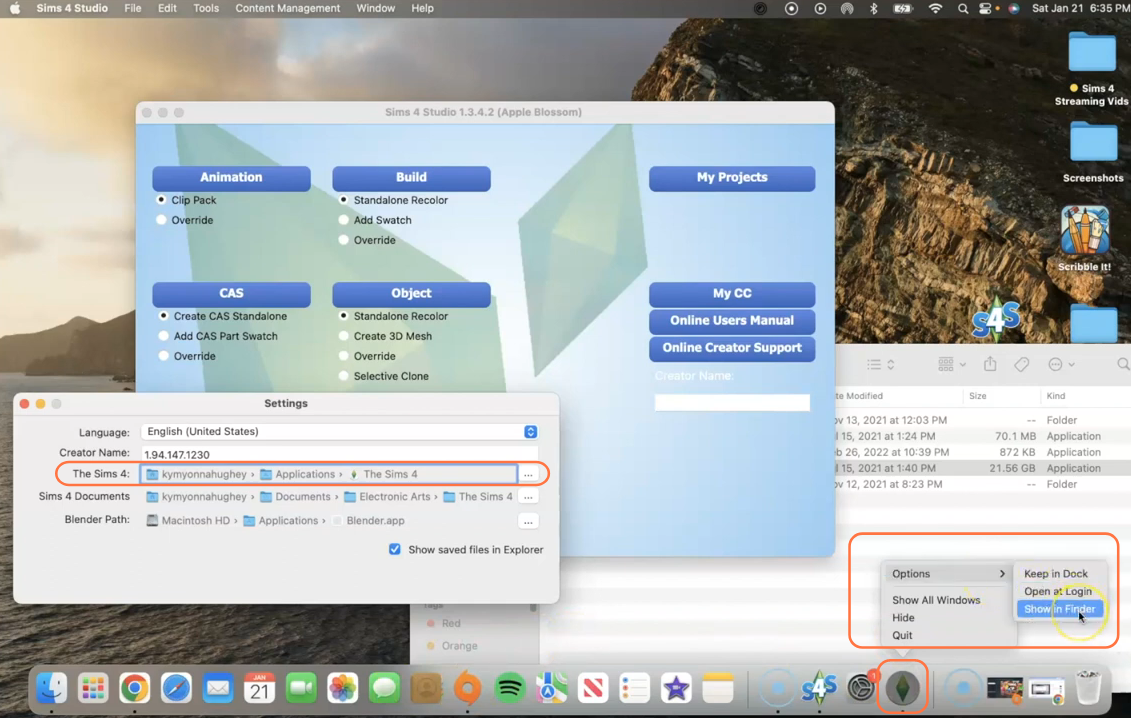
Next, Sims 4 Studio will prompt you to specify the location of your Sims 4 game. To find the exact location, open the Origin app and launch Sims 4. Right-click on the Sims 4 game icon on the taskbar, hover over the “Options” menu, and select “Show in Finder“. This will reveal the exact location of your Sims 4 game folder.
Step 5: Connecting Sims 4 Studio to the Game
Once you have configured these settings, Sims 4 Studio will load up the game and establish a connection. Then close out all the windows related to the Sims 4 Studio setup.
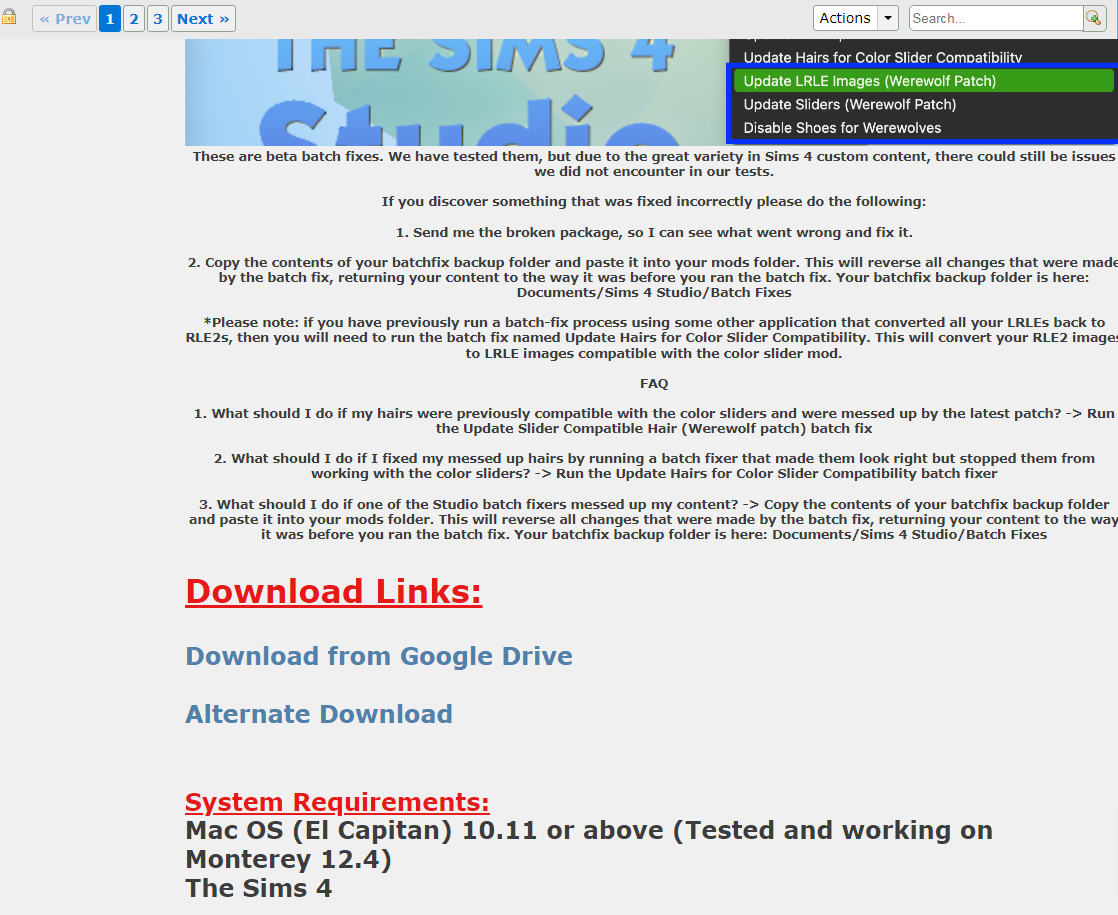
Step 6: Accessing the Content Management and Batch Fixes
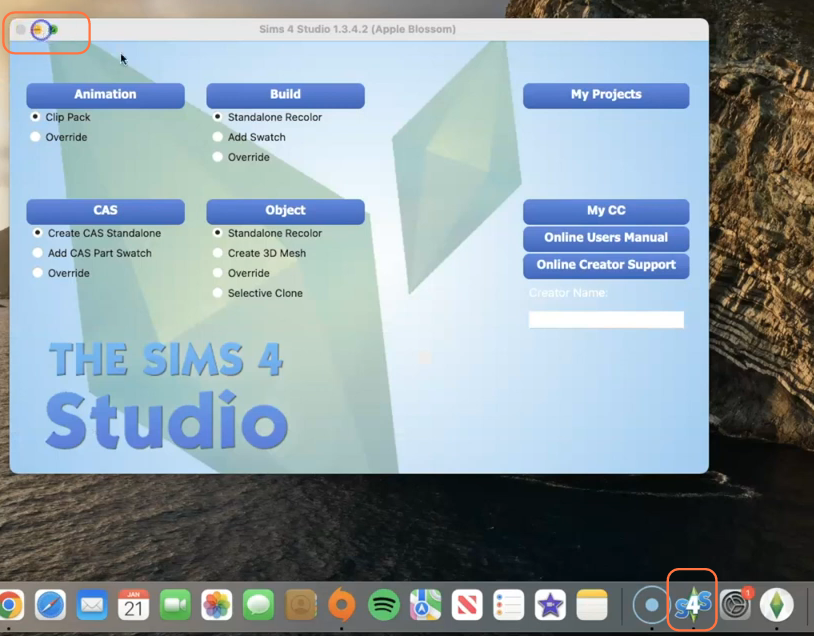
To utilize the repair features of Sims 4 Studio, launch the application by clicking on the Sims 4 Studio icon in the taskbar. At the top of the window, you will find the Sims 4 Studio options’ location. Navigate to the “Content Management” tab and a dropdown list will appear. From there, select “Batch Fixes” followed by “Objects” and then choose “Fix windows and doors” or any other fix you require.

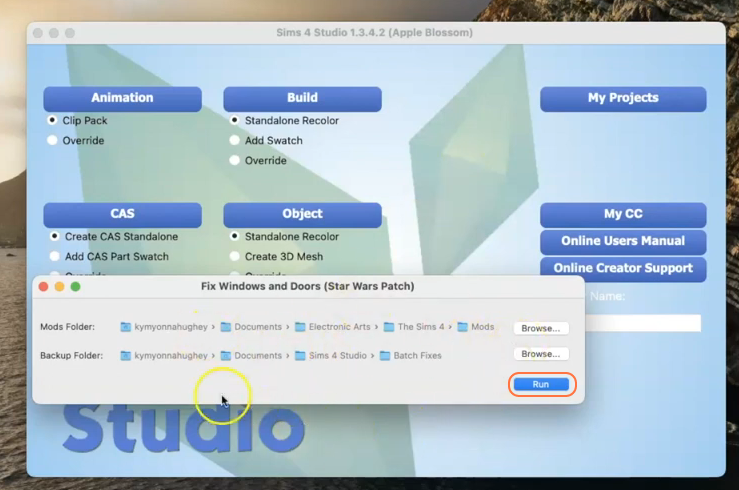
Step 7: Running the Fix
After selecting the appropriate fix, a pop-up window will appear. Click the “Run” button to execute the fix. Sims 4 Studio will perform the necessary actions to repair the broken windows, doors, or other selected objects in the game. A window will display the results of the fix, showing you what has been successfully repaired.