In this comprehensive guide, we will take you through the step-by-step installation process of the highly recommended Sunrise Alarm Clock Mod on Windows. Before we begin, please ensure that you have already installed the core library mod, as it is a requirement for seamless usage of the Sunrise Alarm Clock Mod.
Step 1: Downloading the Sunrise Alarm Clock Mod
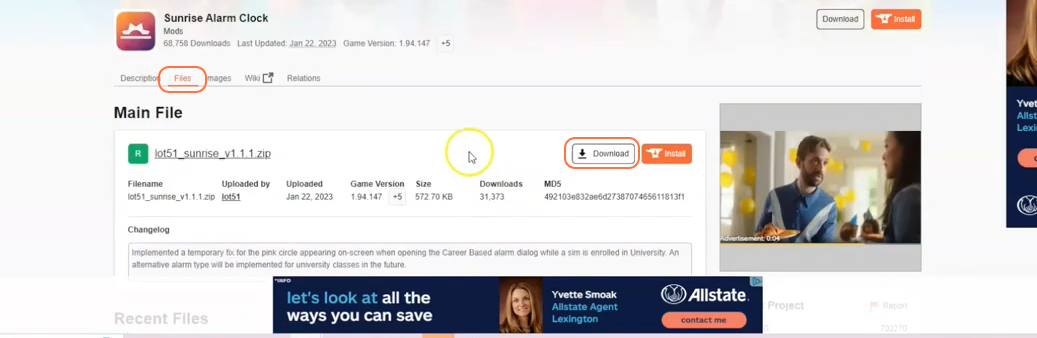
To get started, visit the official source of the Sunrise Alarm Clock Mod at “www.curseforge.com/sims4/mods/sunrise“. Once on the website, navigate to the “Files” tab and click the Download button. The mod’s zip file will begin downloading in few seconds, and you can monitor its progress at the bottom of your screen.
Step 2: Disable Auto Updates for the EA App
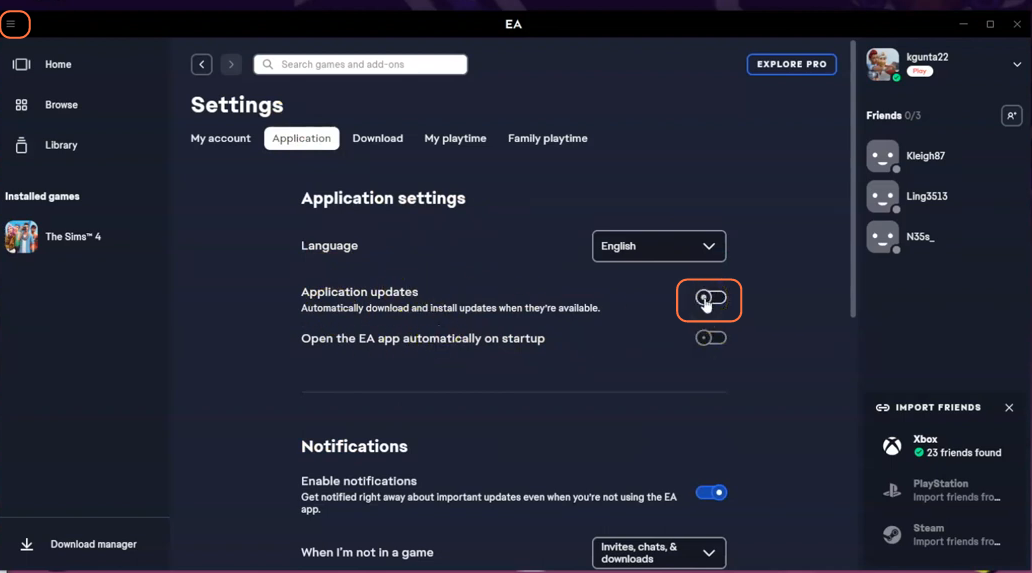
To avoid any potential conflicts with your mods, it’s important to disable the Auto Update feature in the EA app. To do this open the EA application, click on the three lines icon at the top left corner of the screen, then select “Settings”. From there, go to the “Application” tab and locate the “Application updates” toggle button to disable it. By turning off this feature, you prevent the EA app from automatically updating while your Sims 4 game is updating, as it could disrupt your mods. When an update available for the EA app, simply remove the mods folder from the Sims 4 game directory, update the EA app, and then restore the mods folder once the update process is complete.
Step 3: Extracting the Mod Files
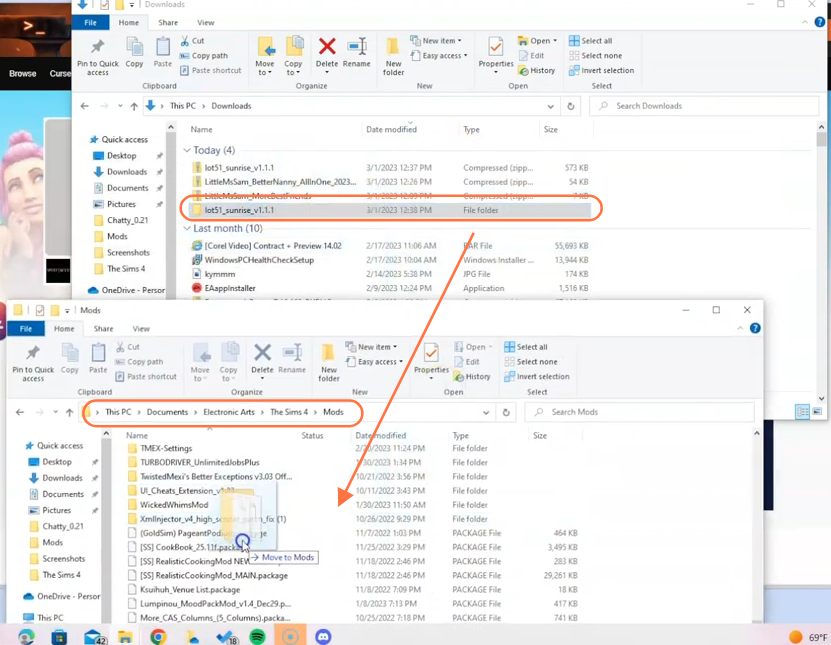
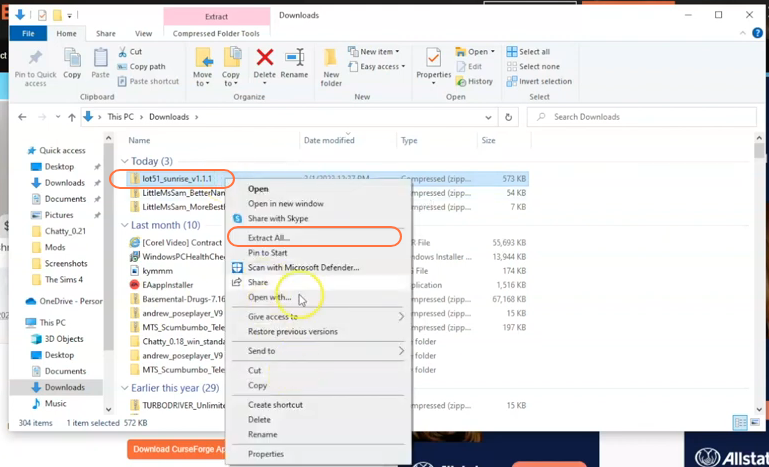
On the other hand, once download is finished, open your File Explorer window and navigate to the “Downloads” folder. Typically, downloaded files are saved in this location. Right-click on the downloaded zip file of the Sunrise Alarm Clock Mod and select the “Extract All” option. This action will extract the contents of the zip file into a new folder, which will
contain a script and a package file necessary for the mod to function properly.
Step 4: Locating and Preparing the Mods Folder
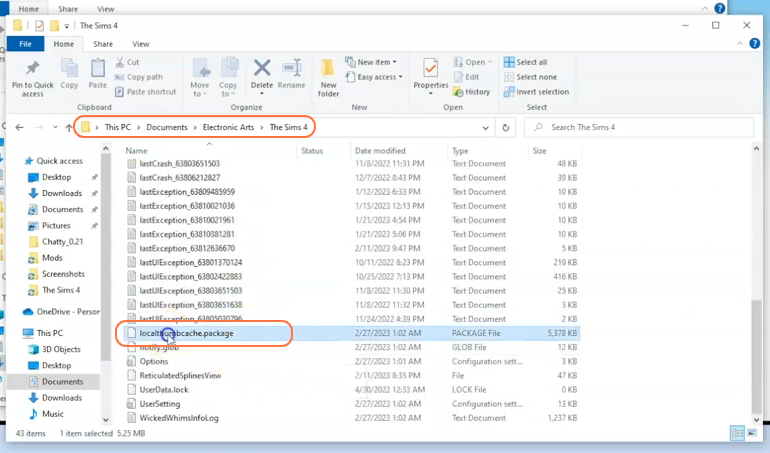
Open another File Explorer window and navigate to the Mods folder in your Sims 4 game directory. The game directory is usually located at Documents > Electronic Arts > The Sims 4. This folder serves as the designated location for all custom content and mods, allowing the game to recognise and utilise them effectively. It is recommended to delete the “localthumbcache.package” file from your Sims 4 folder. If you don’t see this cache file, most probably you are attempting to install the mod with your Sims game open. In that case, exit the game first before proceeding with the mod installation. It’s important to note that if you haven’t installed any mods before, you need to load up the game at least once and then exit to generate the necessary folders, such as Documents, Electronic Arts, and Mods for a seamless mod installation process. You will find only the Resource.cfg file in the mods folder after running the game for very first time. Additionally, ensure that the game is not running while you install any modifications.
Step 5: Installing the Mod
Now, take the extracted folder containing the package and script files and drag it directly into the Mods folder of your Sims 4 directory. This action ensures that the mod is correctly placed for the game to recognize and activate it during gameplay.