In this step-by-step guide, we’ll let you know how to install the ‘Working Pet Water Bowls’ Mod in Sims 4! This mod adds water bowls for pets to enrich your Sims pet care experience.
Step 1: Prepare Necessary Tools
Before diving into the mod installation, ensure you have the XML Injector, a vital tool for incorporating mods into your game.

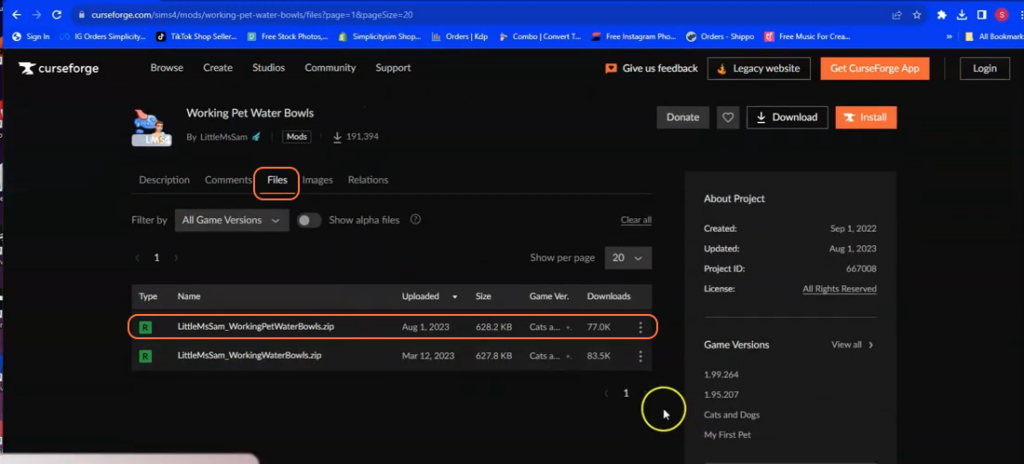
Step 2: Download the Mod Files
- Visit the Curseforge page for the “Working Pet Water Bowls” mod and locate the ‘Files’ tab to access the most recent version for your installation.
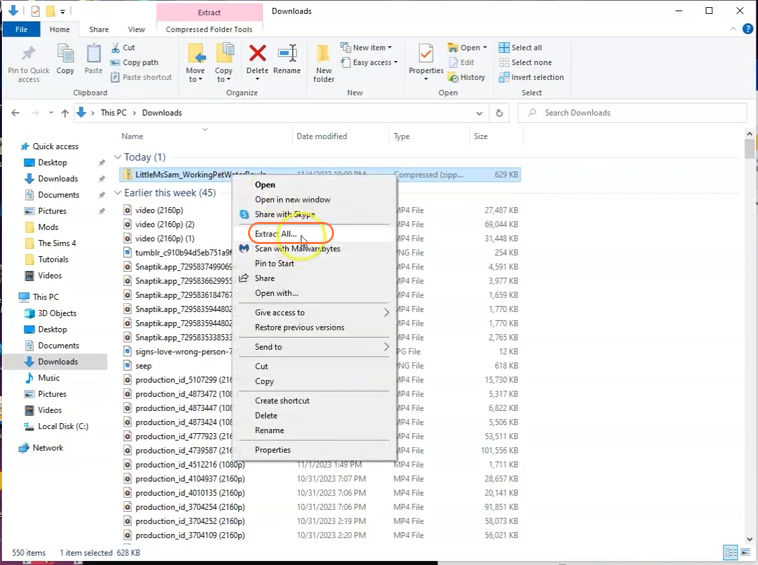
Step 3: Locate and Extract the Downloaded File
- After downloading, access your download folder by selecting the file explorer (or Finder for Mac users).
- Locate the downloaded zip file and right-click to extract its contents. For Mac users, a double-click opens the file in a blue folder or use an extractor app.
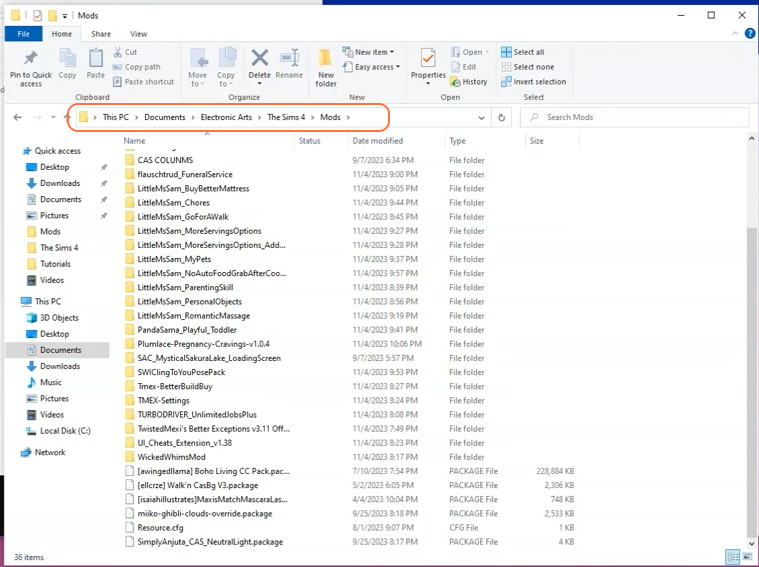
Step 4: Navigate to the Sims 4 Mods Folder:
Open another File Explorer (or Finder window for Mac users) and navigate through the following path: Documents > Electronic Arts > Sims 4 > Mods.
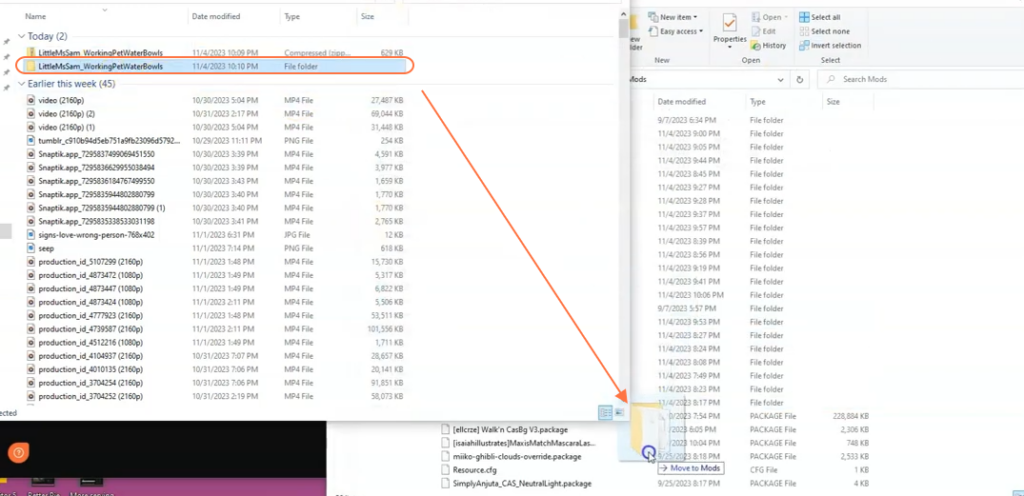
Step 5: Place Files in the Mods Folder
- Transfer the extracted mod folder containing the necessary files into the Sims 4 Mods folder. Ensure you place it directly in the Mods folder to enable its functionality within the game.
Step 6: Adjust Game Settings
Before launching the game, configure your game options. If you’re new to mod installations, access your game settings and enable “Custom Content” and “Script Mods” options. This step ensures that the modded content can be used within the game seamlessly.
By following these steps, you’ll successfully install the “Working Pet Water Bowls” mod and can enhance your Sims 4 gameplay.