Follow these step-by-step instructions to effortlessly remap any button on your controller and tailor it to your preferences.
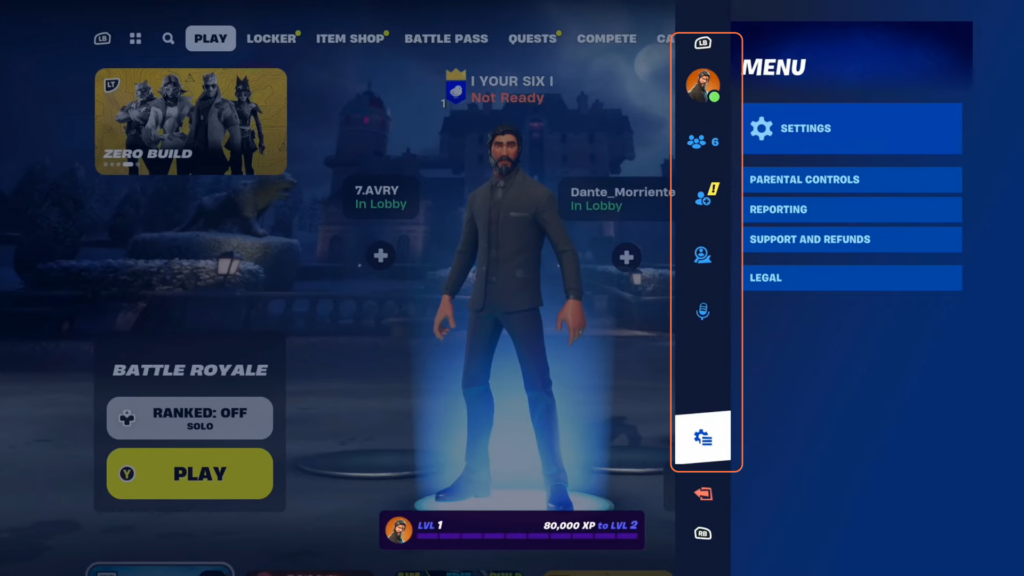
Step 1: Access Settings
Press the “Options” button on your controller while in Fortnite. Navigate to the “Settings” from the menu.
Step 2: Choose Controller Mapping
Use the R1 button and navigate to the “Controller Mapping” section at the top.
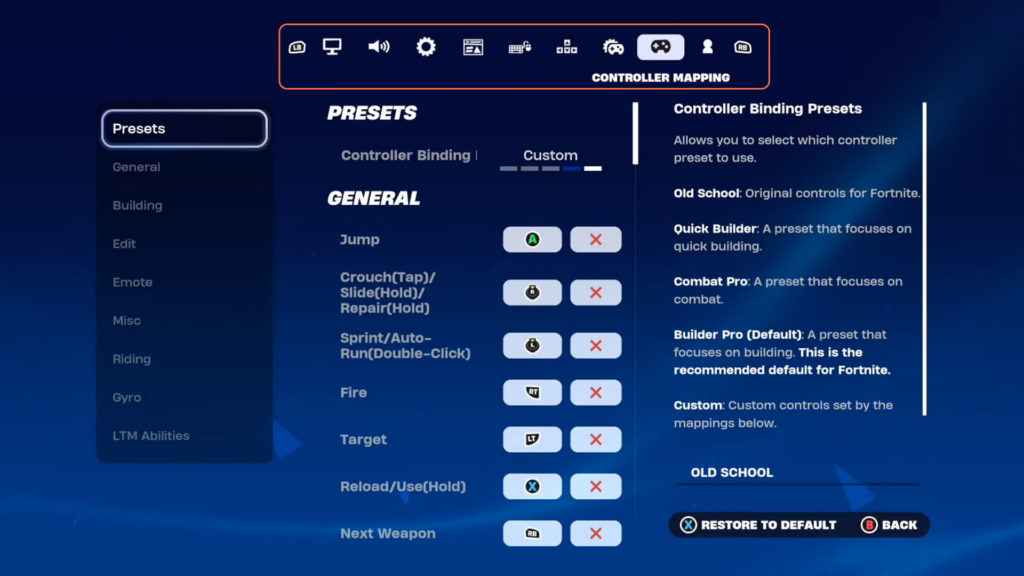
Step 3: Select Custom Preset
Choose the Presets option and scroll sideways from options like “Old School” or “Quick Builder” until you reach “Custom”.

Step 4: Explore Button Assignments
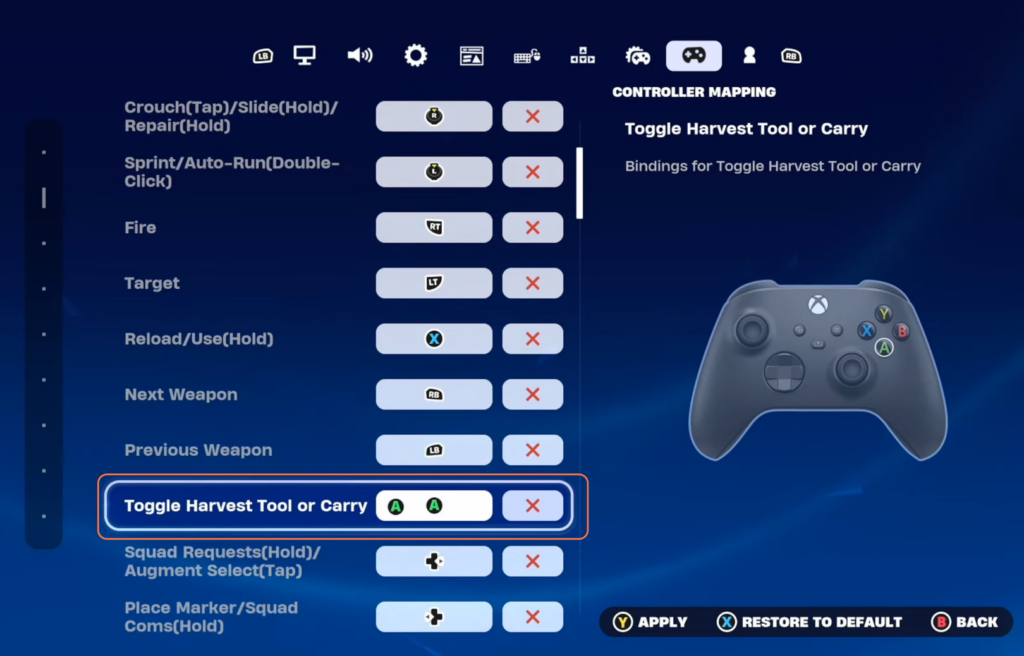
On the left side of the screen, you’ll see various sections like General, Building, Edit, Emote, Miscellaneous, Riding, Gyro (if available), and Limited Time Modes (LTM) abilities.
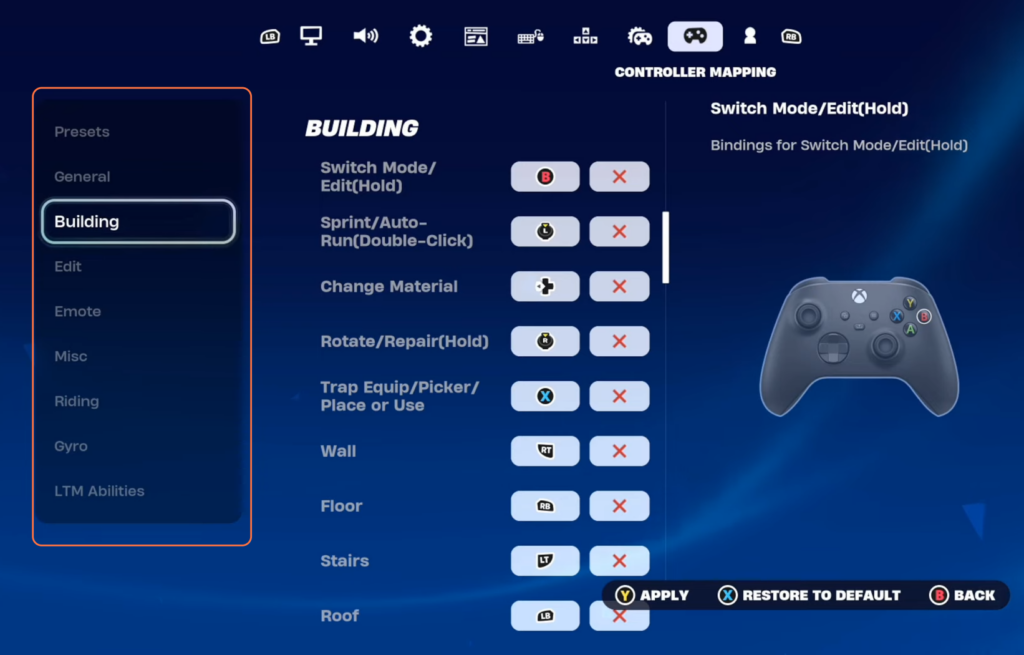
Step 5: Remap Buttons
First, we will go for the General Section settings. For instance, to remap the “Jump” button, select it (press A) and then press the desired button you wish to assign (e.g., Y). Confirm the remapping.
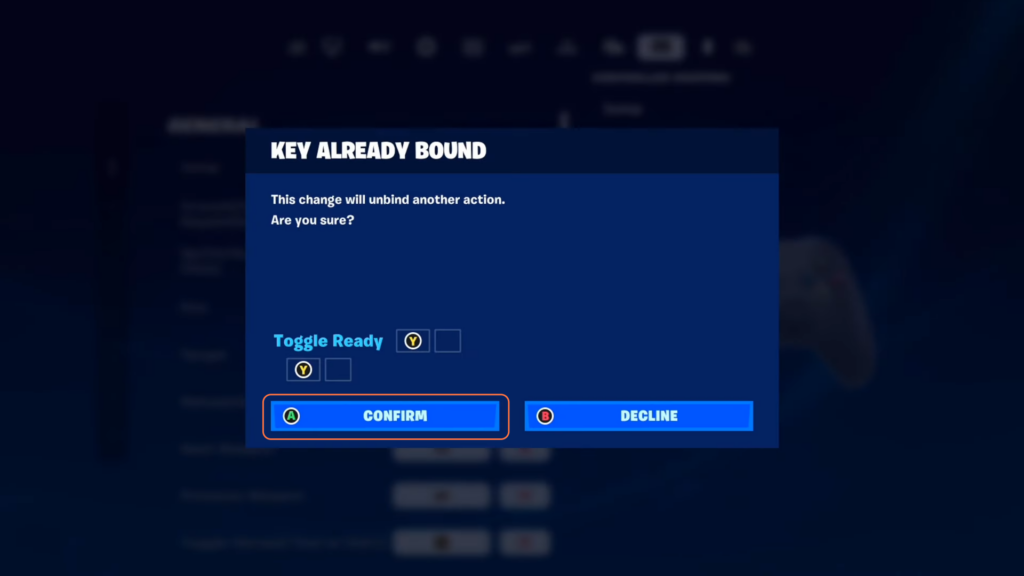
Step 6: Resolve Conflicts
If the newly assigned button had a previous function (e.g., Y was previously Toggle Harvest Tool), find that function and assign a new button to it to avoid conflicts.
Step 7: Restoration
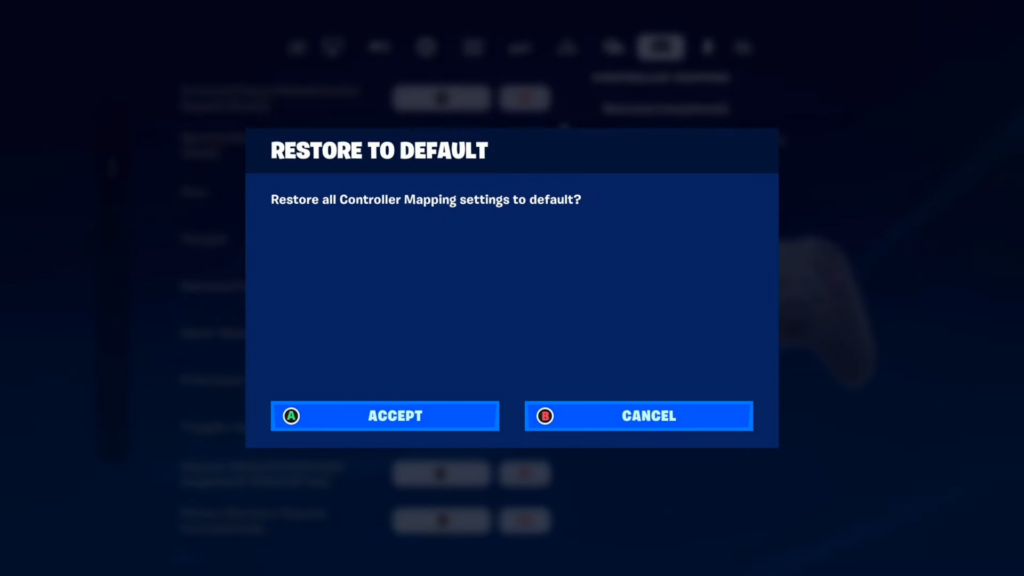
- If ever you make a mistake or want to revert, press the “X” key to restore all buttons to their original settings.
- Once you’ve adjusted buttons to your liking press the “Y” key to apply changes. This saves your custom settings.
With the help of these steps, you can personalize your controls for an optimal gaming experience in Fortnite Chapter 5.