Scary Horror 2 Escape Games is a puzzle game by Escape Adventure Games. It follows their popular Scary Horror Escape Room Games app. In this game, you’re kidnapped on your 30th birthday and thrown into a life-or-death challenge.
The game consists of three distinct chapters, each different based on clues, hidden items, and level of difficulty. The individual chapter includes a unique story, starting from kidnapping to the entrance to the horror house and then liberation. You’ll explore themed rooms with graphic details and scary settings. In this comprehensive guide, you will be able to solve clues and puzzles to escape, hints, and full solutions if necessary.
Chapter 1 Kidnapping
You will get the complete guide for Chapter 1 – Kidnapping in Scary Horror 2: Escape Games, the second spooky escape room game by Escape Adventure Games.
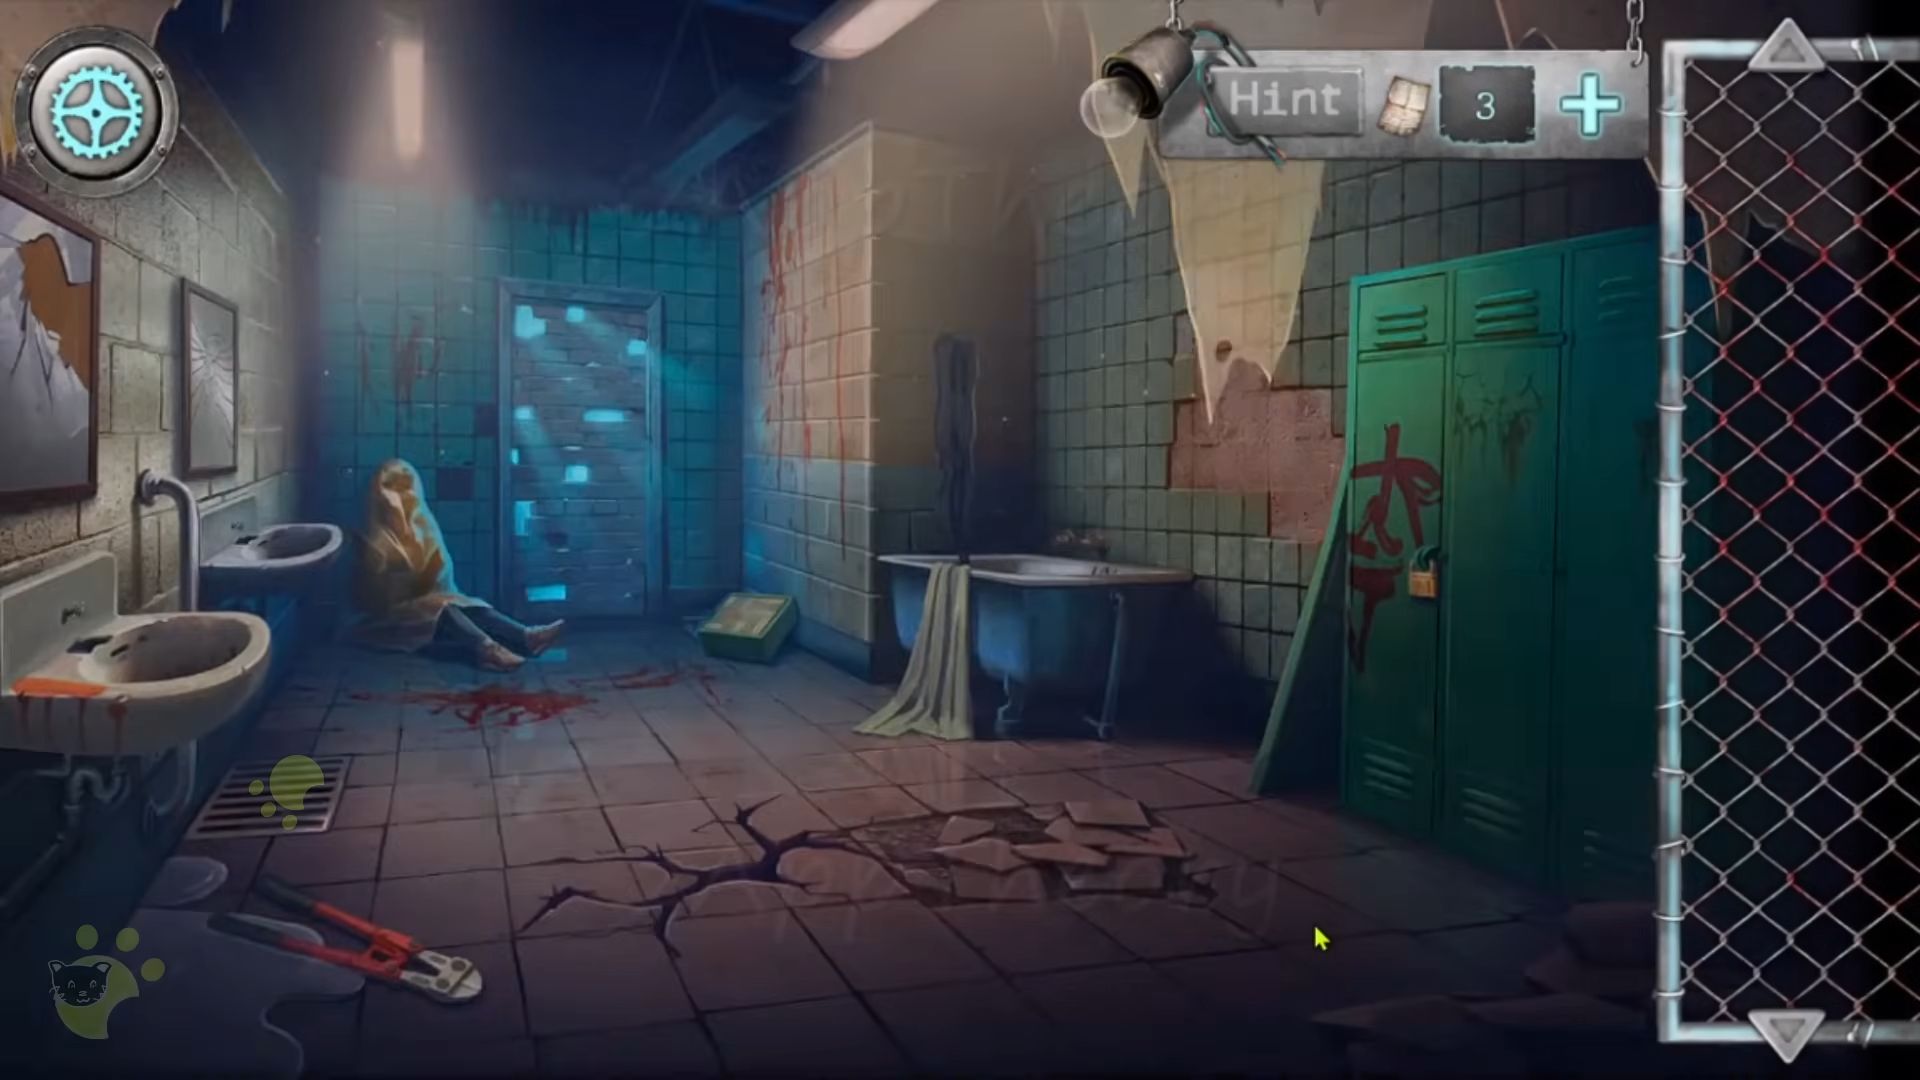
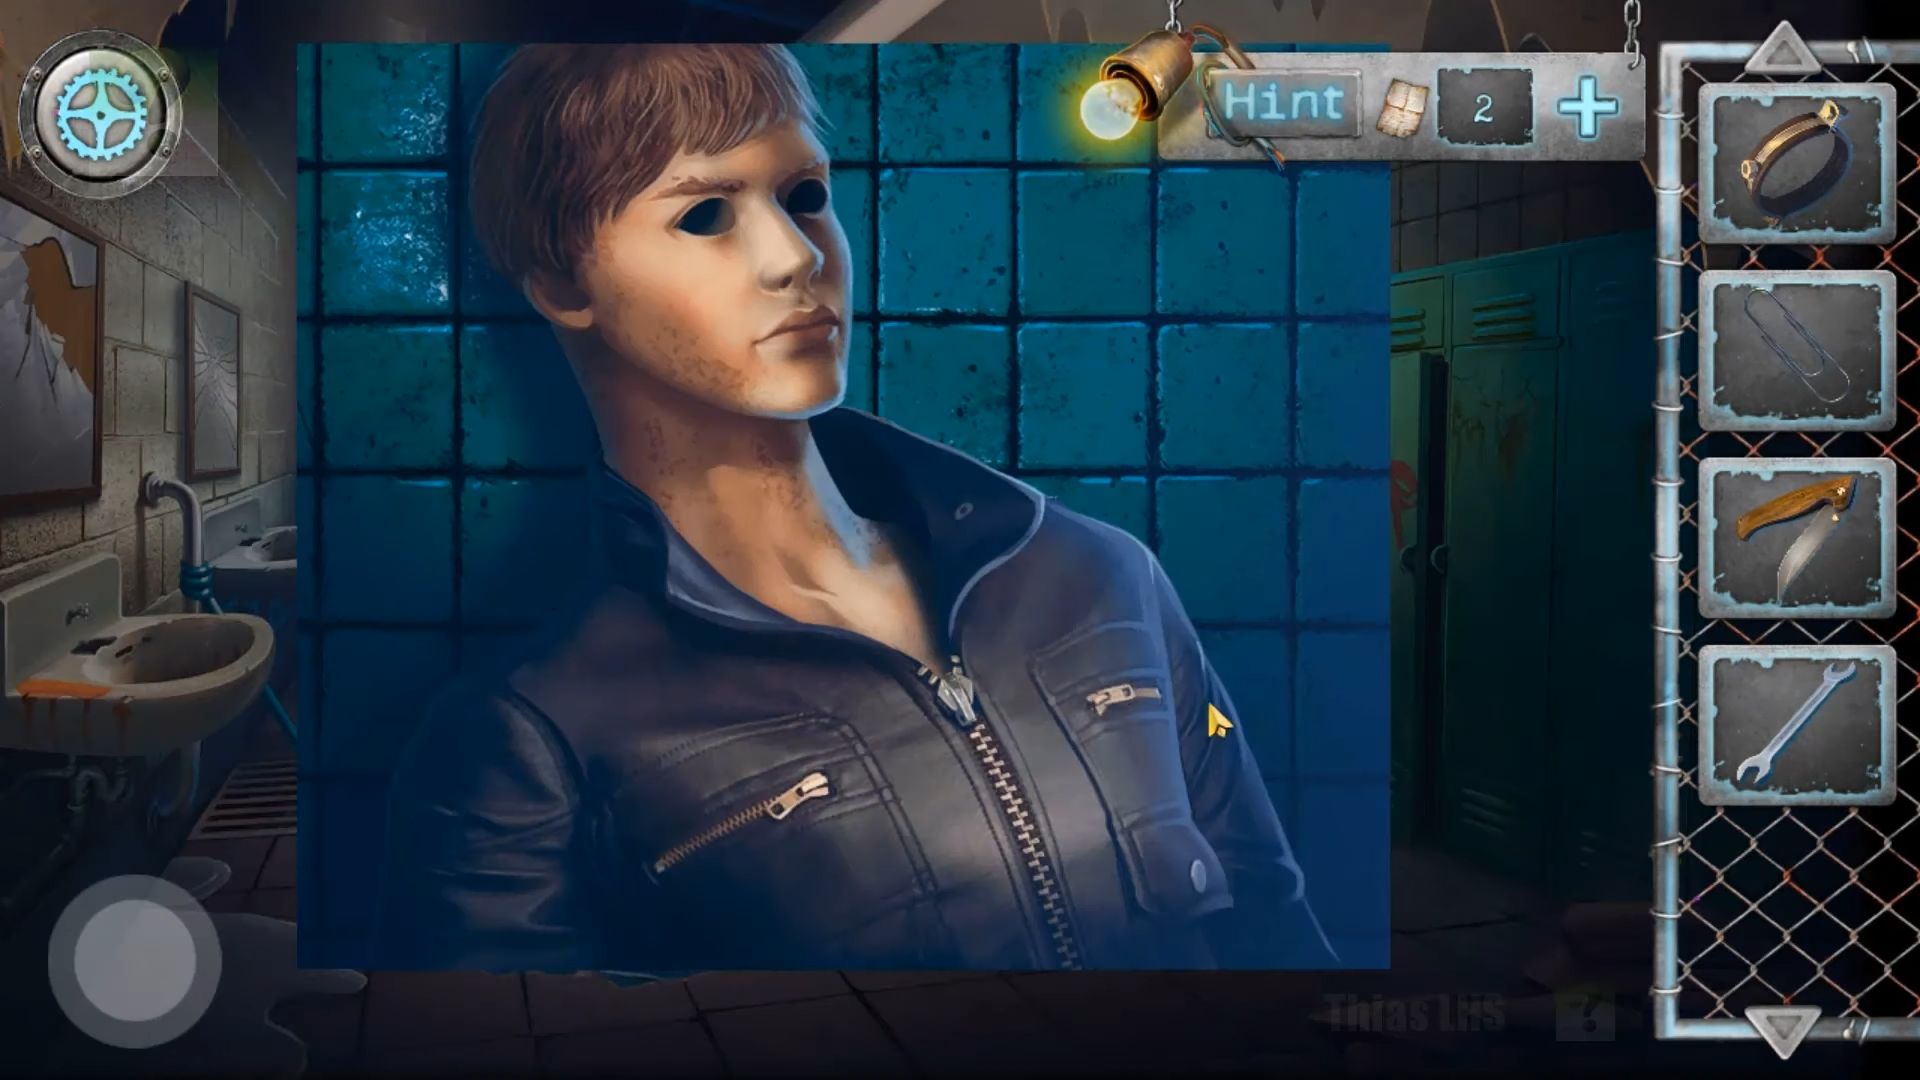
Your 30th birthday takes a scary turn as you get kidnapped and drugged in the first chapter. When you wake up, you find yourself in a run-down bathroom with a body and a hole in the floor.
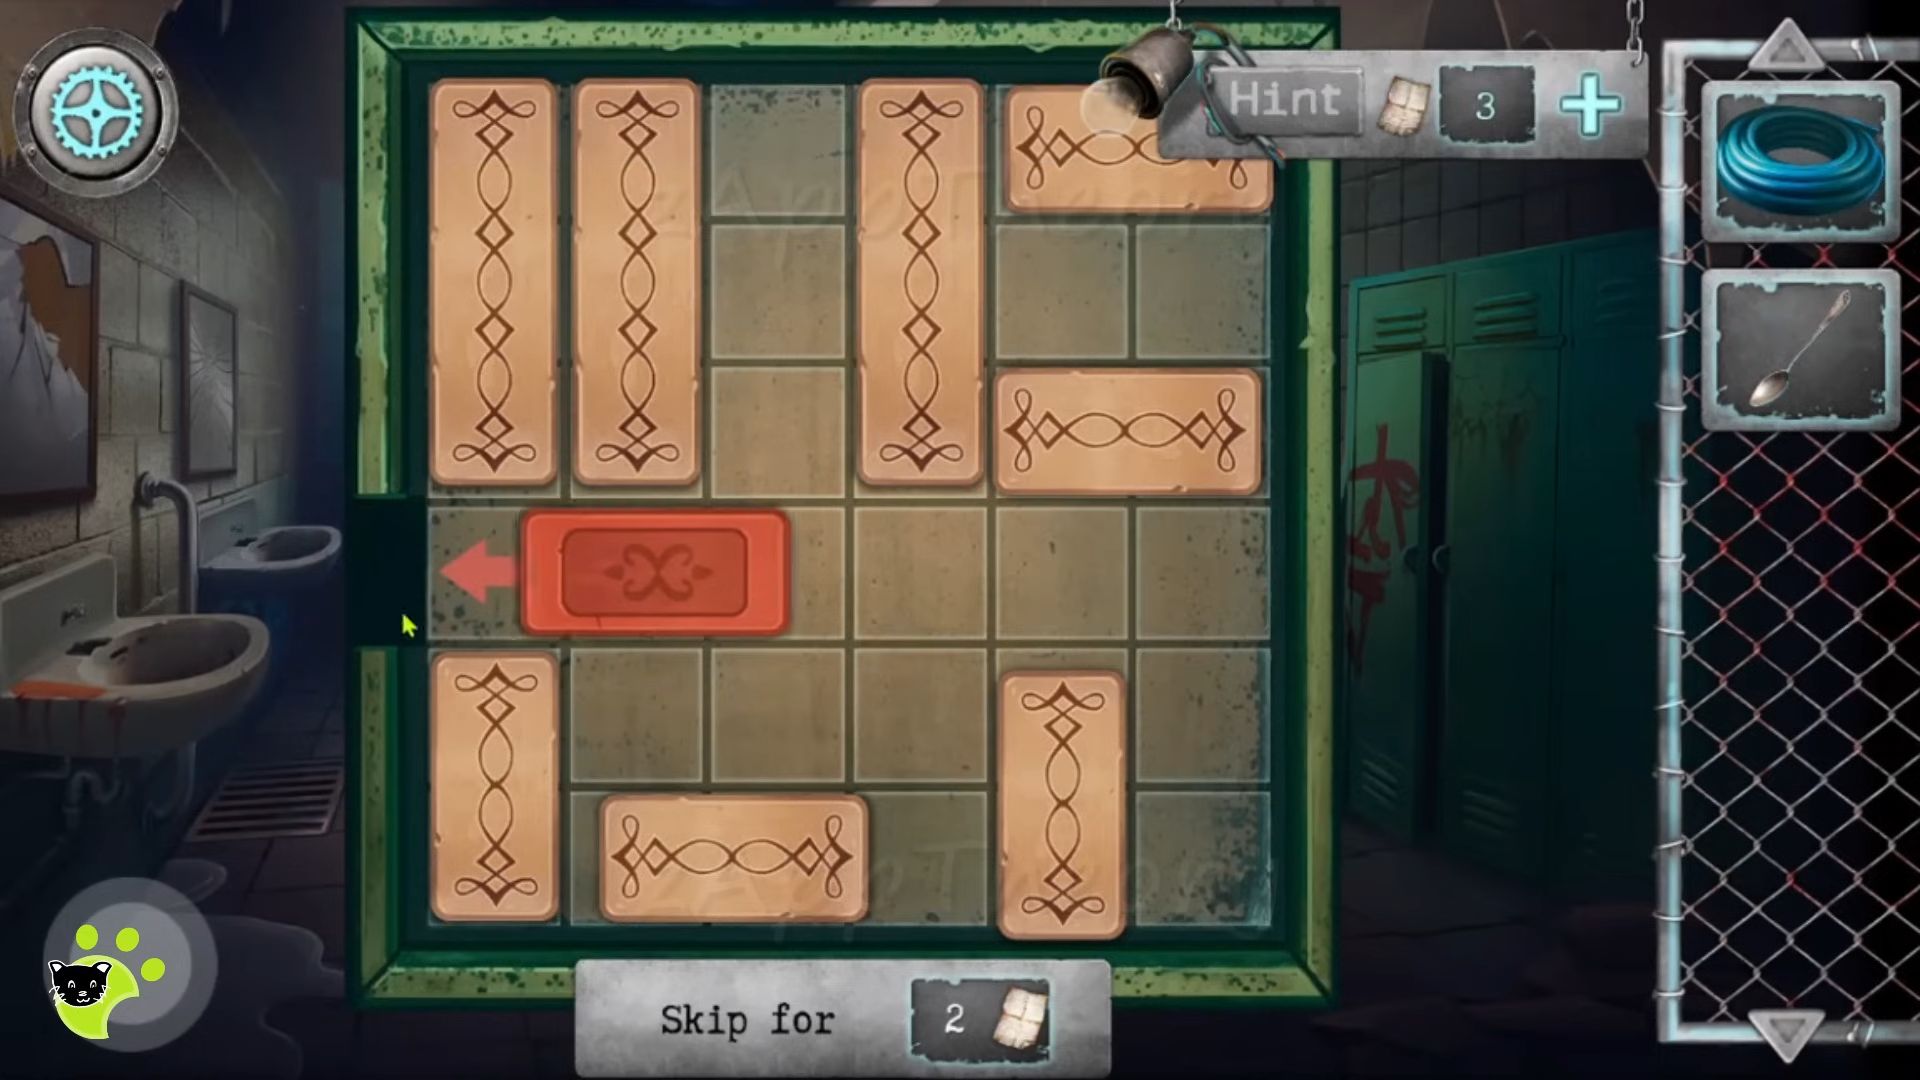
Start by picking up the bolt cutters (metal nippers) from the floor. You need to use them on the padlock of the lockers on the far right and grab a blue hose from inside. Then, near the bricked-up door on the floor, find a green box with a puzzle. Solve the puzzle by rearranging the blocks to slide the red one to the left. Once done, open the box and take the pipe clamp from inside.
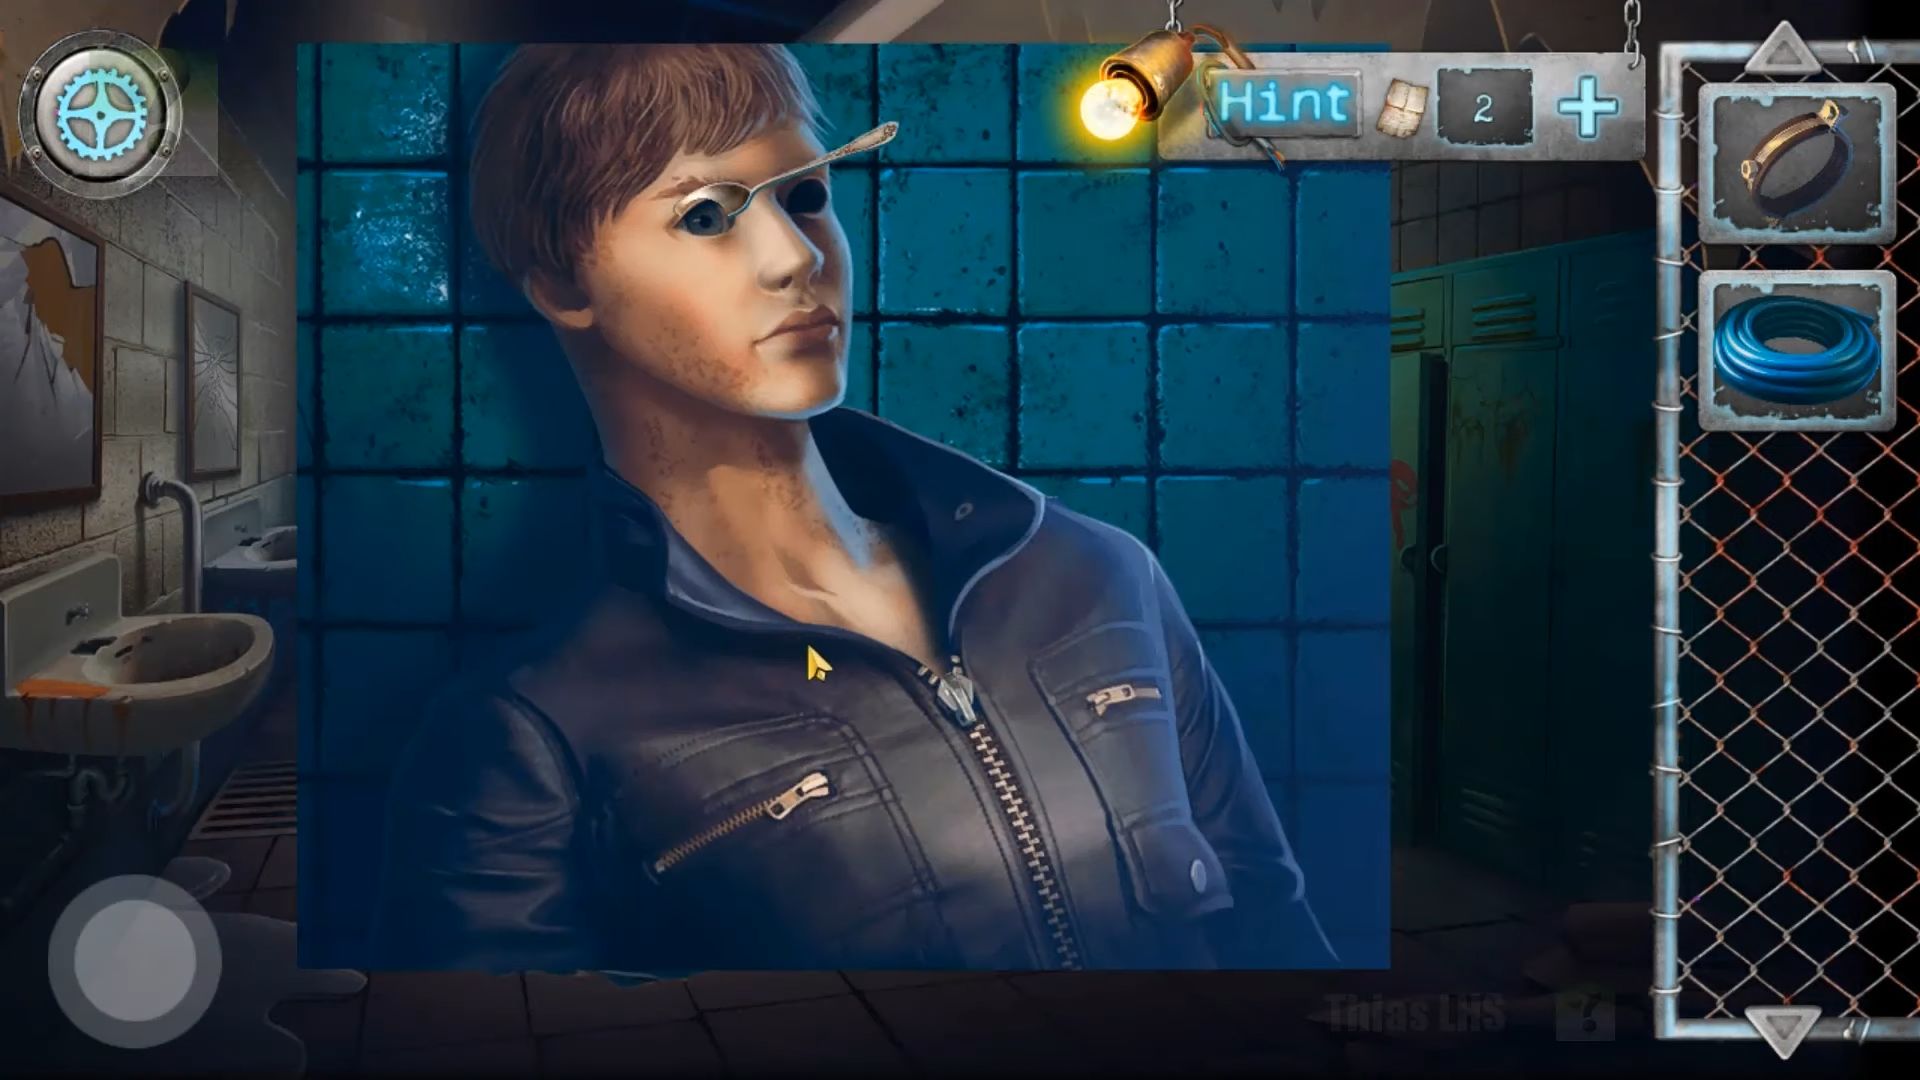
Tap to check the bath and grab the spoon from the side. Take a look at the body; remove the sheet by tapping on it. It turns out to be a mannequin. After that, you have to use the spoon to take out the remaining eye and find a key.
Use the hose on the handle located between the sinks on the left wall. This will securely tie it. After that, tap on the hose on the floor to lower it into the hole. Now, tap the hole to go down to the next level.
Next, pick up the wrench from the floor and tap on the green bag behind it. In the bag, you need to tap the notebook to discover a message and collect a paper clip. Use the key to open the lunch box and get a knife from inside. After that, go back up to the bathroom area using the back option.
Revisit the mannequin, attach the paperclip to the broken zipper, and open the jacket to find a light bulb.
Go back and check the locker on the right once more. Then you need to utilize the knife to open the round can on the lower shelf and grab a blue button (boiler lever). View the bathtub again and use a wrench to take off the nut on the red valve.
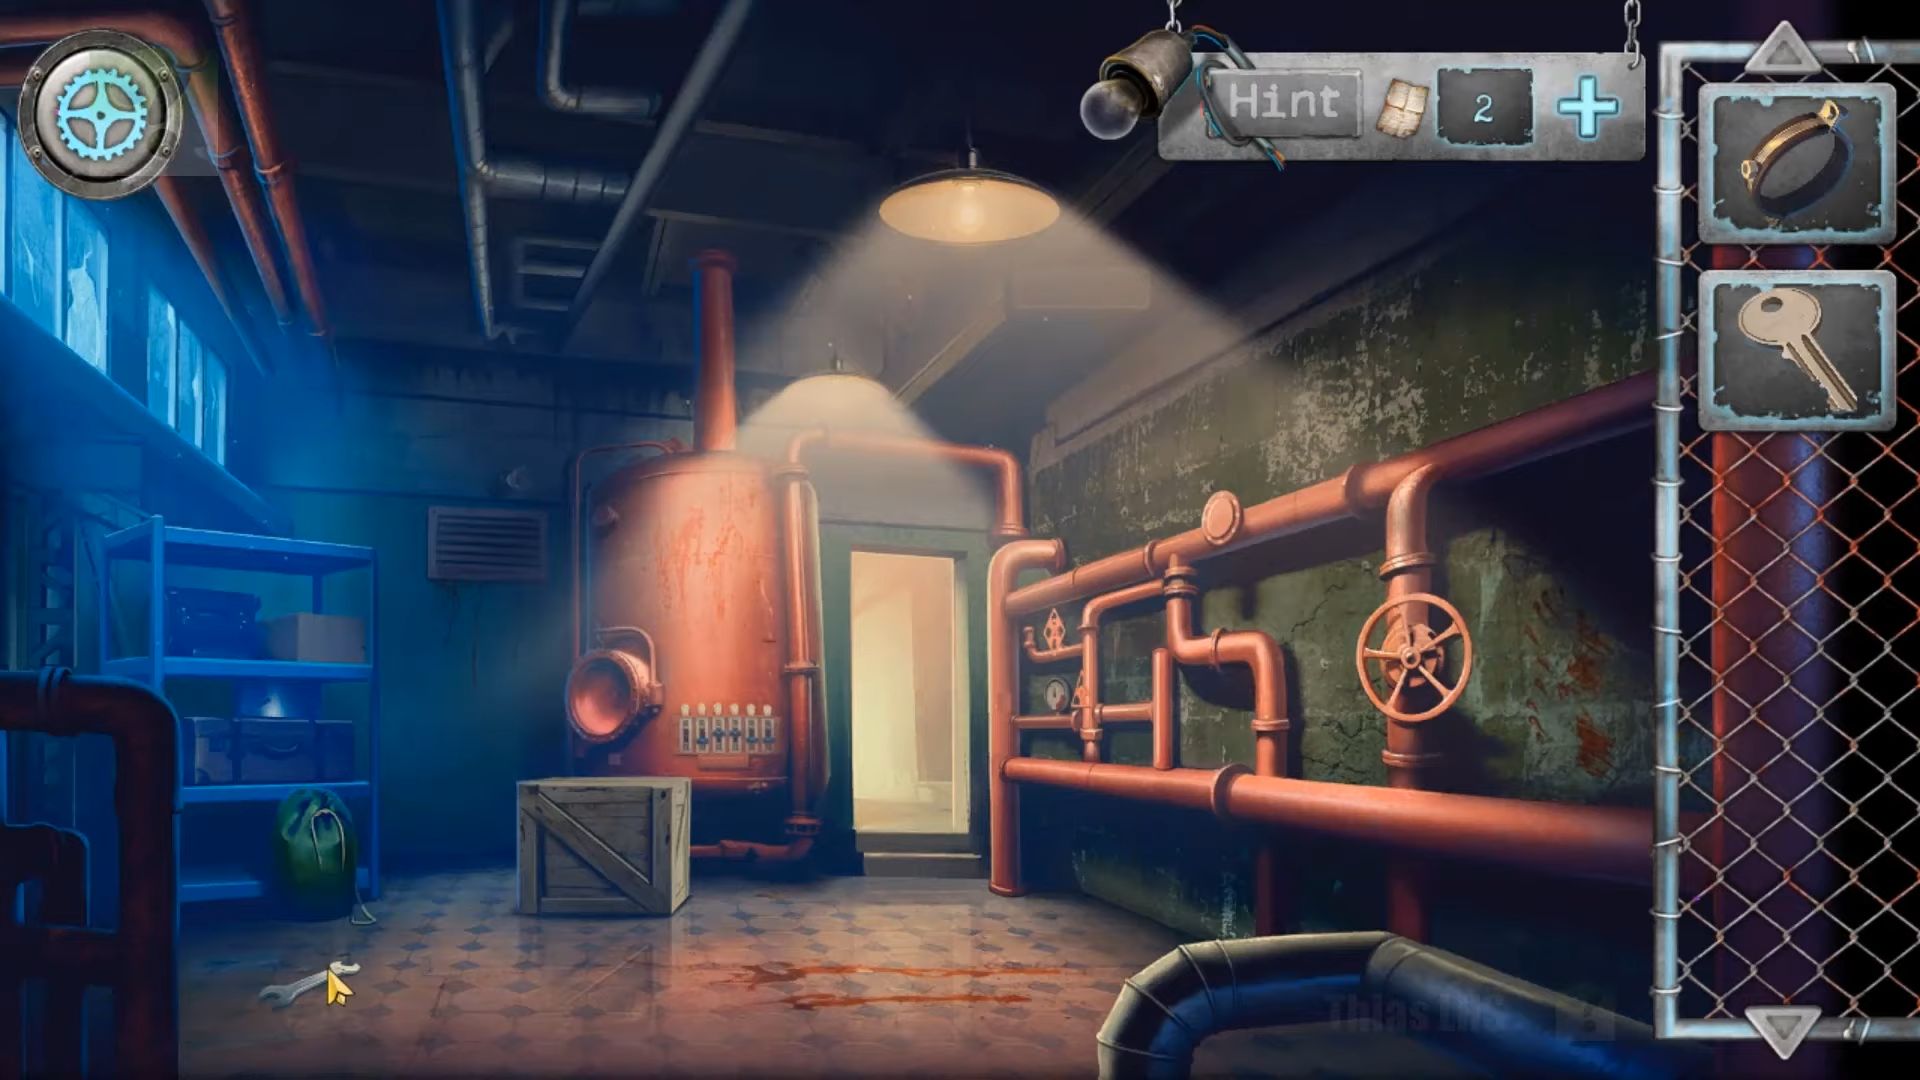
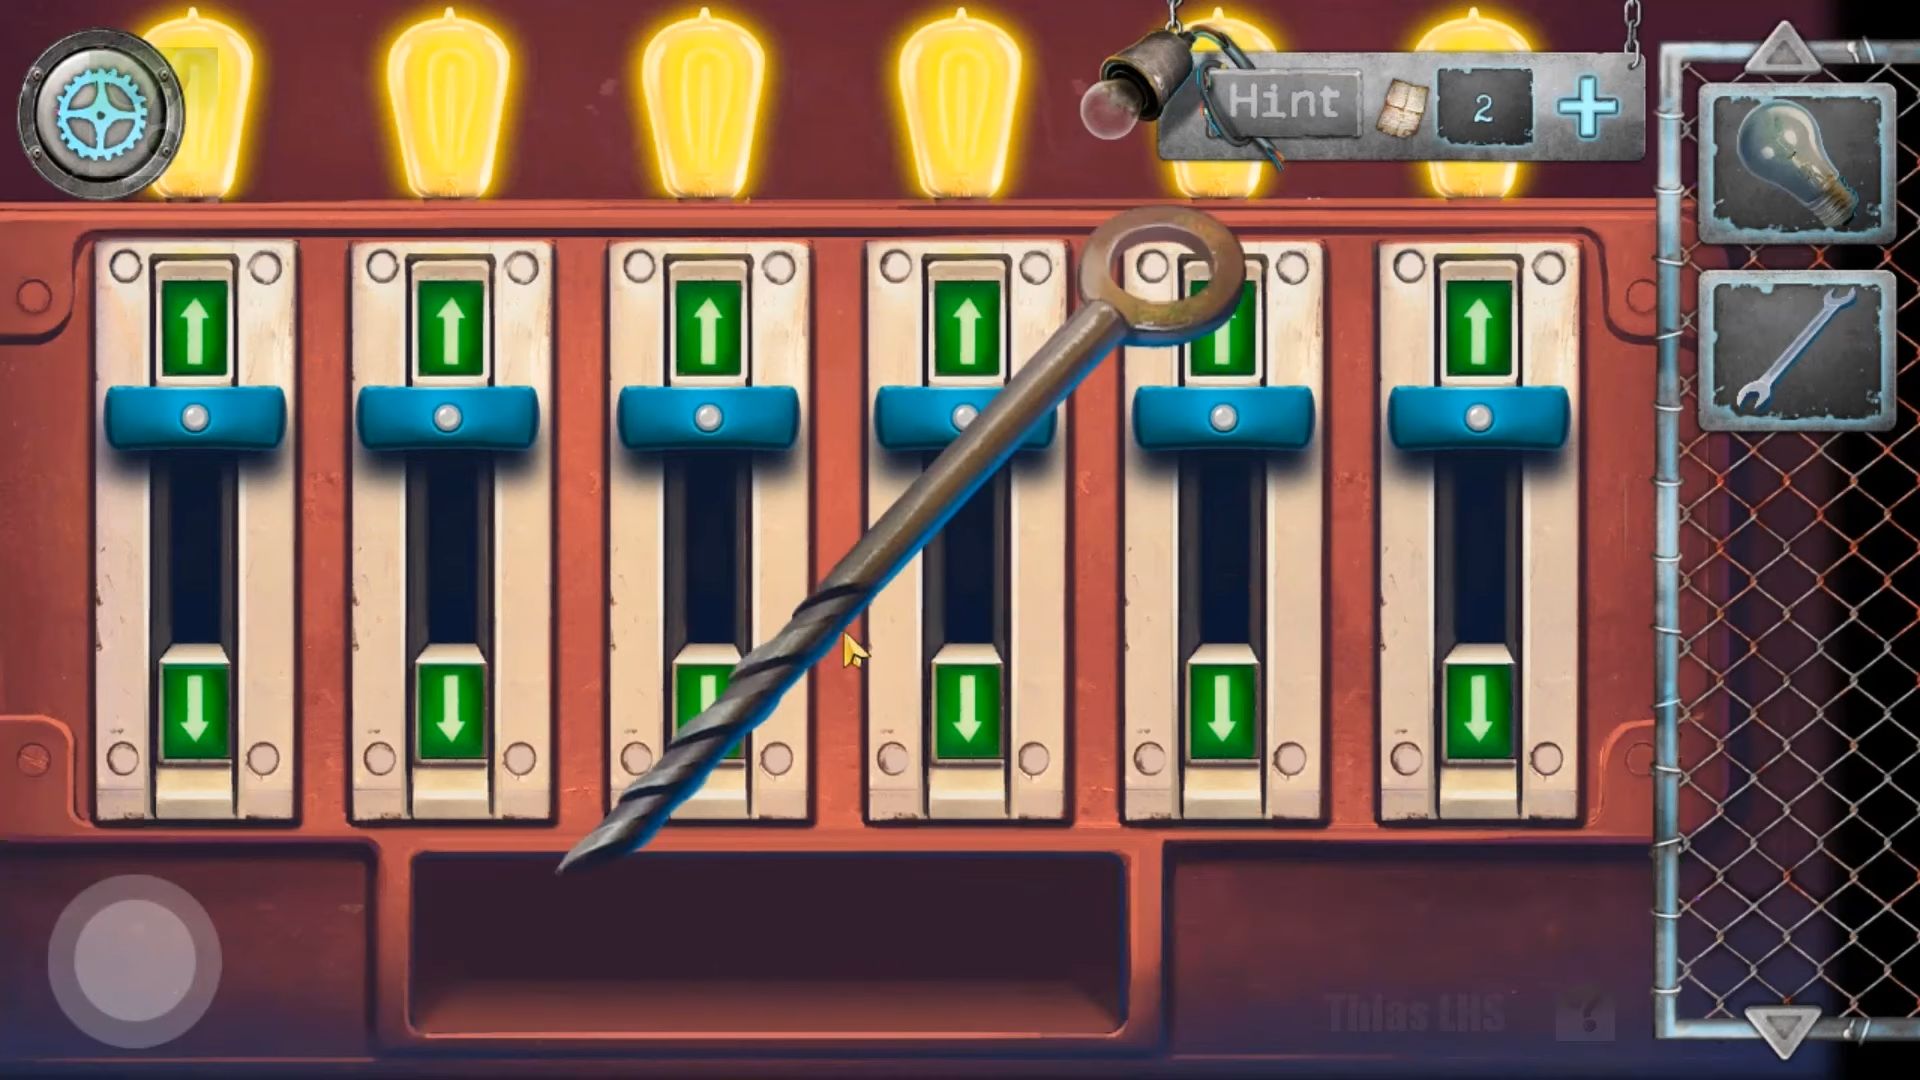
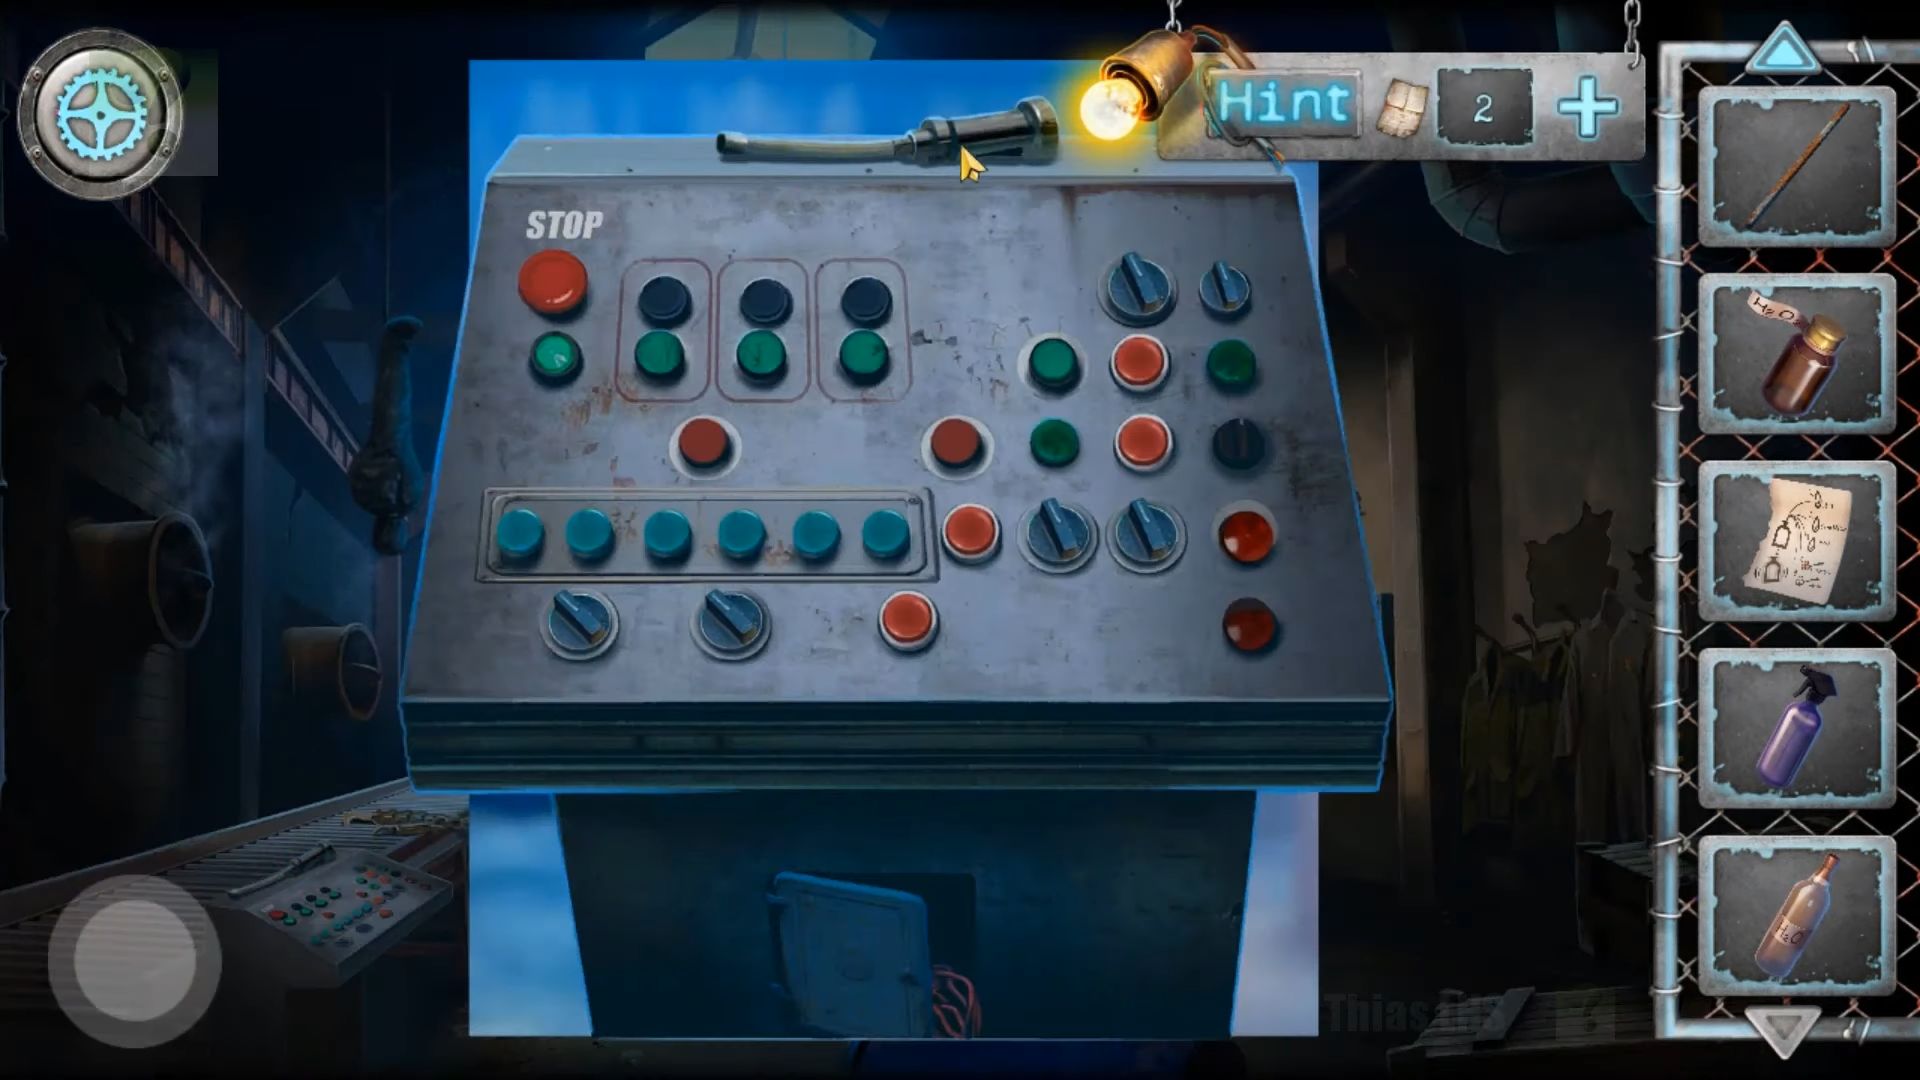
After that, you have to collect the red valve. Return to the boiler room, view the control panel on the front of the boiler, and add the blue button to initiate a puzzle. Swipe up to turn on all the switches, figuring out the correct order to make them all stay on.
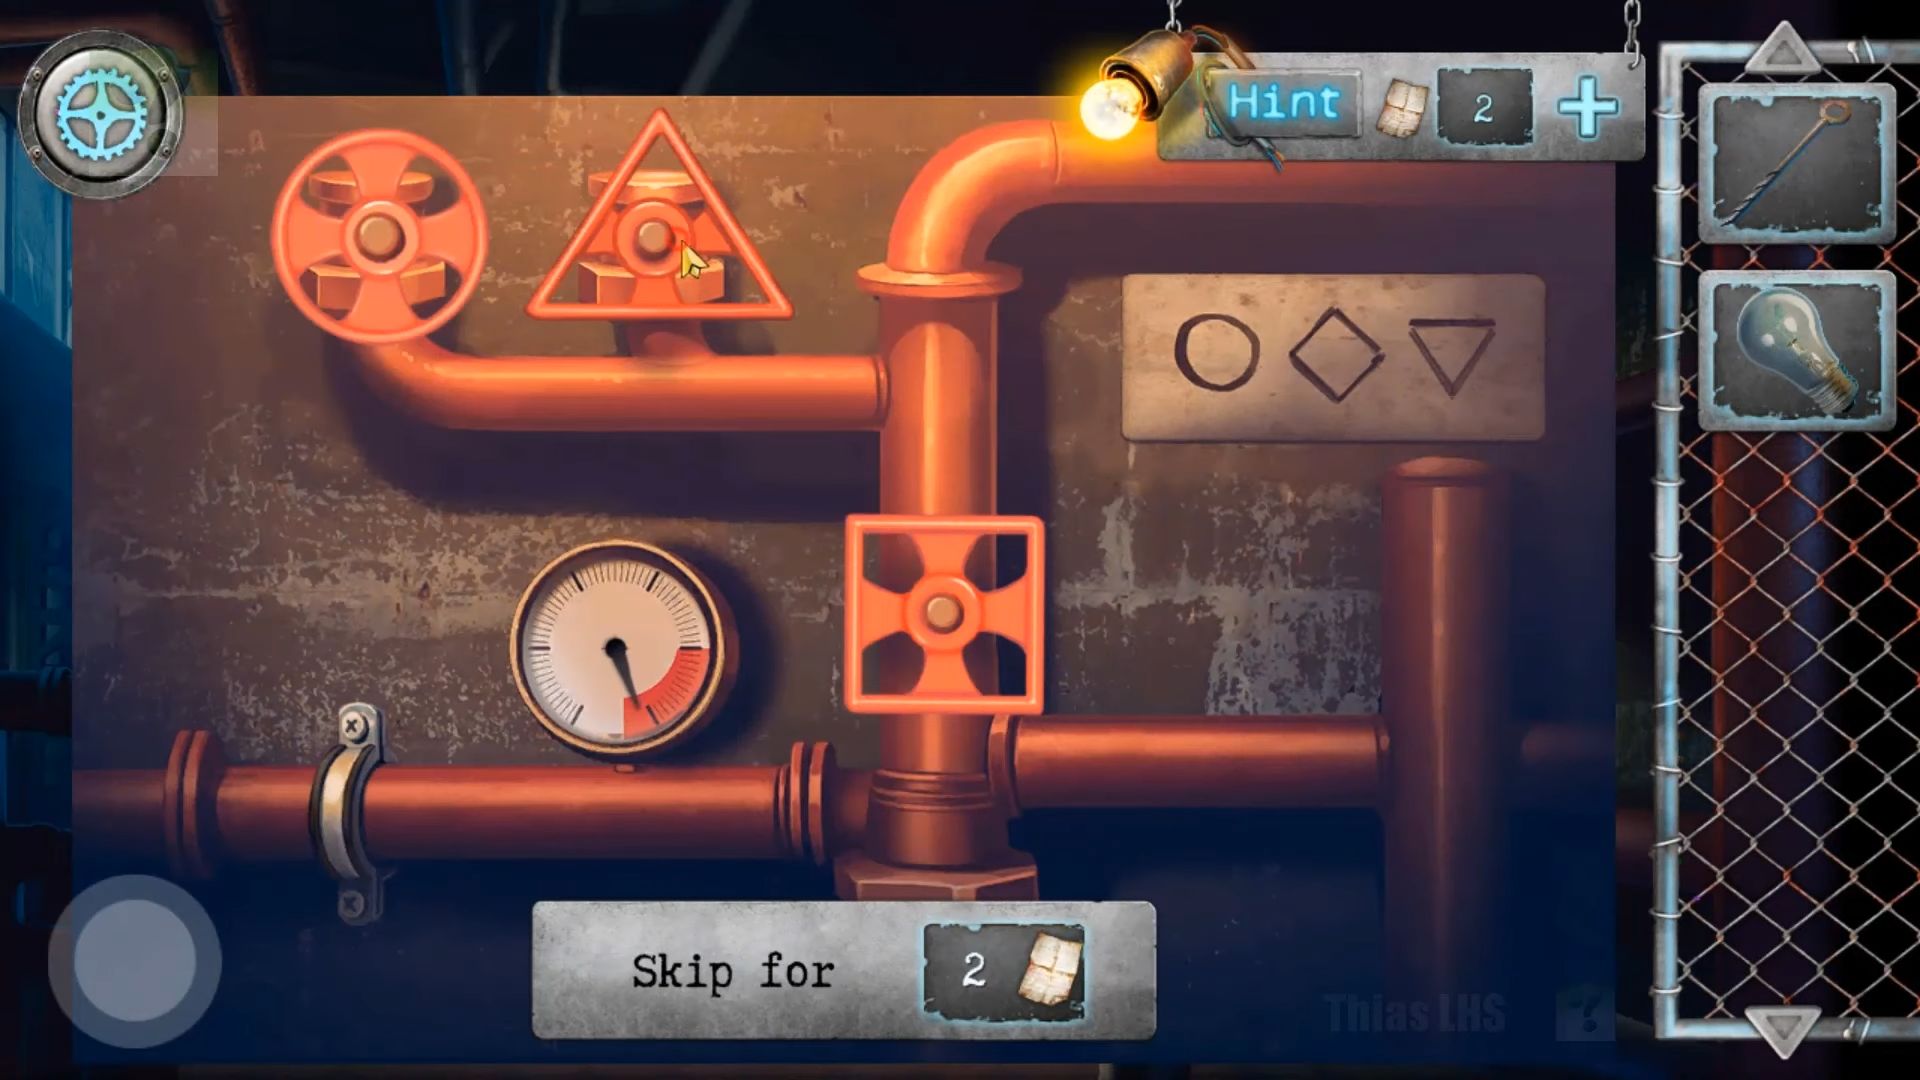
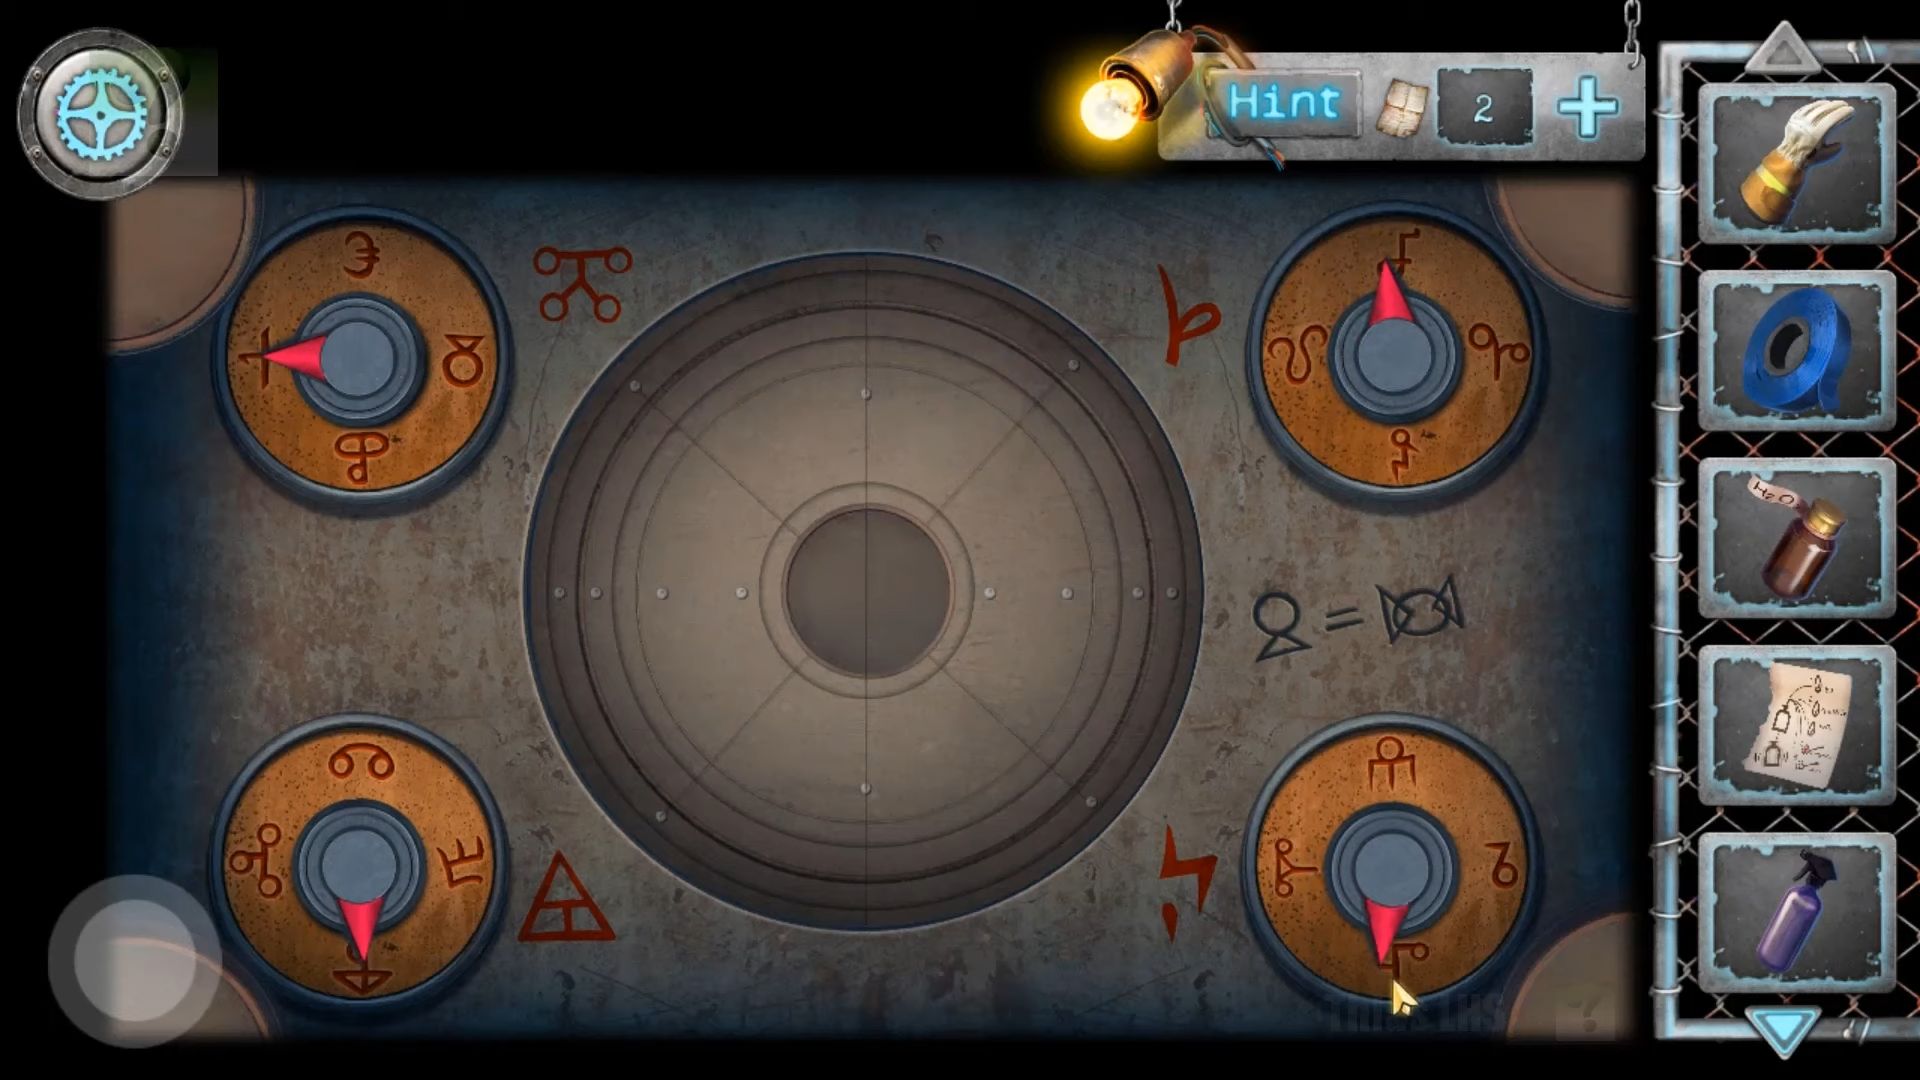
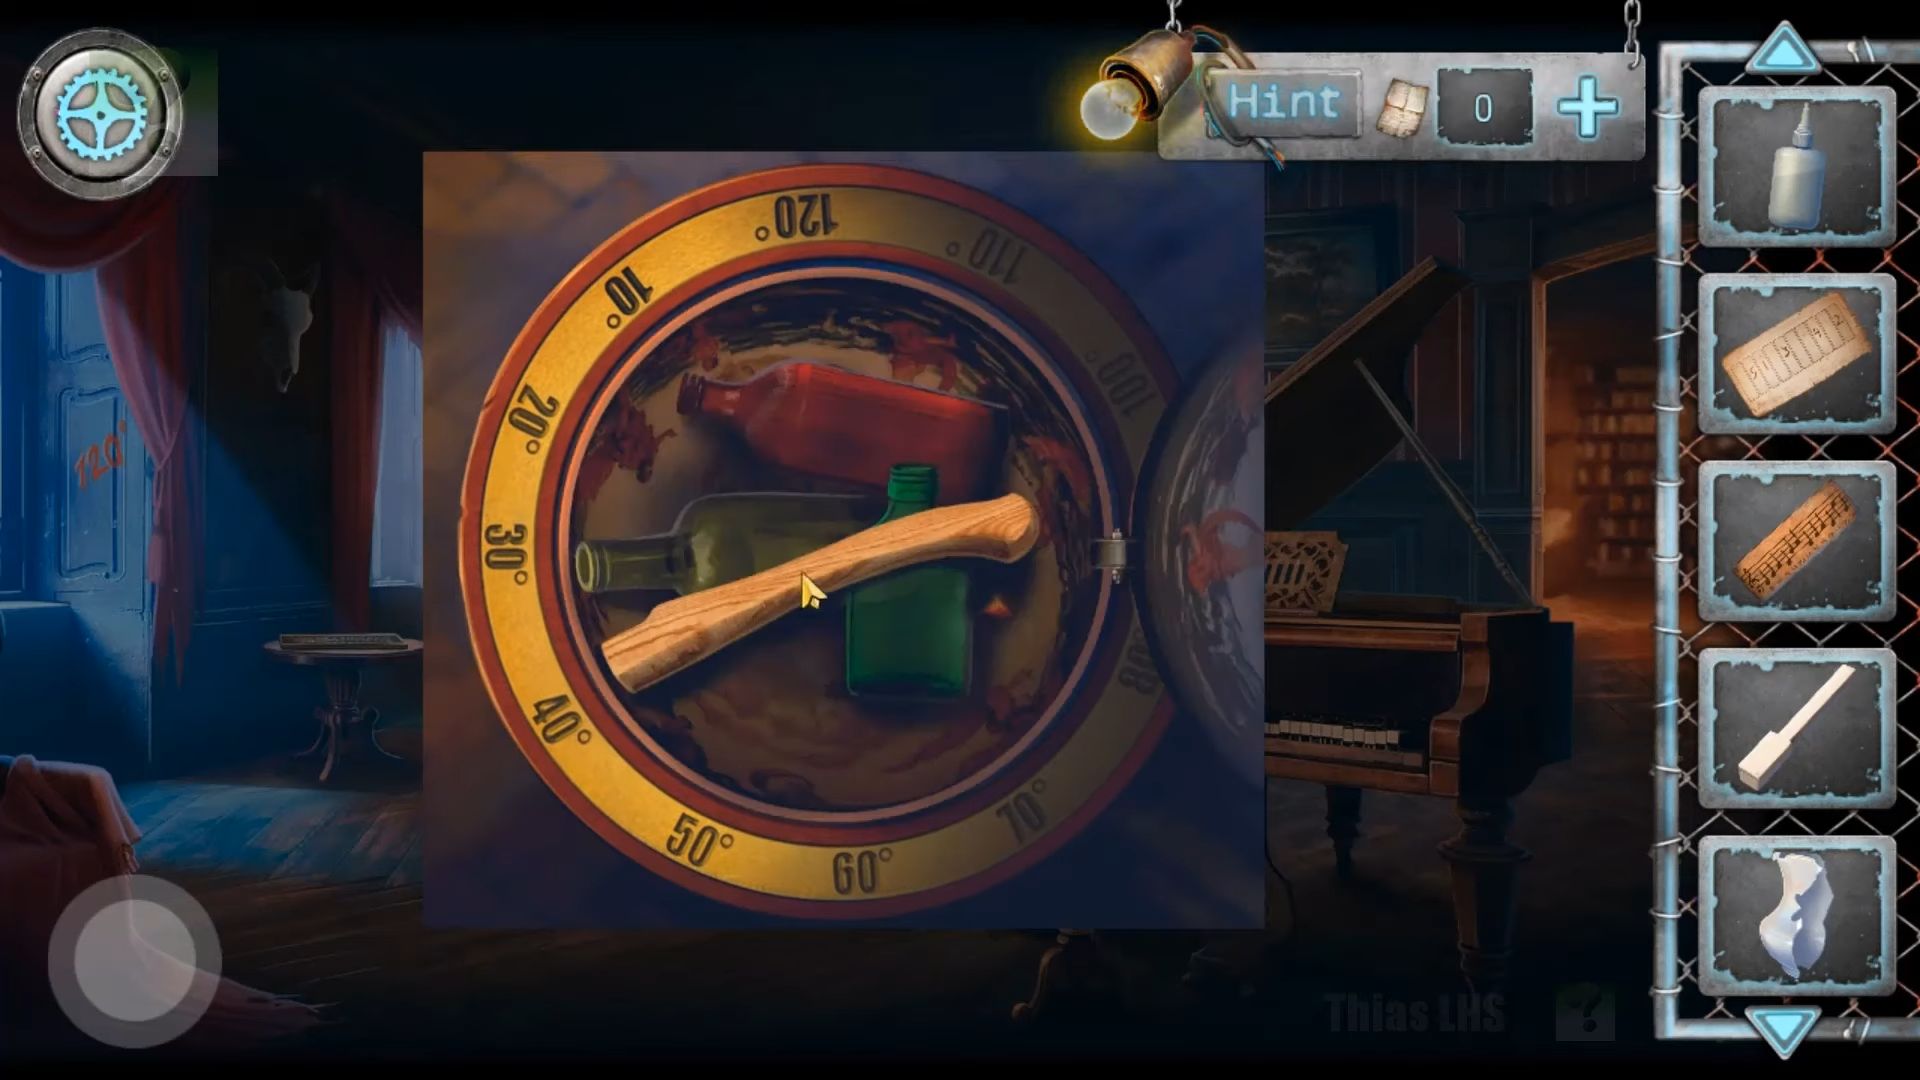
Now you have to collect the Firebox key. Then, tap on the pipes on the right to view the pressure gauge. Attach the round valve to the top left, following the diagram on the right to set the 3 valves to the correct positions. Turn the round valve until the pressure gauge drops to 0. Finally, place the pipe clamp over the hole on the lower left.
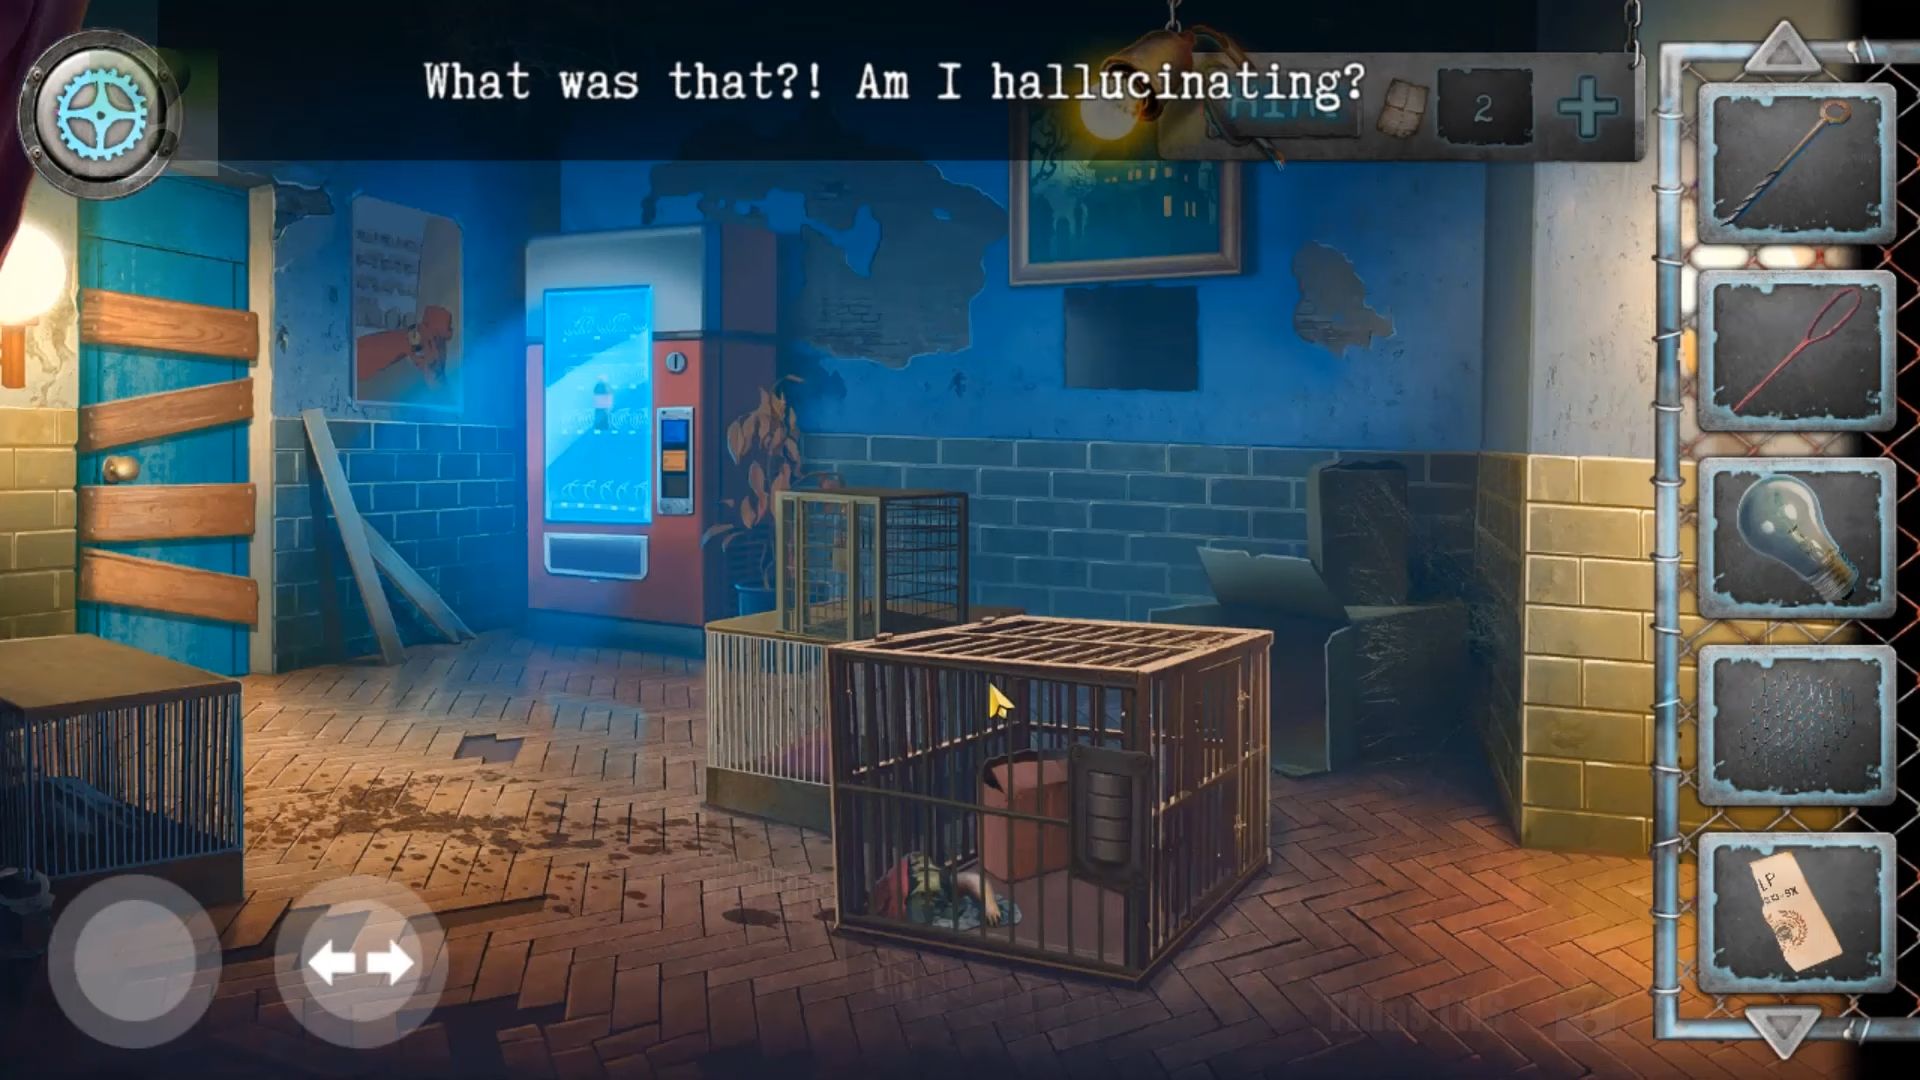
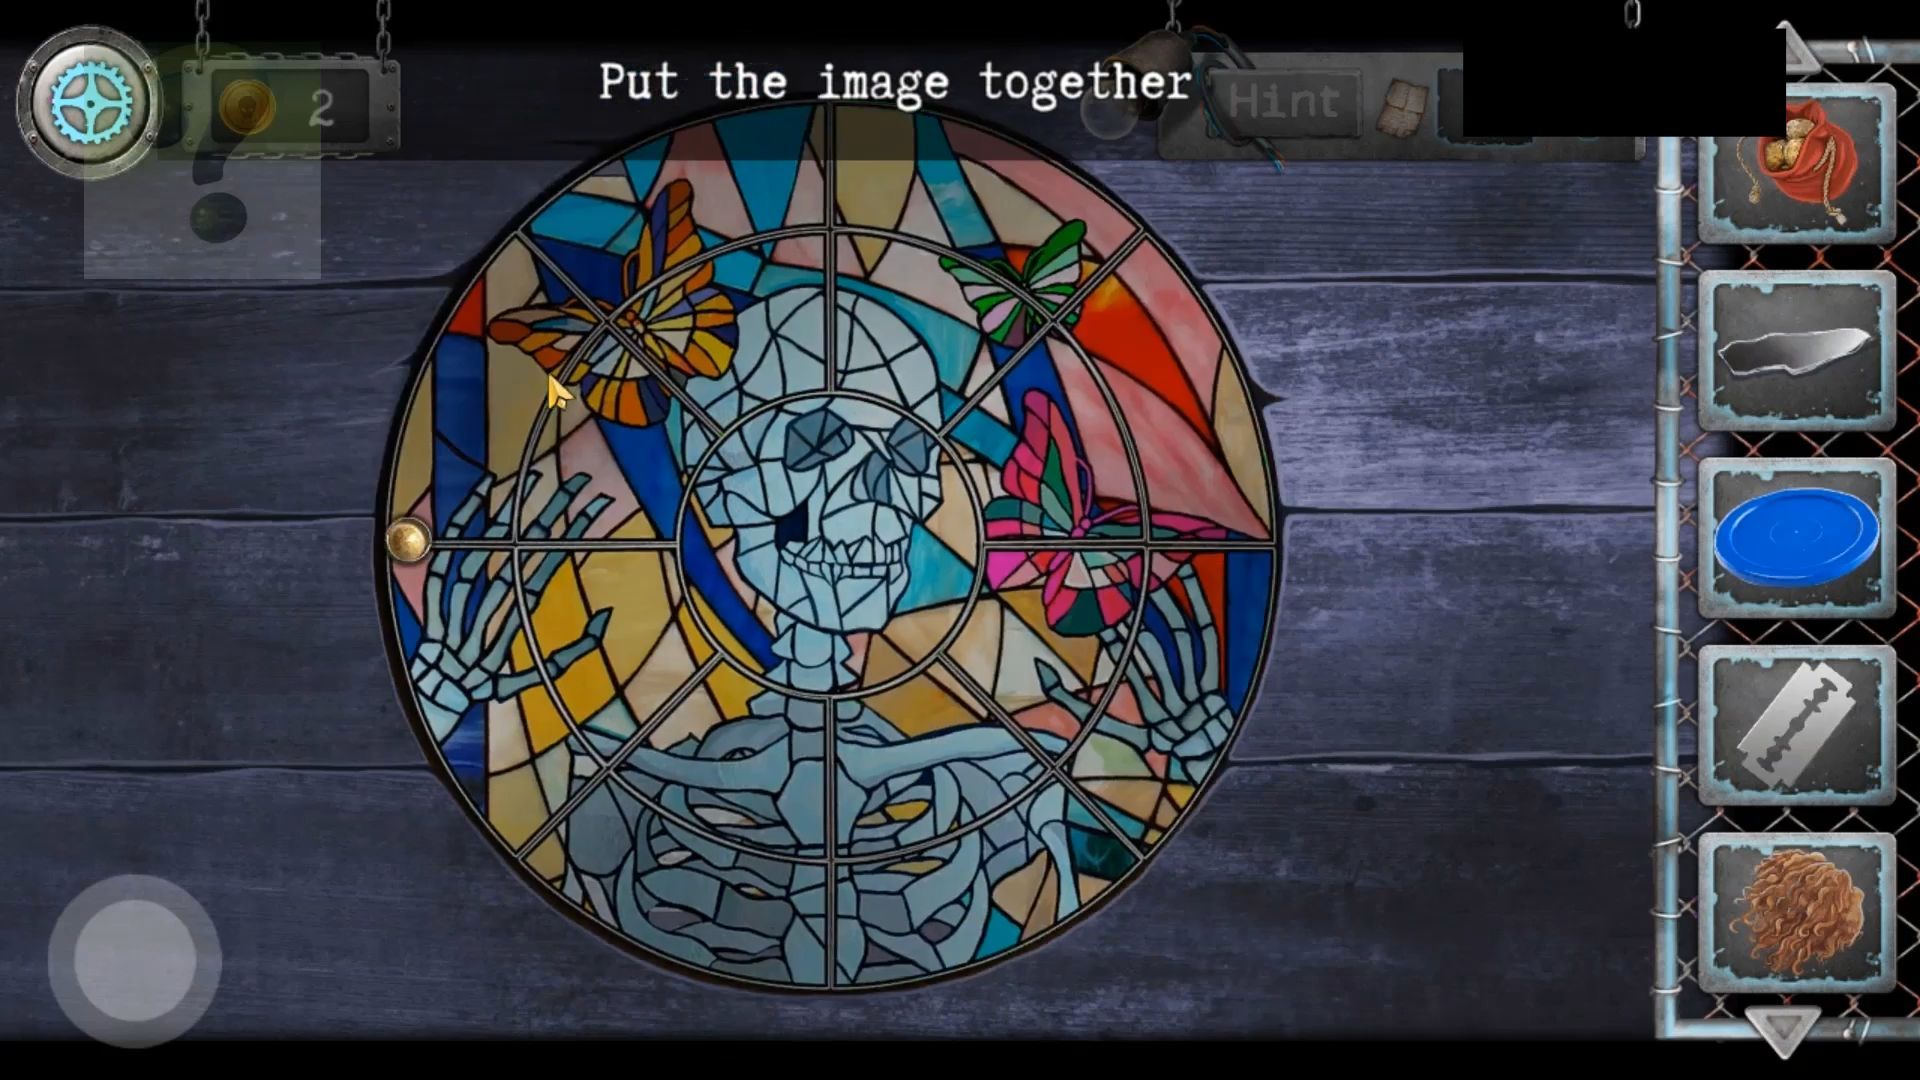
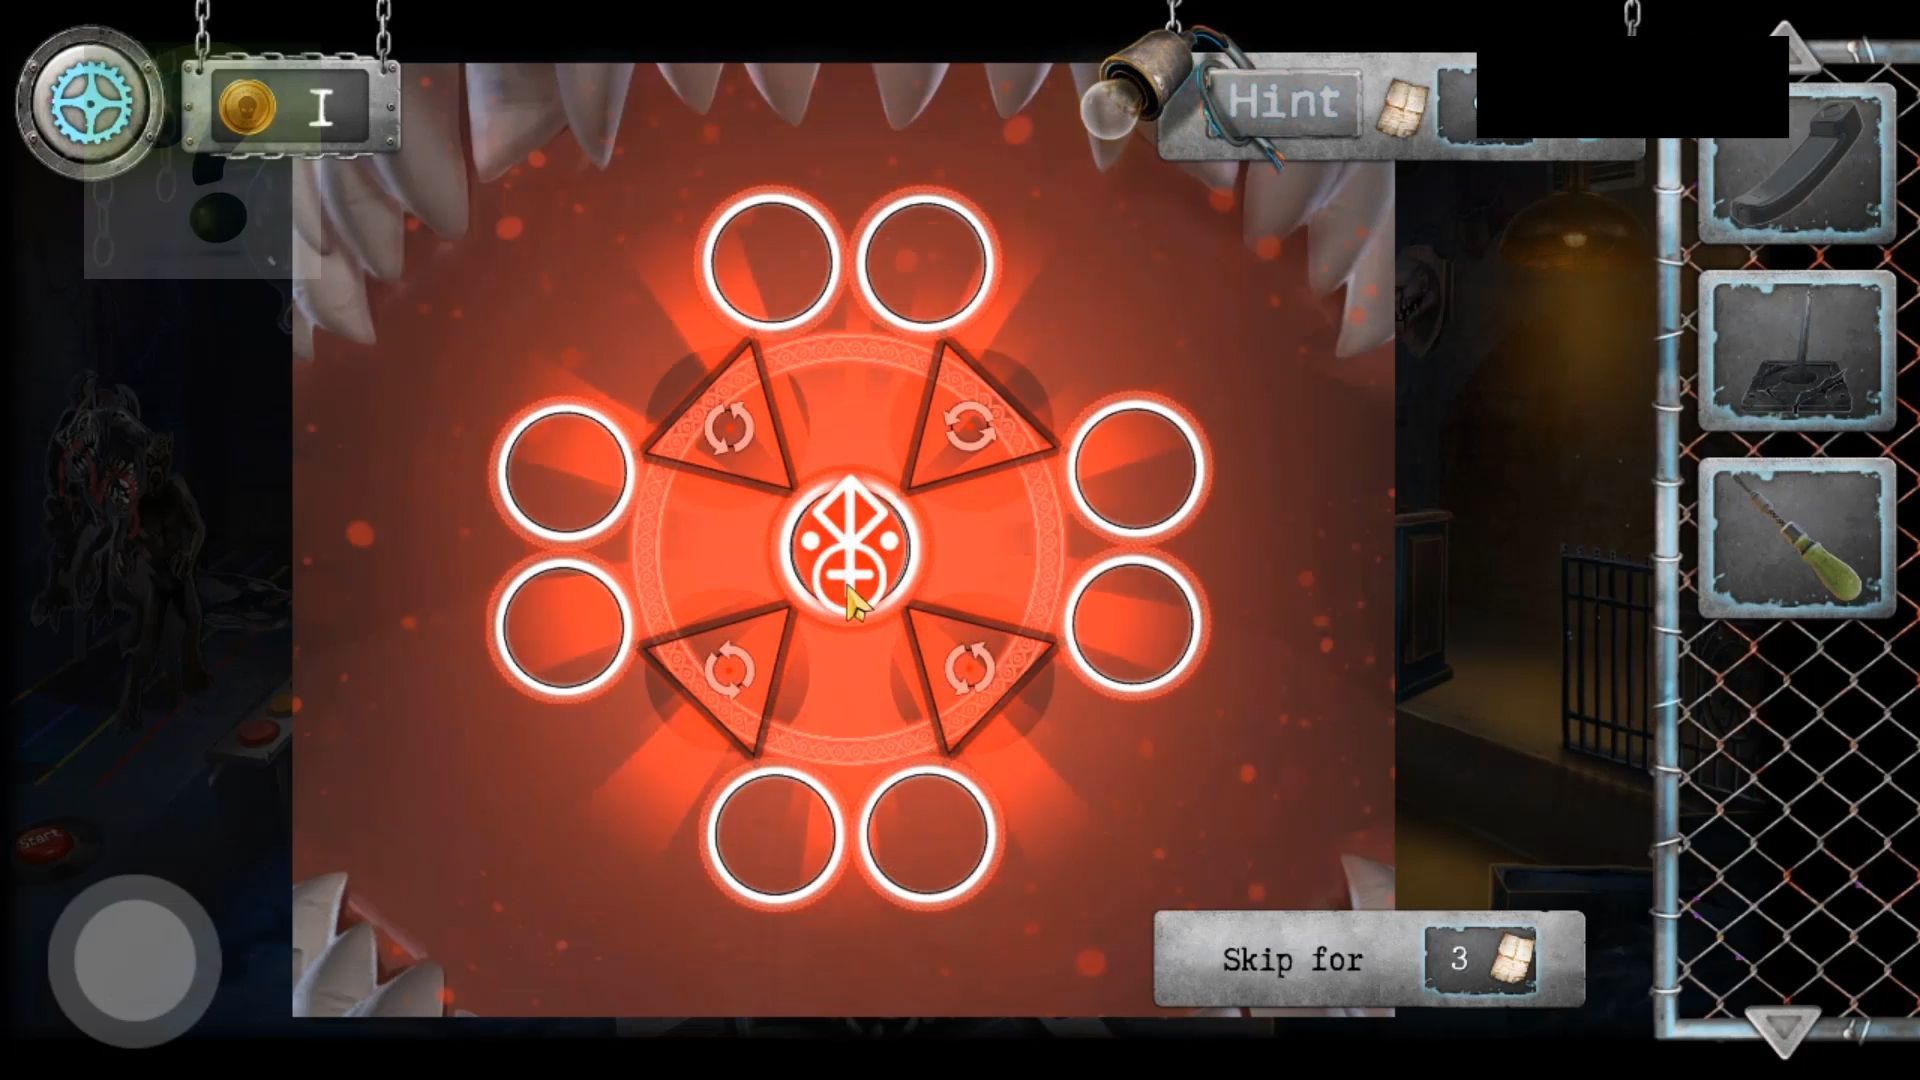
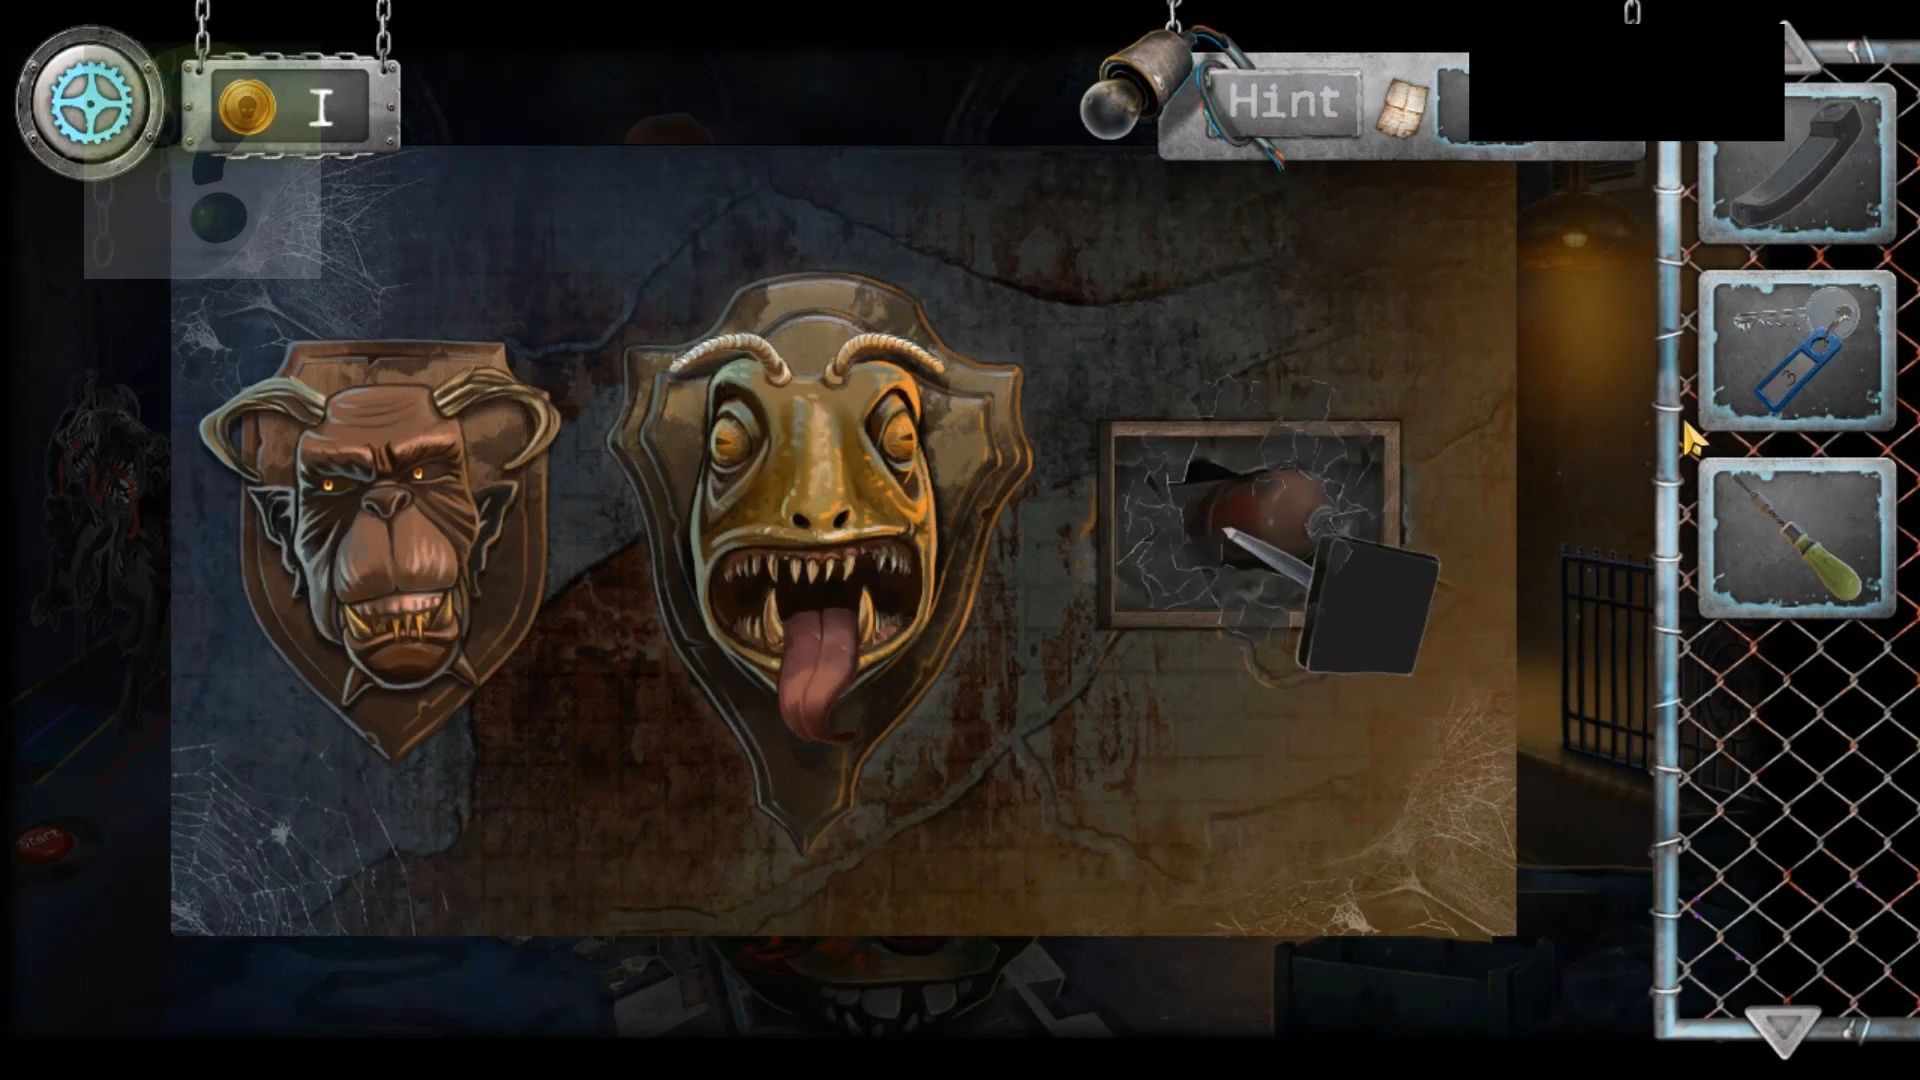
Once you’ve done it right, the doorway to the next room will be open (no more steam blocking it). Go into the next room and begin by tapping the left cage/box to get a scrap of paper. Then, you need to check out the drink vending machine at the back and grab a screwdriver. Next, tap to see the picture on the back right wall and solve the puzzle by rotating the pieces to complete the picture.
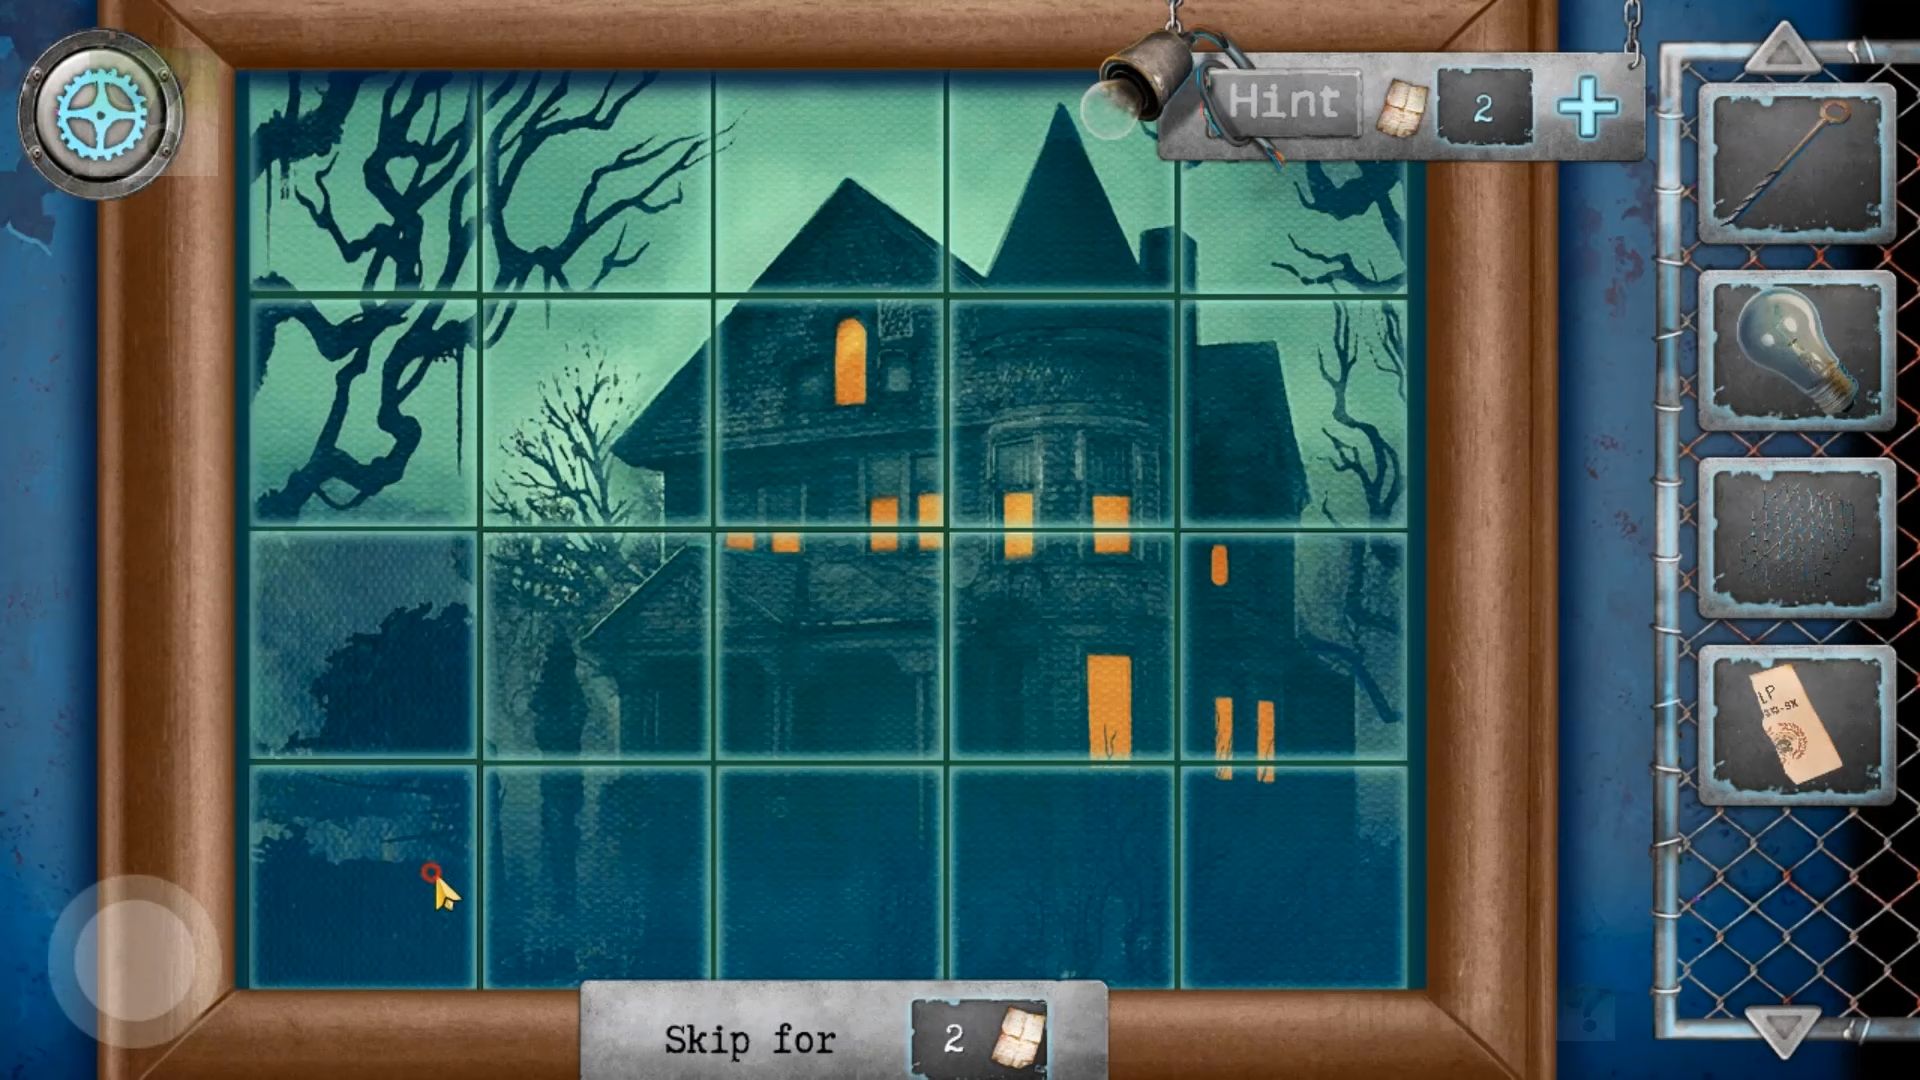
After completing it, grab a net hoop without a net. Tap to look at the cage in the center of the room and collect the net from the top. Then you have to combine the net with the hoop to create a butterfly net. Return to the boiler room and tap on the metal grill above the wooden box.
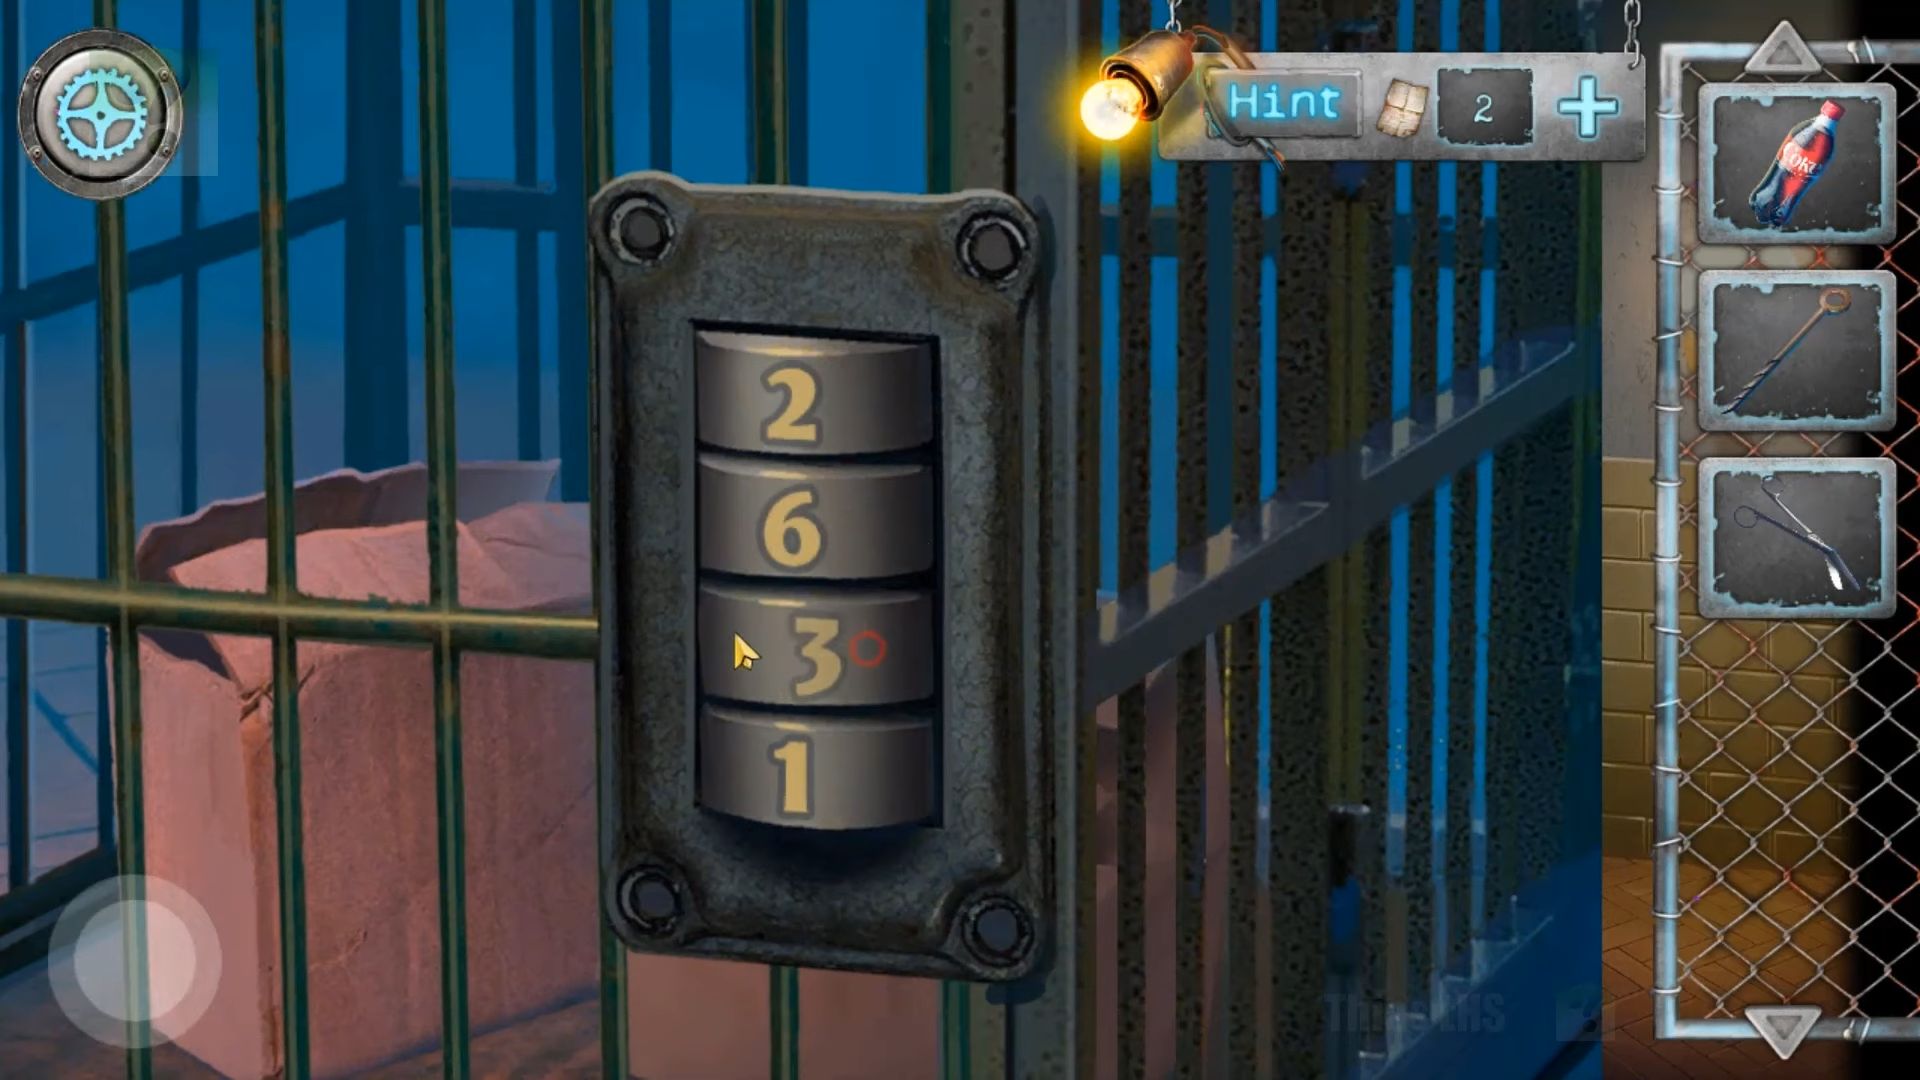
Begin by tapping to take out the broken light bulb and replace it with the one you have. Use the screwdriver to take off the screws and remove the vent cover, revealing a clue. Figure out where to place the numbers 1 to 6 to complete the sum to 12 in both directions. This gives you the 4 digits (2631) for the combination to the cage. Unlock the cage using this code and collect the doll’s hand. Afterward, you need to move the two boxes to access and pick up a crowbar.
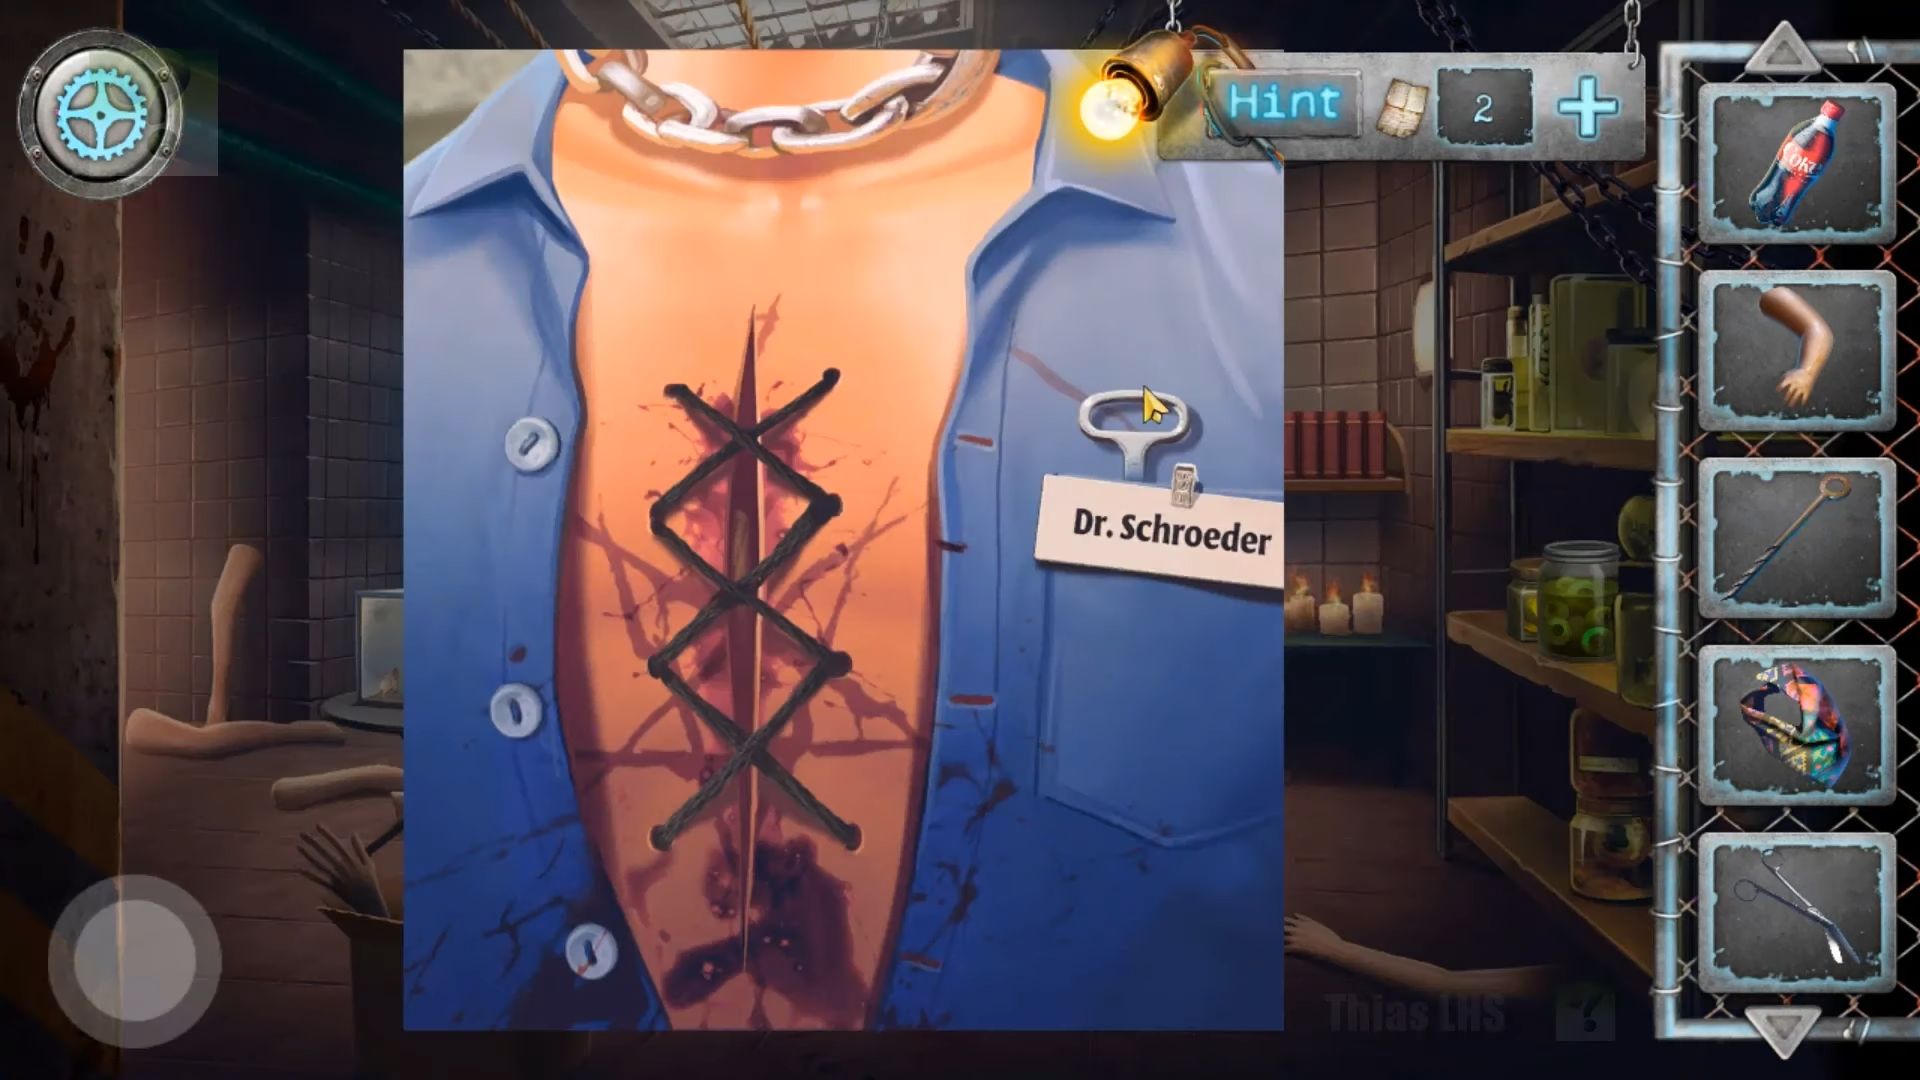
Next, you have to look at the blue door on the left, use the crowbar to take off the planks, then open the door and go into the next room. It’s another scary room with another mannequin. Start by picking up the colorful neckerchief from the floor. Tap on the hanging mannequin, view it, and collect a triangular key from its pocket.
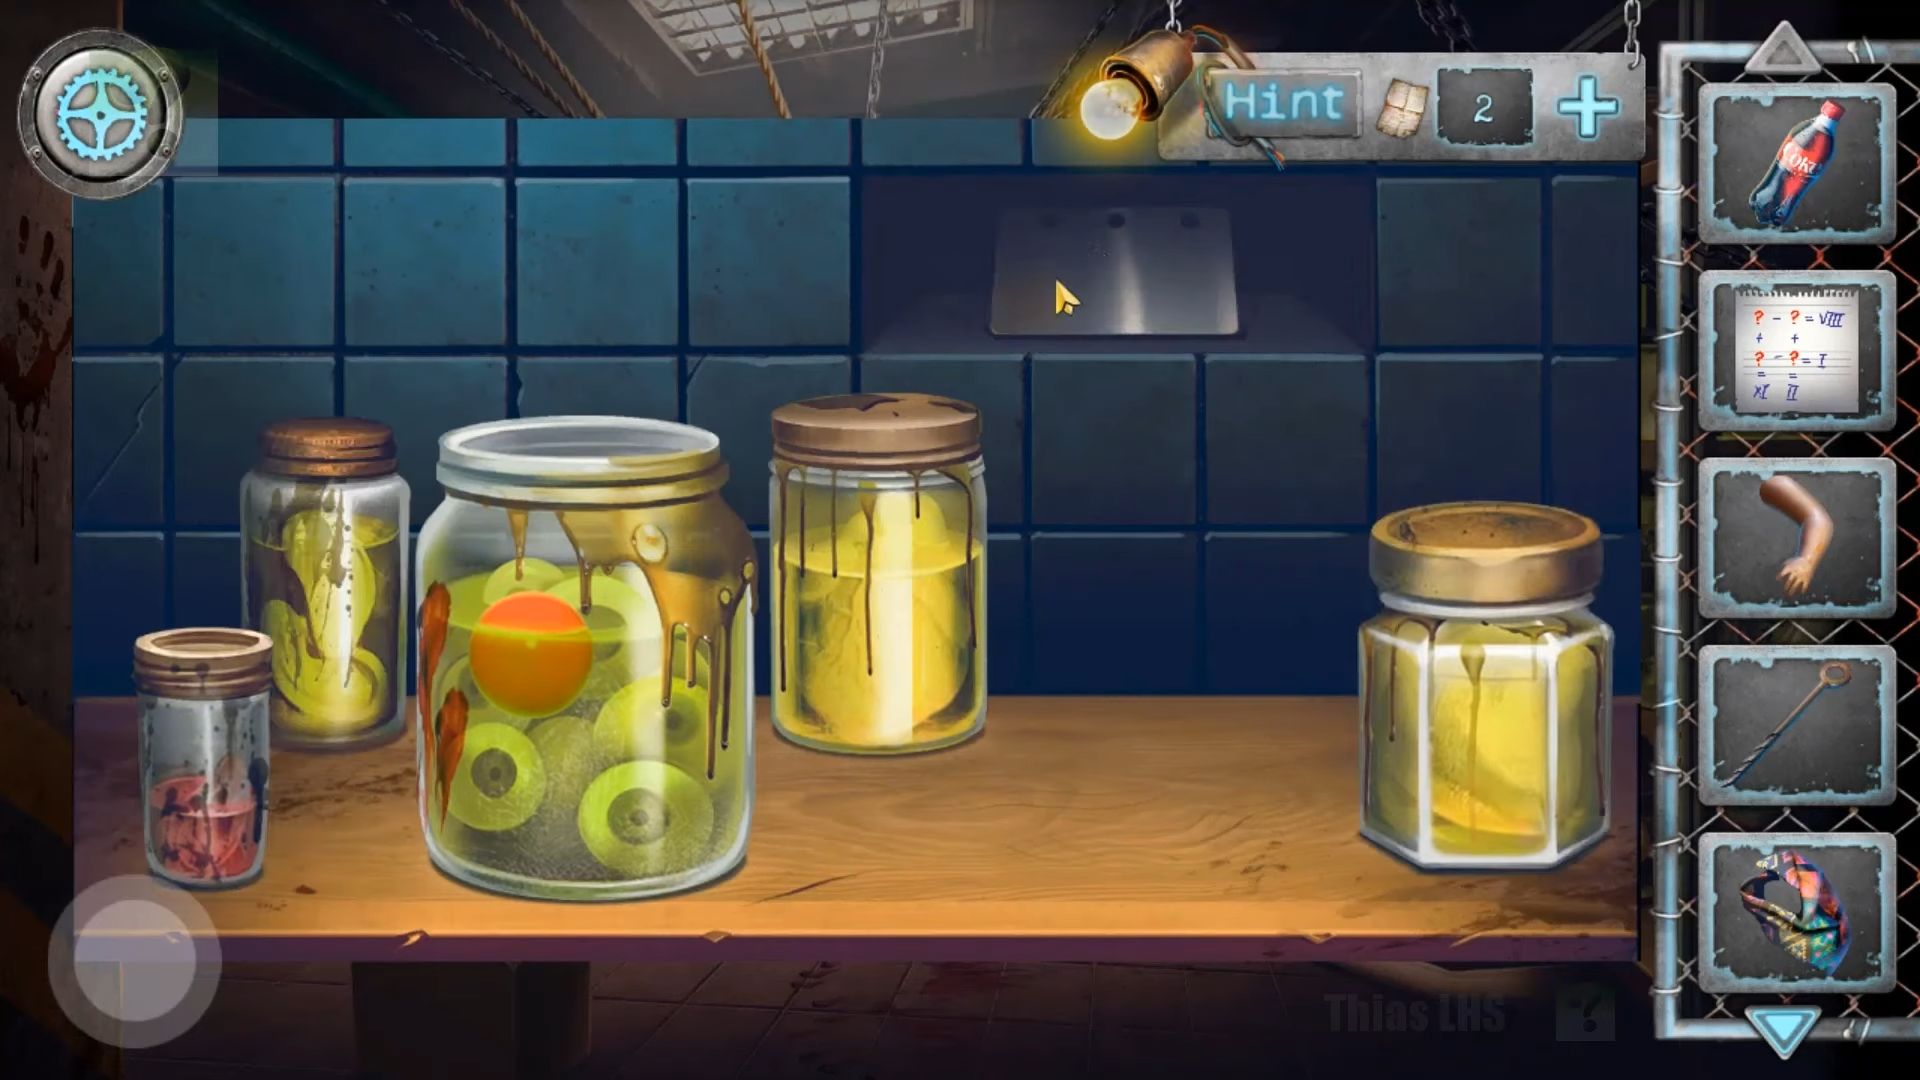
Look at the shelves on the right wall to find a puzzle with jars. Rearrange the jars into the right positions, and once done, collect the key card from the opened wall panel.
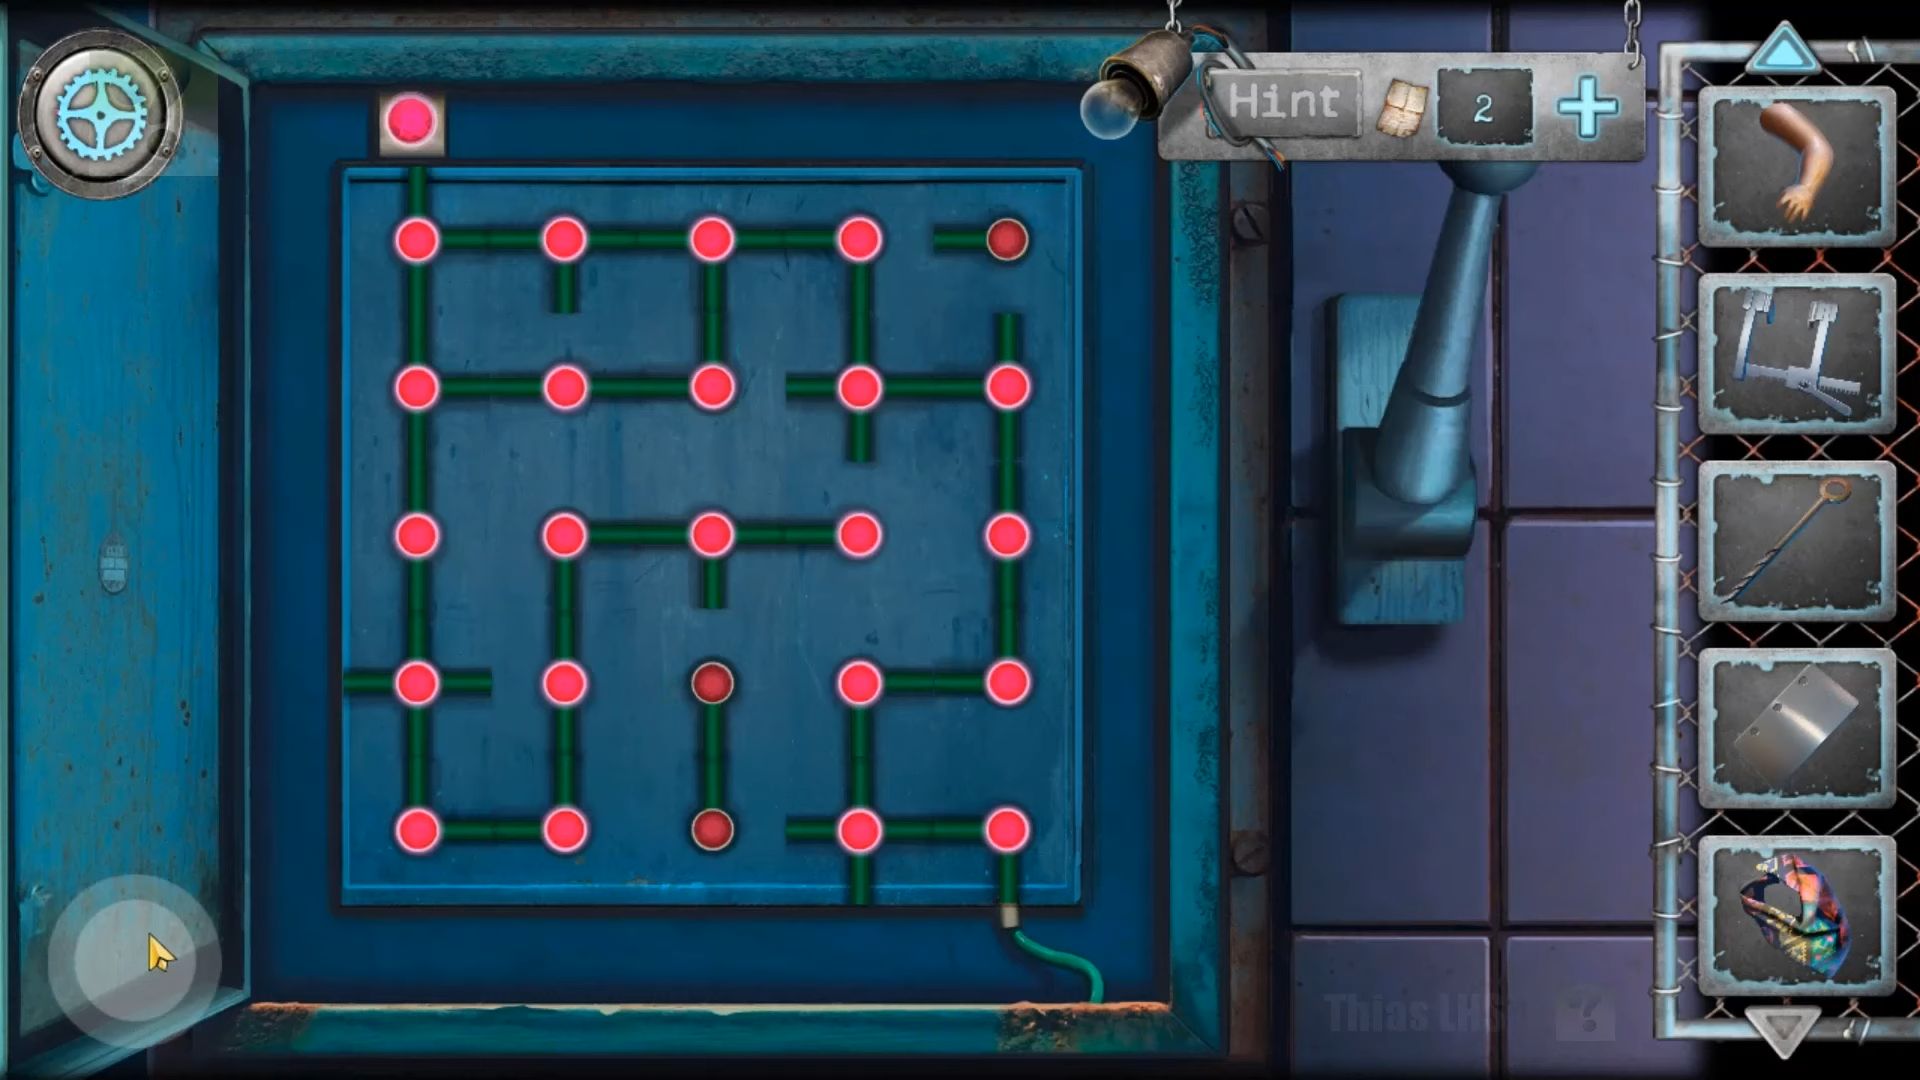
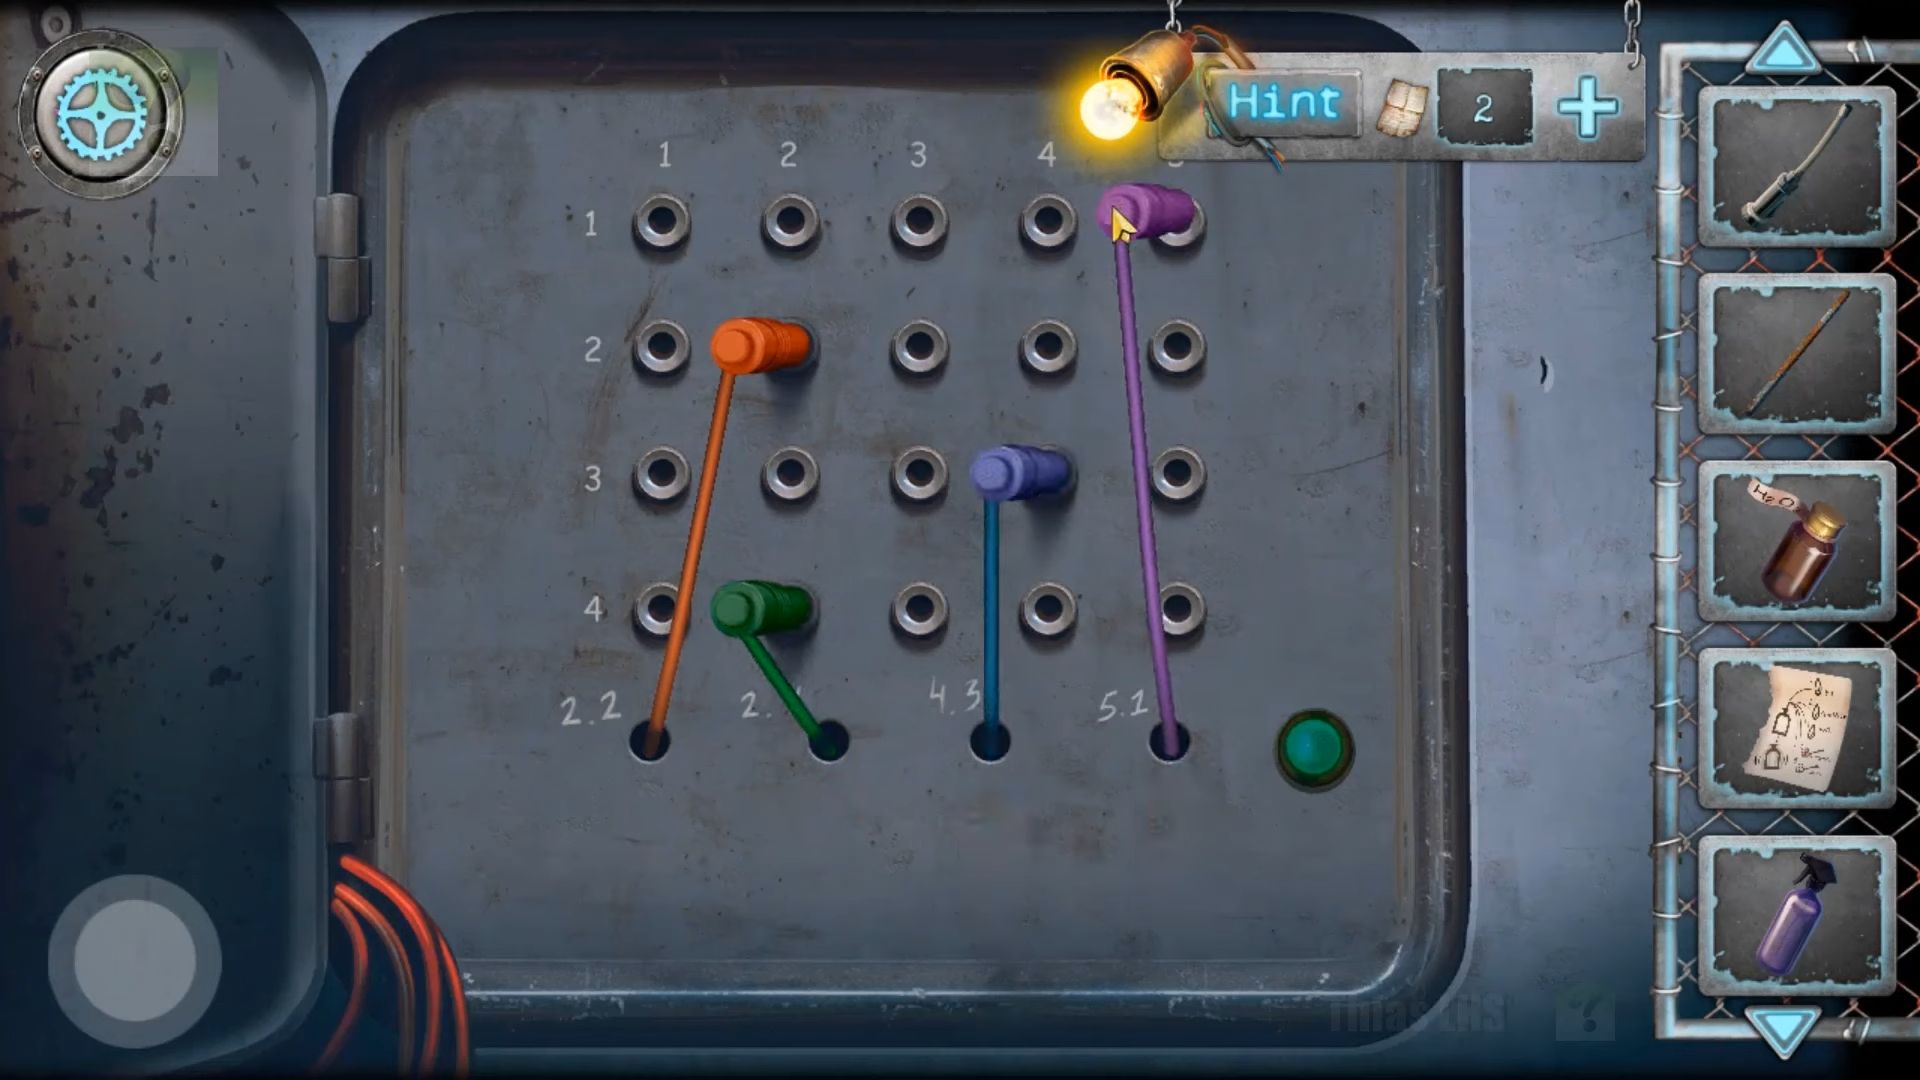
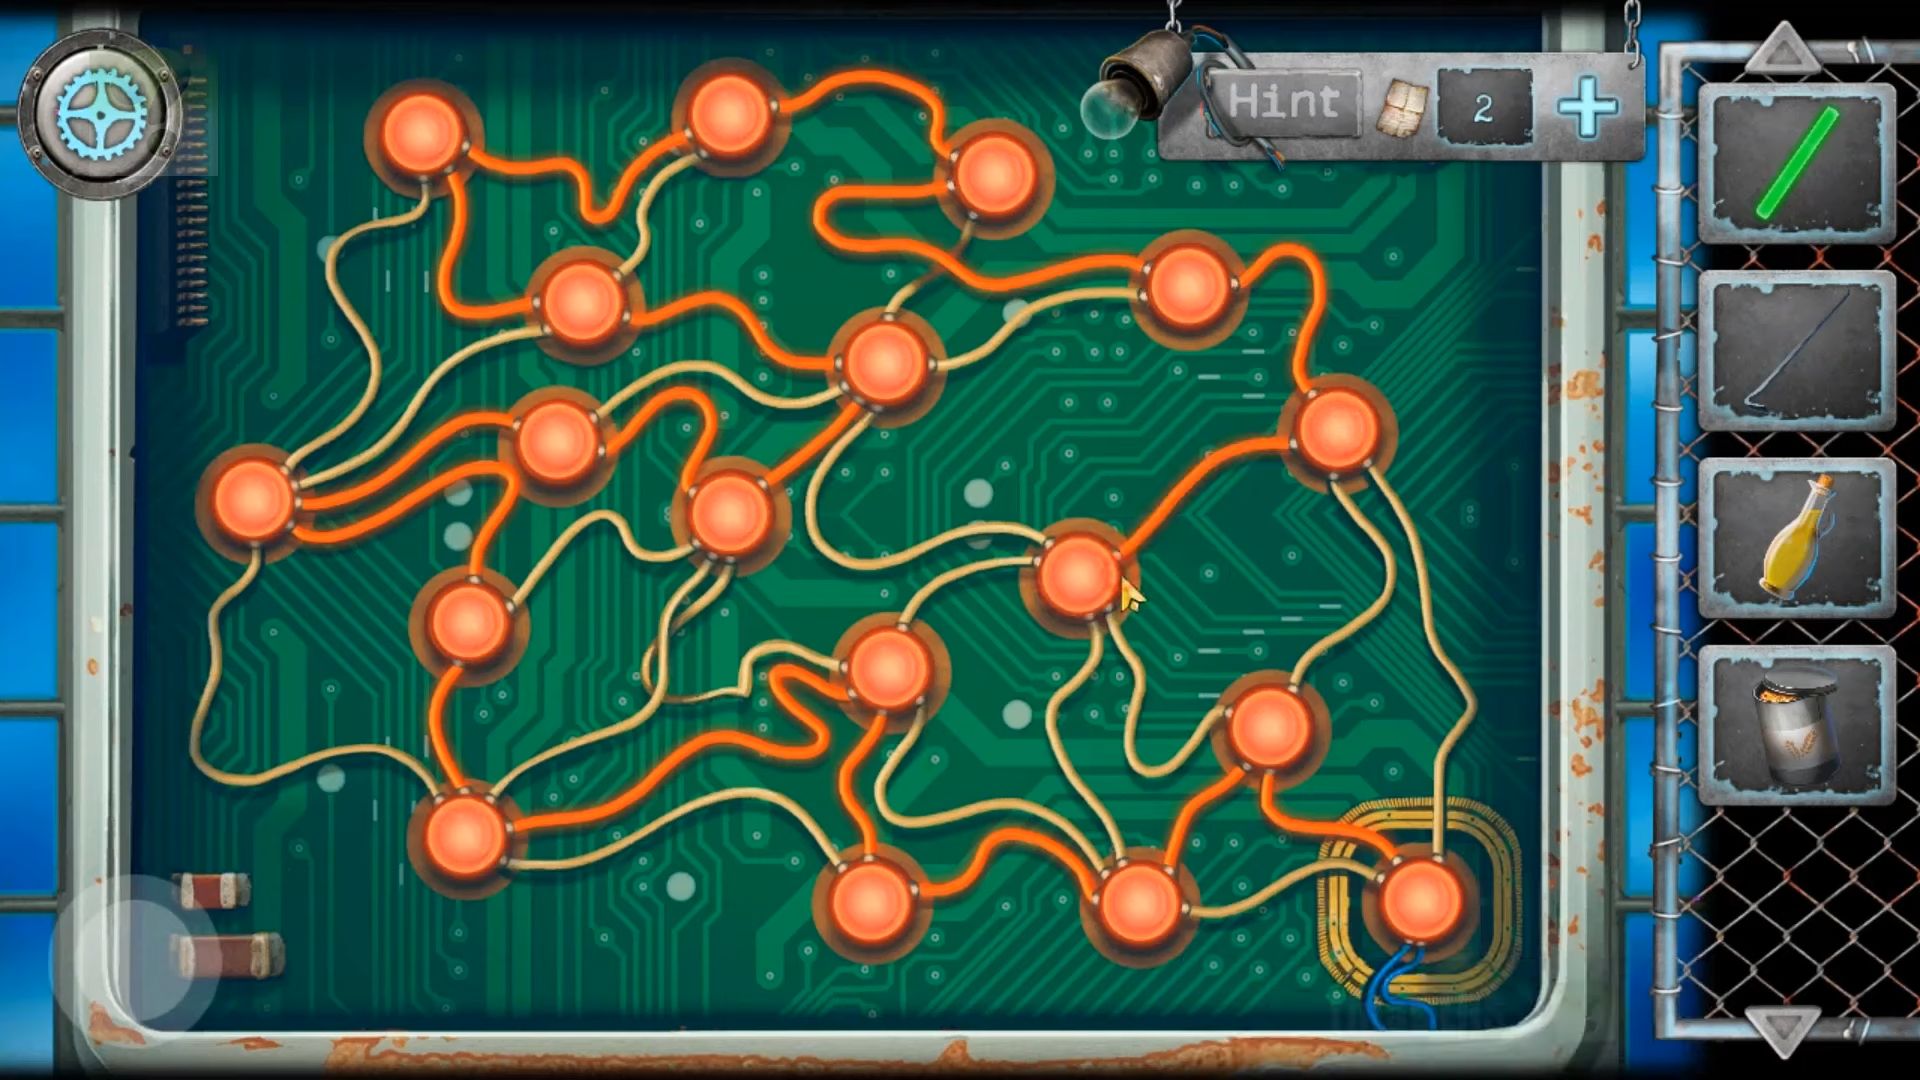
Tap the bottom arrow button to check the other side of the room. Then look at the small electrical panel on the right and open it using the triangular key. Solve the wire connection puzzle by creating a circuit from the bottom right to the top left; you don’t have to connect every node.
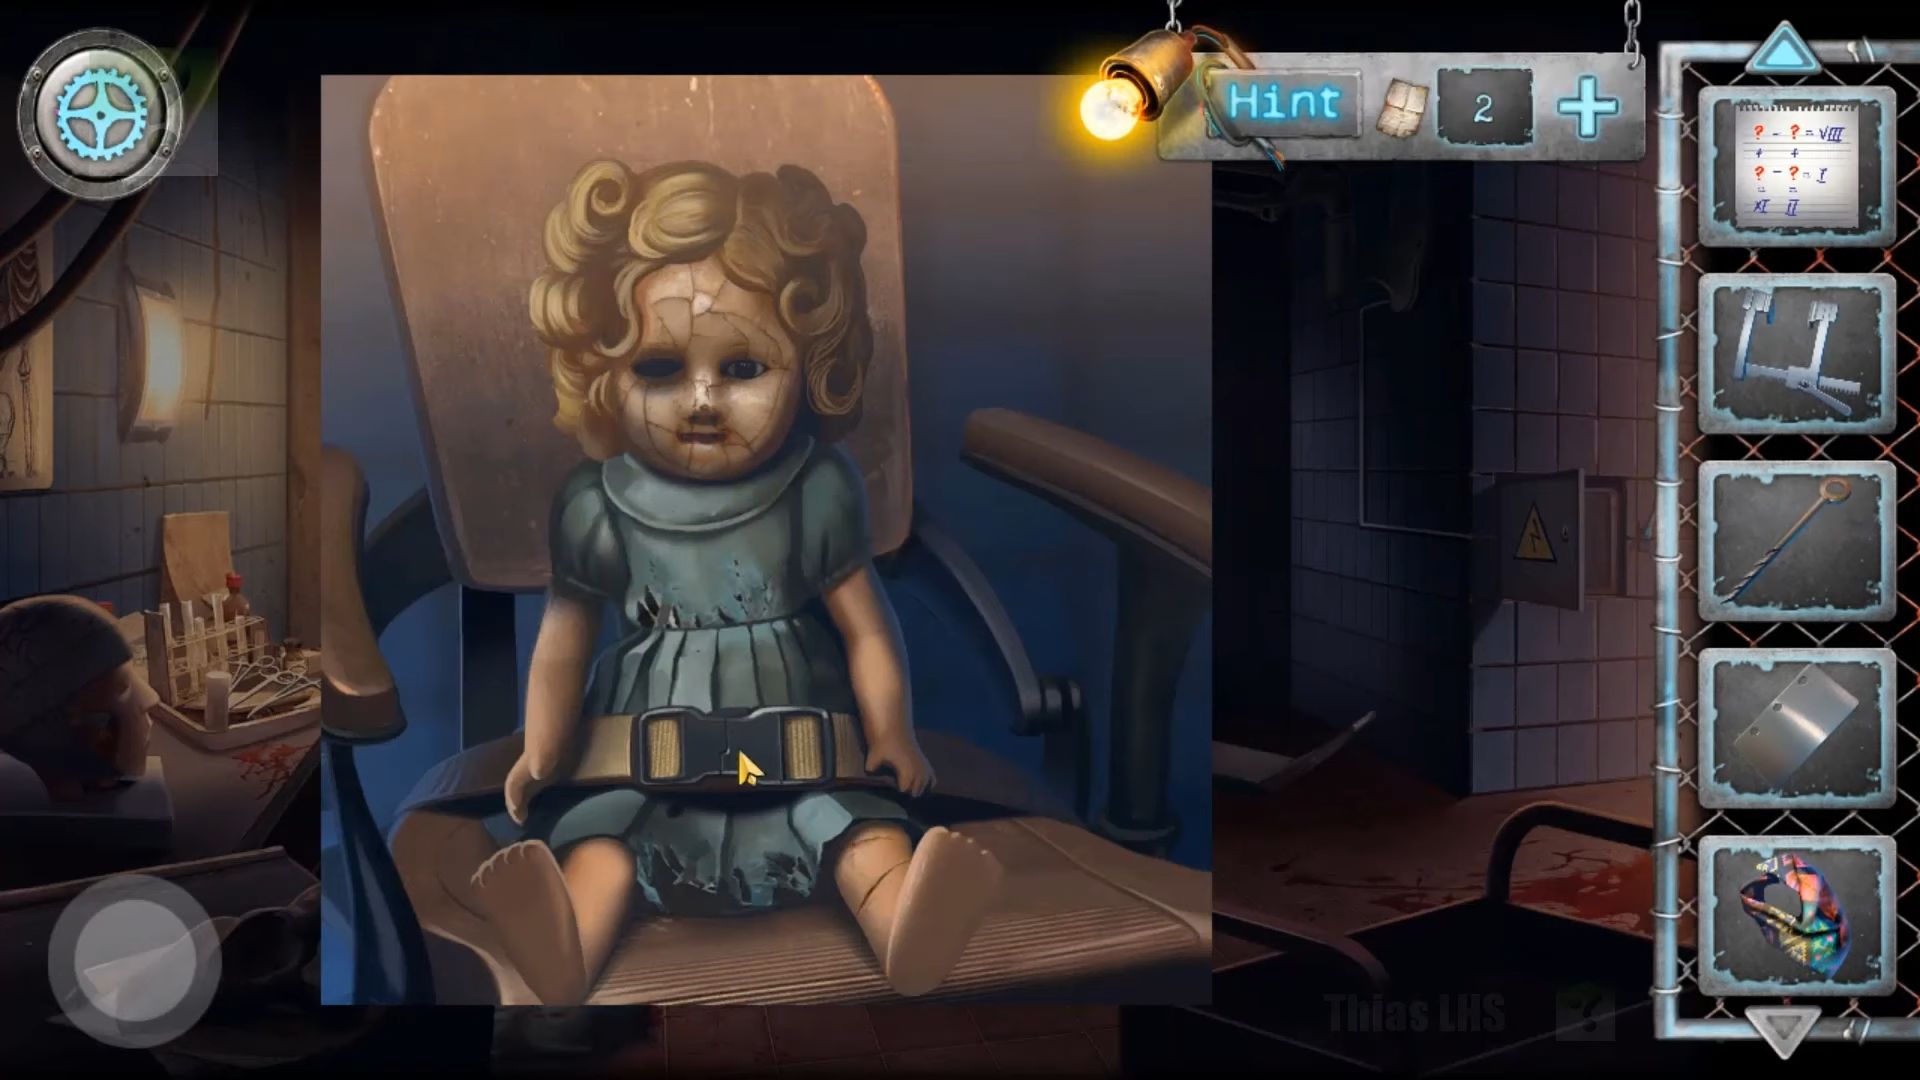
Tap the lever to turn on the light. Move the cloth on the floor and pick up the doll’s head underneath. Look at the chair where the light is on, add the head and the arm to the doll, then tap to release the straps and collect the doll. Next, tap to check the table on the far left.
Get the sternum expander tool. After that, you need to go back to the bathroom, tap to see the bath again, and use the butterfly net on the water to collect a Coce (Coke) button. Then, go back down and into the hall with the cages. Tap the arrow button to check the other side of the room, where there are some traps.
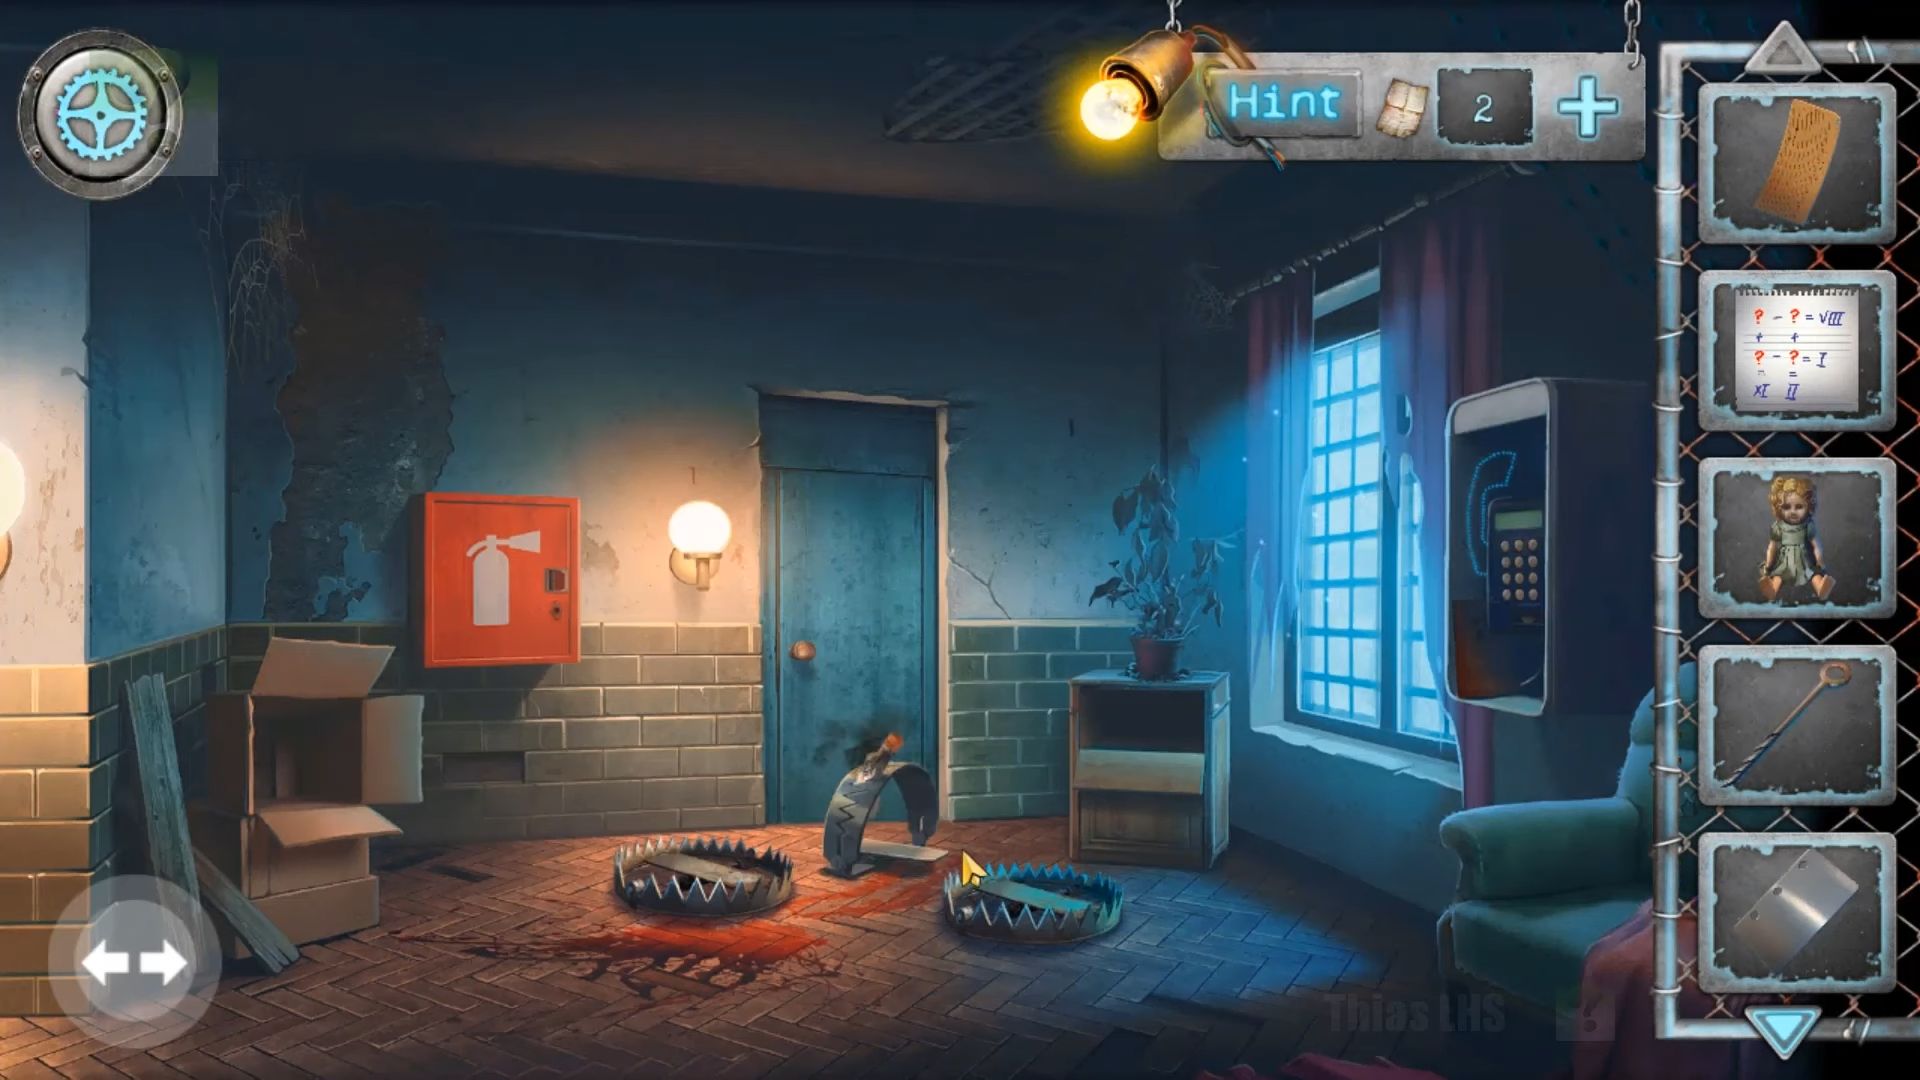
Go back to the hall area and look at the other side with traps on the floor. First, check the firebox on the left and open it using the firebox key. You have to collect the fire extinguisher. Next, use the doll and the bottle of Coke on the traps to throw them and trigger the traps. Now, open the door and go through the corridor.
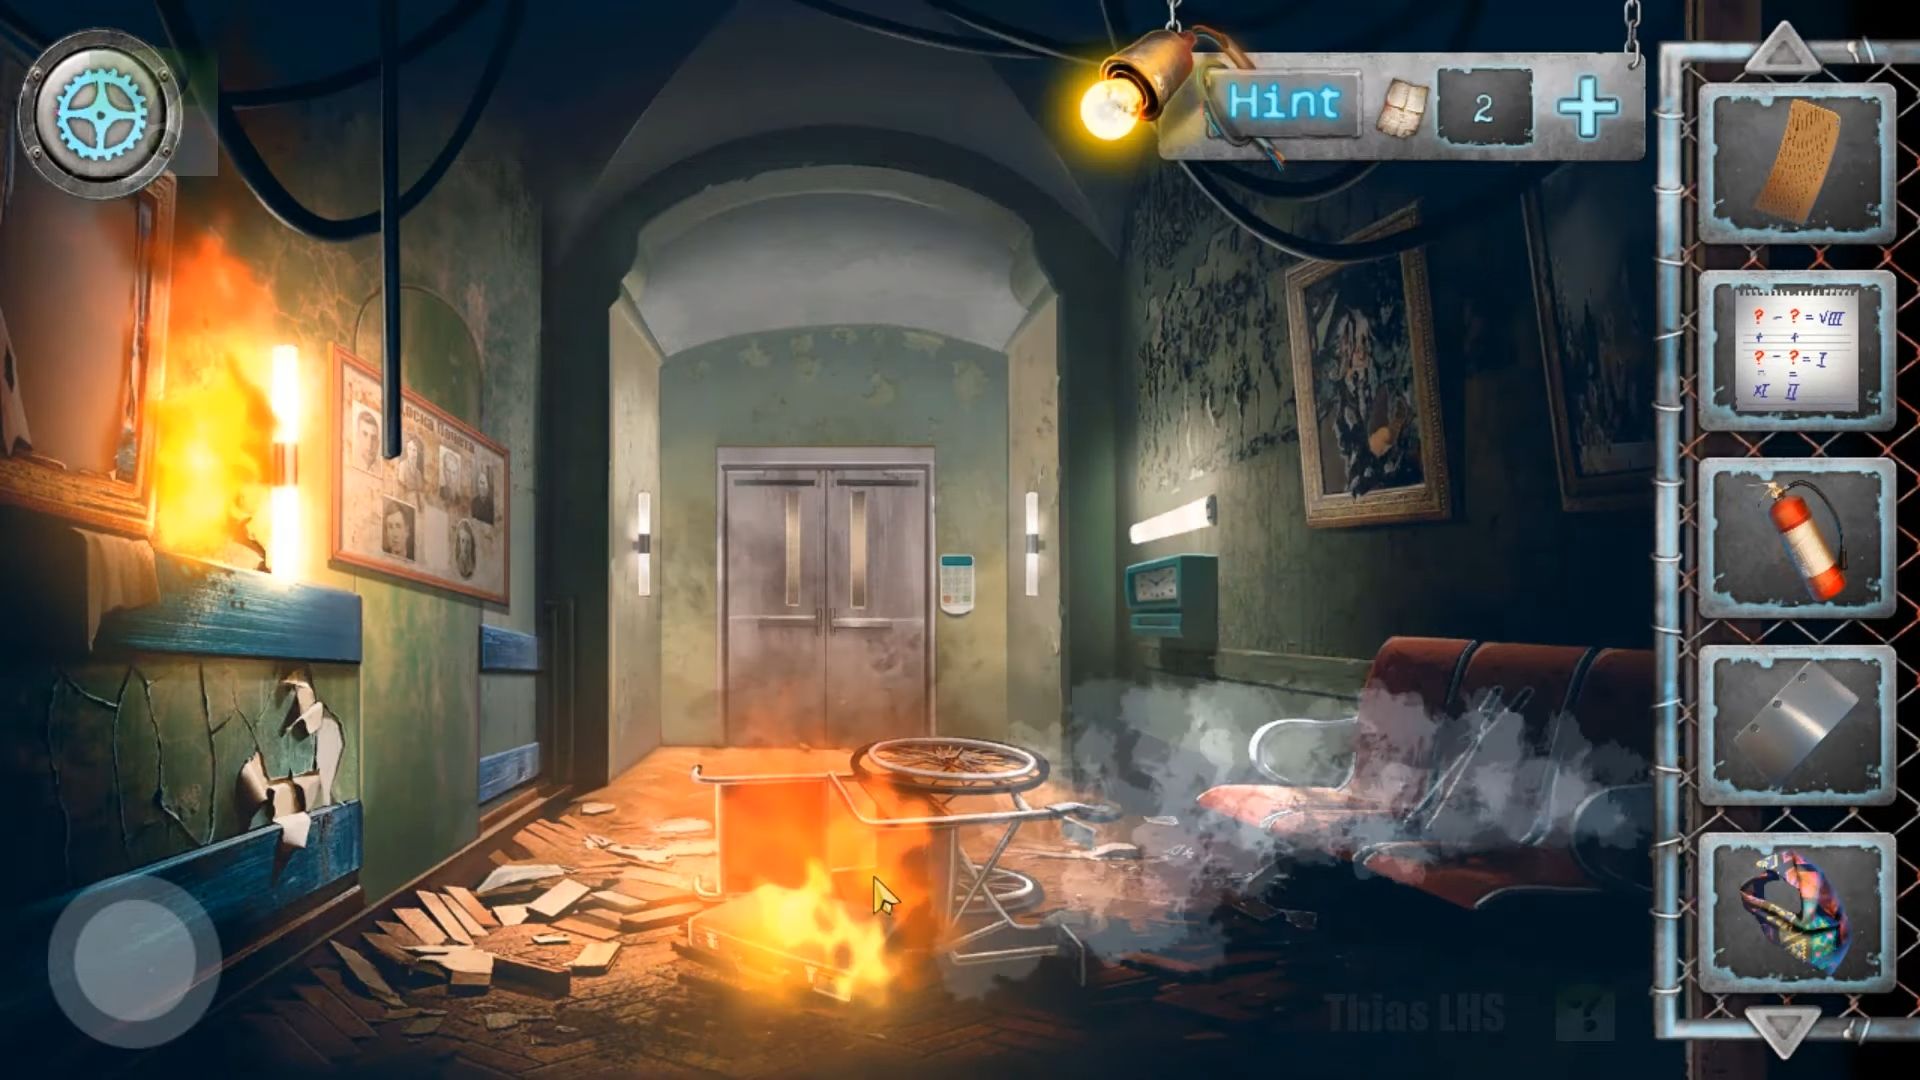
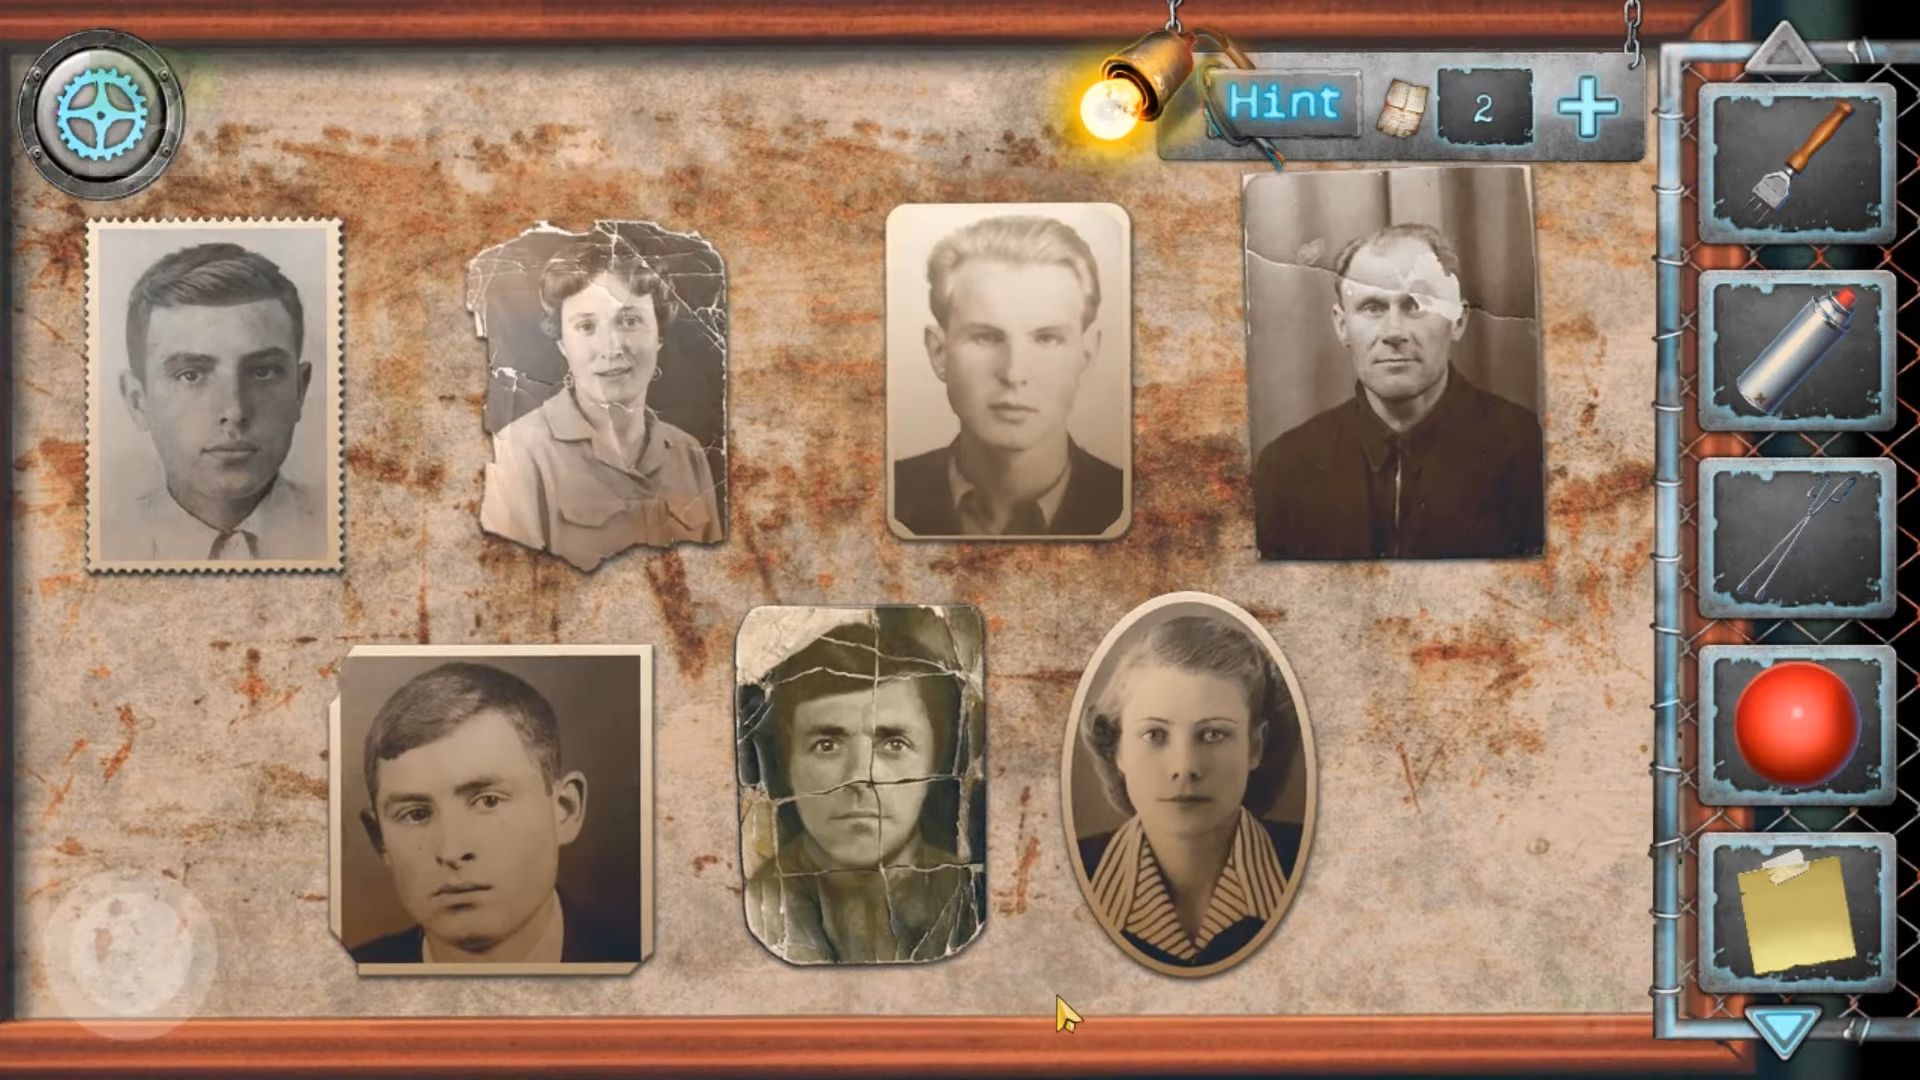
Get the forceps from the chairs on the right and check the board on the left wall with photos. Pick up a yellow sticky note, then look at the briefcase on the floor, take a book, and note the time on the piece of paper (2:45). Attach the punch card to the briefcase and set the time to 2:45 as shown on the paper. Now, collect a round handle.
Go back to the previous room and check the firebox again. Attach the handle to the small door in the box and open it to pick up an Ice breaker. You have to use the forceps on the jar with the red ball to get a red plastic ball. Tap on the small shelf above the candles with books on it; notice a gap.
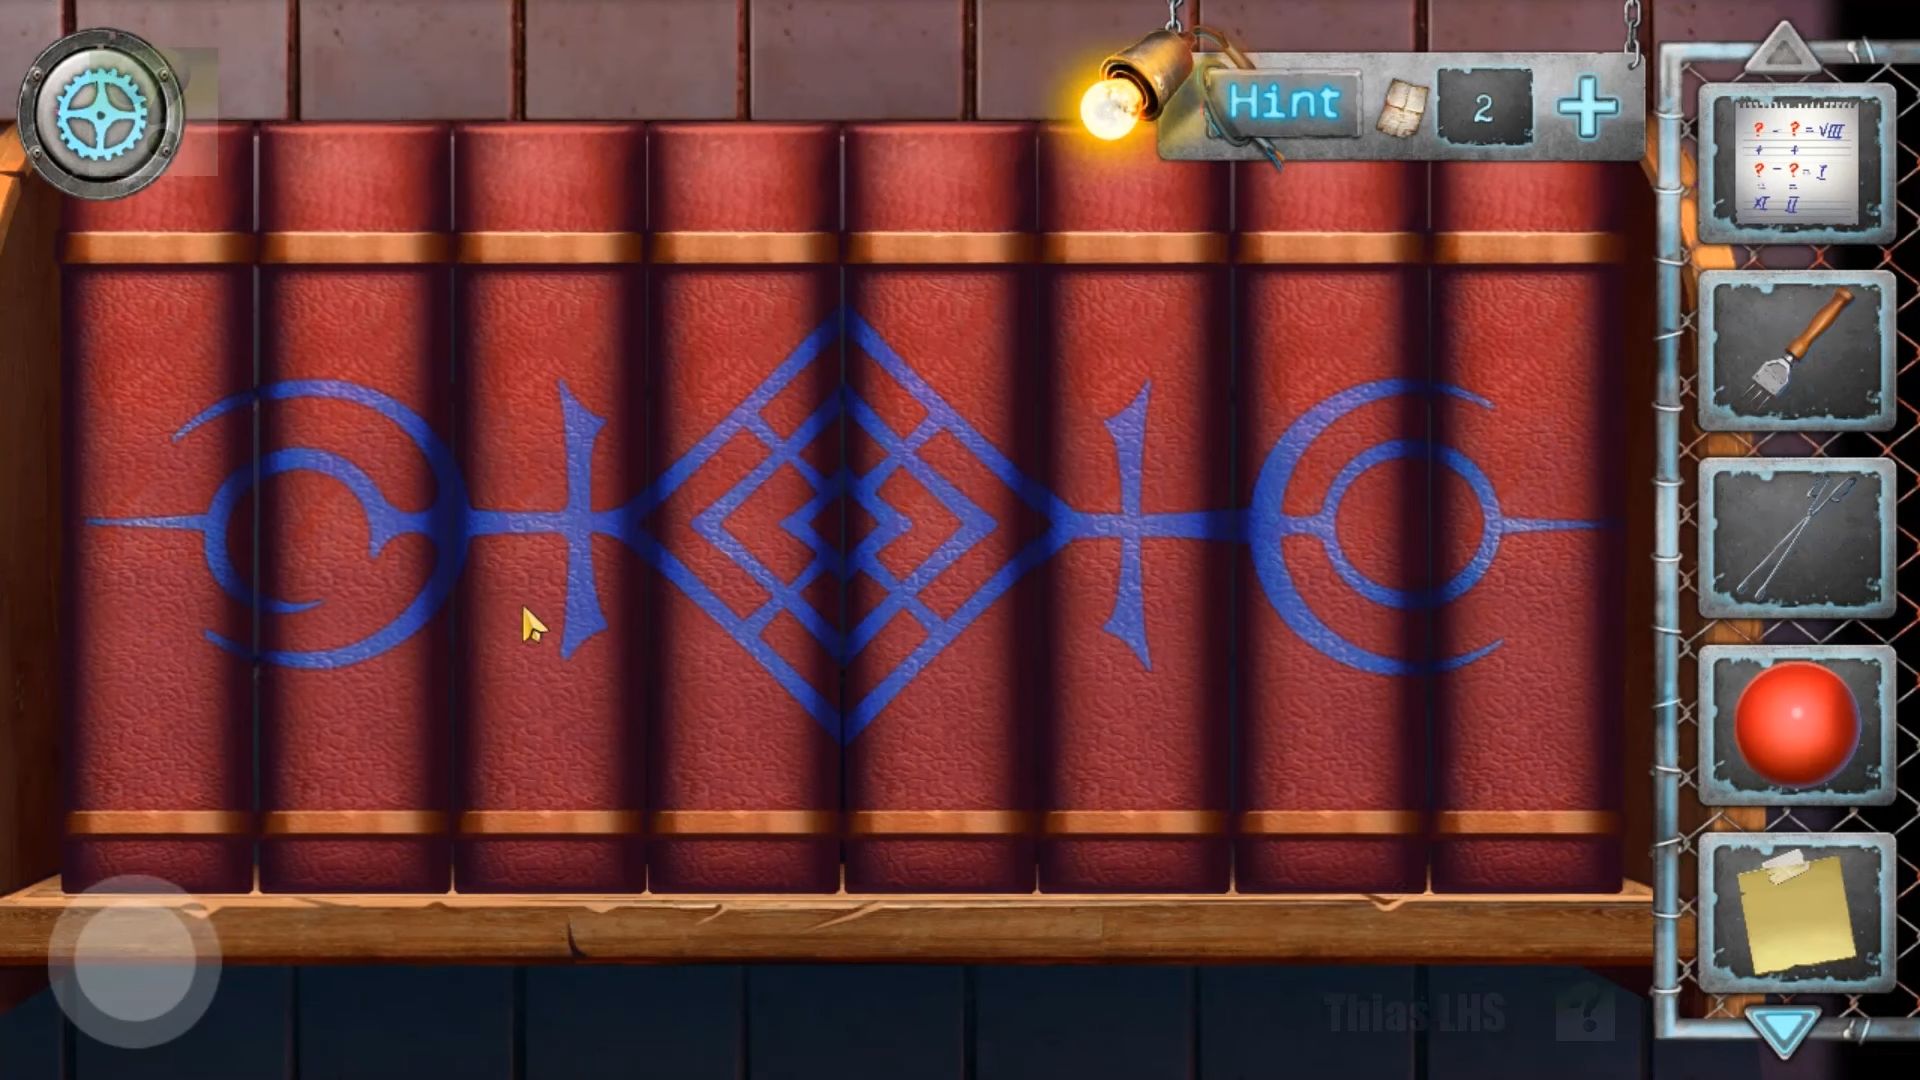
Add the book to the gap and solve the puzzle by rearranging the books. After that, collect a name tag – Dr. Kilstomery.
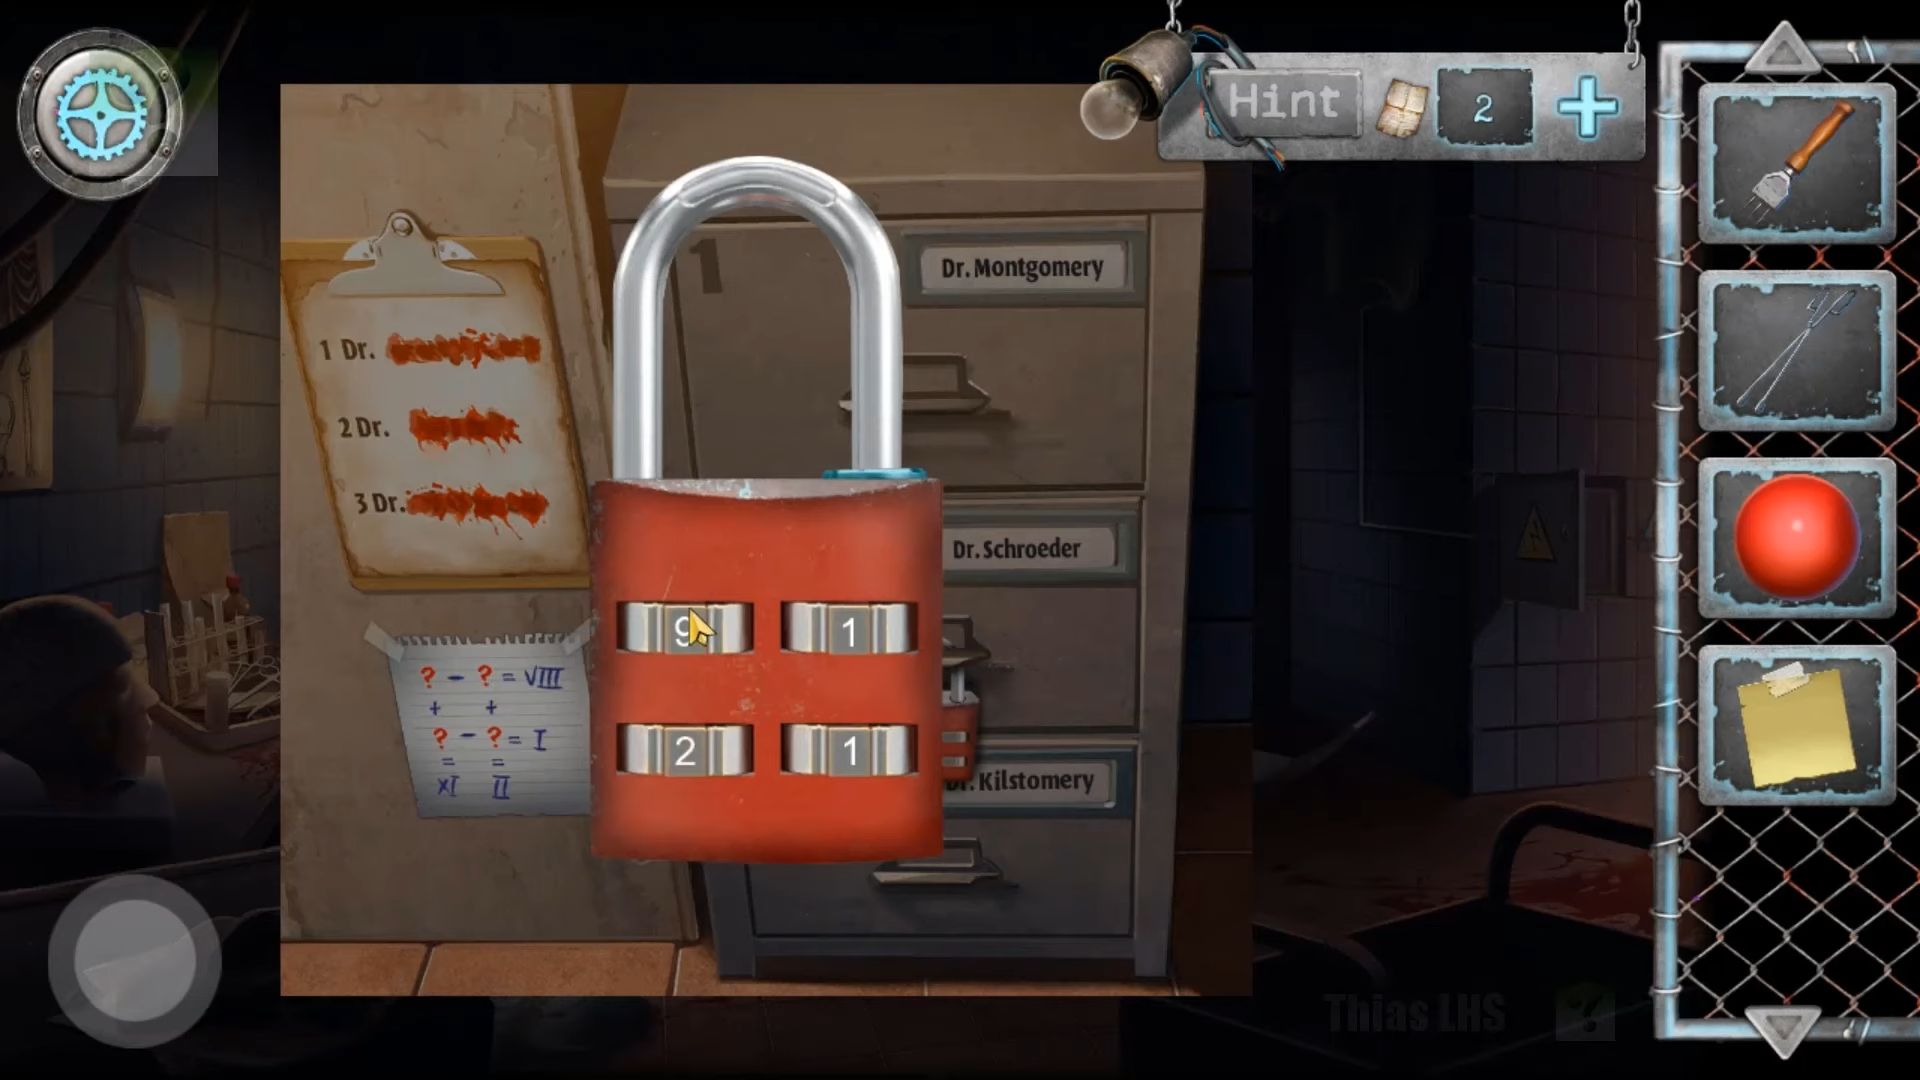
Go to the left side of the room with the dental chair. There’s a filing cabinet with 3 drawers on the left. Attach the name tag to the drawers to begin a puzzle and arrange the names in the right order. Then, add the paper clue to the left, and you can use it to get a code for the padlock (91 21). Use this code on the padlock, open the drawer, and collect a scalpel.
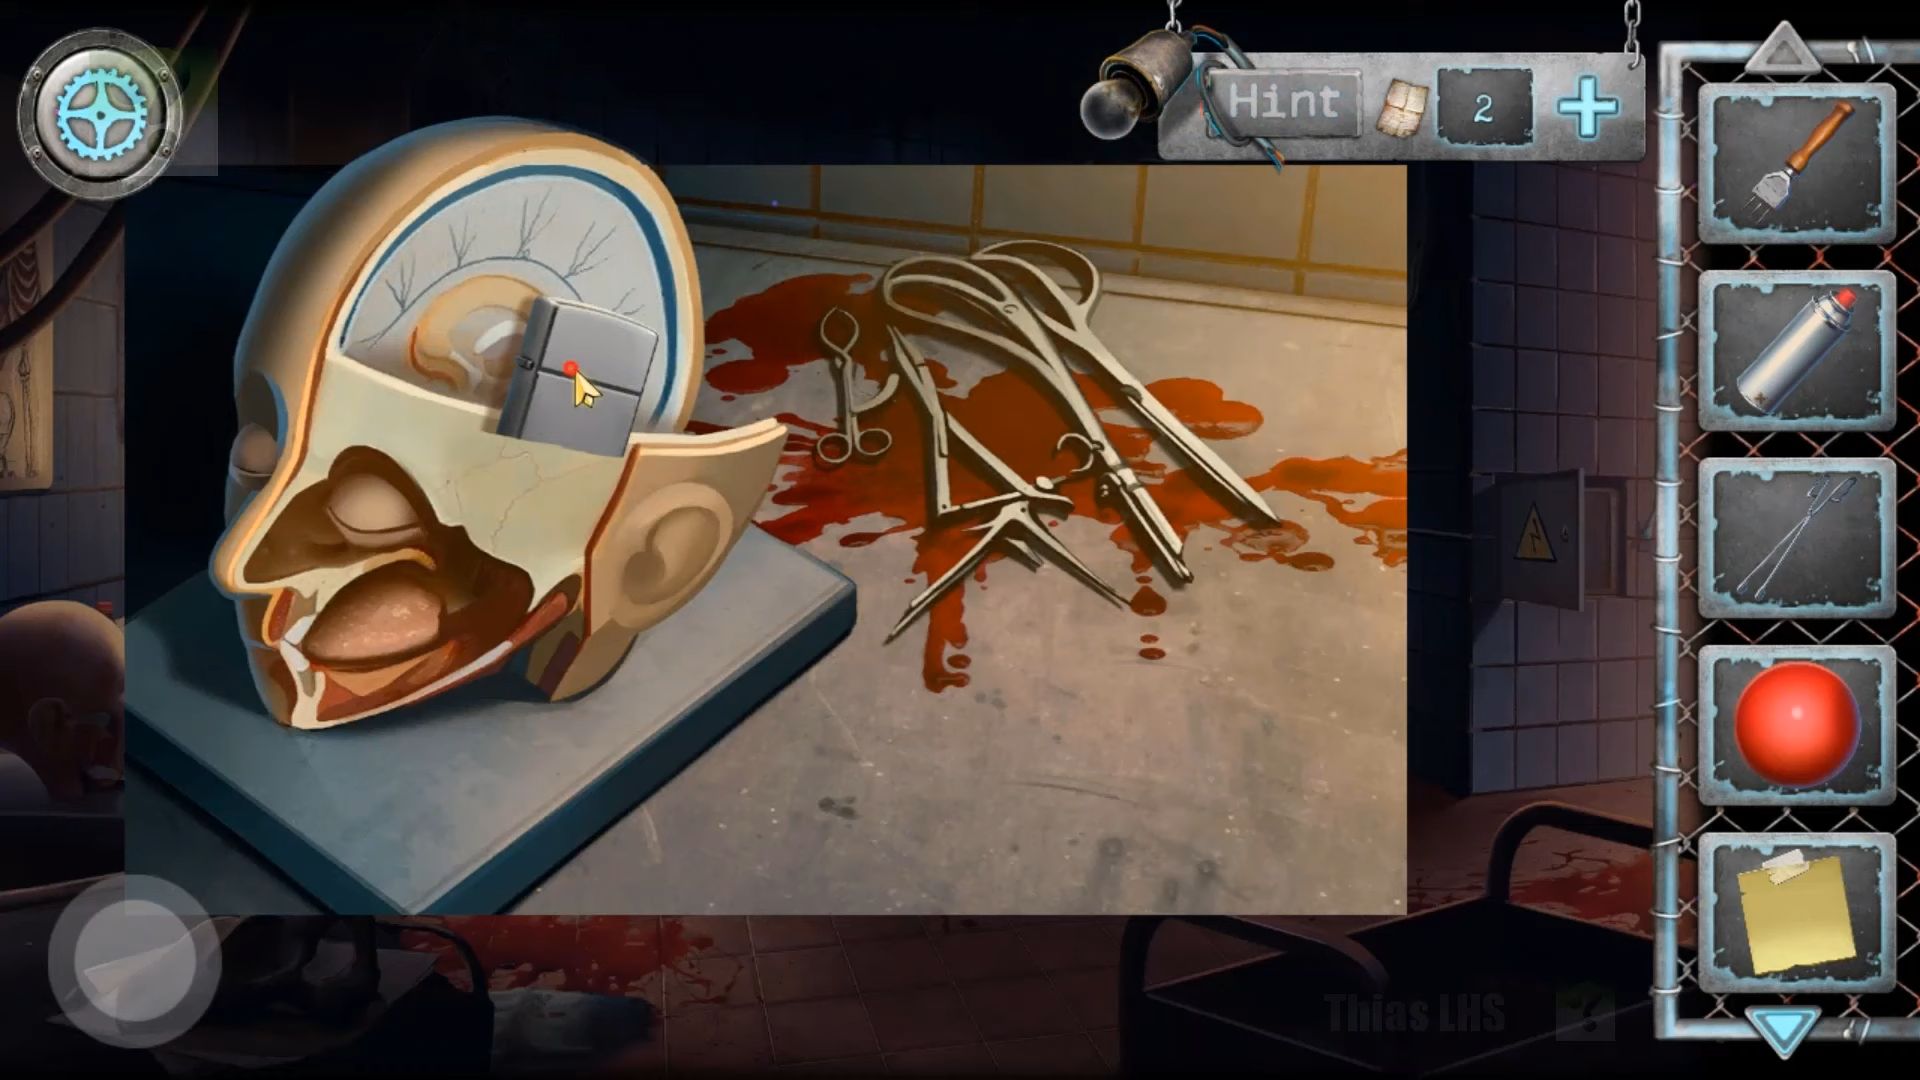
Open the top drawer and take a sleep gas cylinder. Look at the table on the left with the head again and use the scalpel to cut away the bandages on the head. Tap to remove the layers of the model until you find a lighter to collect.
Go back to the boiler room and check the open wall vent again. Then you have to use the lighter on the vent to see inside and pick up a roll of tape. Return to the room with the dentist’s chair and filing cabinet. Open the bottom drawer, click on the folder, and find a torn photo. Arrange the pieces and use the tape to fix the completed photo to collect it.
Move back to the corridor with the photo board on the left, and place the fixed photo on the board to start a puzzle. Once solved, a hidden doorway opens and goes through to a secret laboratory.
You’ve entered a secret laboratory from the hallway. Start by picking up the empty bottle from the floor. Below the blue glowing sphere, there’s an iced-up freezer.
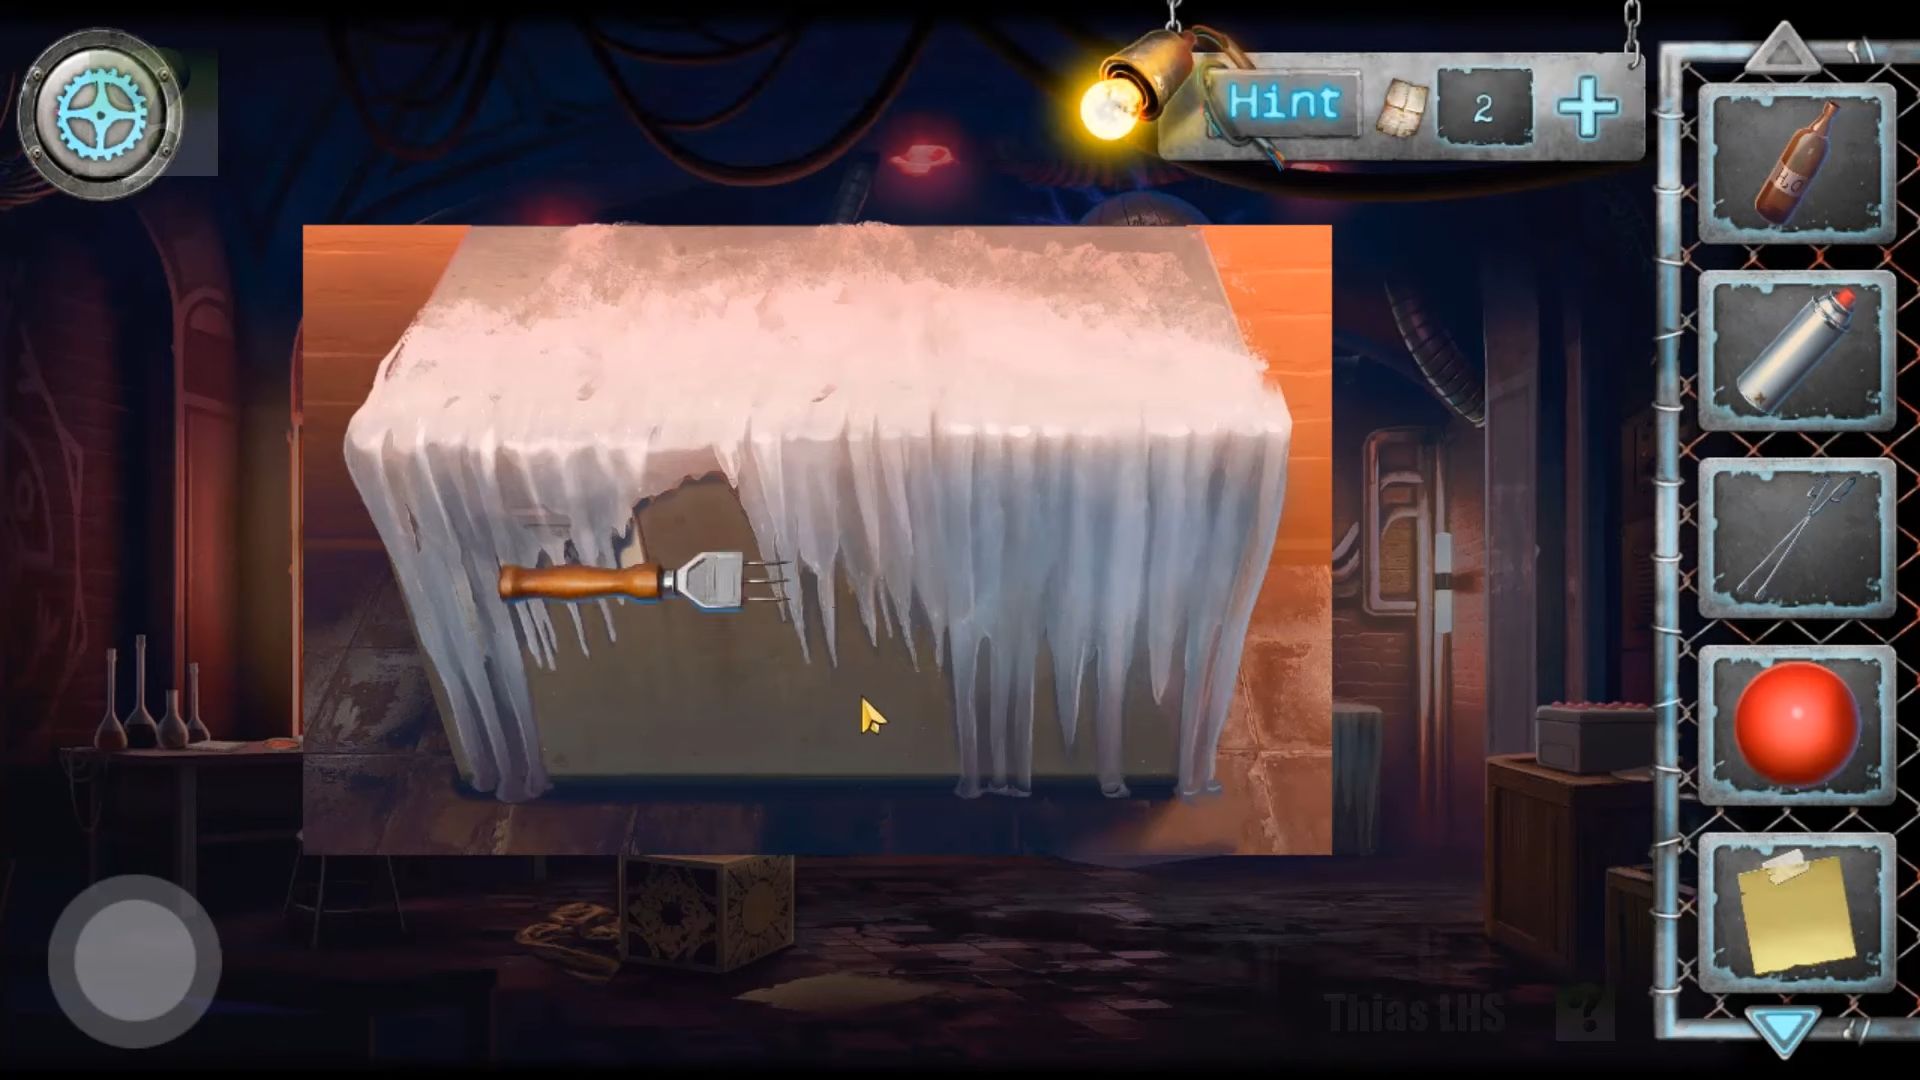
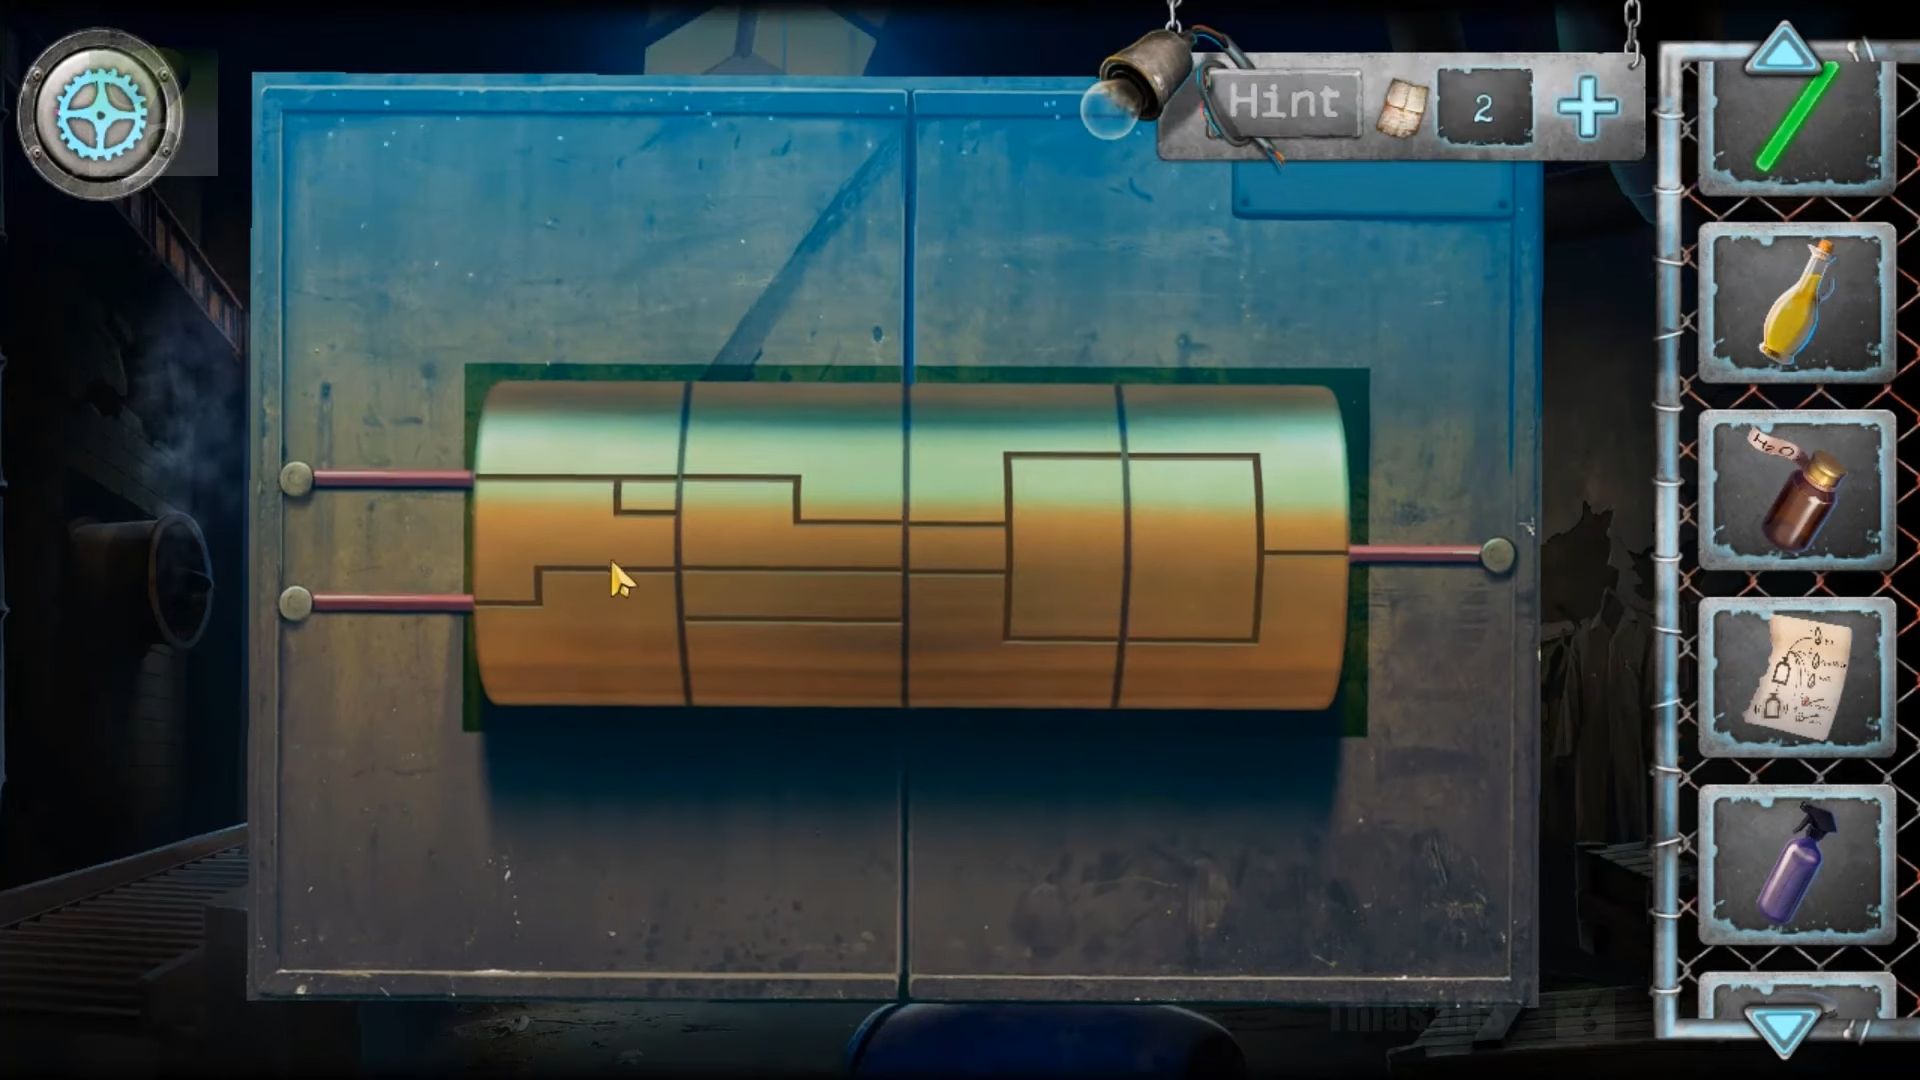
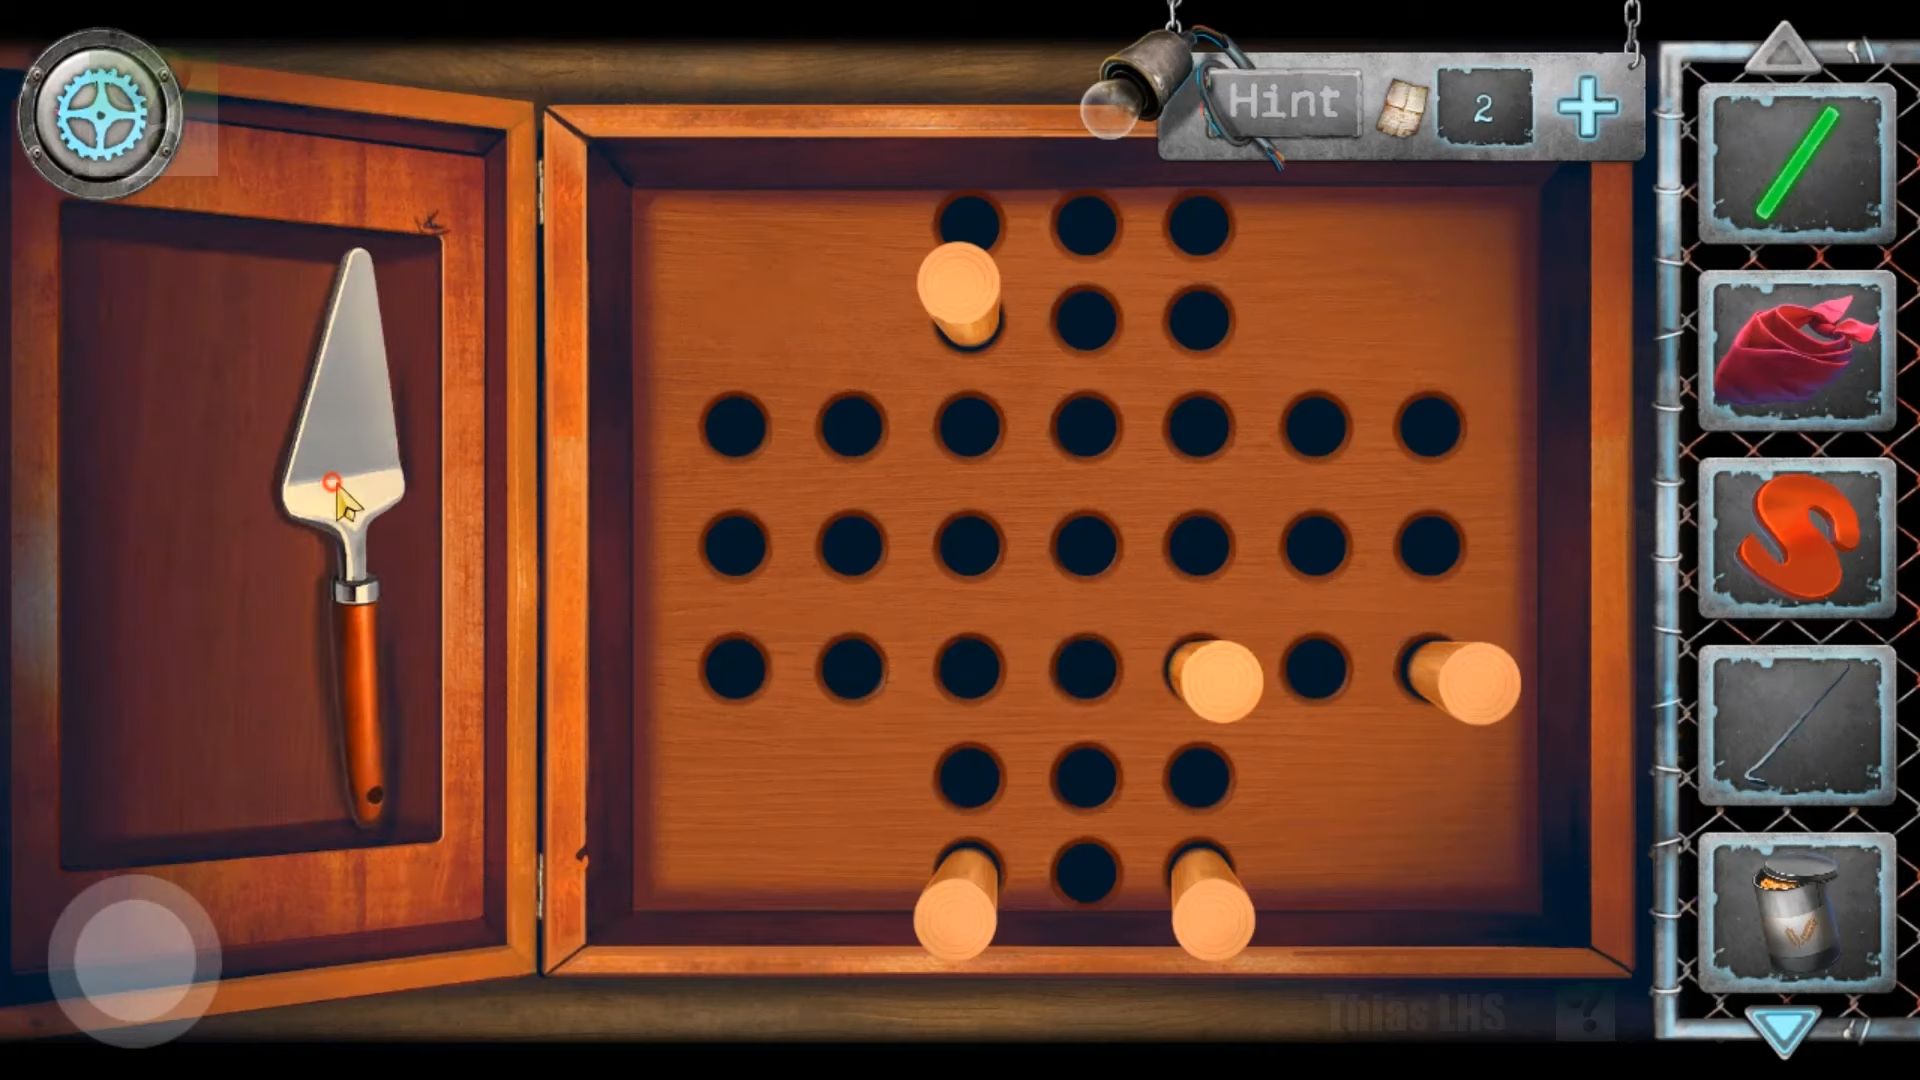
Next, use the ice breaker on the iced-up freezer to clear some ice, then press the green button to defrost it. Open the freezer and collect a hose. On the far right of the room, there’s a box with a puzzle on top involving red balls. Add the red plastic ball to it and follow the instructions to solve it. In the beginning, more dots will appear around the outside. You can use these, but your goal is to cover all the red balls.

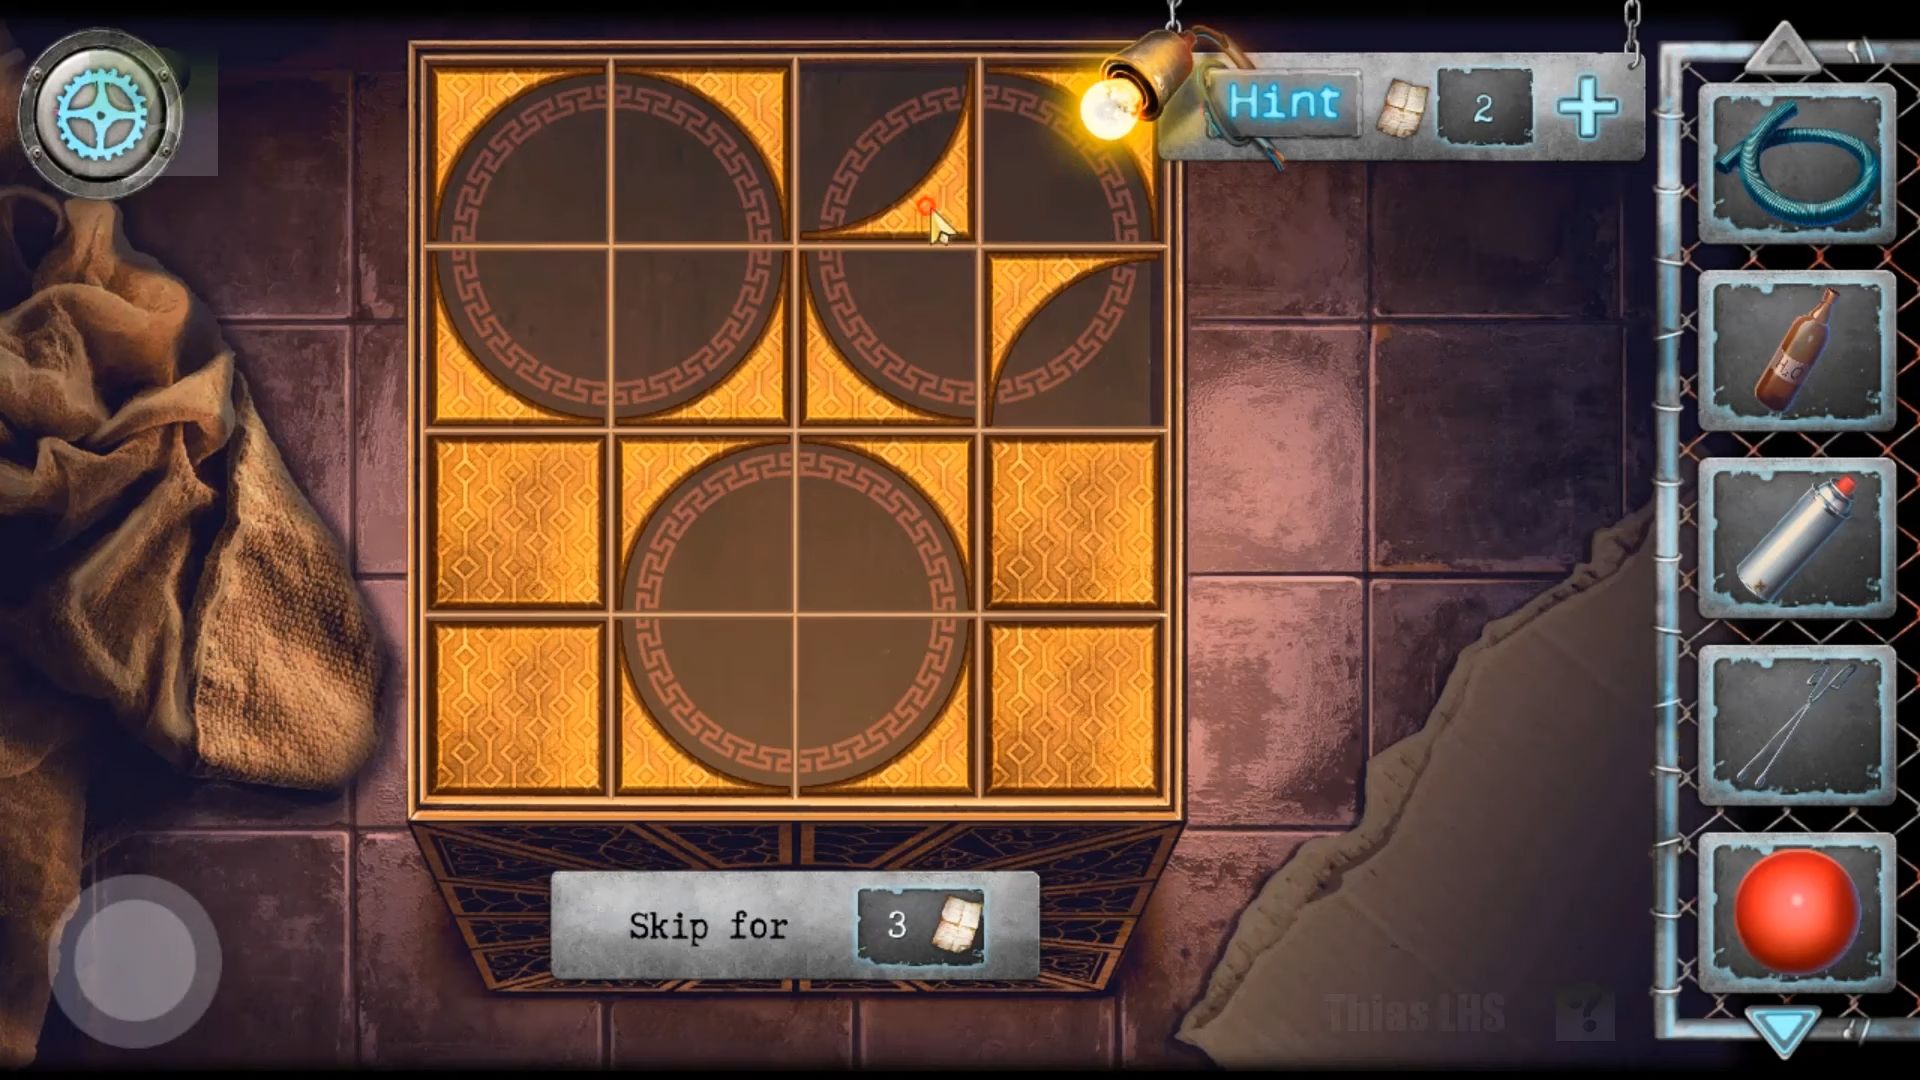
Grab the non-sharpened pencil and check the cube box on the floor. It’s a puzzle – tap pairs of gold shapes to swap their positions. You need to arrange them to match the three circles.
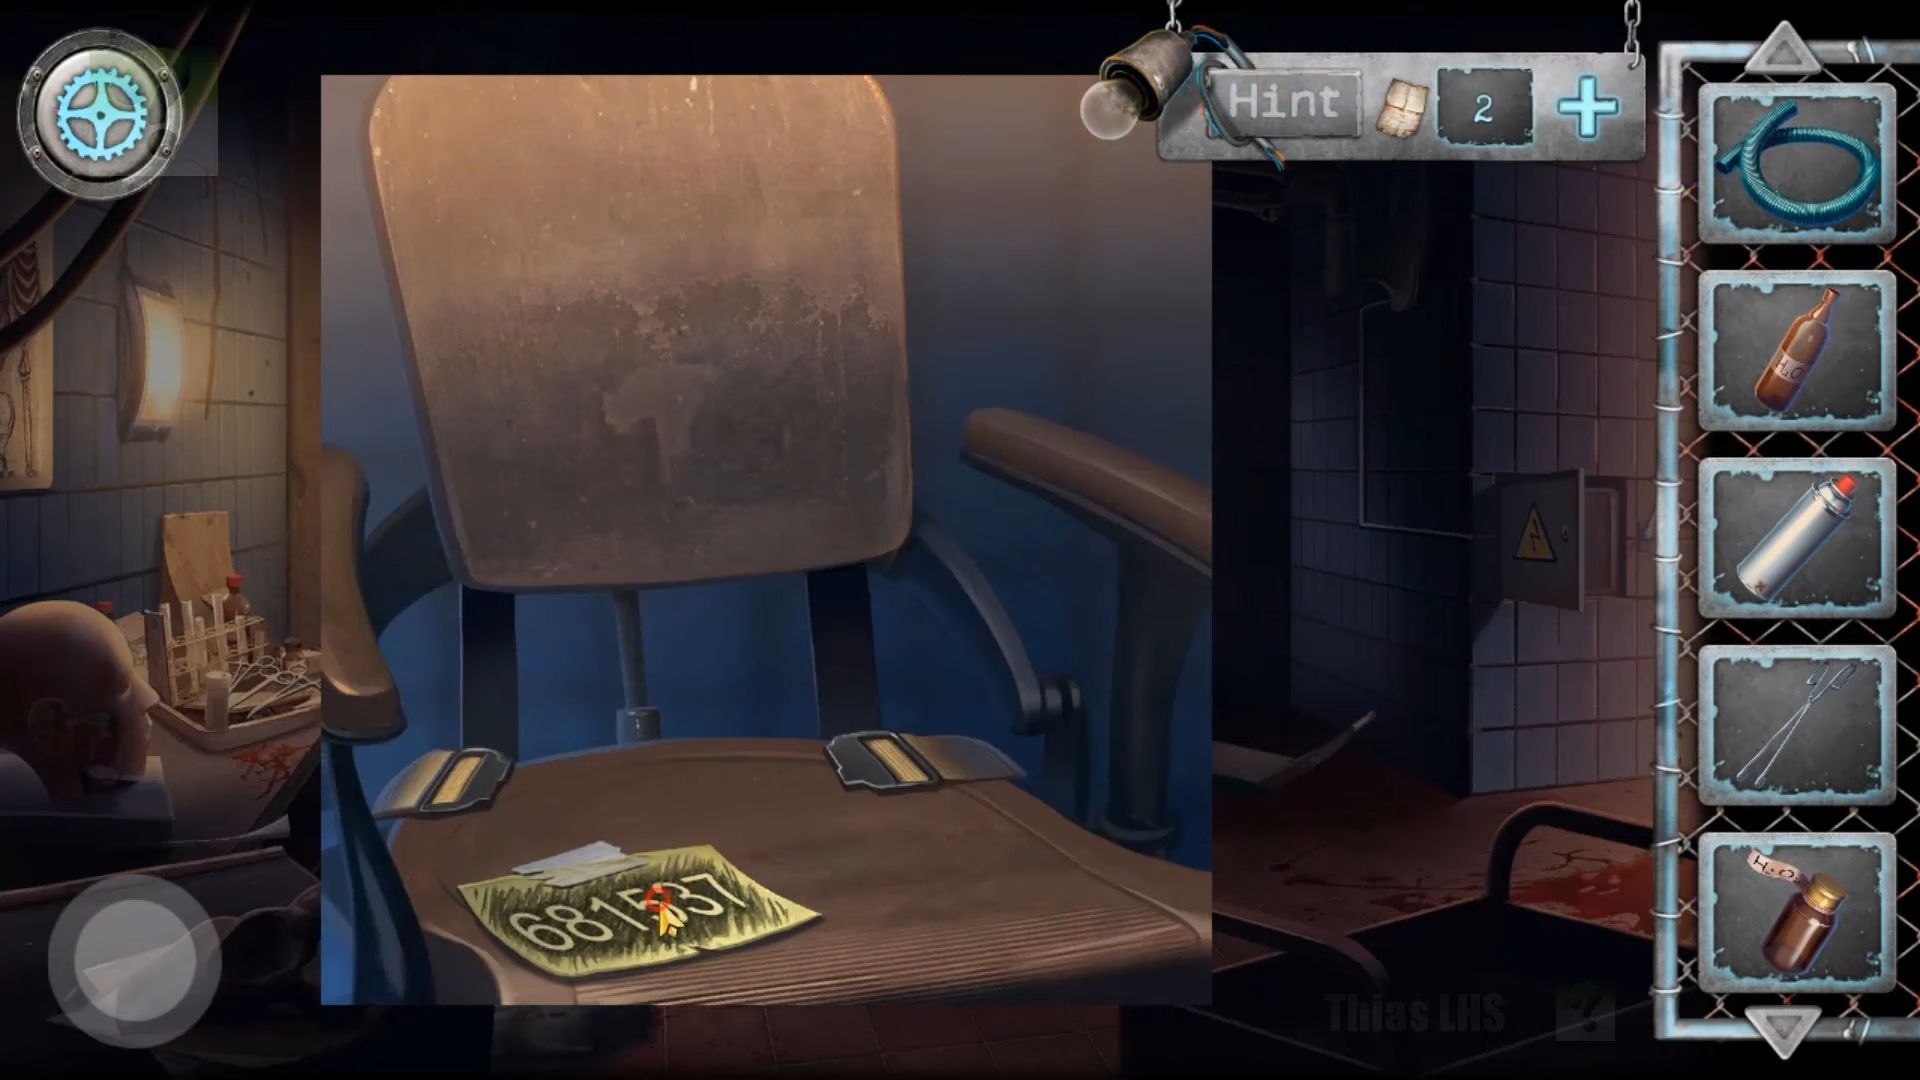
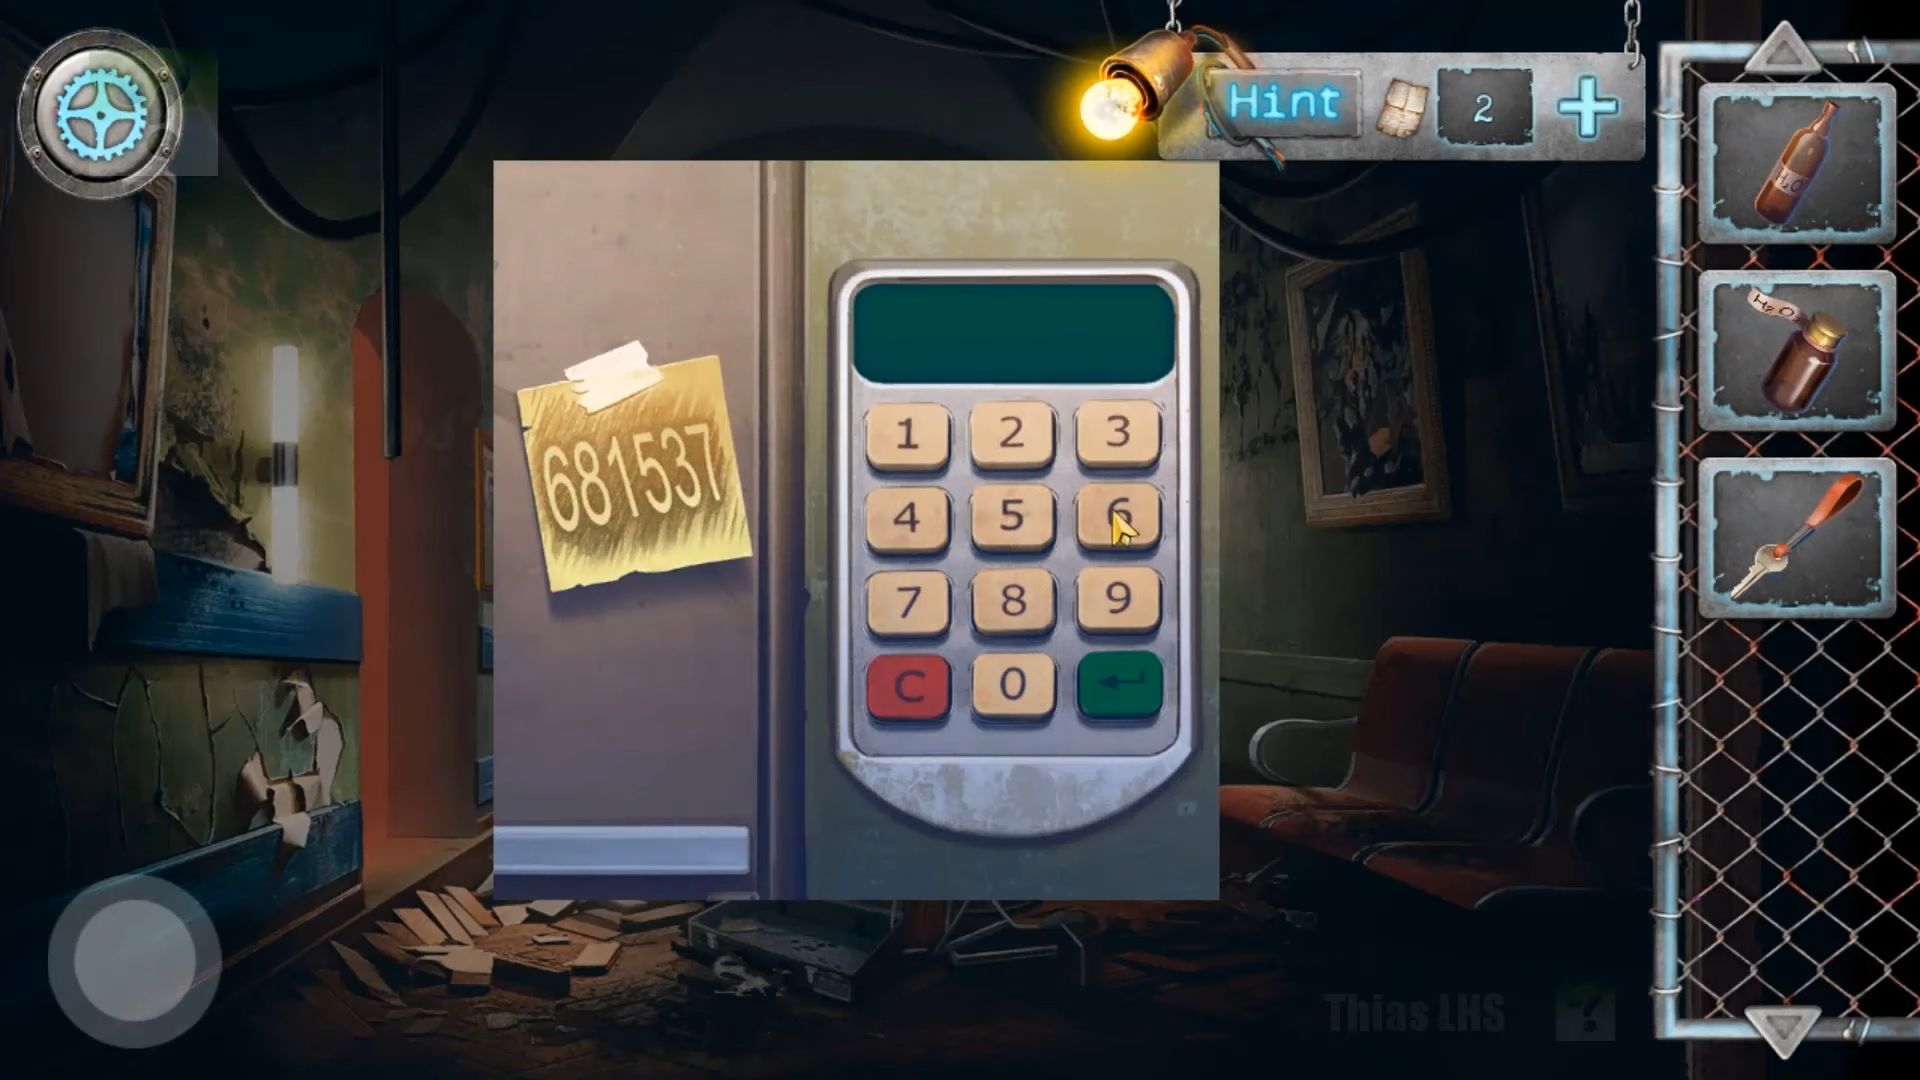
Get a bottle of H2O2 and tap to see the table on the left. Use the pencil on the sharpener at the back left to sharpen it. Move to the left of the room with the dentist’s chair, view the chair, and attach the yellow sticky note to it. You have to use the pencil on the note to reveal a code: 681537 and collect the note.
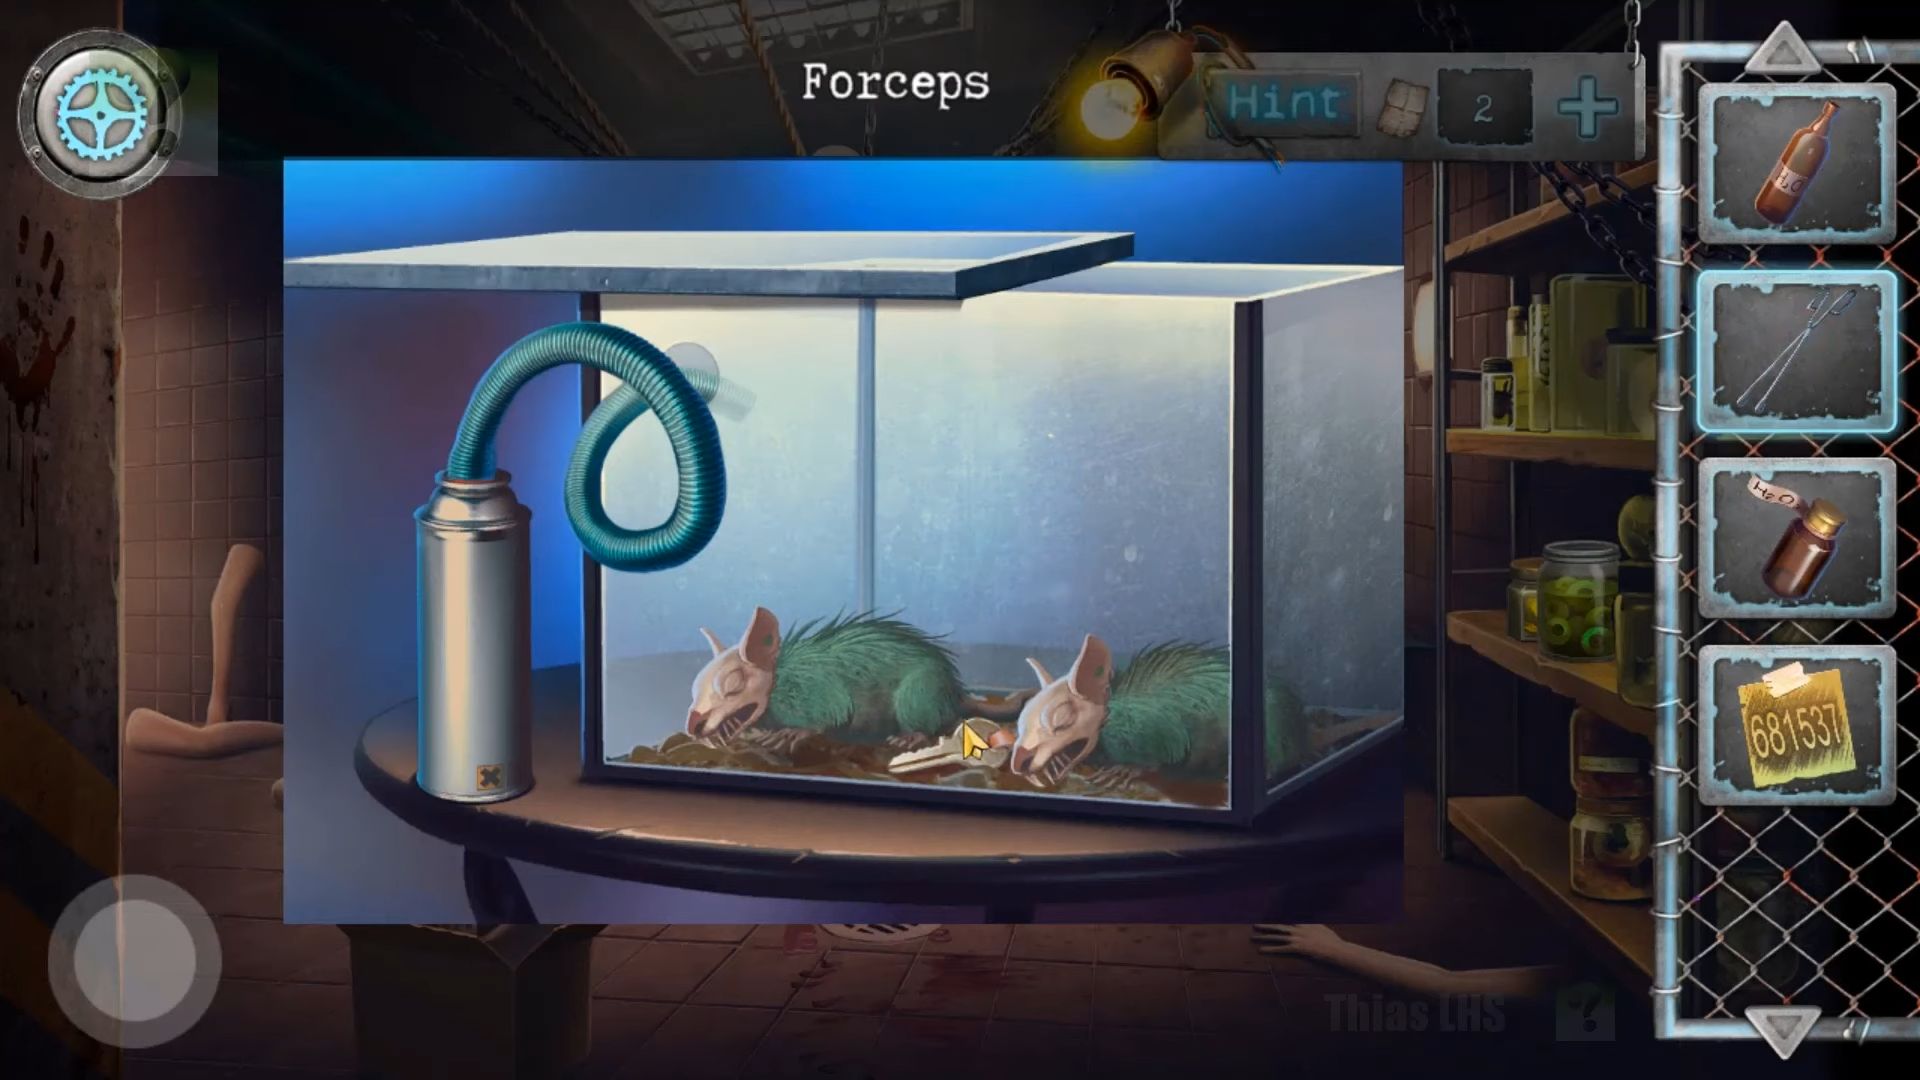
Go back to the room with the hanging body and check the glass cage with rats. Combine the corrugated hose with the sleep gas cylinder in your inventory. After that, use this sleep gas cylinder on the hole in the glass cage. Now, open the lid and use the forceps to collect the key.
Return to the hallway with the wheelchair. At the end, there’s a double door with a keypad and you have to use the code found above on the keypad to open the doors. If you can’t enter the code, you forgot to pick up the note. This leads you into a morgue.
Begin by tapping to see the autopsy table, which looks suspiciously clean. Collect an instruction leaflet from it. Next, pick up the paper on the floor at the bottom right to get a clue.
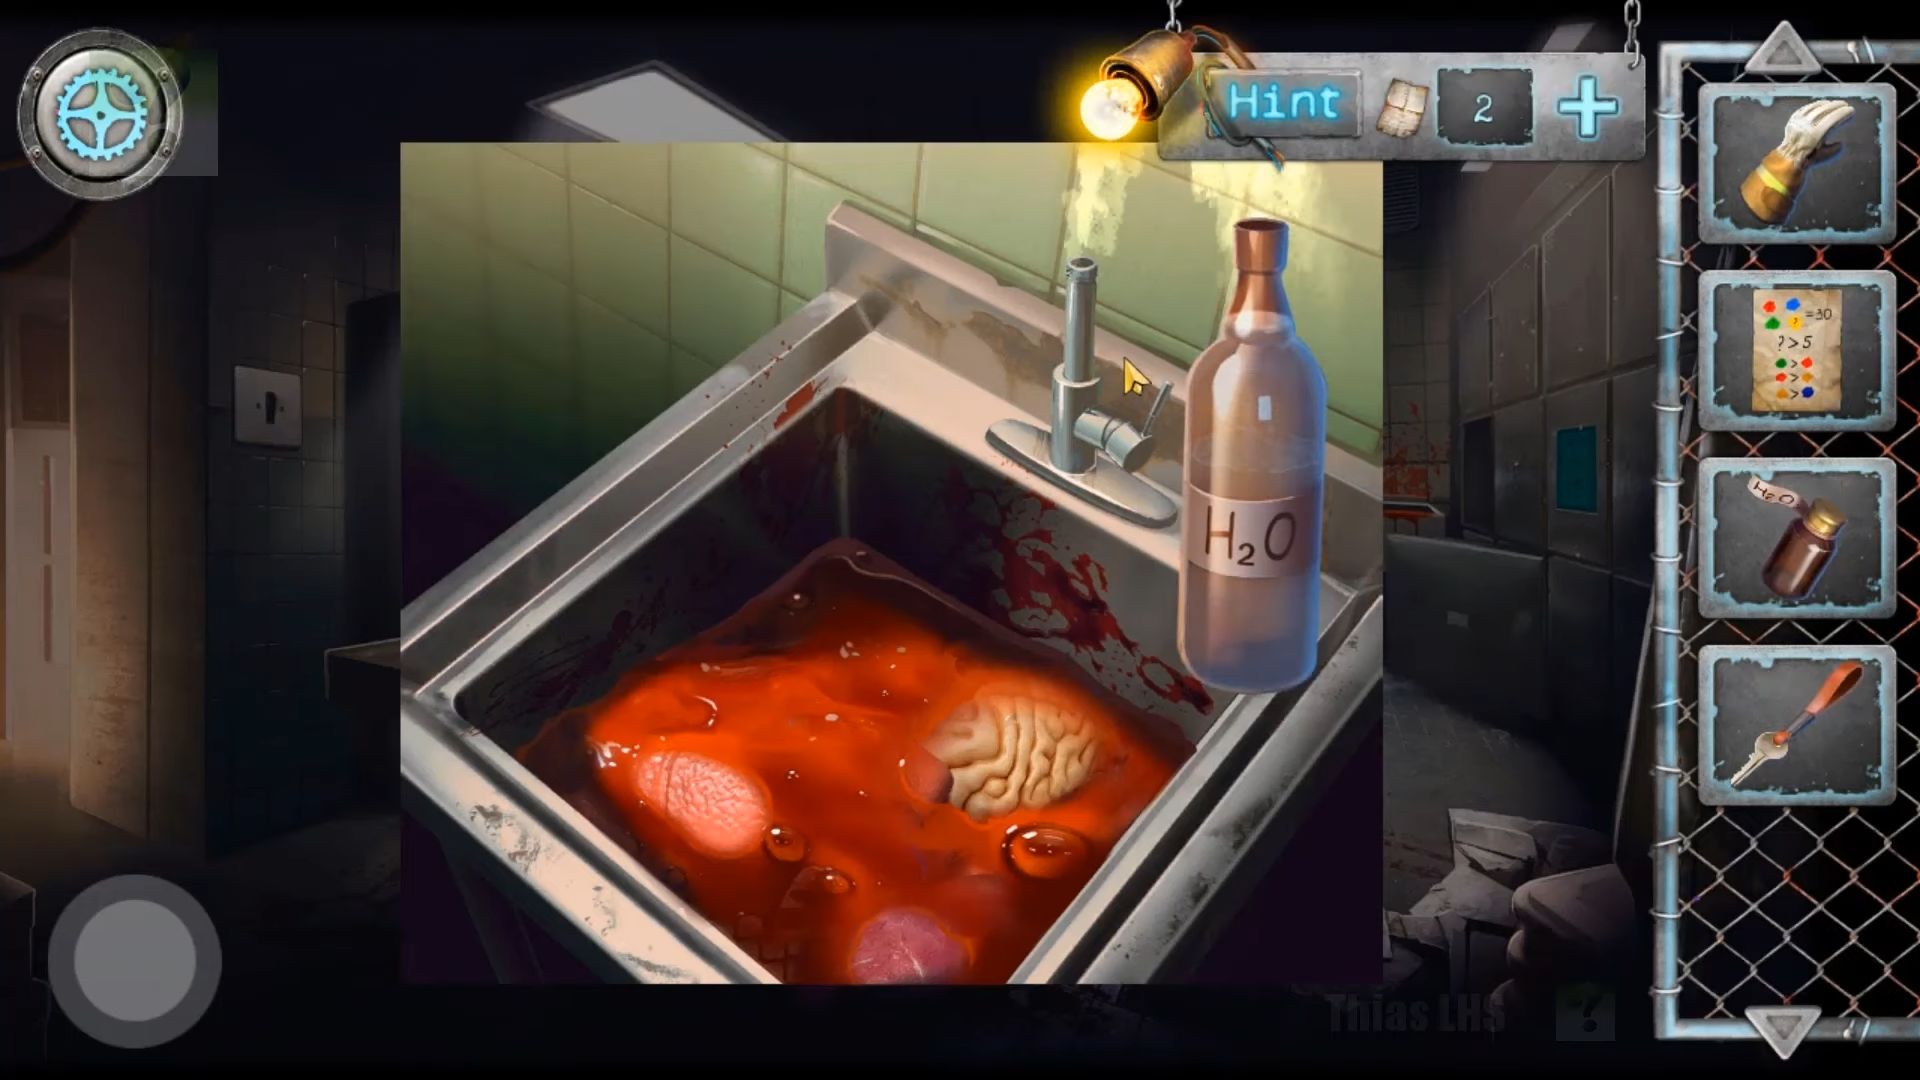
Collect a spray bottle and check the sink on the back right. Tap to view it and pick up a fire glove. Click the tap to make the water run, and then use the empty glass bottle to fill it with water.
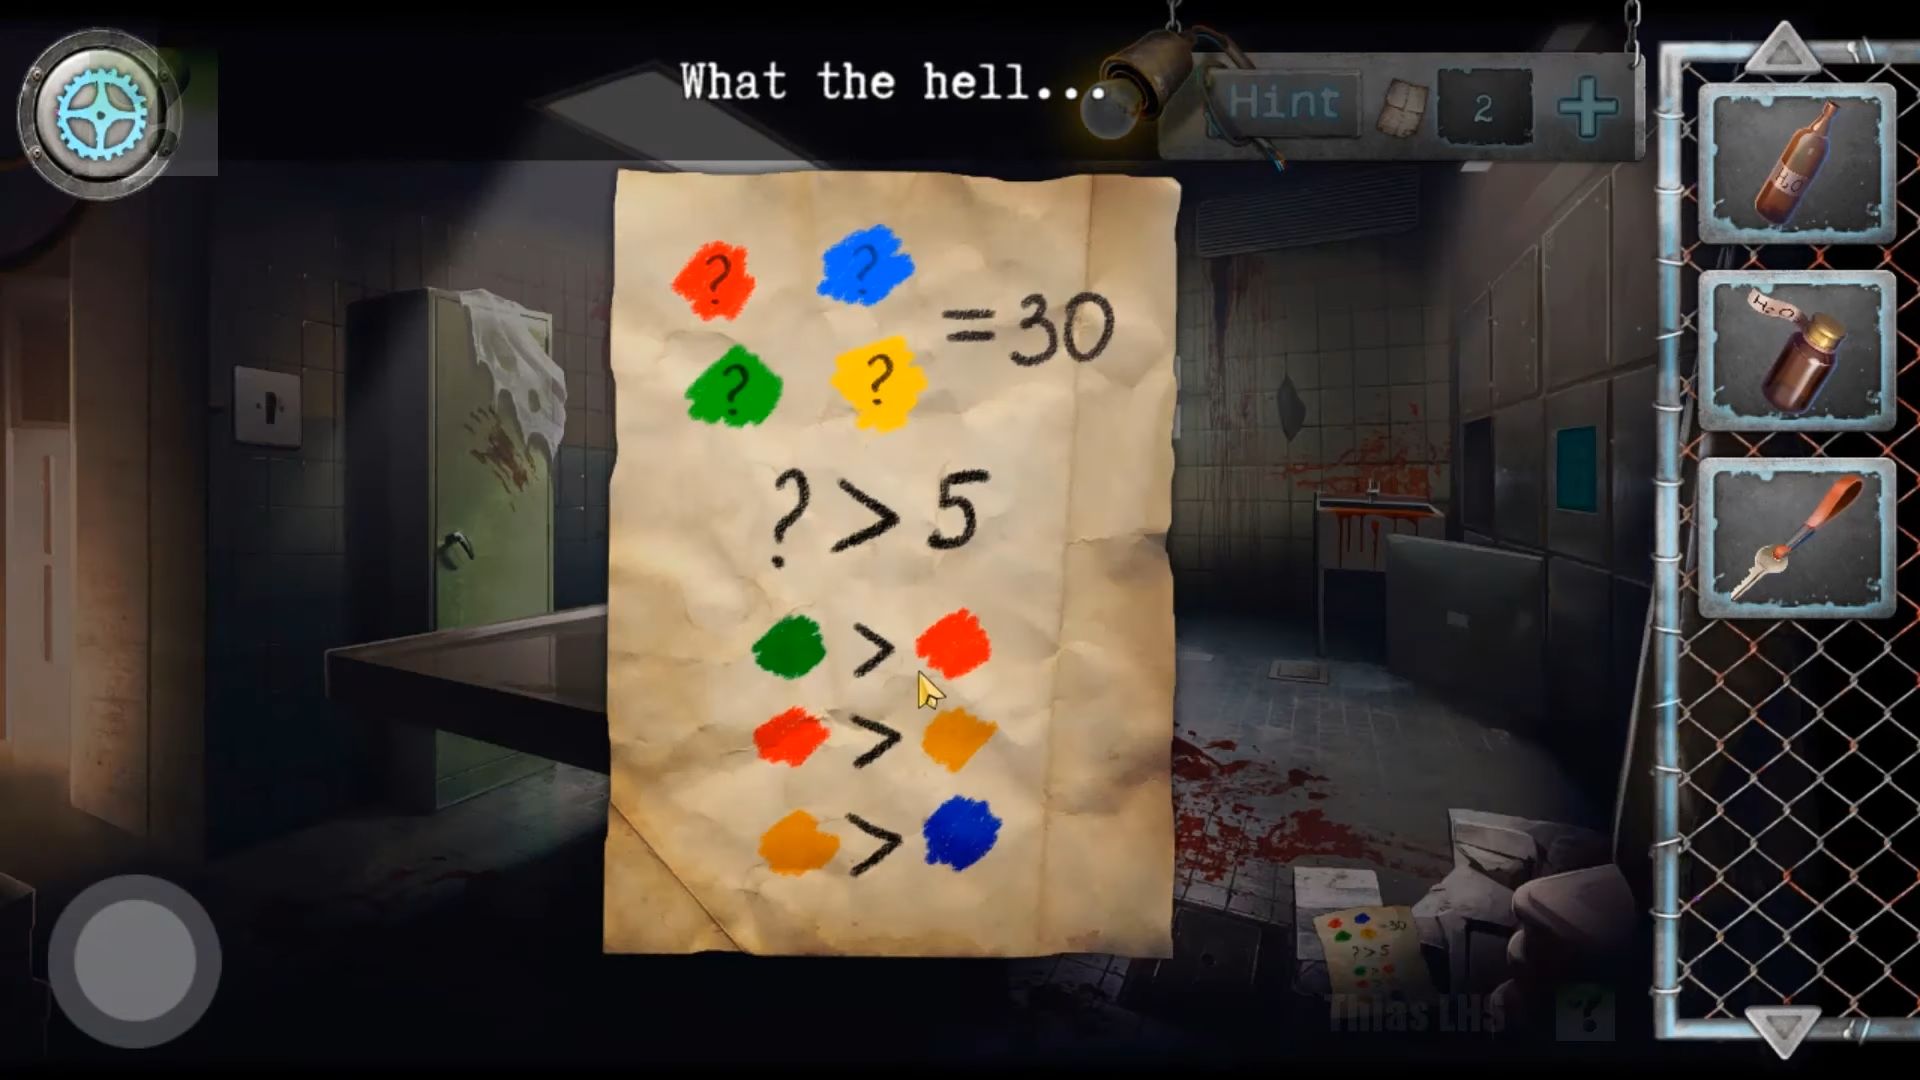
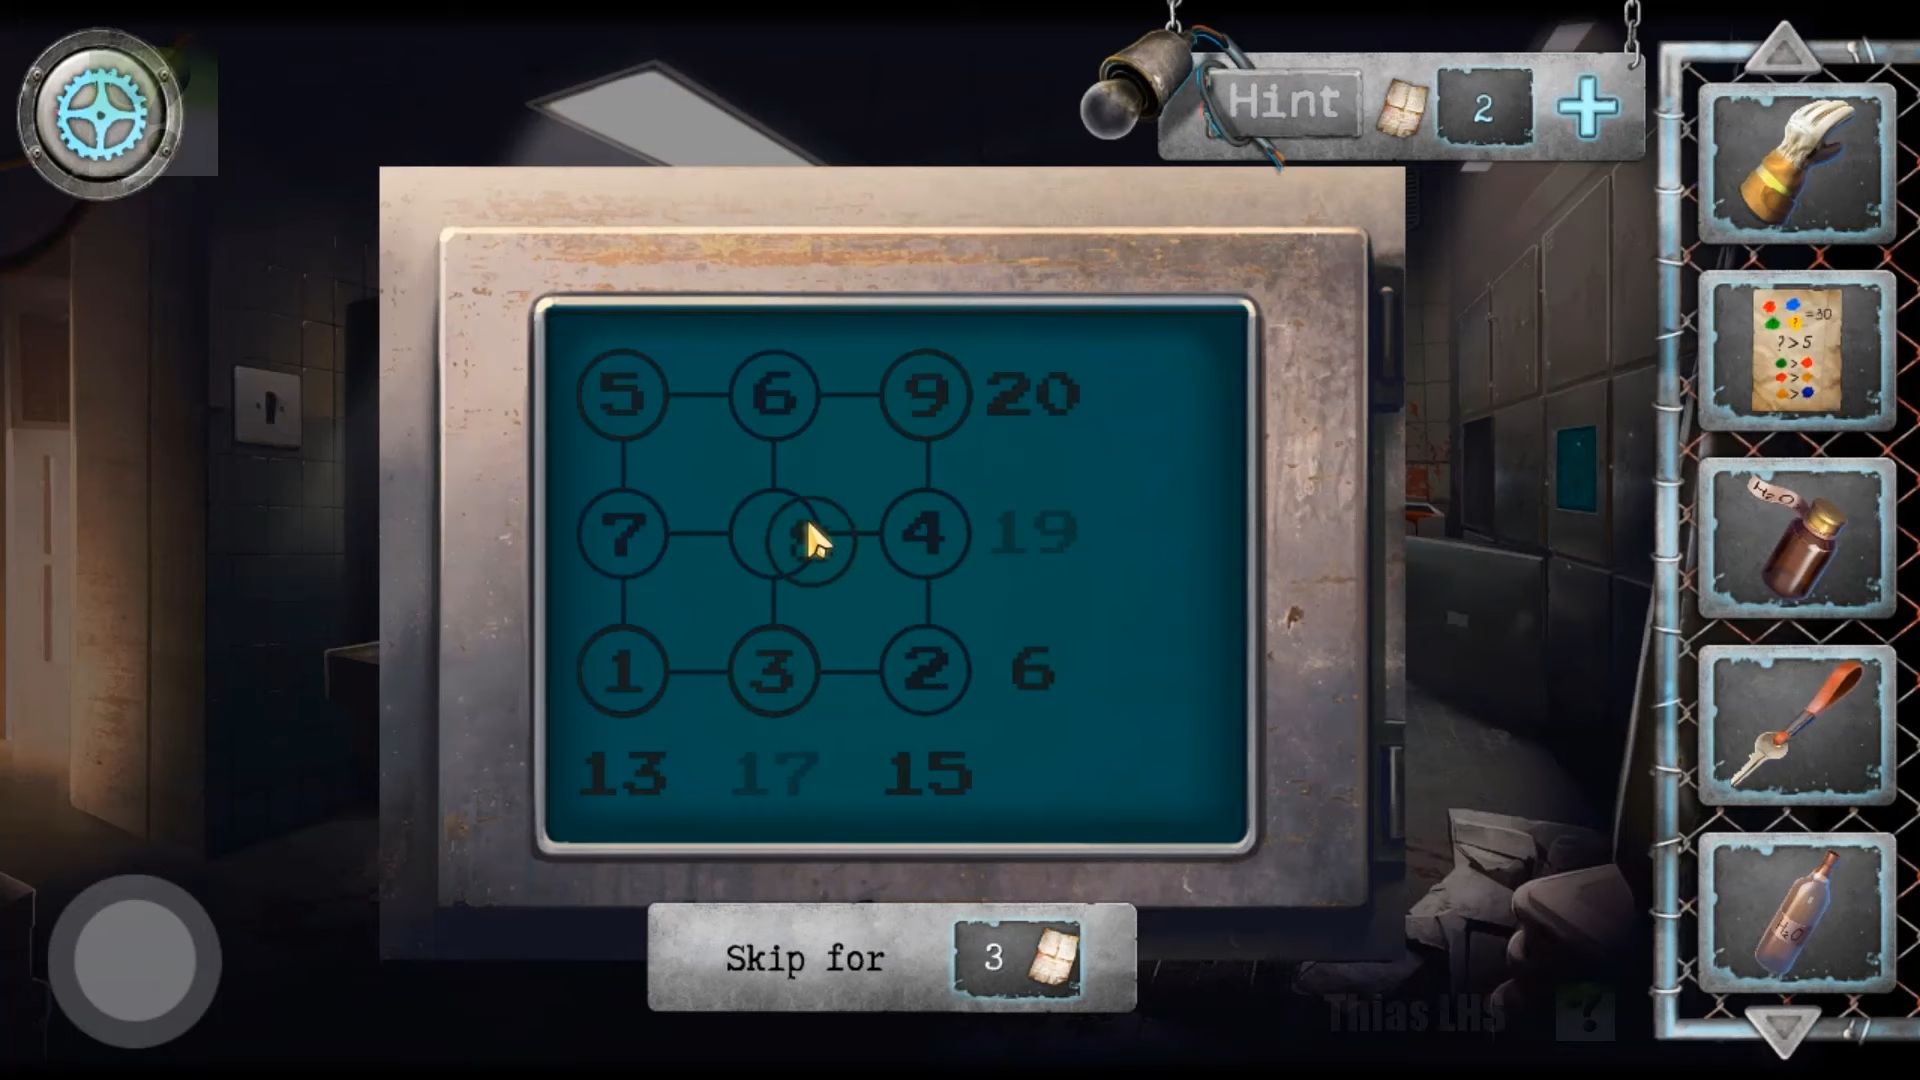
Above this, on the far right, there’s a green panel on one of the doors. It’s a math puzzle. Drag the 5 numbers on the right to complete the correct sums on the grid.
Tap to see the table at the back on the left, which has a scale. Now you have to use the key on the locked box to the left, open it, and collect insulating tape. Go back and move to the left area, which is a crematorium.
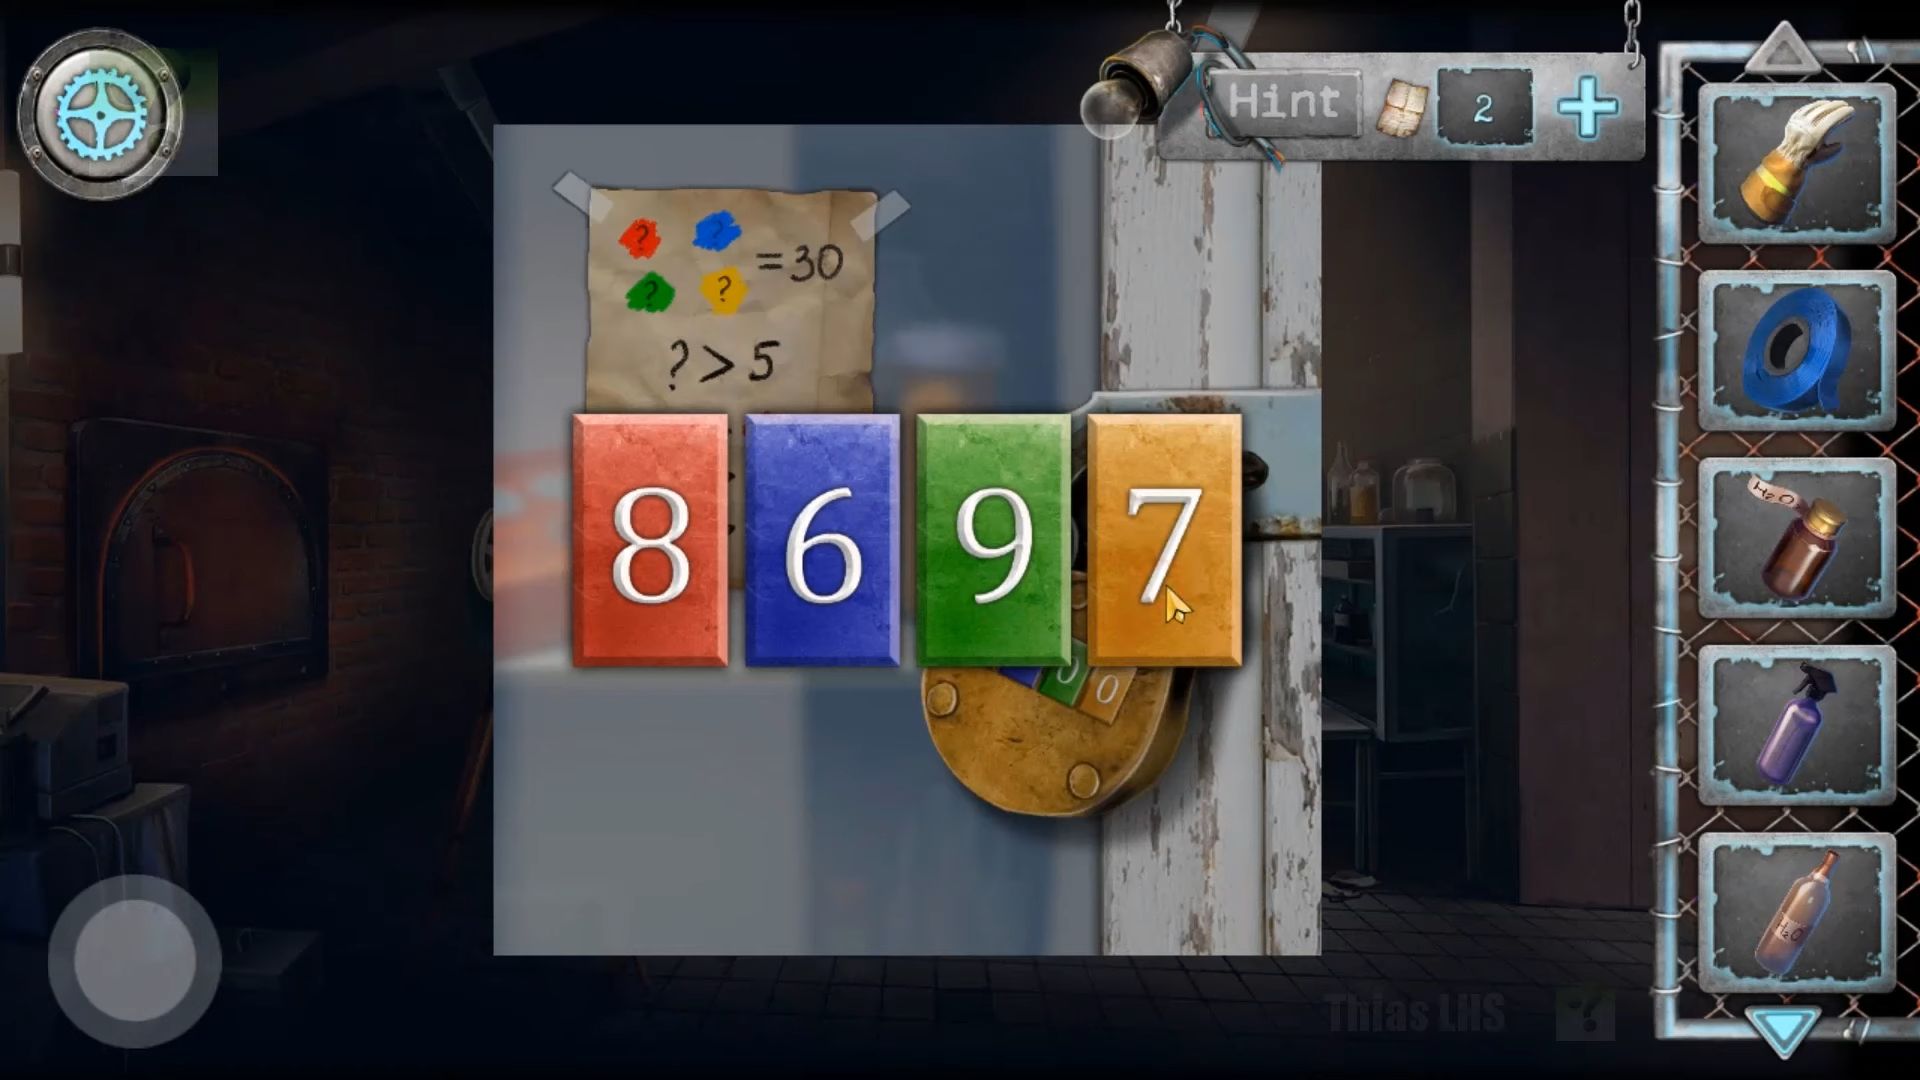
First, tap to see the projector on the left and pick up a note from it; this is a clue. Next, on the back wall, there’s a white cabinet. View it to see a padlock with 4 colored dials and use the paper clue you found to get the combination (8697).
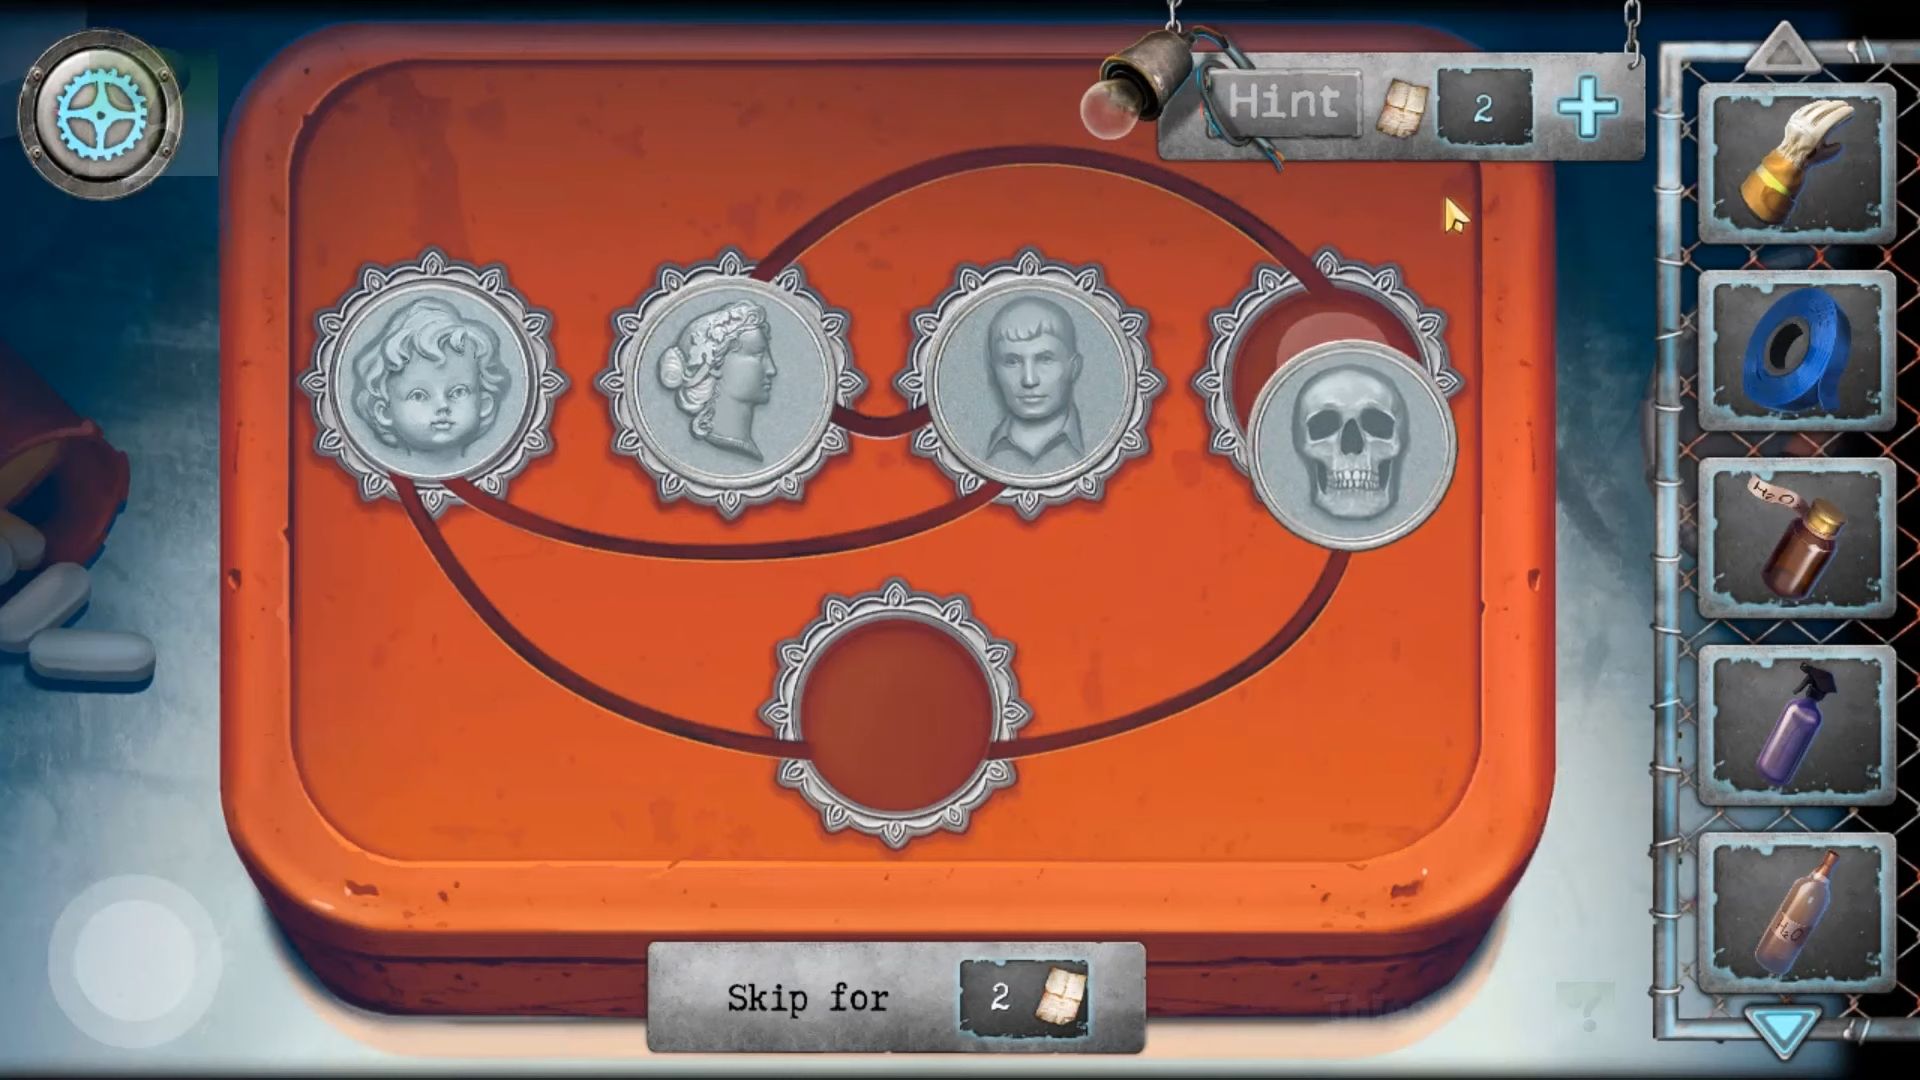
Open the cabinet and check the red box inside. This is a puzzle in which you have to arrange the tokens in the correct order. Inside, there’s a clue. Take note of the highlighted symbols and their number order.
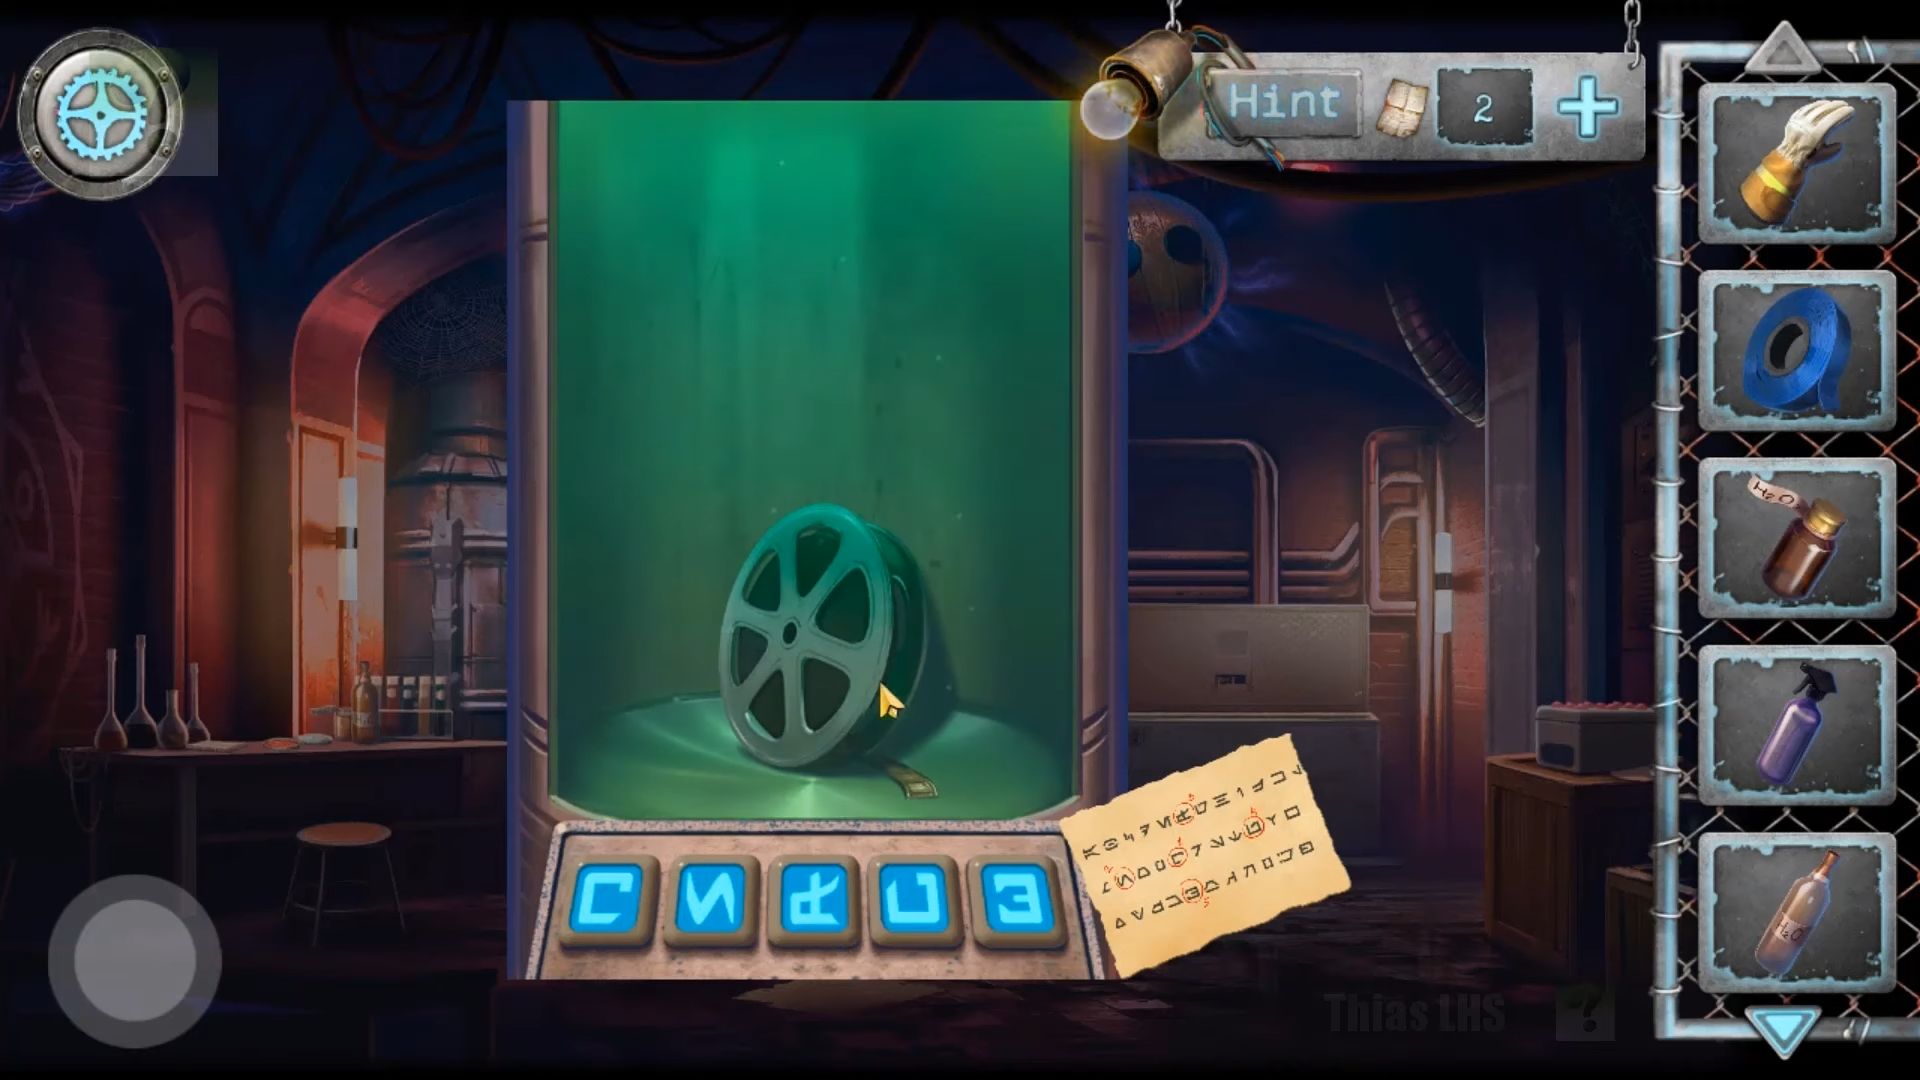
Go back to the hallway and then enter the secret room on the left. You need to look at the green glowing cabinet on the back wall. Now, use the symbol clue to enter the combination.
Next, return to the crematorium area. Put the film reel on the projector and press the green button to turn it on. After the show, you’ll notice the back left corner illuminated.

Shift the boxes and other items to uncover a hidden door with a code lock. You need to observe the 4 symbols in red and the clue on the right. Rotate the inner circle to align with the clue, matching up the correct symbols. You have a brief moment to see the correct matching symbols for the 4 red ones in writing. Set these on the 4 dials that appear and it’s easier if you don’t align it completely at the start.
Enter a factory and start by picking up a metal bar from the bottom right. Next to the burning barrel on the right, there are some boxes; check them. Open a box and pick up a hook. You need to use the insulating tape on the shard of glass on the floor, then collect a Glass knife.
In the center, there’s a mine cart with 2 hanging chains. Use the hook in your inventory to attach it, then tap to place the chains on the conveyor belt on the left. Now, look at the control panel on the left and the instruction note will be added.
Start by picking up a spray hose from the top and tap to view the wires at the bottom. There are four wires, each with coordinates above it and you need to place the plug for each in the correct hole.
You can now use the control panel and follow the number sequence on the instruction note to activate the correct switches. Once done, the conveyor will activate and move the mine cart from the doorway. Before moving through, go back to the morgue and look at the sink in the back right again. It is full of blood and organs. You have to add the spray hose to the water outlet, then turn on the water.
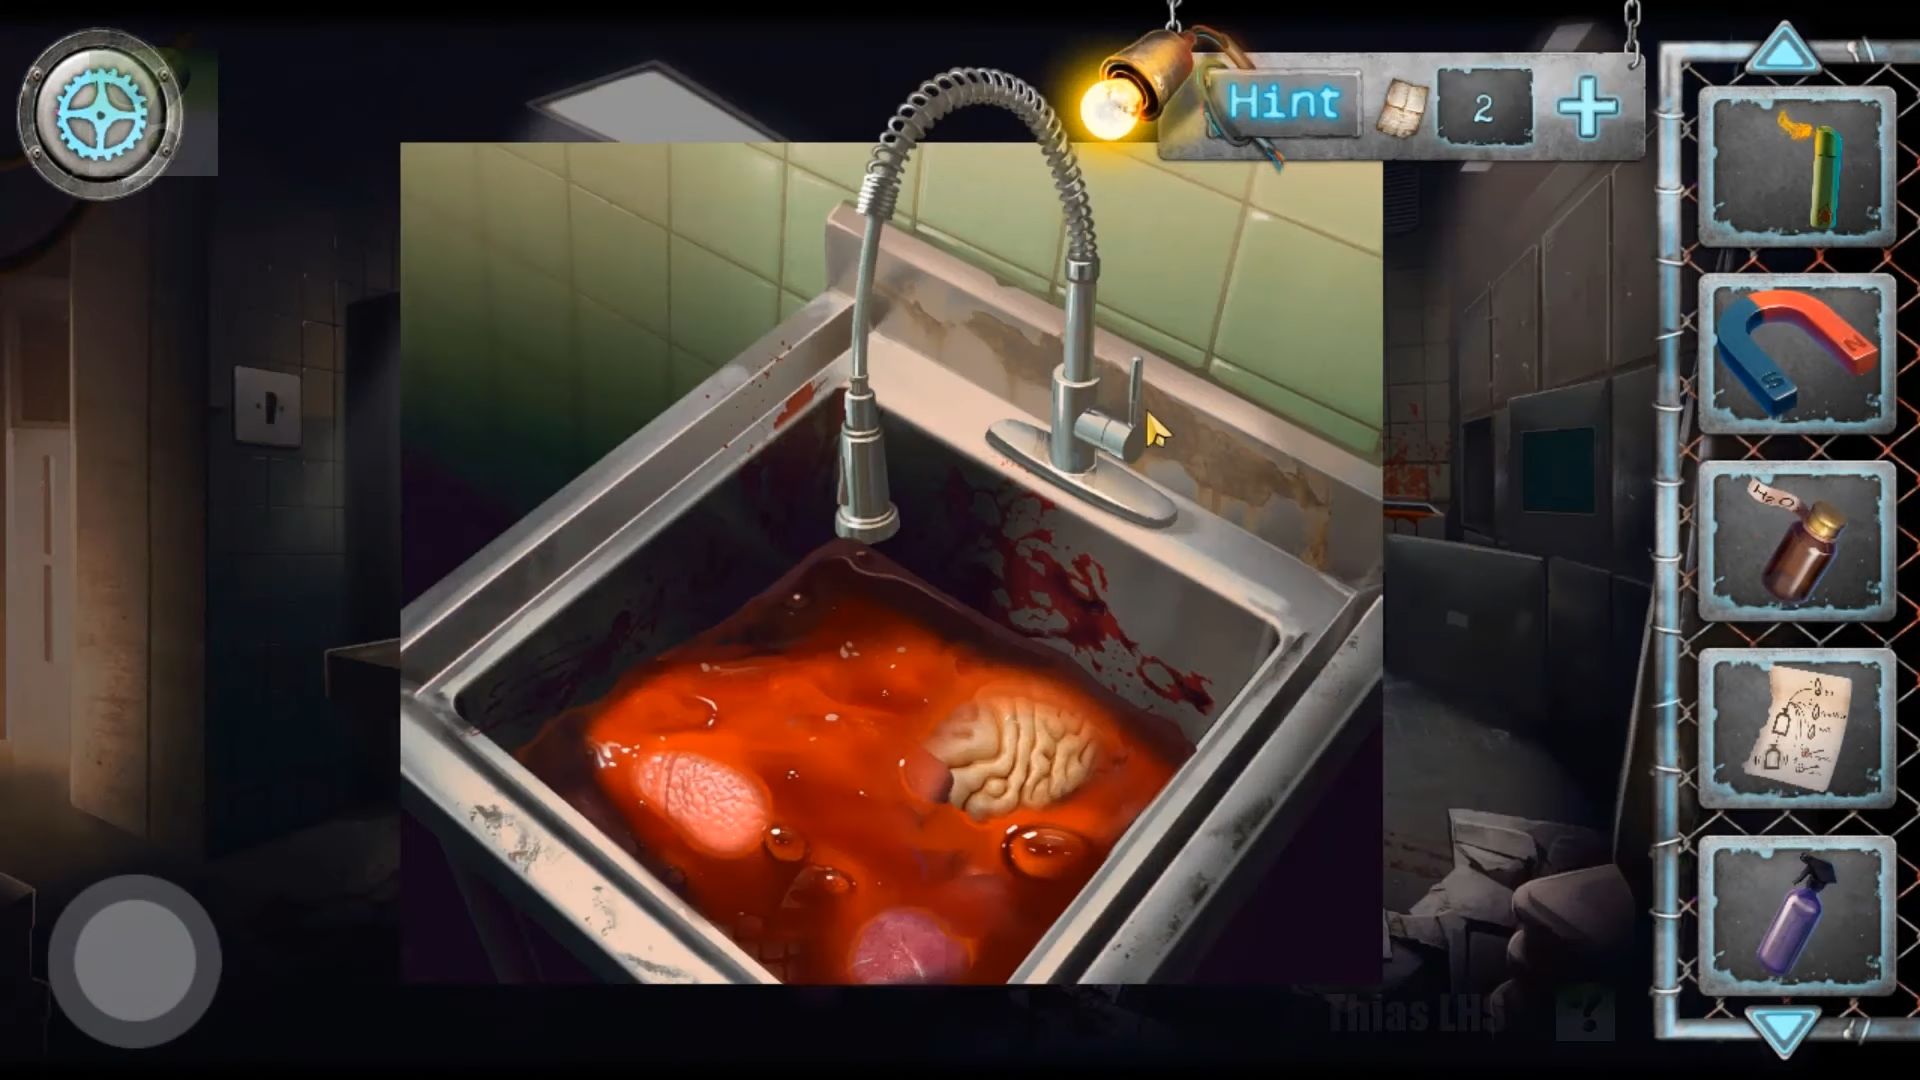
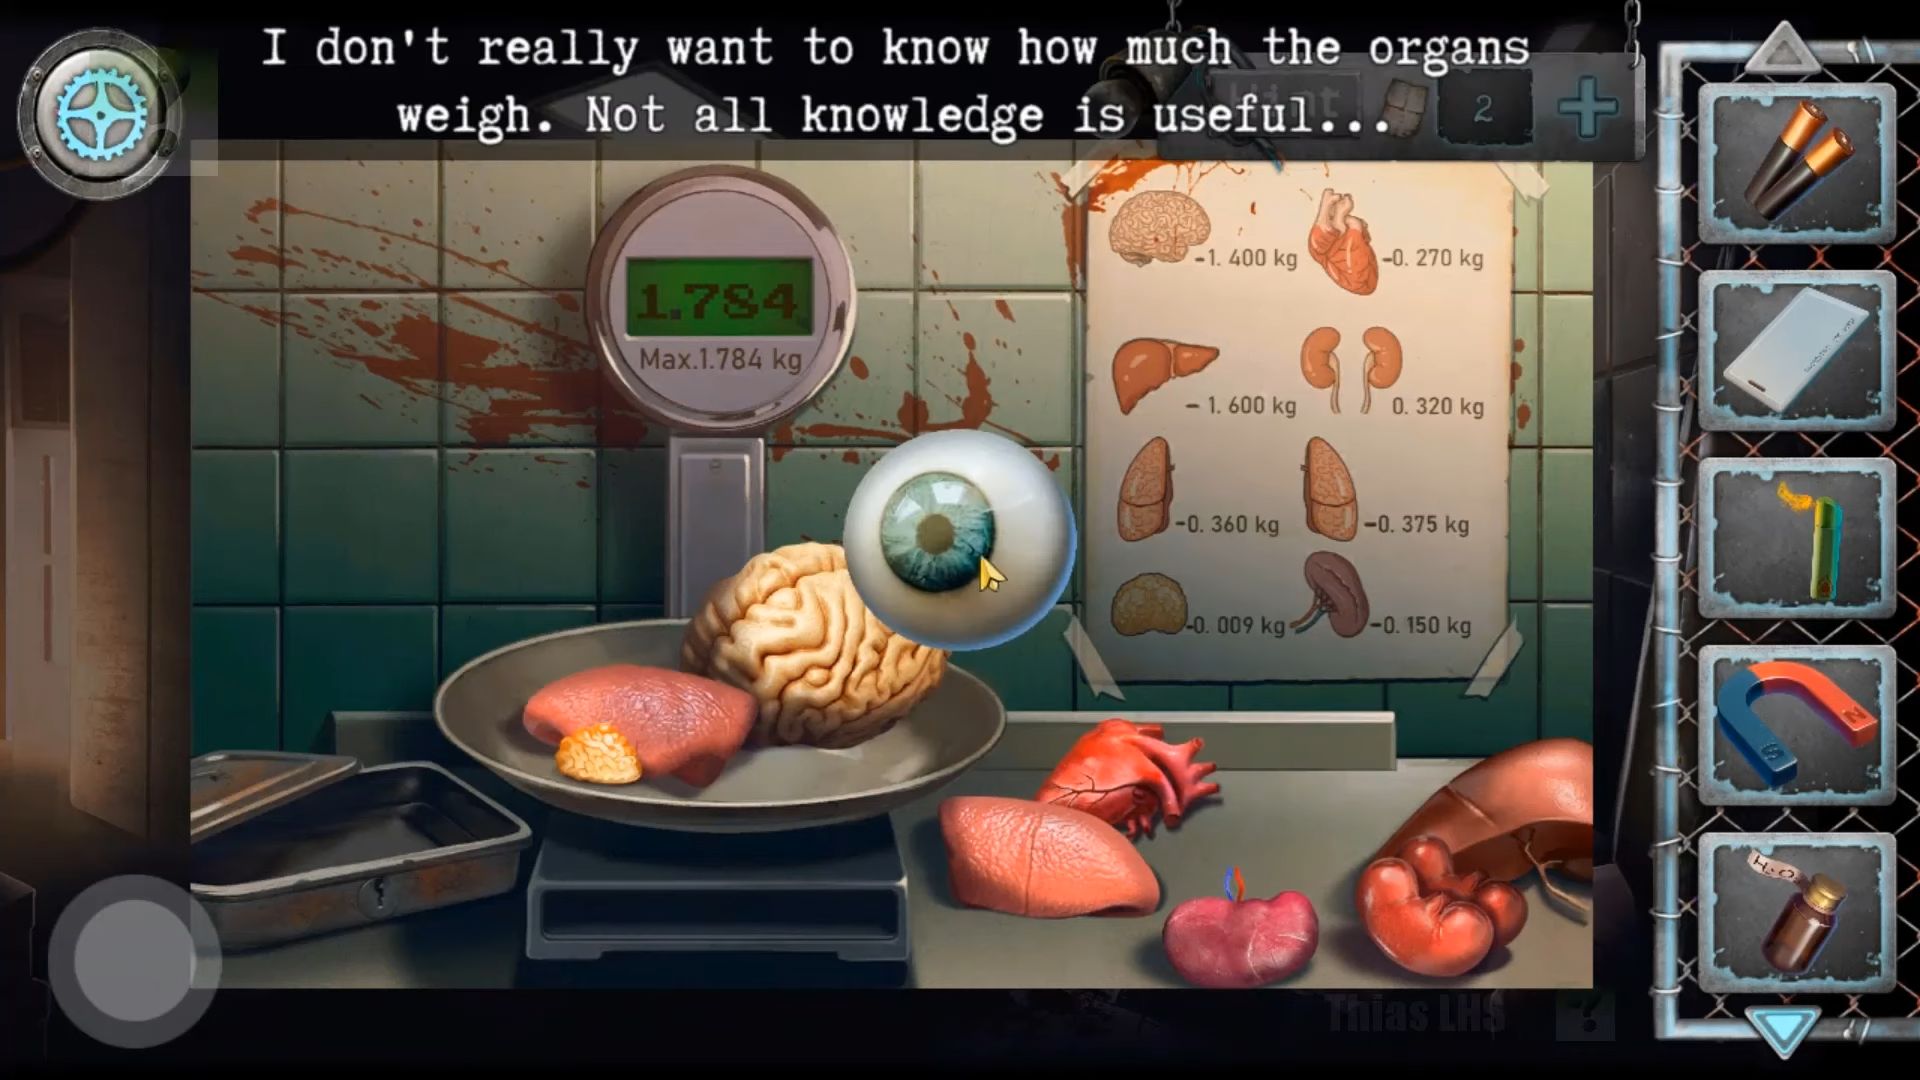
After the blood washes away, turn off the water, and then collect the (plastic) organs. Go to the table with the scale and place the organs on the bench to the right. This is a puzzle, so you have to note the maximum weight limit and place organs on the scale to reach the max.
Use the weight chart to figure out the right ones and once done, you need to pick up a glass eye. Now, return to the factory and move through to the next area – a cafeteria.
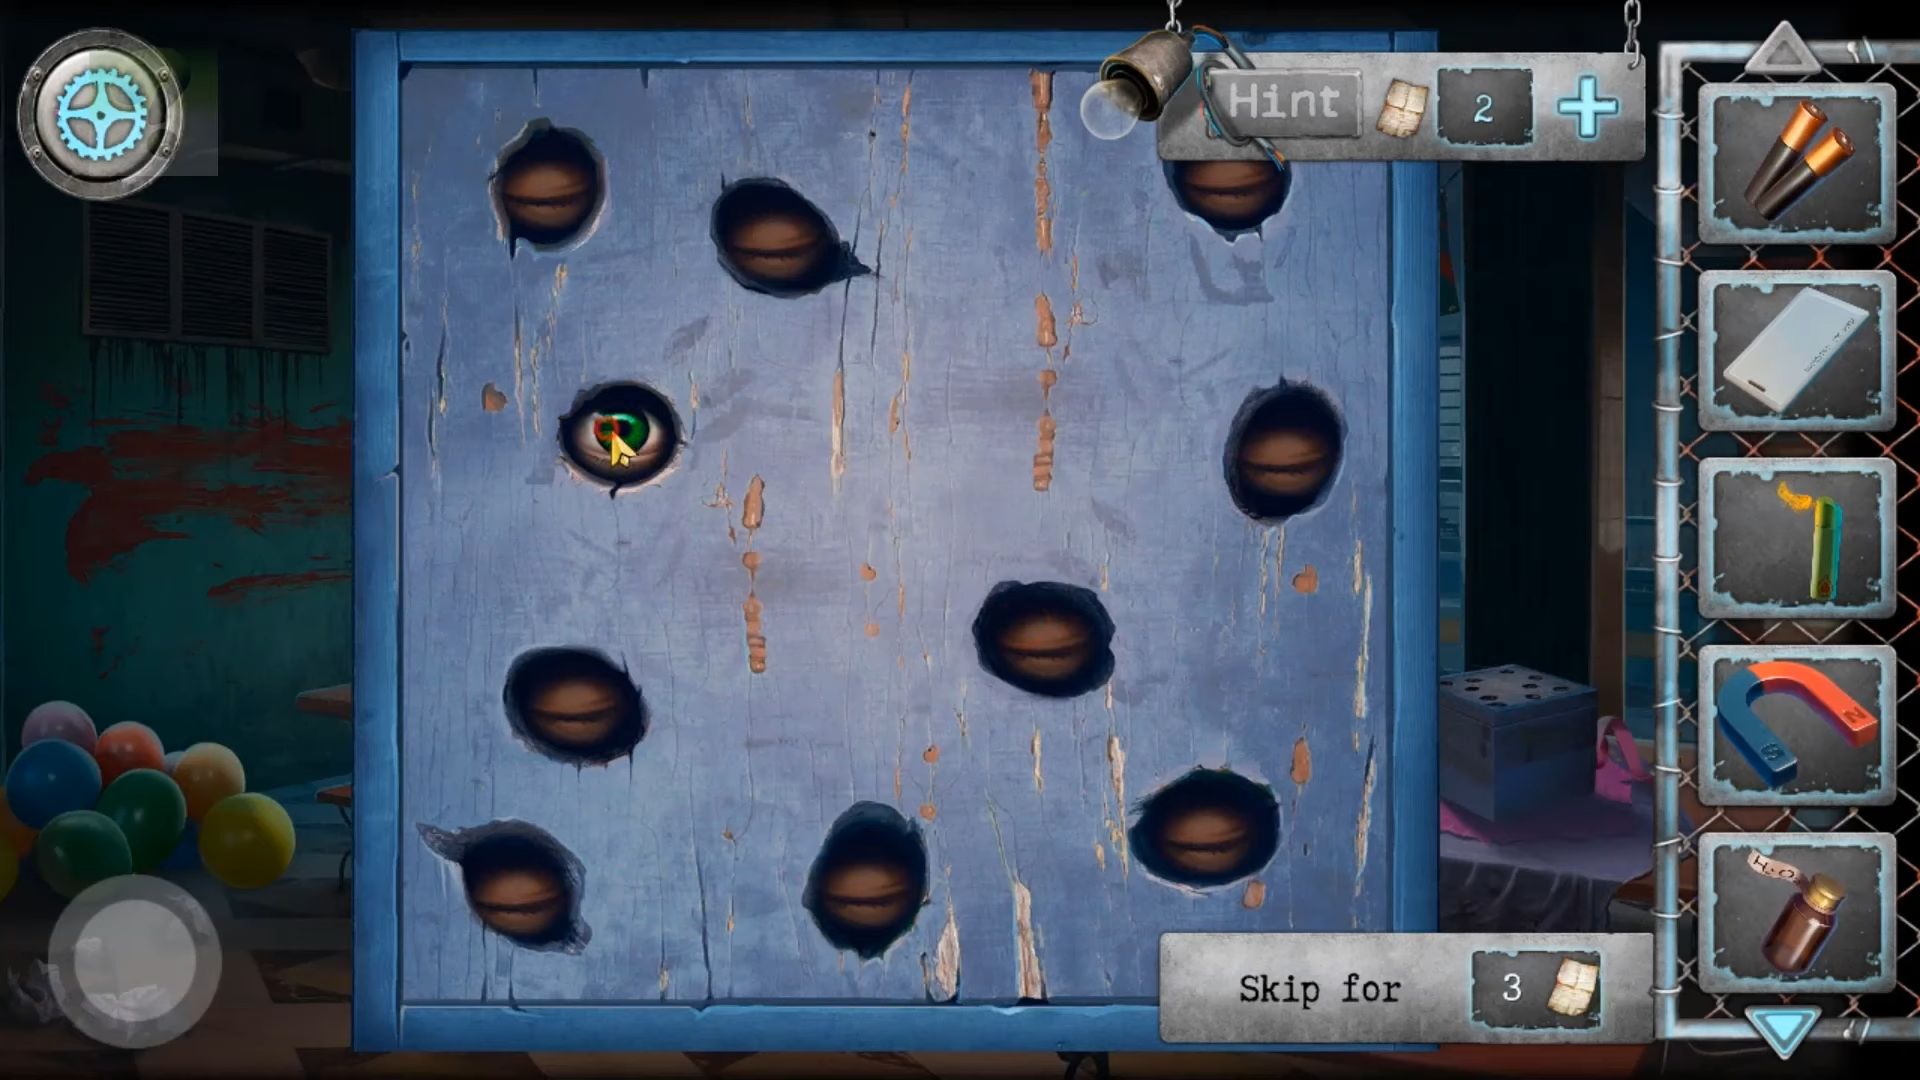
You’ve made it to a cafeteria and now start by collecting the green Hairspray can from the table on the right. Then, tap the present on the table. Open the wrapping, and you find a wooden box with eyes. Add the glass eye to the empty spot, then solve the puzzle. Tap pairs of matching eyes to close them until all are closed. Once done, you will collect the Luminous fluorescent stick.
Check the red toolbox on the far table, open it, and pick up a wire. Turn over the blue radio and open the back panel to get some batteries. Combine the wire with the metal rebar (stick) in your inventory to obtain a Rebar with the hook. You have to use the Rebar with the hook to find a horseshoe-shaped magnet. Cool it down with the water bottle and then collect it.
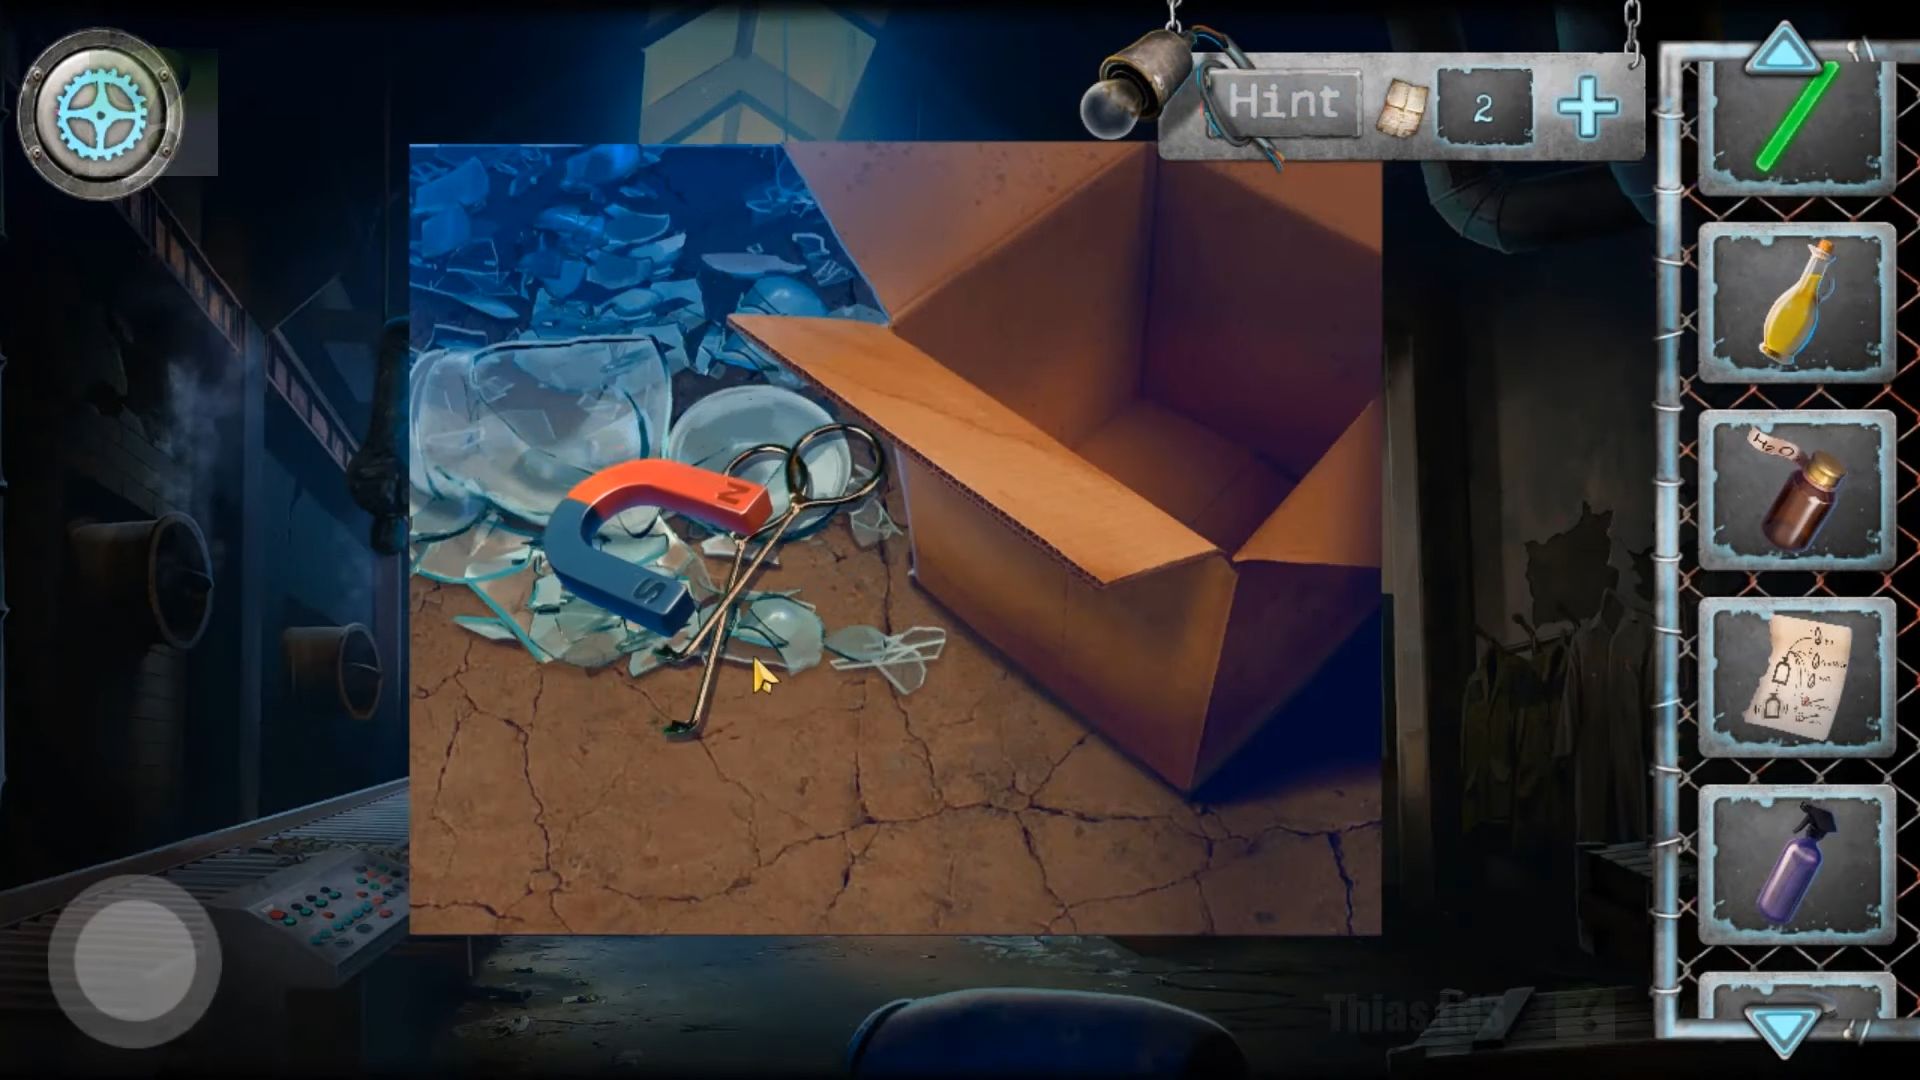
Now you need to return to the factory and look at the broken glass by the boxes on the right again. Use the magnet here to grab lock picks from under the glass.
Tap the arrow button to move to the other view of the room. Start by collecting the torch (UV flashlight) from the floor. Add the batteries to it to get a working UV flashlight and look at the cleaning cart on the bottom left. You have to collect the can of grain from the bucket. Take note of the clue on the side of the locked box.
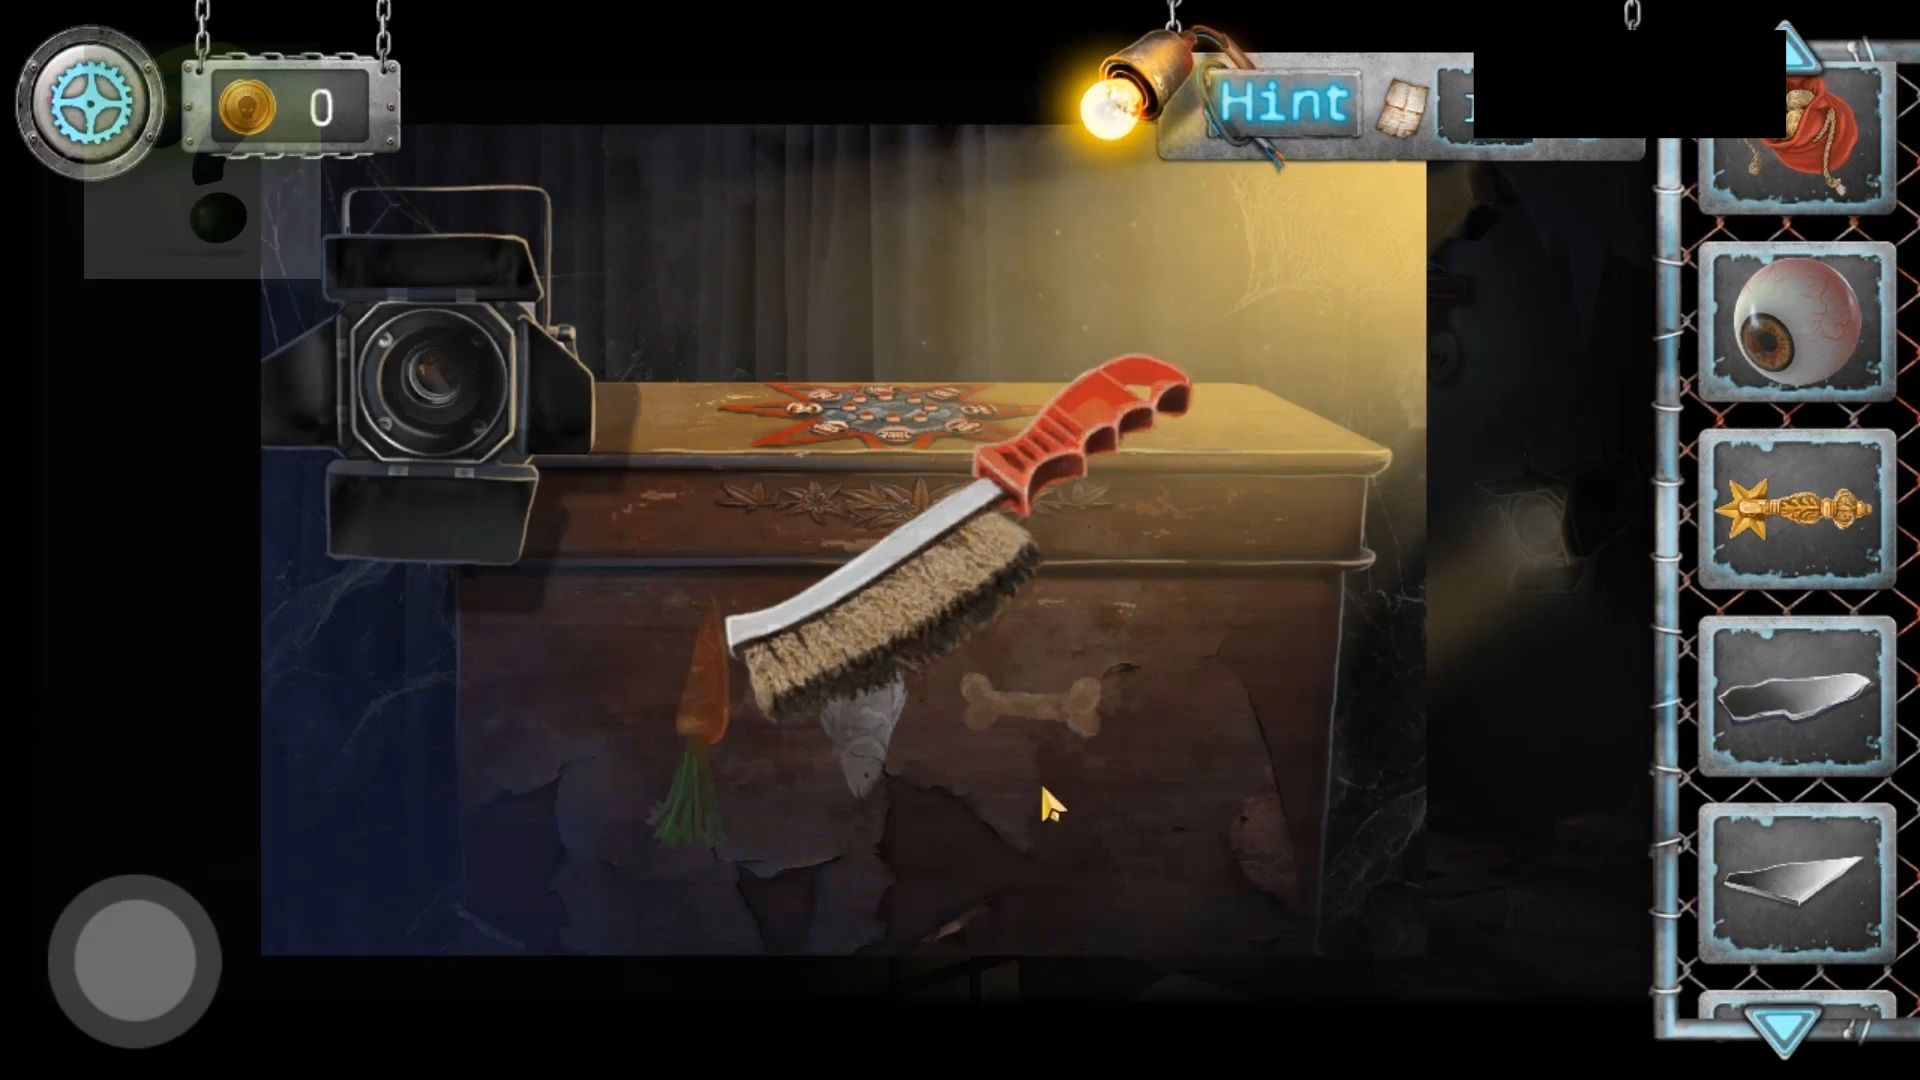
Use the lock picks on the lock to open it, and pick up a metal brush. On the counter to the right is a food mixer.
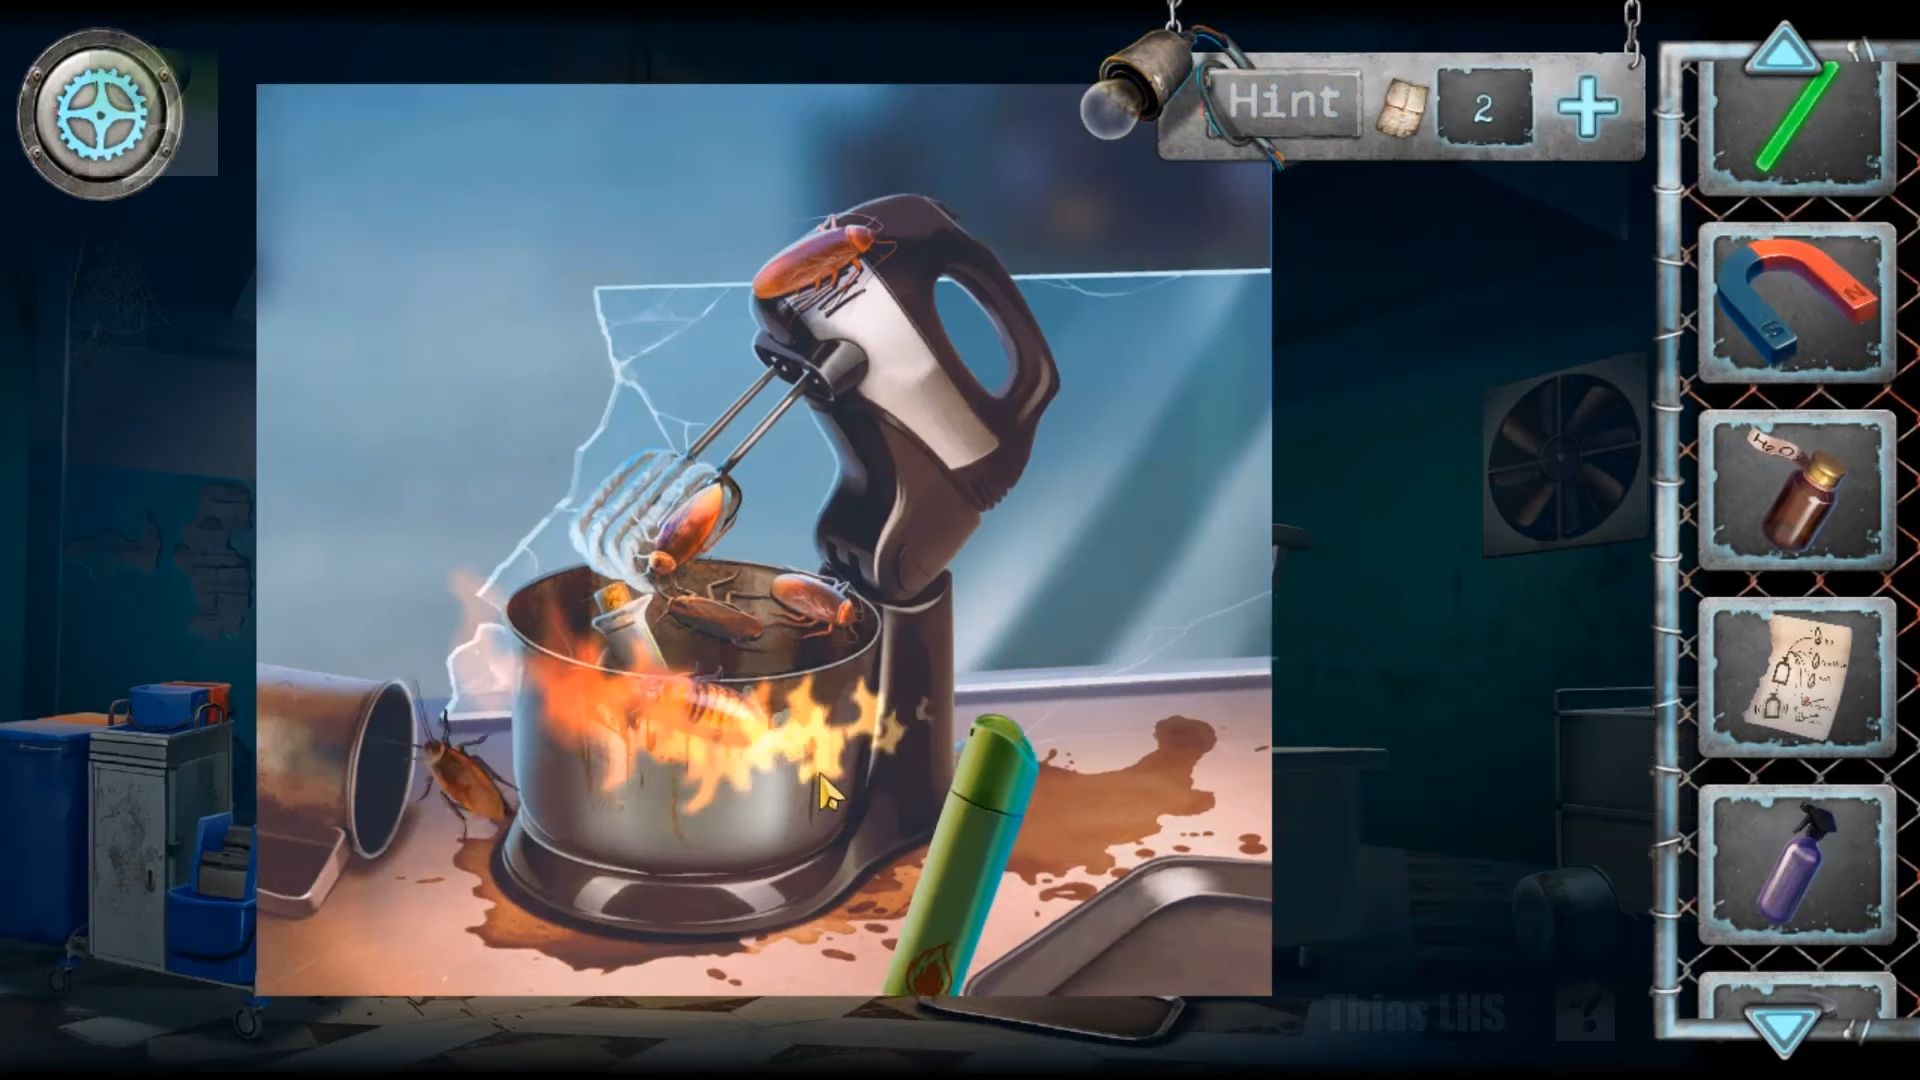
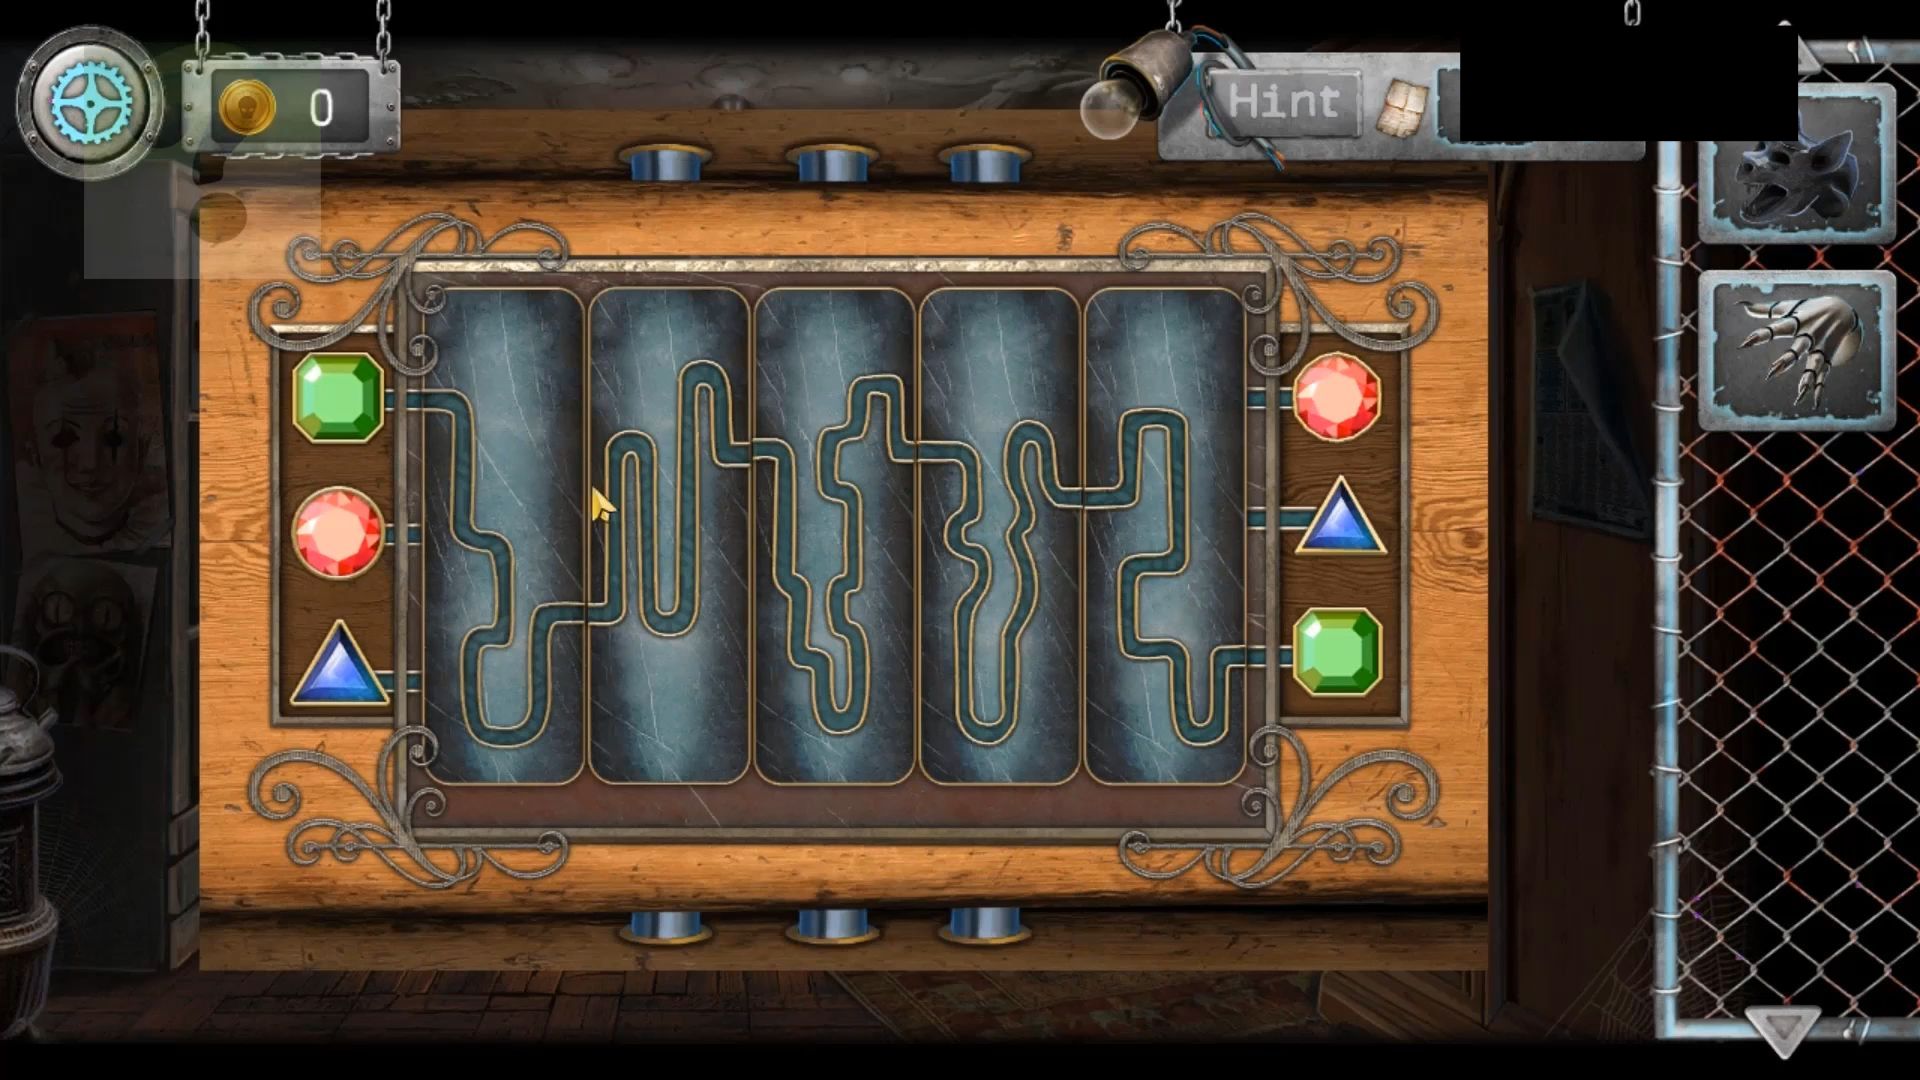
Next, use the can with fire again to remove the bugs, then pick up a bottle of olive oil from the inside. Go back to the factory, on the right wall is a panel with a corroded puzzle cylinder. After that, you have to clean it off using the metal brush and rotate the 4 pieces to get continuous lines across it. Once open, collect a crowbar.
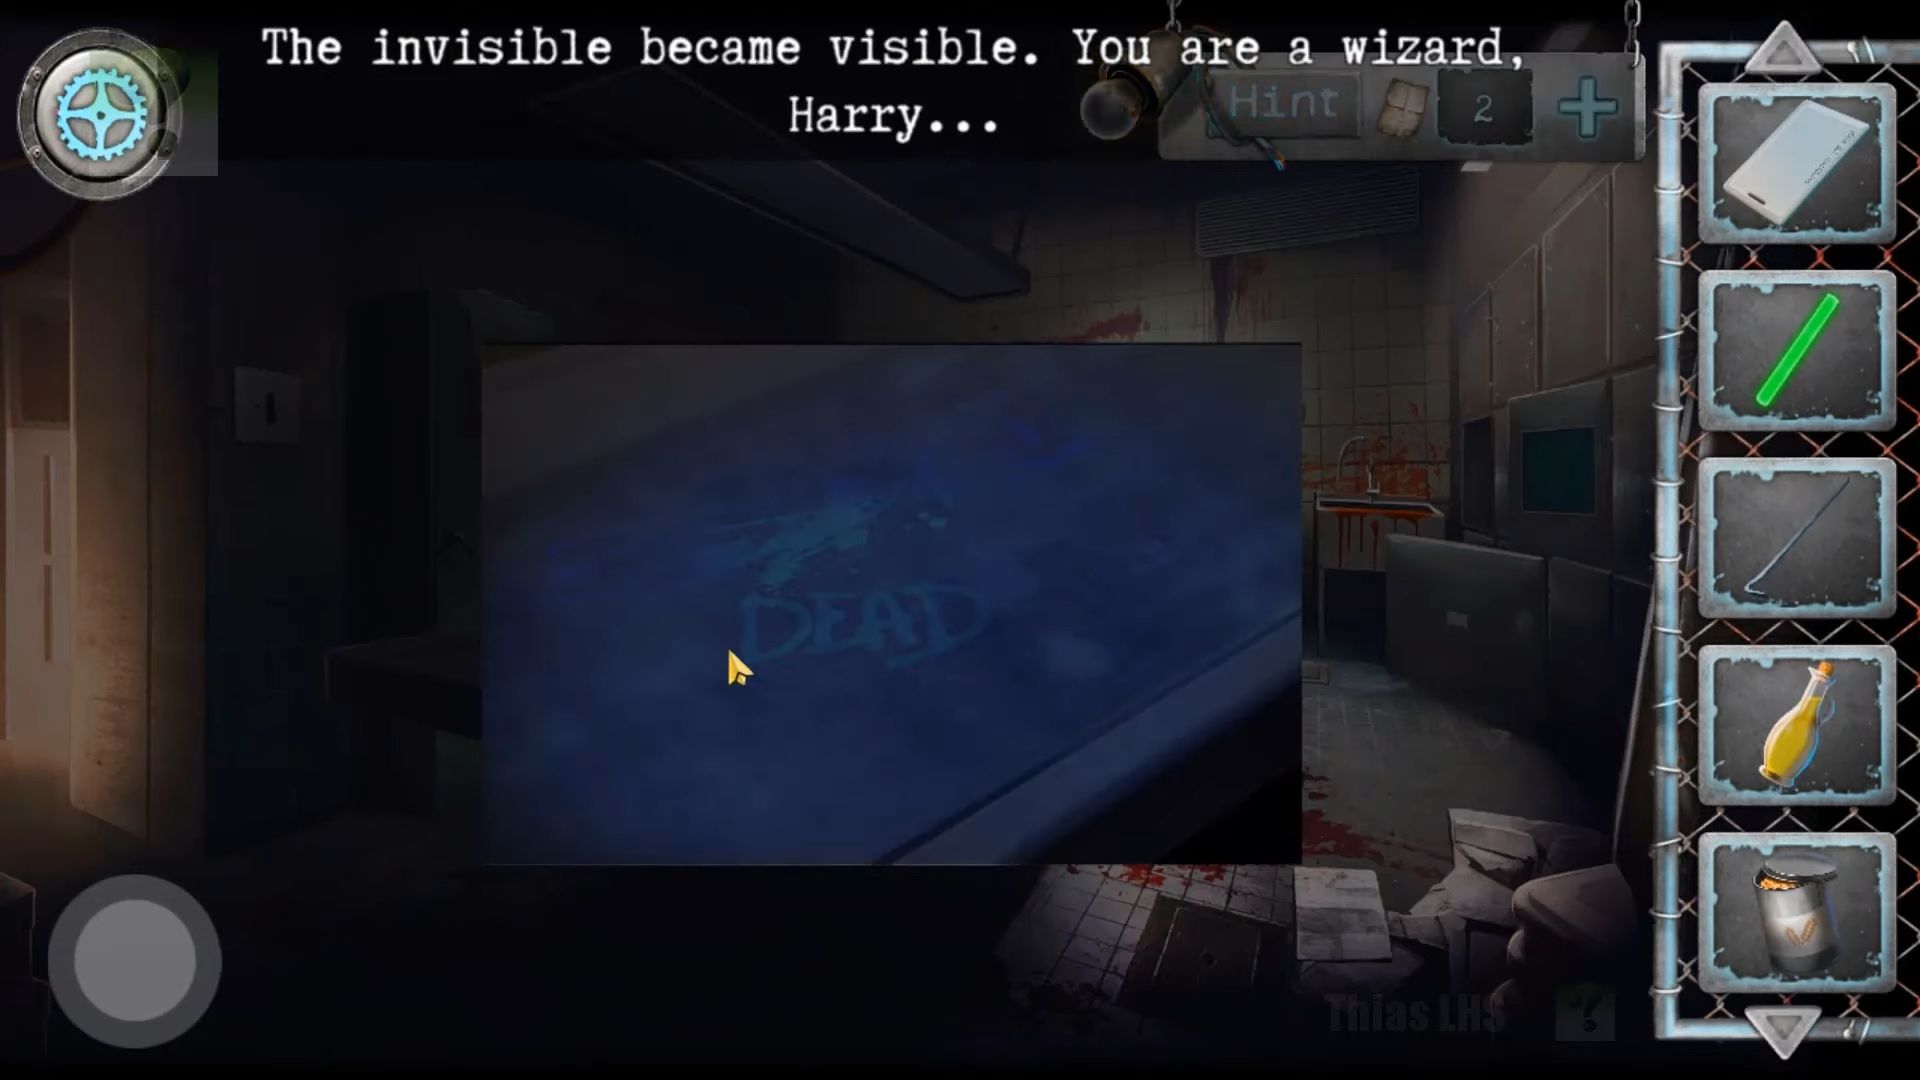
Go back out to the morgue and the operating table. First, turn off the light switch on the left wall, then view the table. Use the luminol on the table surface and then the UV flashlight to reveal a clue.
Go back to the cafeteria and head to the far side with the counter. Tap on the locked door with a keypad. First, you have to use the key card on the scanner at the top of the keypad, then apply the clue found above.

This reveals a panel with a circuit puzzle and taps to light up connected lights without revisiting any that are already on. Once done, the door opens, and you can move through to a security room.
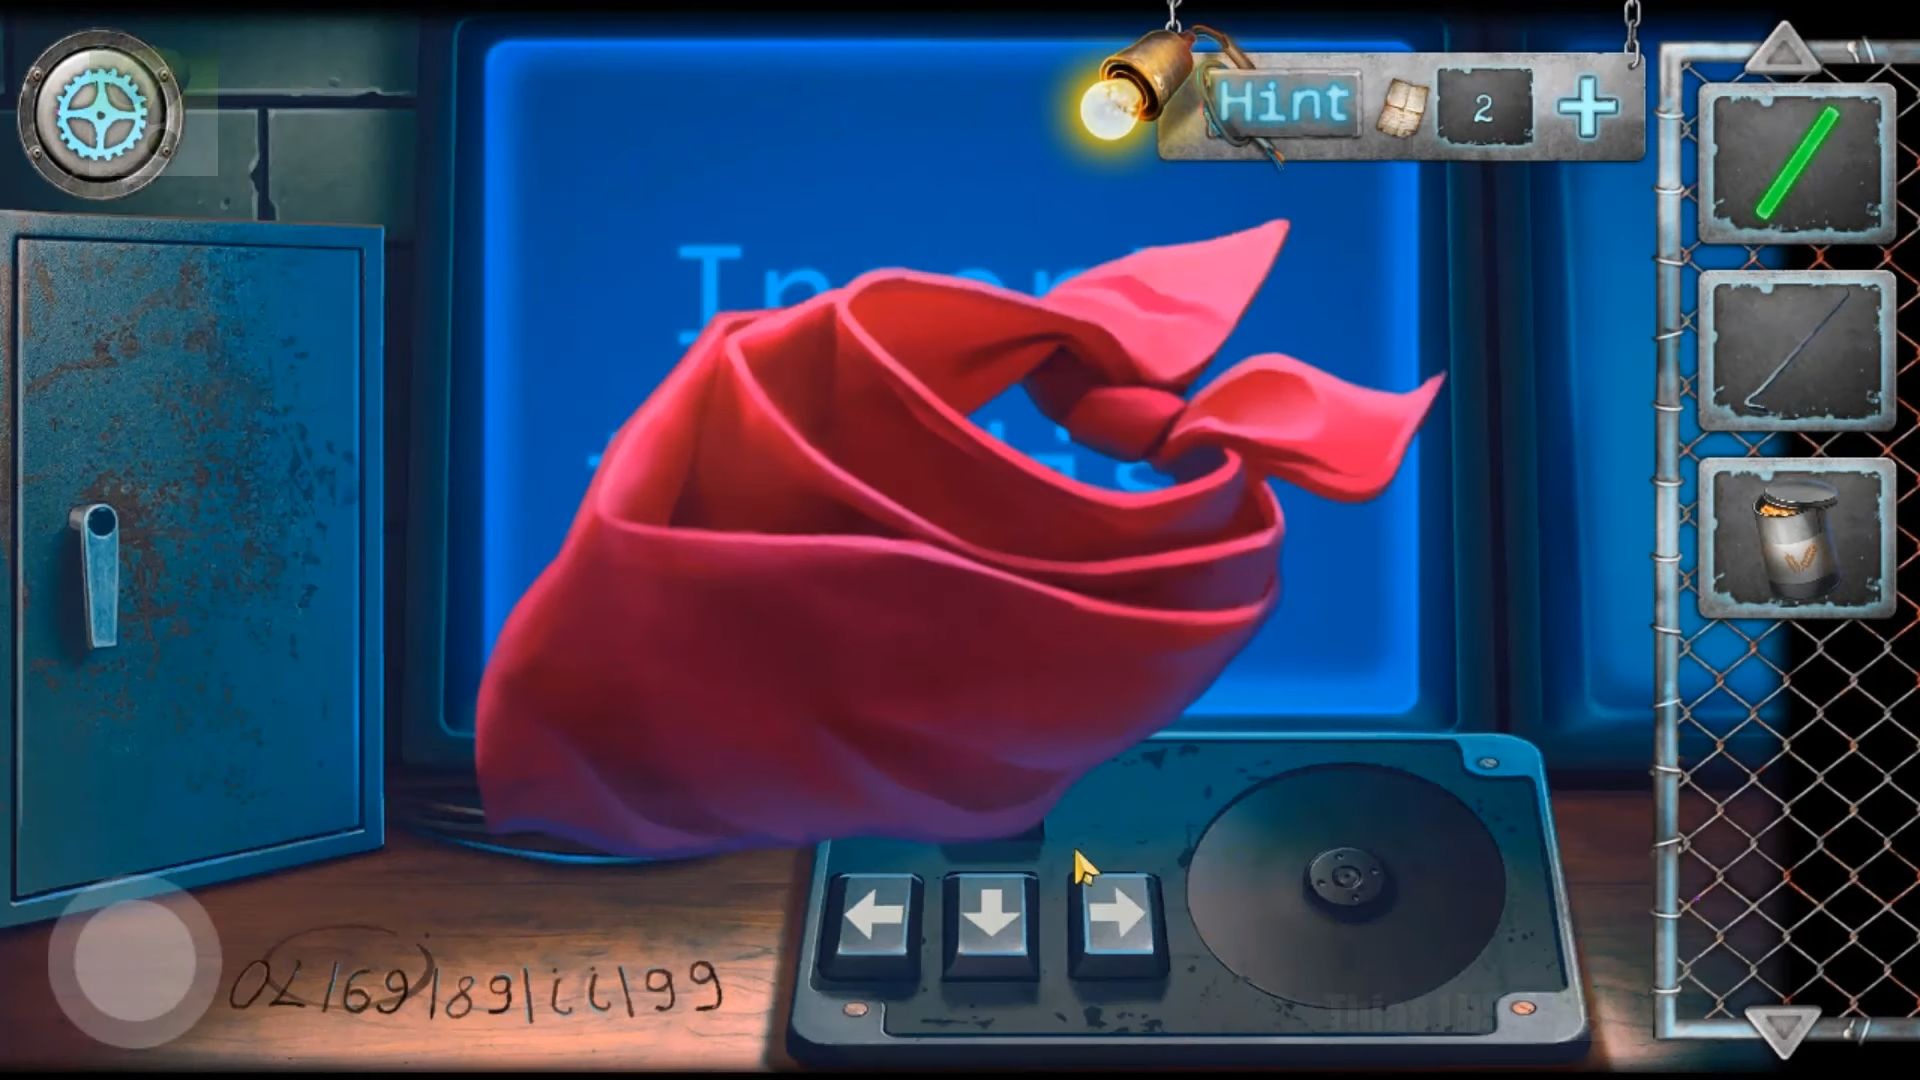
Start by tapping to see the desk under the monitors. Collect the Red bandana and take note of the clue on the table underneath; it has 2 missing numbers.
Now, check the cage on the left; it’s locked with a padlock requiring 4 numbers (3467). Find the 2 missing numbers in a triangular clue on the cleaning cart in the cafeteria and the other 2 on the desk. Since the door is still stuck, use the olive oil on the hinges to open it.
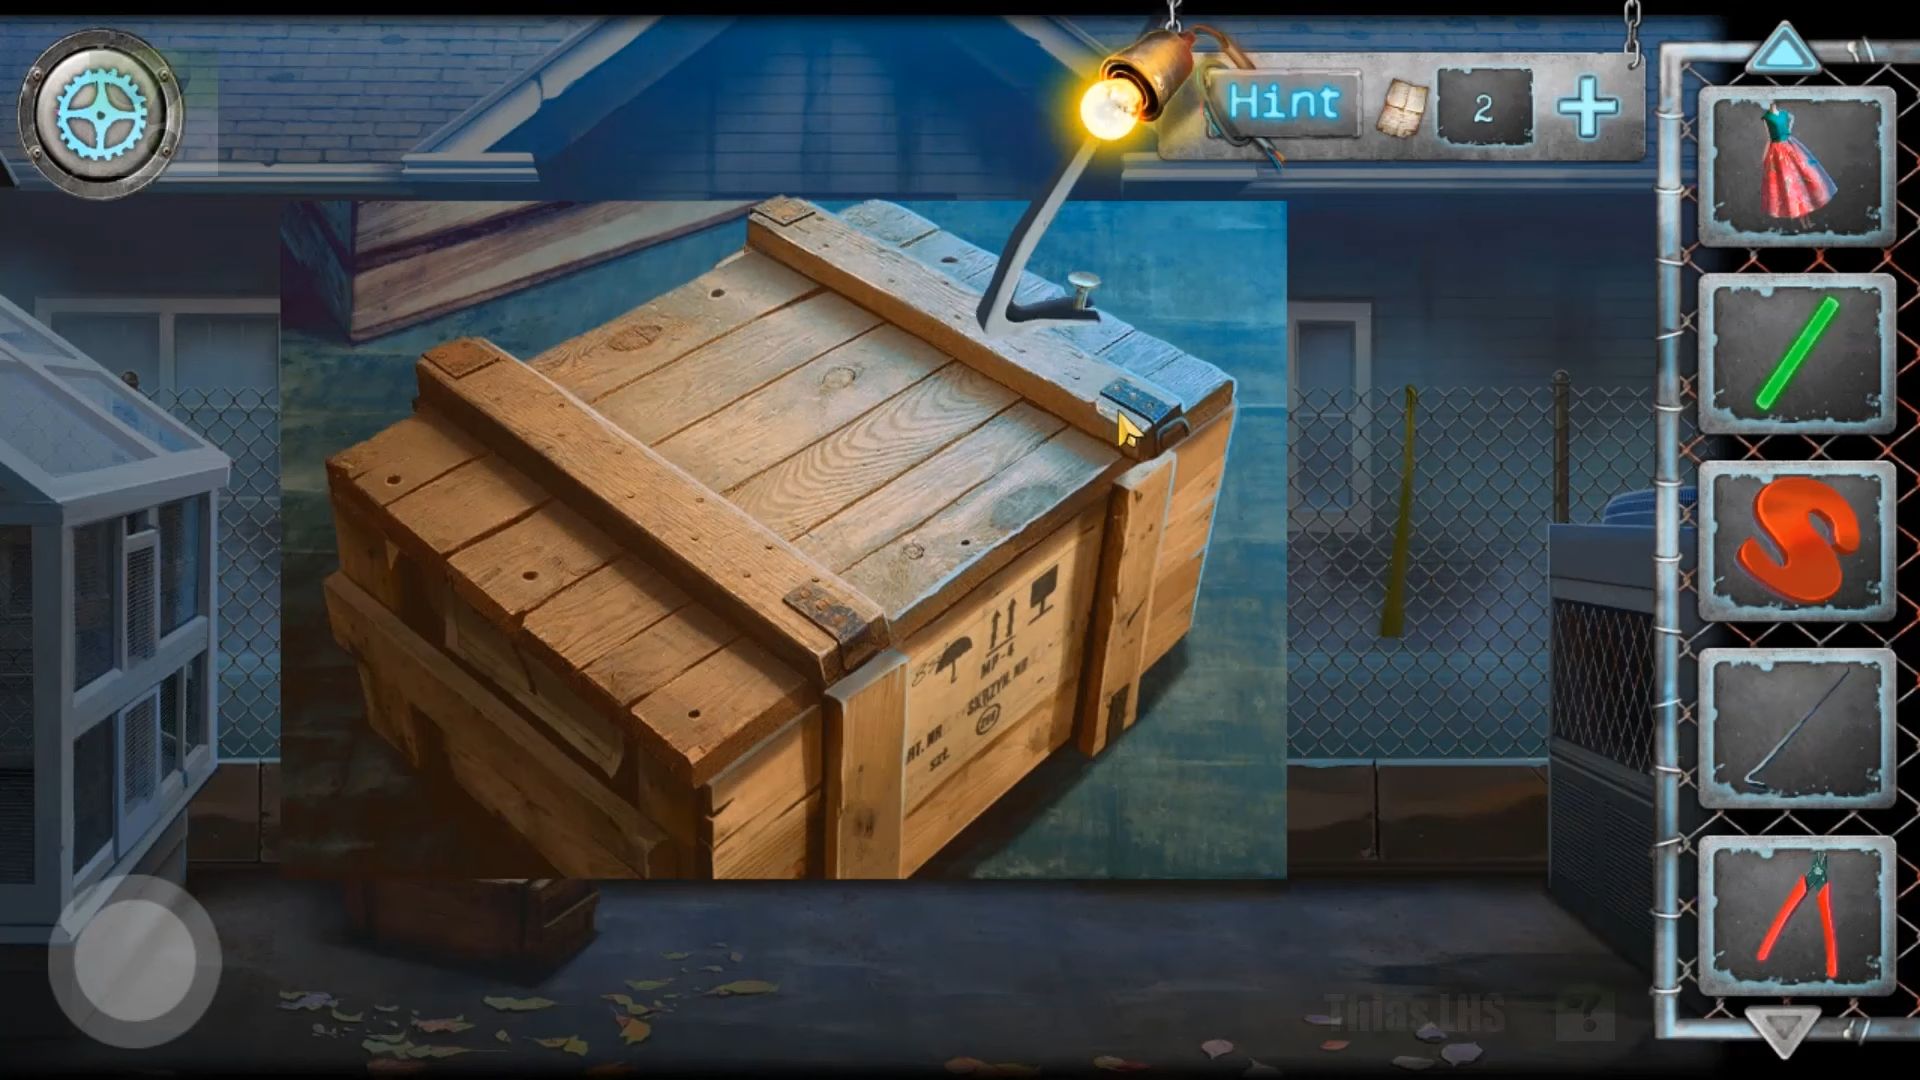
Next, you have to pick up the wire cutters, then use the crowbar to remove the loose nails and open the wooden box to collect a red letter S magnet.
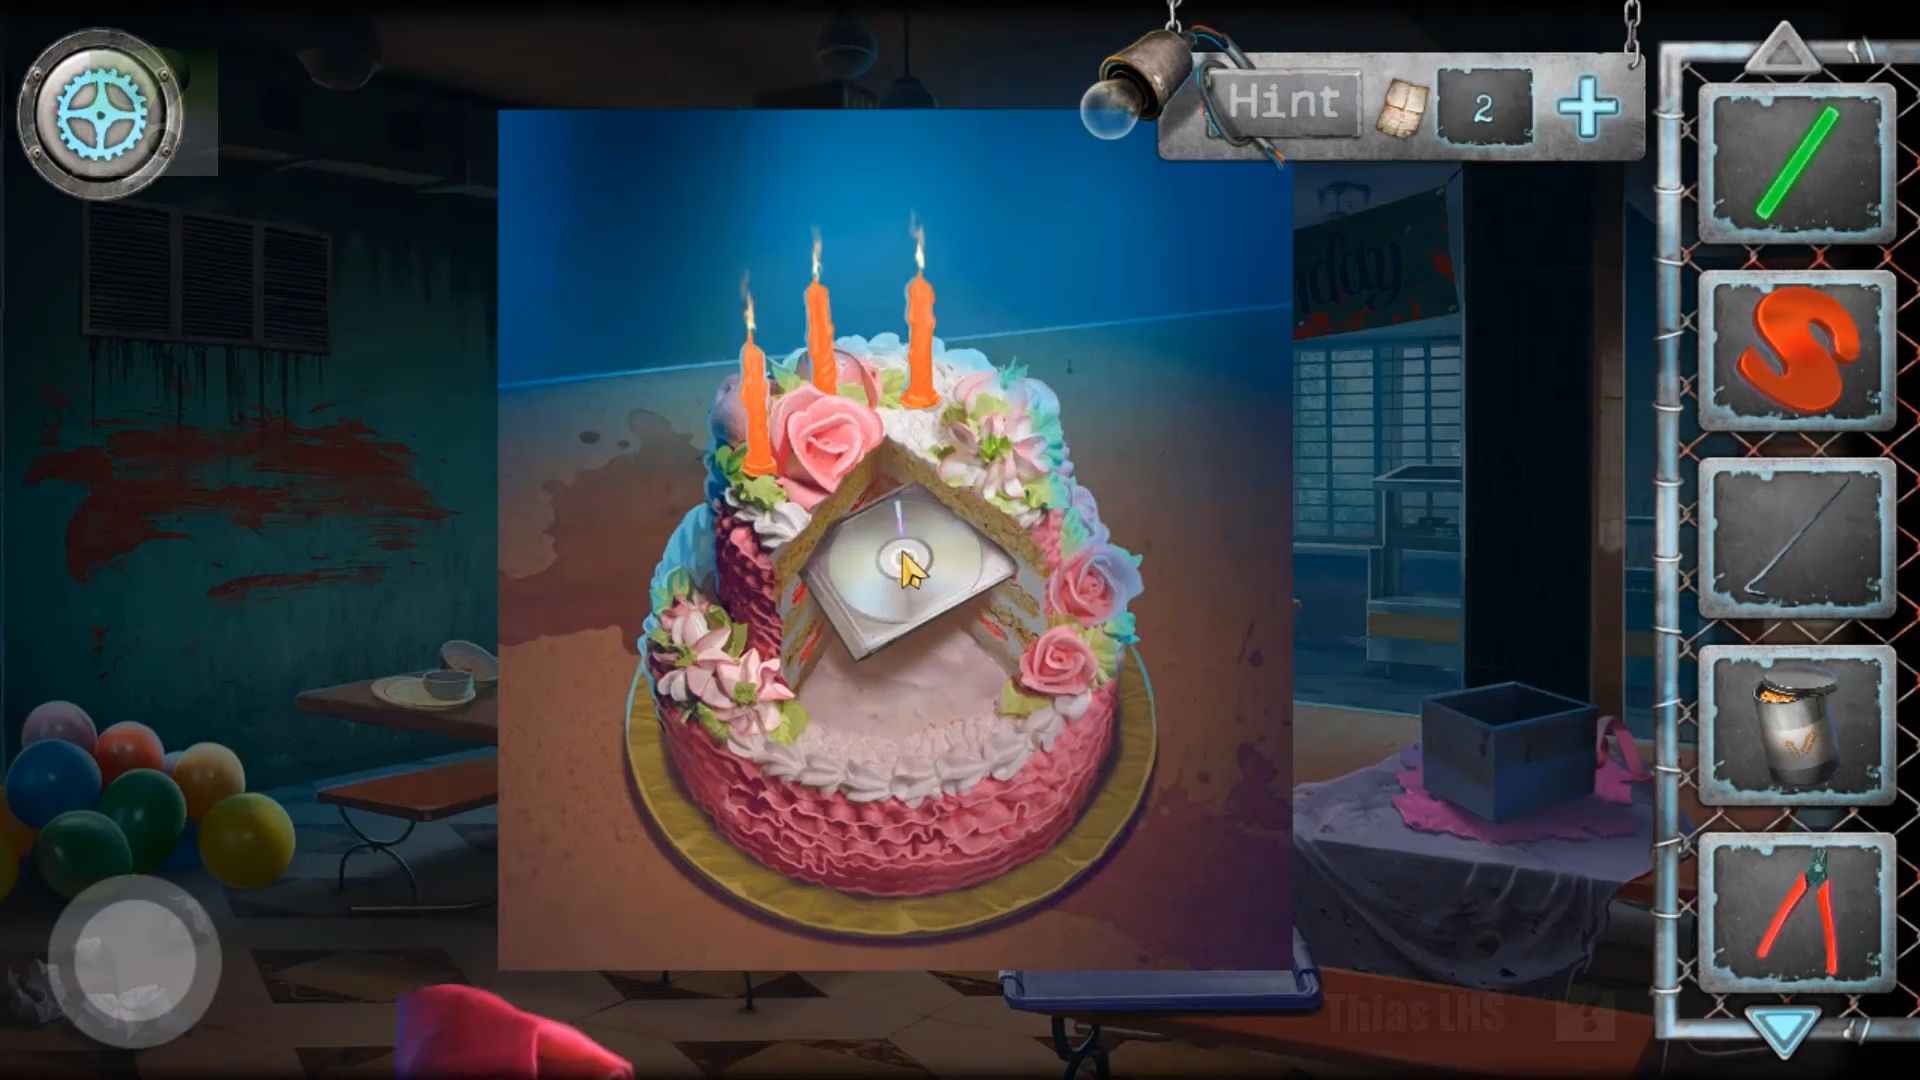
Return to the cafeteria and locate the cake on the table. You have to use the knife to cut it open and then use the bandana to wipe the case you find inside. After that, collect a Disk.
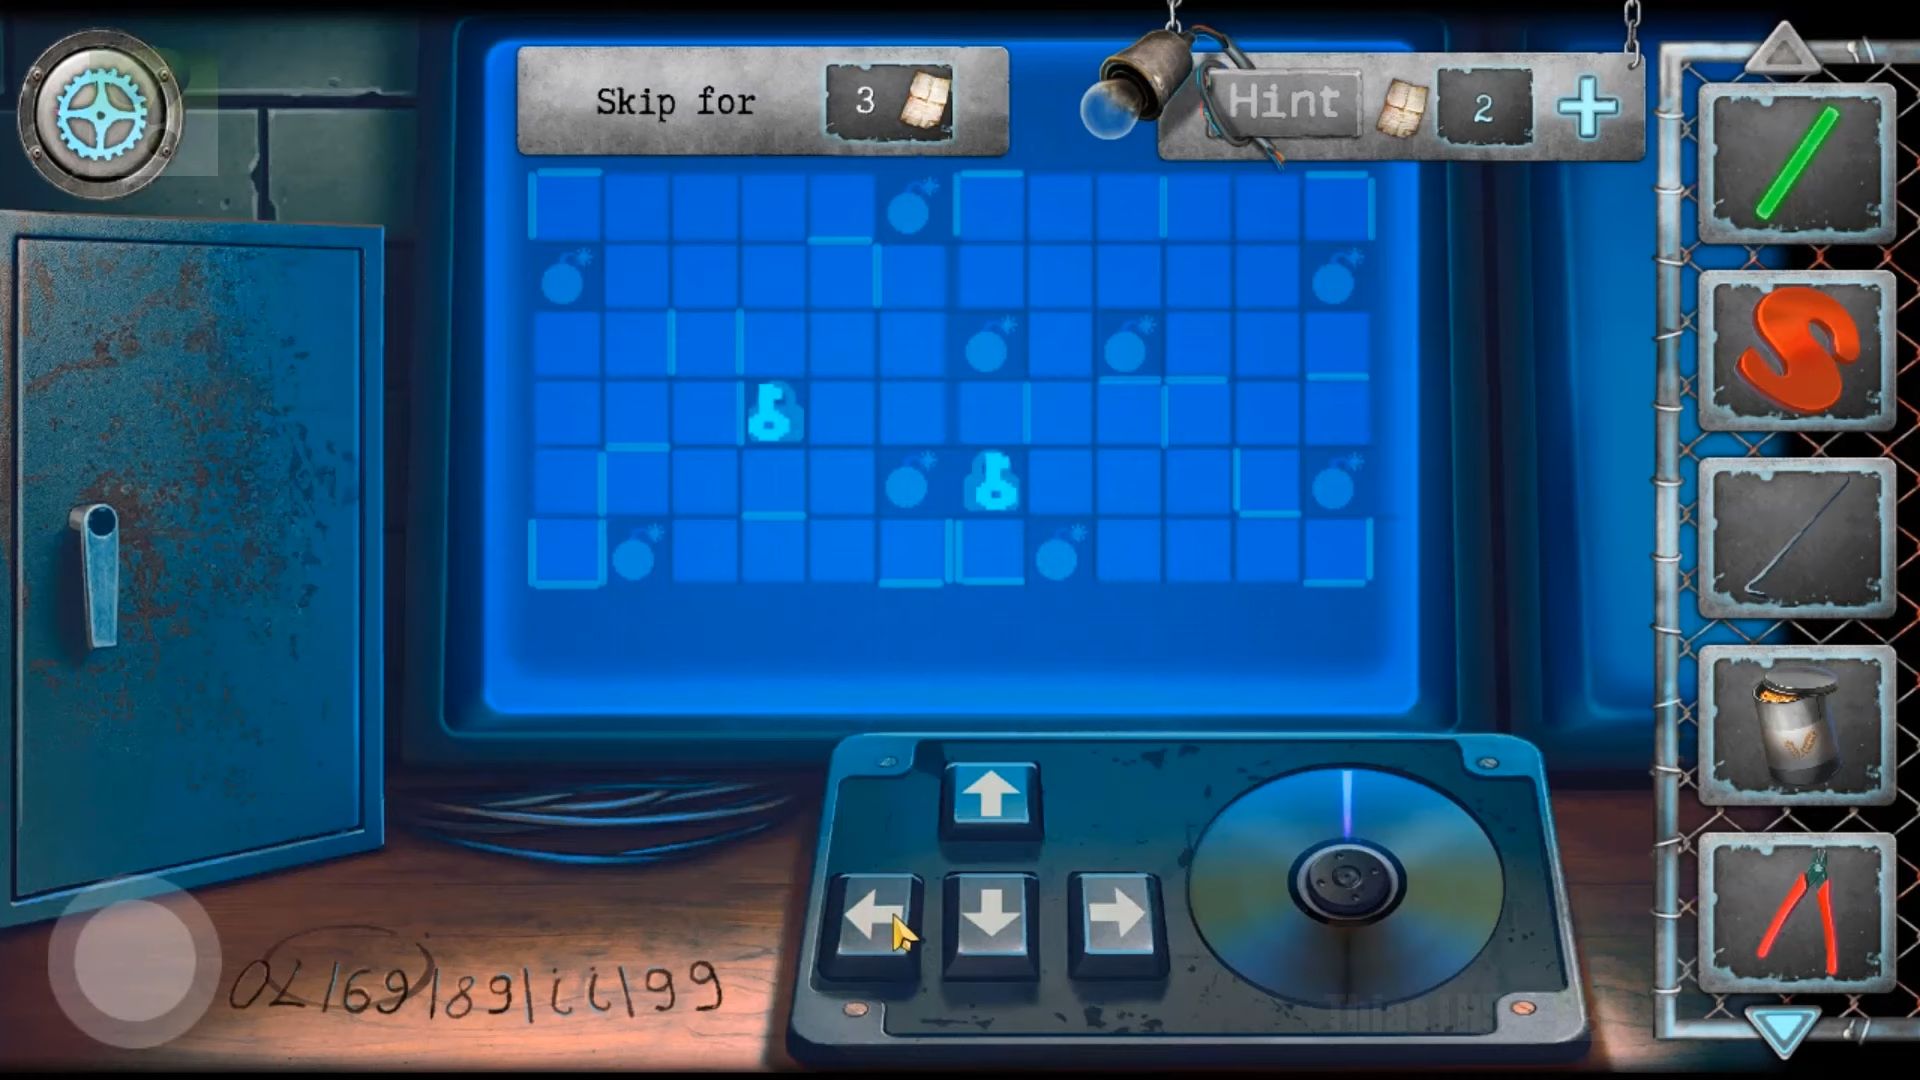
Go back to the security room and insert the disk into the player on the desk. This opens a puzzle on the screen. Solve the puzzle by moving the 2 keys around the board to end up on the 2 locks without hitting a bomb. Once done, collect a key from the box on the left.
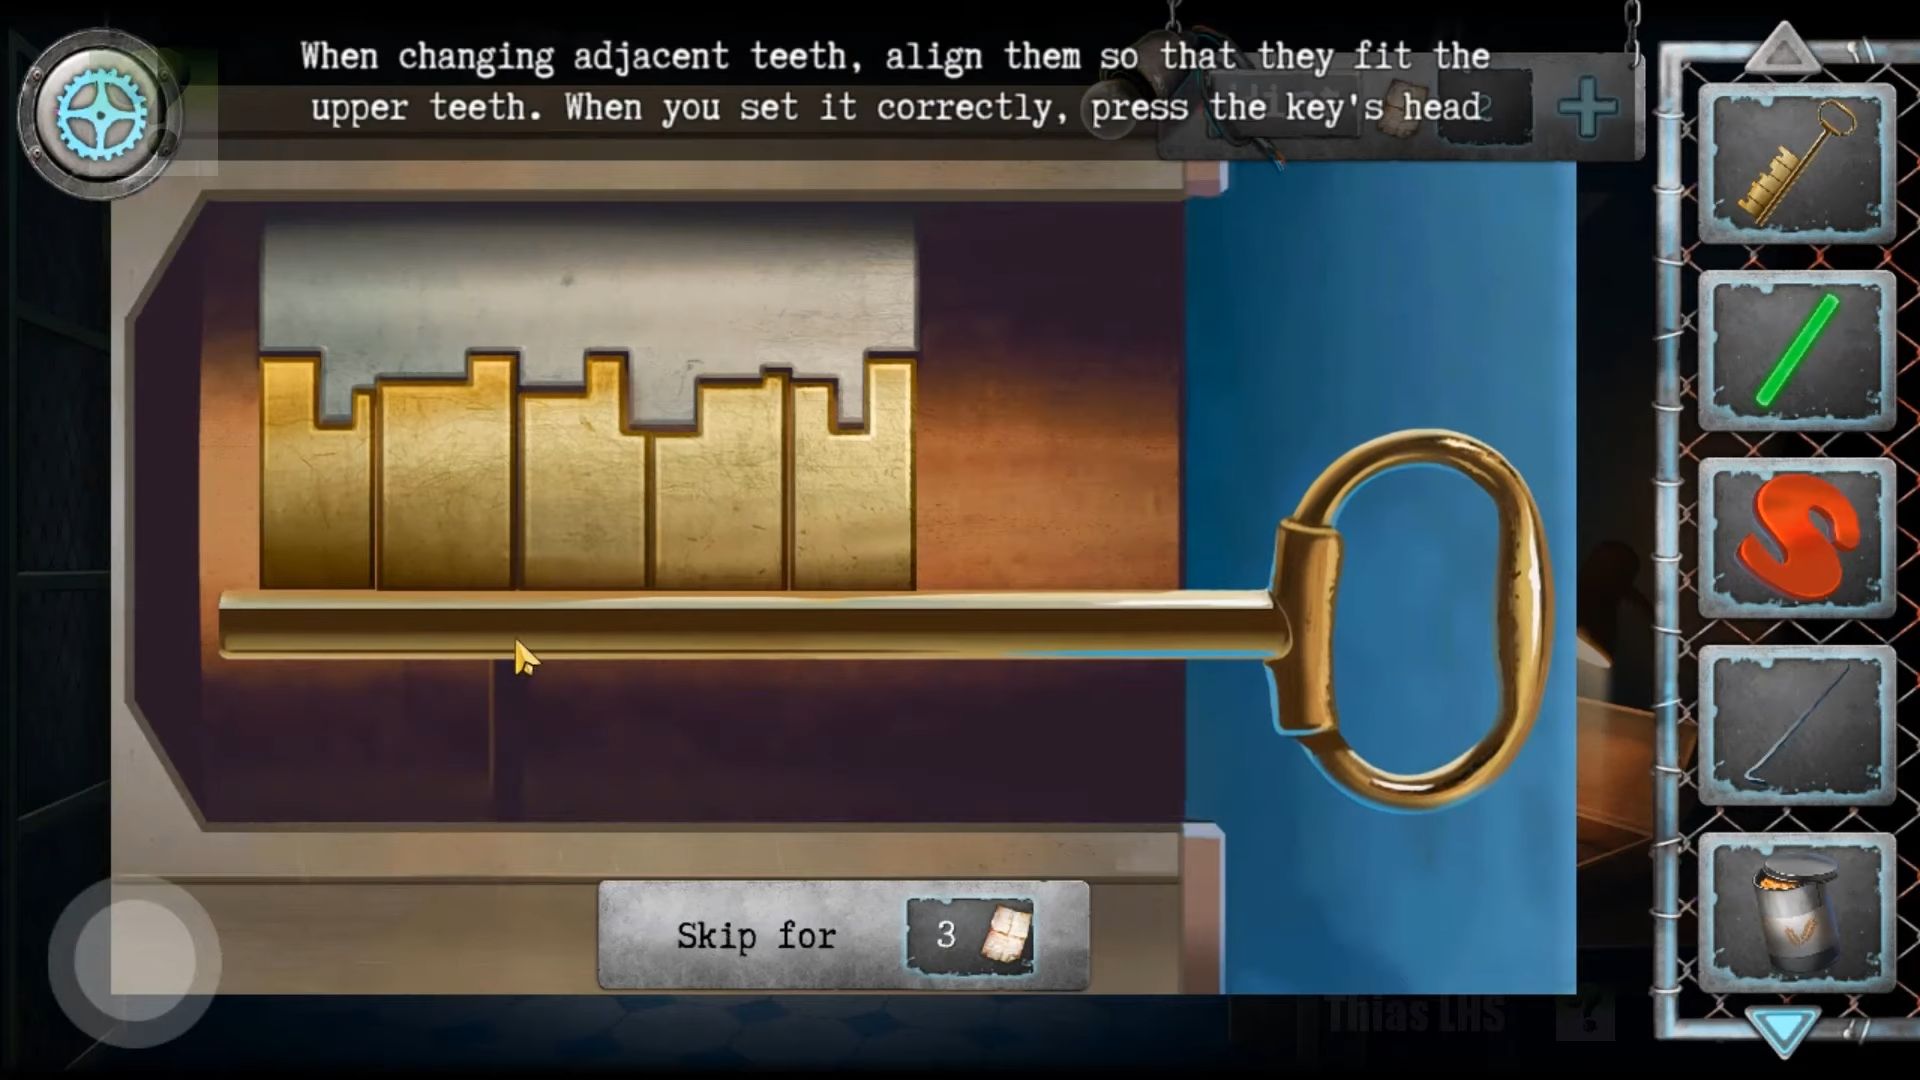
Use the key on the door to the left of the room, and you’ll need to solve a puzzle. Tap pairs of the teeth sections to swap them and match the lock. Once done, you can exit the room onto a rooftop.
Start by collecting the brick from the ground and check the wooden crate on the left. Next, look at the dovecot on the left of the roof. Use the crowbar to remove all the nails and open it. Collect a garden shovel. Now, check the grating on the right of the roof and use the wire cutters to remove all the clips and open the vent.
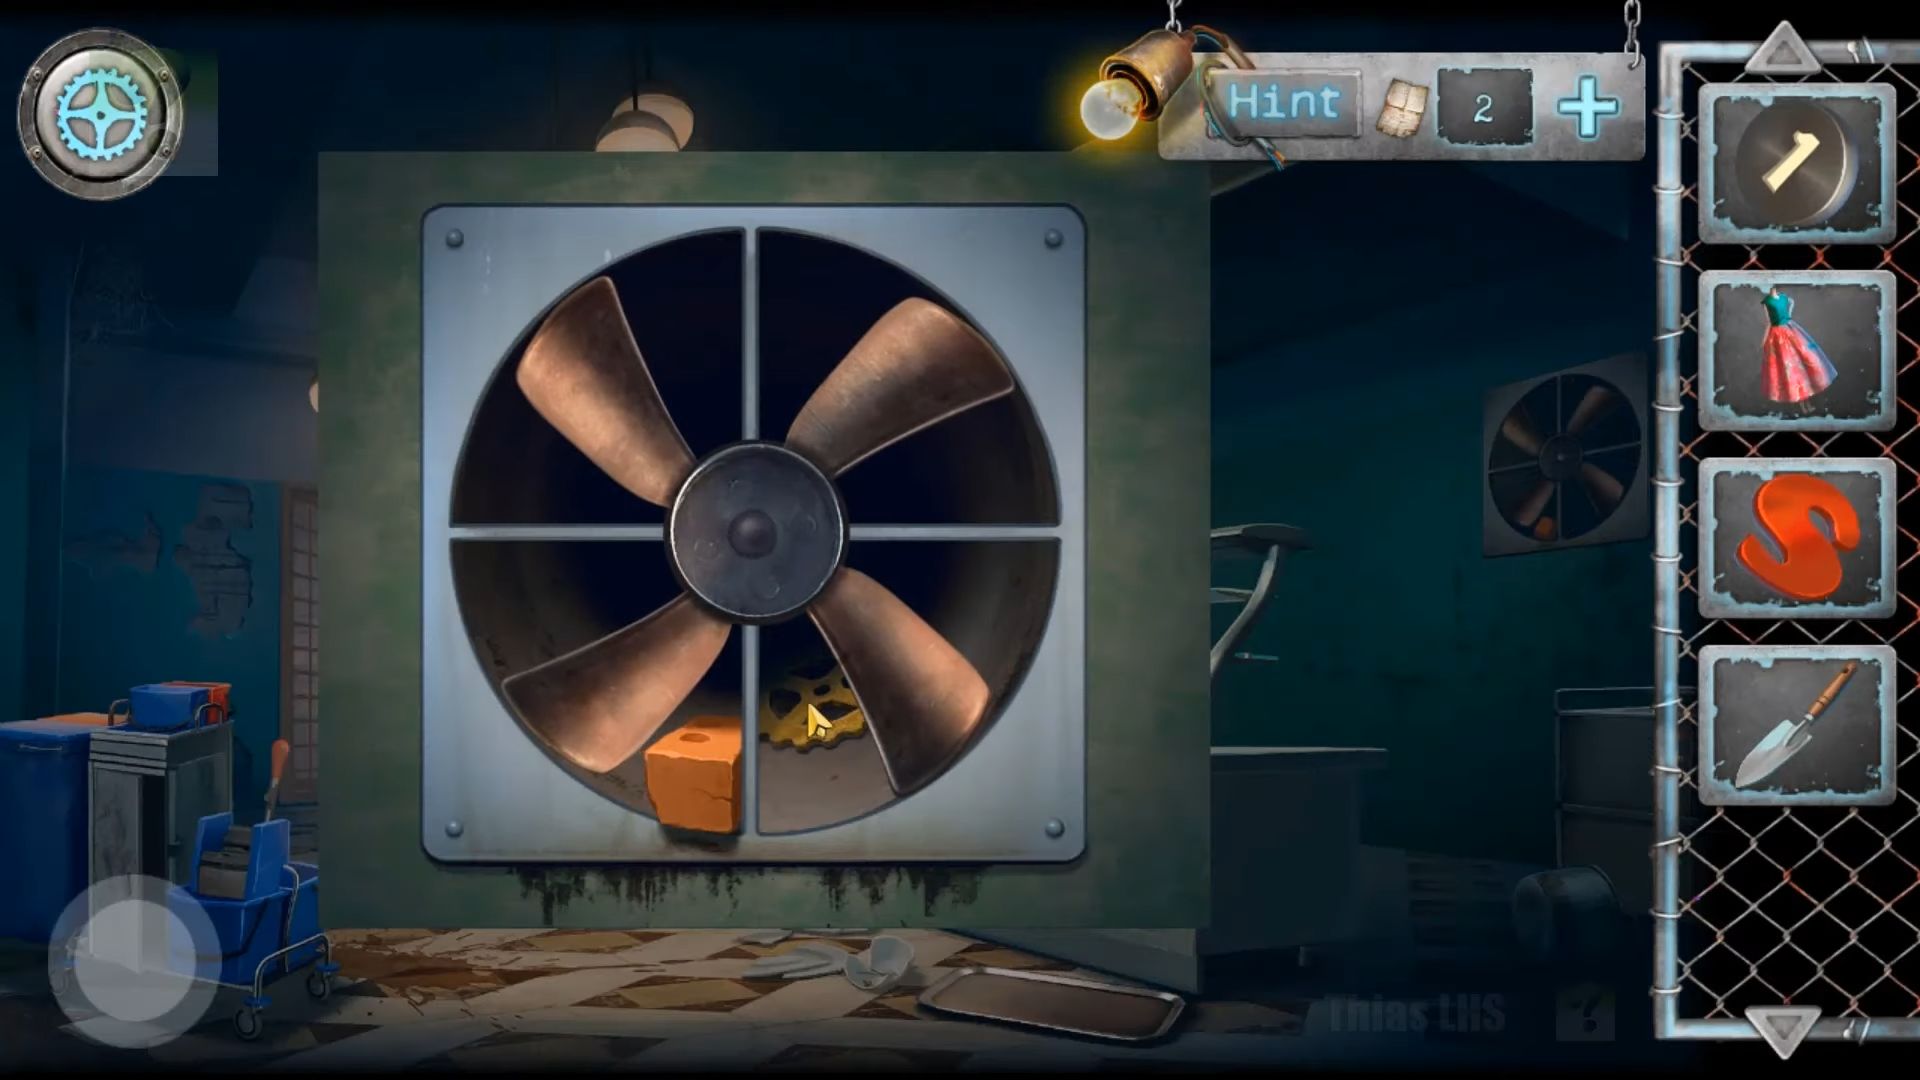
Open the door and then use the can of grain to feed the birds, allowing you to pick up the headless mom doll. Go back into the cafeteria, view the counter, and notice a round air vent on the wall. Use the brick on the fan to stop it, and then collect a cogwheel.
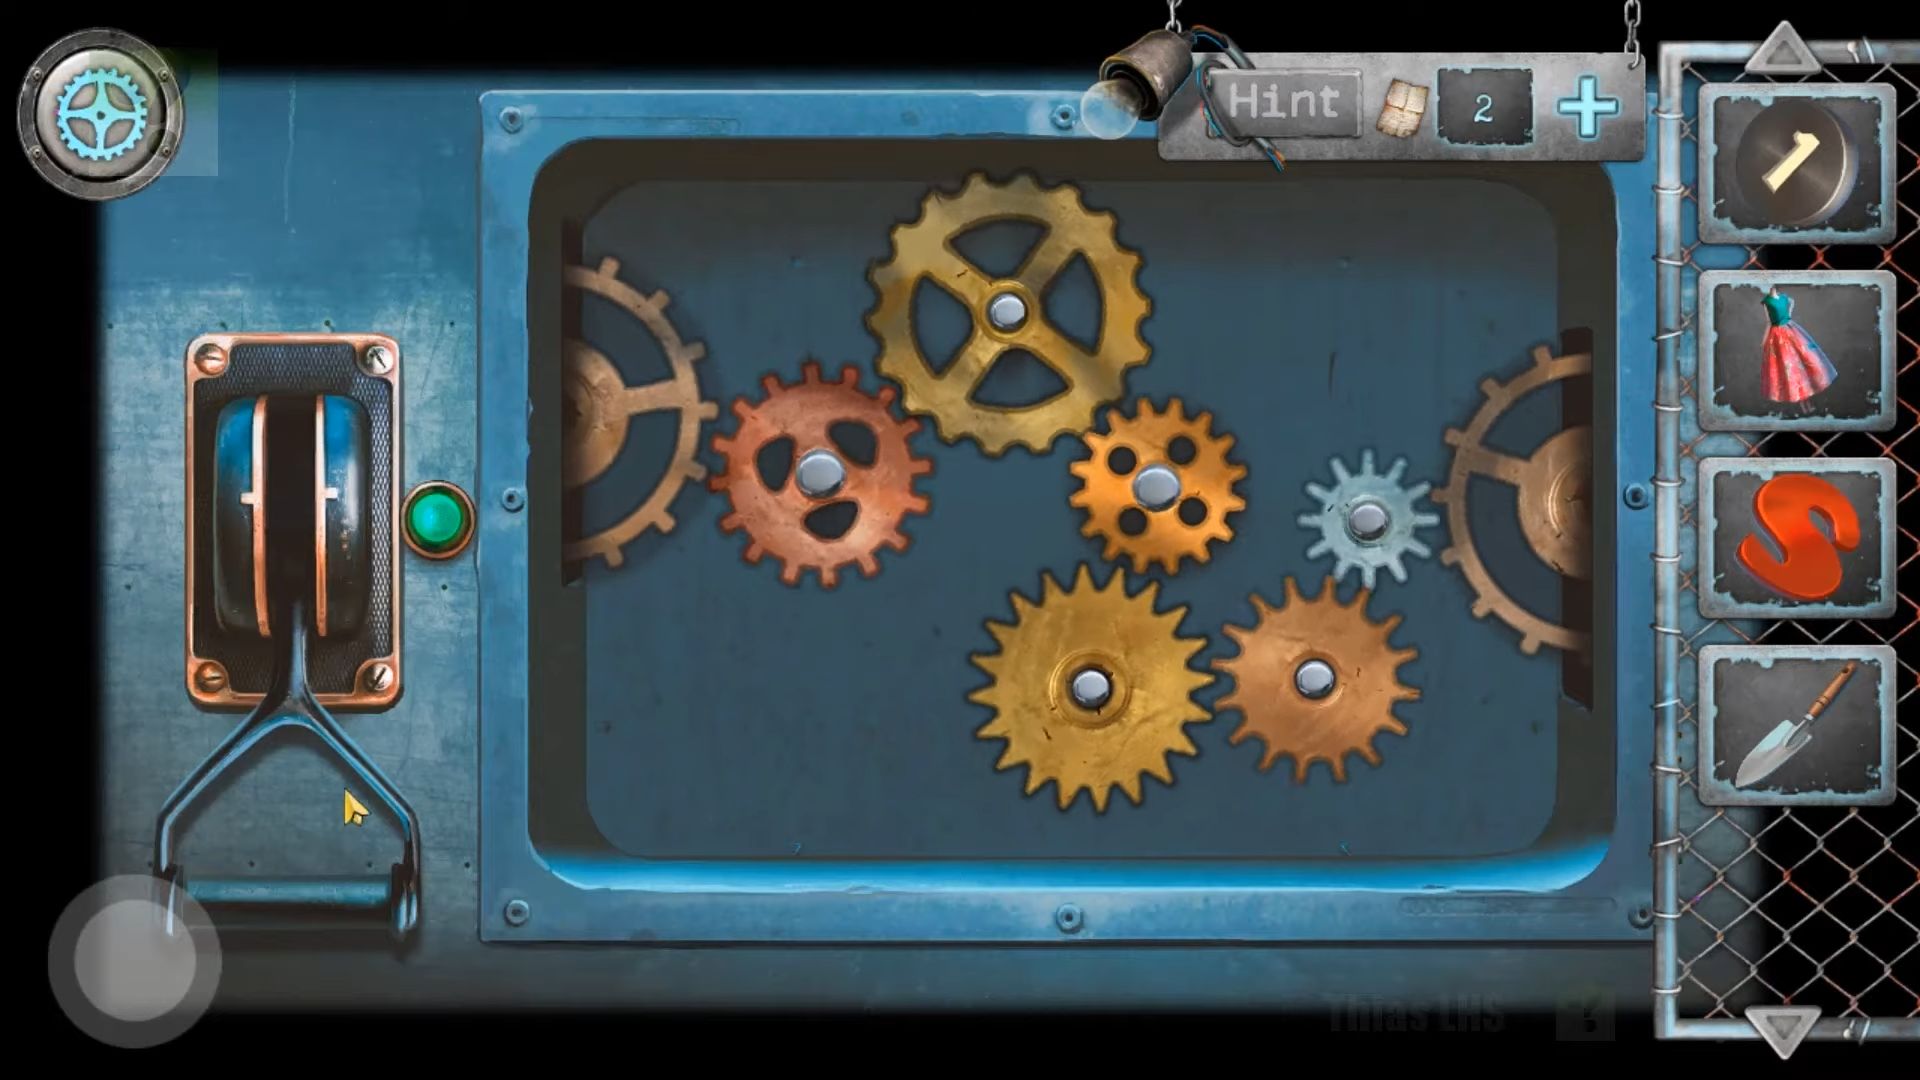
Return to the rooftop and check the box just to the right of the central opening. This has a cog puzzle. Add the cogwheel to it, then rearrange the cogs so that they all fit and turn. Once done, flip the handle on the left, and the bridge to escape will extend. Now tap the doors on the far side to cross over and make your escape. Congratulations on surviving the first chapter of Scary Horror 2.
Chapter 2 Horror House
Here’s the complete guide for Chapter 2 – Horror House of Scary Horror 2: Escape Games, the second scary escape room game from Escape Adventure Games.
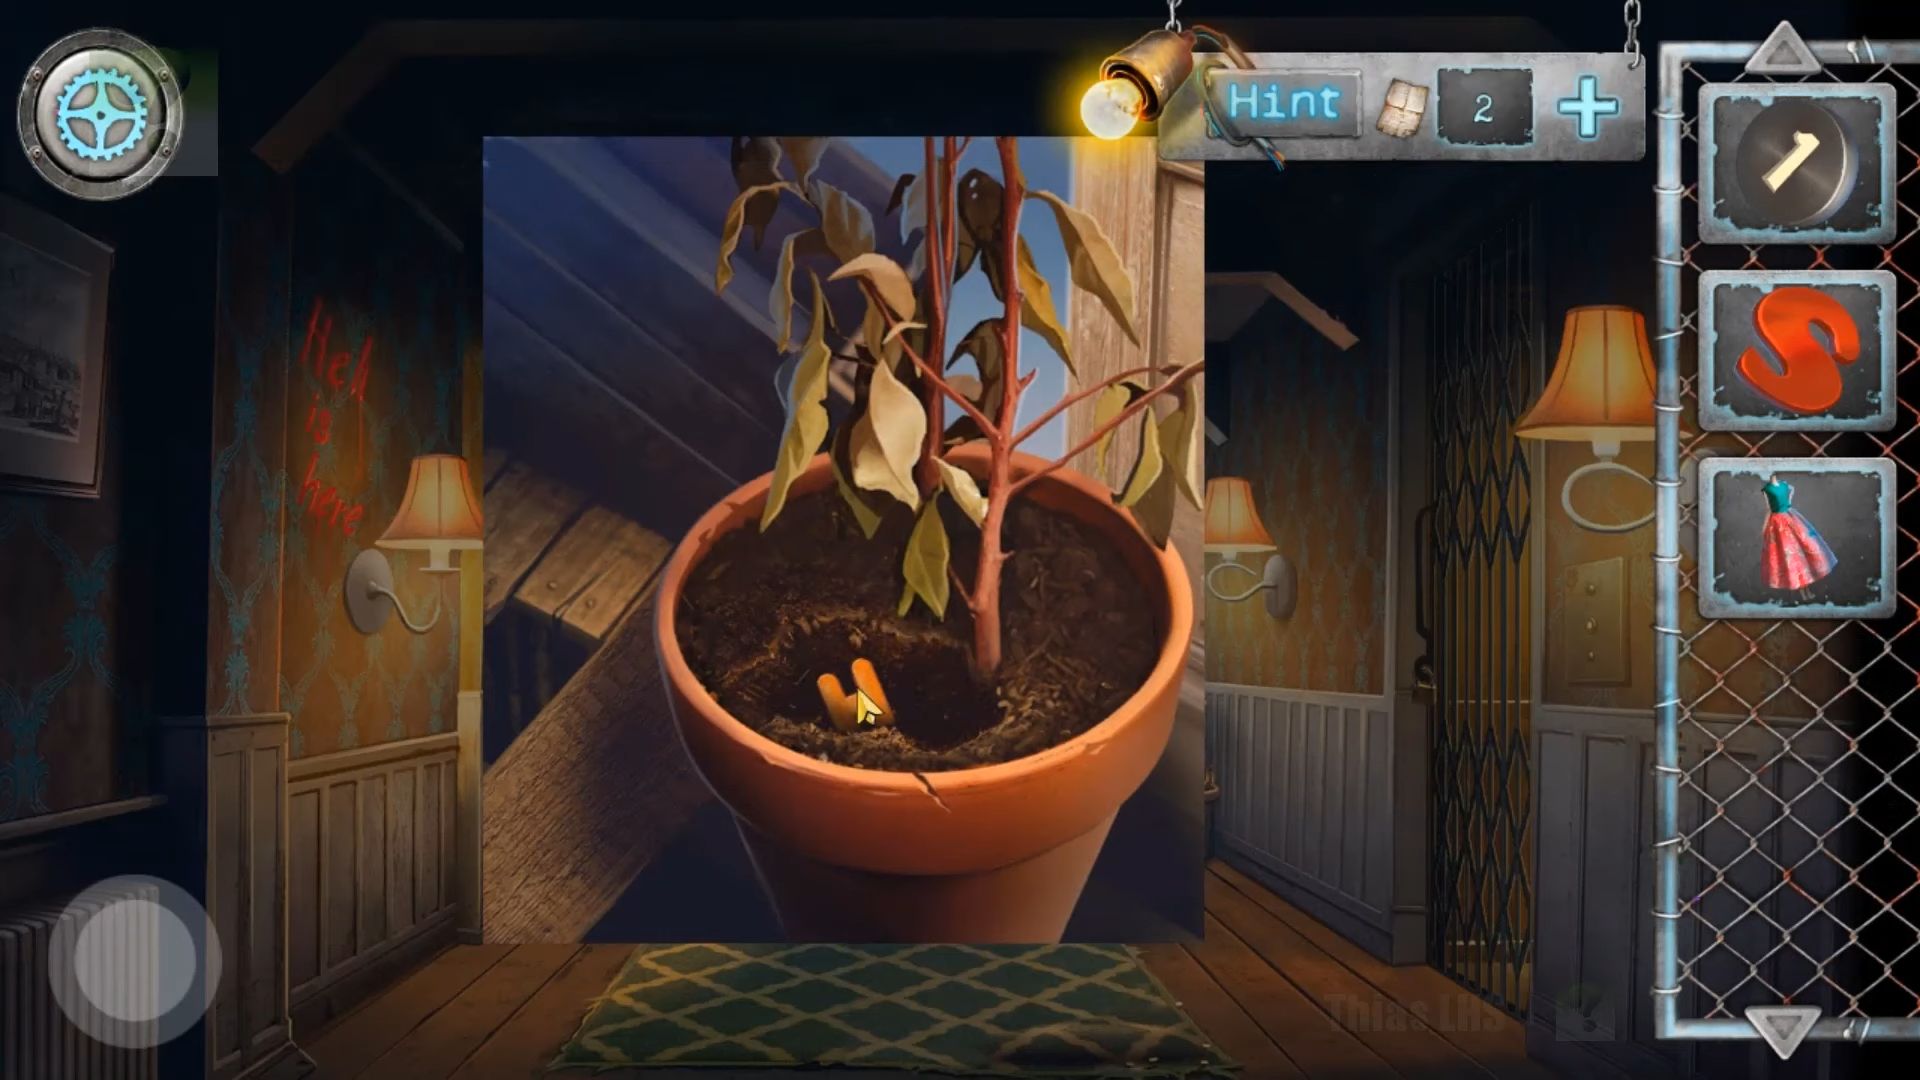
Starting in a hallway with some items in your inventory, tap on the flower pot on the right side. Then use the garden shovel to dig in it until you unearth and collect a Letter H.
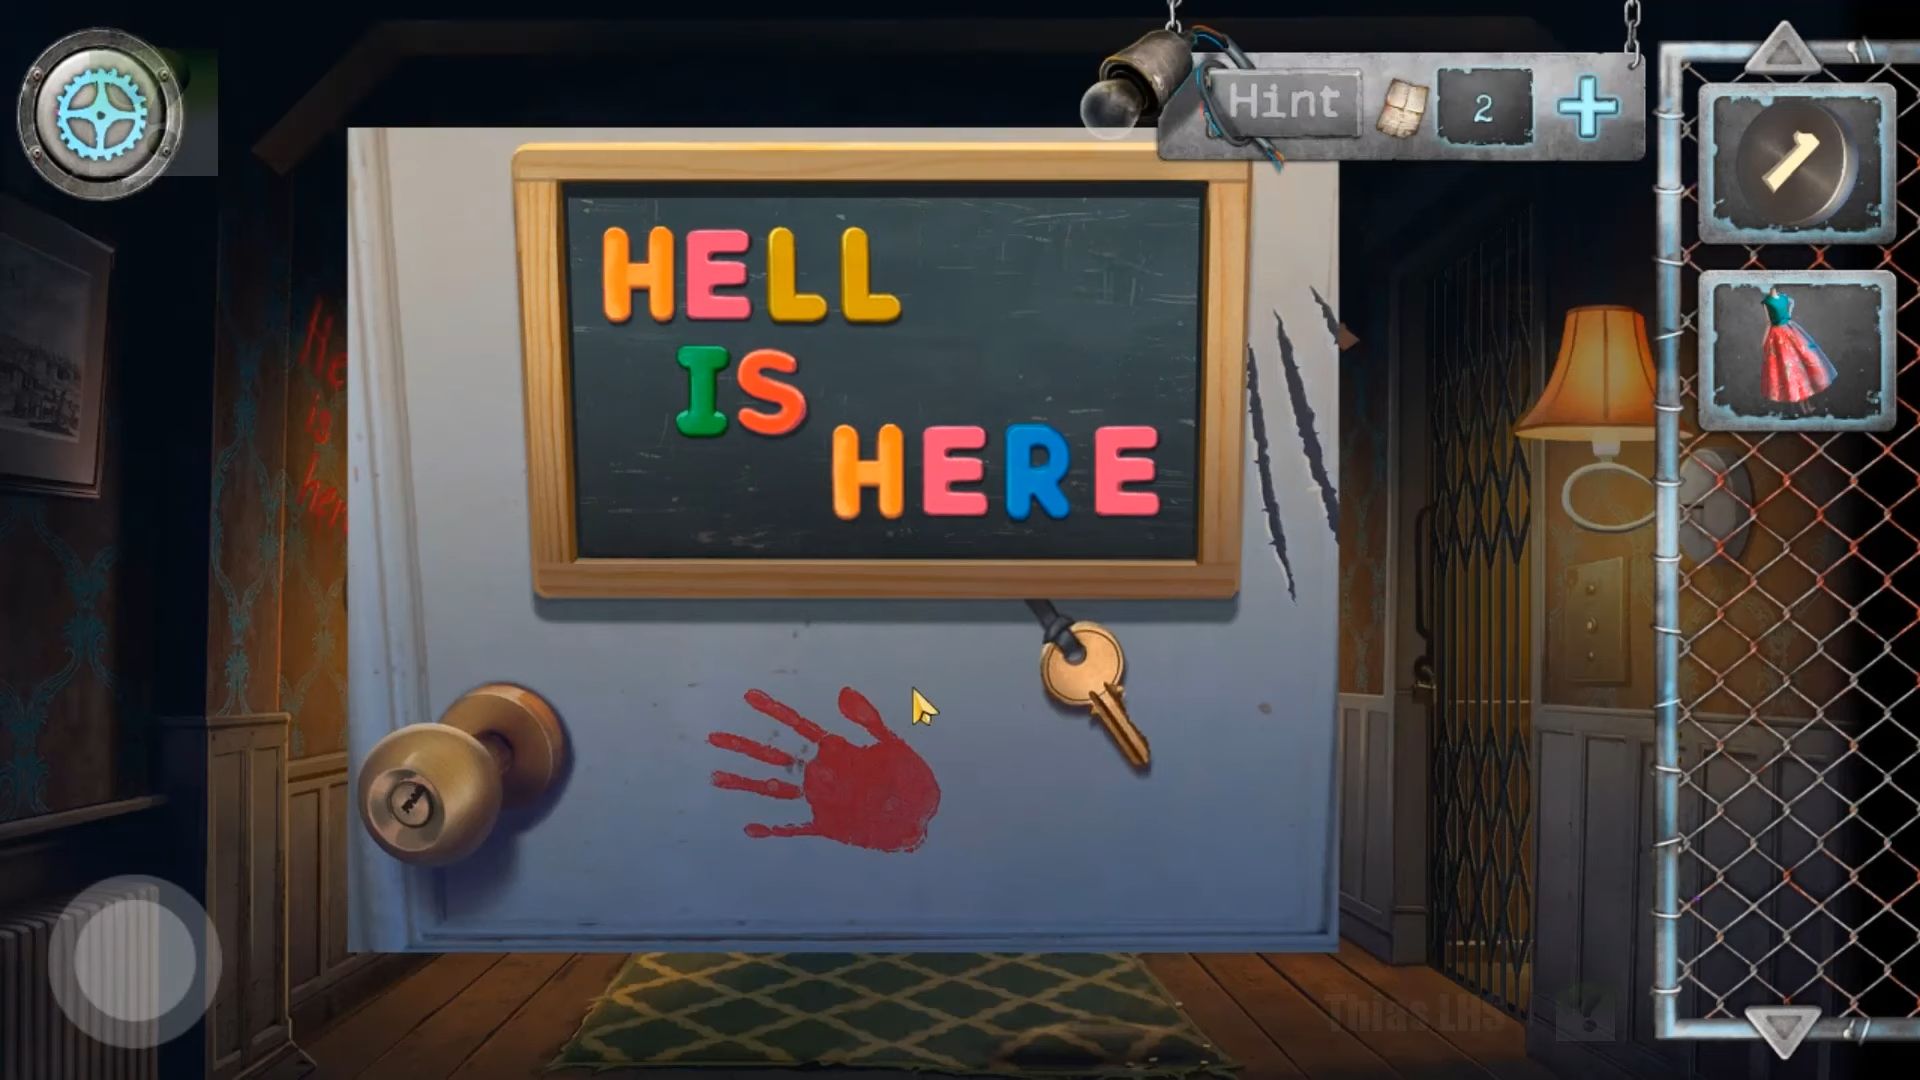
Now, tap to see the door on the left of the corridor with a board of letters. Add the 2 letters to it, and then rearrange them to form the correct phrase. There’s a clue written on the left wall of the corridor to help. Once completed, you can collect a key.
Use the key on the doorknob to unlock it and enter a child’s bedroom. After that, collect a round detail ring from the toy truck that moves into view. Then, tap to view the posters on the left wall. Remove the posters by tapping until you find a clue – a set of 5 shapes.
Now, tap on the cupboard just to the right of the posters to see a lock with a 5-shape combination. Use the code found above.

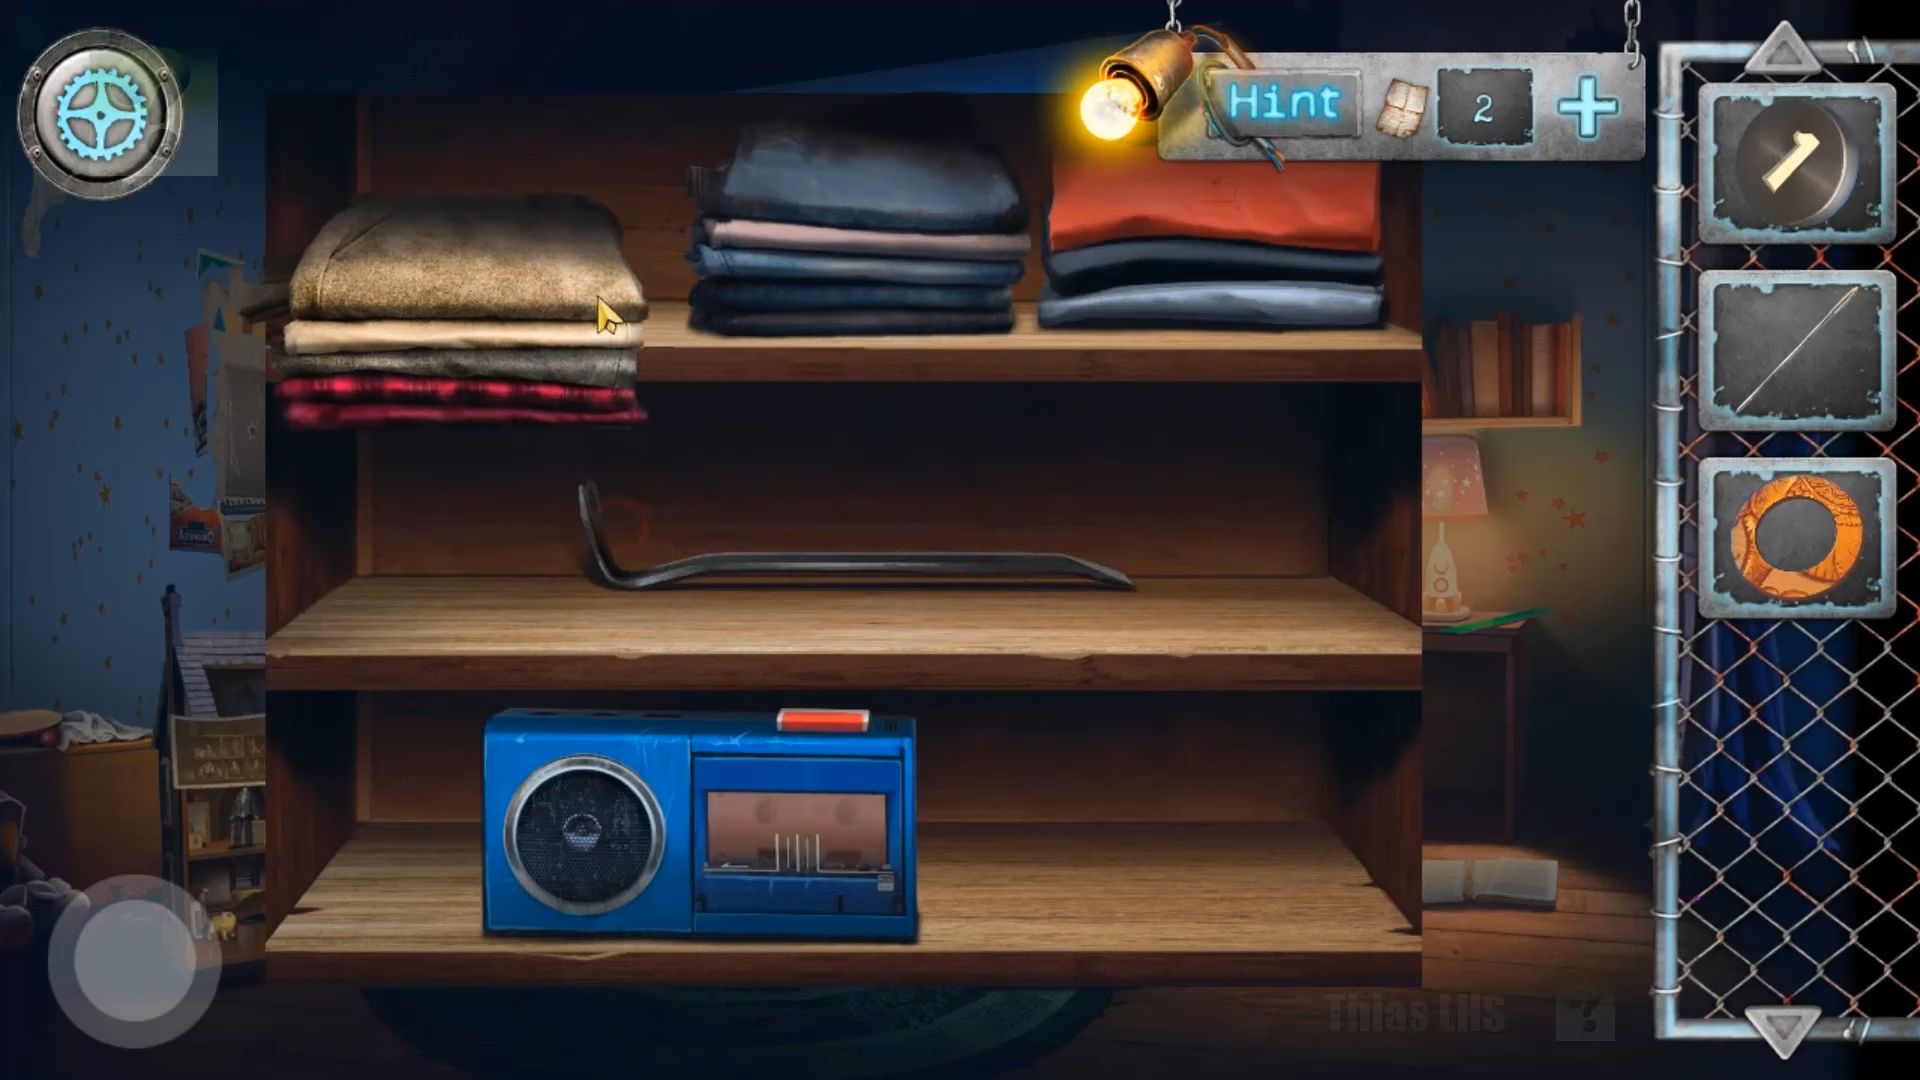
Take note of the cassette player, then move the 3 piles of clothes up to the top shelf to reveal and collect the crowbar.
Tap under the bed and see a moving toy. Although you can’t interact with it yet, collect the thread on the left. You have to combine the sewing needle and sewing thread in your inventory. Now, tap on the doll on the floor in the lower left and assemble the doll following the instructions on the paper.
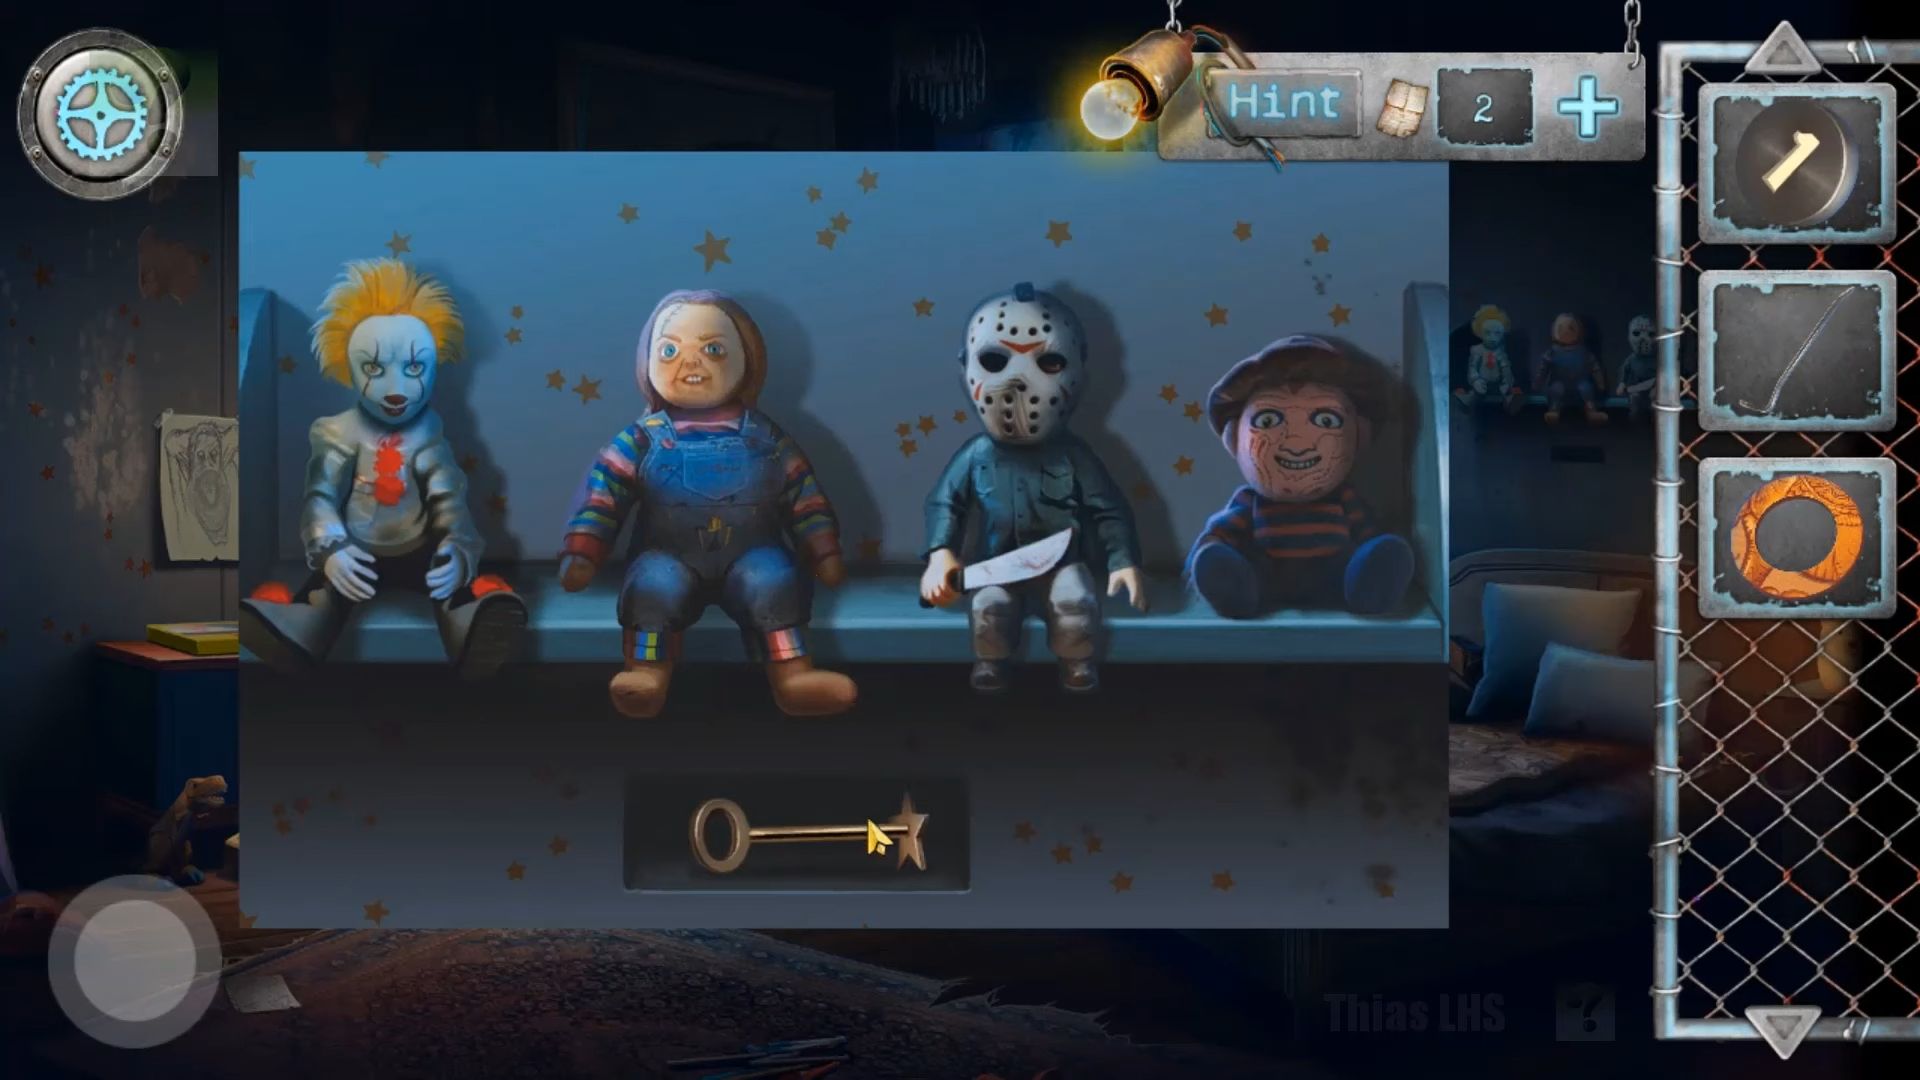
First, add white stuffing to the hole in the chest and use the needle and thread to sew it all together. Next, add the clothes to the doll, and now you can grab it. View the shelf above the bed, add the repaired doll to it, and pick up a Star key.
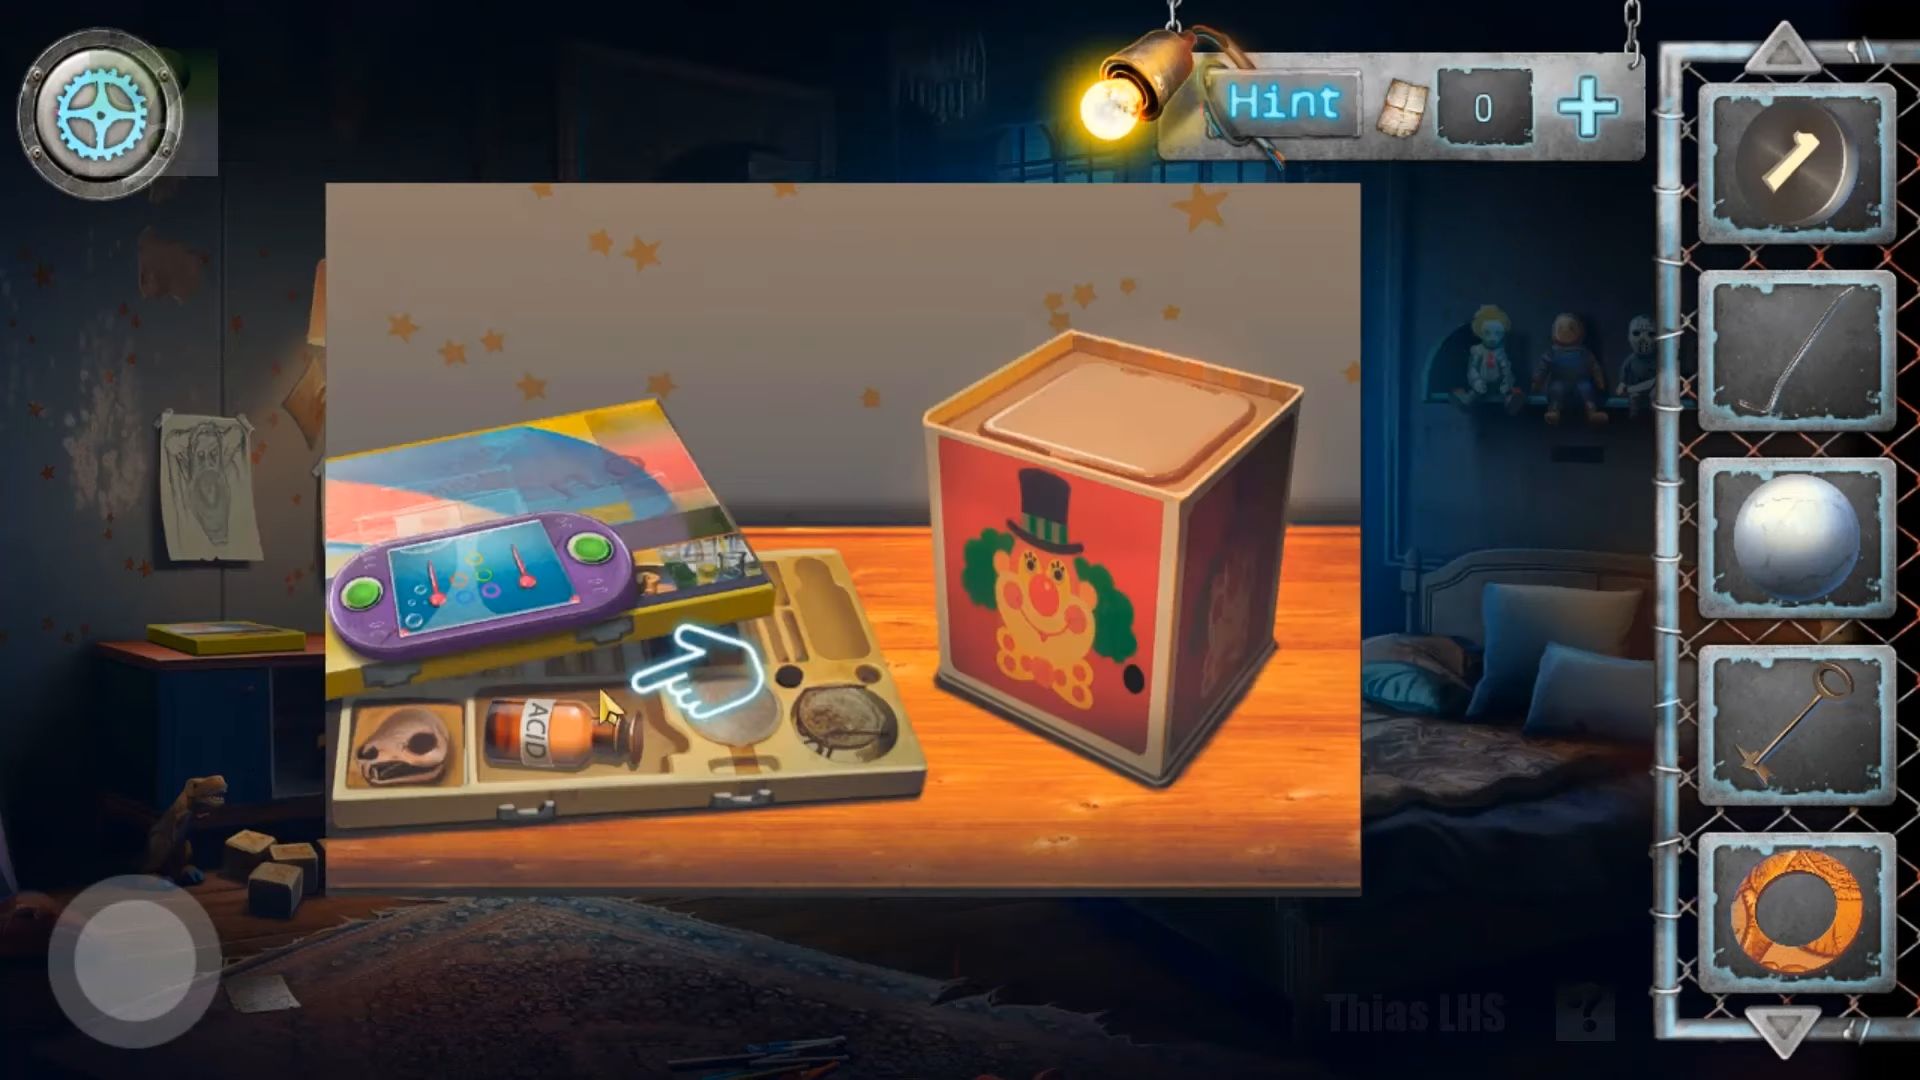
Next, tap the colorful table on the left and then on the purple game to play it. It’s a water ring catch game. Press and hold both buttons, then release them to drop the rings on the spikes. Once done, tap again to open the box under the game and collect a bottle of acid.
Switch back to the other side of the room and check the wall where the posters were. There’s a panel with a star-shaped slot and you have to use the key to open it to collect some glue.
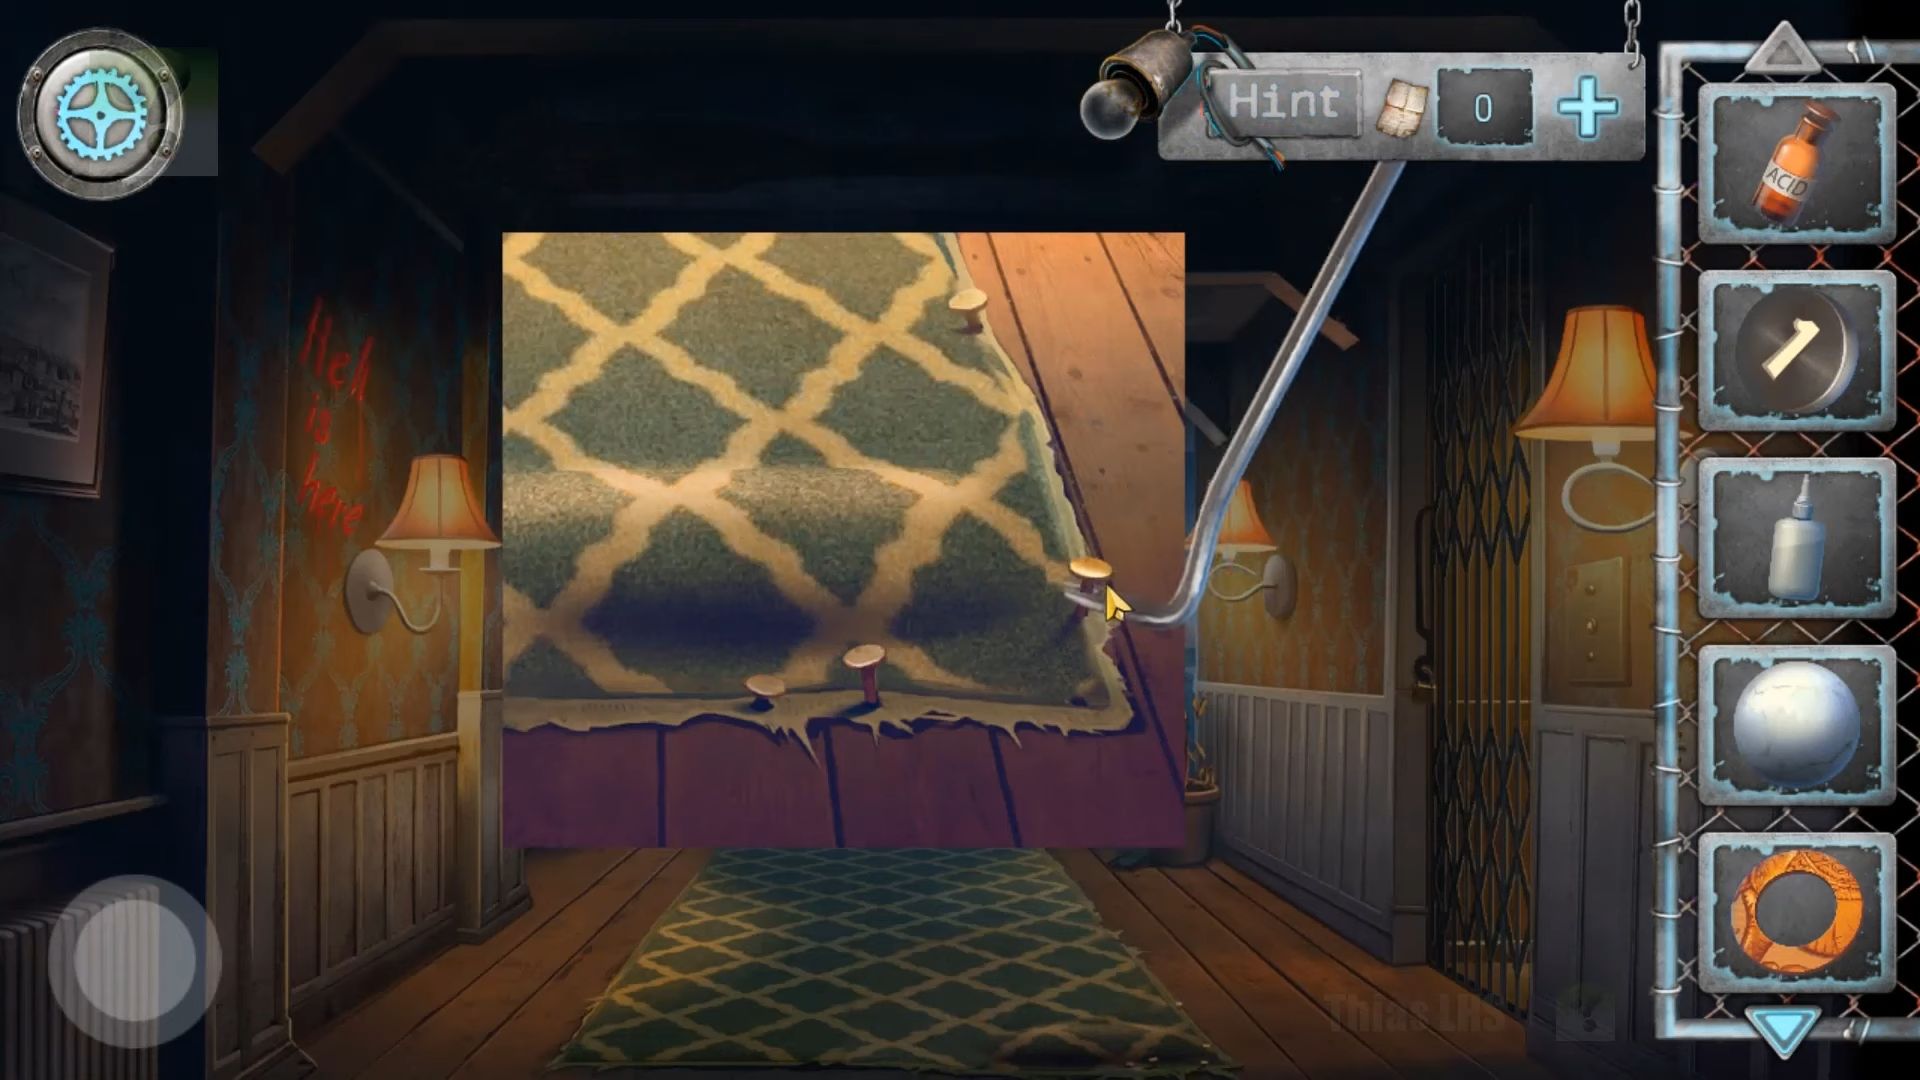
Exit back to the hallway and tap the bottom right corner of the carpet to see if it is nailed down. First, collect the needle, then use the crowbar to remove the nails and pick up the weight.
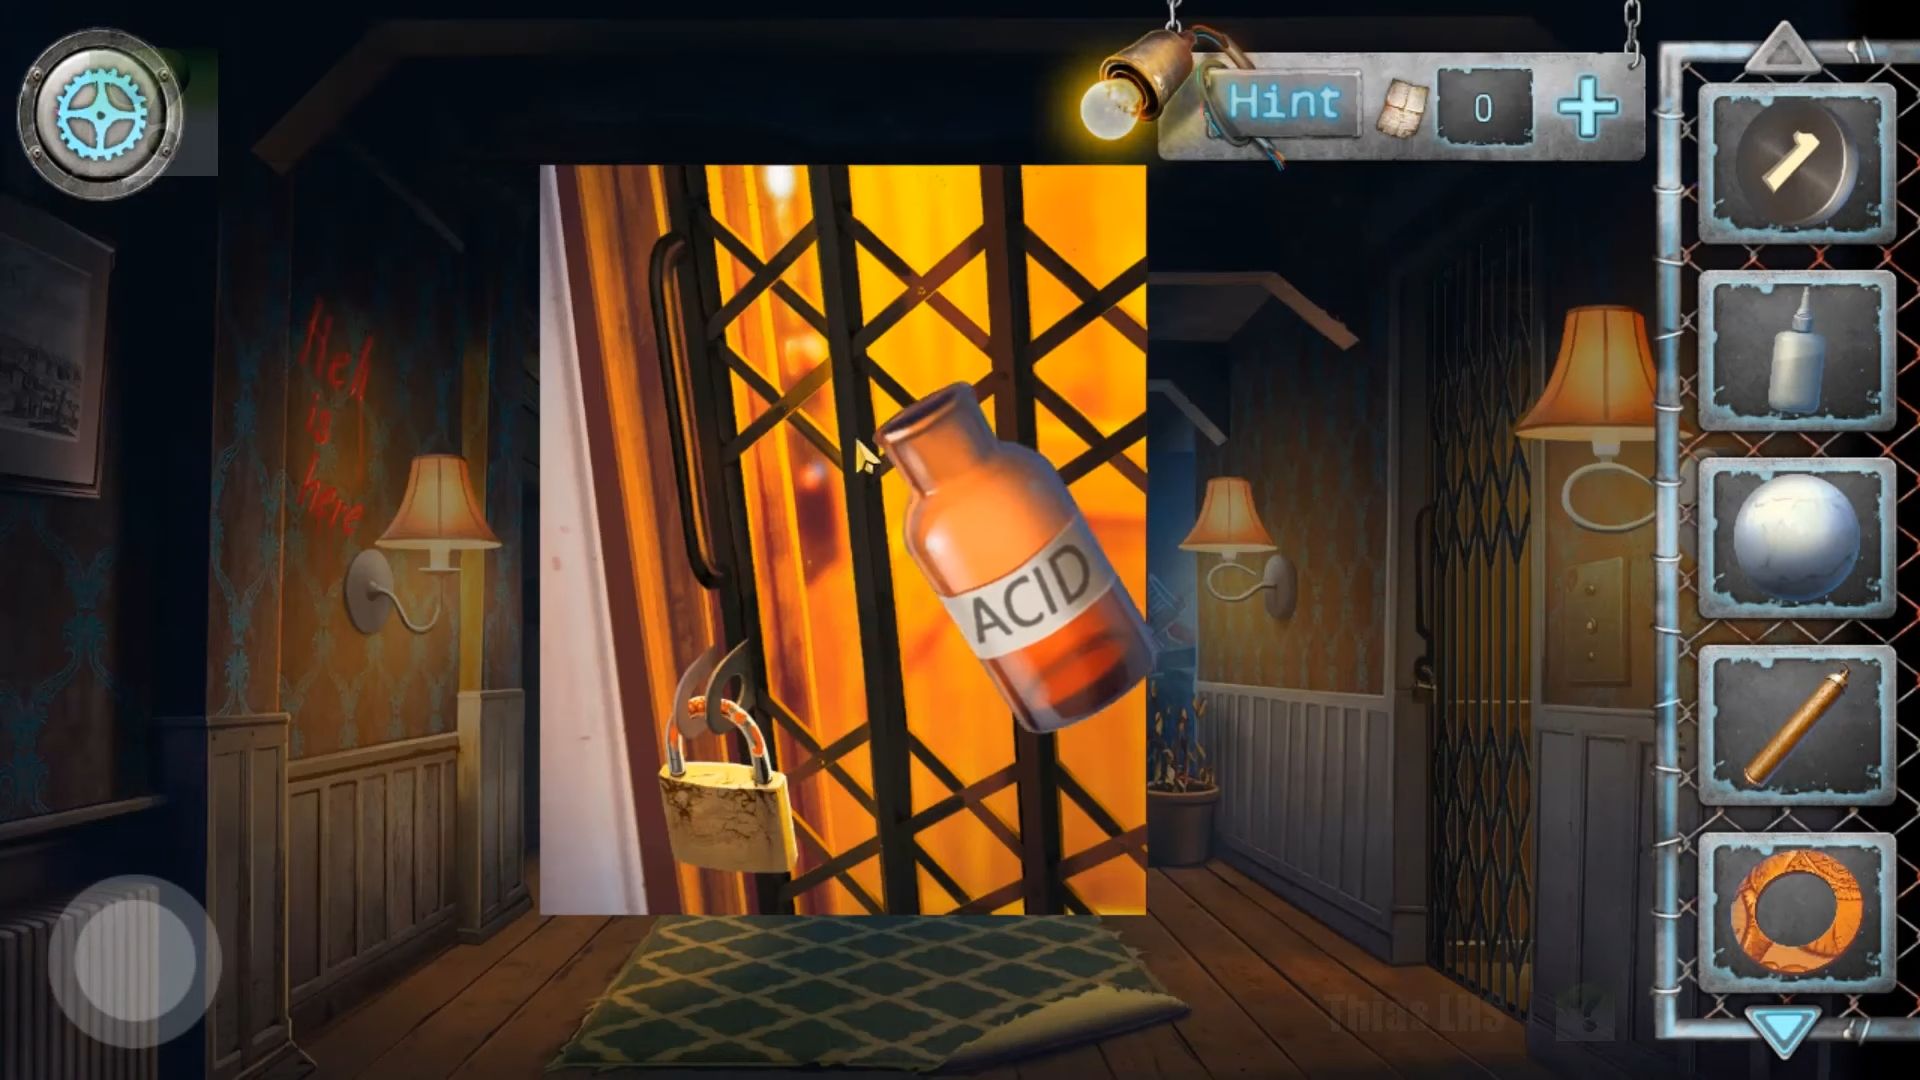
Navigate back to the hallway and look at the locked elevator door on the right. After that, use the acid on the padlock to open it, and then you can enter the elevator.
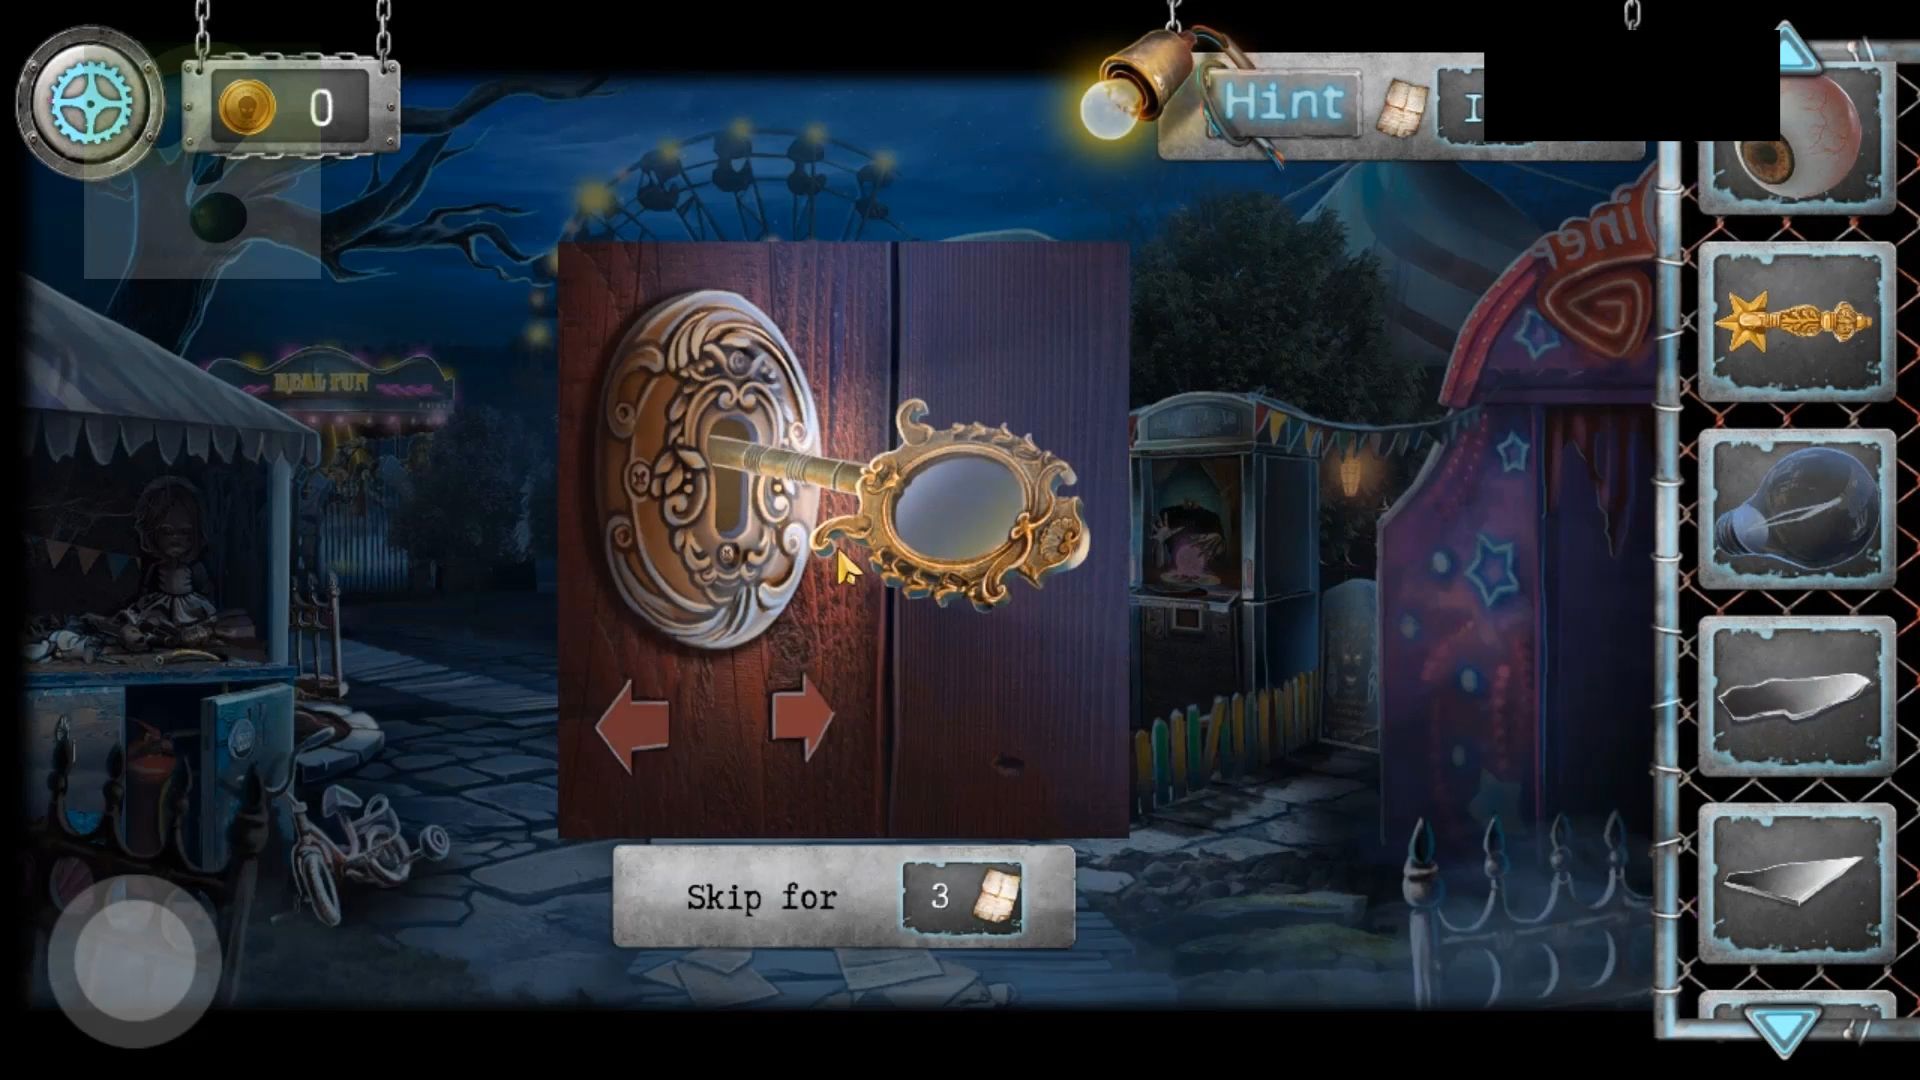
Add the round detail that you have to start the puzzle and rotate the rings to make a picture of an elephant. You can then pick up a handle from the box. Take note of the clue on the wall: “He will come at 03:55.” Collect the axe head from the floor, and then view the round puzzle on the wall.

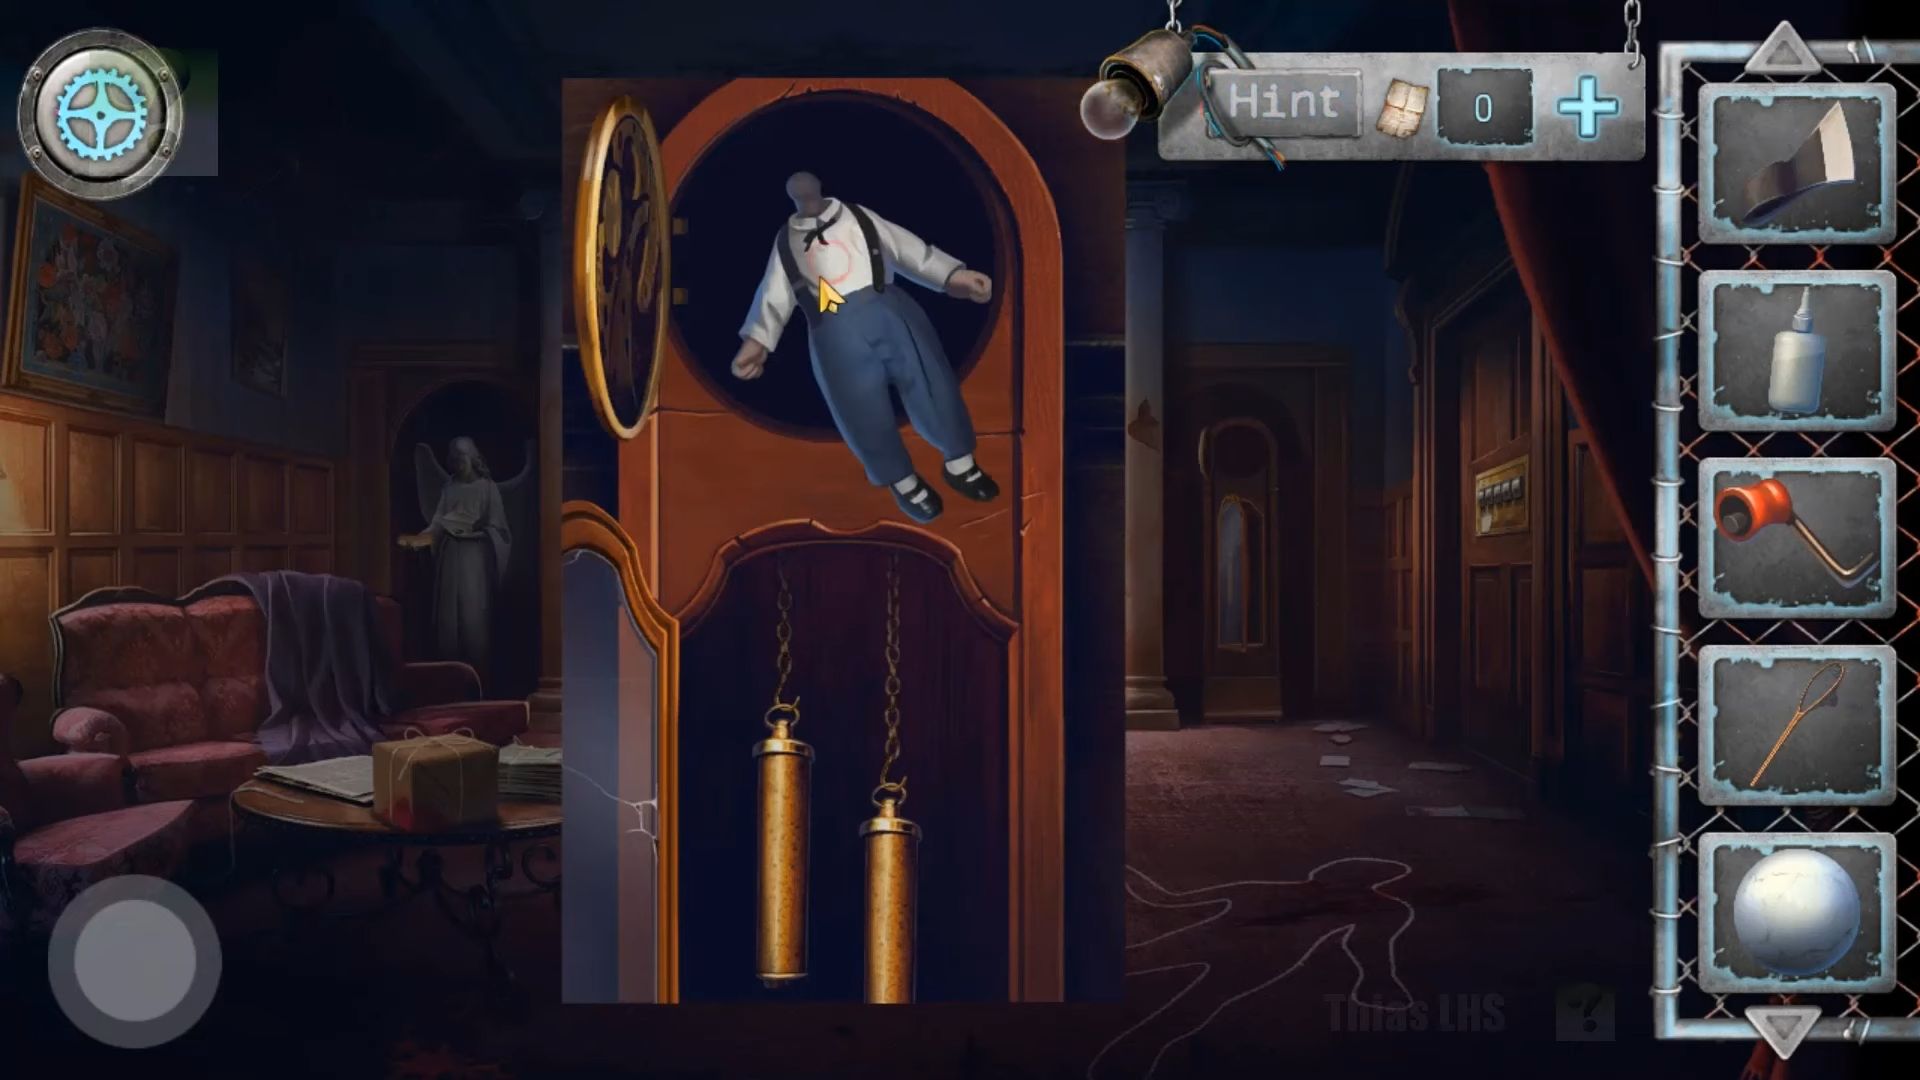
Install the button with the 1 in the elevator control panel and press it. This action takes you down to Level 1 hall. First, pick up the net from the outline on the floor, tap to view the table on the left, and collect the stack of newspapers.
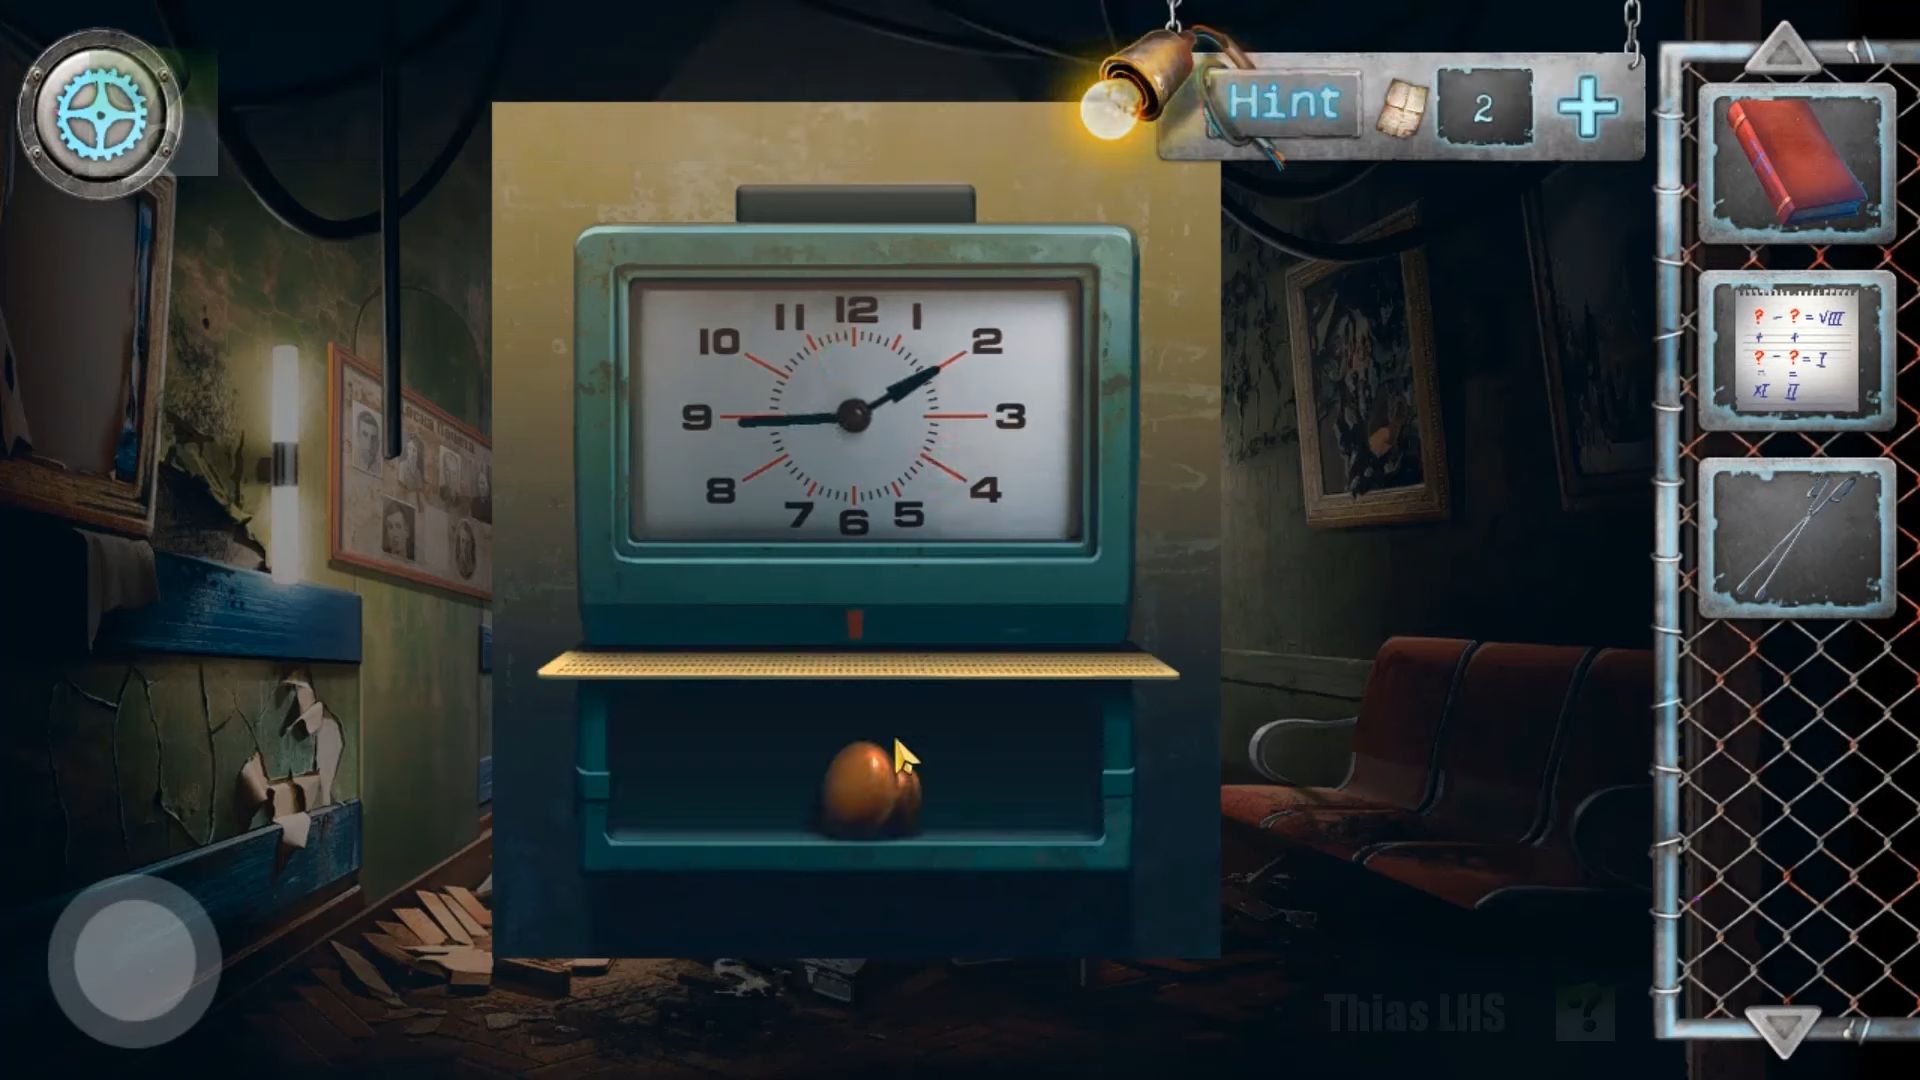
Now look at the big clock on the right of the room. Open the lower door and attach the weight to the empty chain. Set the time to 3:55 and collect the Grandpa doll with no head.
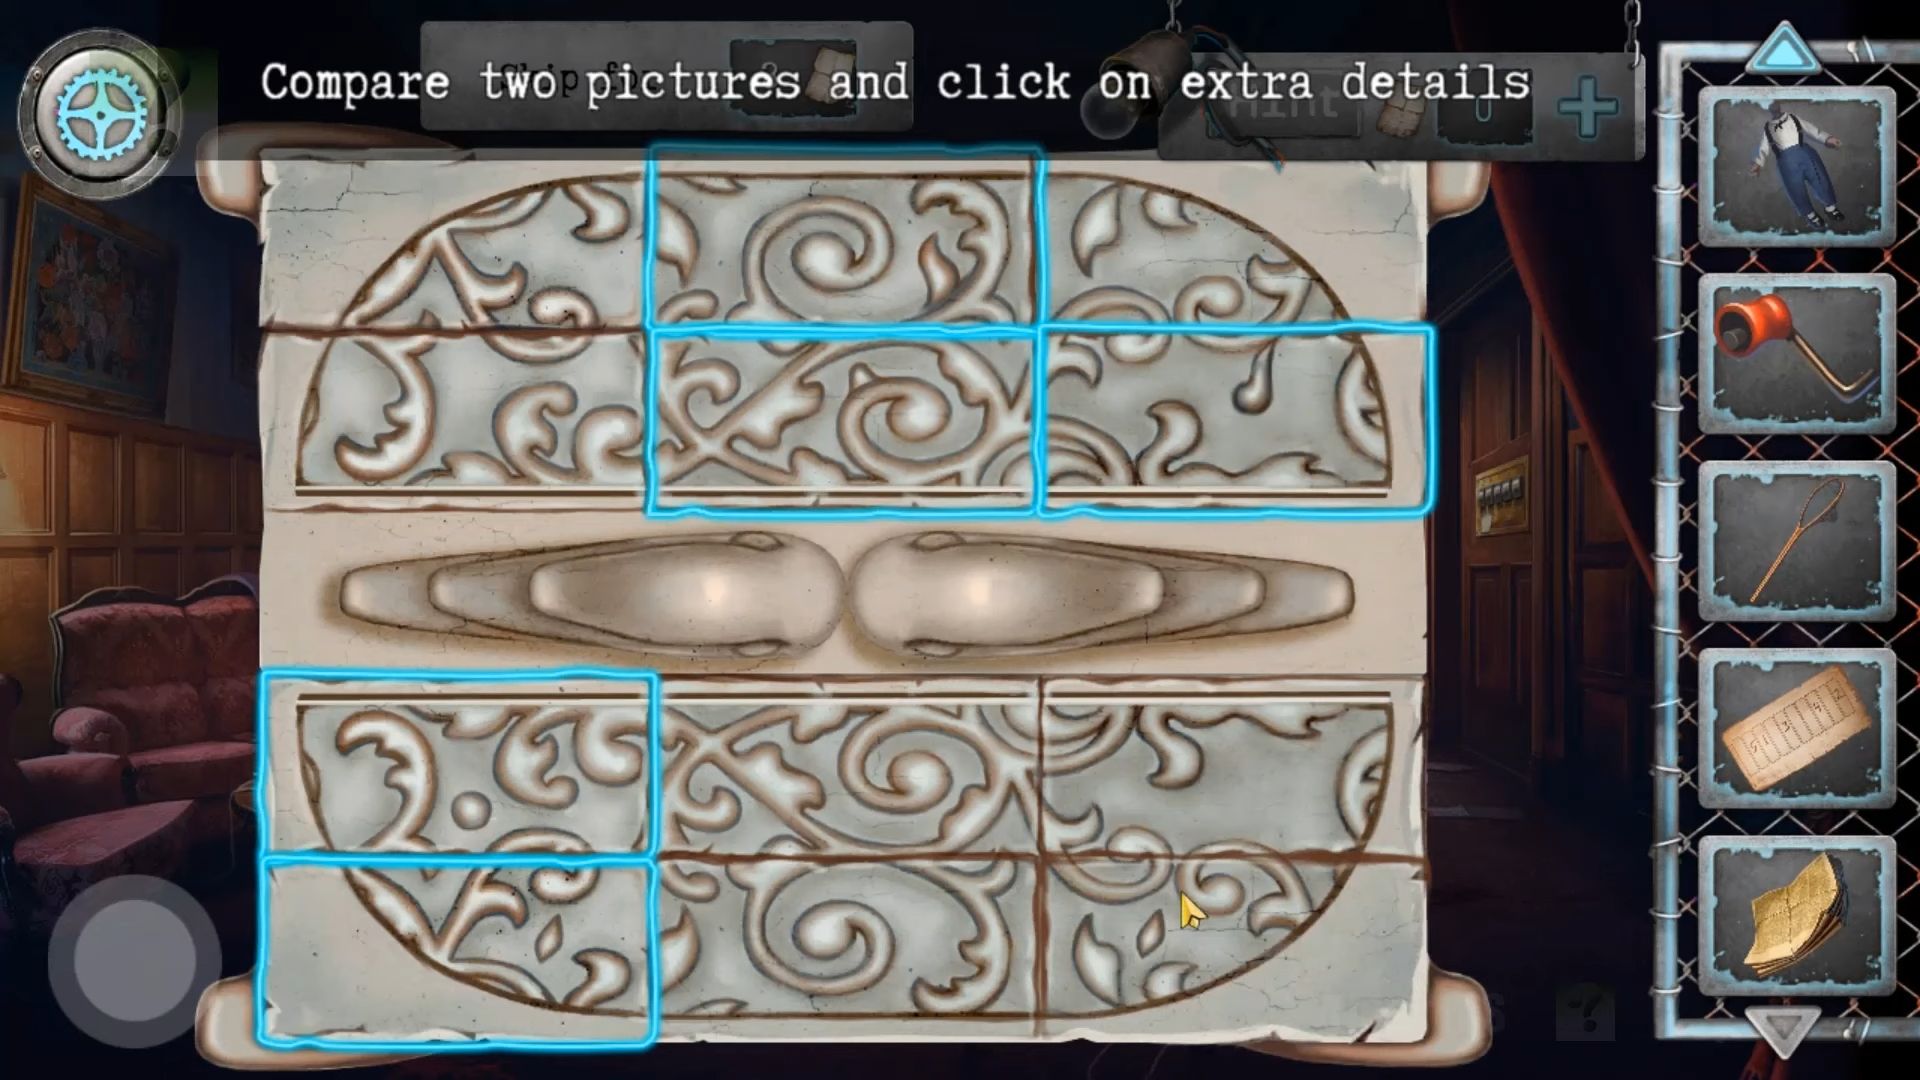
Next, check the statue on the left of the room. Collect the paper, which is a clue, and then add the marble ball to the open hand. Now, you’ll get a puzzle to compare two pictures. The top and bottom sections are similar but different. Find the pieces that have extra details in them and pick up another paper clue with notes.
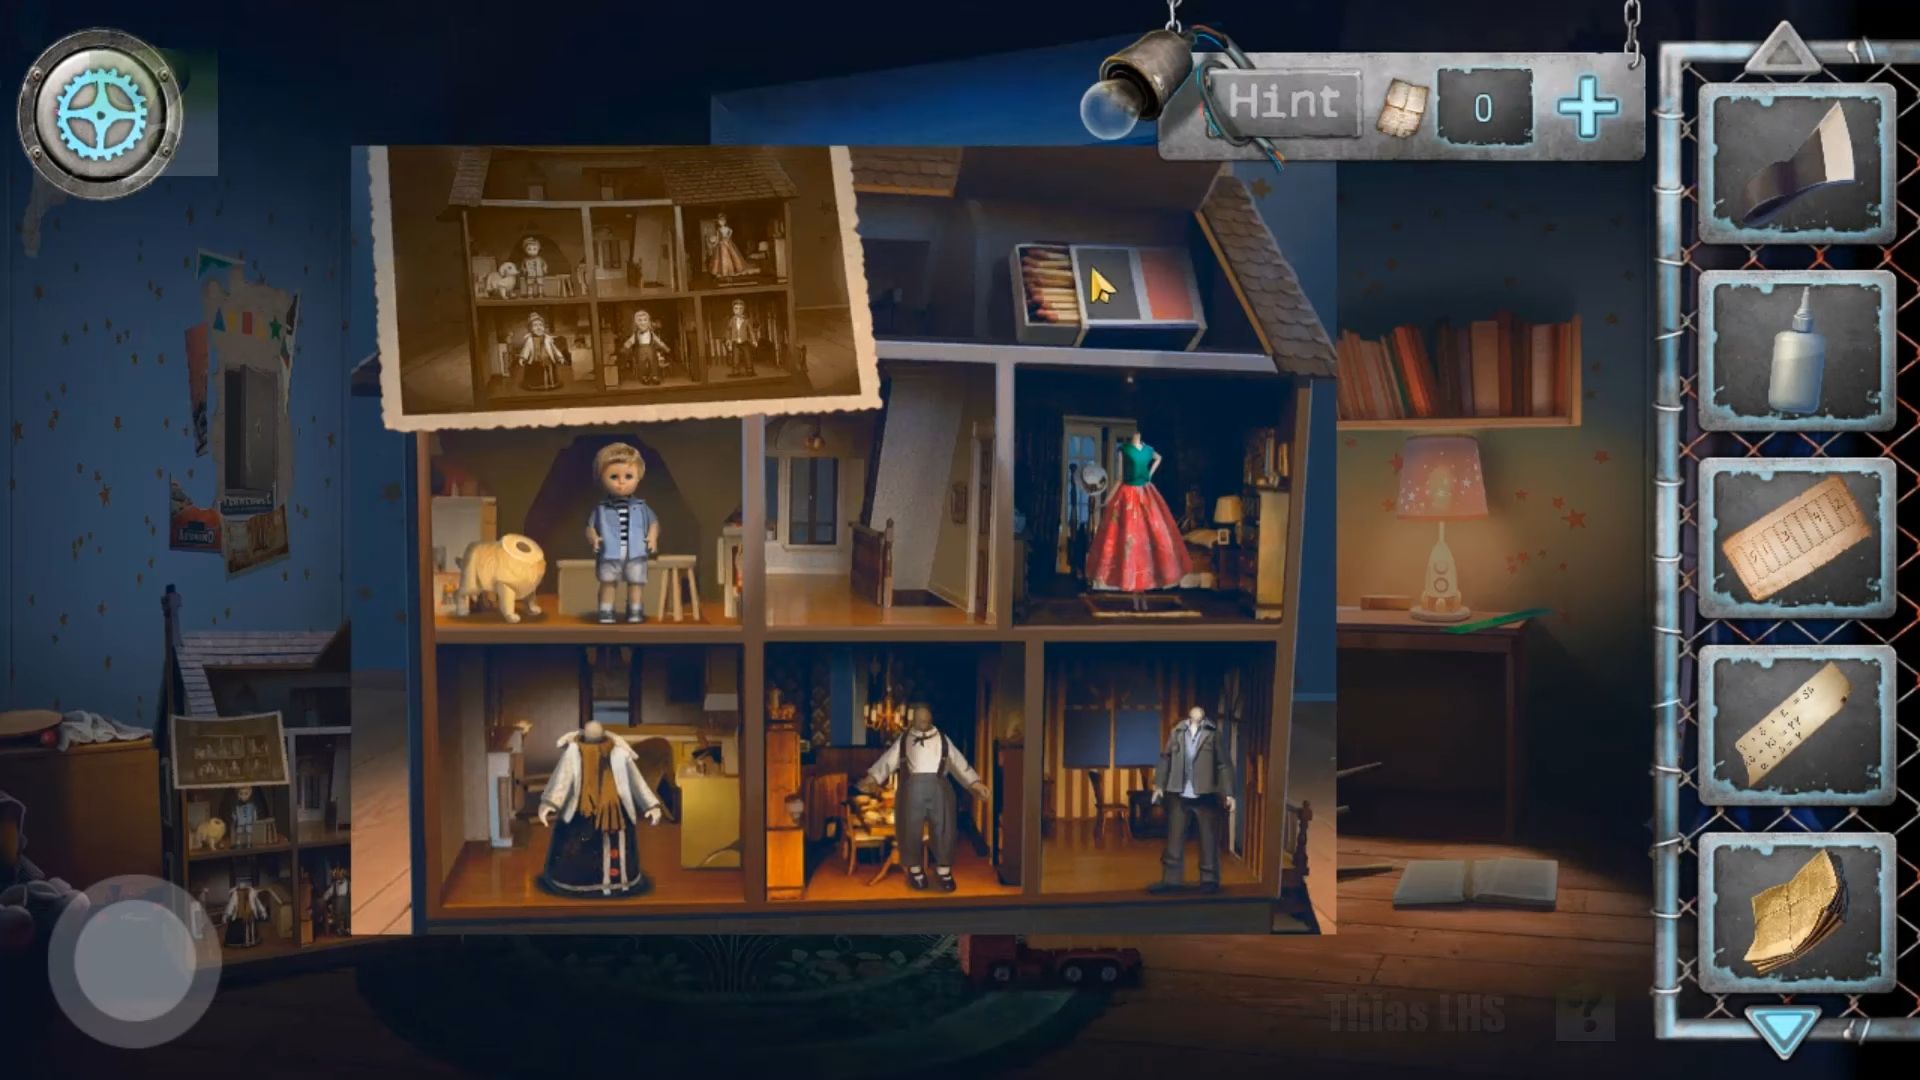
Next, go back up to the elevator and return to level 2. Re-enter the child’s bedroom and tap to view the desk with the lamp to find a photo puzzle. Rearrange the pieces to complete the puzzle and you need to pick up this final photo as a clue.
After that, view the dollhouse on the left and add a photo of the dollhouse to it. Add the Mom doll and the grandpa doll to the house, then follow the photo to arrange the dolls in the correct locations. Once done, you can collect a matchbox.
Now, return to the other view of the room and look inside the cupboard again to find the cassette player. Add the cassette to it and play it to hear spooky sounds until the speaker opens, allowing you to collect a piano key Key I. Then, go to the elevator and return to Level 1. There is a door on the right with a number lock.
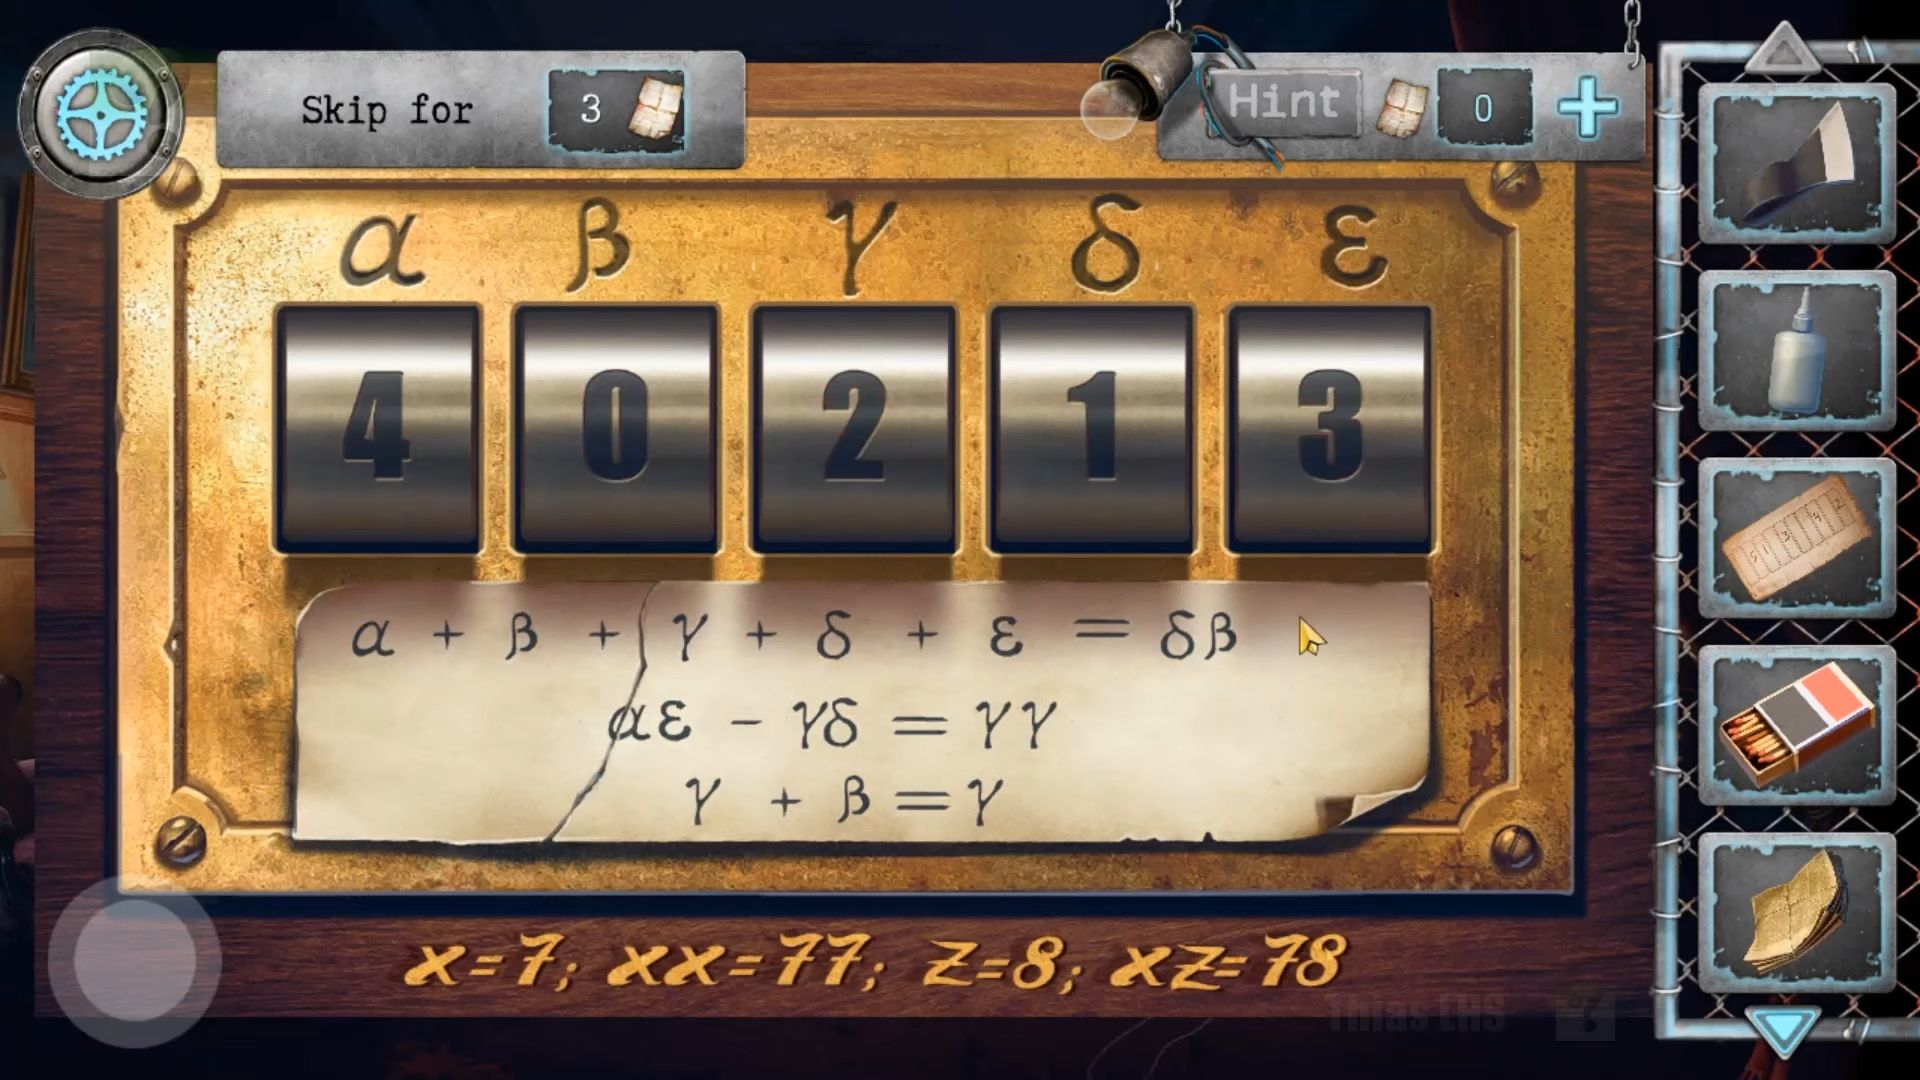
View this and add the torn paper to complete the clue and solve the equations to get the correct combination for the lock (40213). Enter a library room.
First, pick up the large hammer from the floor and tap to view the suit of armor on the left and collect the Gauntlet from the hand. Next, view the cushion on the sofa for a clue and use the arrows to rotate the view to see a piano. Grab the white Half lampshade from the floor. There are two more number clues here.

Tap to view the globe at the back of the room. This is a puzzle; note the three-direction arrows with colors. You can now collect an Axe Handle and combine it with the axe head to make the Axe.
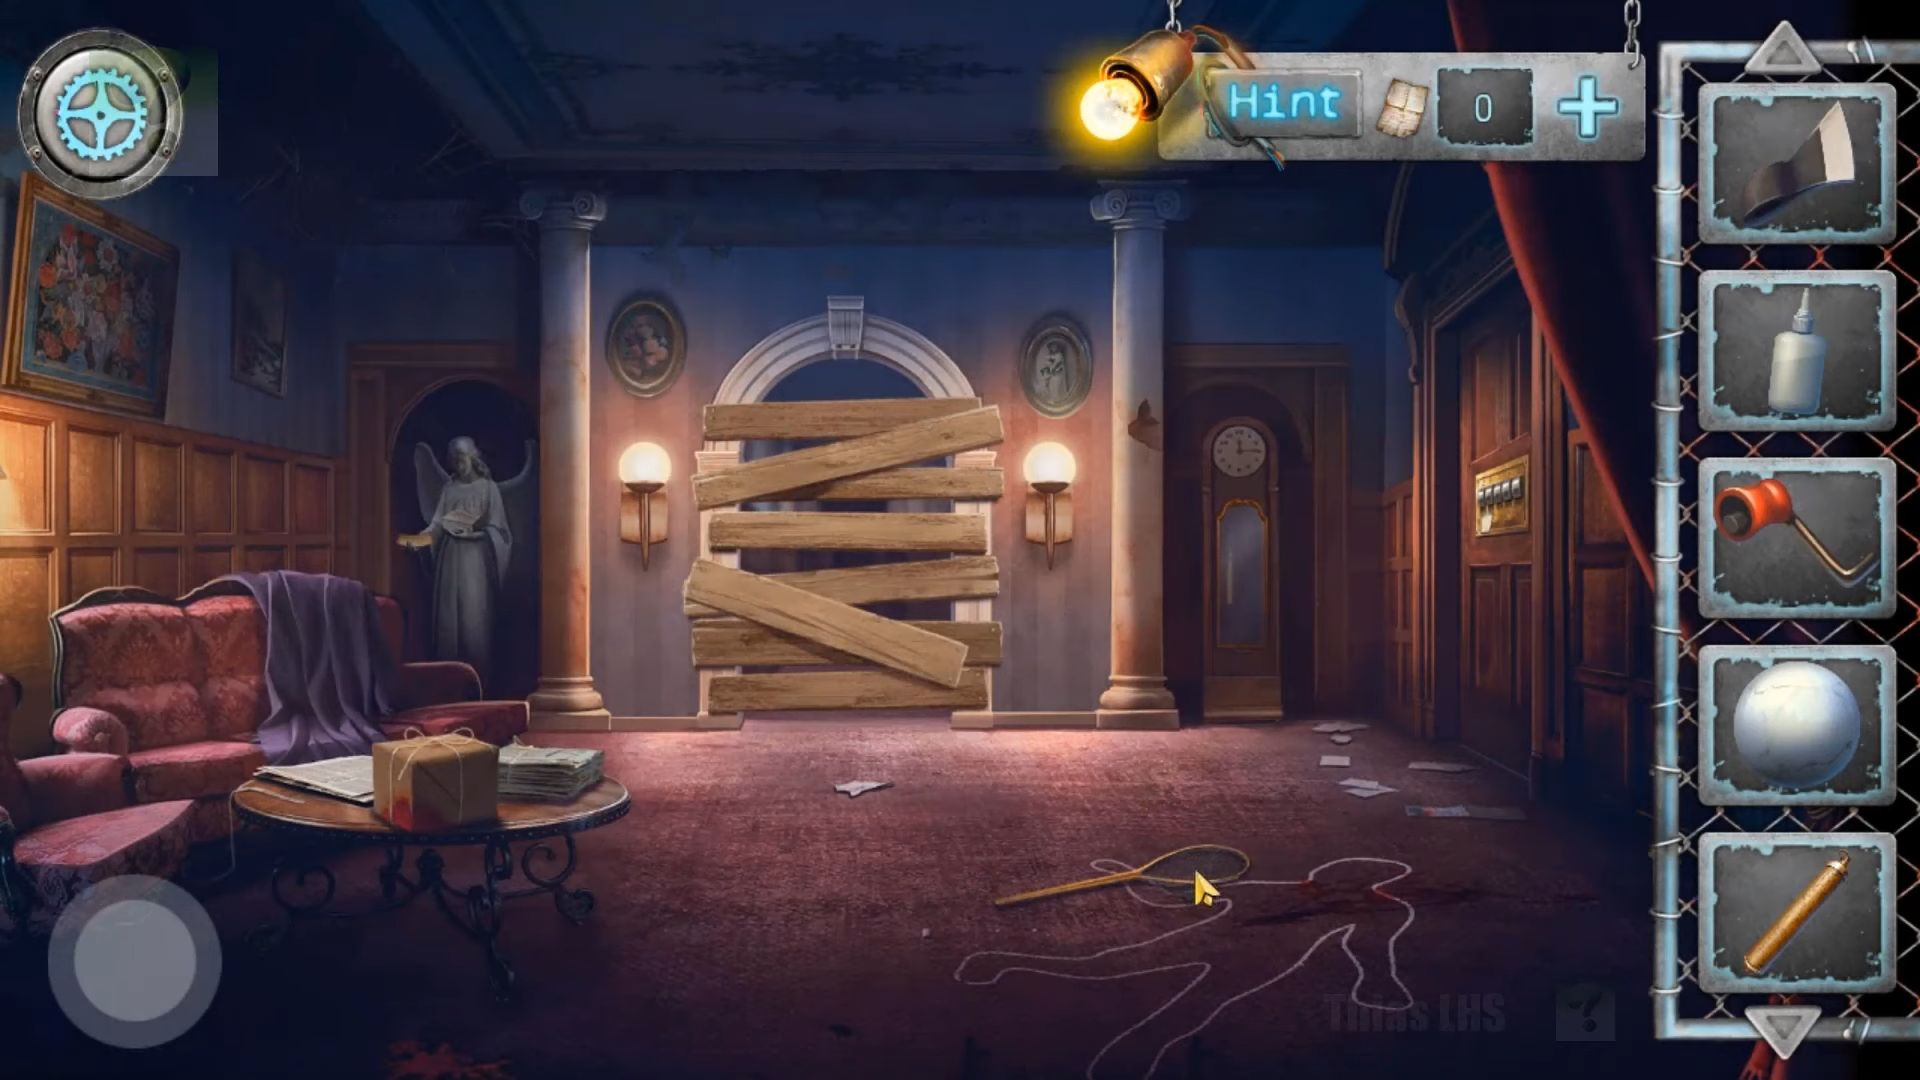
Go back to the level 1 hallway, then use the Axe to break the wooden boards blocking the doorway. After breaking them all, proceed into the corridor.
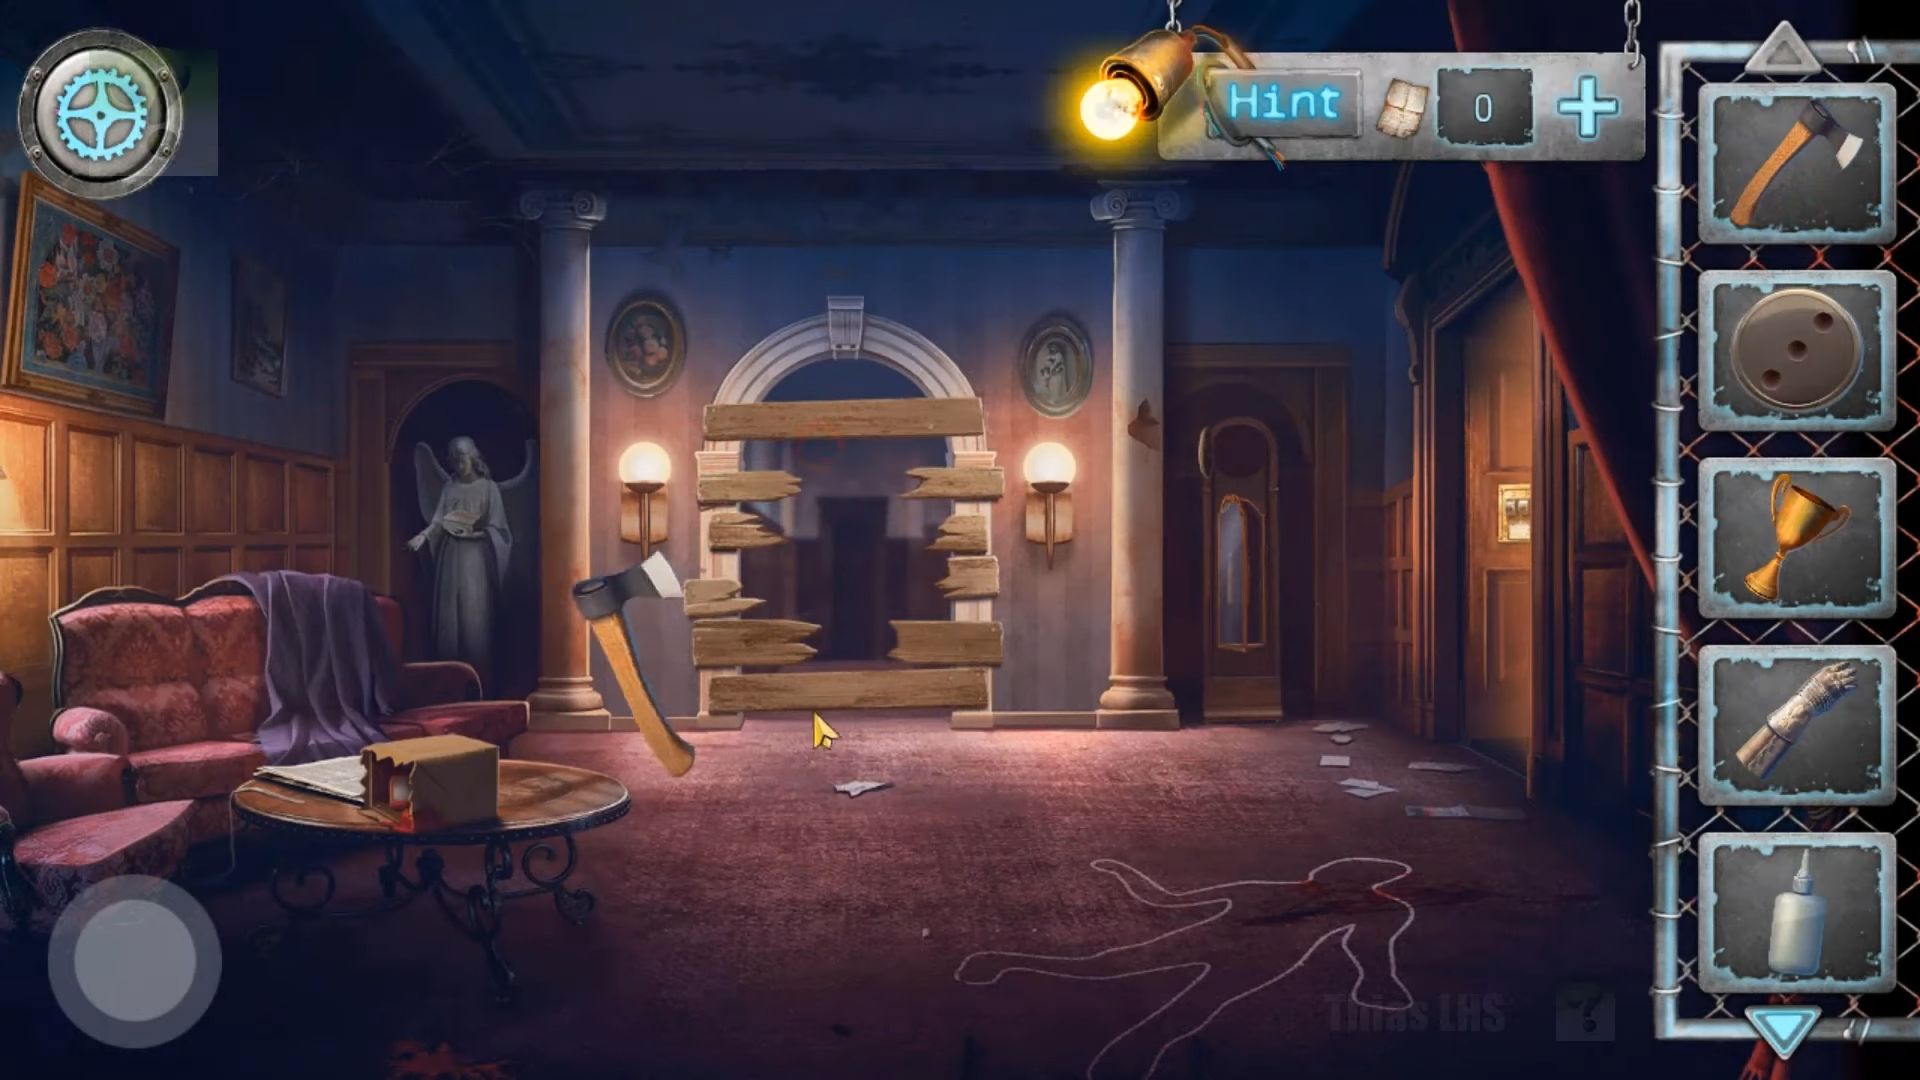
Upon breaking through the boarded-up doorway, check out the paint cans in the bottom left. Now you have to move them to uncover and gather wire cutters. Tap to see the red box and the ladder stuck in the ground at the center. Use the hammer to break the ground and retrieve both the box and the ladder (hit the three legs of the ladder).
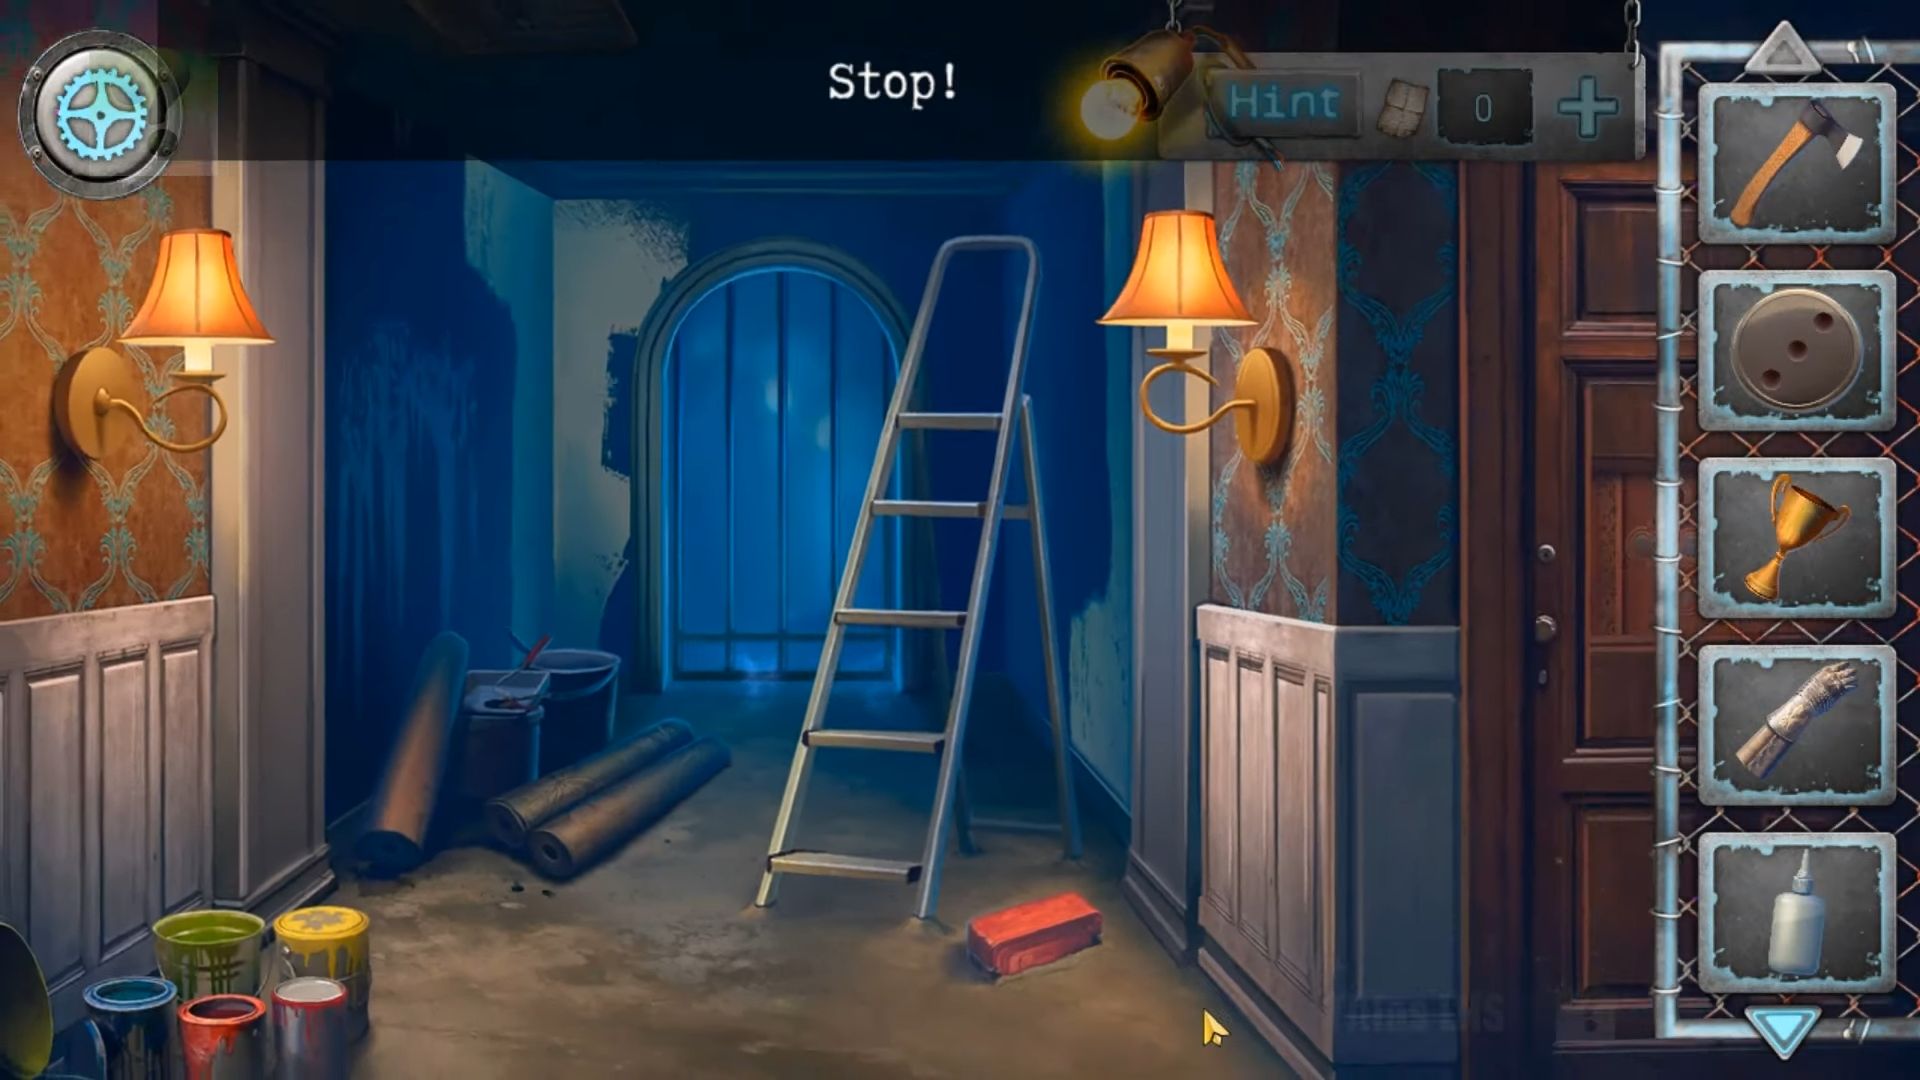
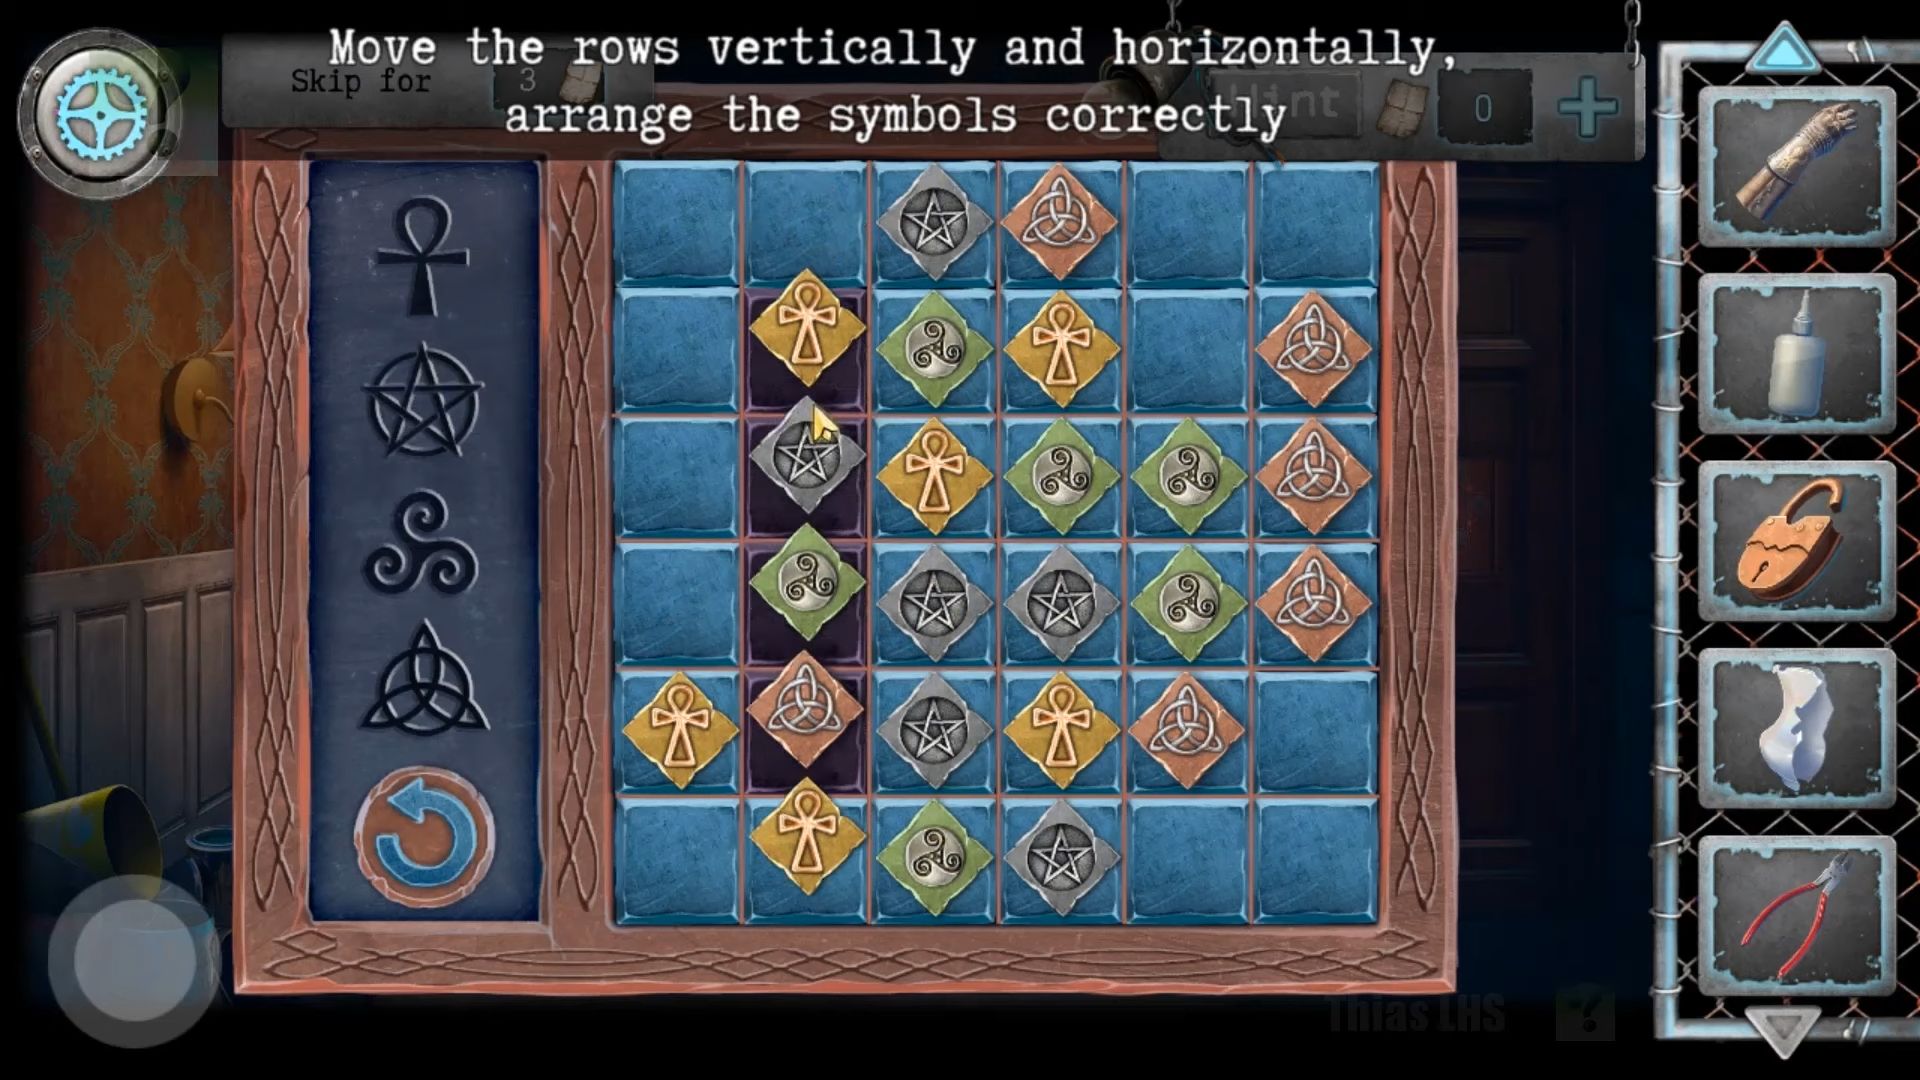
You can’t open the box right now, but tap the ladder to shift it to the left under a ceiling puzzle. Solve the puzzle by putting the symbols in a way that matches the four shown on the left with the four vertical black squares on the board (you don’t need to arrange all the pieces). After solving it, a panel opens, and you can pick up a metal saw and another half lampshade.
Return to the Library room and tap on the fireplace. You have to put the newspaper into it and use the matches to light it. After that, go back to the hall and tap the low table on the left to view it again, where you’ll find a wrapped box.
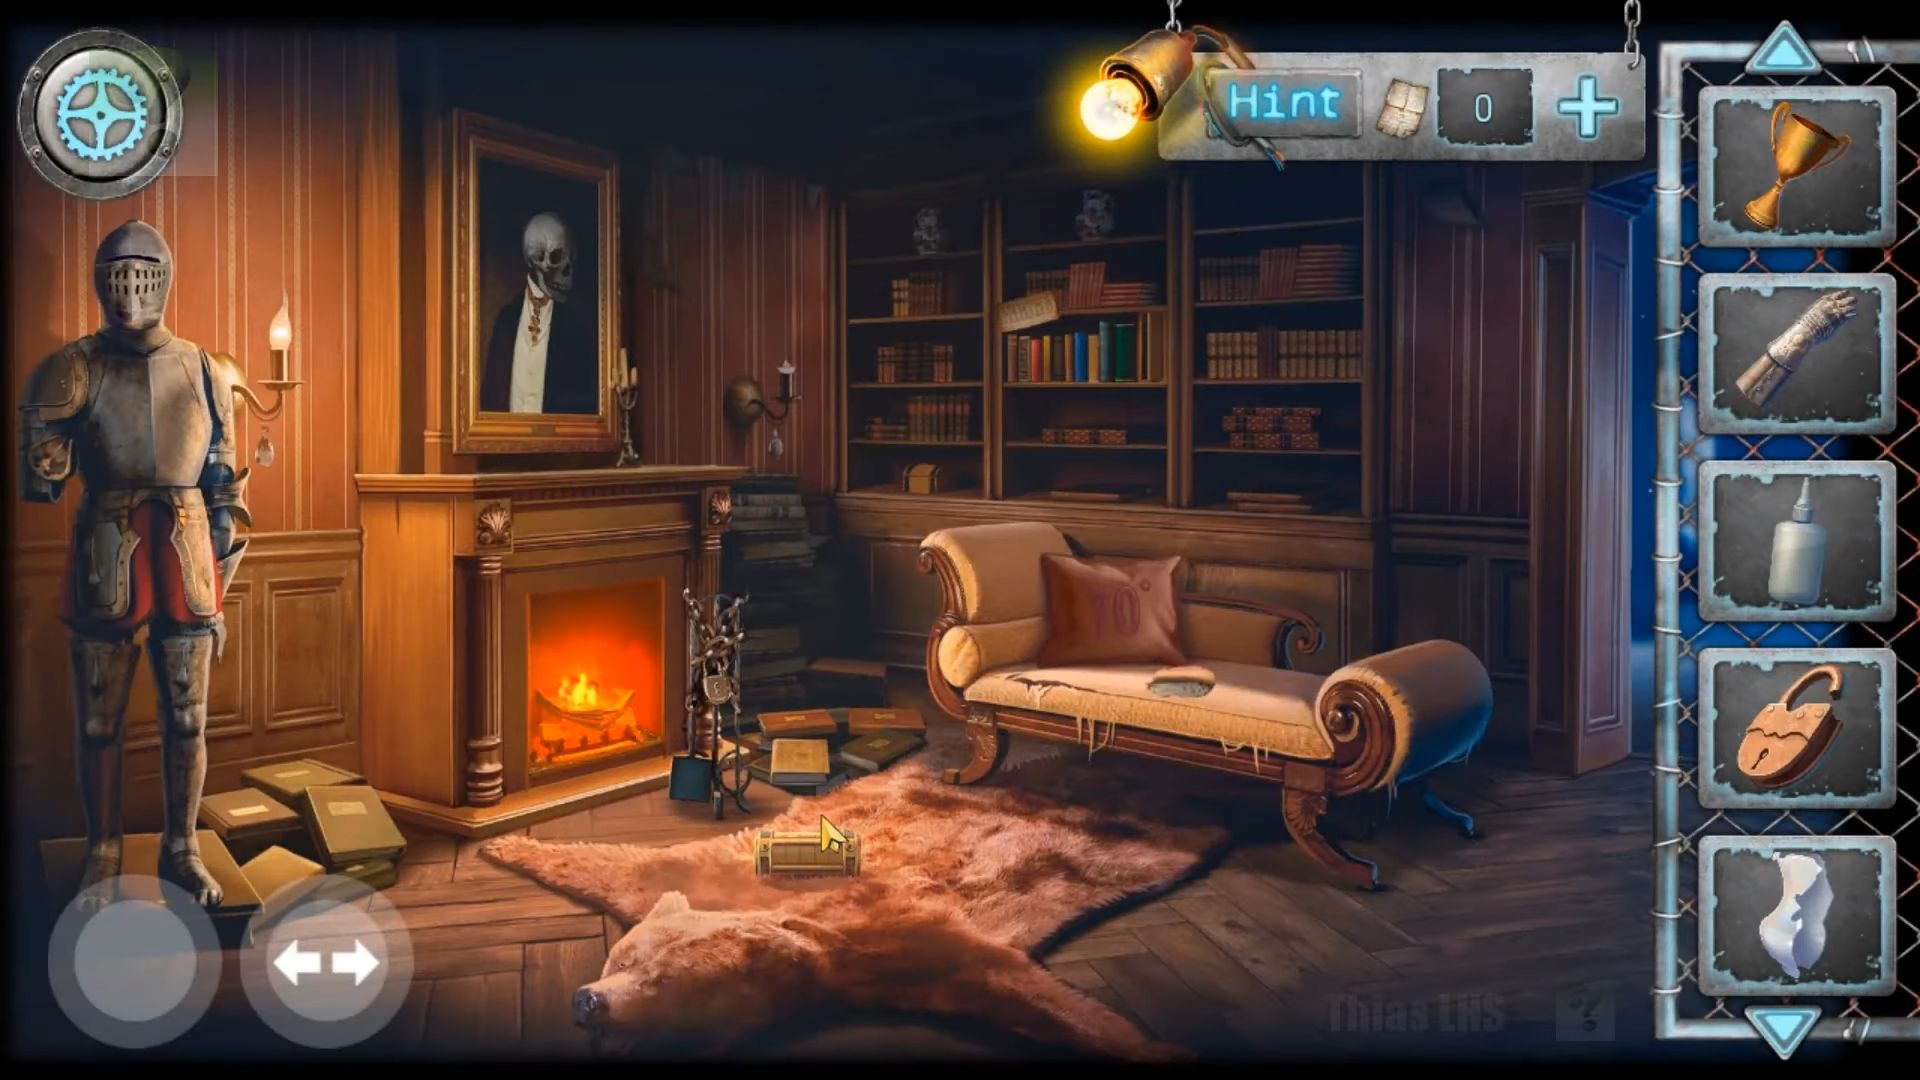
Turn the view towards the piano and on the left, there’s a small table; check it out to find an Ouija board to get the folding knife from it. Rotate the view once more and look at the sofa to find a lump. Use the knife to cut open the fabric and retrieve the padlock from inside. Open the box with the knife and take a Ouija Pointer.
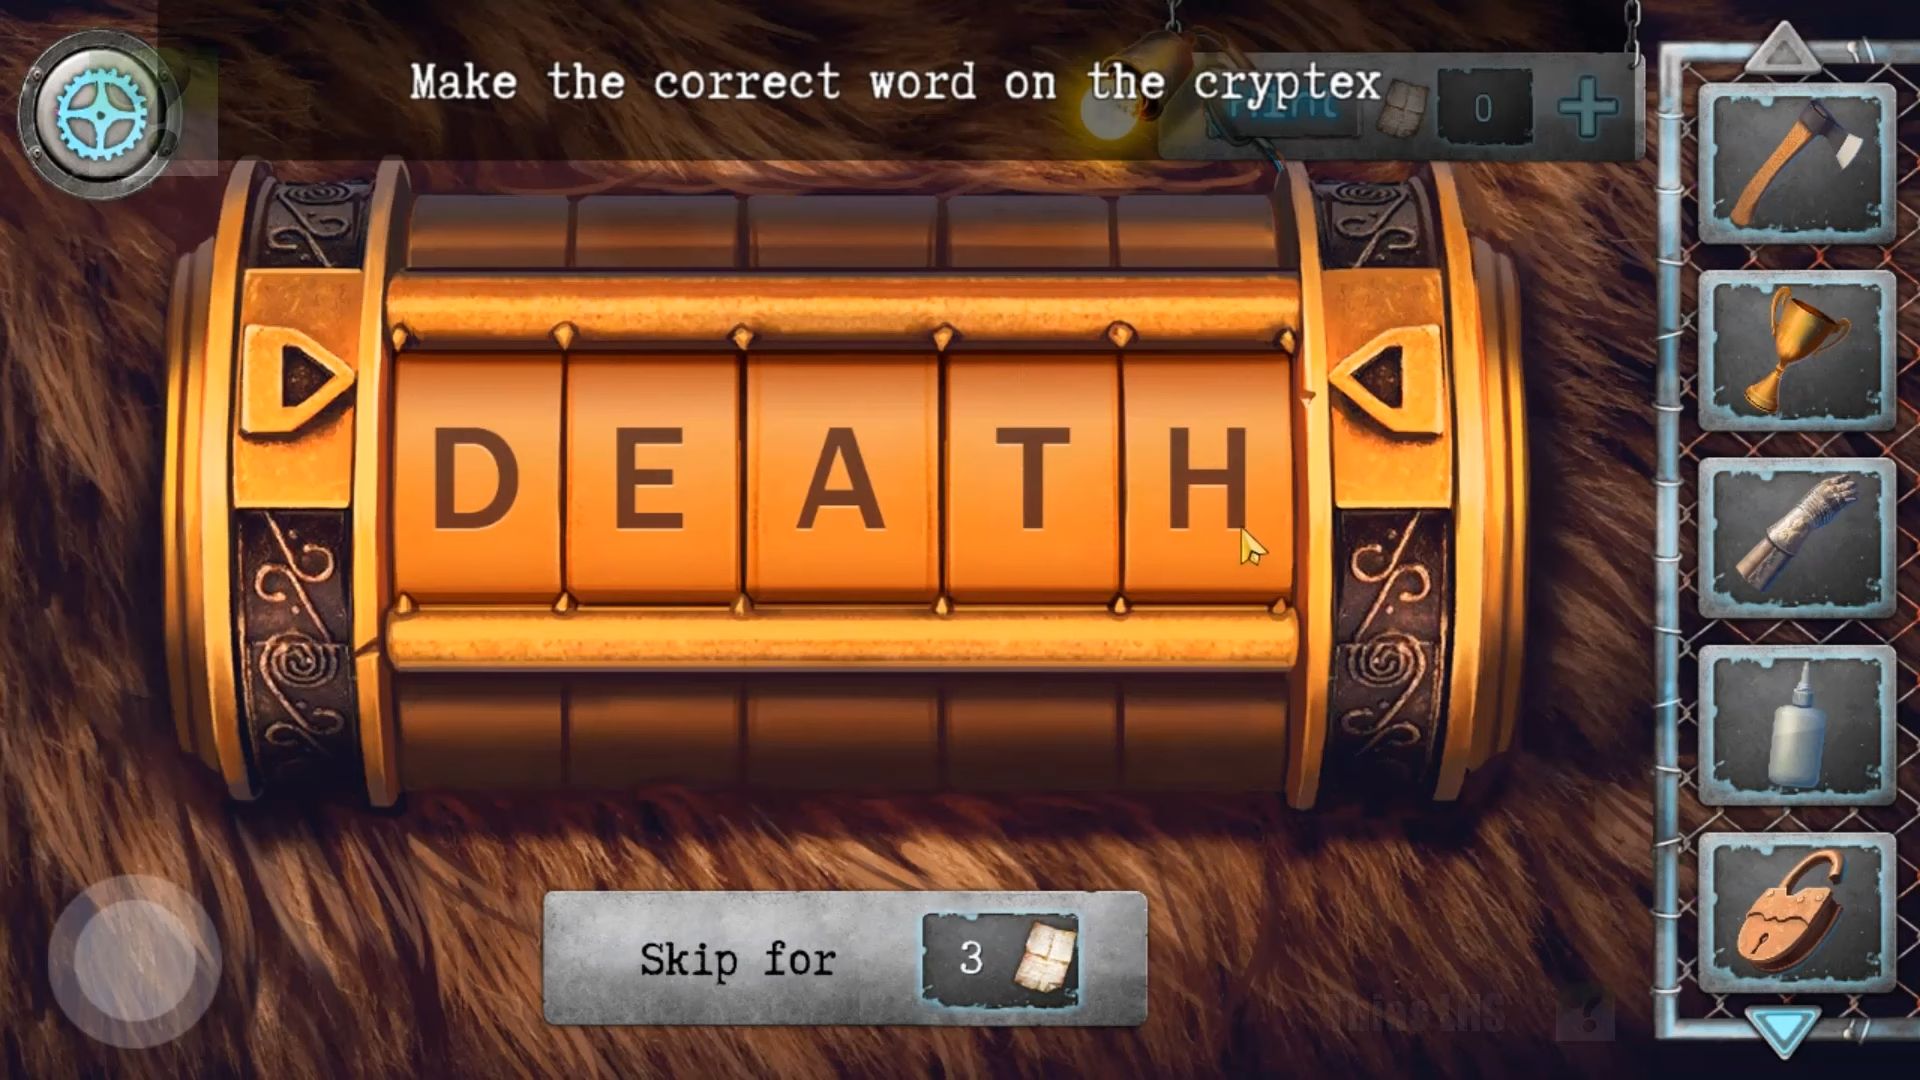
Head back to the library and locate the Ouija Board. Add the pointer to it, tap the symbol on the right, and observe the word it spells out. Rotate the view again, check the cylindrical Cryptex box on the bear rug in front of the fire, and use the clue from the board to set the correct code, then open it to collect a Detail button.
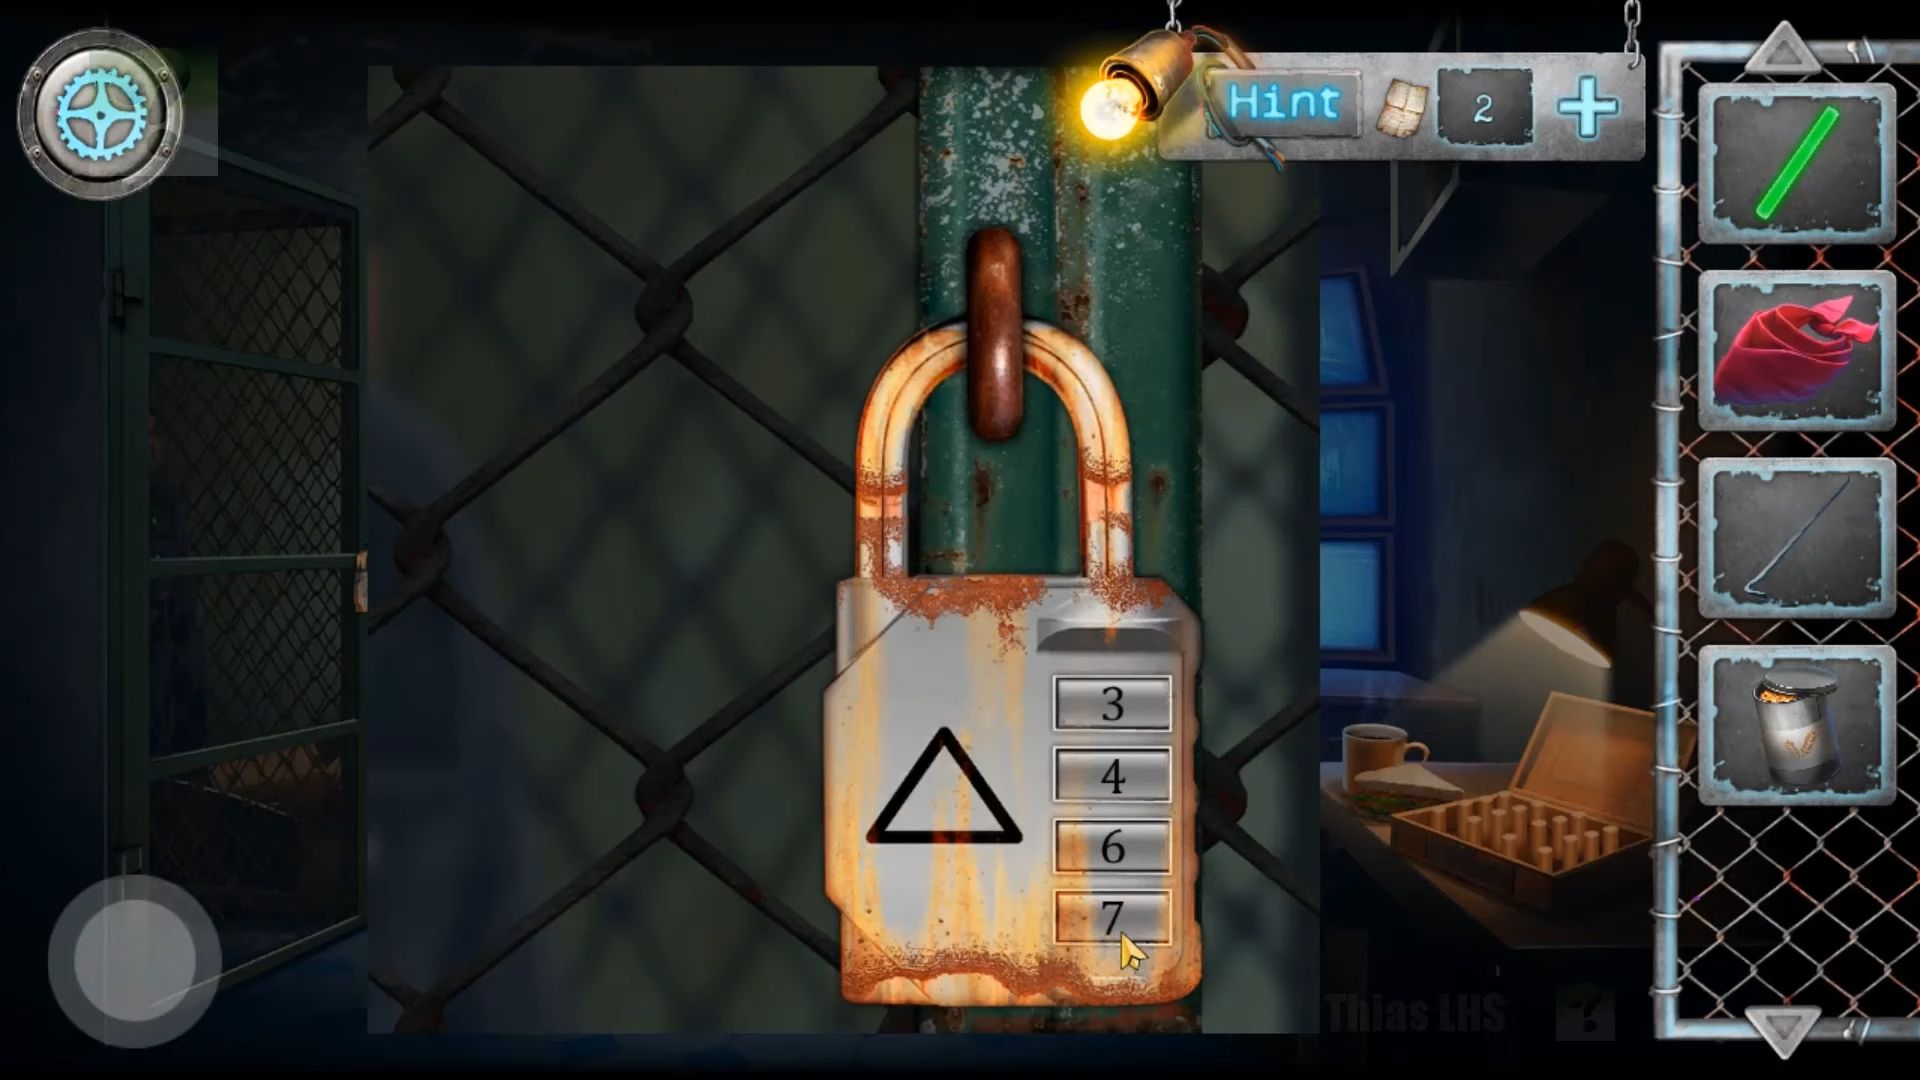
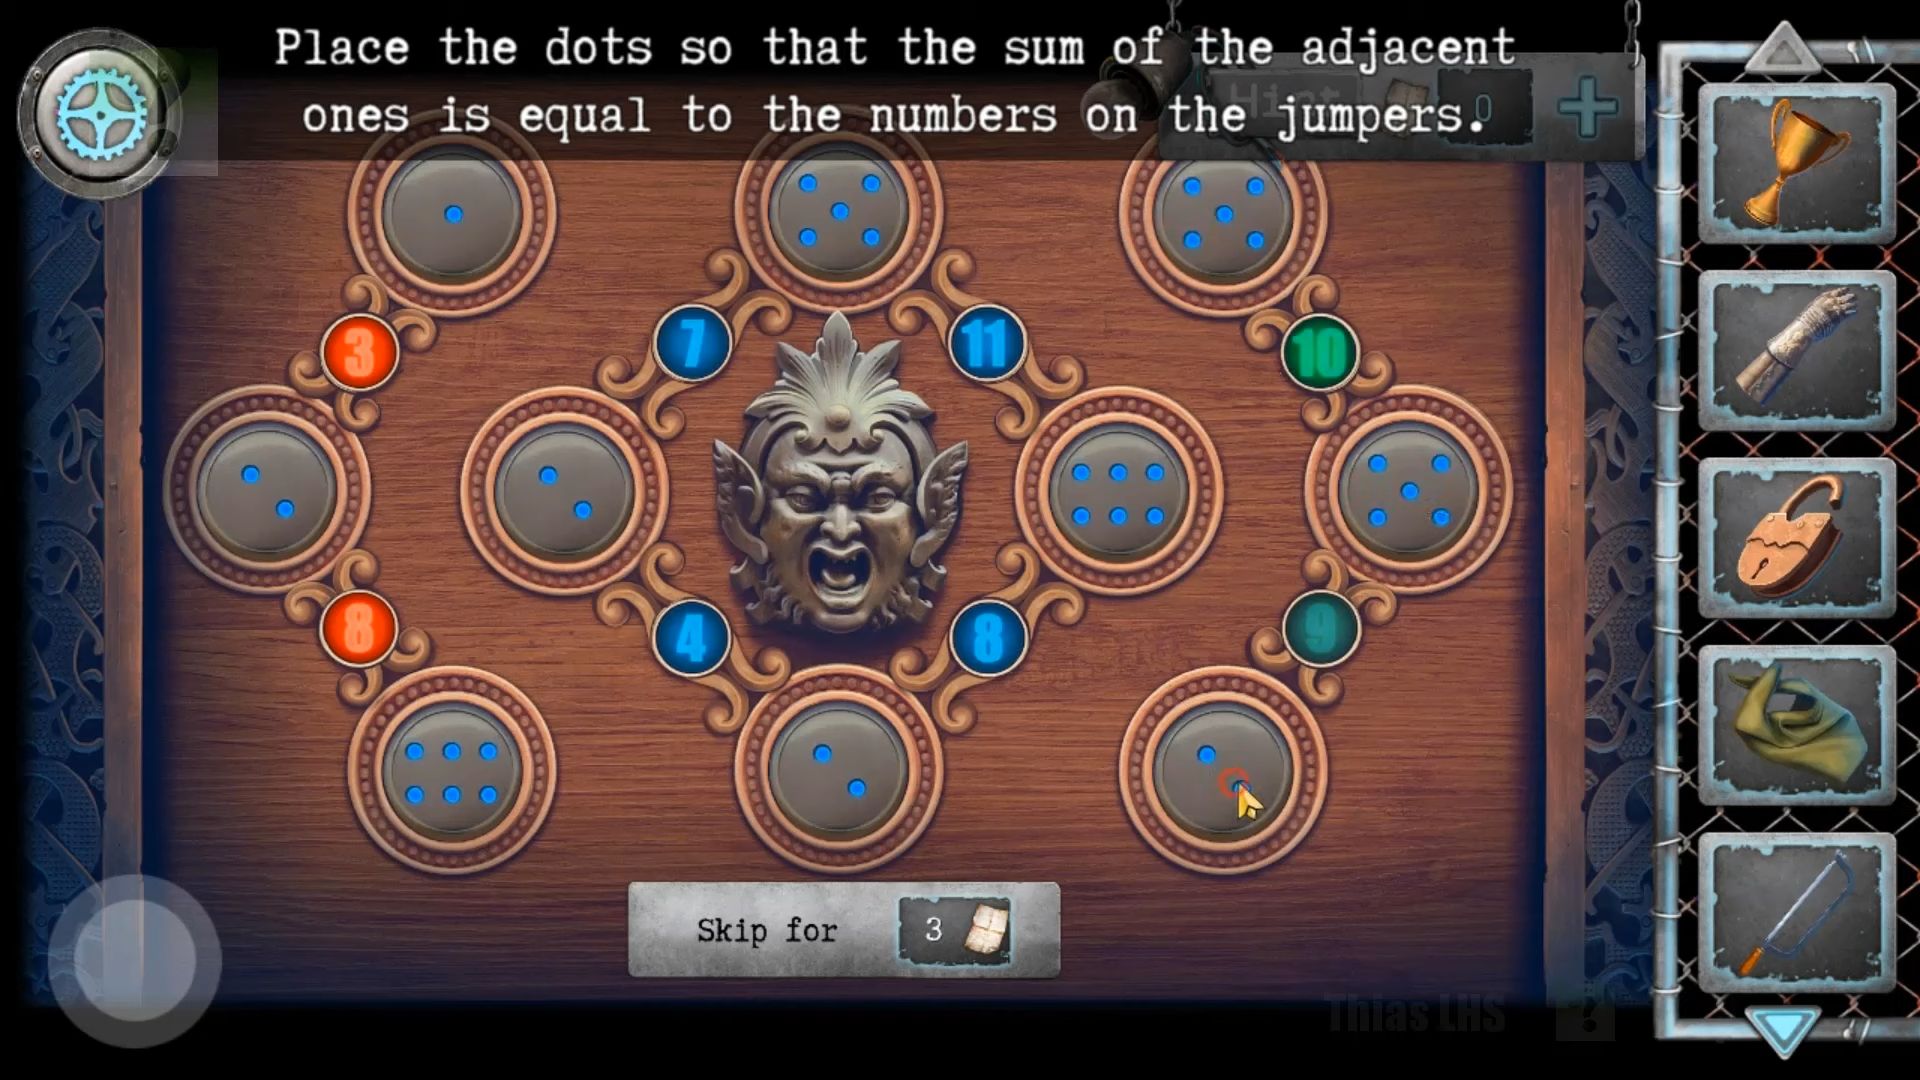
Go back and head to the corridor with the ladder. On the right, there’s a door with a puzzle panel. Use the Detail you just collected to begin the puzzle and you need to tap each button and set them from 1 to 7. Make sure the sum of the two adjacent buttons matches the number between them. There are multiple ways to solve this puzzle.
Enter the study room, look at the statue on the far left, and get some batteries from it. Move to the center of the room by the chair and pick up a broom. Now, check out the desk, get the developer bottle, and use the golden key to open the wooden box.
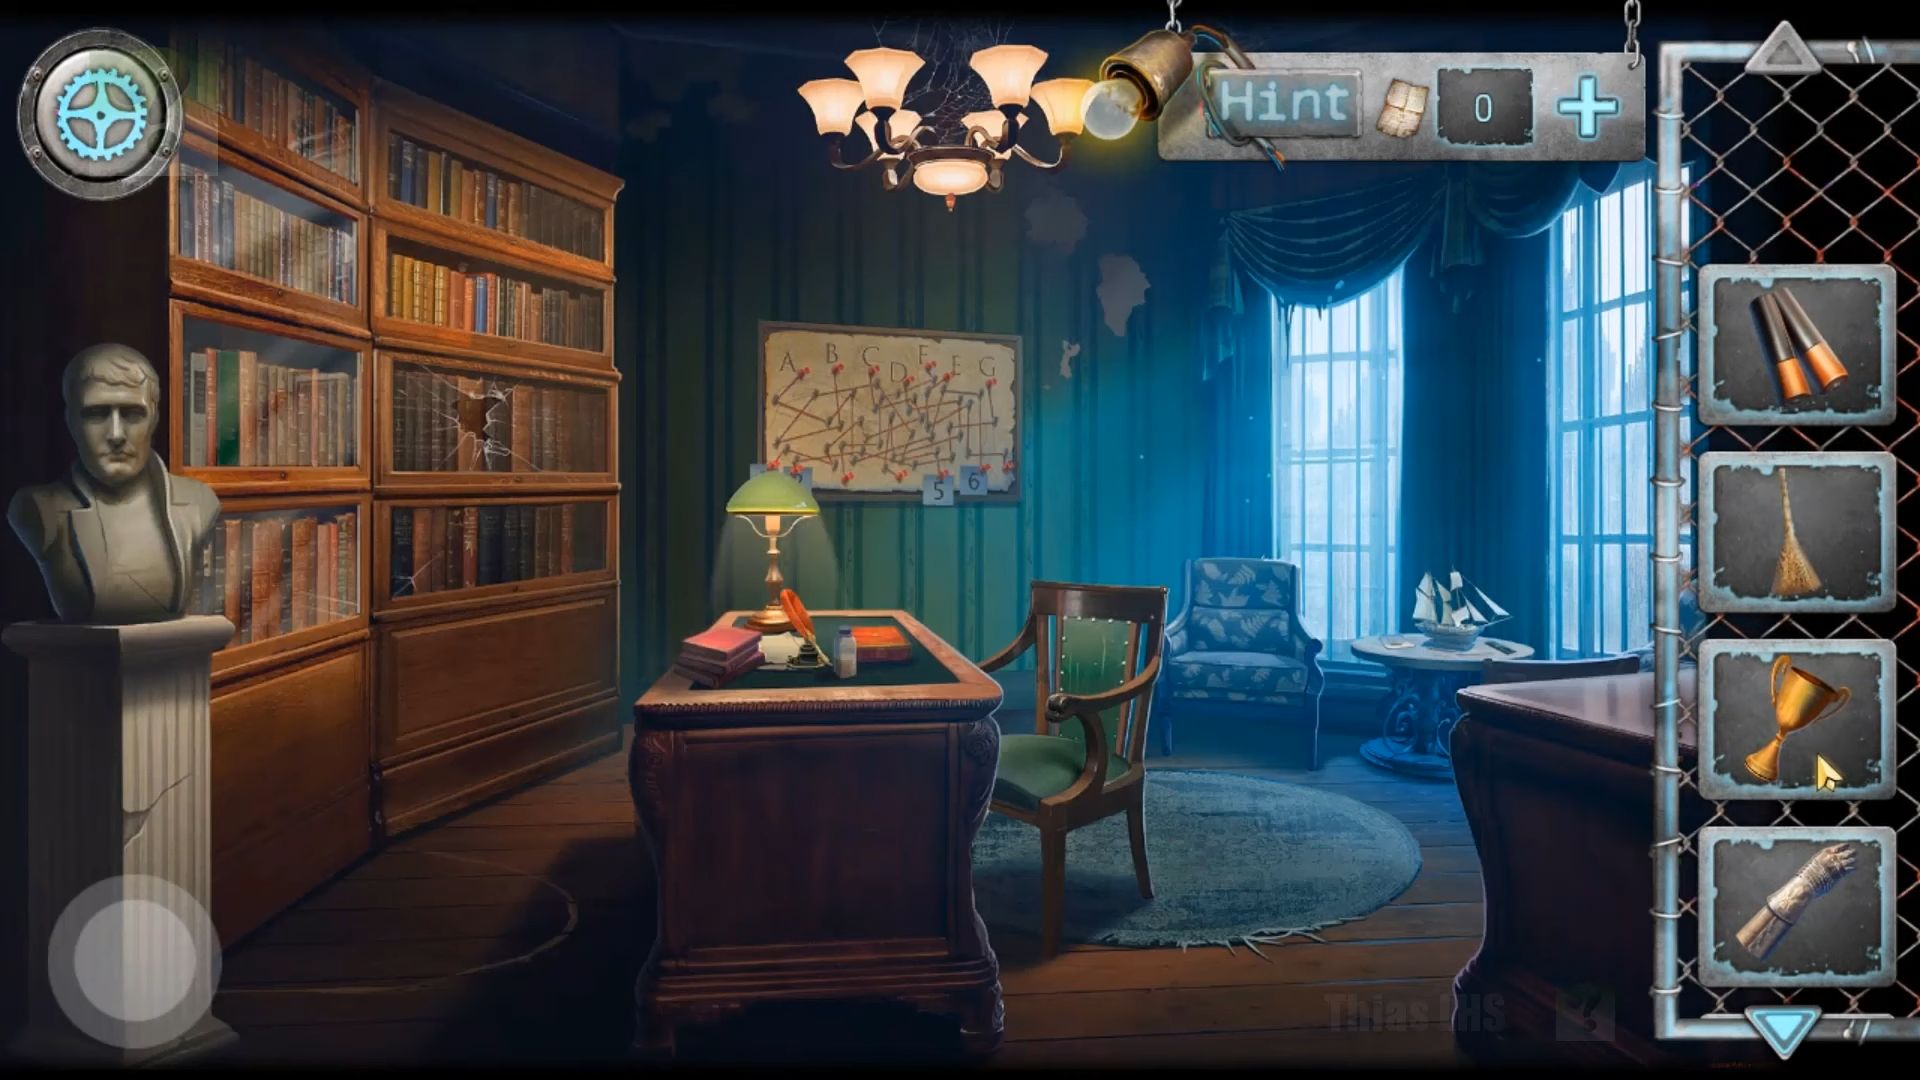
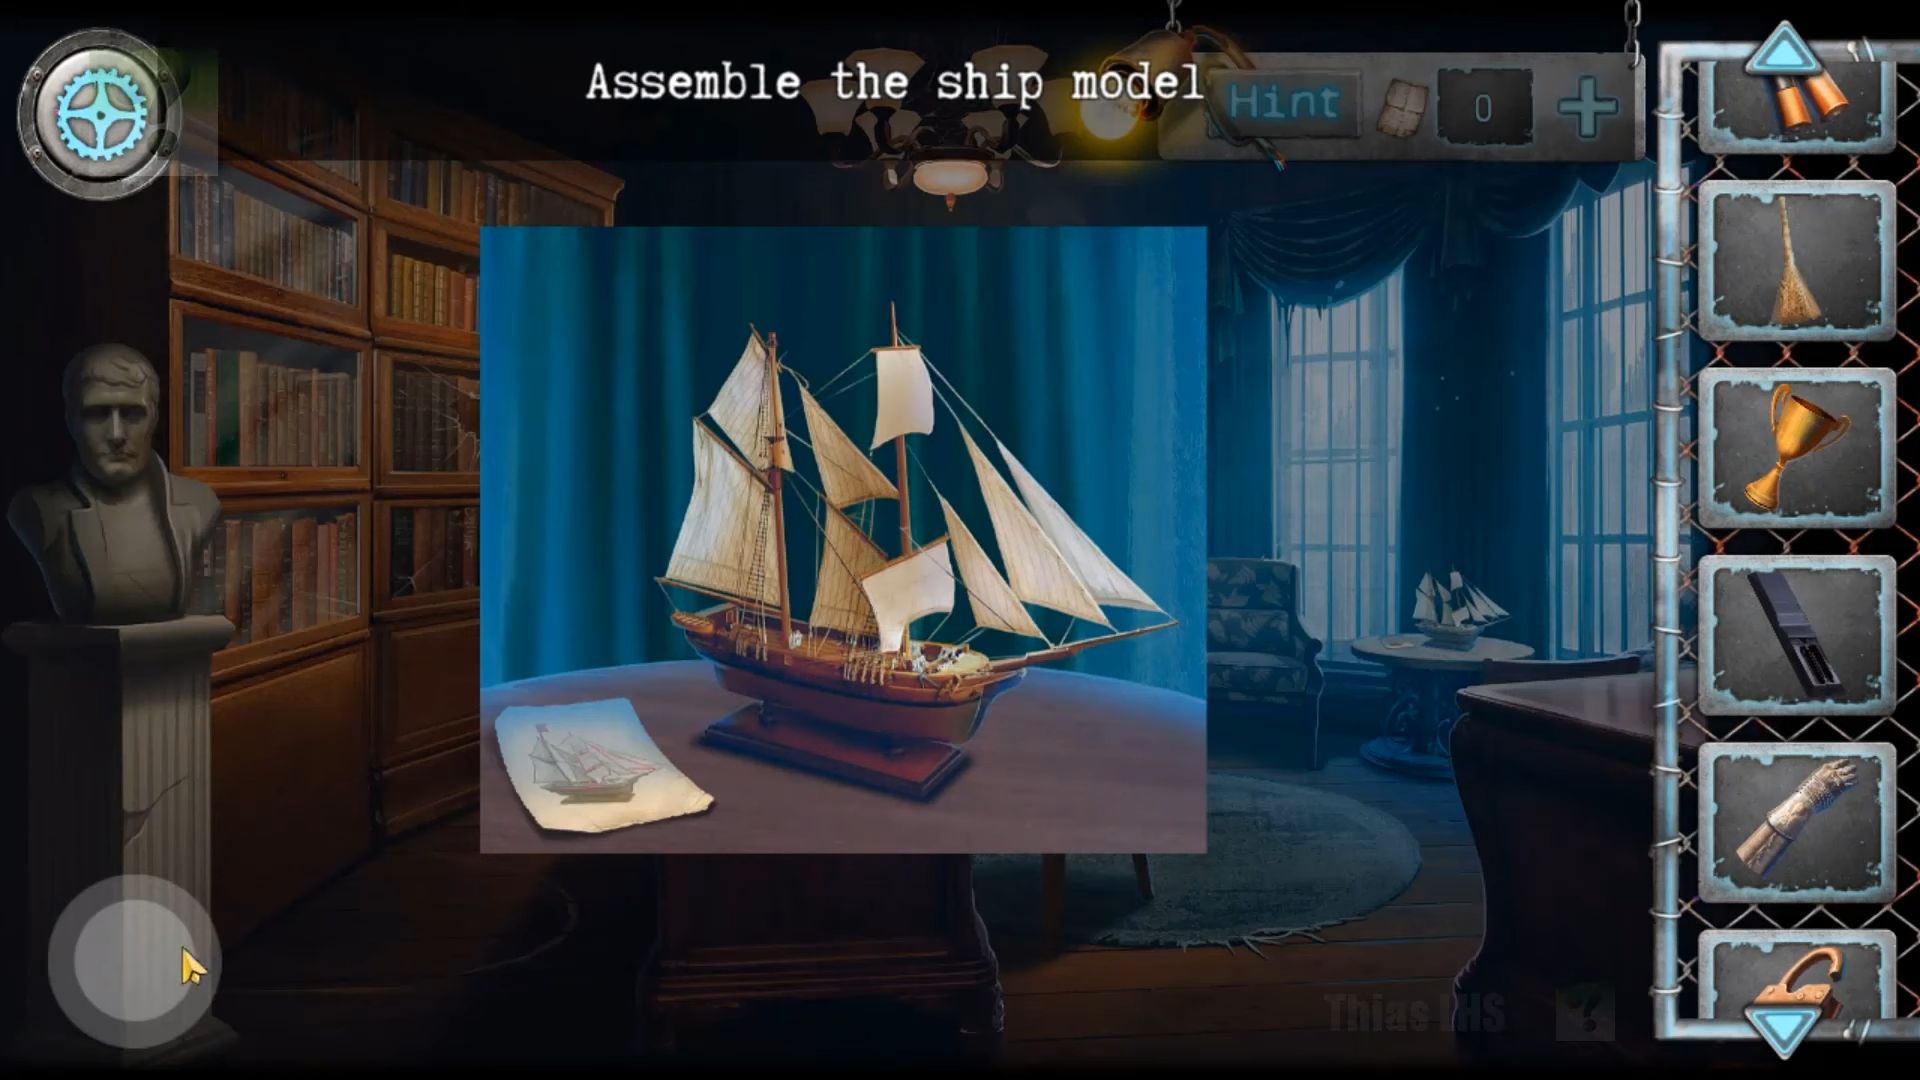
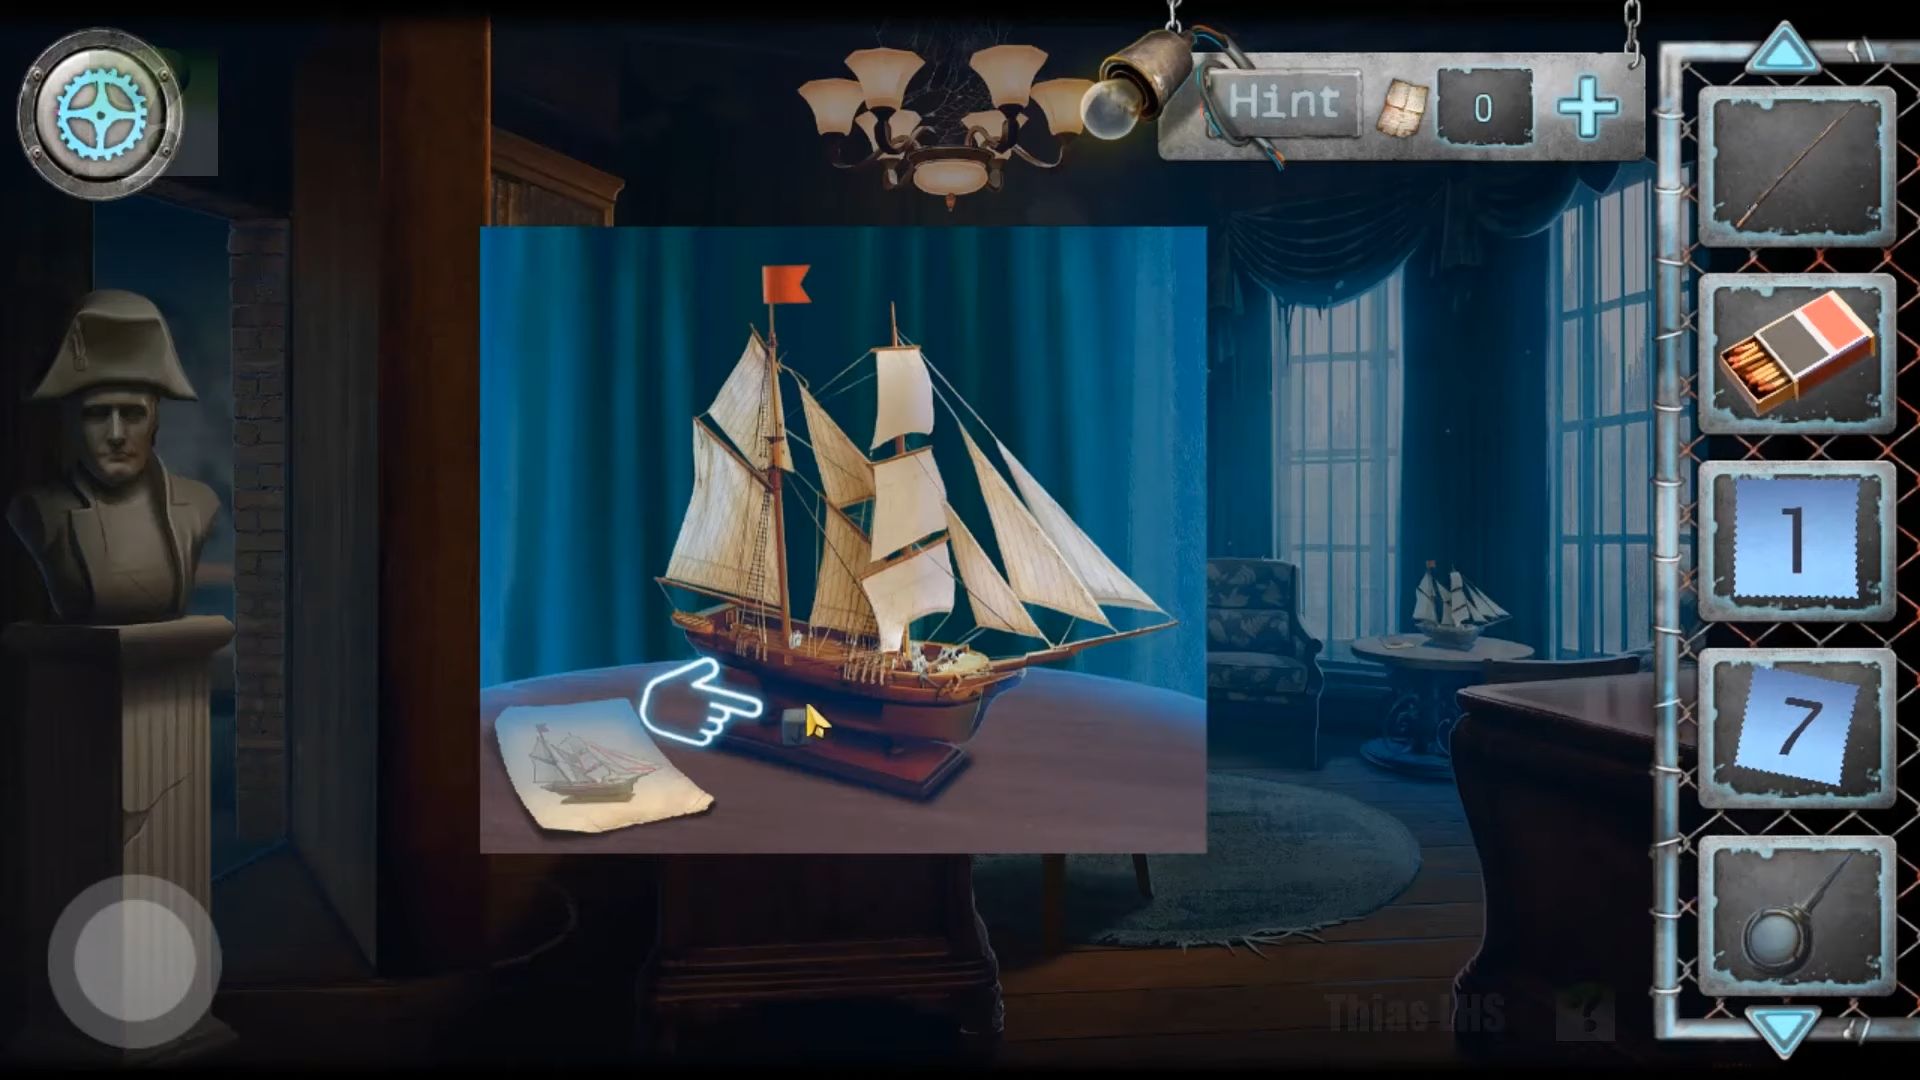
Tap the table by the window with the ship model on it. After that, you have to grab the remote control from the table and then combine it with the batteries.
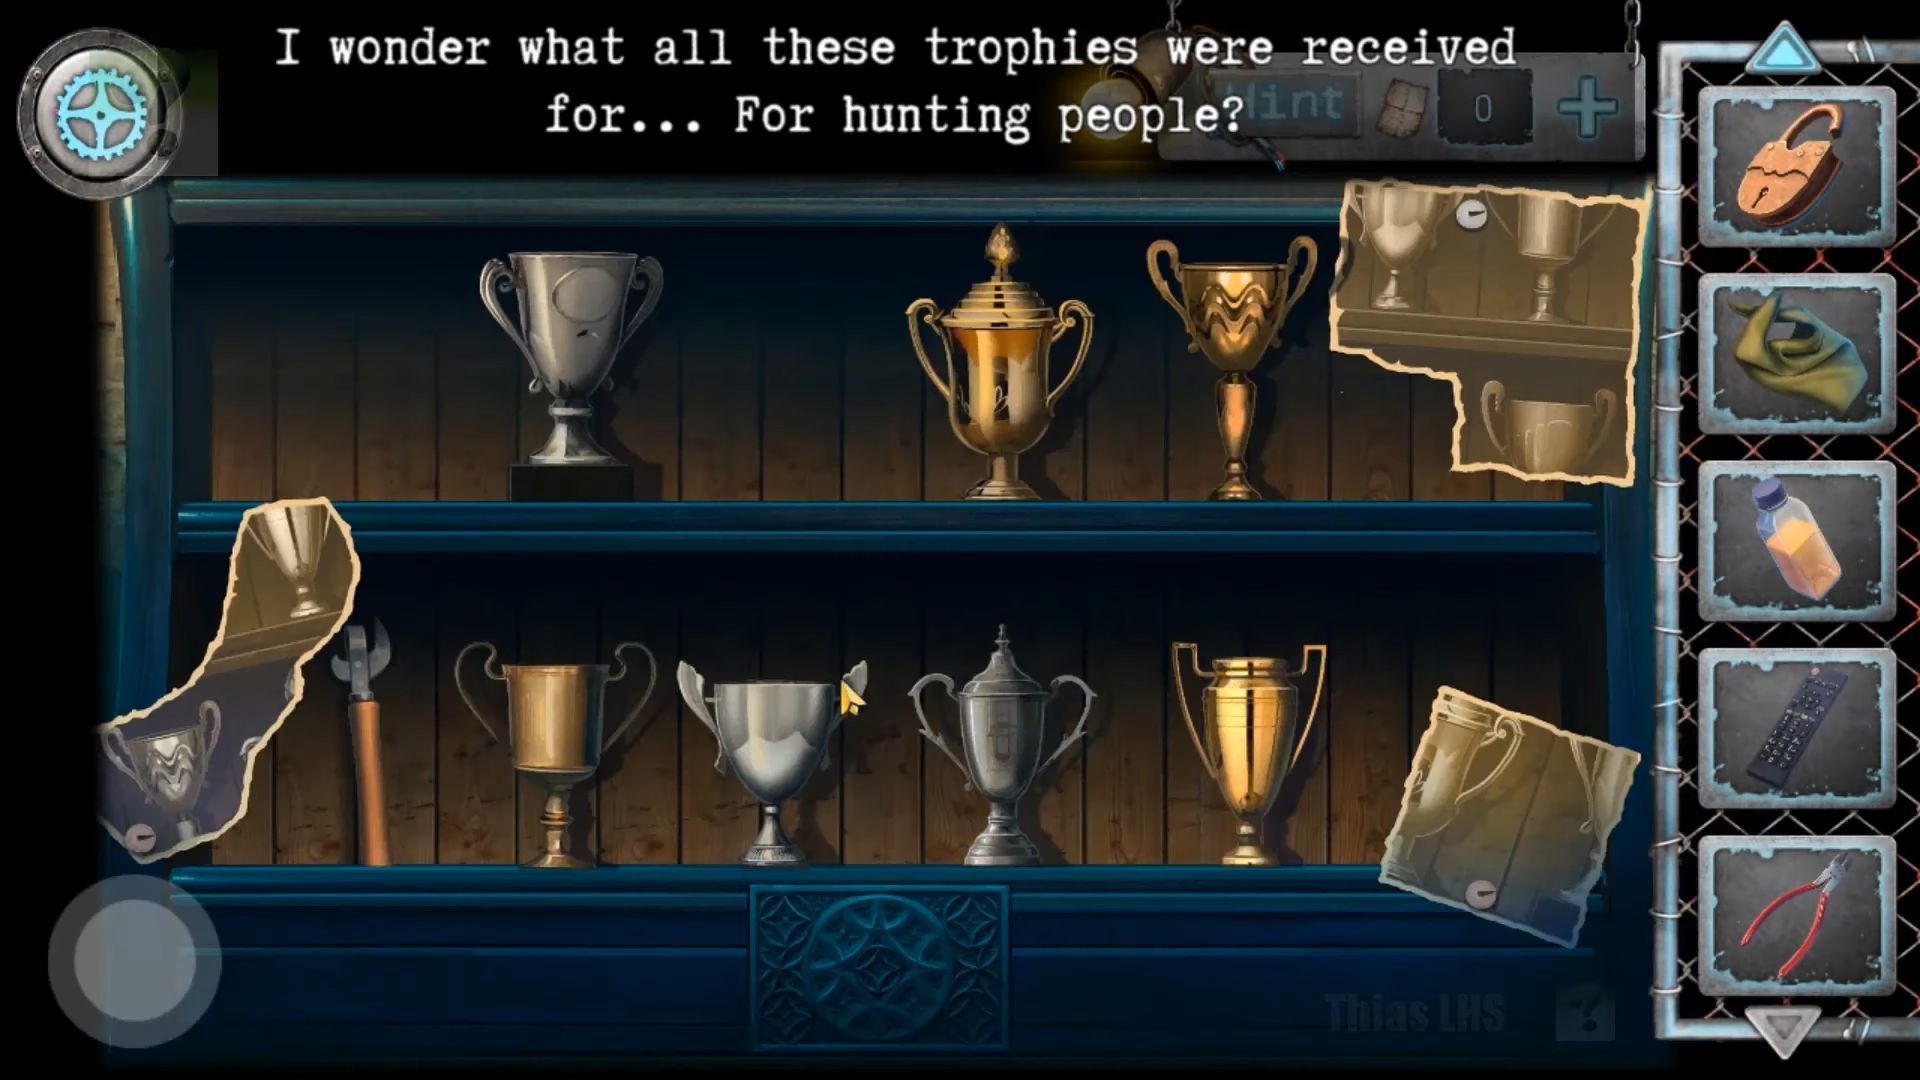
Go back to the hall and then head to the corridor with the ladder. In the end, there’s a doorway blocked by bars. Now you have to utilize the Saw for metal to take off a bar and enter a medieval-style room. Tap to see the shelves below with trophies, and gather a can opener from the lower left.
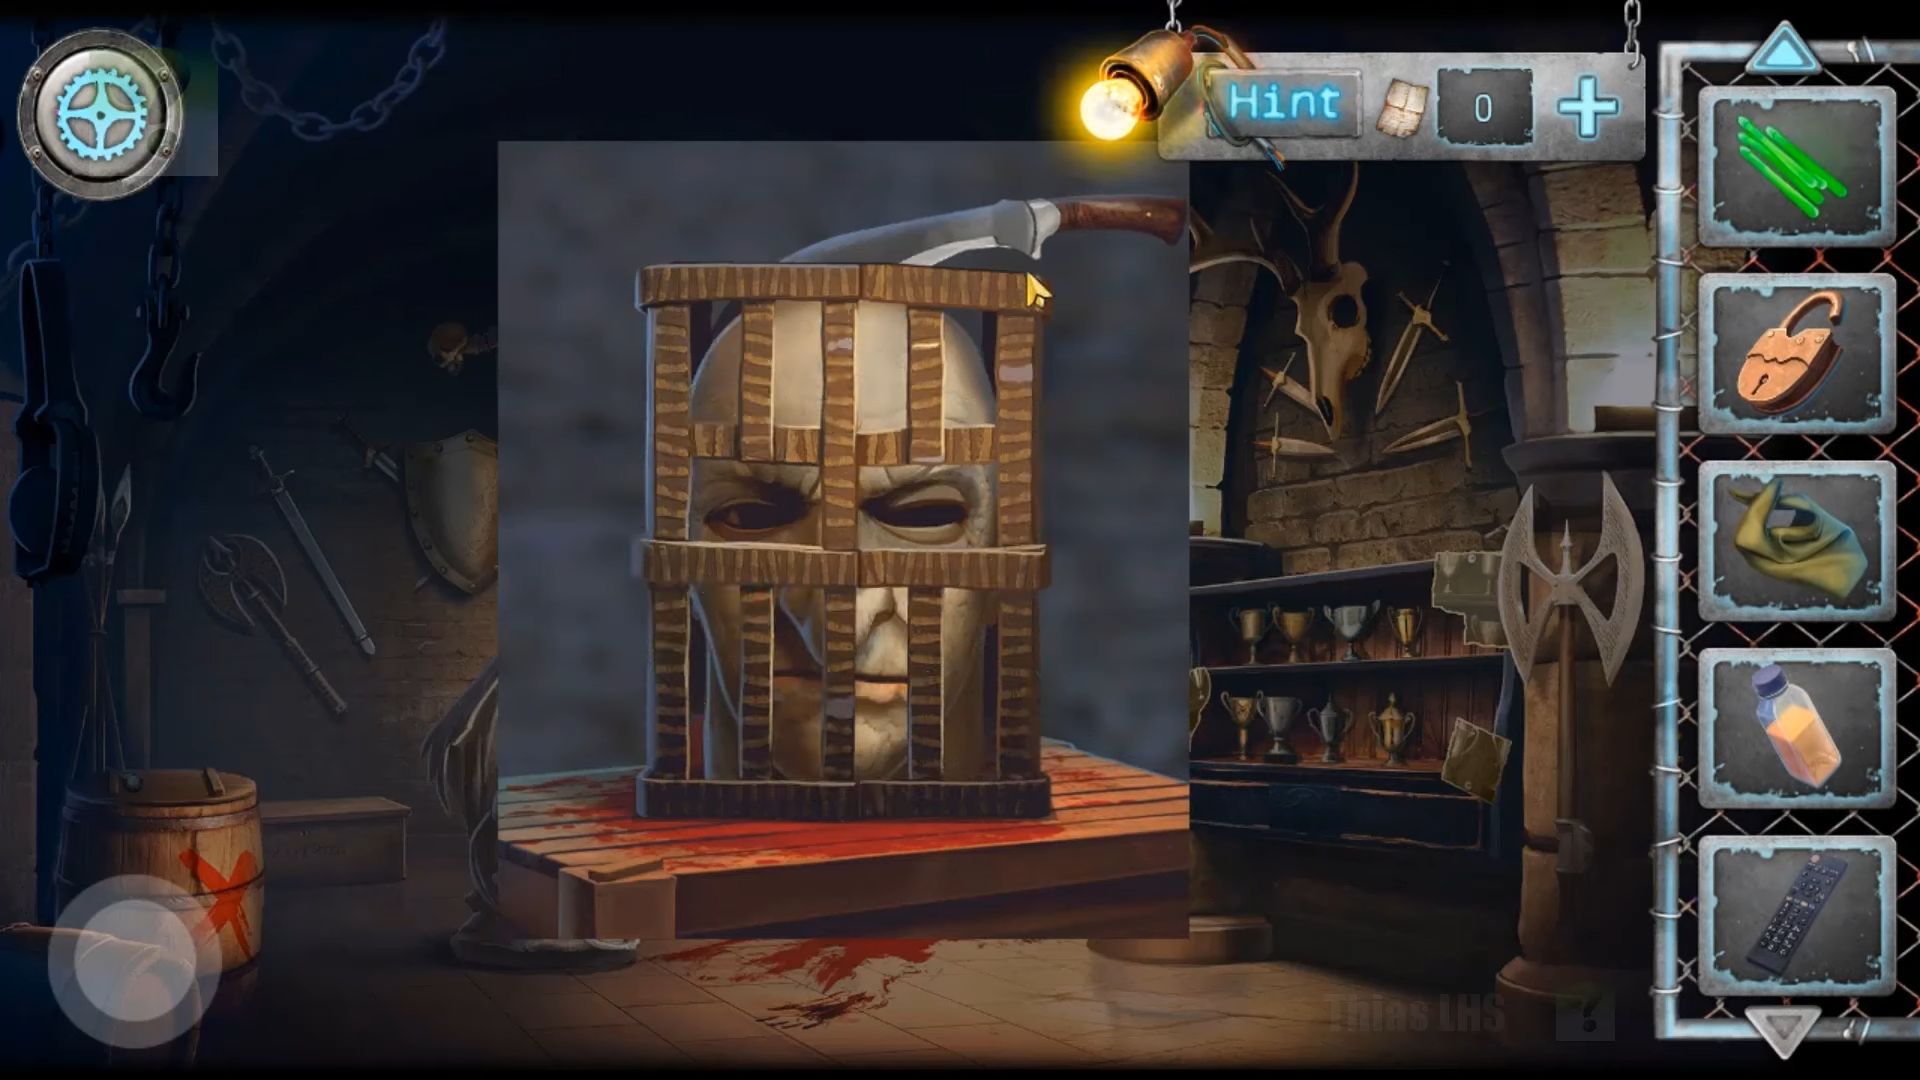
Next, check the red box on the floor again. Open it using the can opener and get some neon sticks. In the back center of the room, there’s a box with a head on top. Now use the wire cutters to cut all the wire loops, then tap to remove them. Take the knife from the top of the head, and it will fall apart, allowing you to collect a bottle of paint remover.
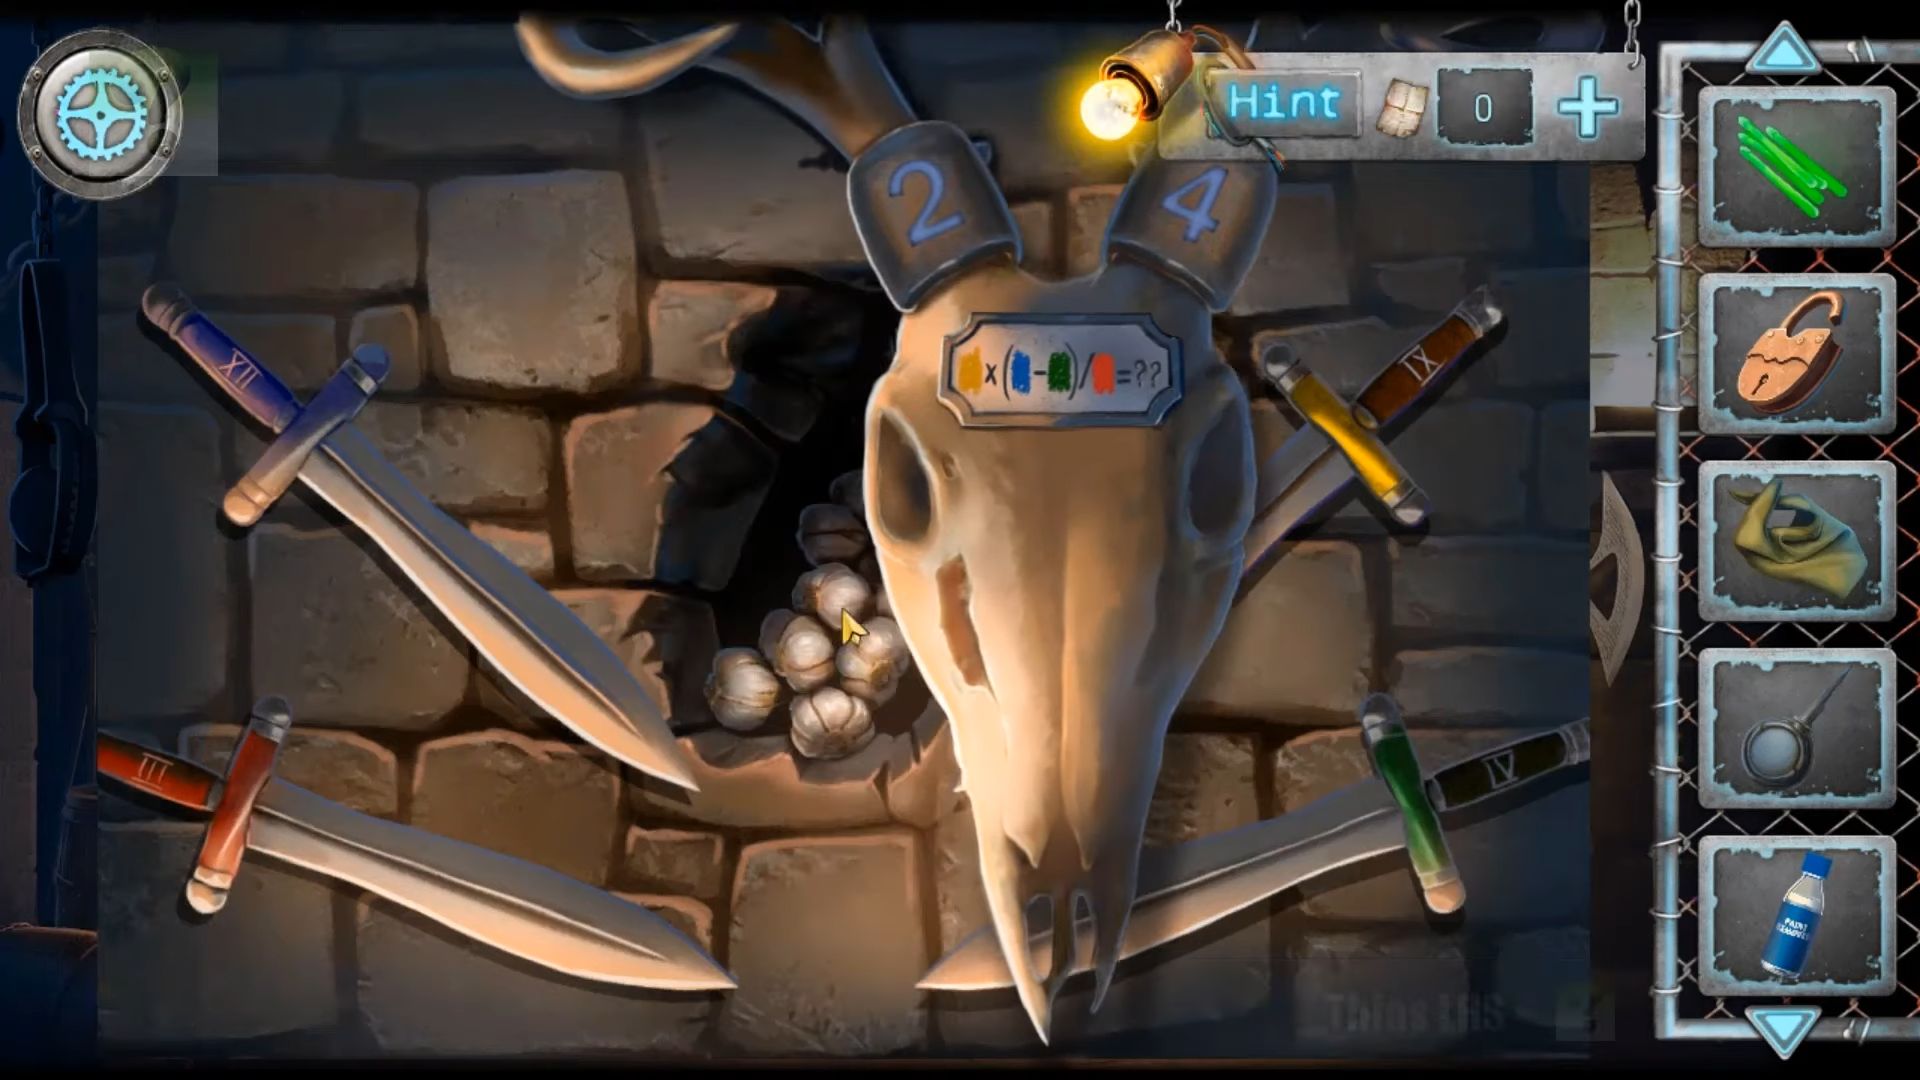
Next, tap on the animal skull on the right wall with a puzzle to solve. Take note of the numerals on the sword handles with colors, and then collect the bunch of garlic.
Return through the corridor to the medieval room. In the center, there’s a pulley with a chain. You have to attach the handle to the pulley, and this will break the gargoyle figure. Examine the remains and clean them until you find and collect a hammer. After that, use the arrows to see other areas of the dark room, and employ the neon sticks to light it up. A vampire will then appear.
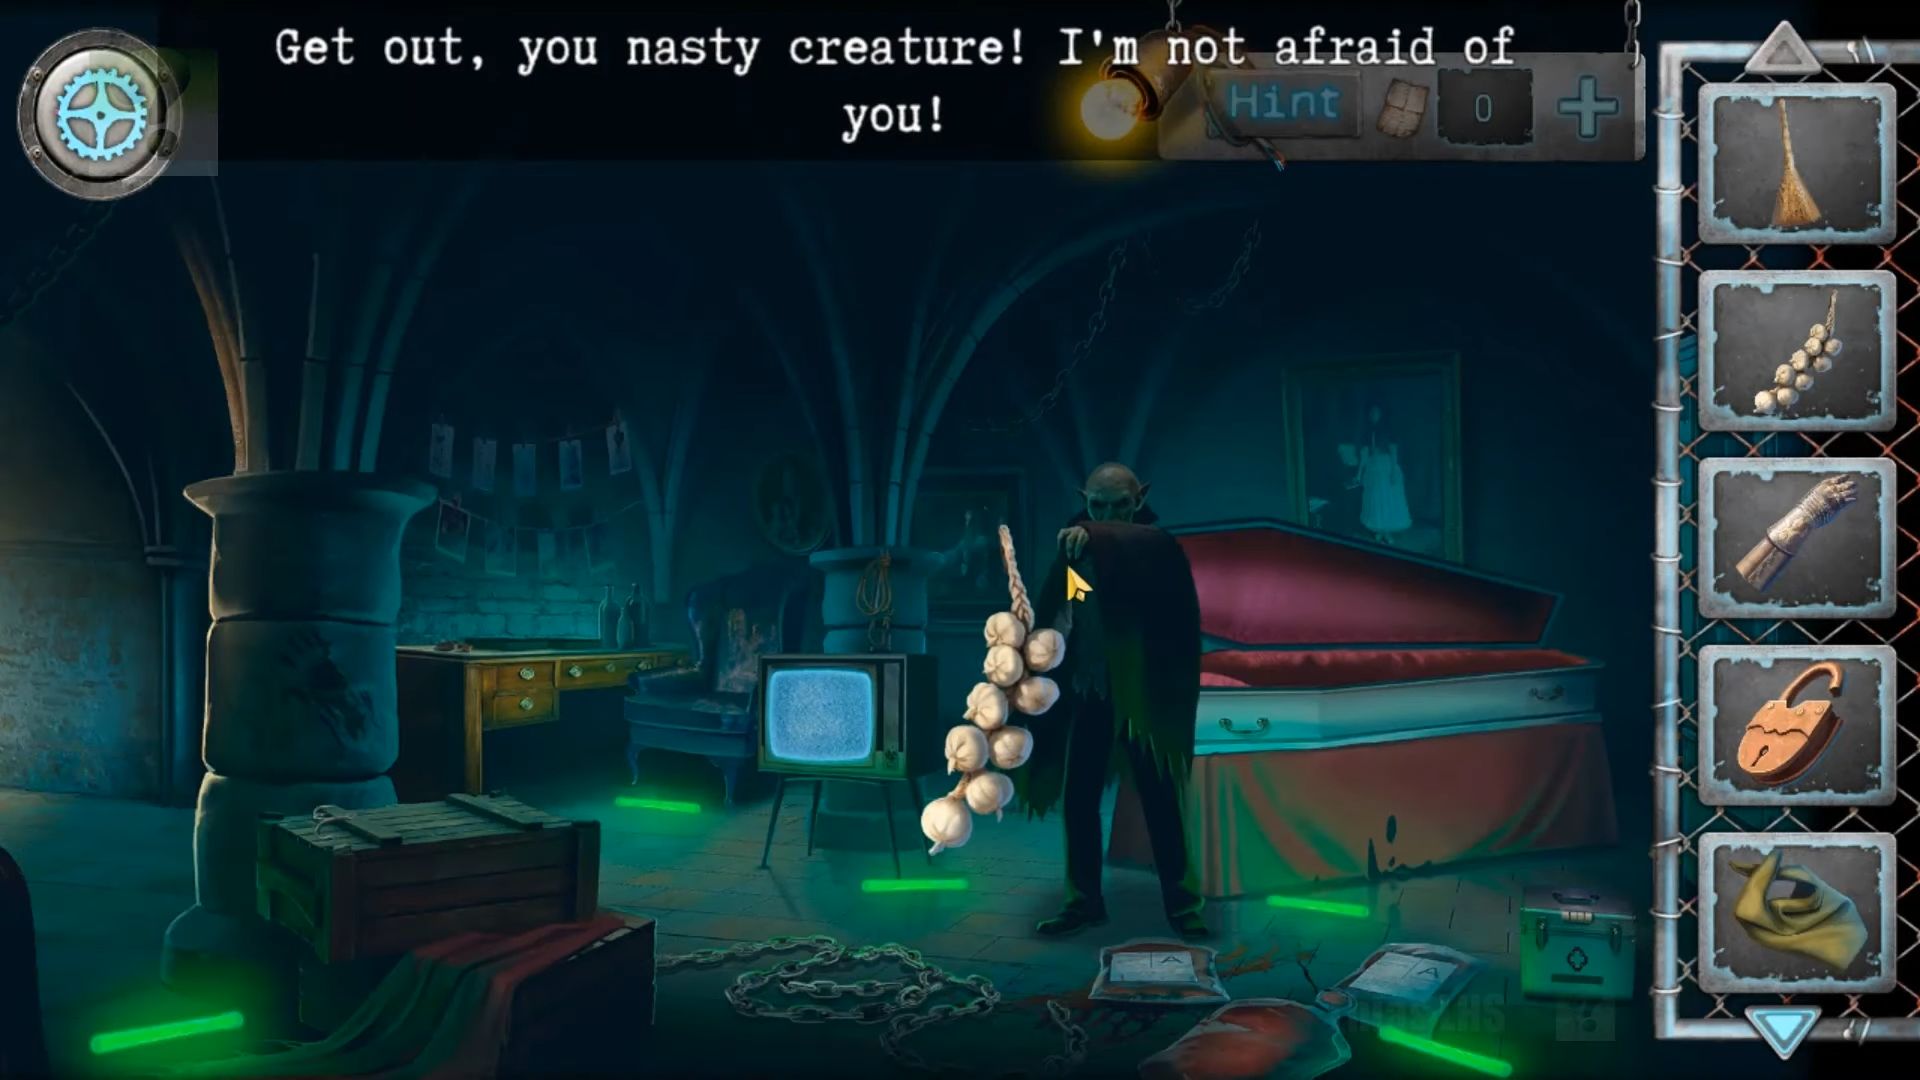
First, gather the large chain from the center of the floor. Attach it to the coffin and secure the lid by adding the padlock. Now, you are safe.
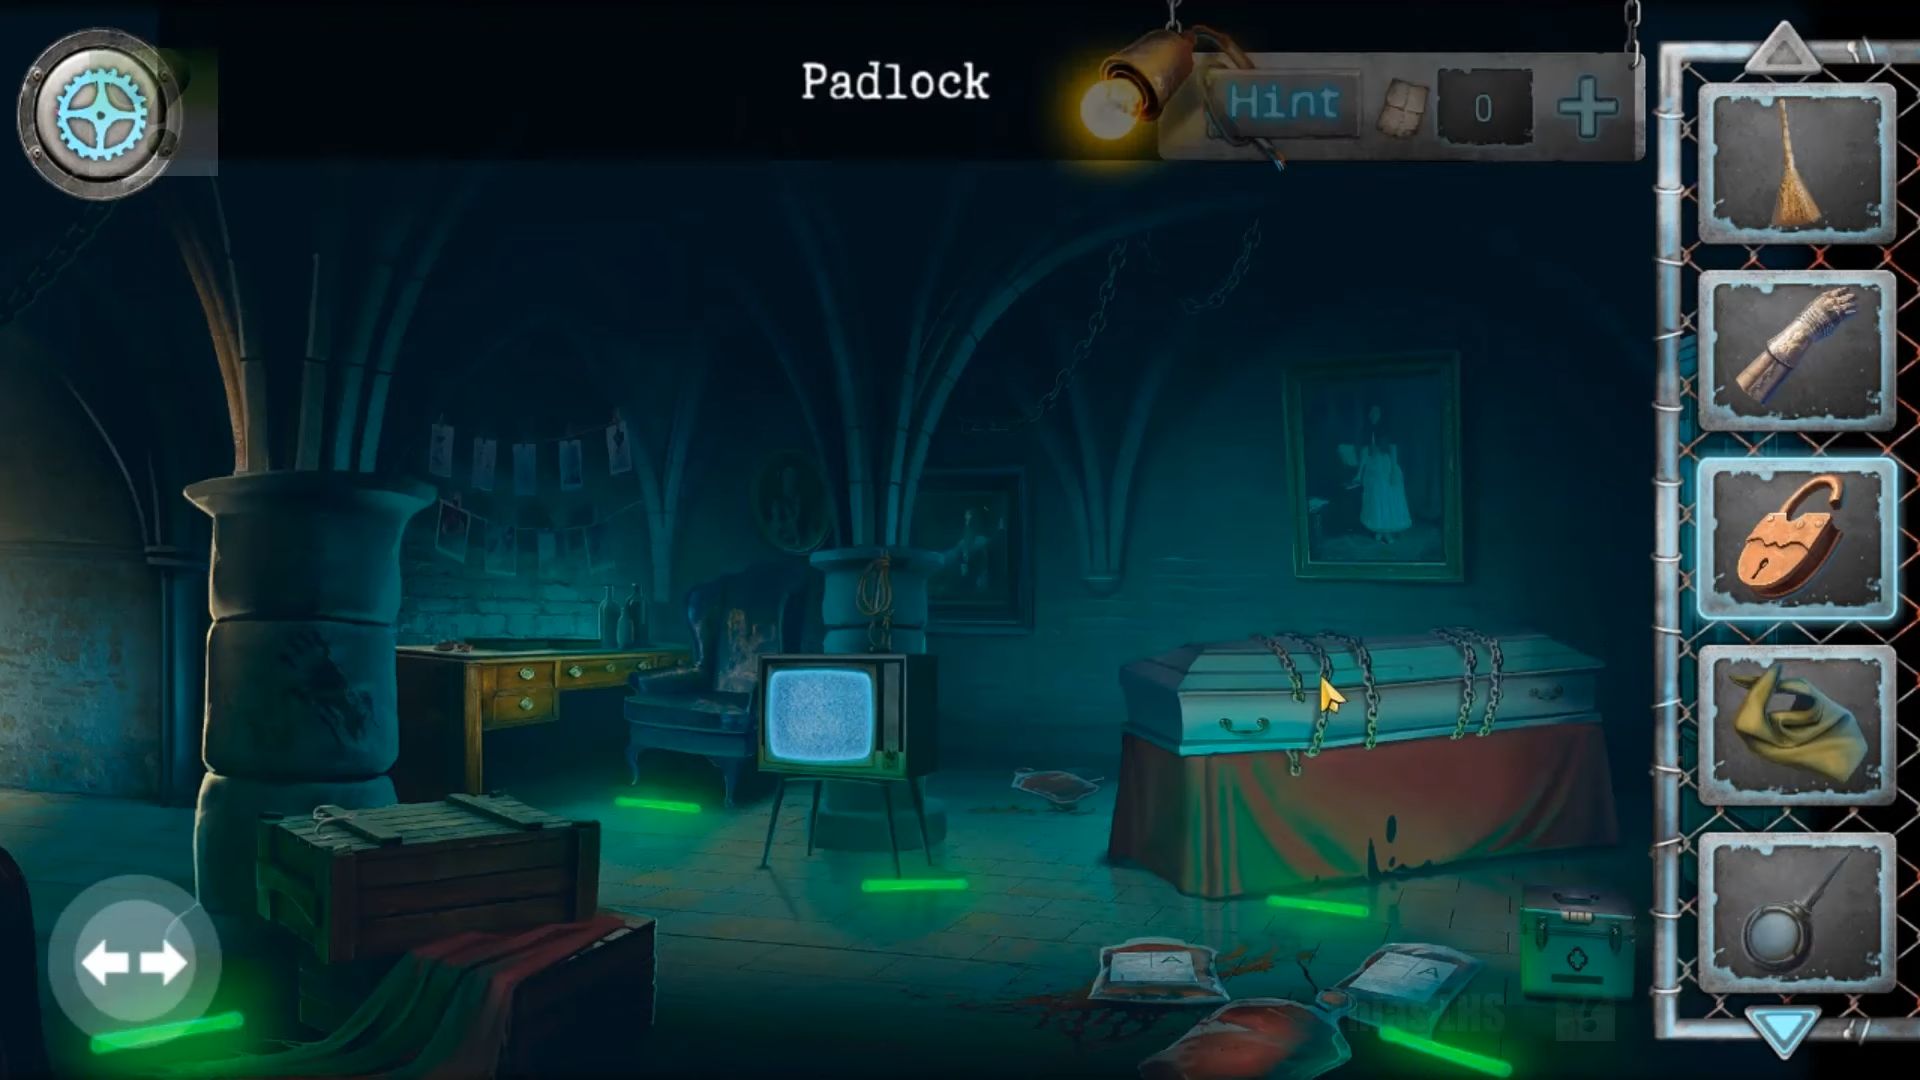
Next, check out the metal medical box on the lower right, which needs a 4-digit combination, and collect a Sail (a part of a model ship). On the bottom left, there’s a barrel with an X. Examine it and gather an Oiler (oil can) from the top.
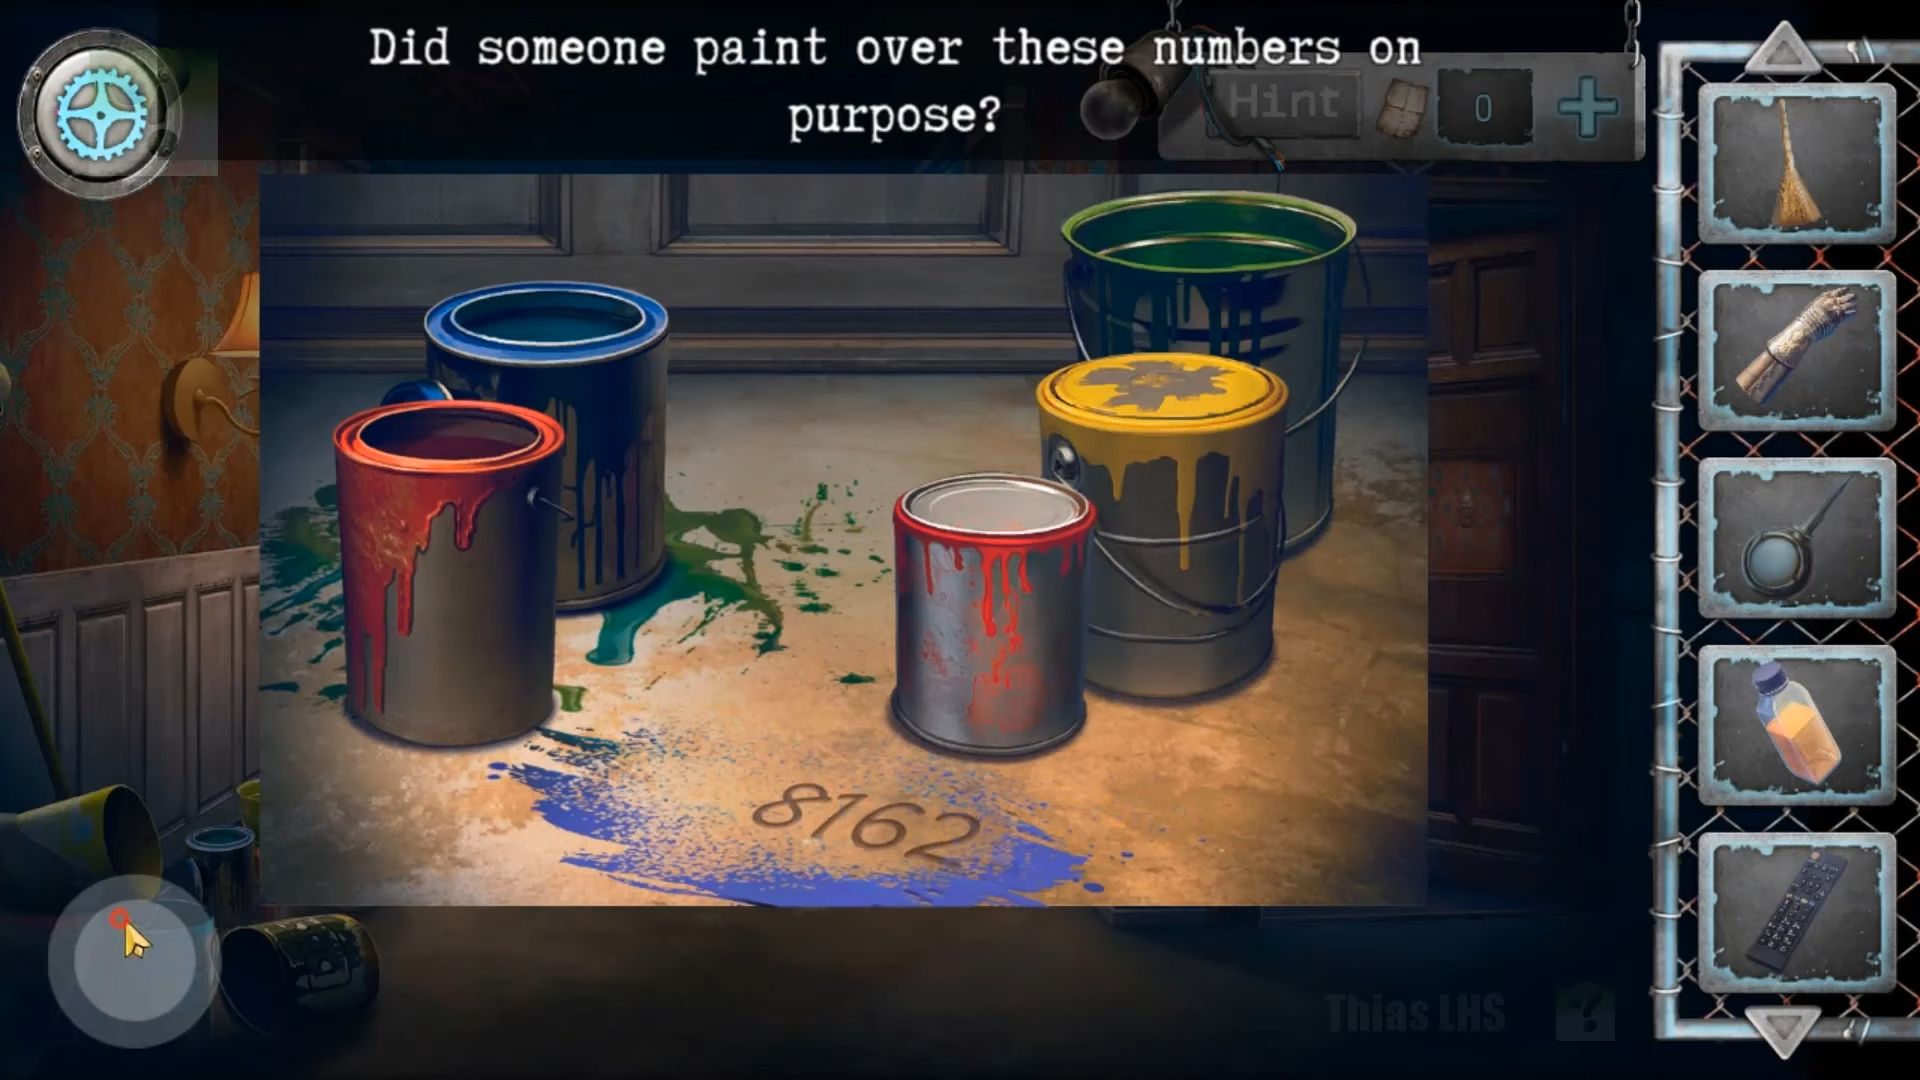
After that, leave the room and go back to the corridor with the paint cans. Now you have to look at the paint cans to find blue paint on the floor. Combine the paint remover and the green neckerchief in the inventory, then use it on the blue paint to clean it. This reveals a code (8162).
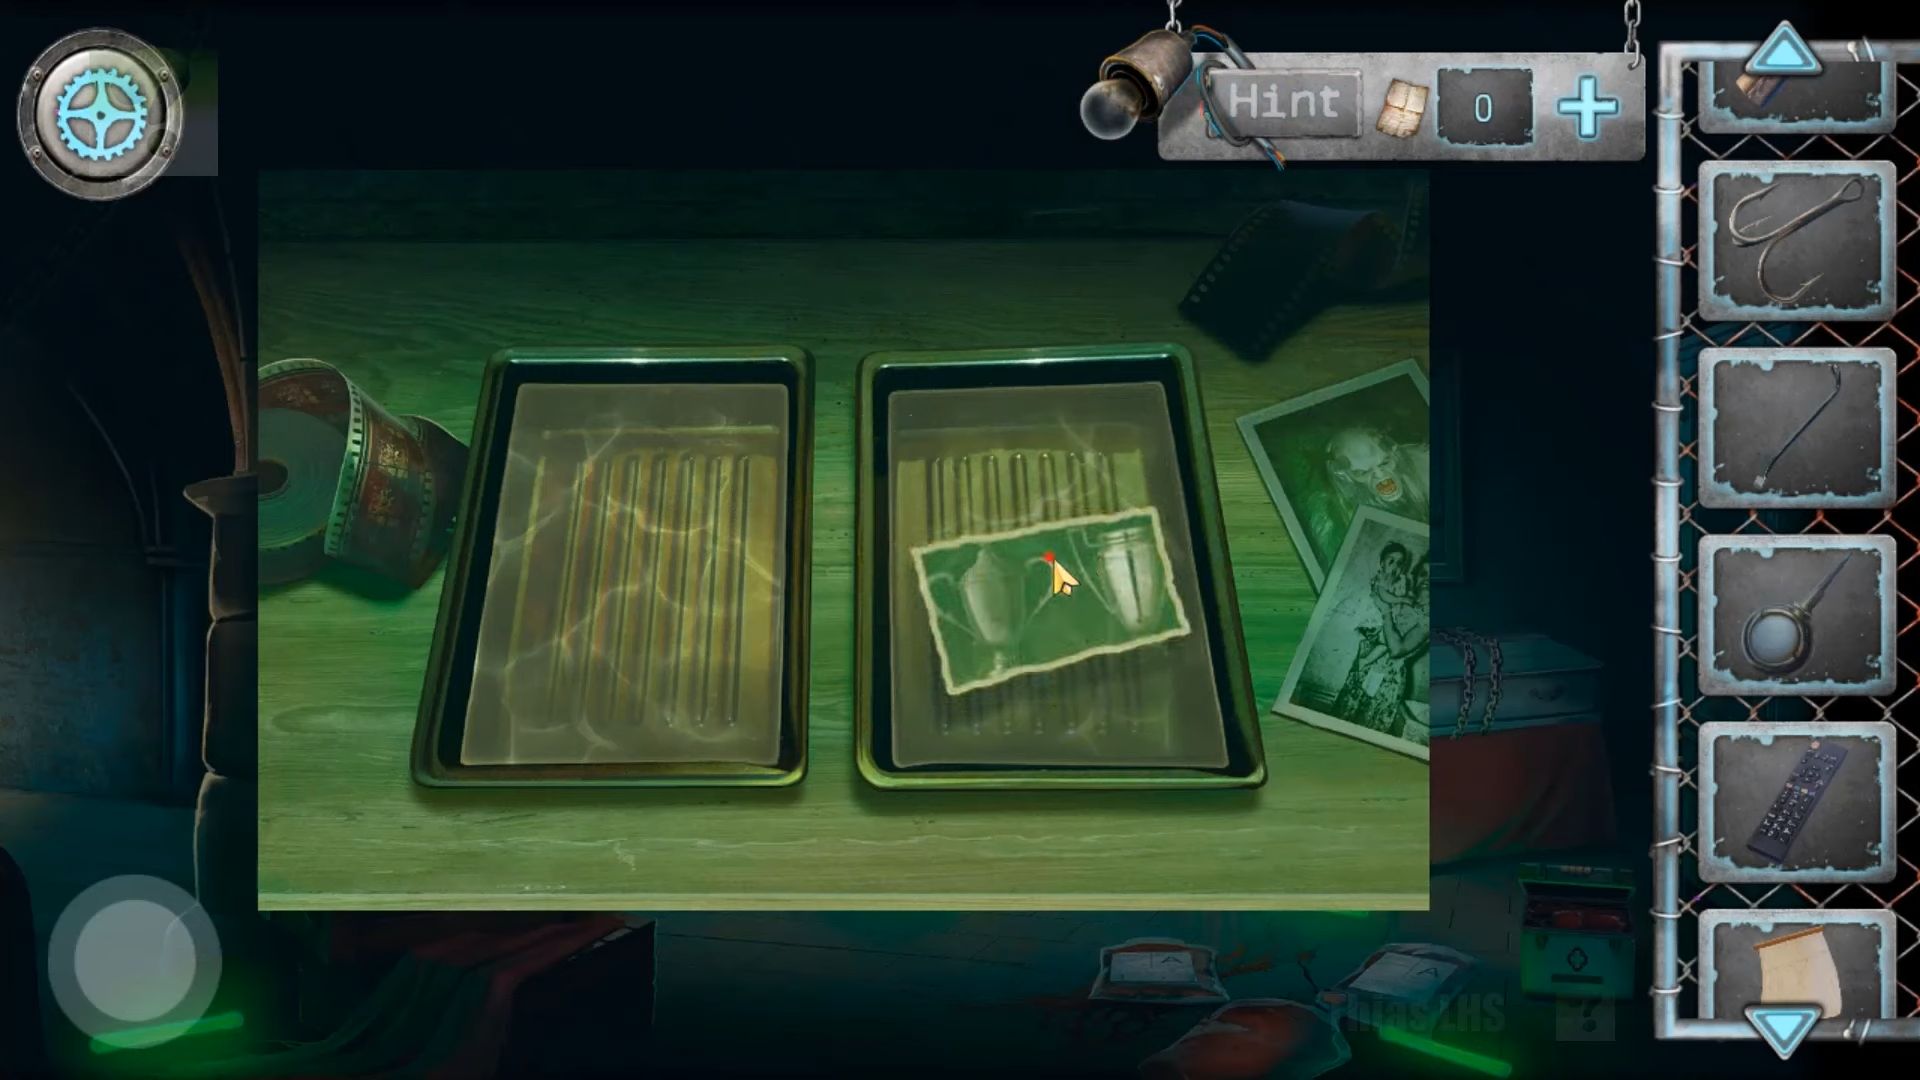
Use the bottle of developer on the empty tray, then drag the tweezers at the bottom to the photo on the left. Once it develops on the right, pick it up. Next, tap the wooden box on the left to view it and gather a Hook.
Now, check out the desk on the back left. There are photo-developing trays here. Use the bottle of developer on the empty tray, then drag the tweezers at the bottom to the photo on the left. When it develops on the right, collect it.
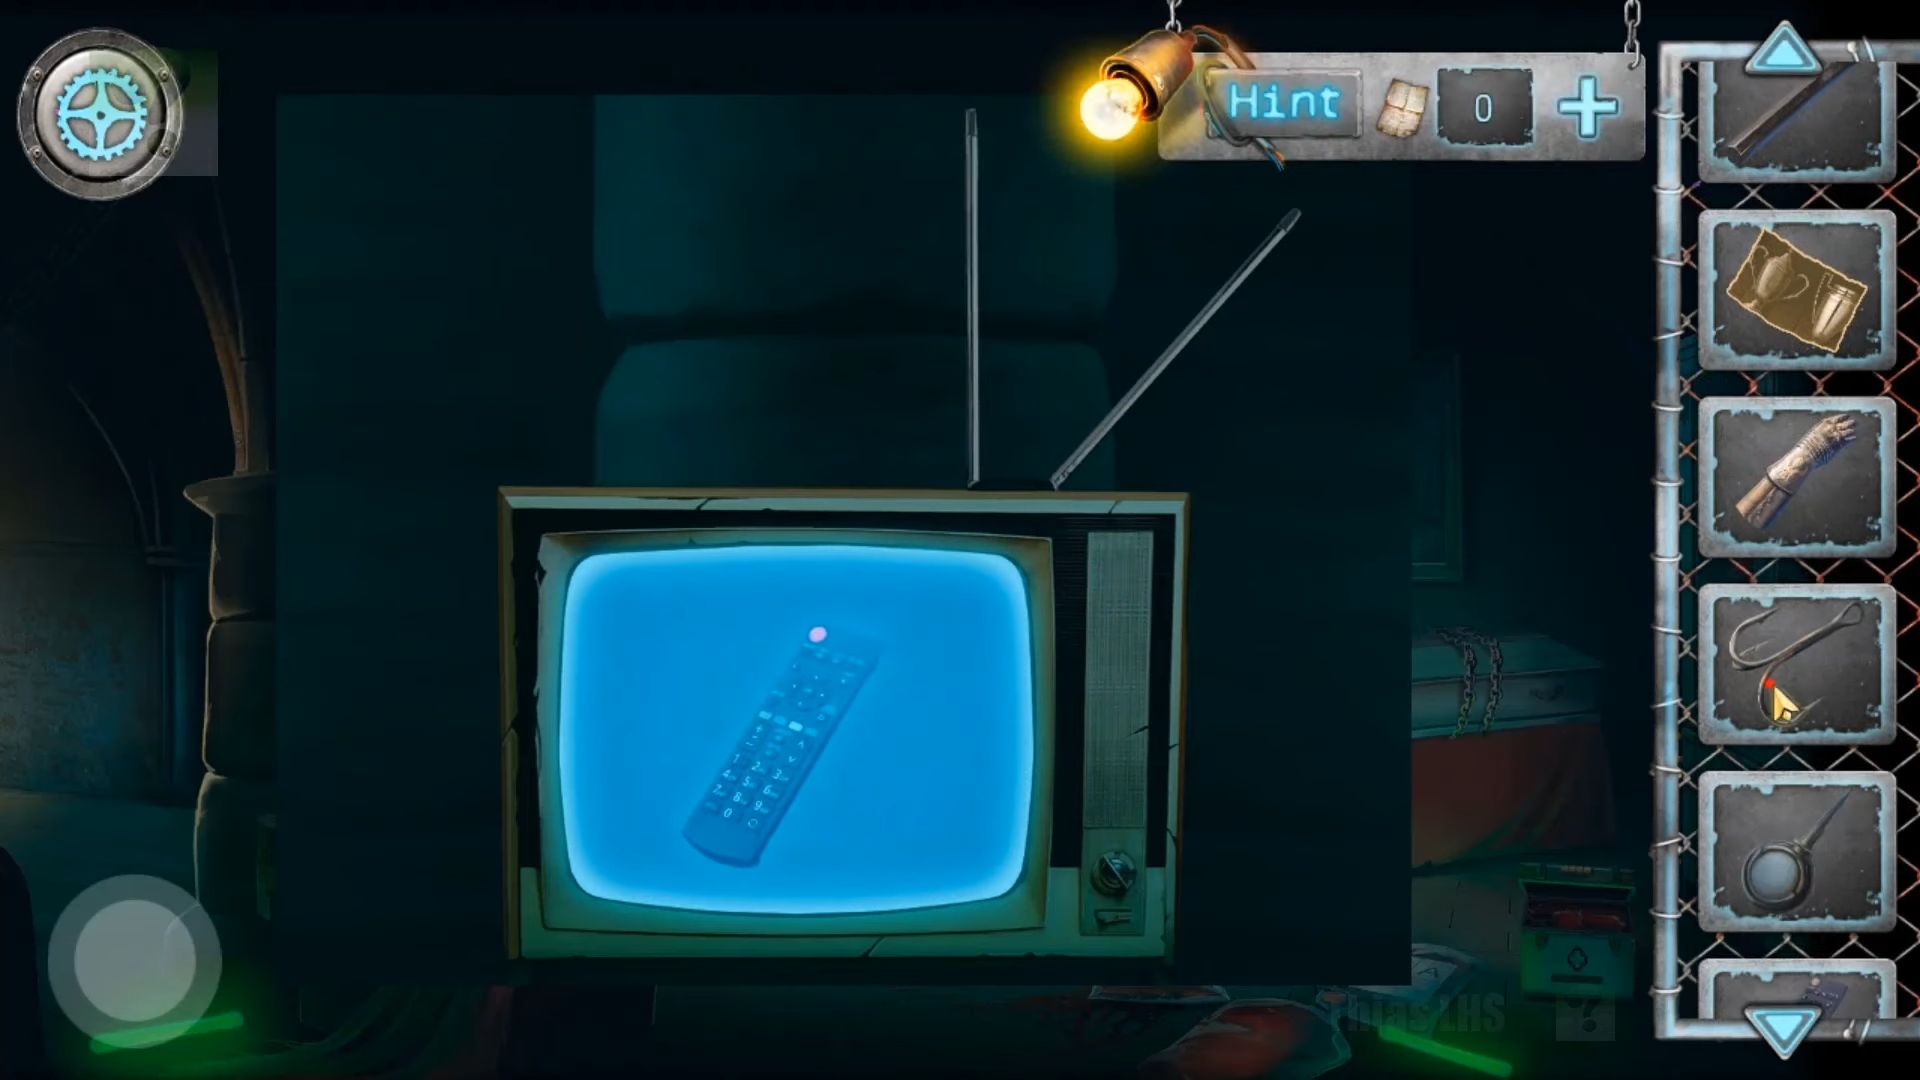
Next, check the metal medical box on the lower right, which needs a 4-digit combination. Open it using the code found above and pick up a Sail (a part of a model ship). Now, look at the TV. Gather the rope from the antenna and adjust the picture until you see an image of a remote control. Use your remote control on the TV, and the screen will fall, revealing a Three-cornered hat. Collect it.
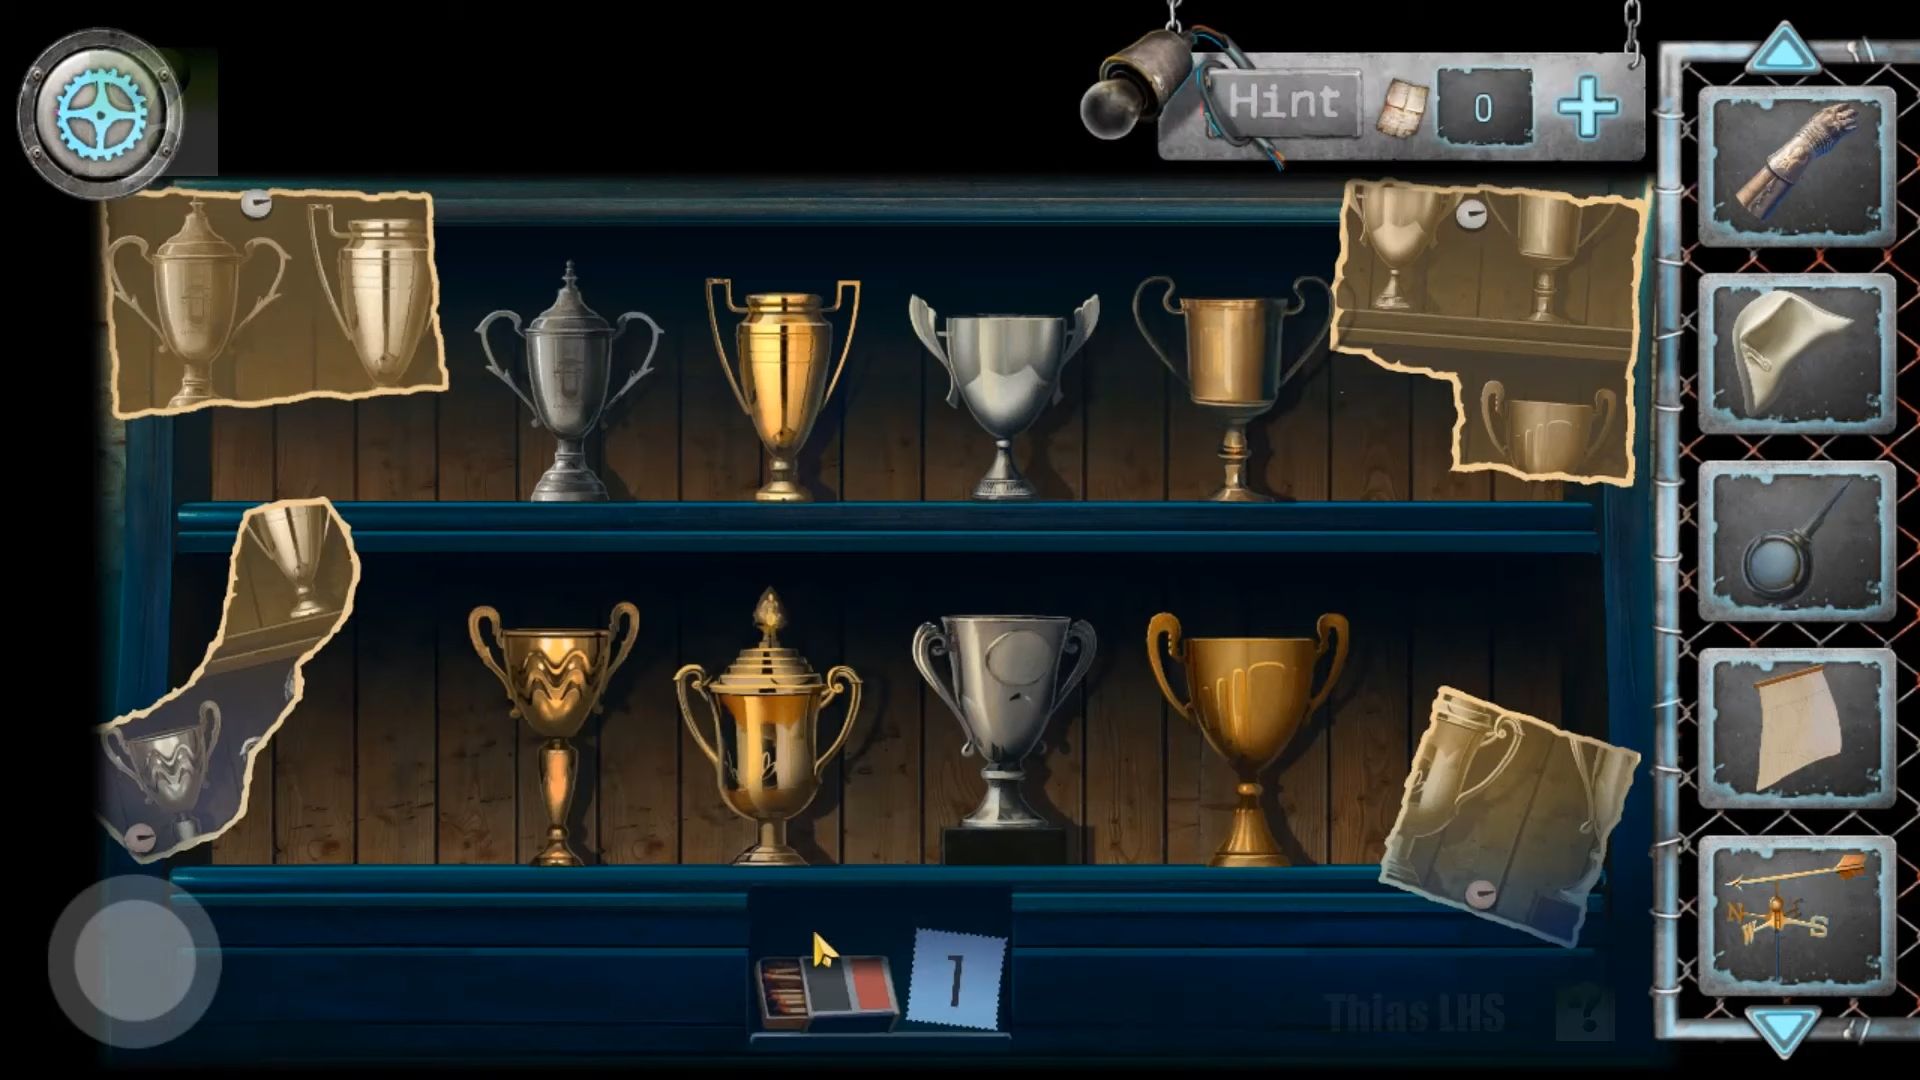
After that, use the small crowbar to open the box, move the packing material, and pick up a Chisel. Use the arrows again to see other areas, then tap to view the shelves with the trophies. Add the trophy you have and the developed photo. Now, solve the puzzle by arranging the trophies based on the photo clues. Collect the matchbox and the sheet with the number 1.
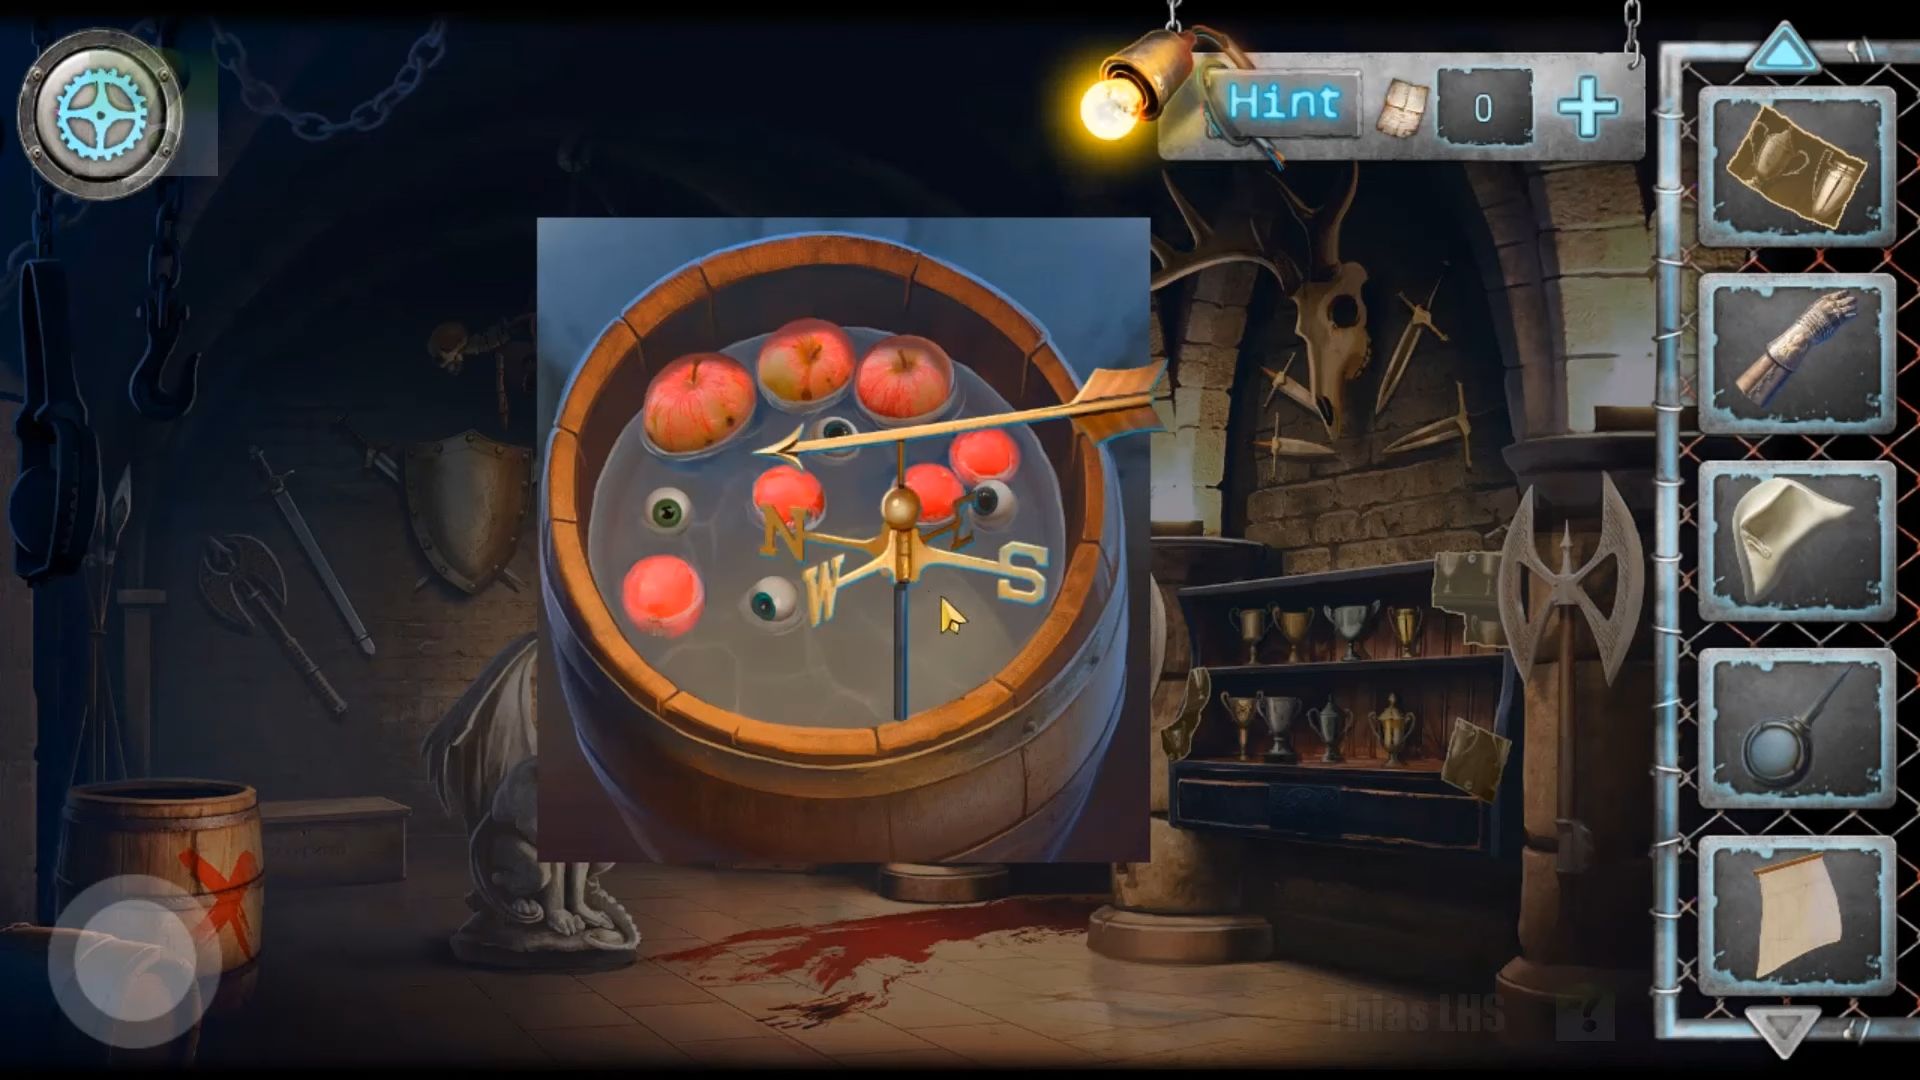
Now, check the barrel on the left of the room again and open the lid to look inside. Combine the hook and the dope in your inventory, then you have to use it to collect the Vane from the water.
Go back to the corridor and enter the Study. Look at the Napoleon Bust on the left again, and add the three-pointed hat. This action opens a door to a secret room.
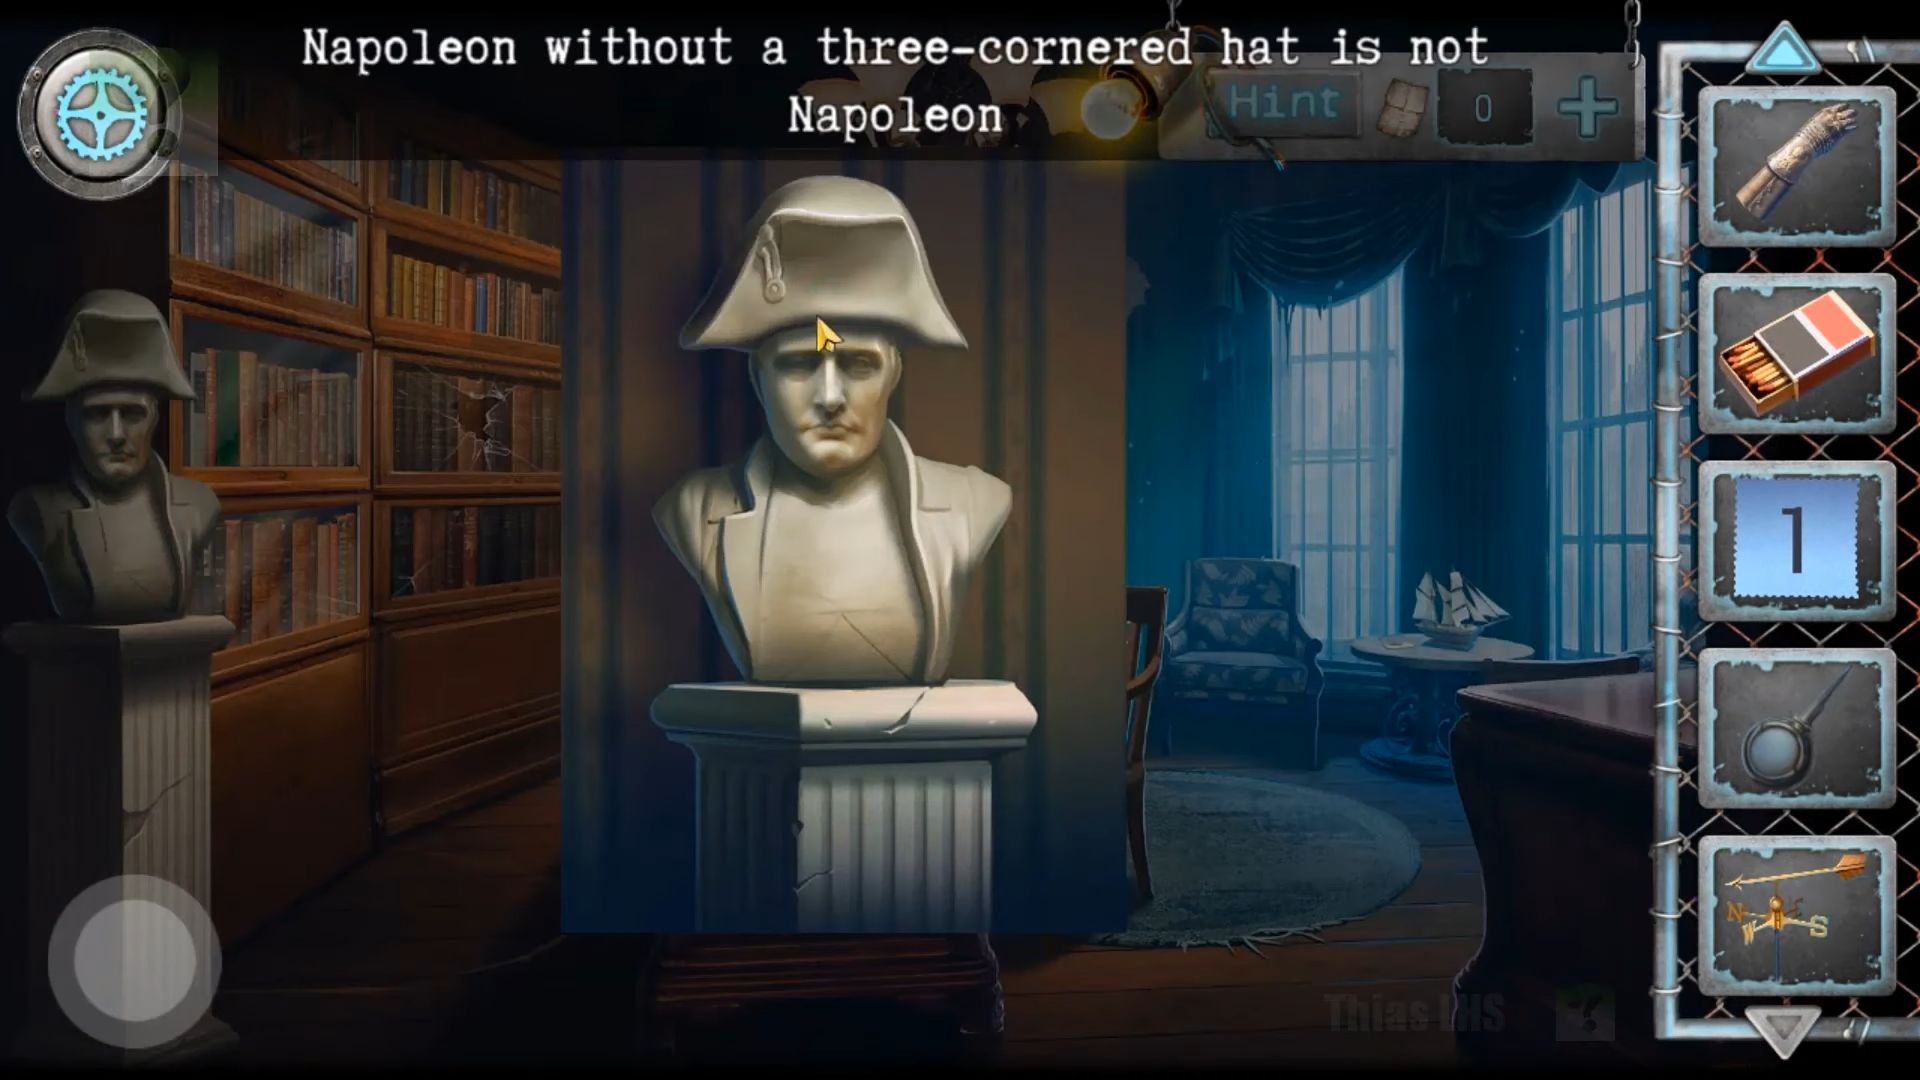
Check out the left alcove, where there’s a small red flag. After that, use the metal gauntlet to keep the door from closing, allowing you to grab the red flag.

Now, look at the table with the model ship once more and find the paper on the left containing instructions for assembling it. Drag the two pieces from the table to add to the model, then use the red flag and sail from your inventory to finish it. Finally, gather the rune.
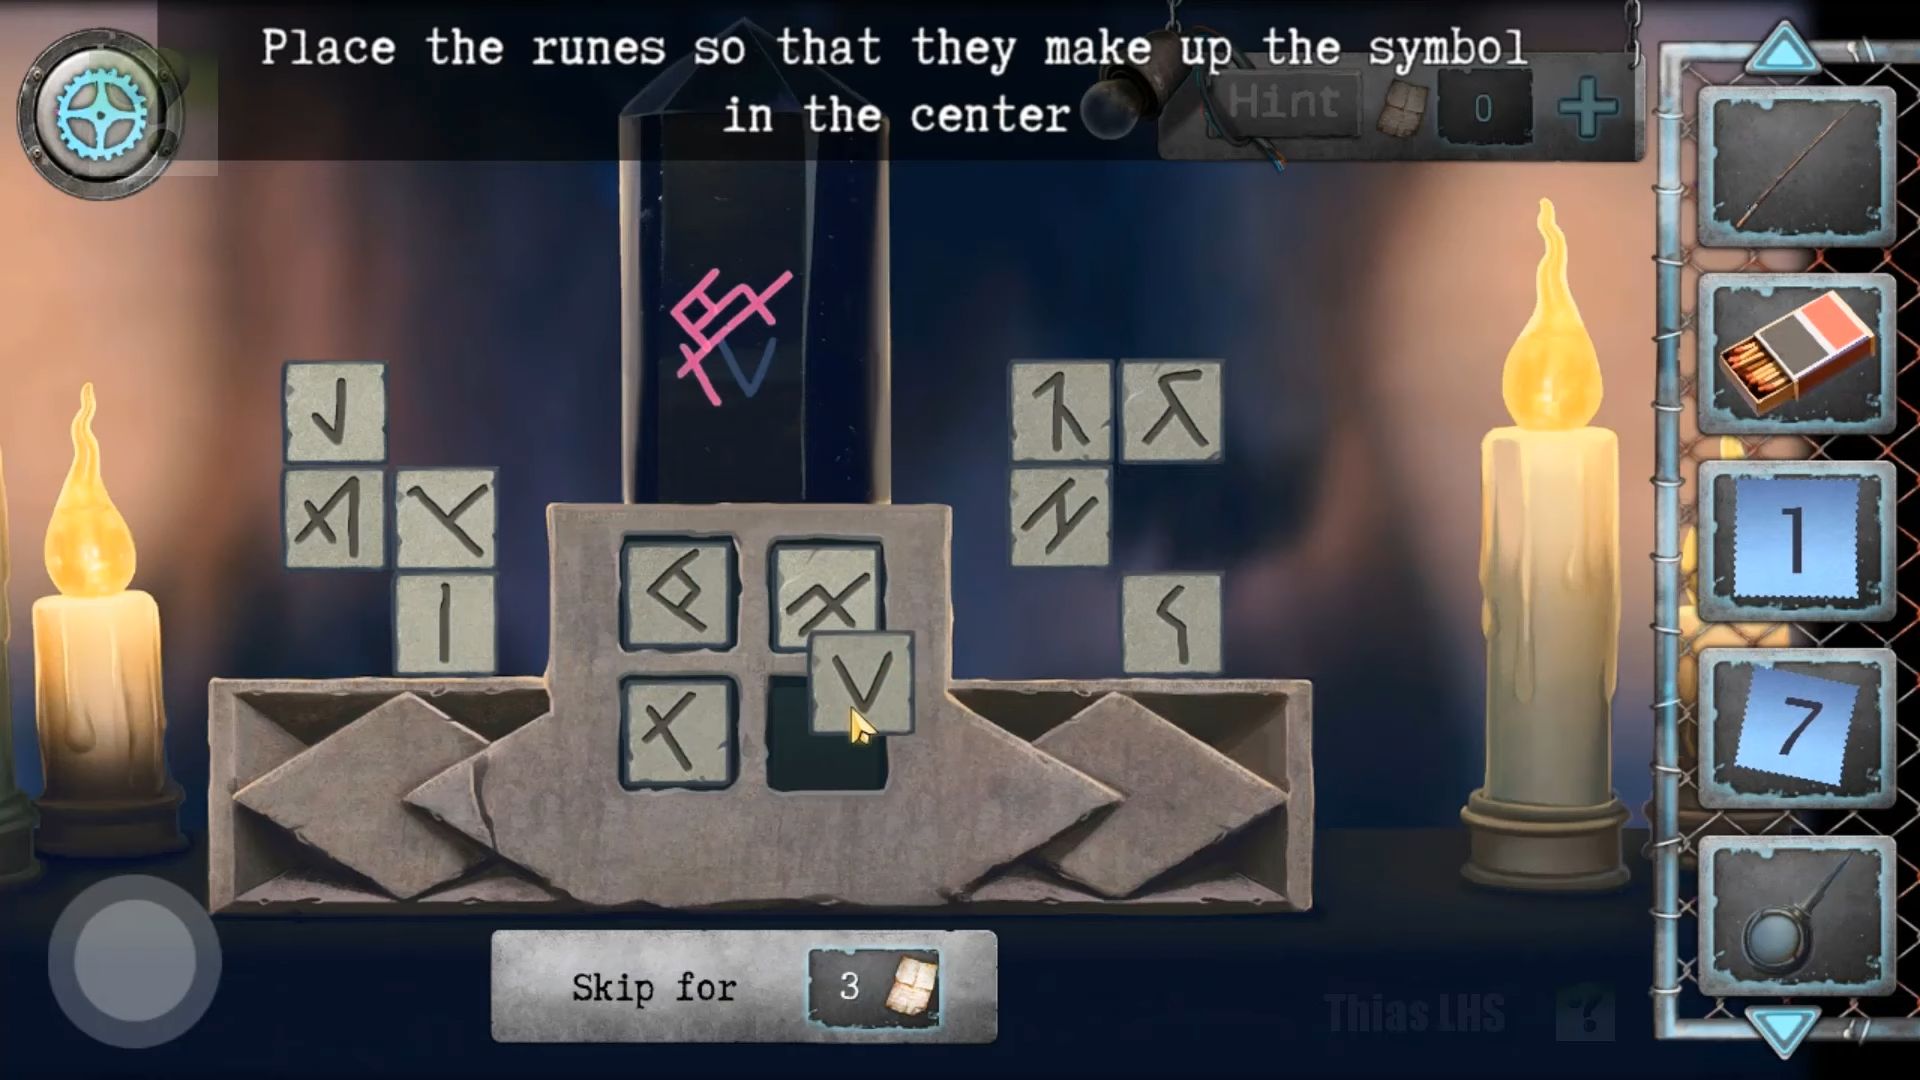
Check out the central altar table. Put the rune block on the left pile, then solve the puzzle by placing four runes into the center slots to match the symbol above each. After that, repeat this three times and now, you can grab a button for the elevator.
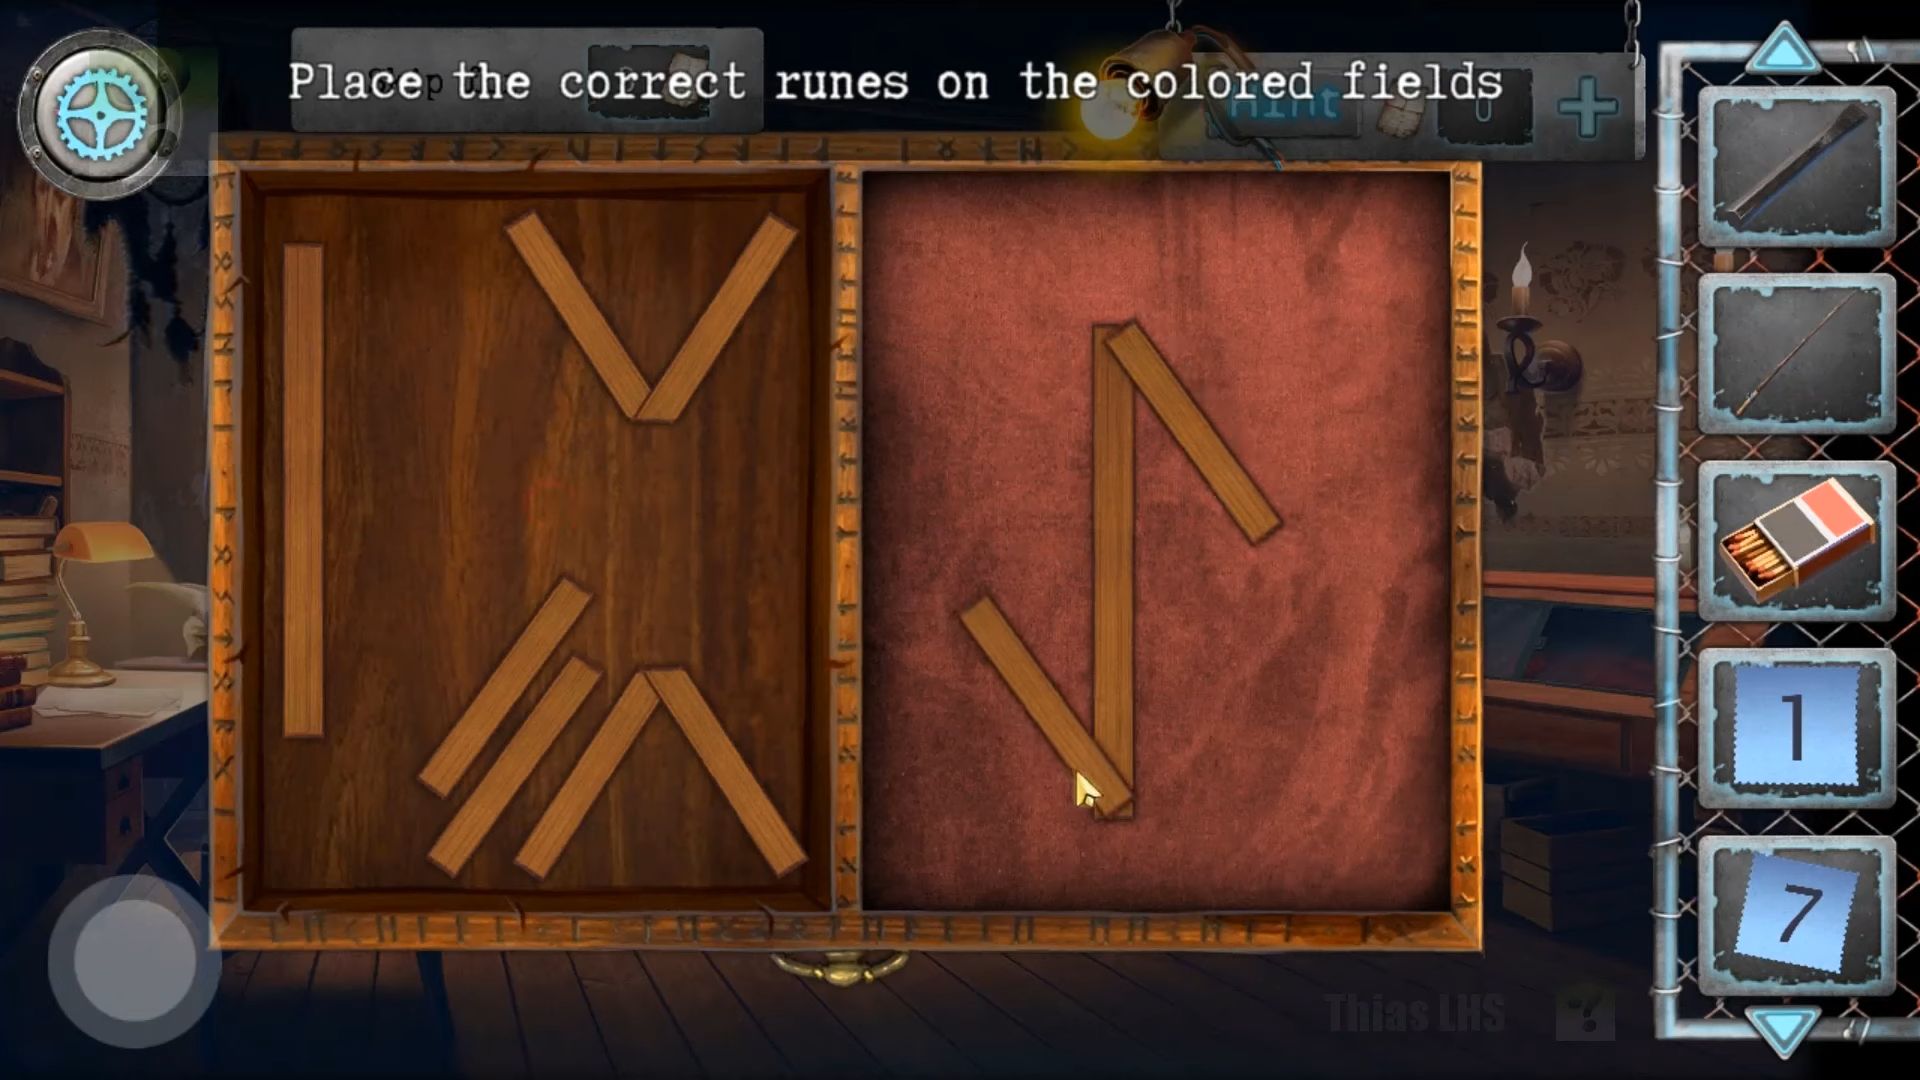
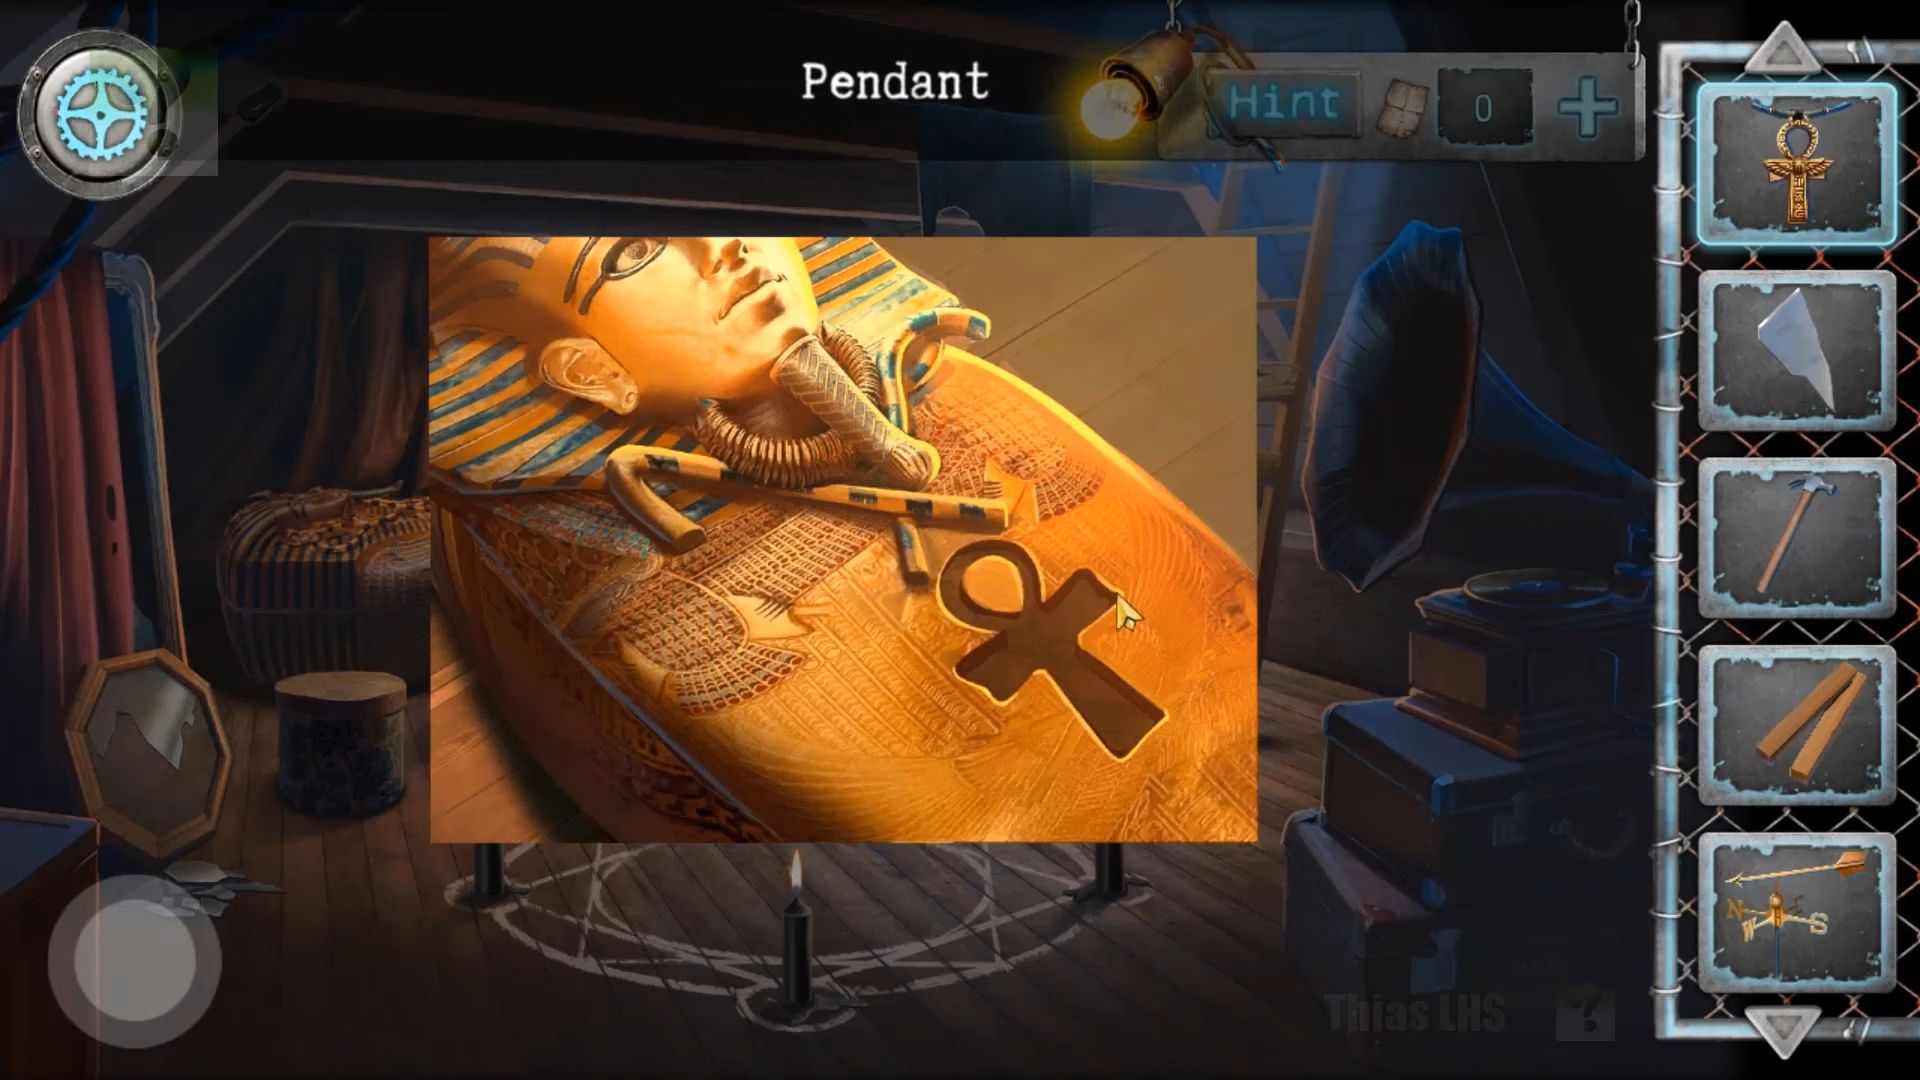
Break open the object using the hammer and chisel (3 hits) and grab a pendant from the skeleton. Take note of the three colored rune shapes in the room: blue, green, and red. Next, tap the box on the left chair to reveal a puzzle. Use the shapes on the left to create runes on the right, selecting the rune based on the background color. Once you make three, you’ll collect a sheet with the number 3.
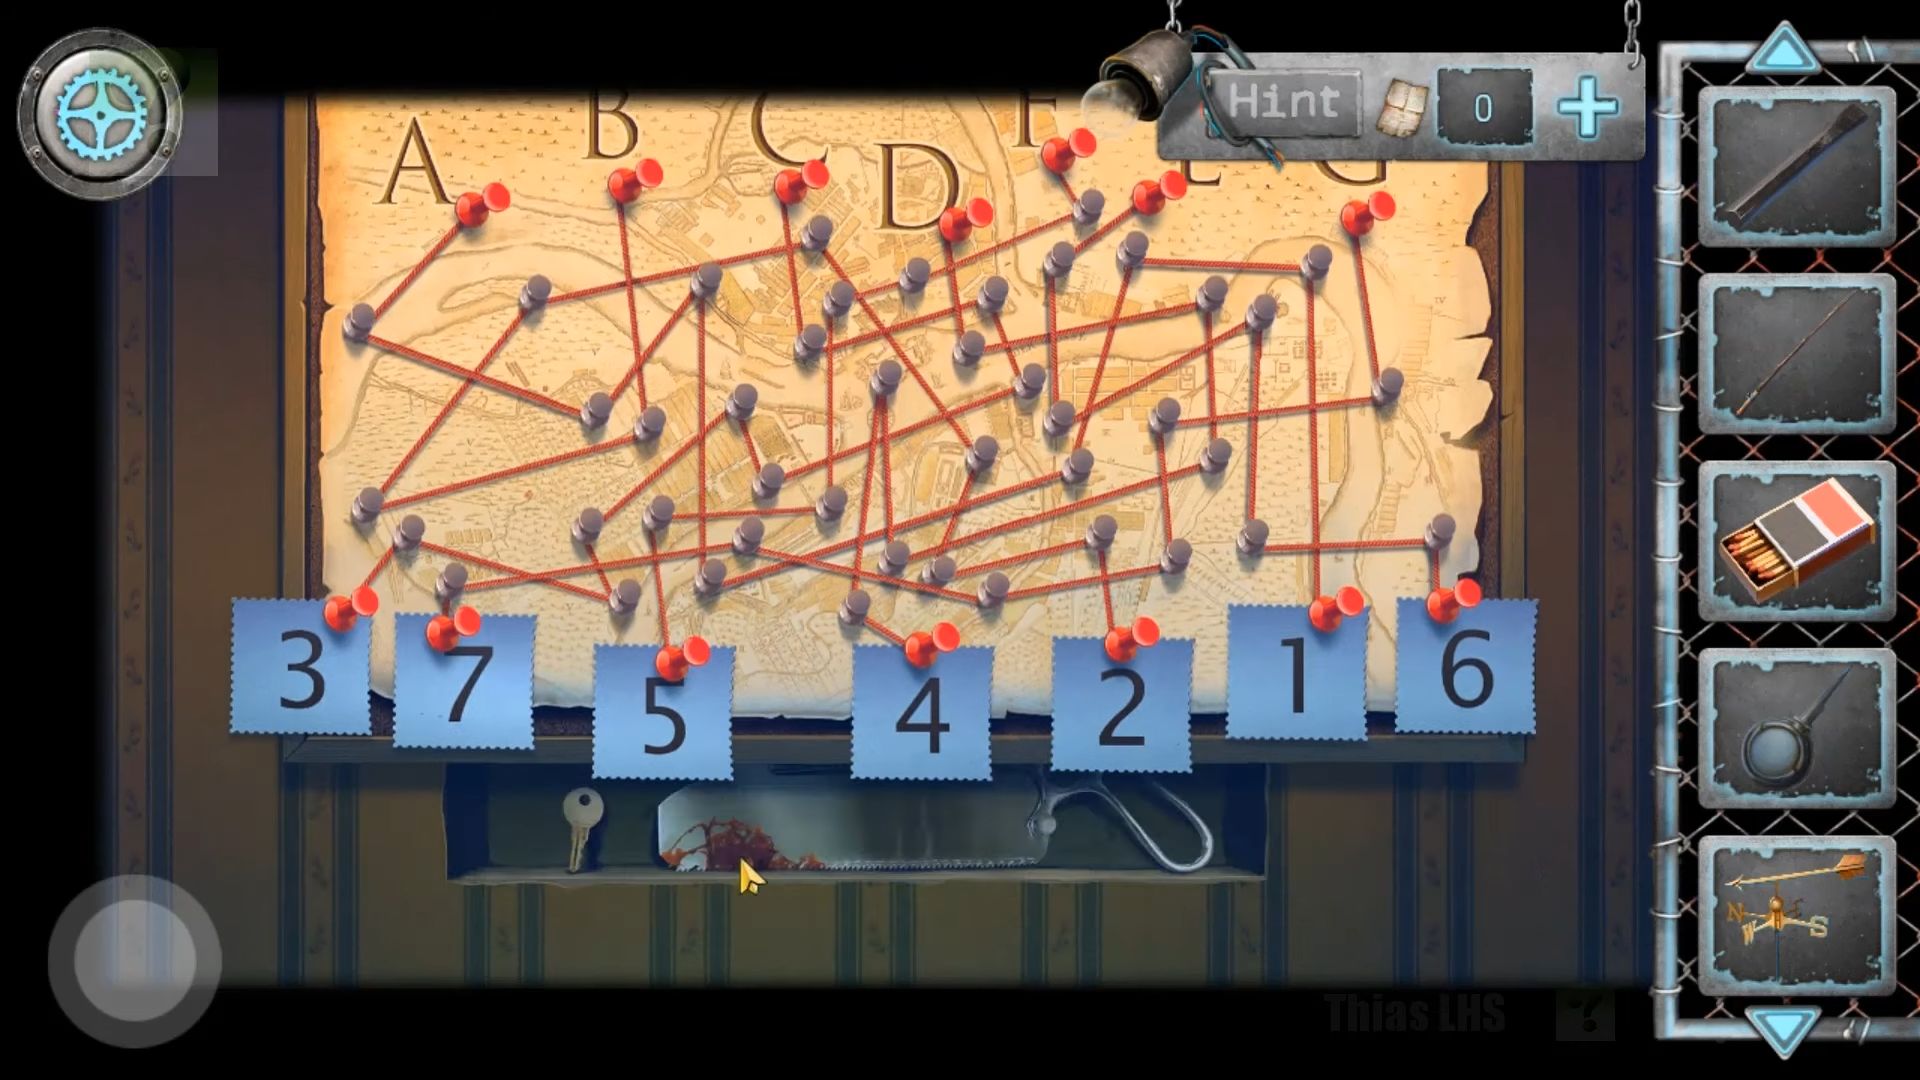
Look at the glass cabinet on the right and grab the number 7 sheet. Leave and check out the pin board/map in the study on the back wall. Combine the three number sheets you have and solve the puzzle by arranging the numbers to match the alphabet (A=1, B=2, etc.), following the strings. Note that F and E are reversed: 3 7 6 4 2 1 5. Collect the small key and a bone saw.
Discover a secret room behind the Napoleon bust in the study. Pick up the fishing rod without a hook from the floor. Combine the hammer and chisel in your inventory, then check out the exposed wall on the right.
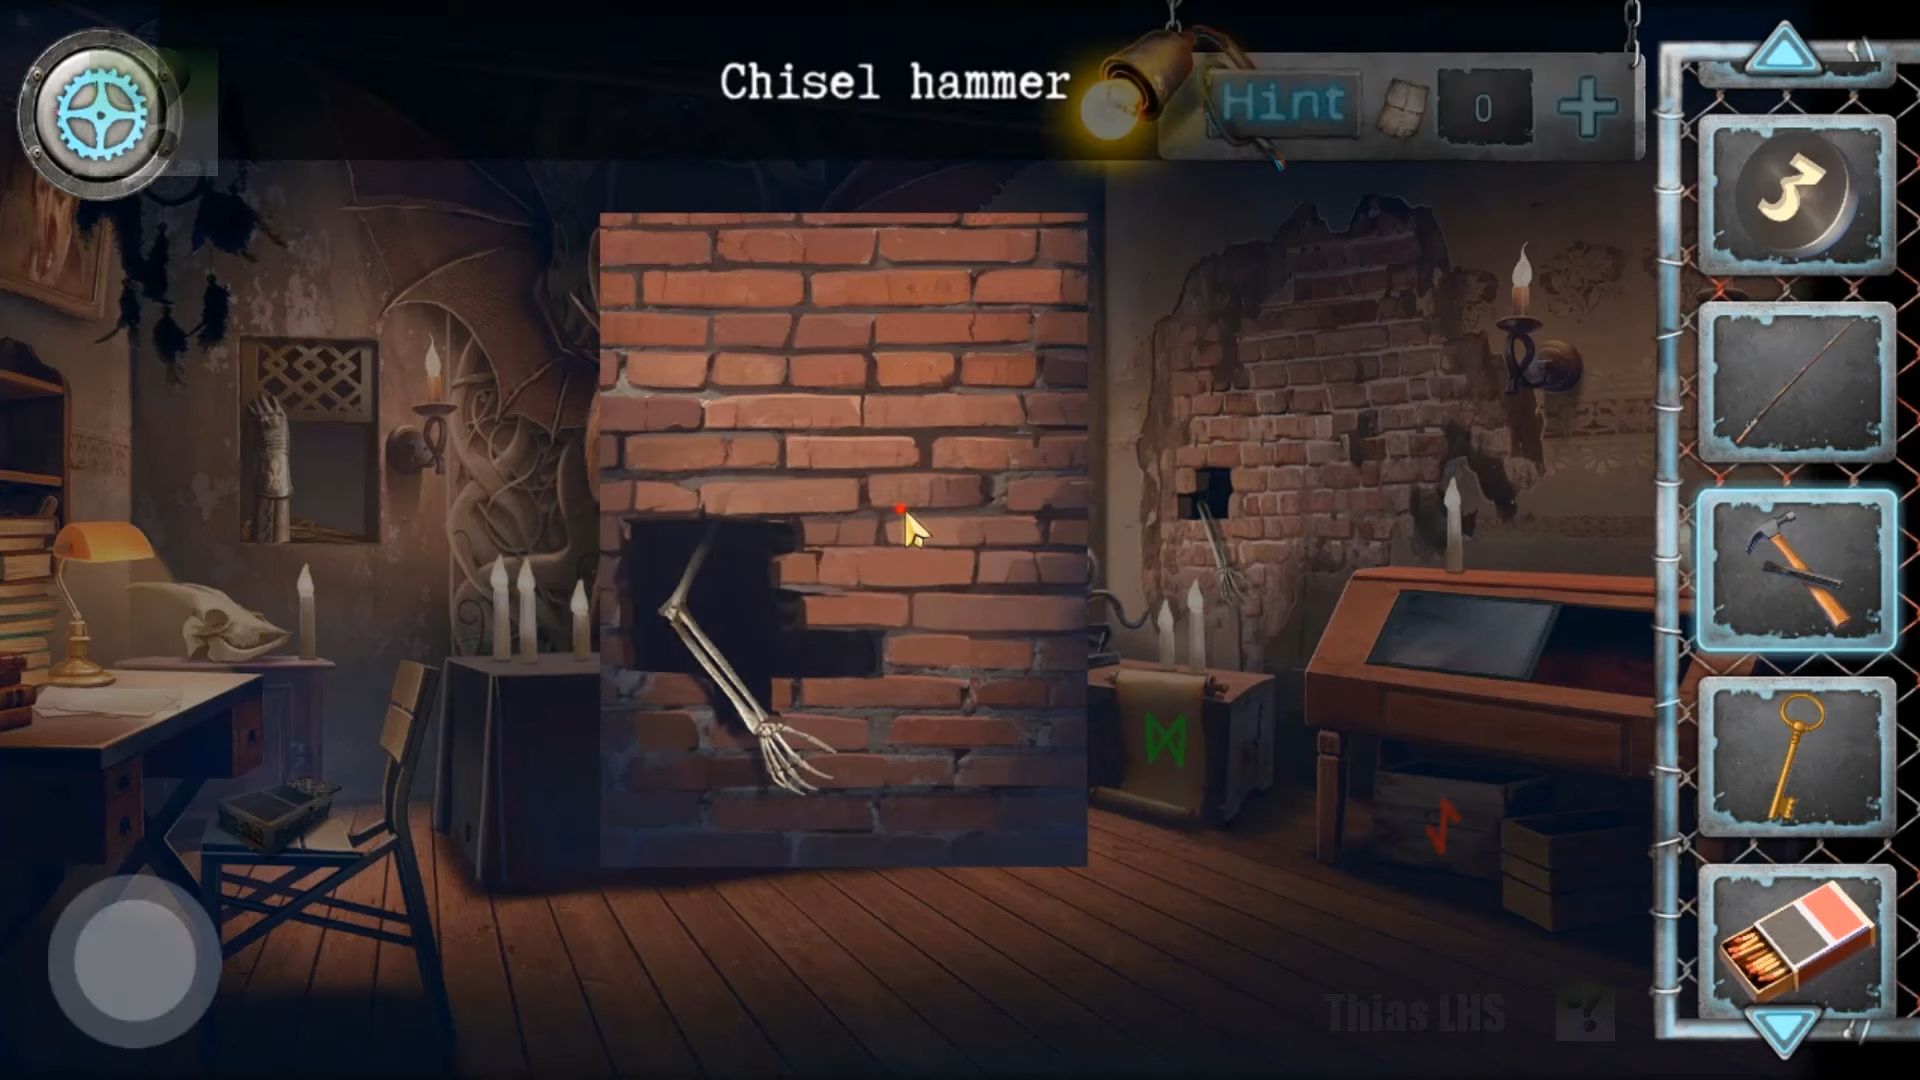
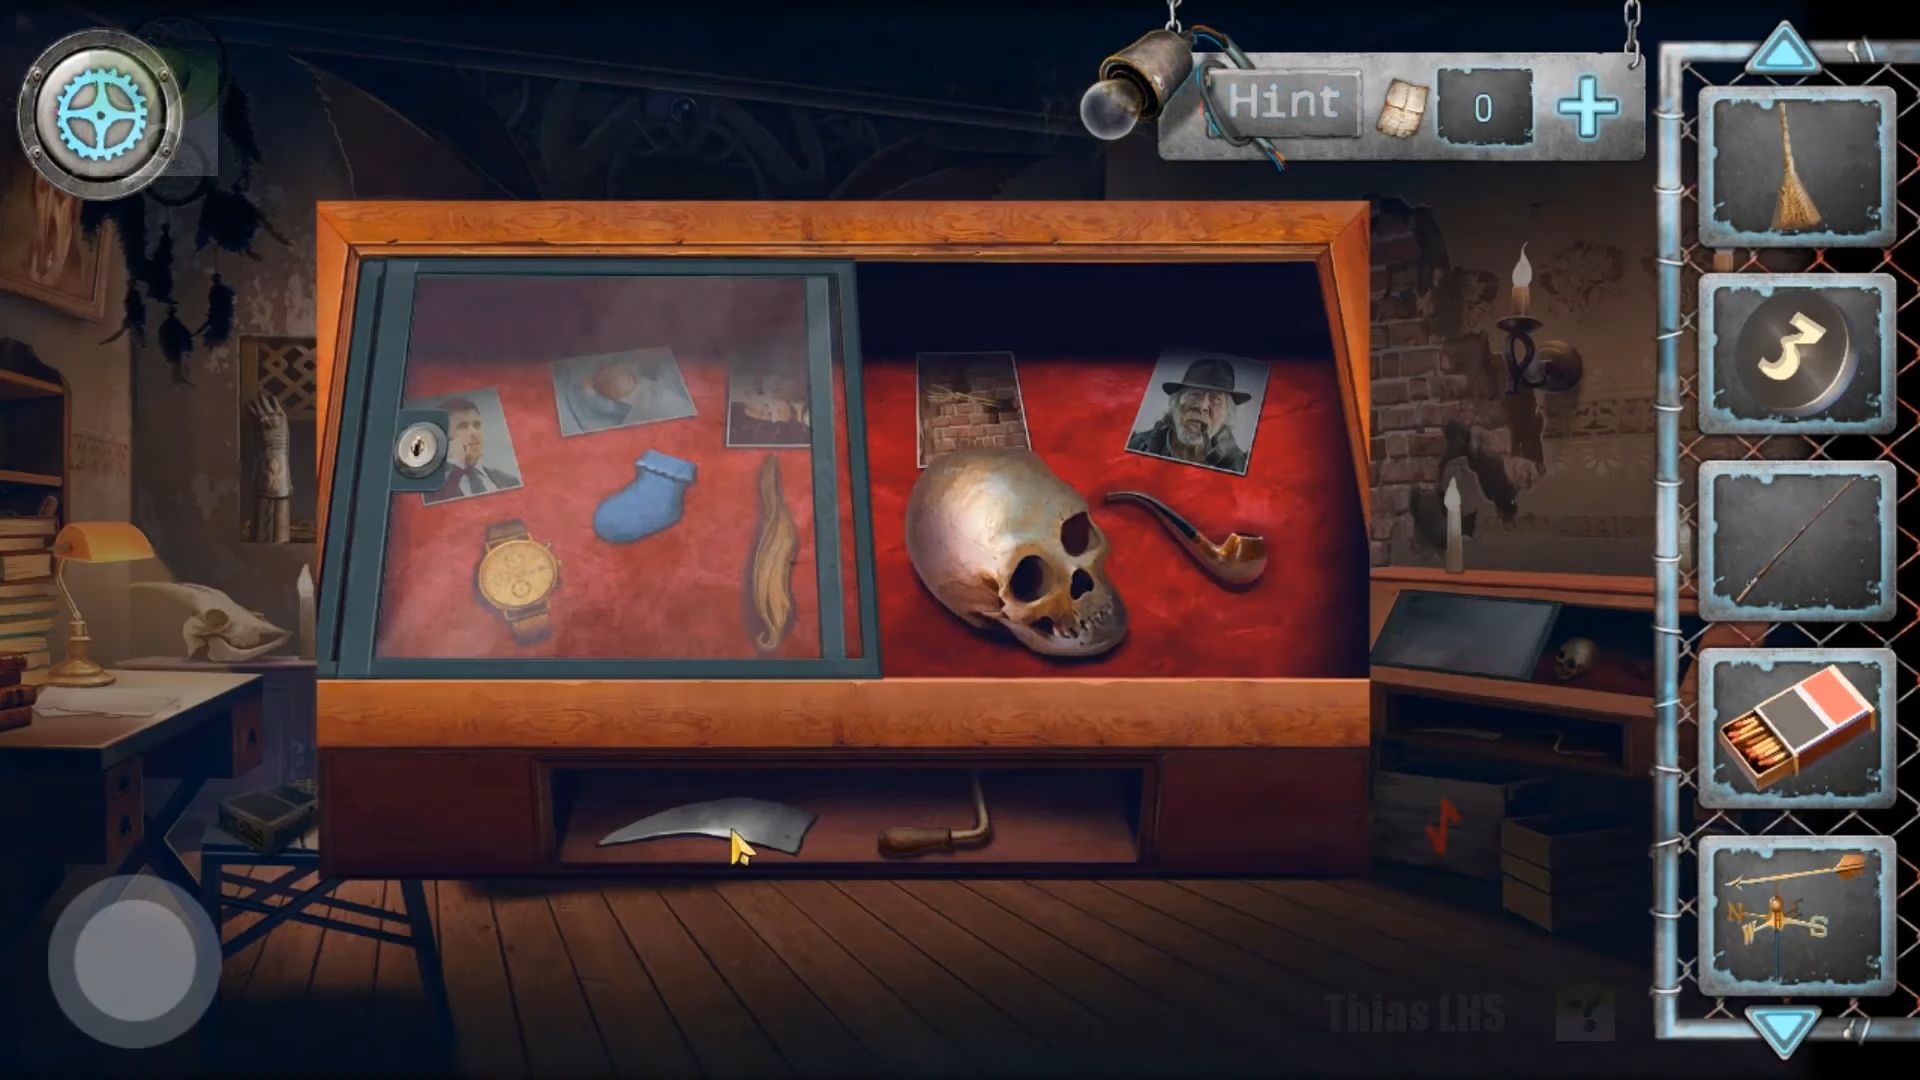
Return to the secret room and check the skeleton once more. Use the bone saw on it to collect the skeleton’s head. Next, go back to the glass cabinet. Unlock it with the small key and add the skull and smoking pipe to the display. Now, pick up a mirror shard and a gramophone handle. Finally, grab a button for the elevator.
Go back to the elevator and add the new button to the panel. Press it to go up to the 3rd floor.
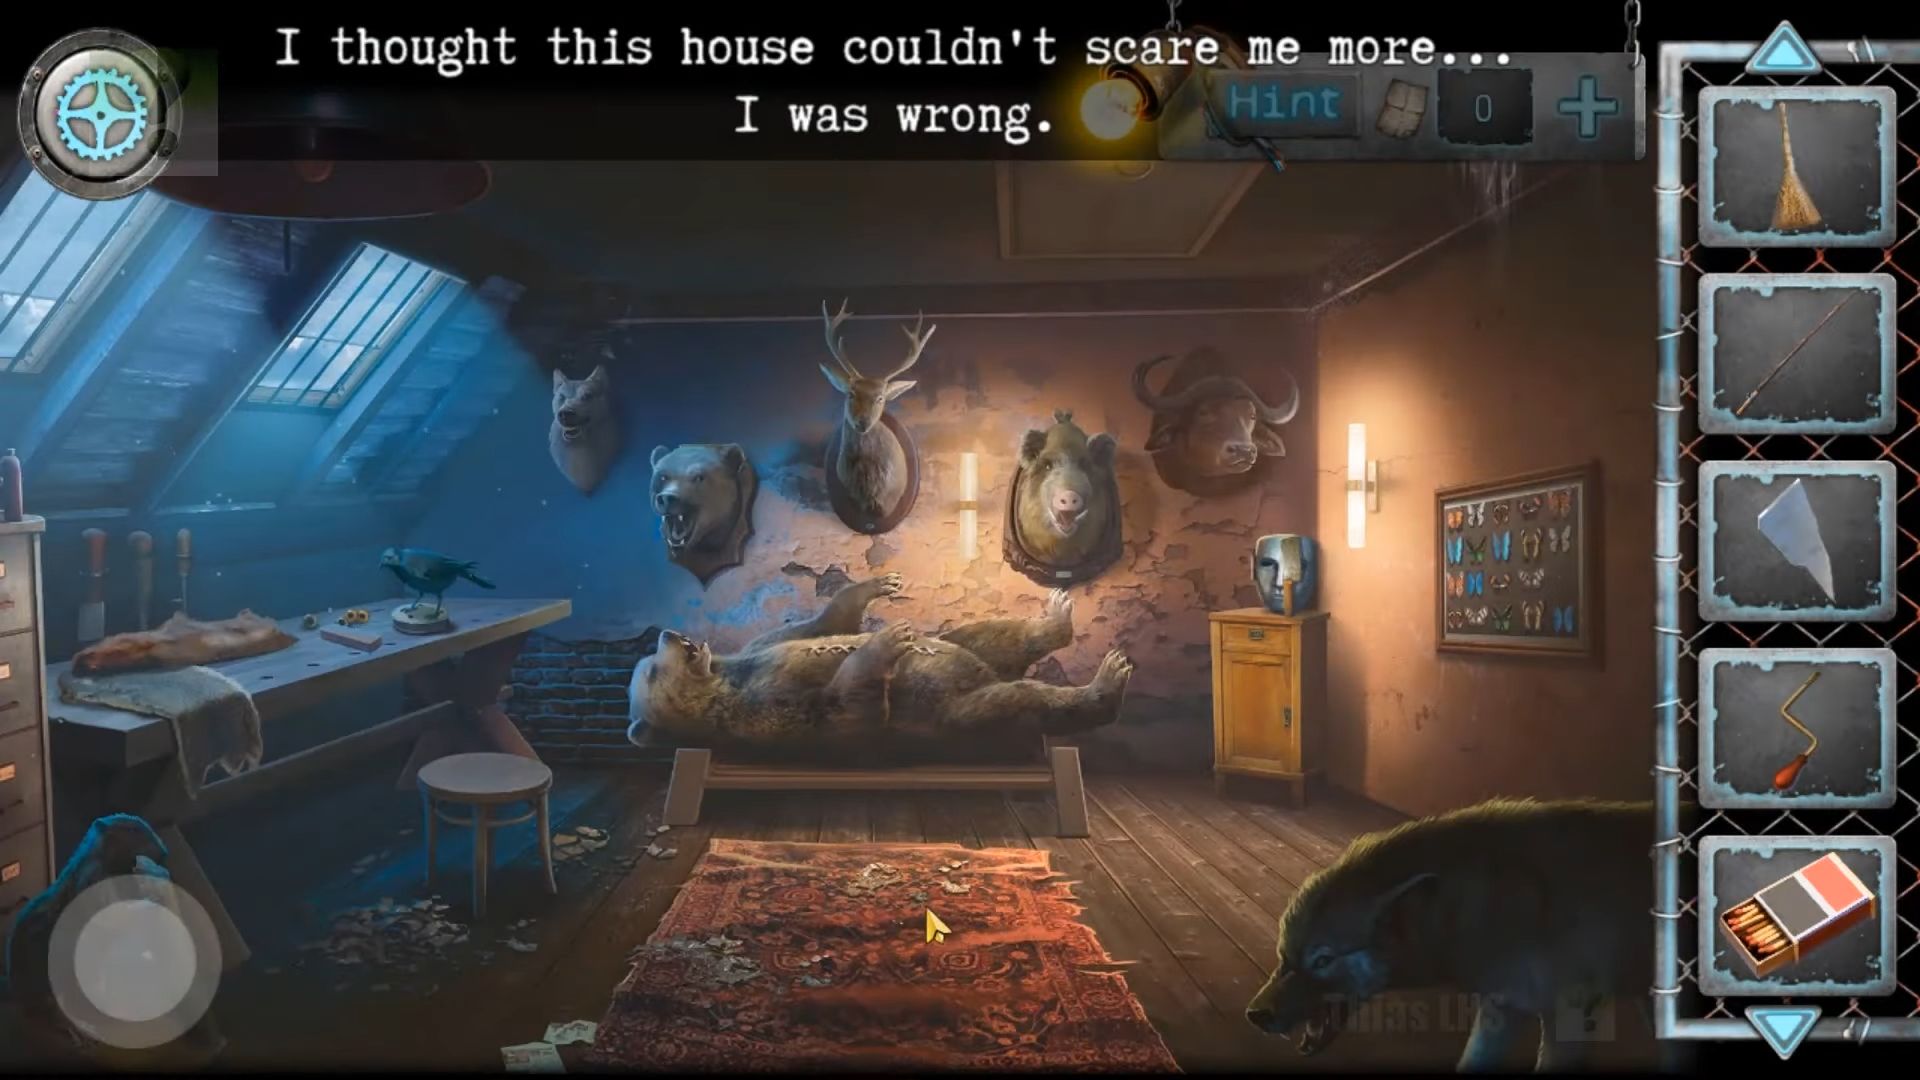
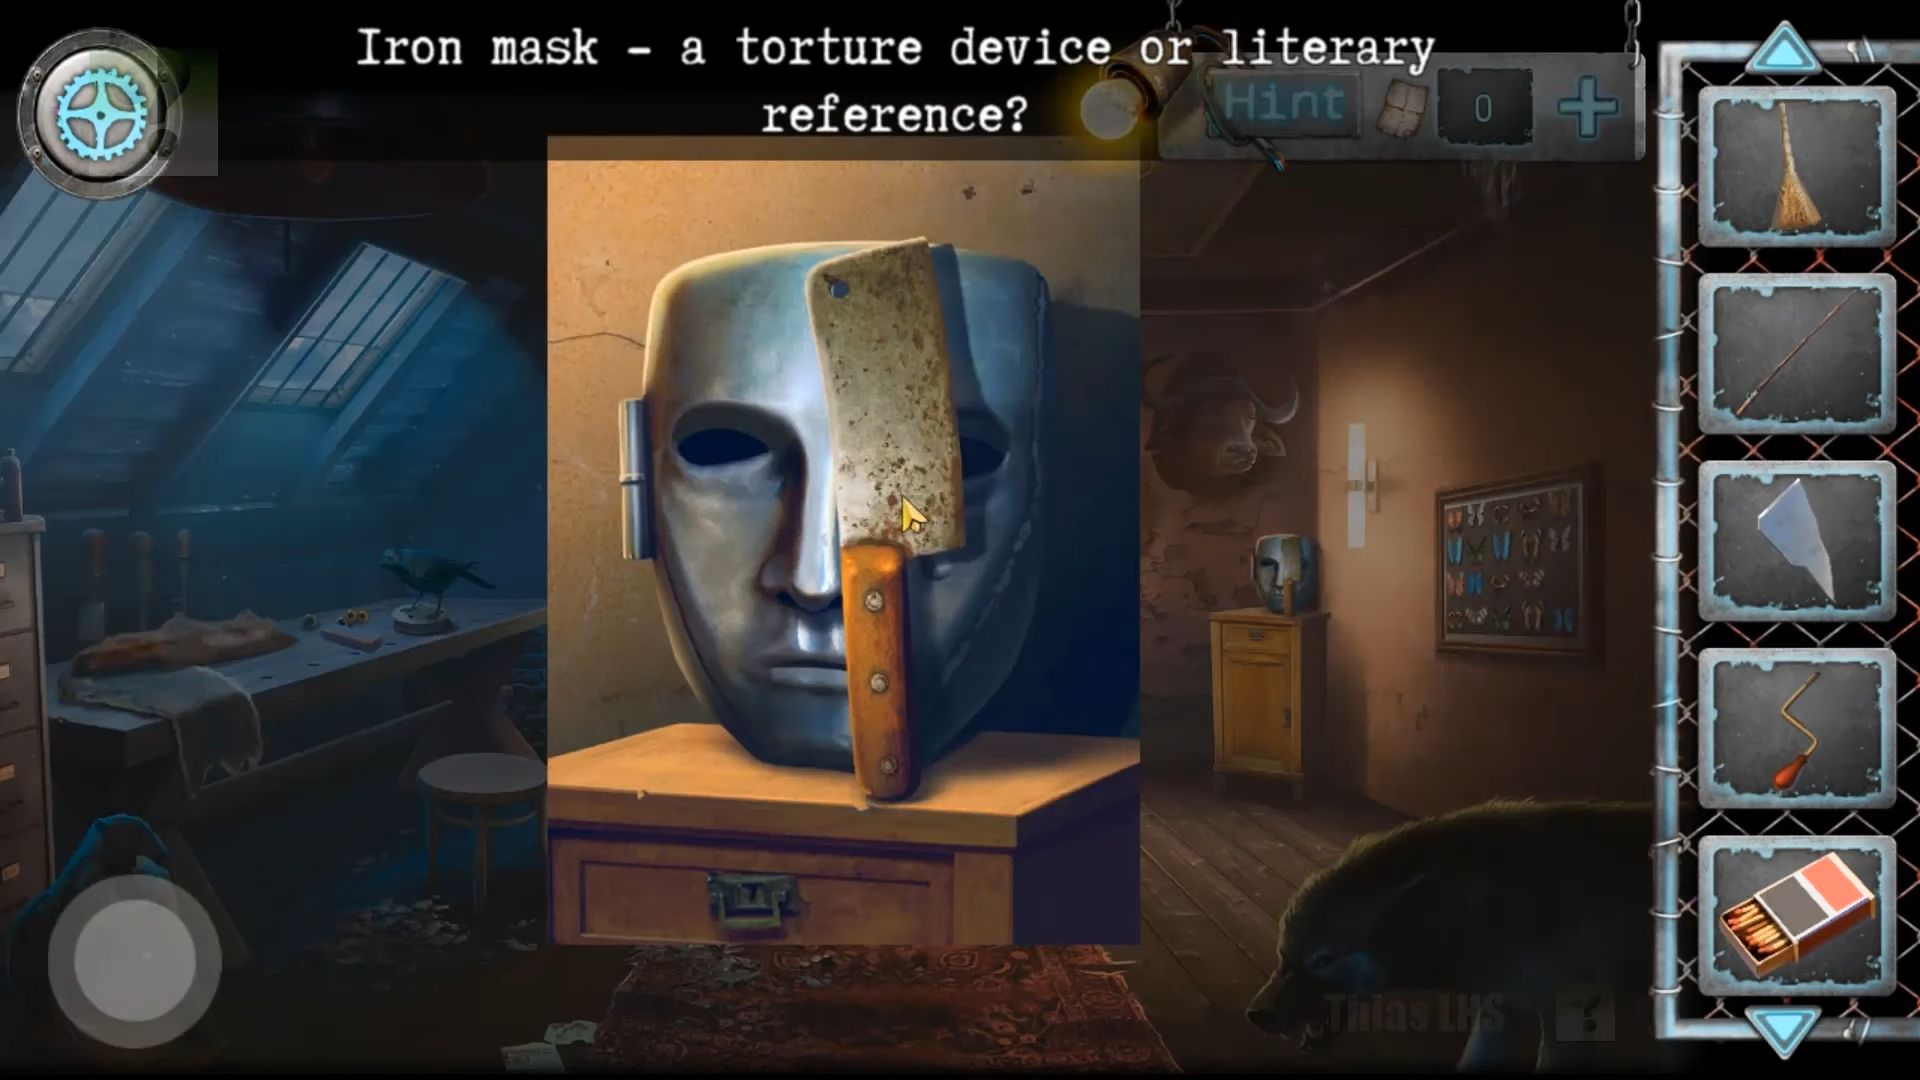
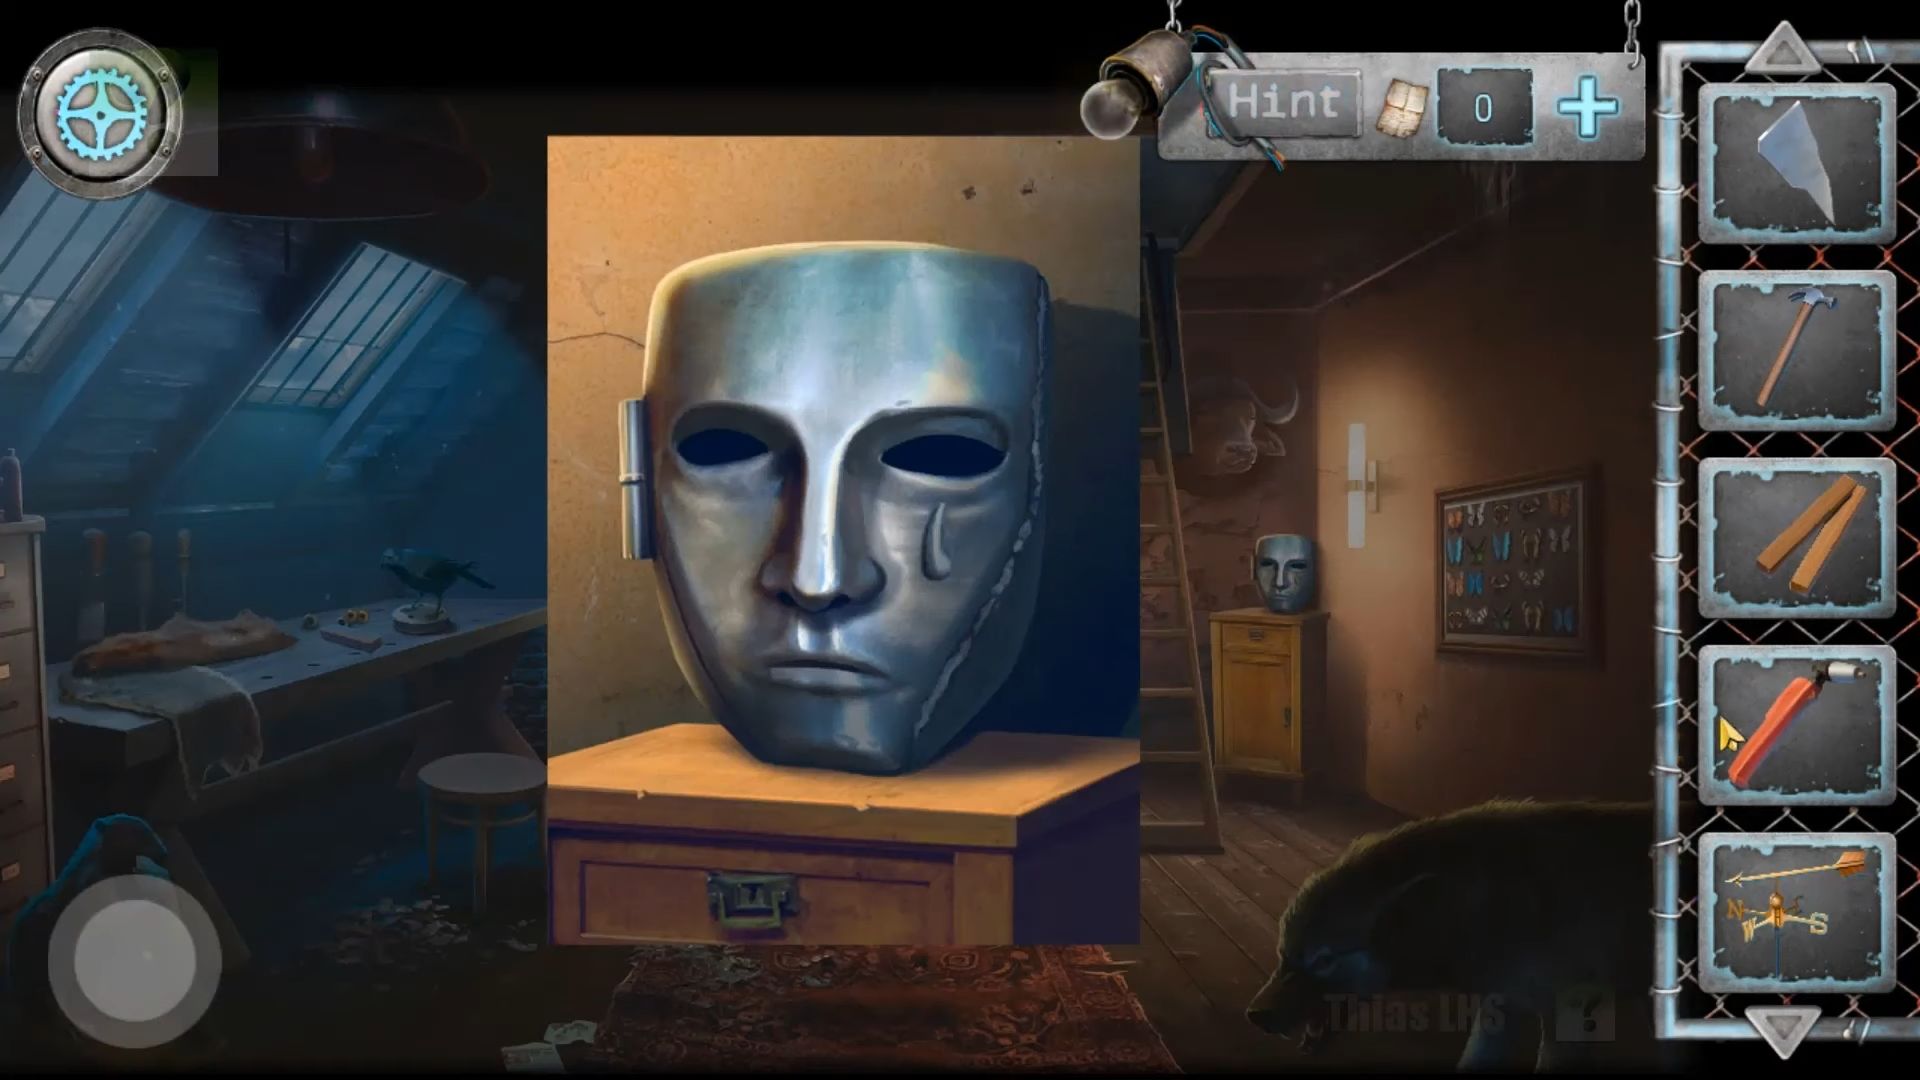
Start by checking the mask on the small cabinet in the back right corner and collect the rusty cleaver. Then, go to the table on the left, where you’ll find a bird figure and a sharpening block. Use the cleaver on the block to sharpen it.
Check the bear lying down to see stitching and open it up with the cleaver. Find and collect a fishing hook and a hammer. Combine the fishing rod and hook, then use it on the ceiling trap door to pull it open.
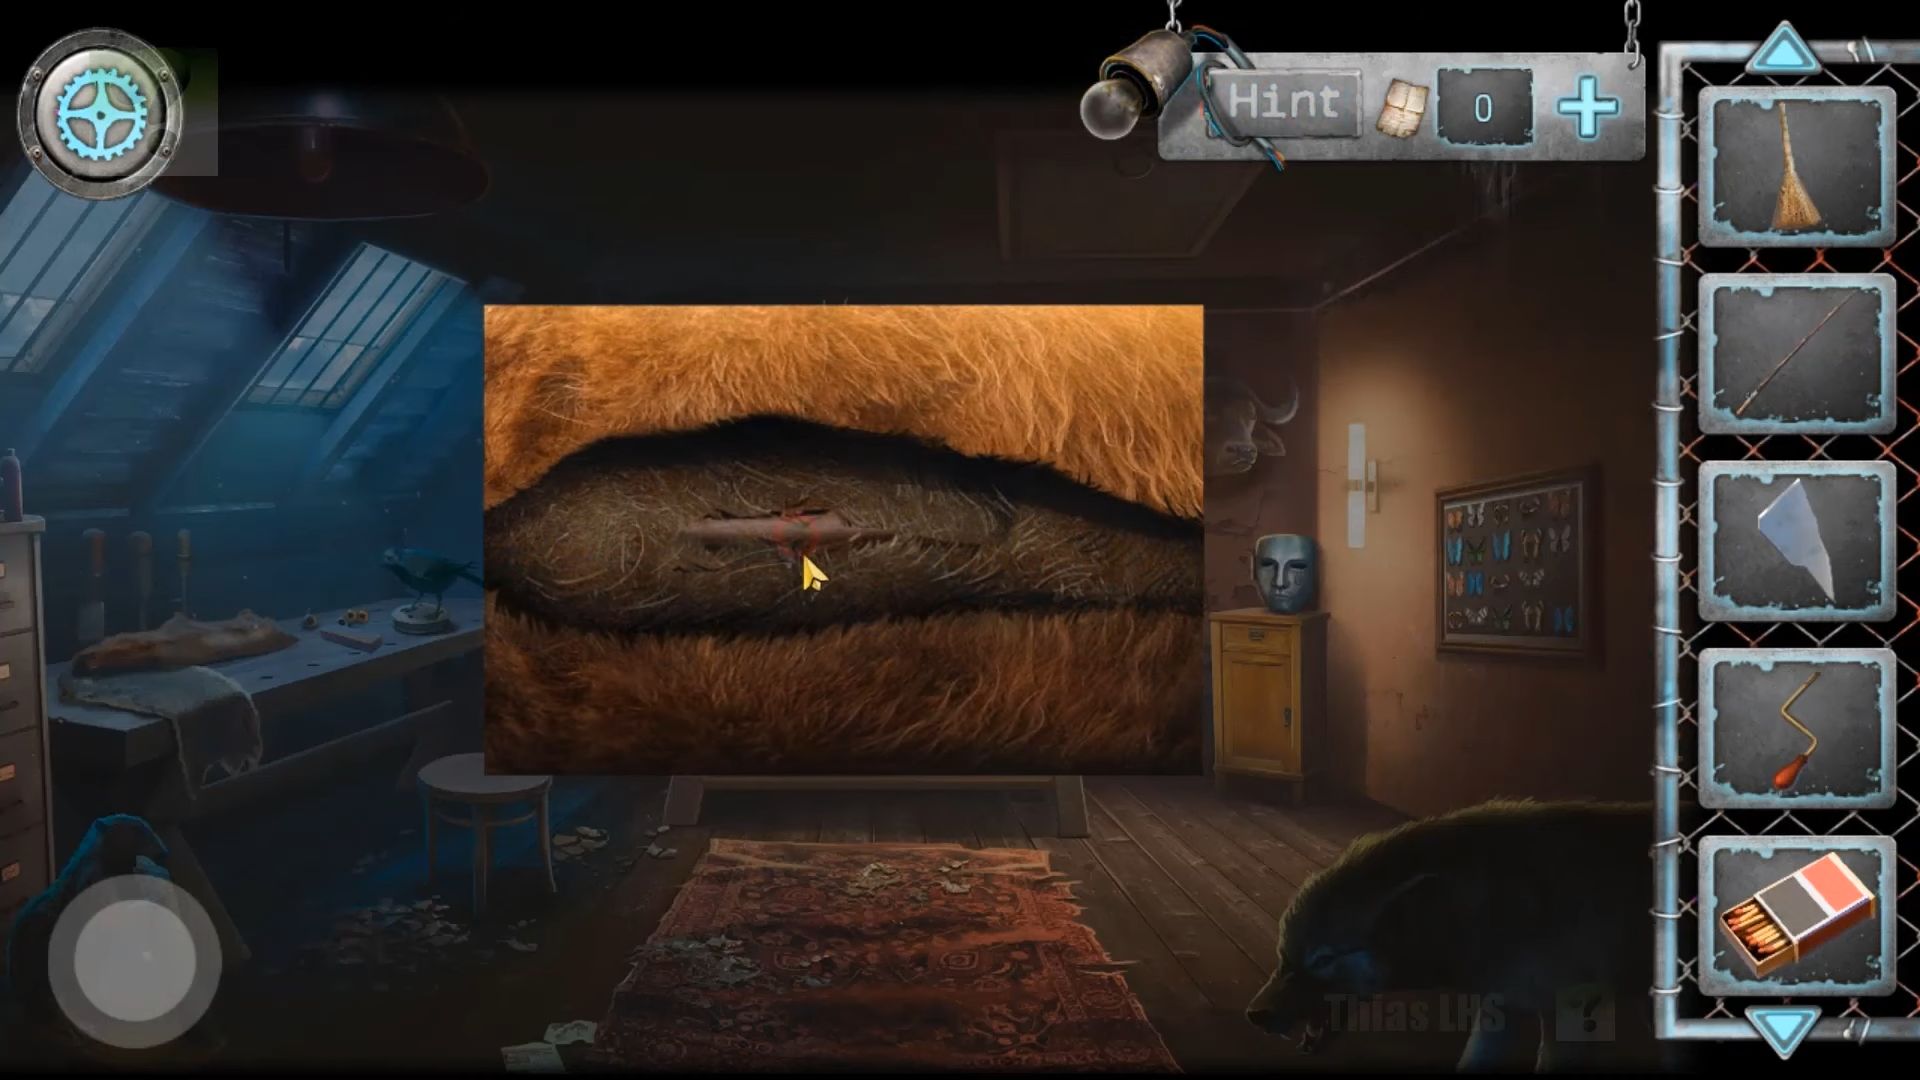
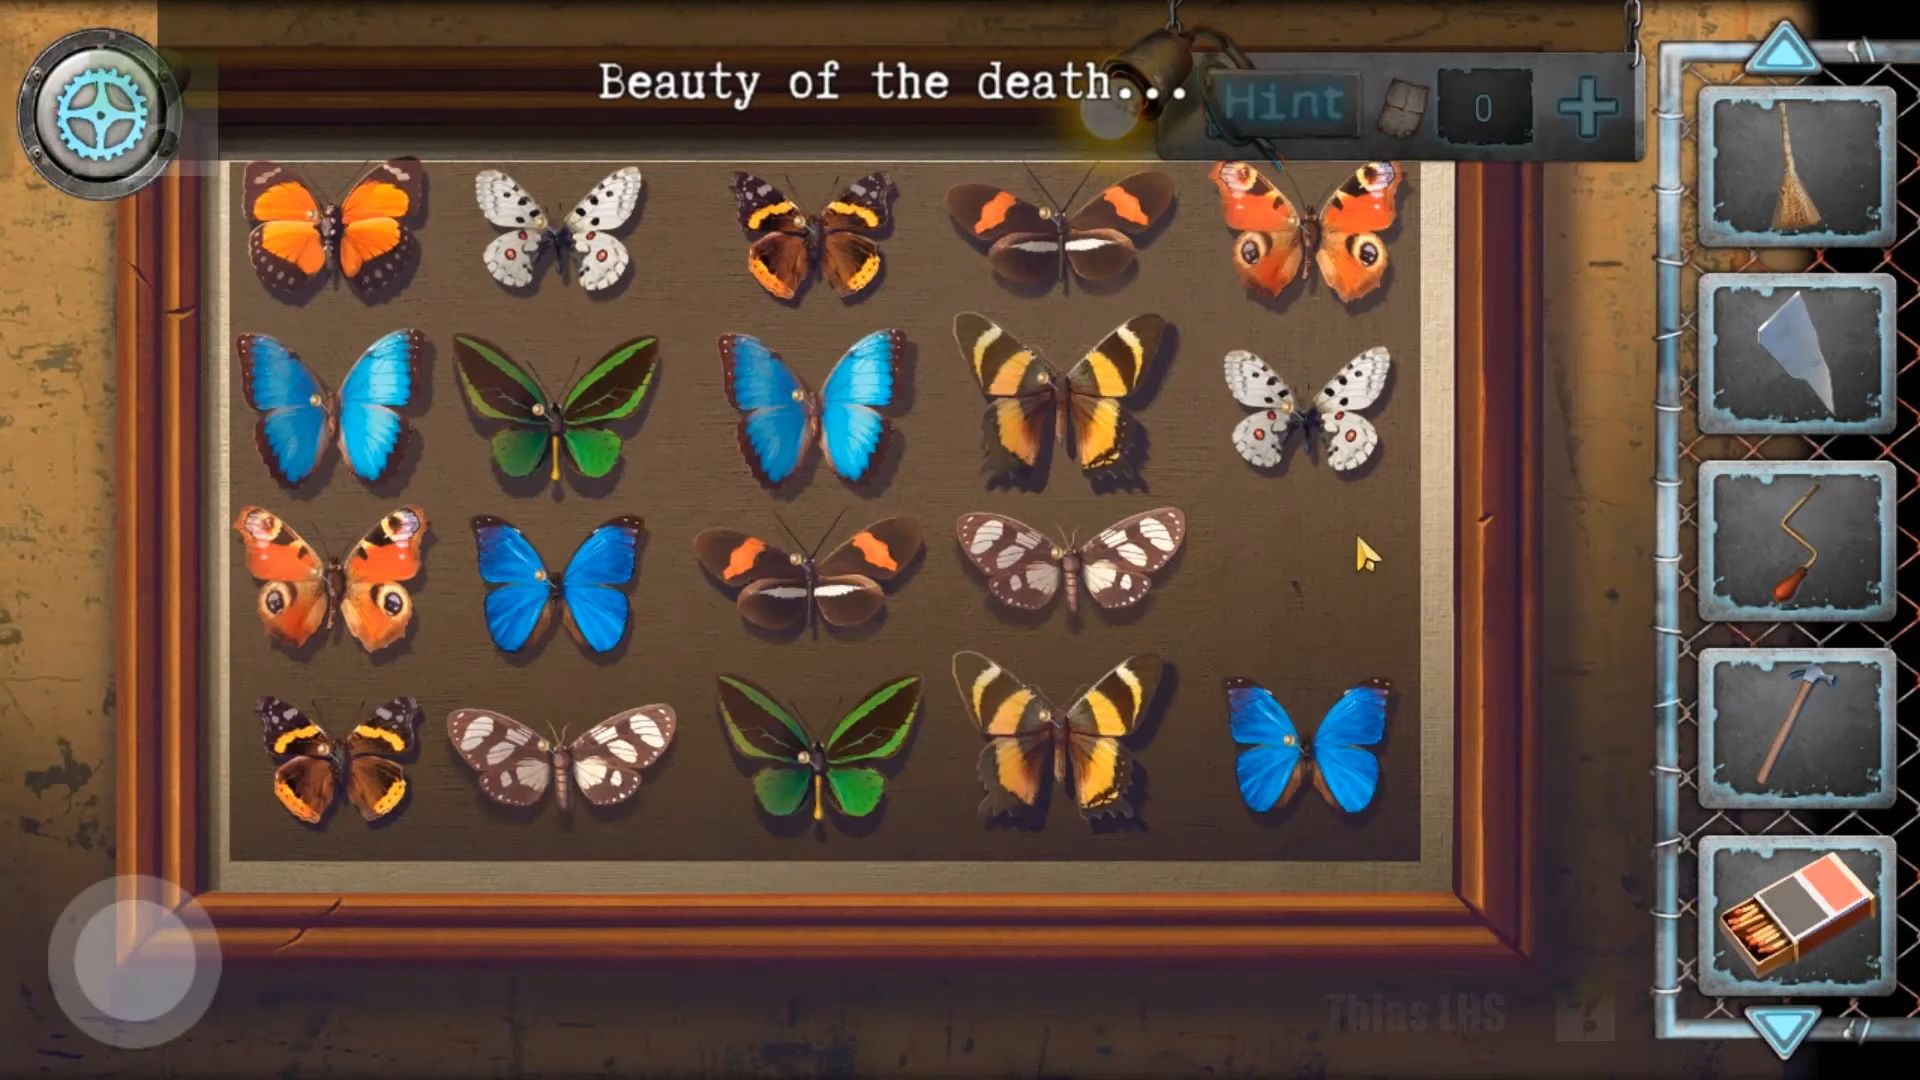
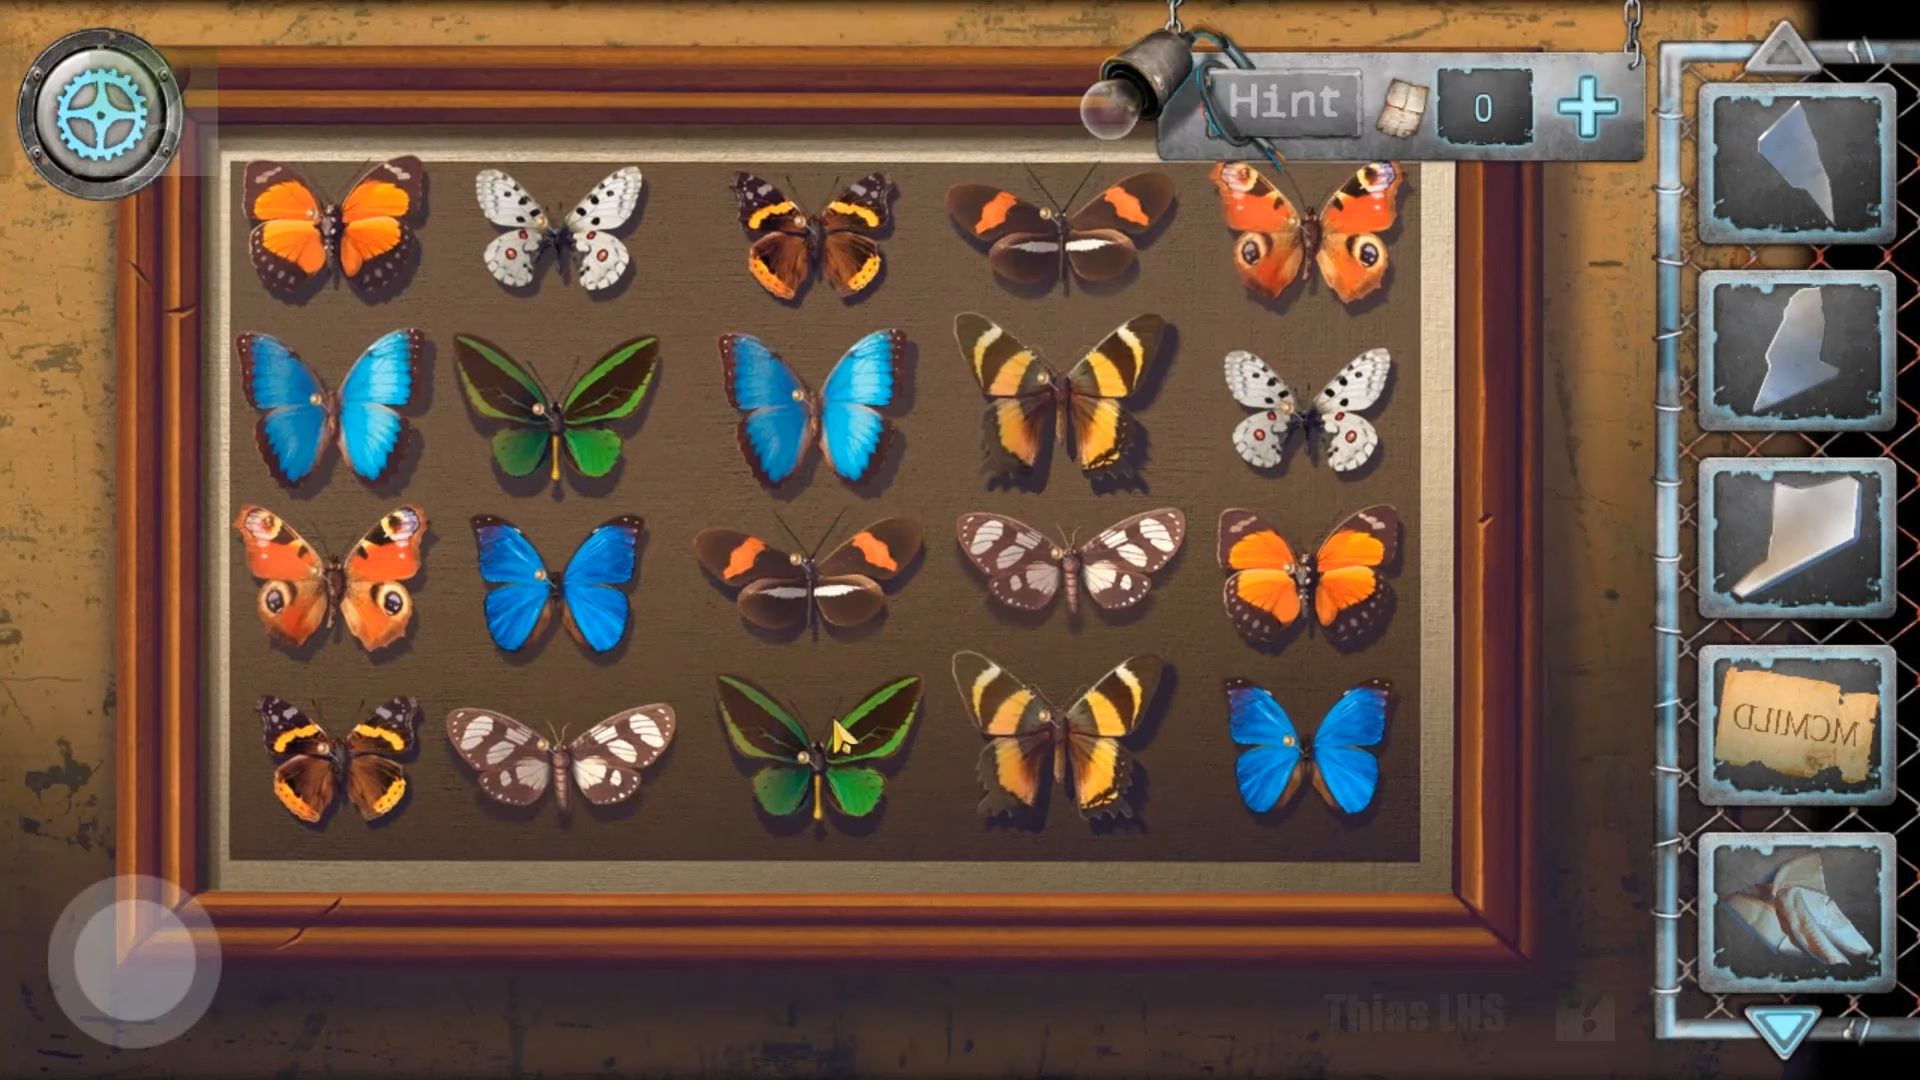
Click on the statue to view the base and grab the medical scissors. Check the nest on the right for a ladder and pick up a butterfly. Go back to the 3rd floor (the room with the bear) and look for a board with butterflies on the right. Add the one you collected to start a puzzle. Tap the matching pairs, and once done, collect the basket.
Head up to the attic and check the broken mirror on the bottom left to collect a record.
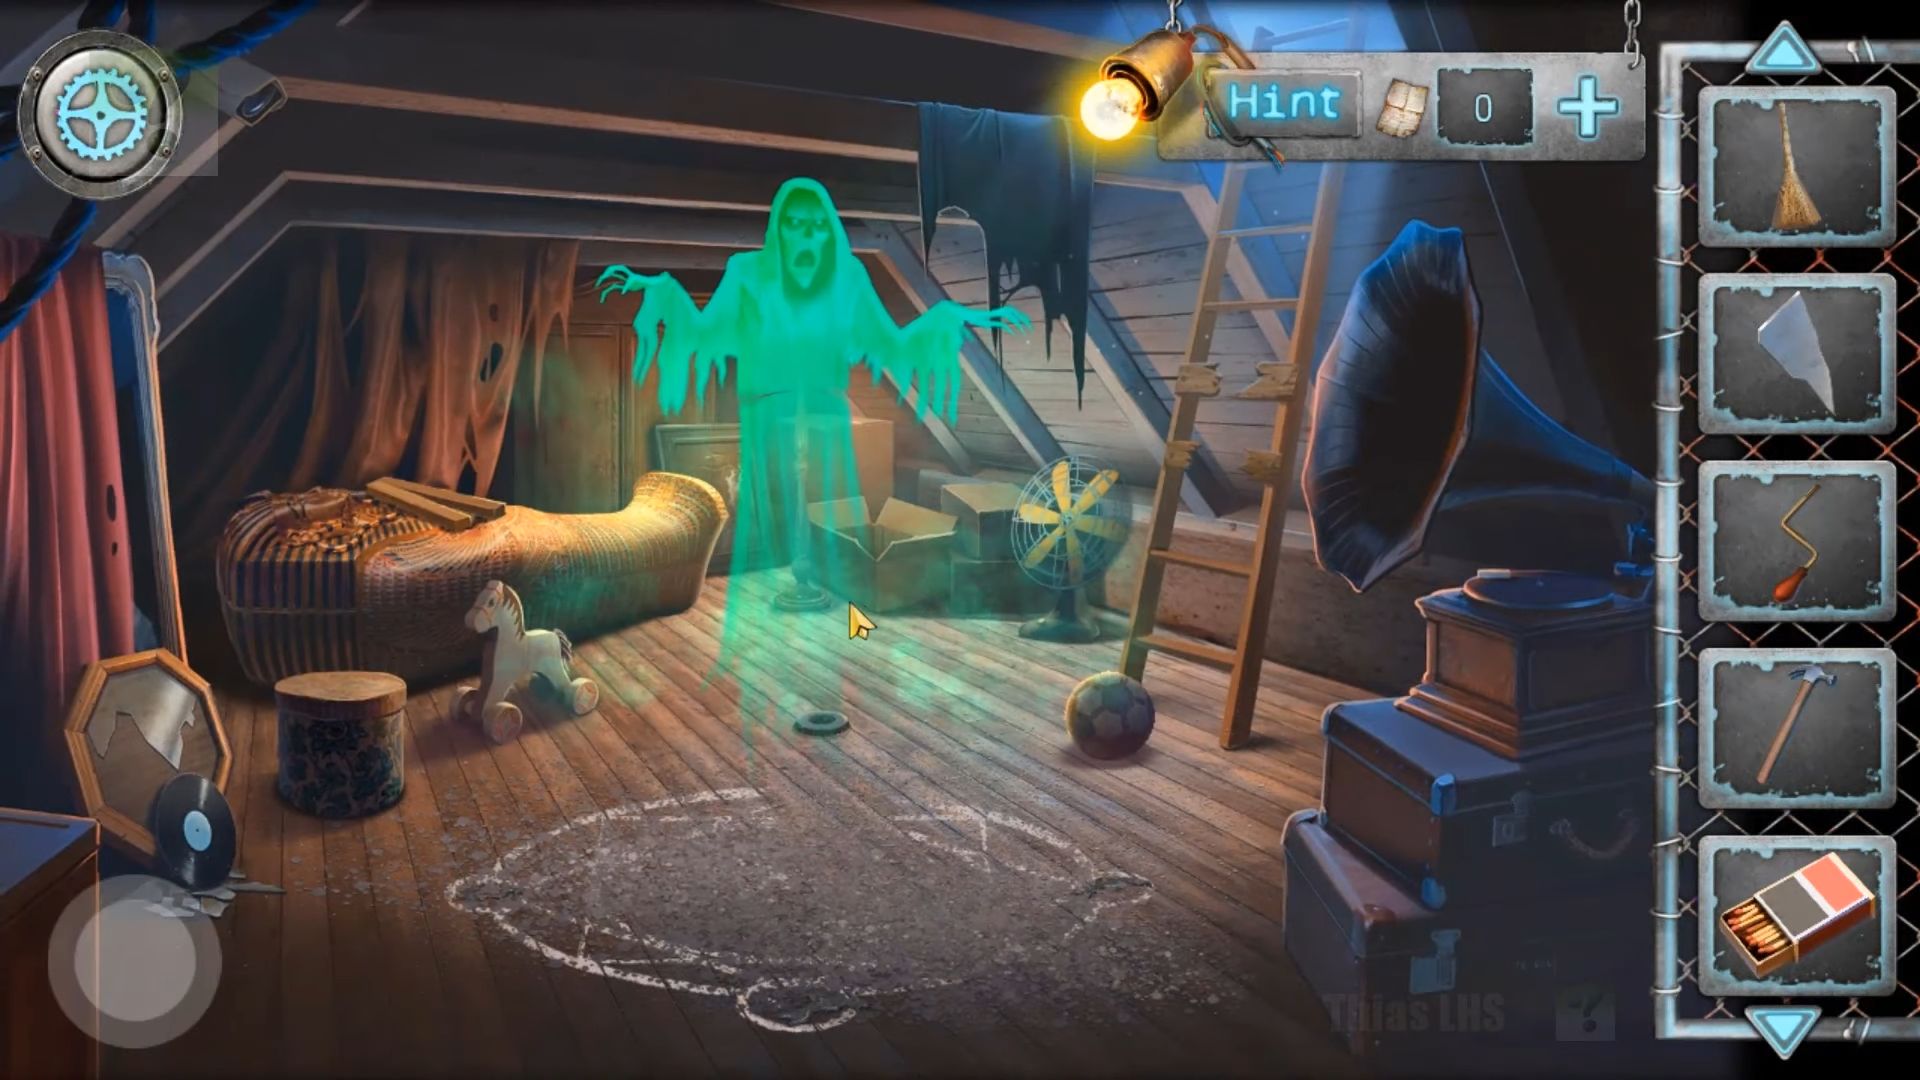
Next, check the gramophone player on the right. Accumulate the chalk and add the record, then attach the handle. Turn the handle to open a drawer and collect black candles. Use the broom to clean the floor, add the black candles to the symbol, and light them with matches. Finally, use the chalk on the floor symbol to complete it, and the ritual will start the fan and remove the ghost.
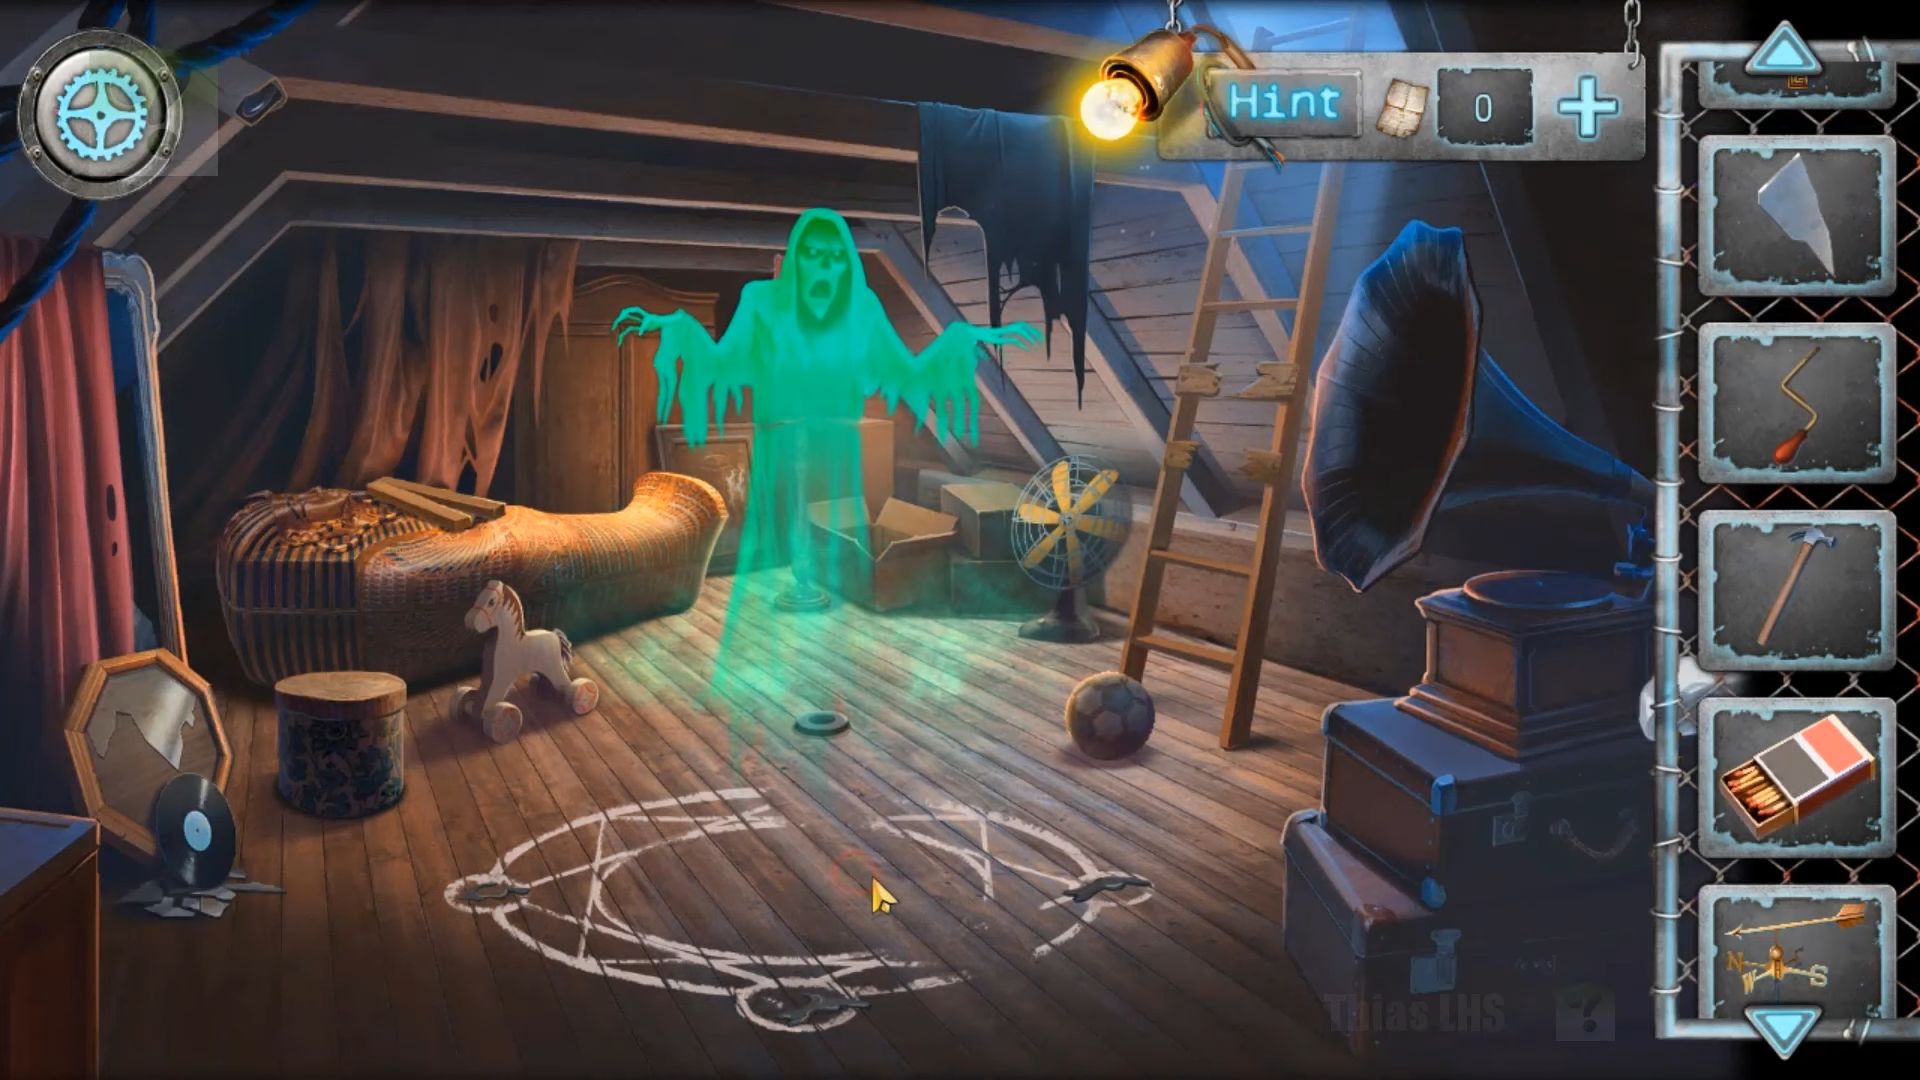
You need to look at the sarcophagus at the back, collect the 2 planks of wood, and then add the pendant to the slot on top to open the lid and grab a plasma cutter.
Check the broken ladder on the right and get a silver key for it. You have to return to the room with the bear and view the mask on the cabinet in the corner again. Use the plasma cutter to open it and collect 4 nails.
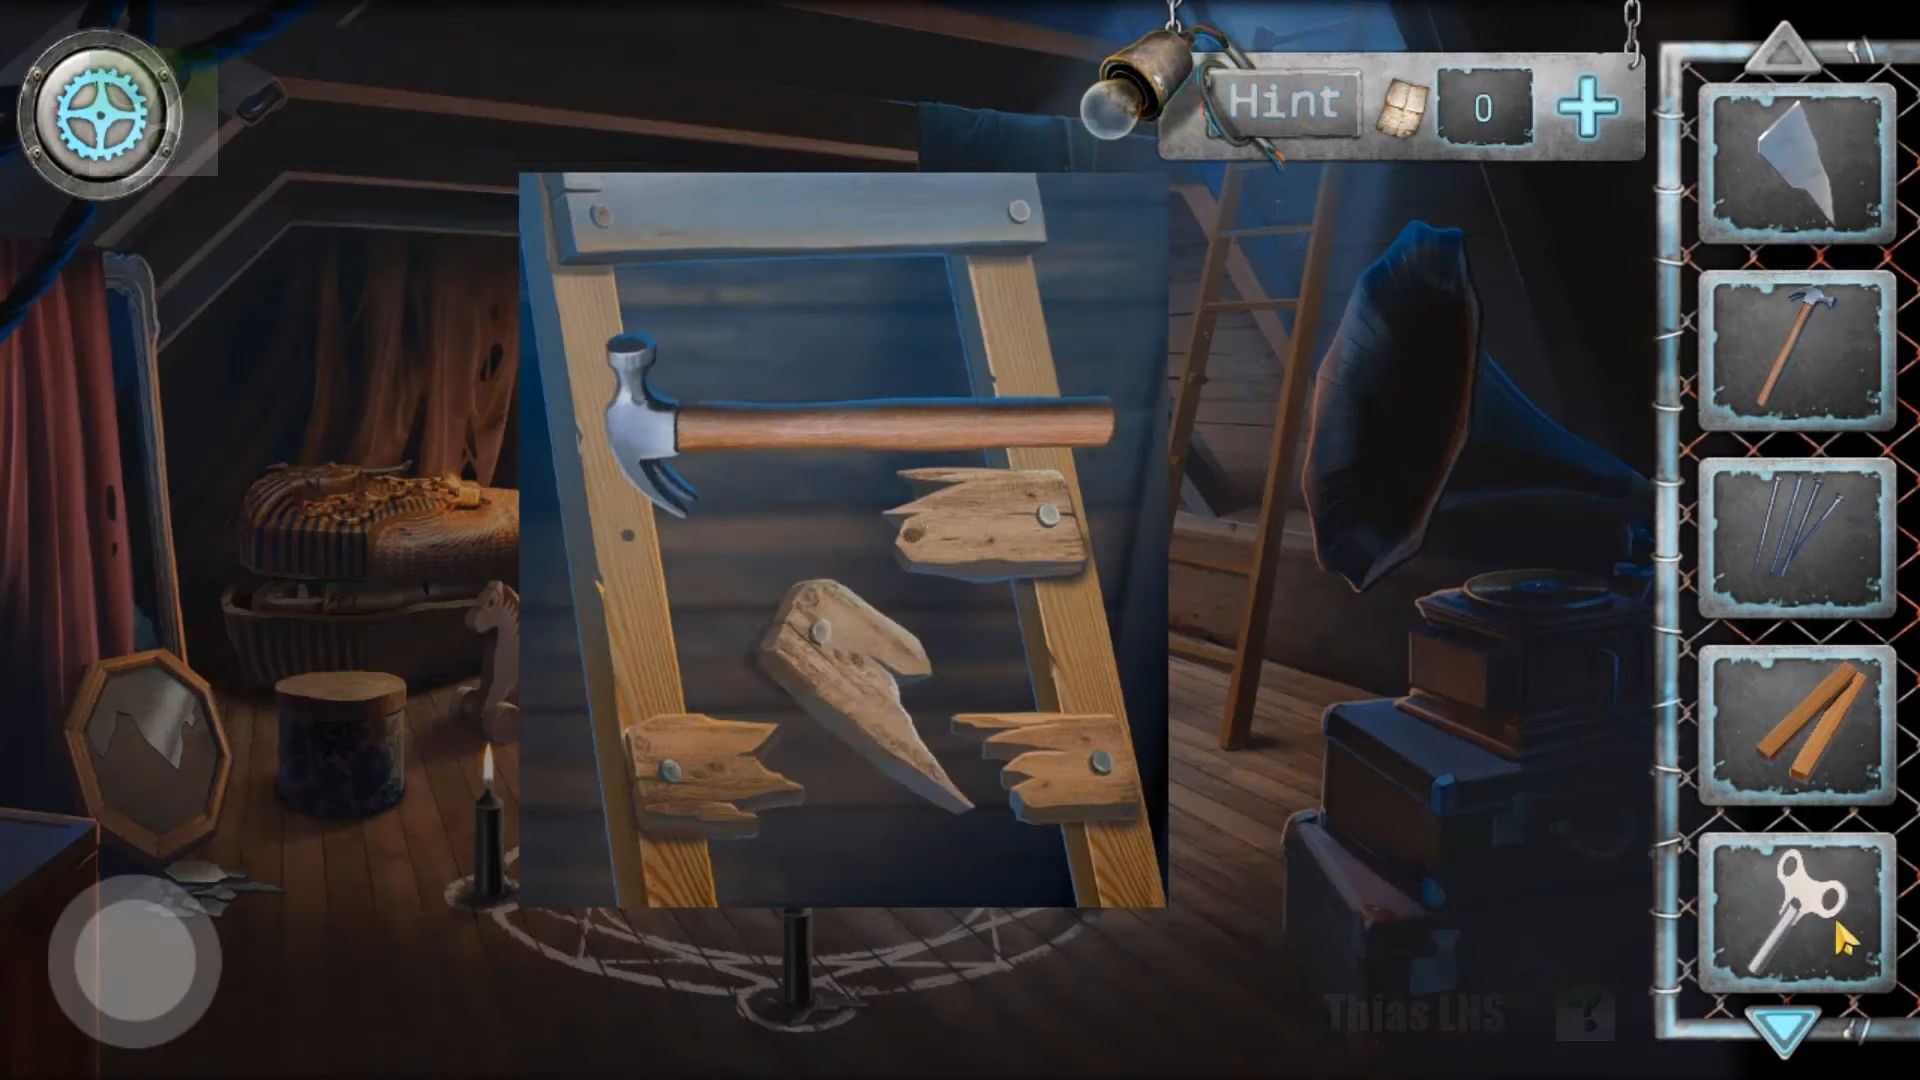
After that, look at the bird model on the table again and use the silver key on the base to collect a second mirror shard. Return to the attic, view the broken ladder again, and use the hammer to remove the broken pieces. Add the 2 planks and the nails, then use the hammer again to secure them.
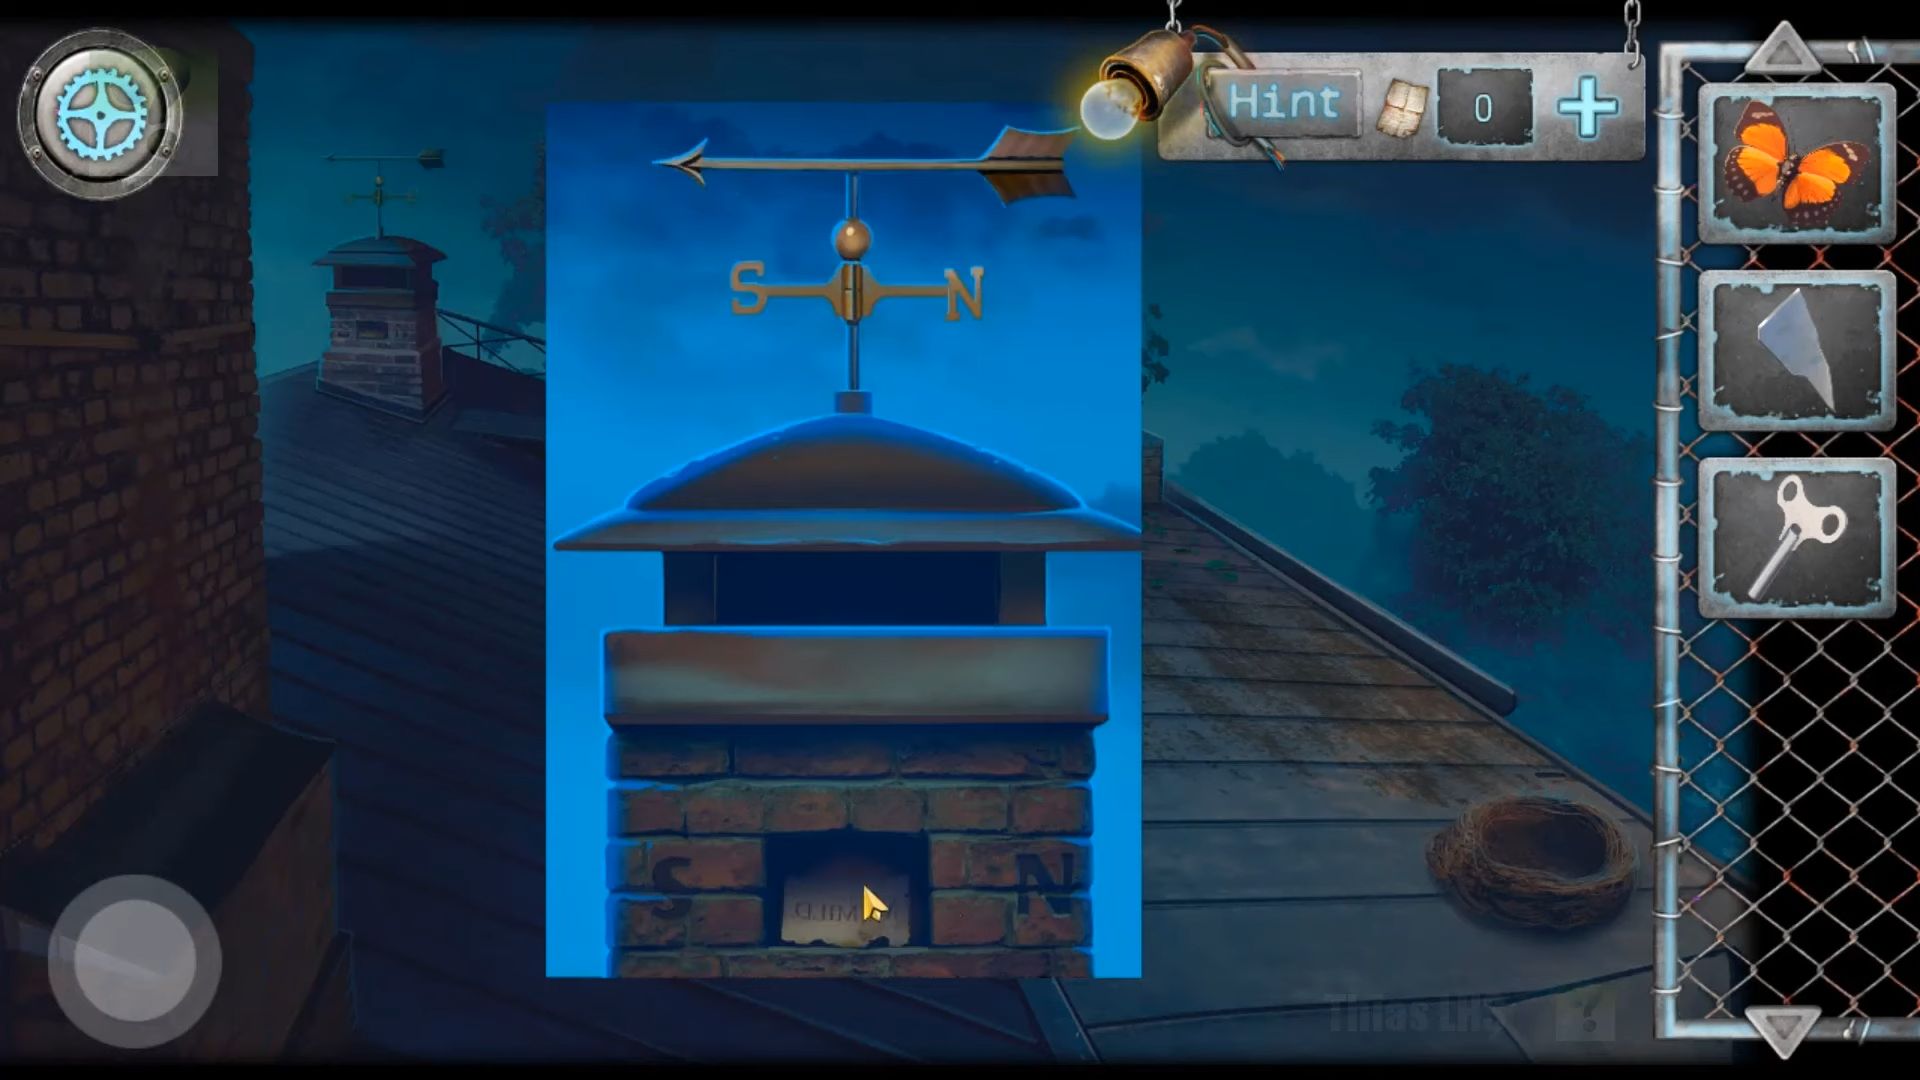
Now, go up to the roof and add the vane. Tap it to turn so that the directions match those on the chimney, and collect a clue – a Latin inscription.
Next, return to the attic and check the mummy in the sarcophagus. Use the scissors to cut the bandages and collect another mirror shard.
Click on the statue to view the base and get the medical scissors. Next, check the nest on the right for a ladder and collect a butterfly. Return to the 3rd floor (the room with the bear) and look for a board with butterflies on the right. Add the one you collected to start a puzzle. Tap the matching pairs, and once done, pick up the basket.
Next, look at the broken mirror again, add the 3 shards to the floor, and arrange them to complete the puzzle. Once done, use the Latin inscription paper on the mirror to reverse it.
Now, solve the rope puzzle by moving the knots to uncross the ropes and turning them all green. Then you have to pick up the rope. Look at the base of the statue again and solve it by selecting the correct numerals on the bricks to collect a metal ring.
After that, check the empty nest on the roof again. Put the eggs into the nest, and a metal pole will appear on the left. Combine the rope and the metal ring, then use this item on the pole to attach it. Now, you can climb down.

Chapter 3 Liberation
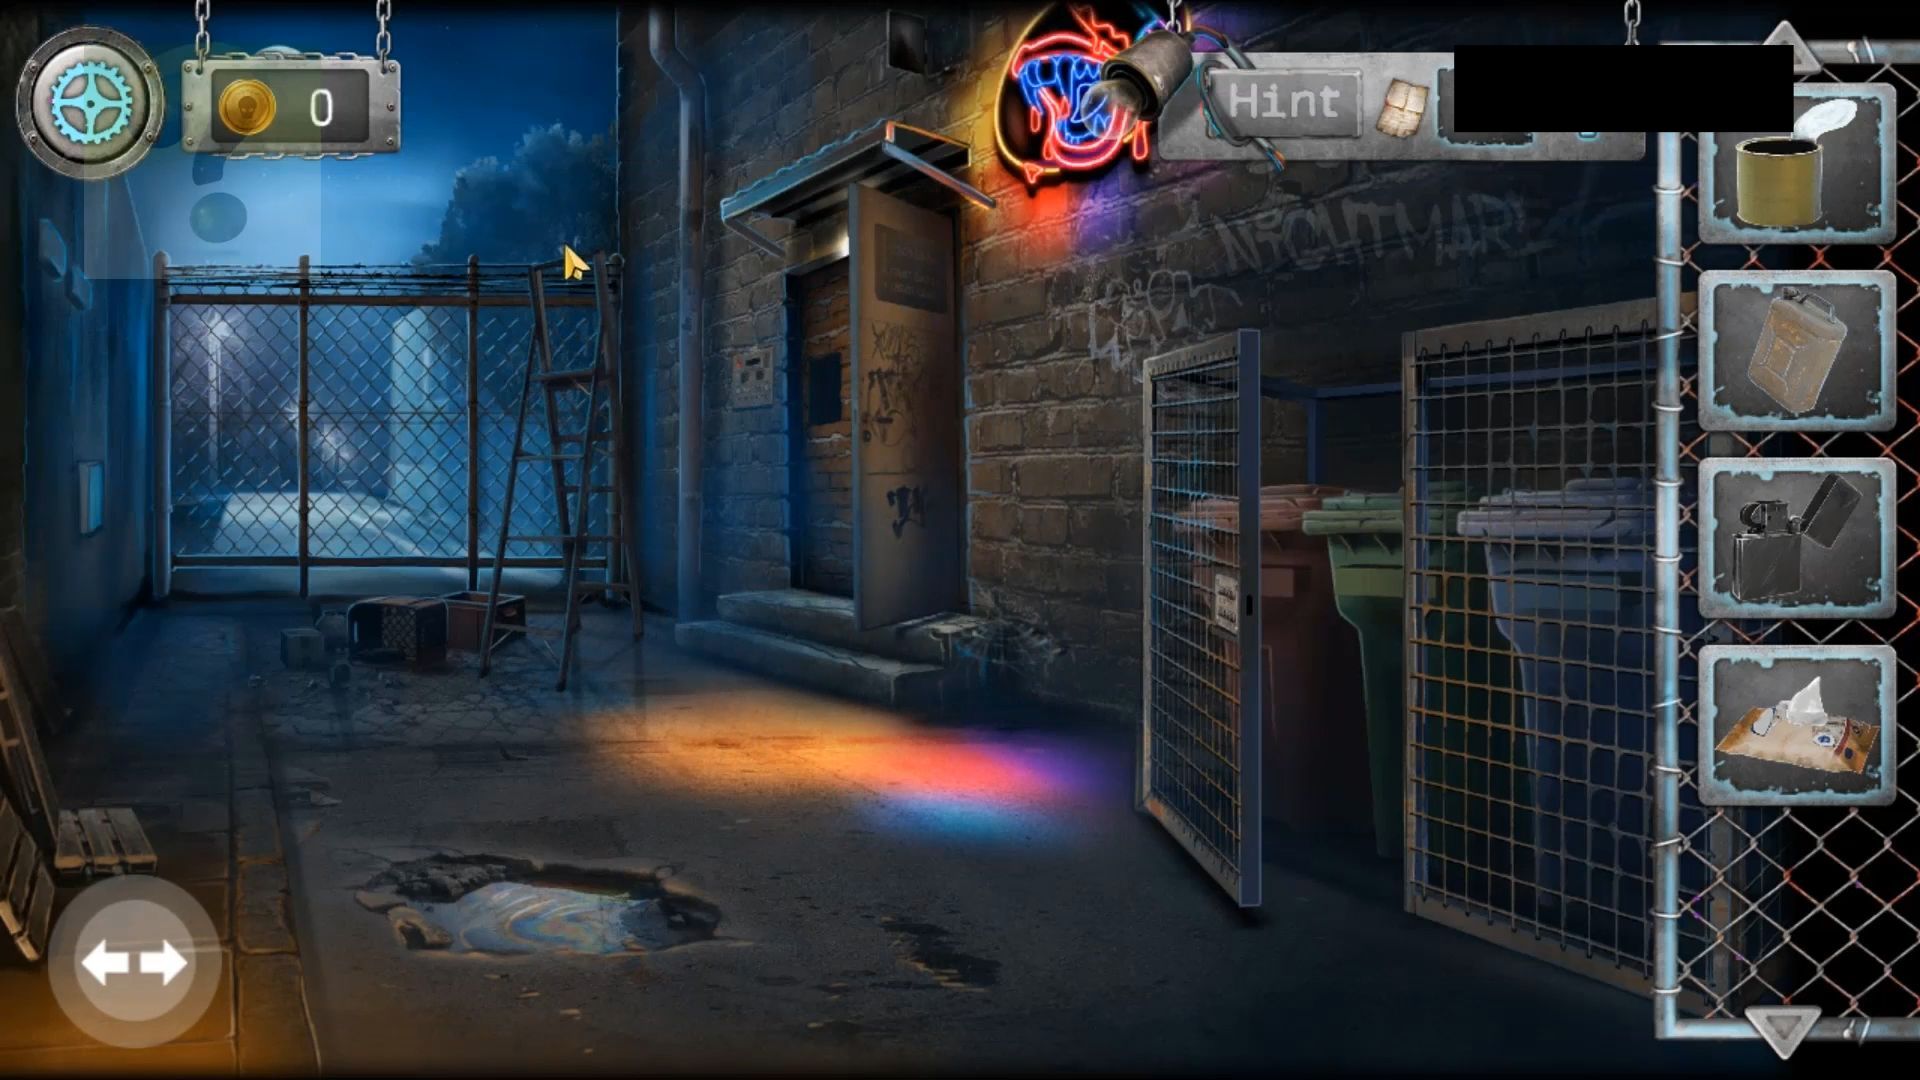
Begin with a Dirty Neckerchief in your inventory. Grab the Stick from the left alley wall, then tap the arrow at the bottom left to switch views. Pick up the Jerrycan with fuel from the bottom right and check out the vending machine at the far end. Extract the crowbar from the vending machine.
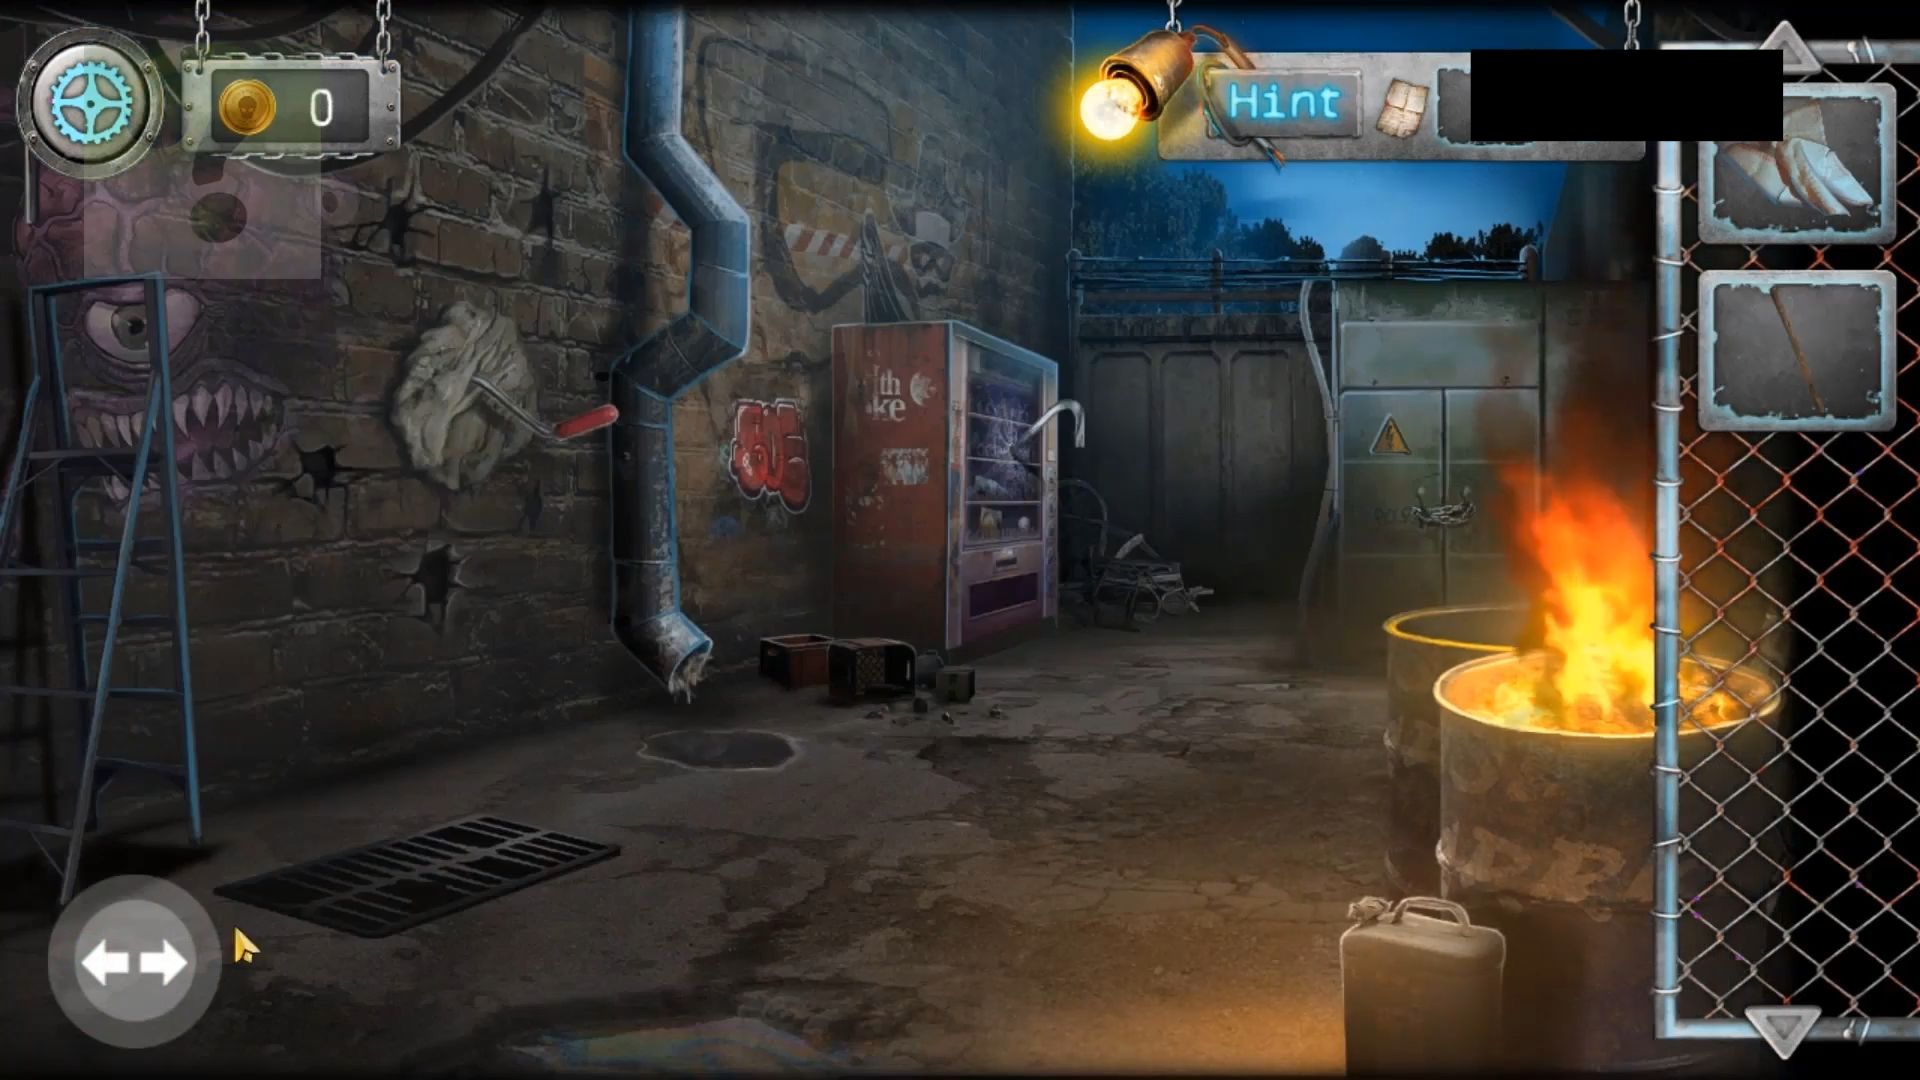
Move back to the vending machine, then use your wallet on the cash slot to add money. Press any of the first 3 buttons to get an item. Repeat this twice to get a Rotten Pie, a Dirty Soda, and Expired canned food.
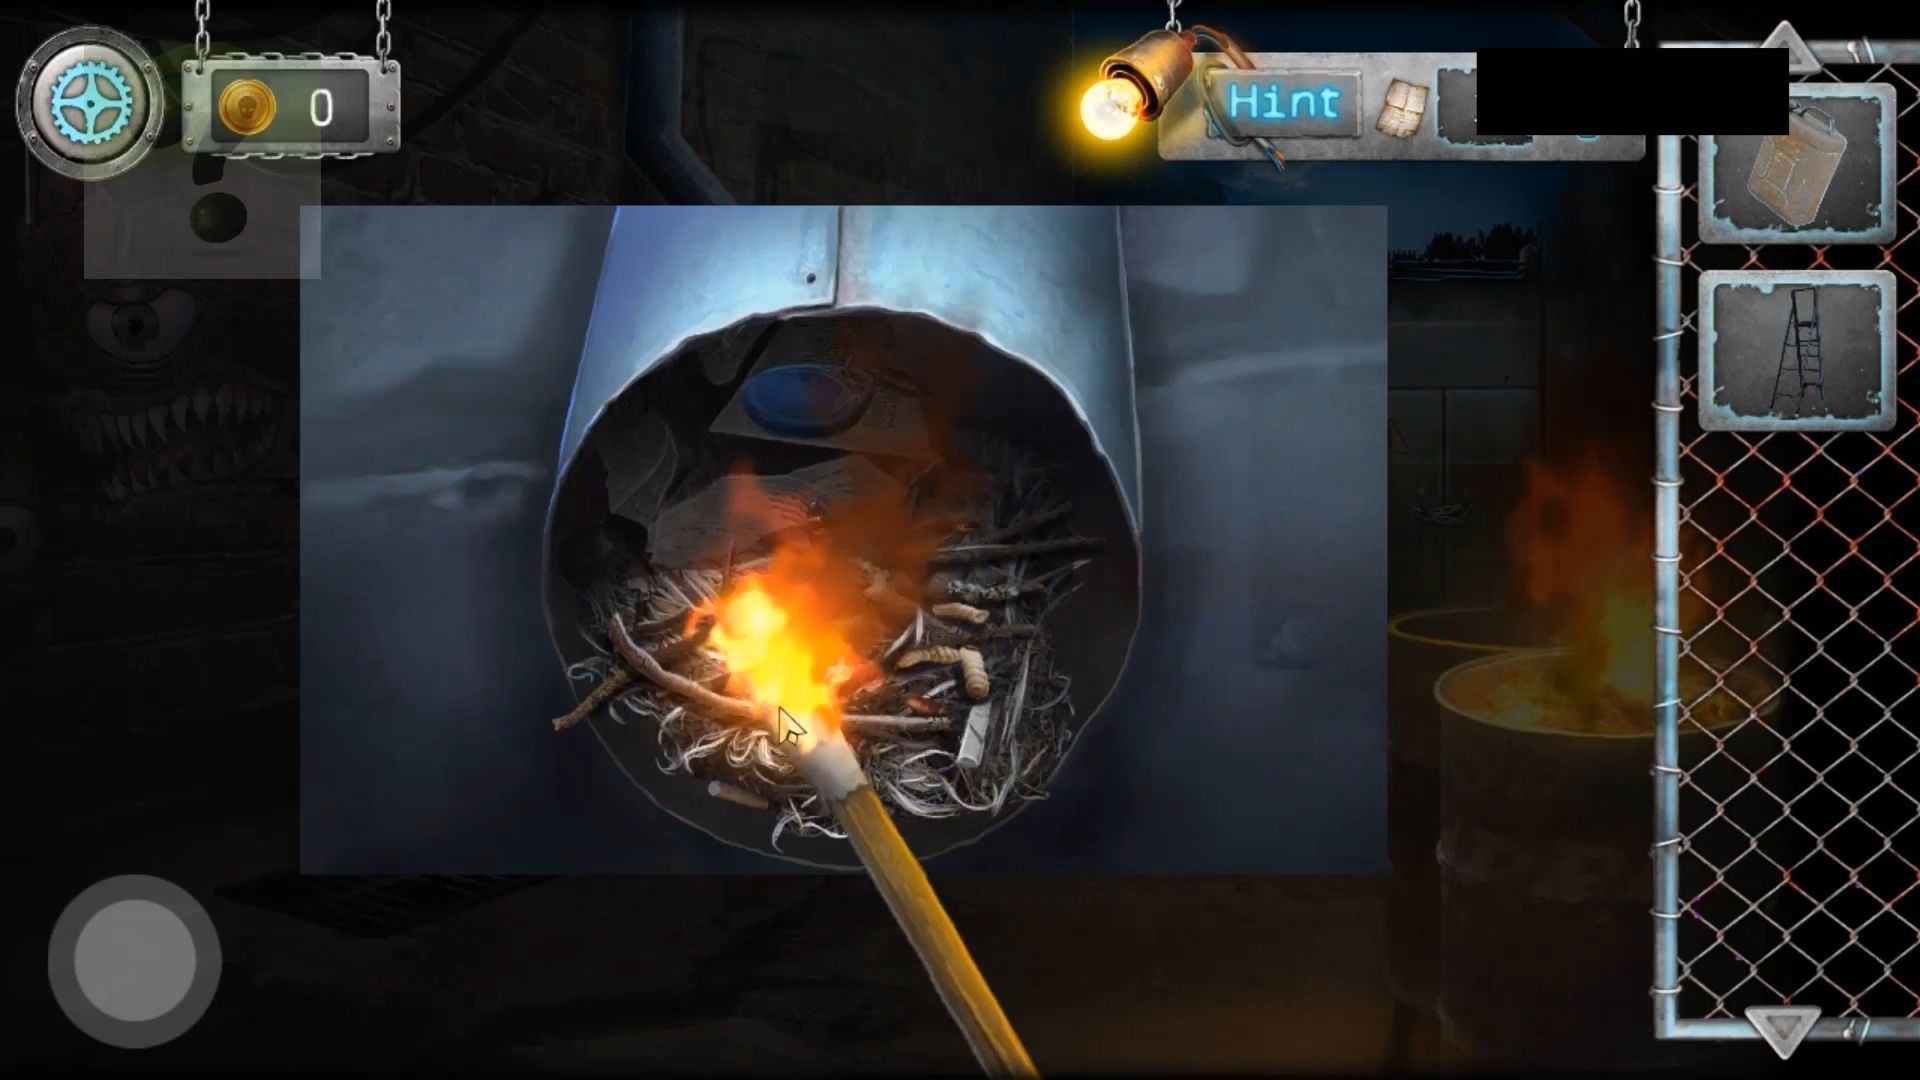
Next, head back to the alley and combine the stick in your inventory with the dirty neckerchief, making a wrapped stick. Use this wrapped stick on the burning barrel on the right to get a torch. Check the bottom end of the drain pipe on the left and employ the torch to quickly clear the bugs inside by moving it around within the pipe.
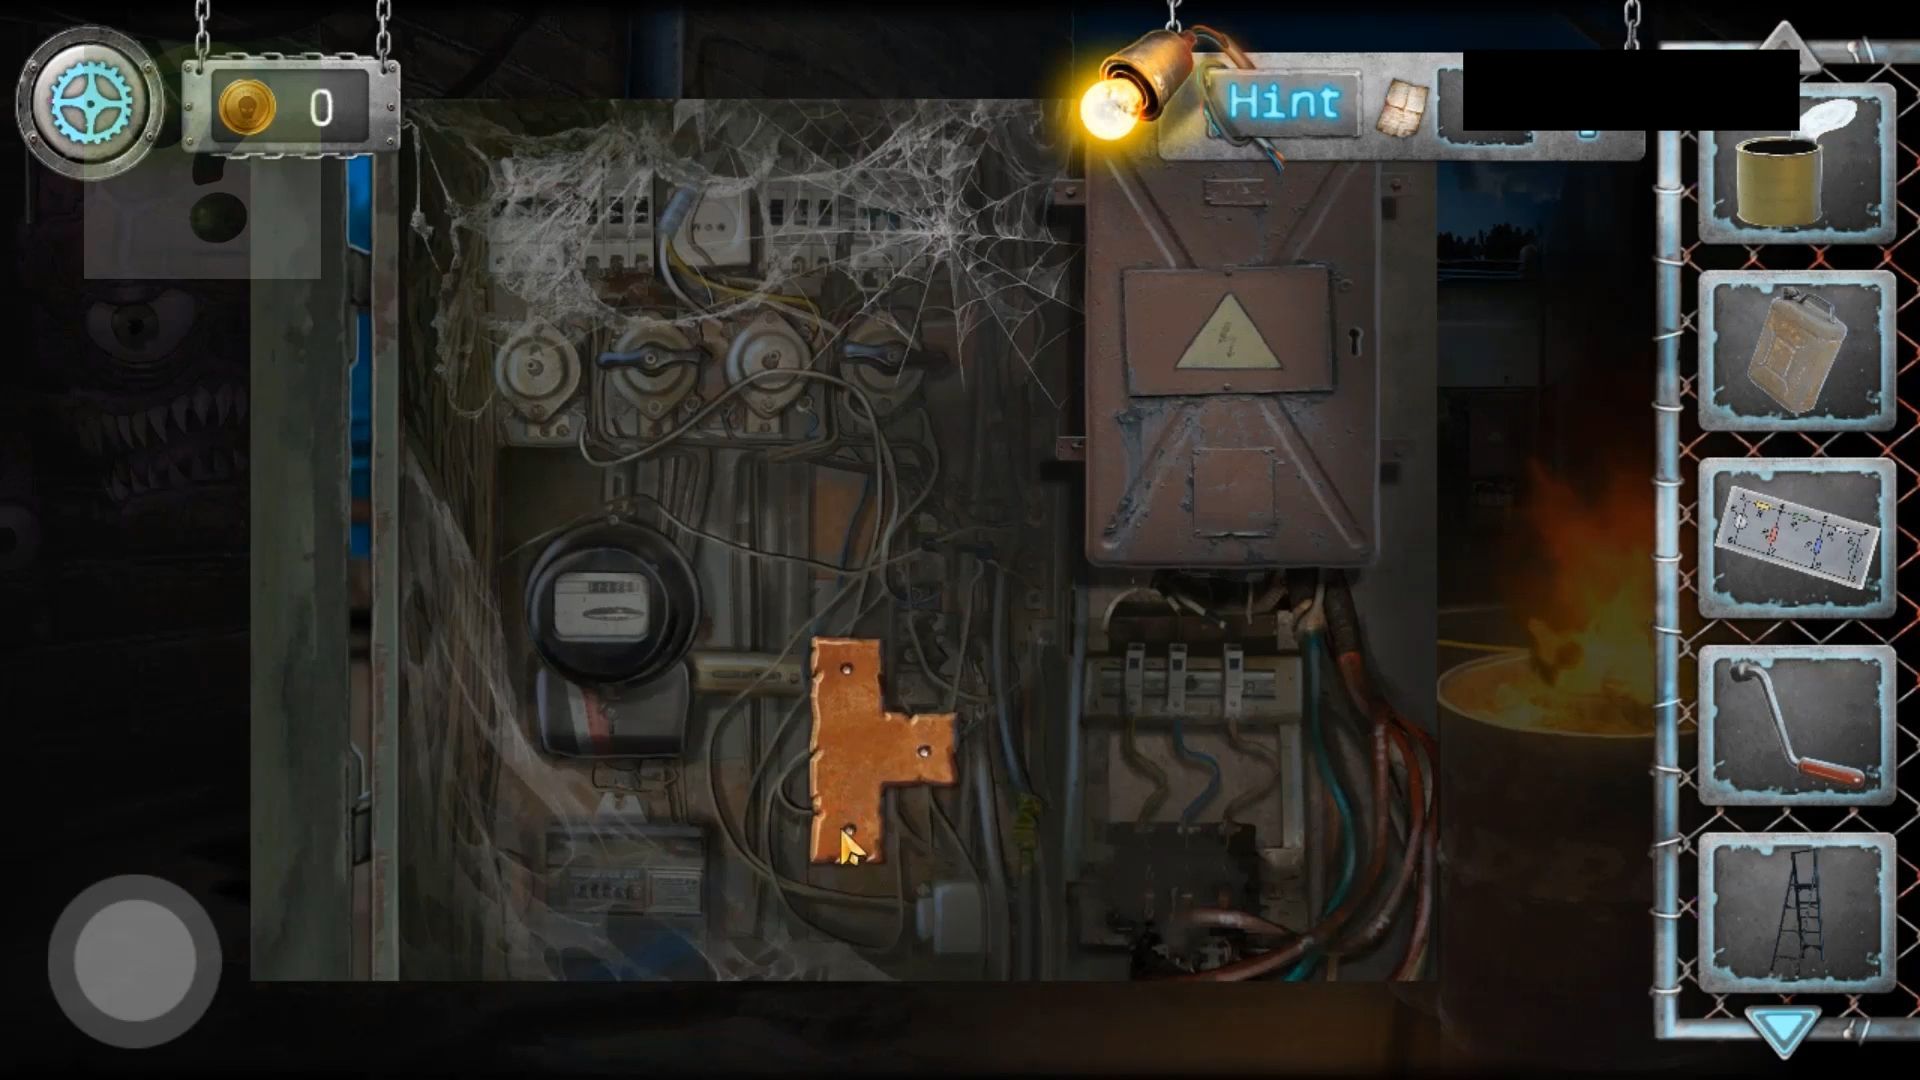
Step back and tap the ladder on the left. After the scary scene, grab the ladder and check the white patch on the left wall for a handle sticking out. Then use the crowbar on the white patch to break it open and collect the Lever. Now, look at the drain cover on the ground beneath it. Use the crowbar to remove the cover and look inside.
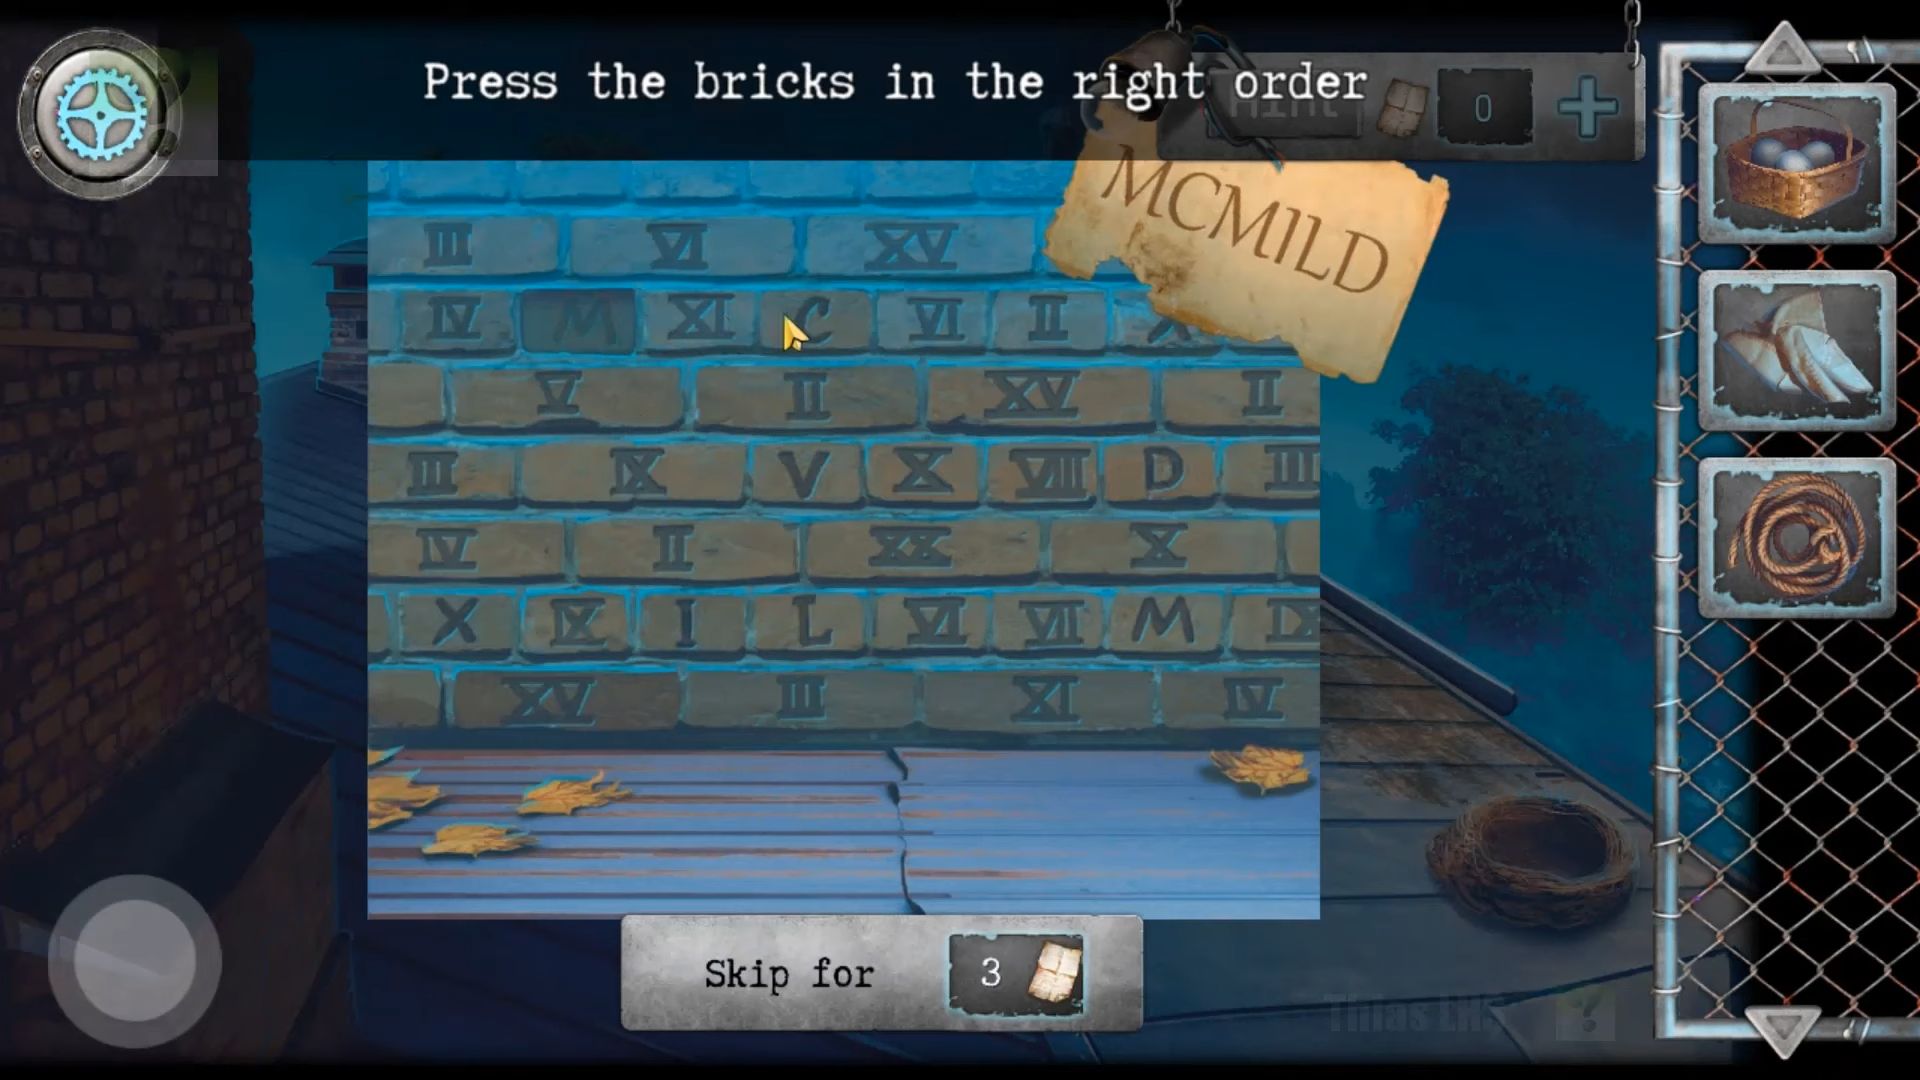
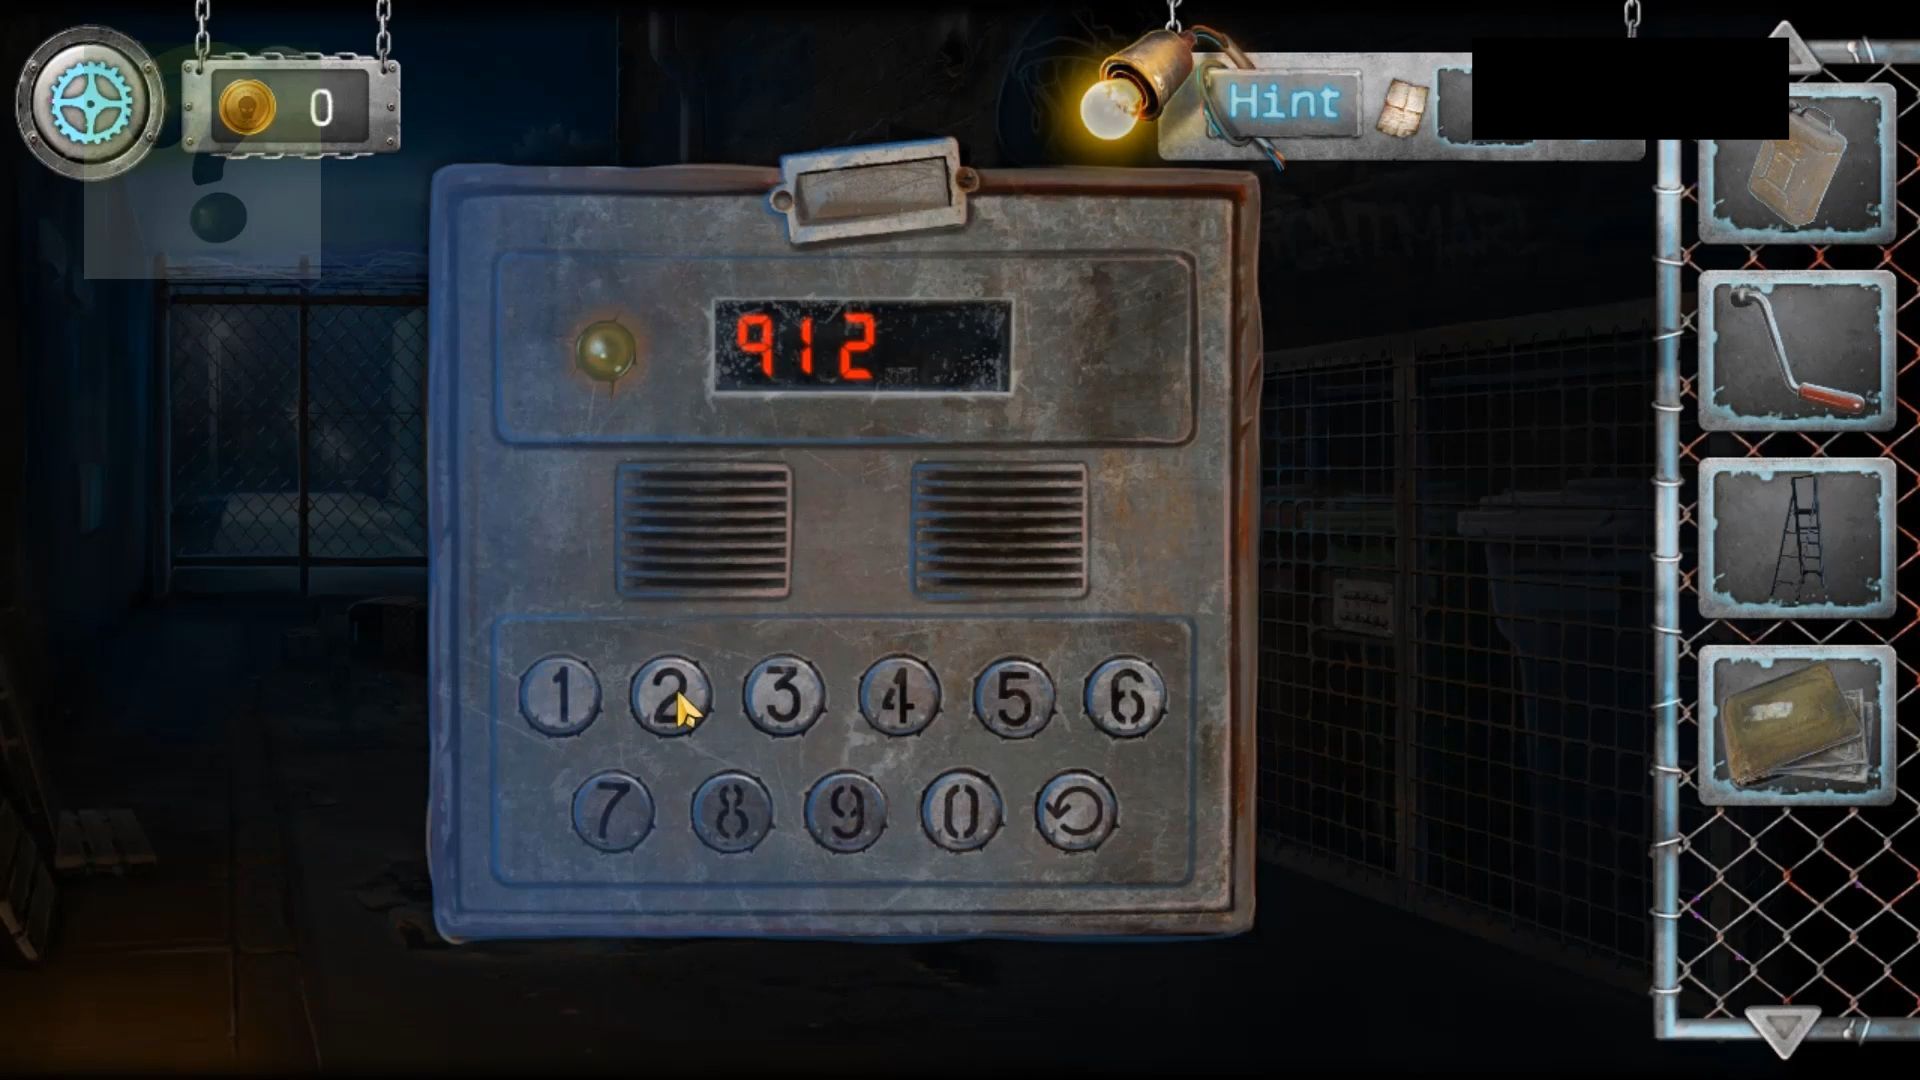
After clearing it, grab a blue Chip and use the arrows to go back to the first alley view. On the right, there’s a door; tap it and observe the numbers on the door. Look at the panel on the left wall, then use the blue-chip on it to activate it. To get the code, interpret the numbers on the door as three equations, giving you three numbers (912).
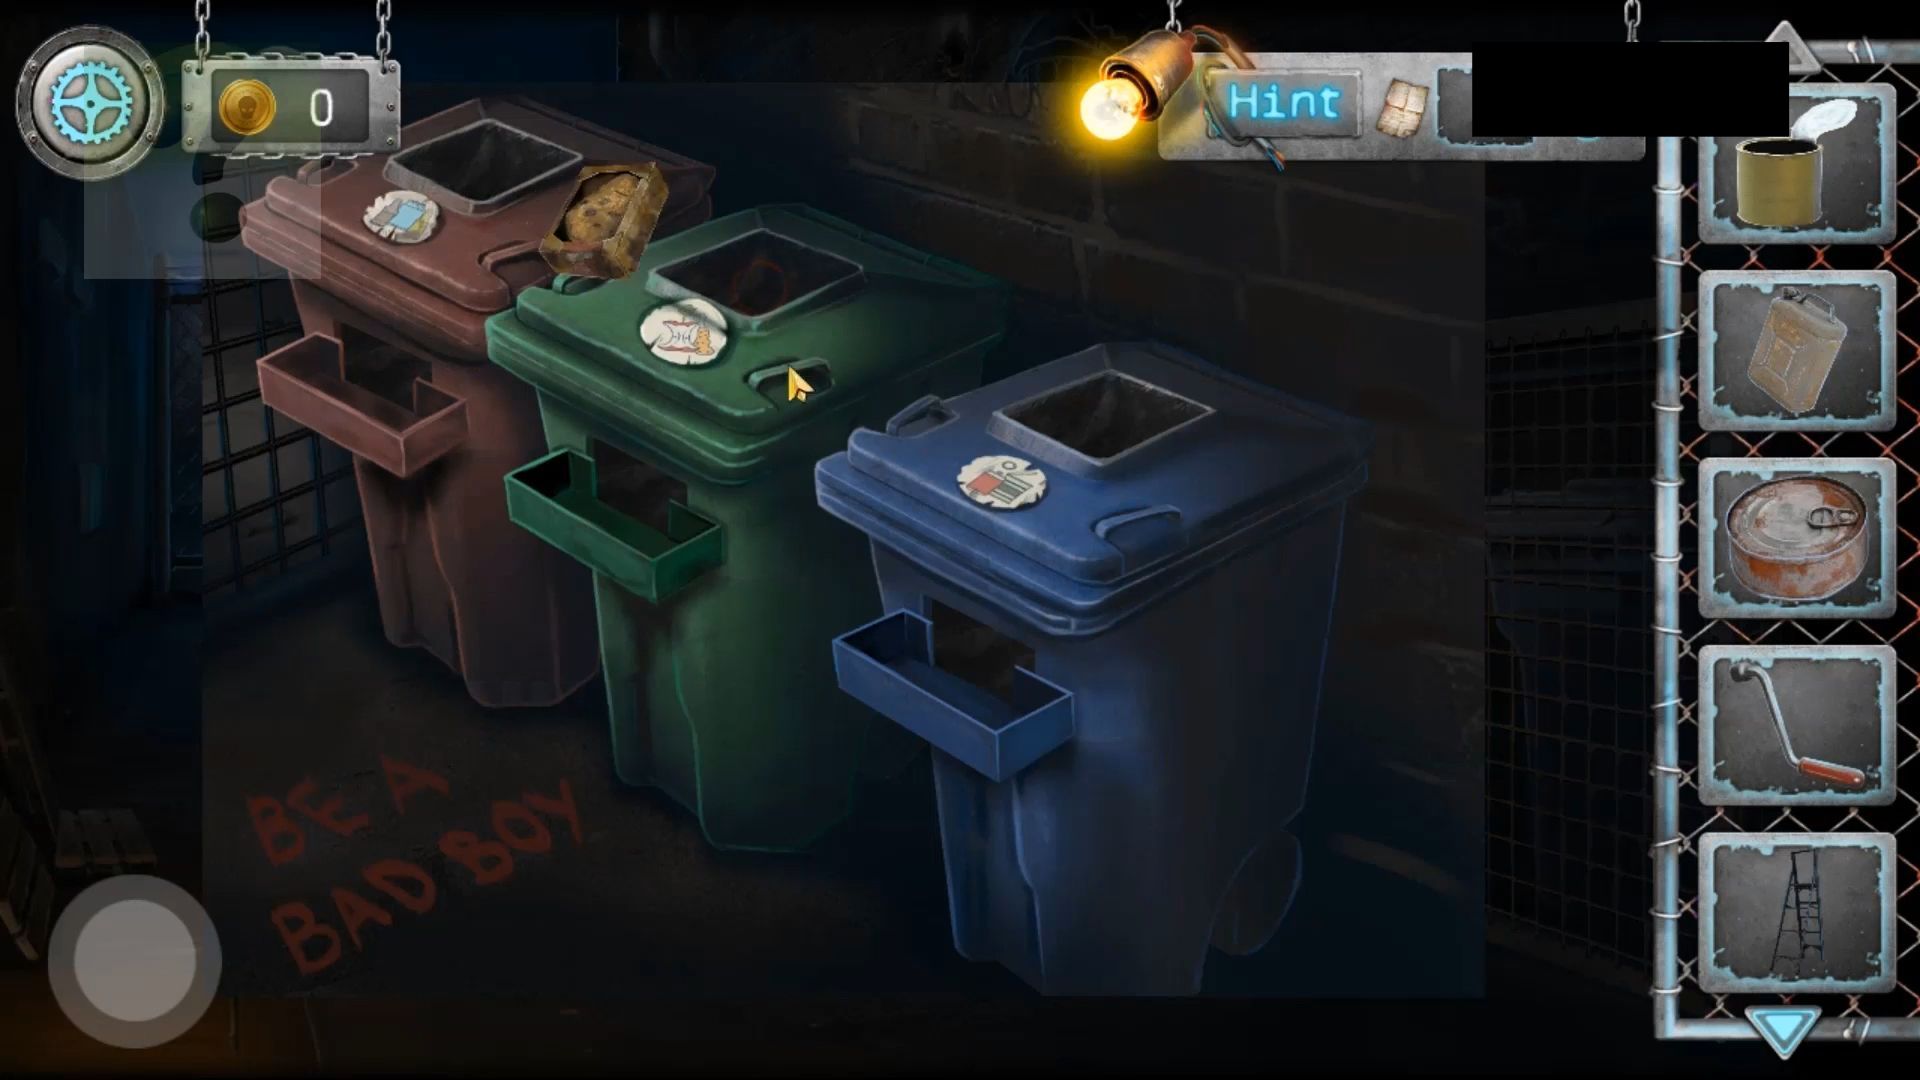
Now use the code to open the door and get a Flyer (paper clue). Step back and check the cage around the bins on the right. You need another code (6942) for the lock, and the Flyer will assist you with this.
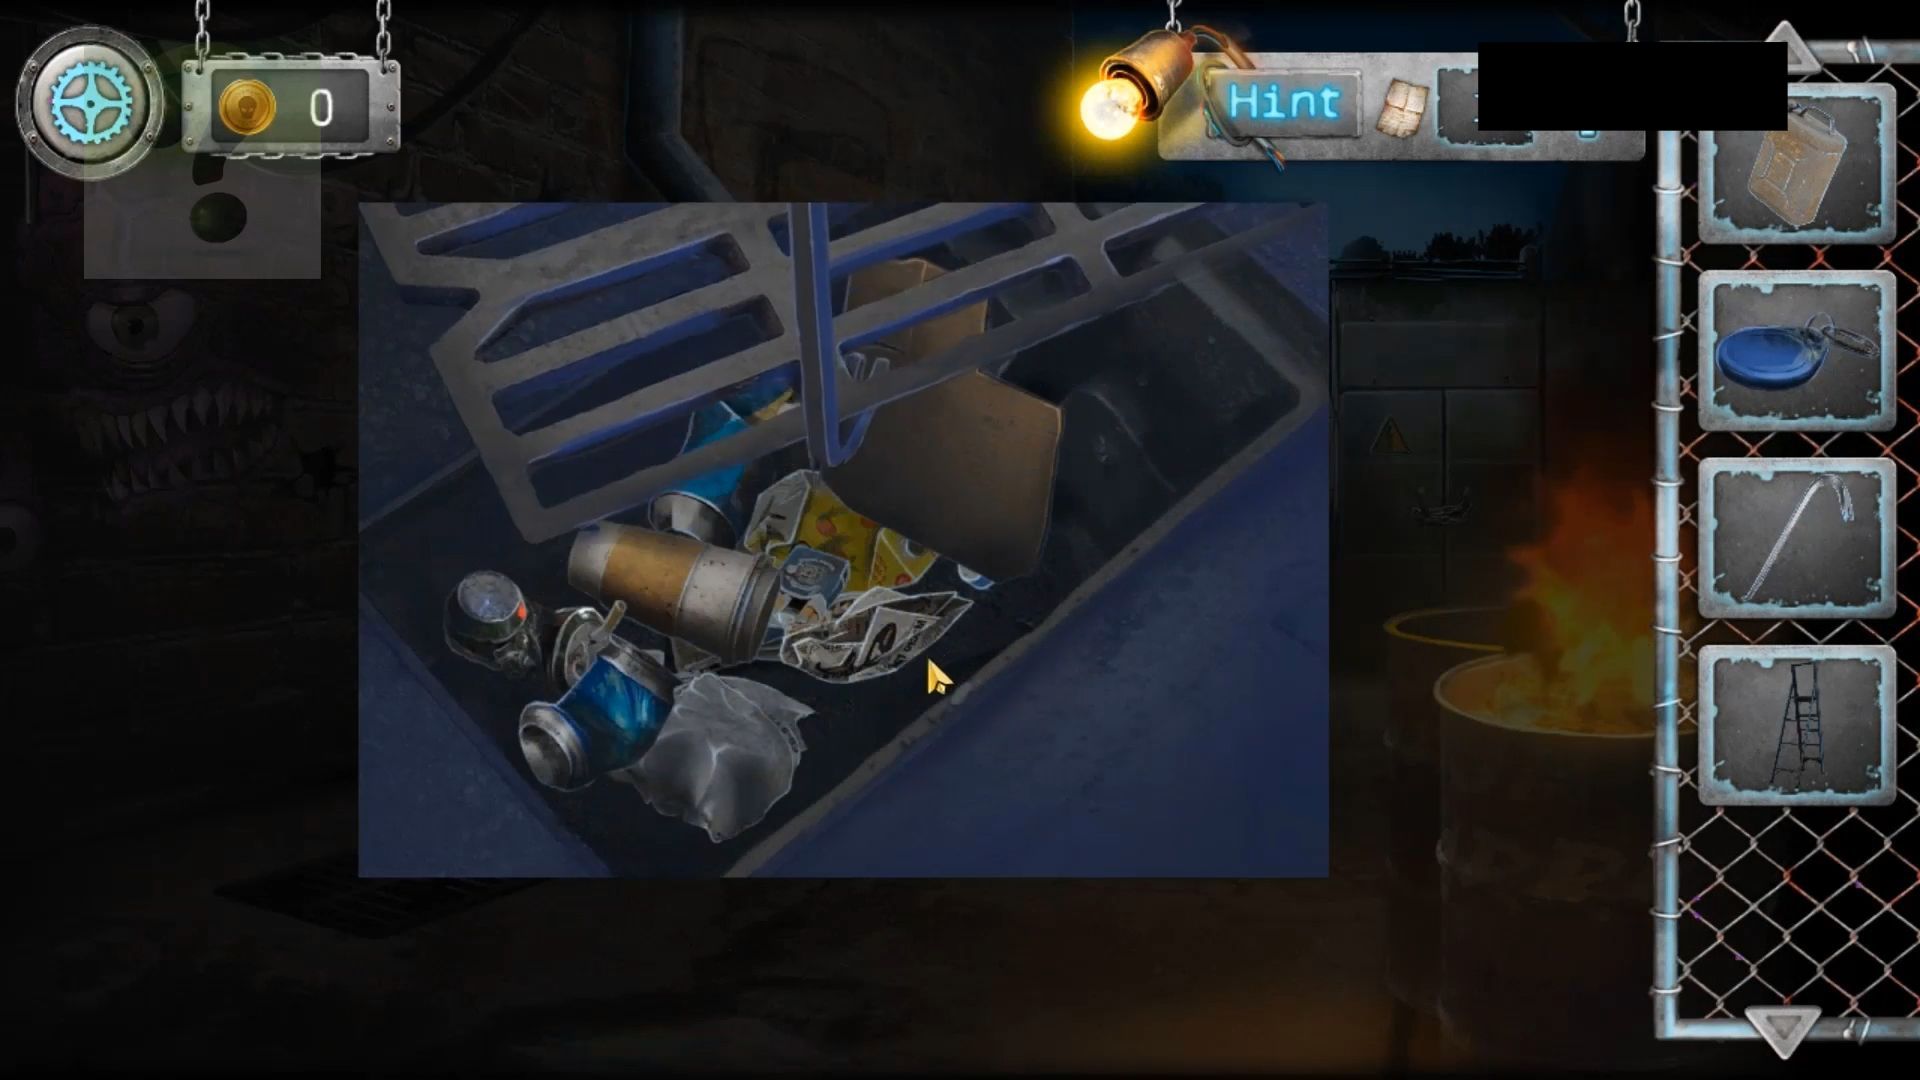
After that, open the three bins and use the three items from the vending machine here. Place the bottle of soda in the red bin to get a can and put the Rotten pie in the green bin to obtain a circuit diagram. Add the Expired canned food to the blue bin, and you’ll receive a bolt cutter.
Rotate to the opposite end of the alley and check the green cabinet. Then you have to use the bolt cutters to remove the chain. Once the cabinet is open, grab the T-shaped Magnet from the bottom center, then go back to the opened door on the other side of the alley, and incorporate the magnet into the other shapes to begin a puzzle.
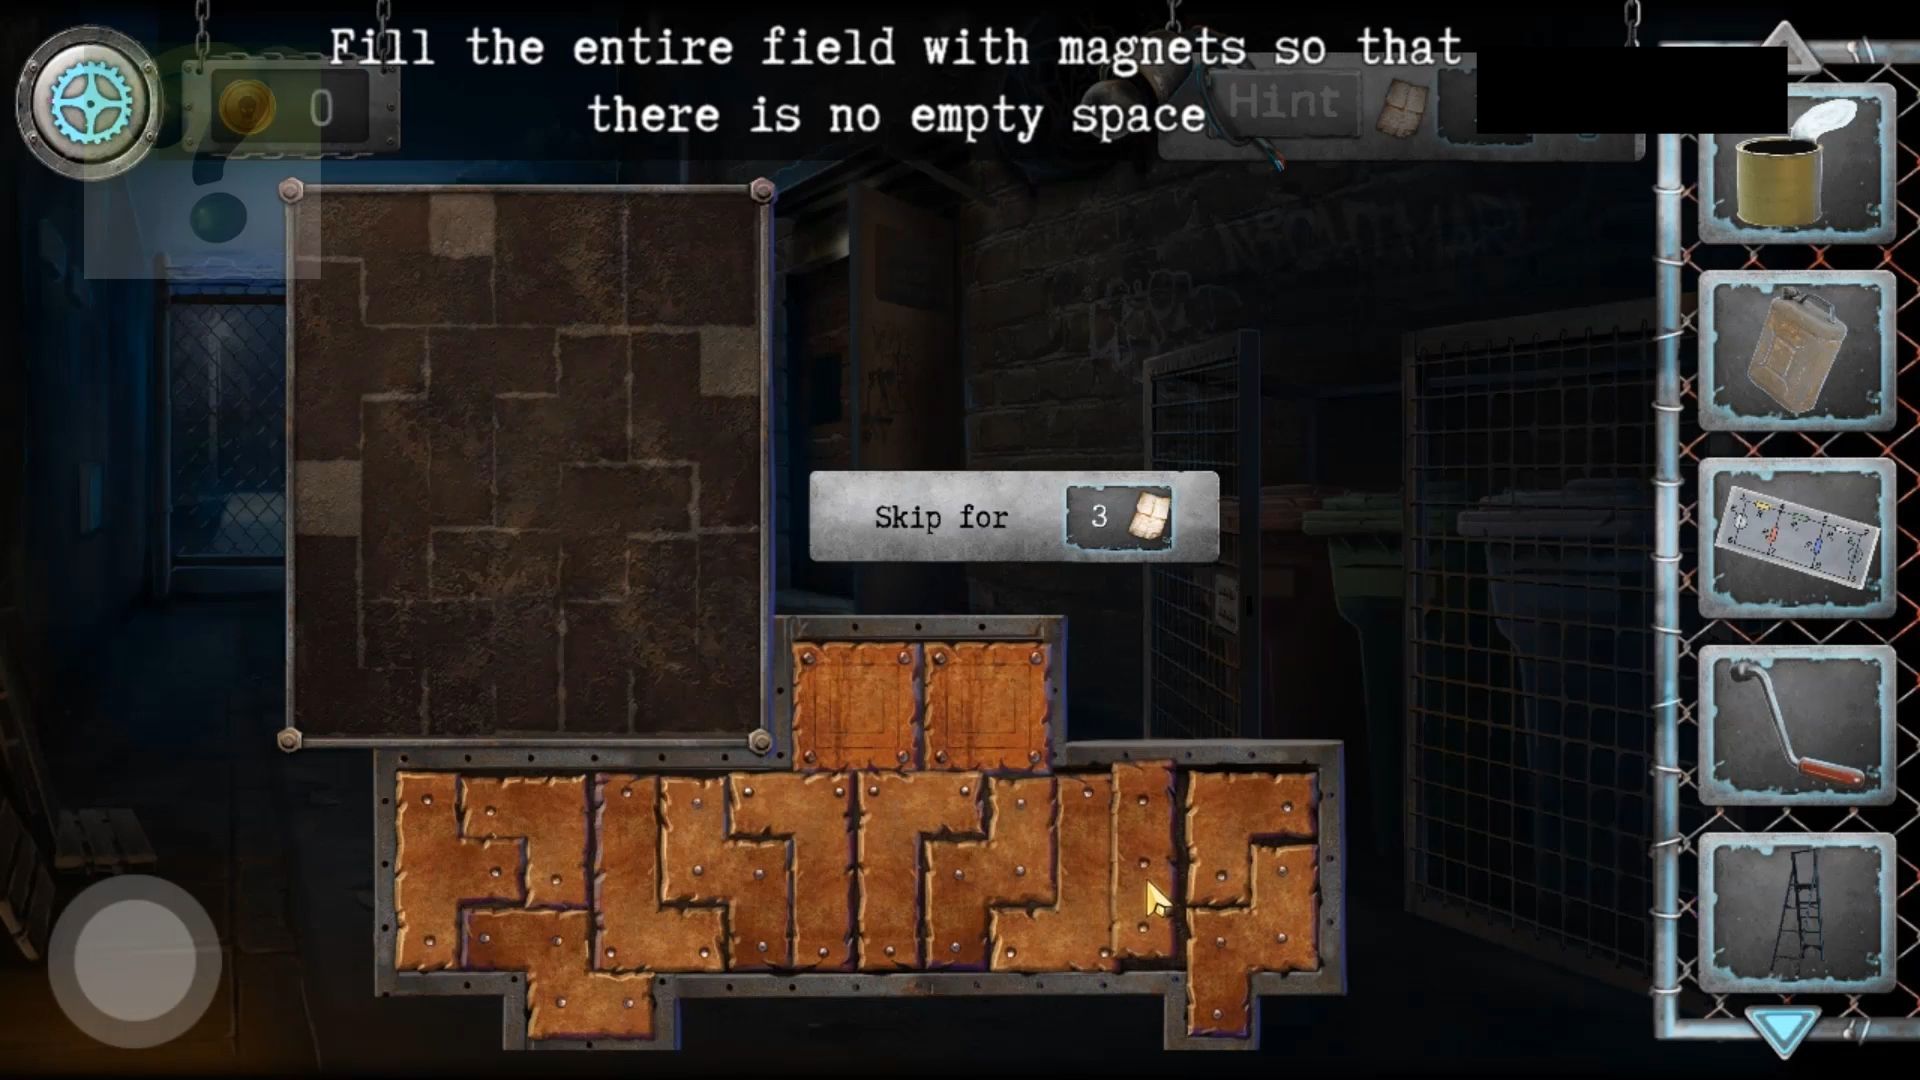
Magnet Puzzle
Then you have to drag and place all the shaped magnets into the bottom space, making sure they fit without any gaps. There’s more than one way to arrange them.
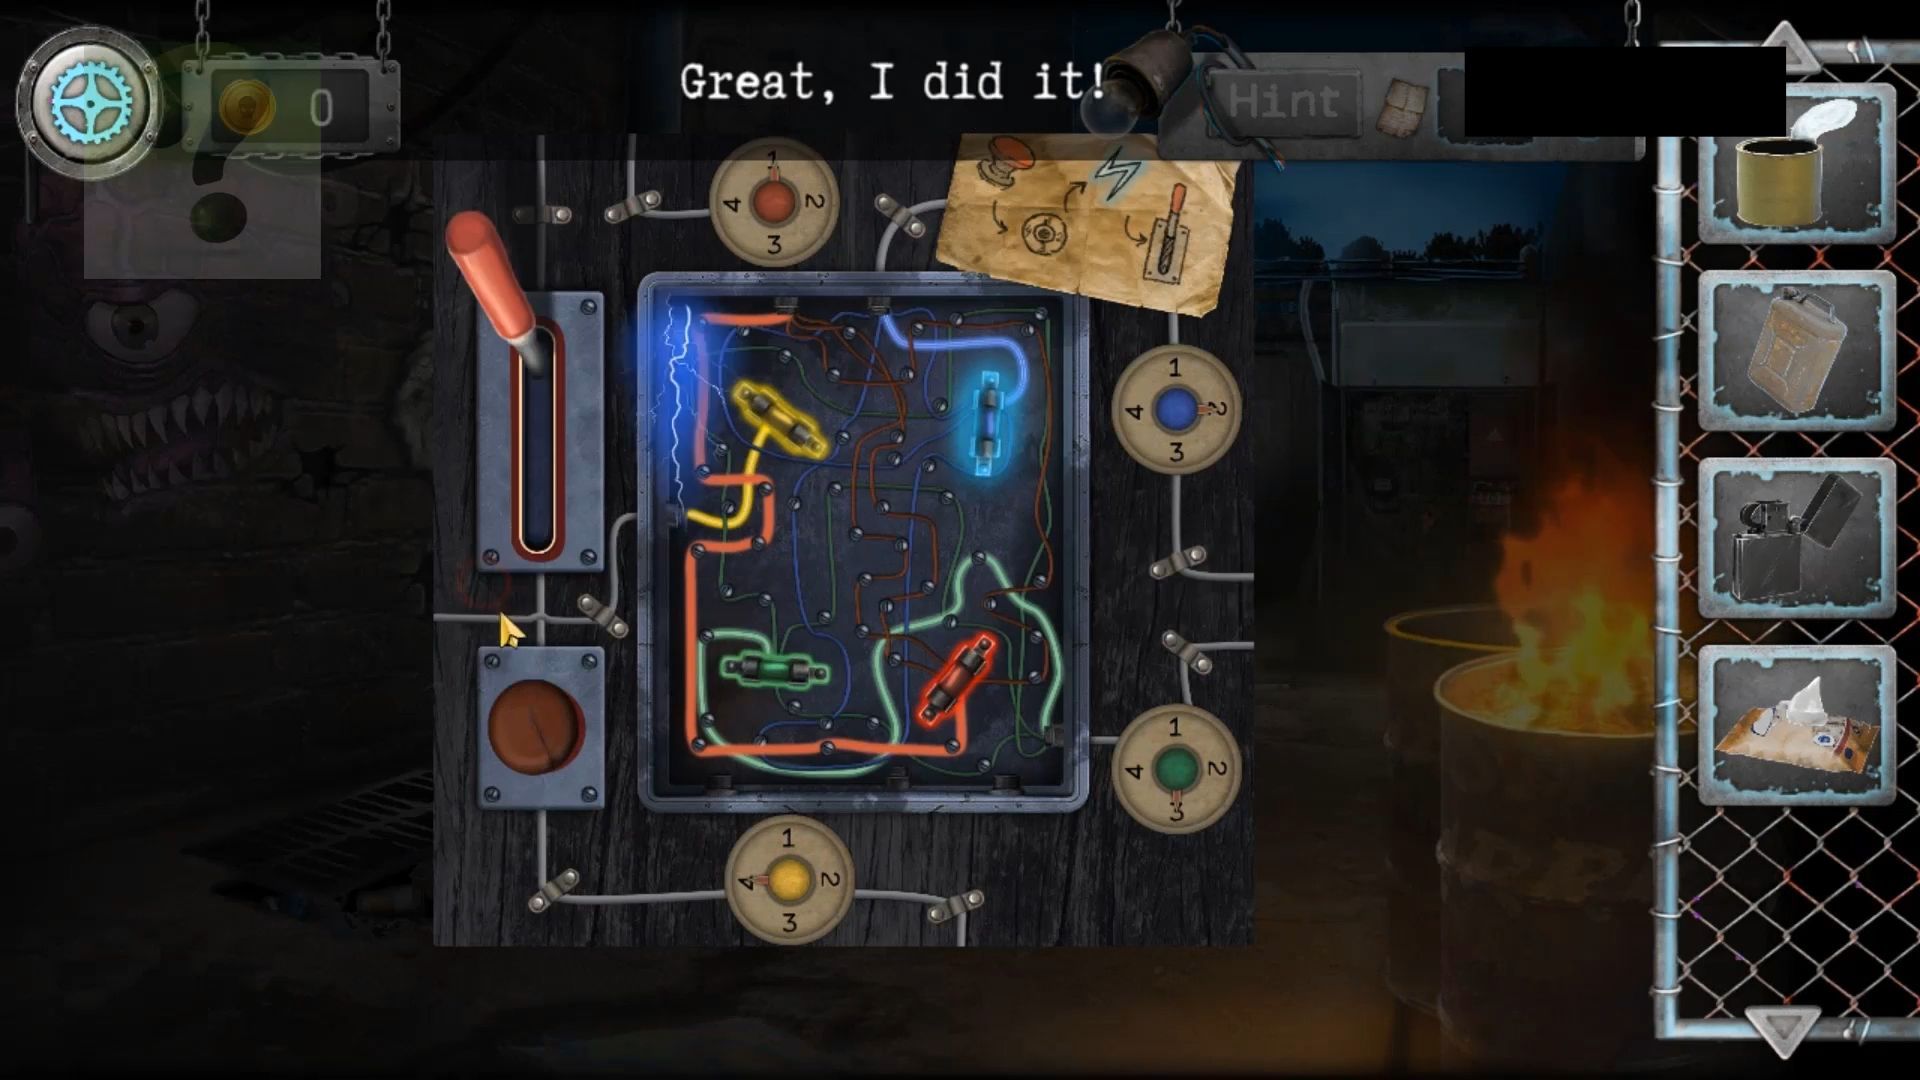
Next, tap the left panel to open it and grab Wire Cutters and a Scheme paper. Step back, use the ladder from the right wall near the bins, and place it. Now you have to tap on the ladder to check loose wires above the small roof over the door. Collect the wet wipes from the roof, then use the wire cutters to trim the loose wires. After that, look inside the case where the wires come from.
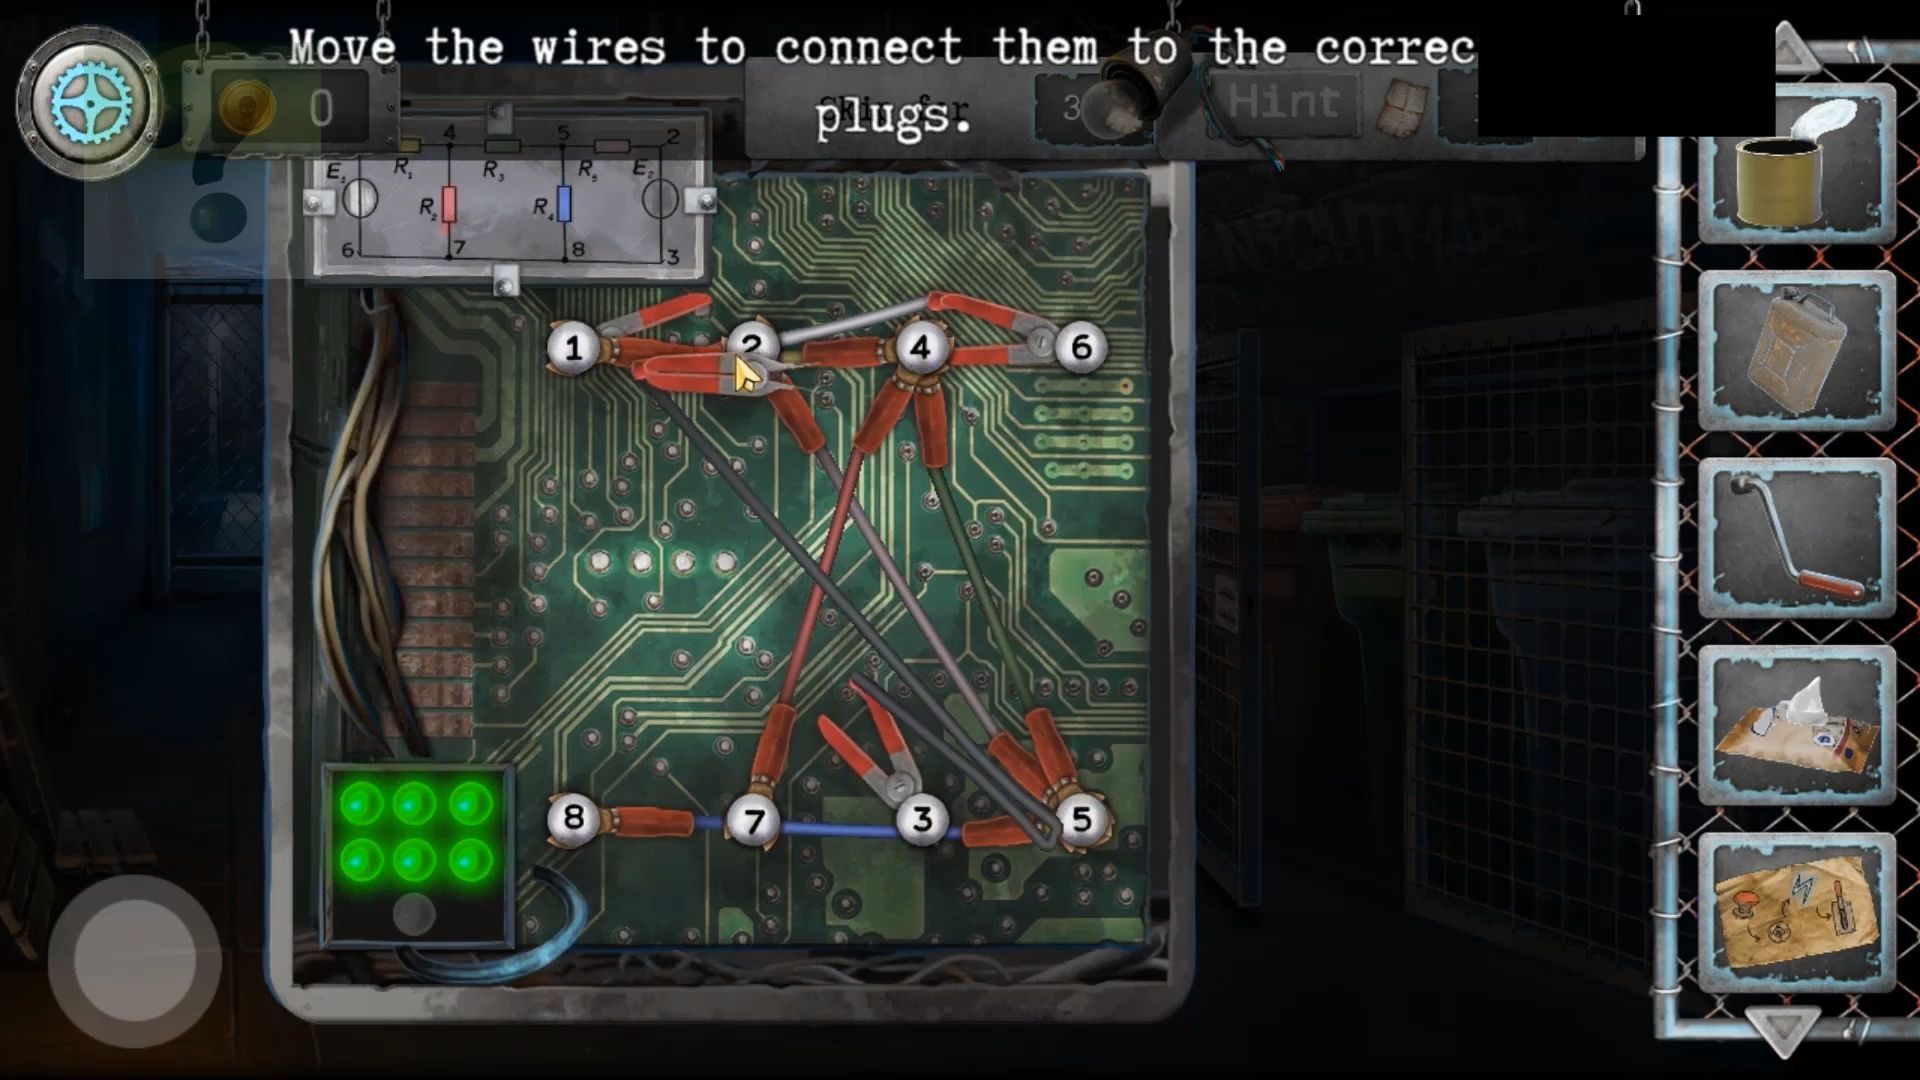
Wiring Puzzle
The circuit diagram is added, providing clues for the wiring. You have to connect the ends of the wires on the right to the correct terminals, matching the wire colors to those on the diagram. The Neon light will turn on, tap the ladder to check the small roof again, and you can now collect a Pike Pole. Also, examine a locked box.
Box Padlock
To get the code, match the color on the padlock with the color on the box lid. The colors on the box correspond to numbers (4548). Collect the Lighter and the Transformer Key. Now go back to the other side of the alley, check the opened drain again, and use the pike pole to get the Red Button.
After that, revisit the opened green cabinet and use the key to open the box on the top right. Take note of the four lines on the paper inside the door, then tap to view the puzzle inside.

Transformer Puzzle
First, place the red button and the Lever on the panel. Tap the red button to power it up and click on two colored dials to change the wire for each fuse. Figure out the right setup so that when you tap the lever, it causes a short circuit.
Now that the power to the fence is off, you have to go back to the other side of the alley, move the ladder to the fence, and tap it to climb over.
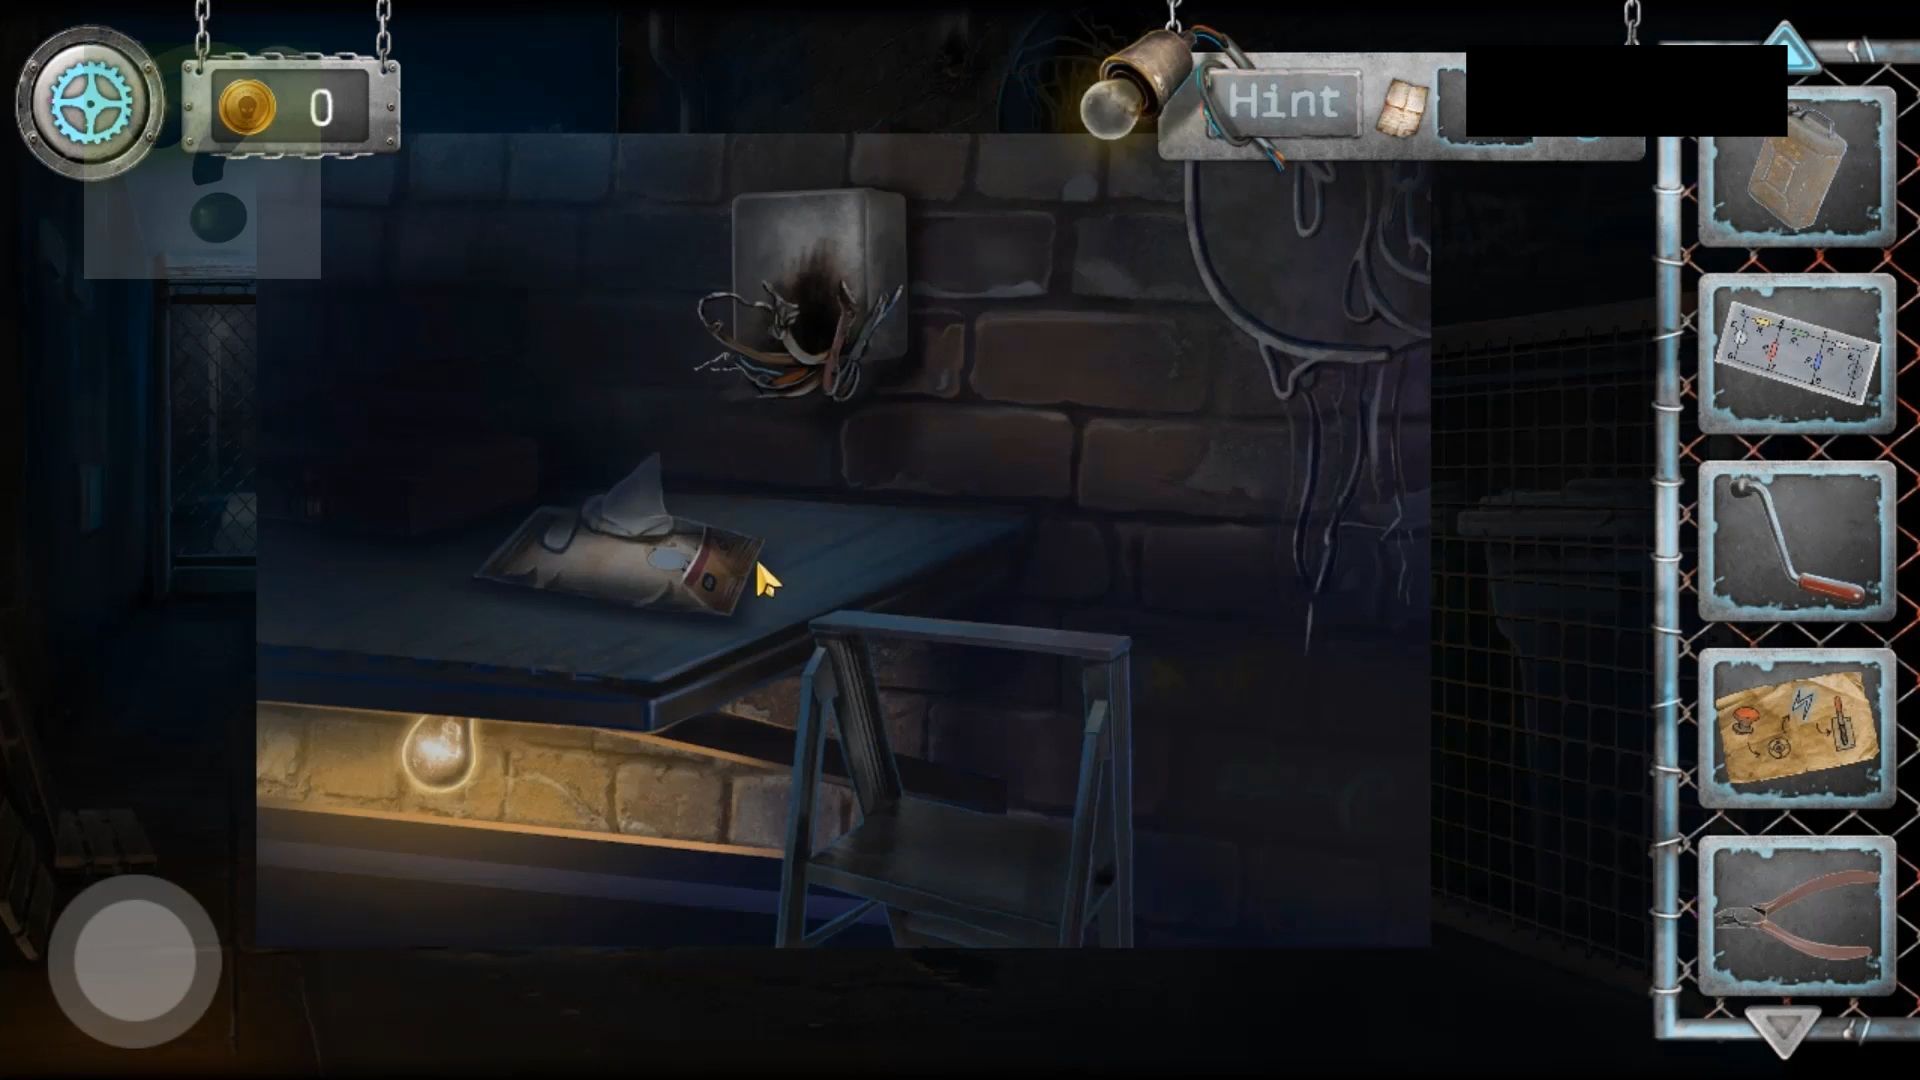
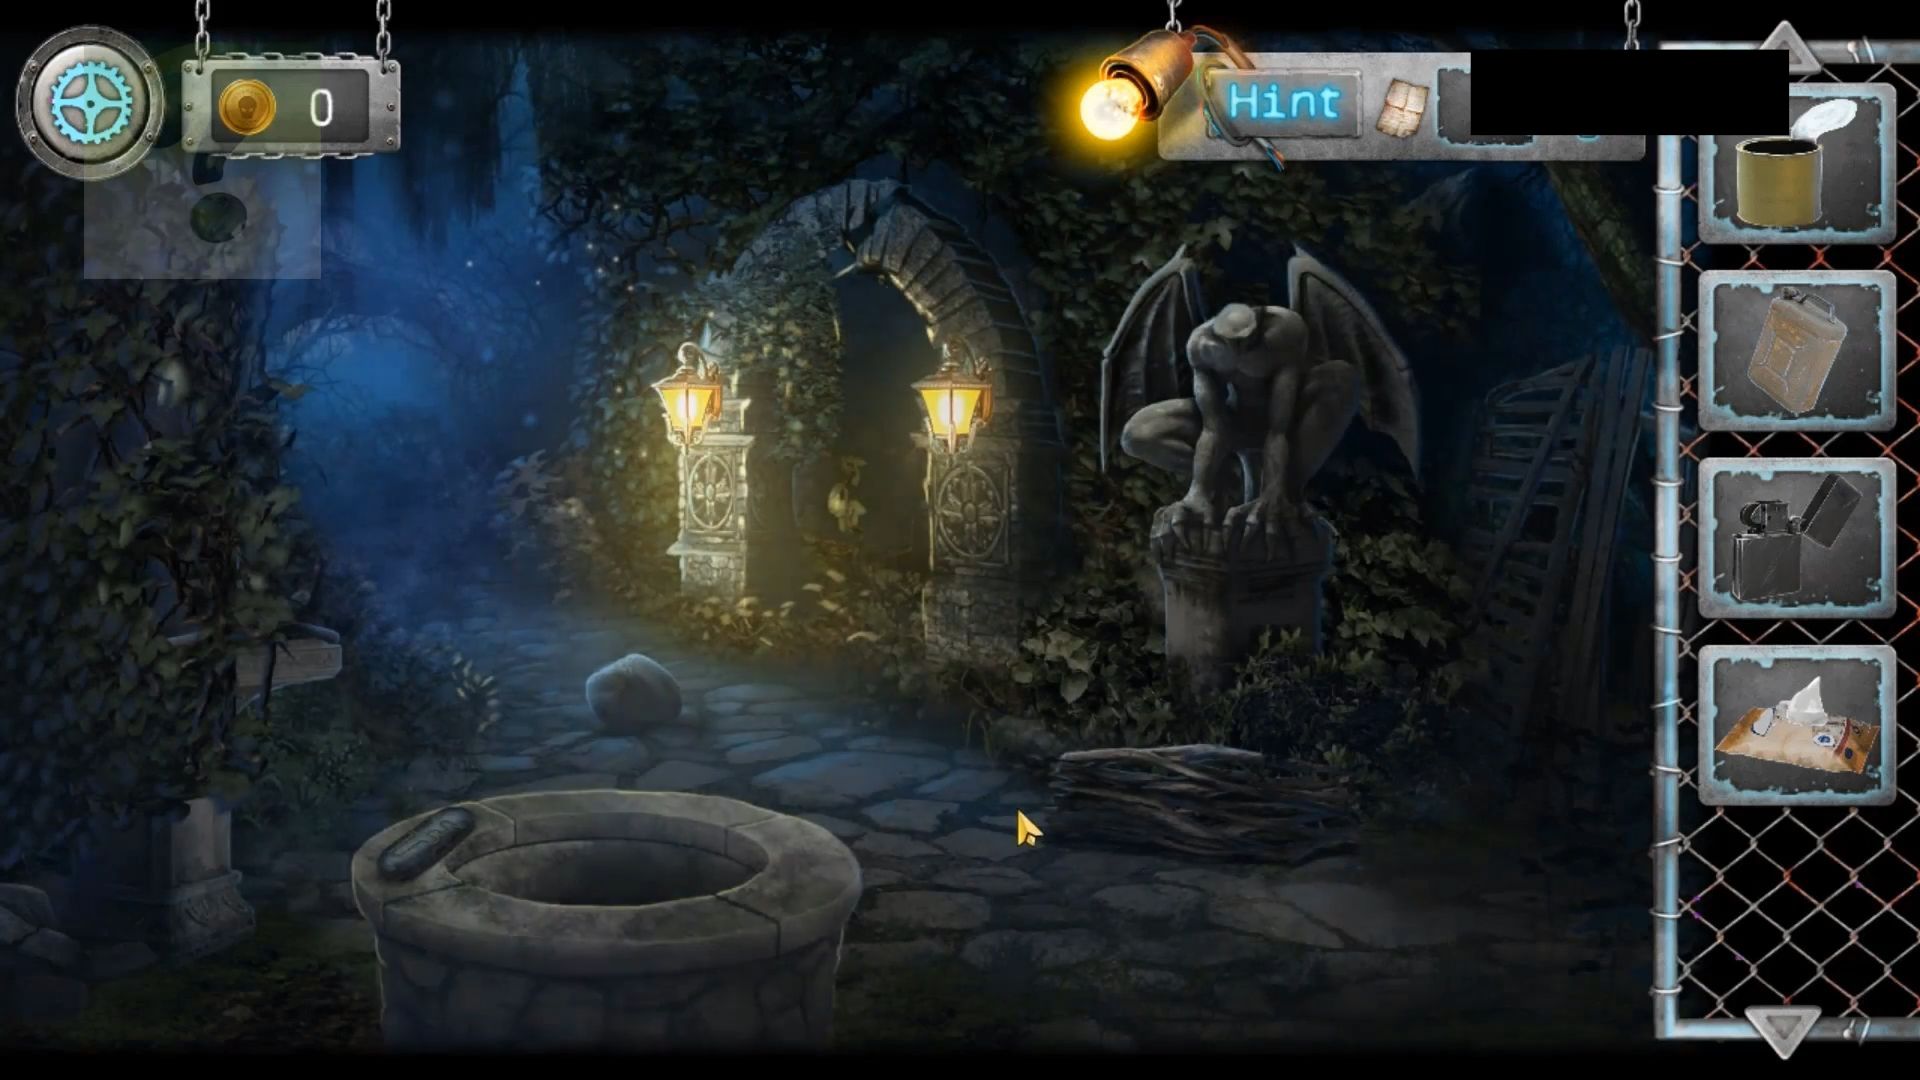
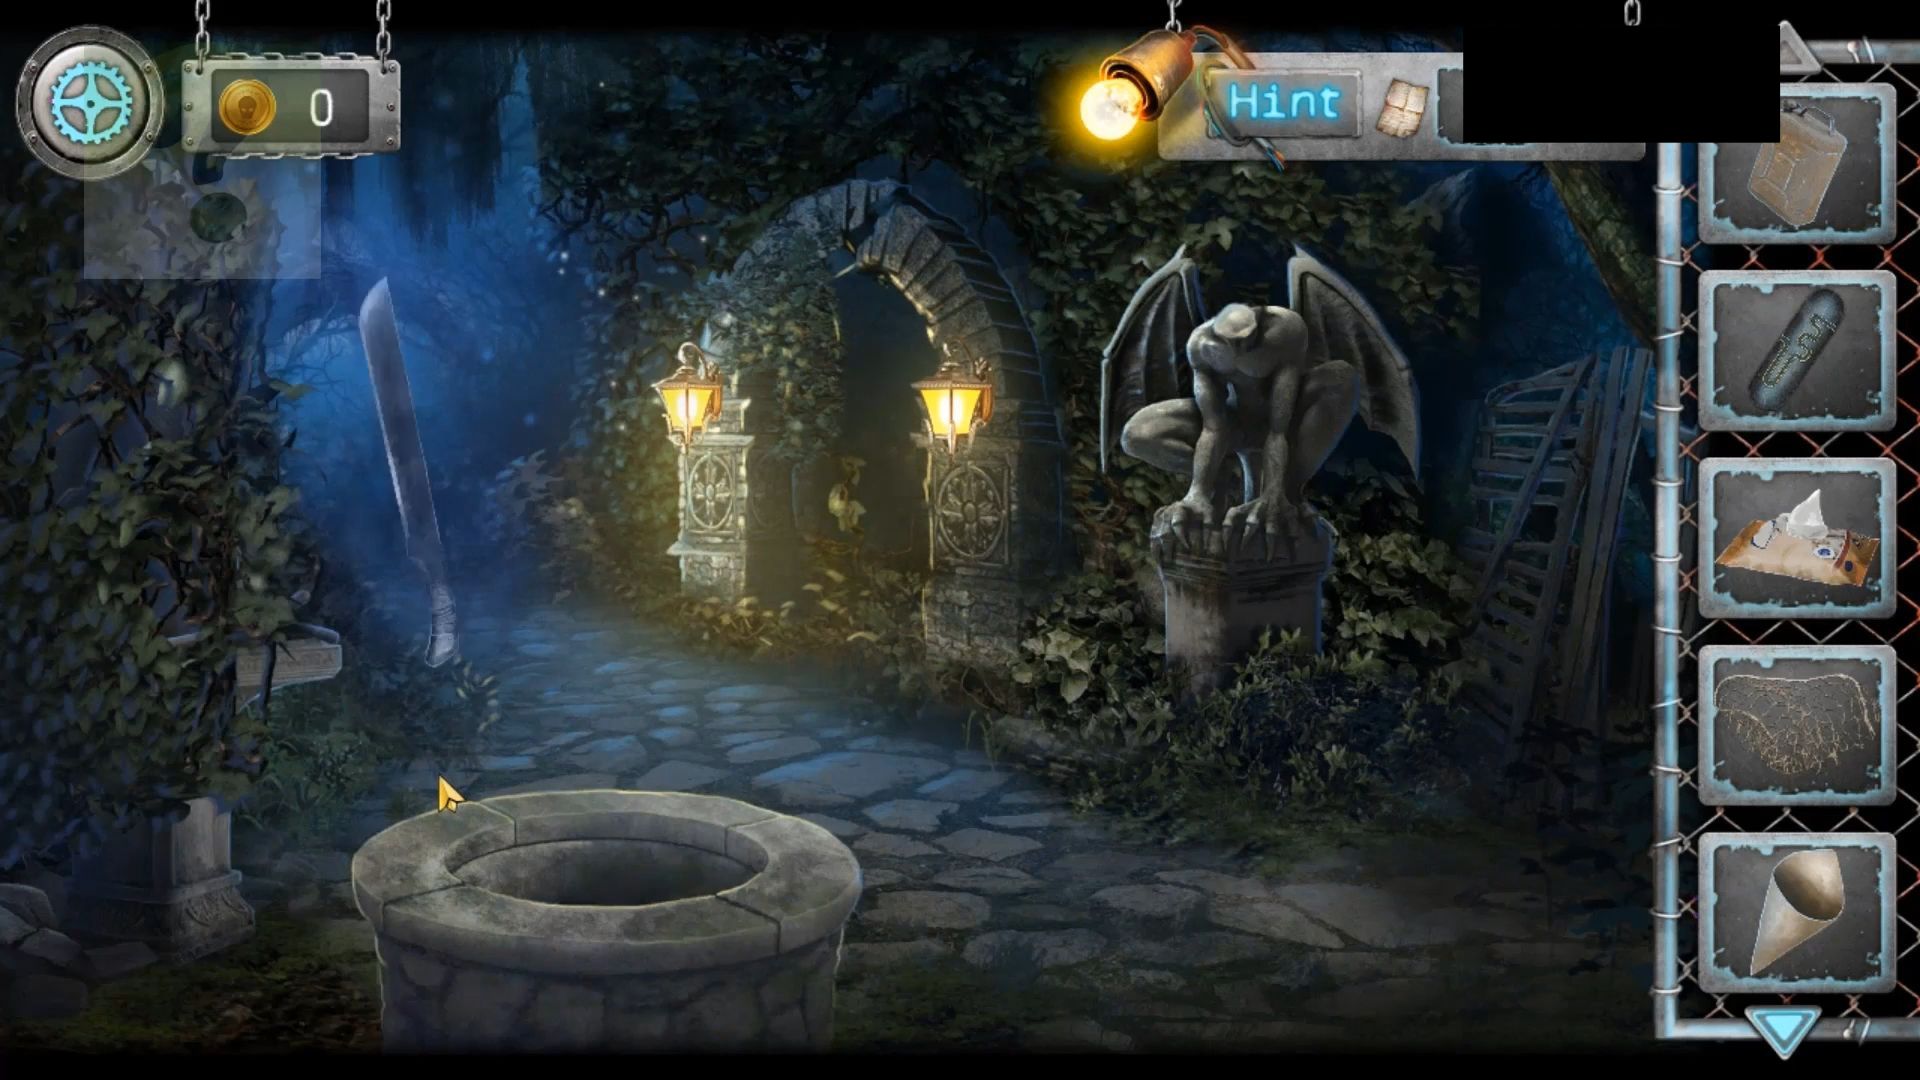
After being chased by the masked figure, you will find yourself in a new area – a dark, overgrown path. Tap on a lantern to view it, open the front, and use the Jerry can with fuel and the lighter to light it. Grab a Stone from the path and a bundle of Dry branches. Also, take the Part of a lock from the well’s rim.
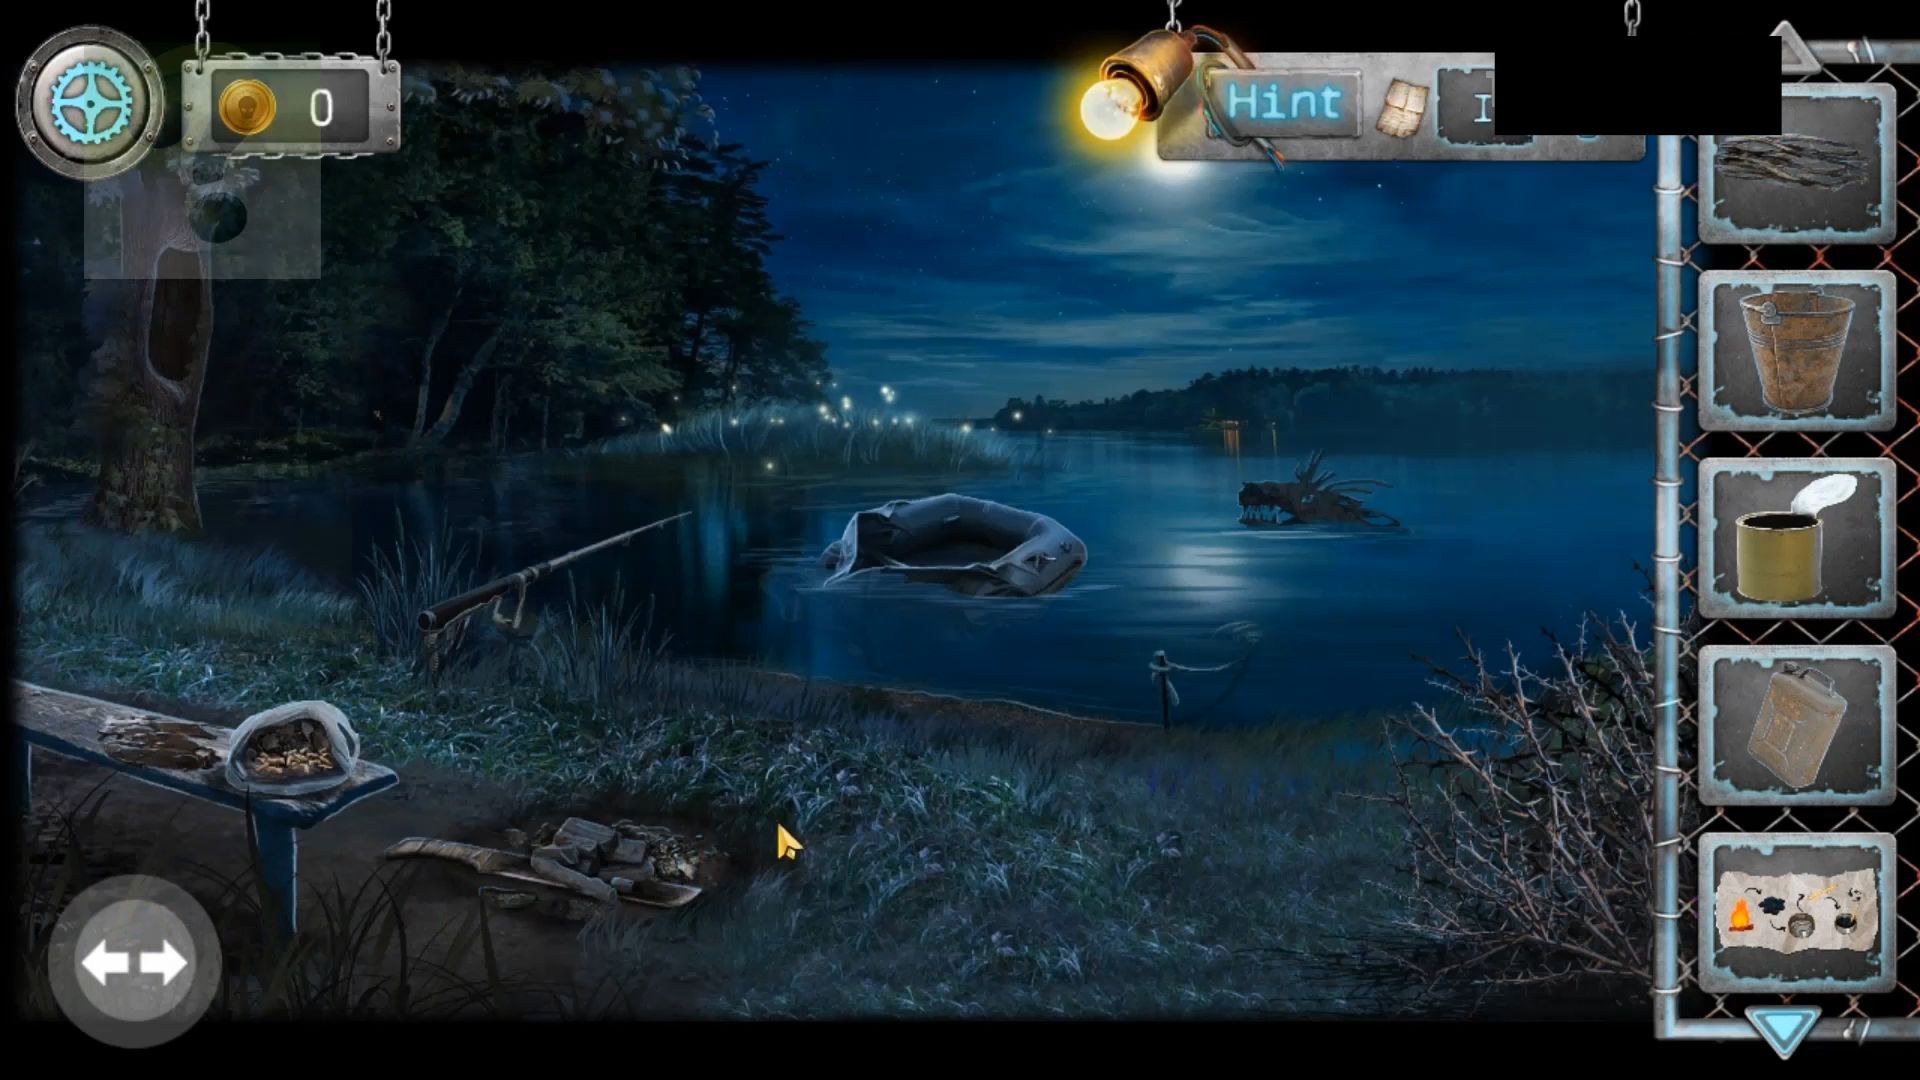
Now, you need to tap the path left of the archway to reach the lake’s edge. Check the bench on the left, grab the Paper (book) beside it, and use the wet wipes to clean a spill in the center, revealing a clue. Turn the plastic bag over and collect a boat repair manual (paper) from behind it.
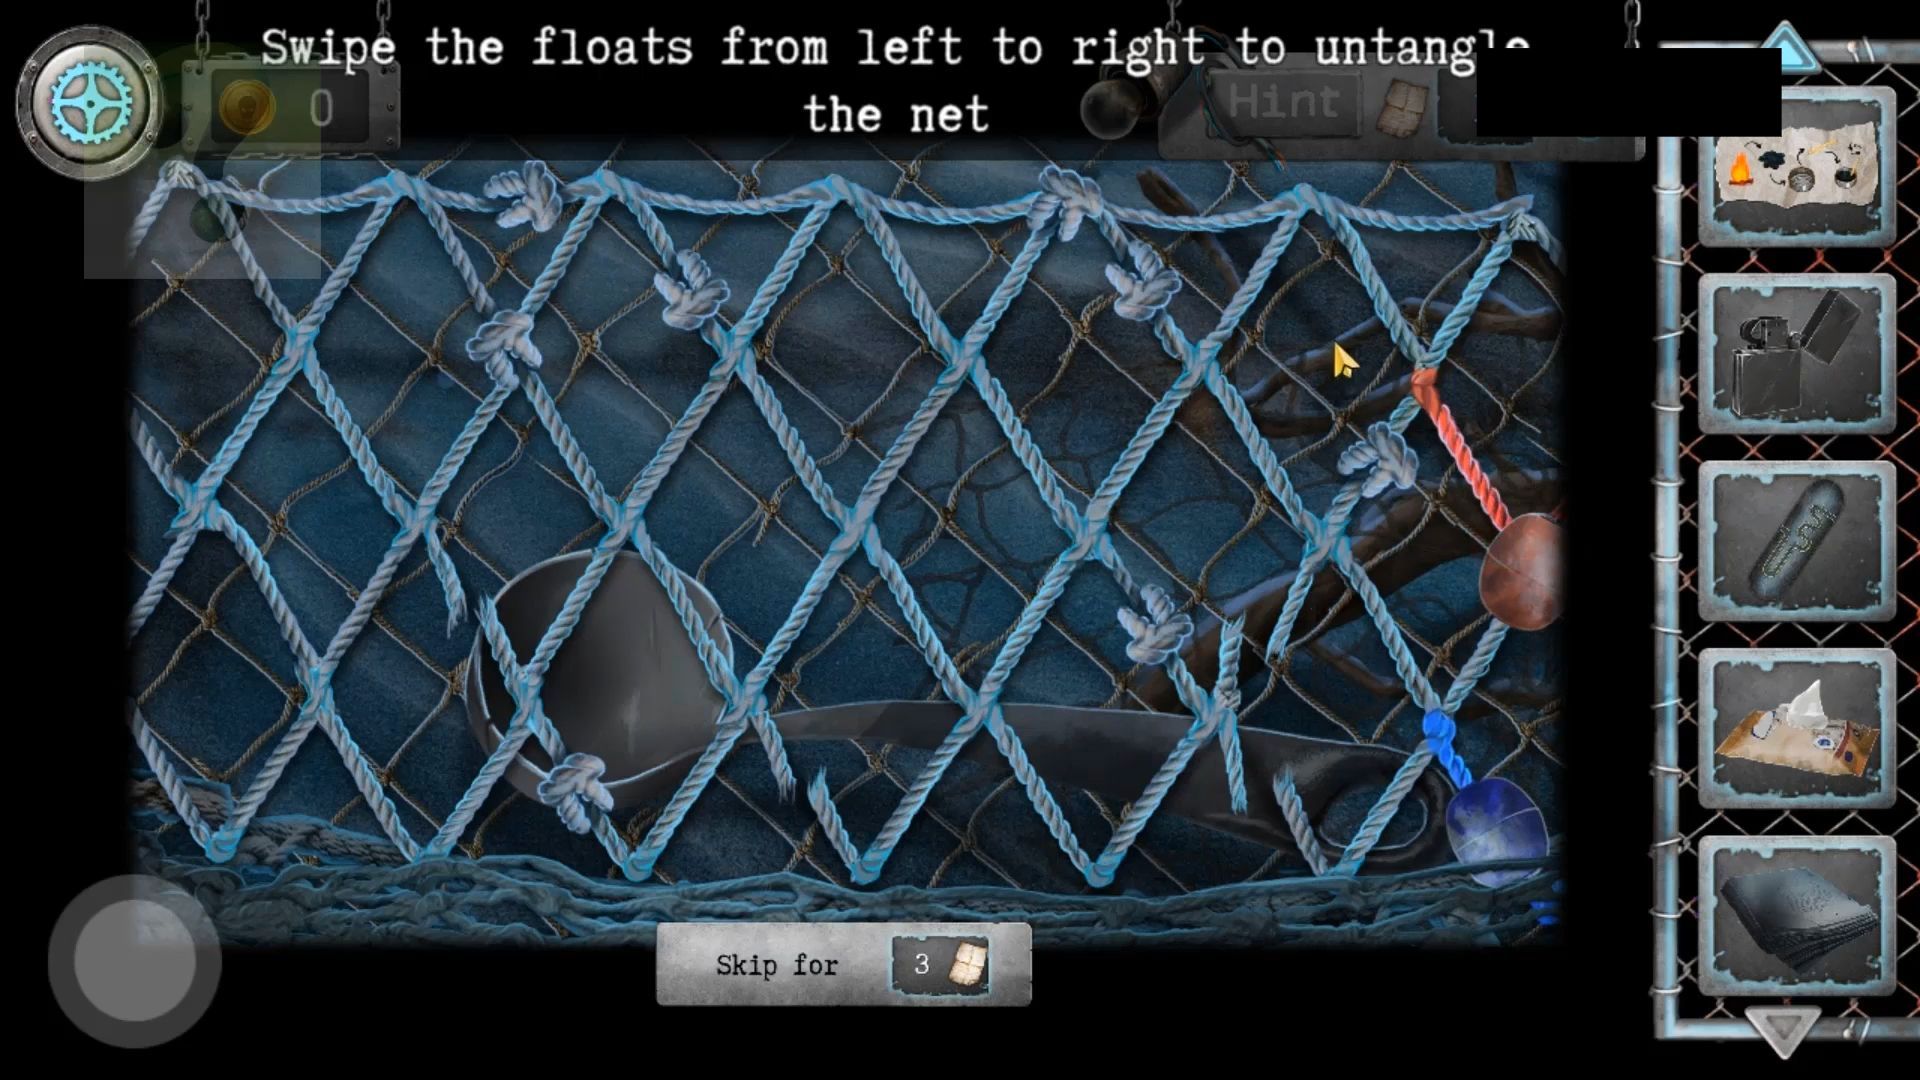
Net Puzzle
Throw the stone into the lake to disturb the strange creature-shaped shadow, revealing it to be a tangled net. After that, you have to pull it in to start a puzzle. Untangle the net by moving the red and blue floats from the left side to the matching colored rope sections on the right. Some sections have knots you can’t pass, and others may break, blocking your way.
Once done, you need to pick up a Net and a Ladle. Also, grab the bucket by the fire and use it on the lake to collect water.
Next, pick up the bucket by the fire, and use it to get water from the lake. Go back to the overgrown path, tap the well, and use the water-filled bucket to fill it. Return to the lake, then gather a second bucket of water, and add it to the well.
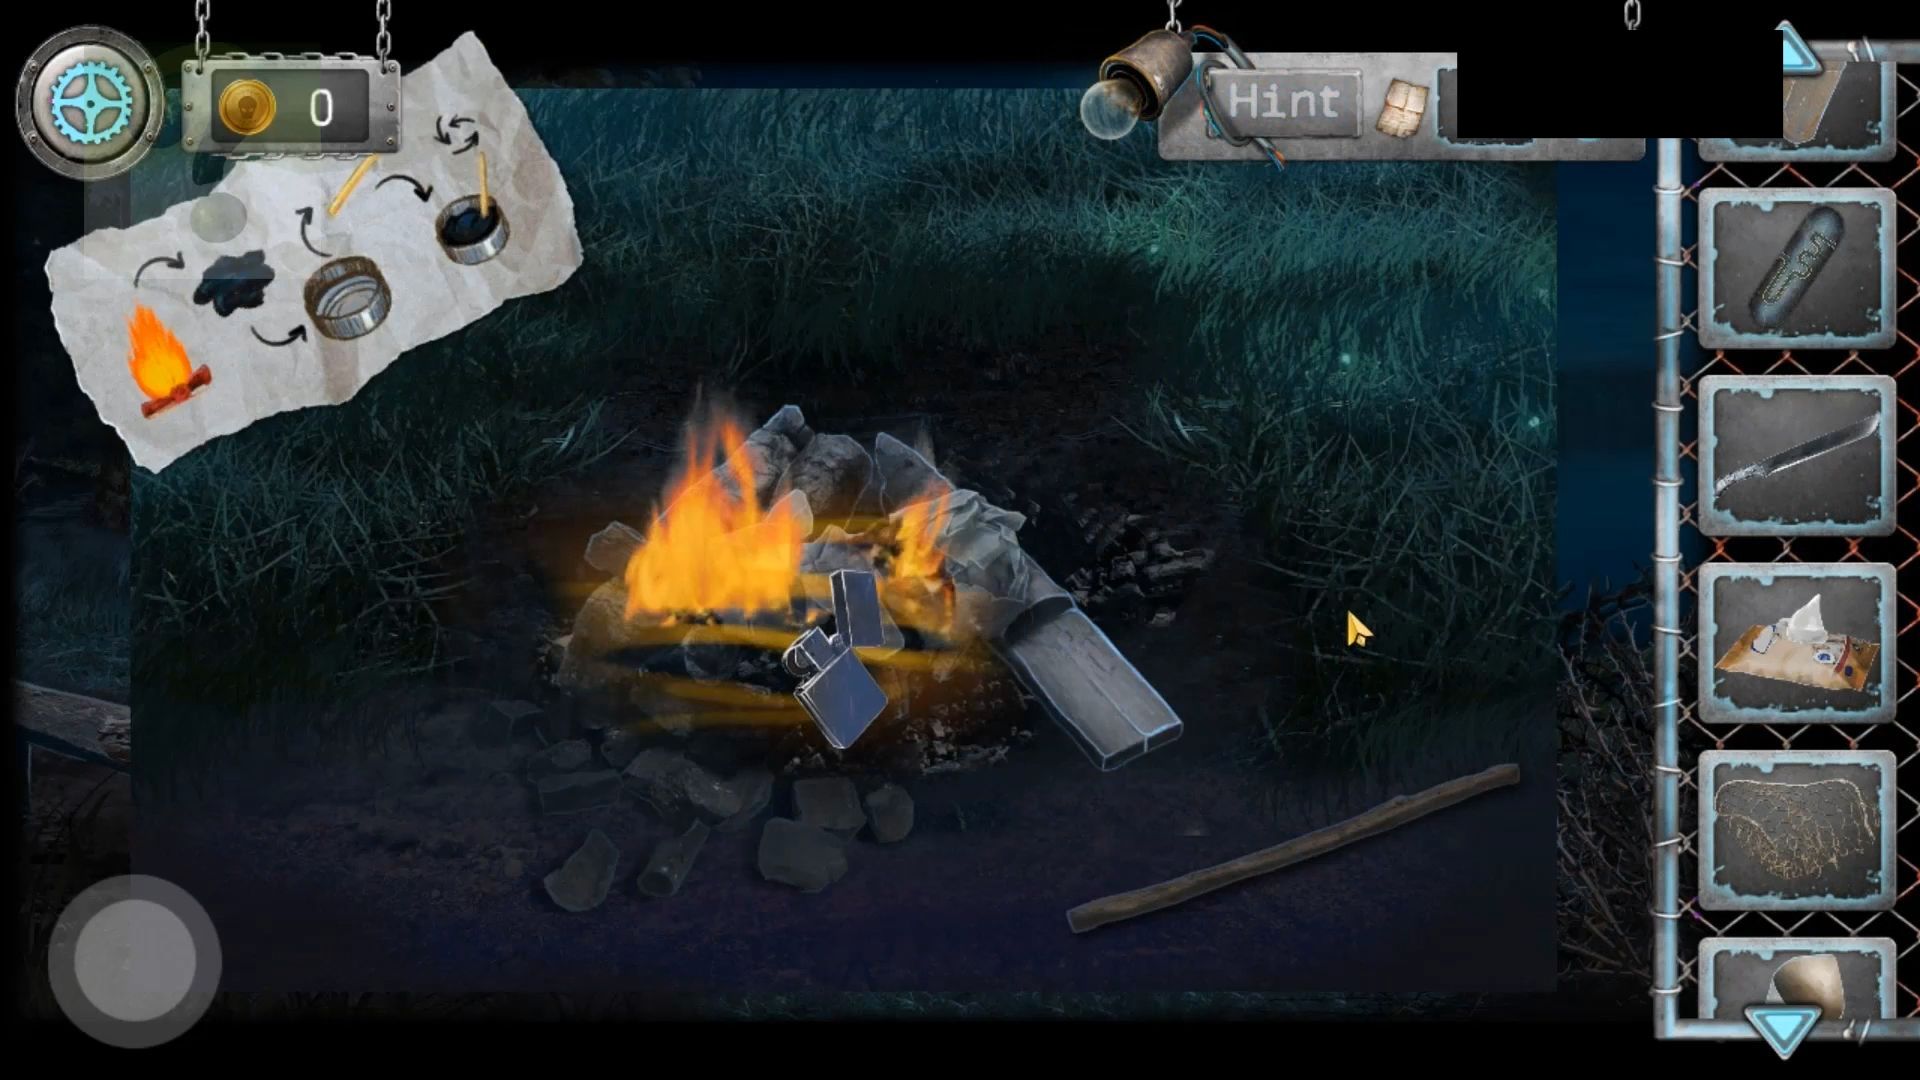
Use the paper (book) on the plastic bag in your inventory to gather maggots in a paper cone. Now, you also have a balled-up paper. Check the burnt-out fire by the bench, pick up a Machete from it, and add the branches. After that, ball up paper to the coals and use the lighter to start a fire.
Close this view and tap the arrow button to go back to the overgrown path with the lanterns. Use the Machete on the vines on the left side to reveal a statue.
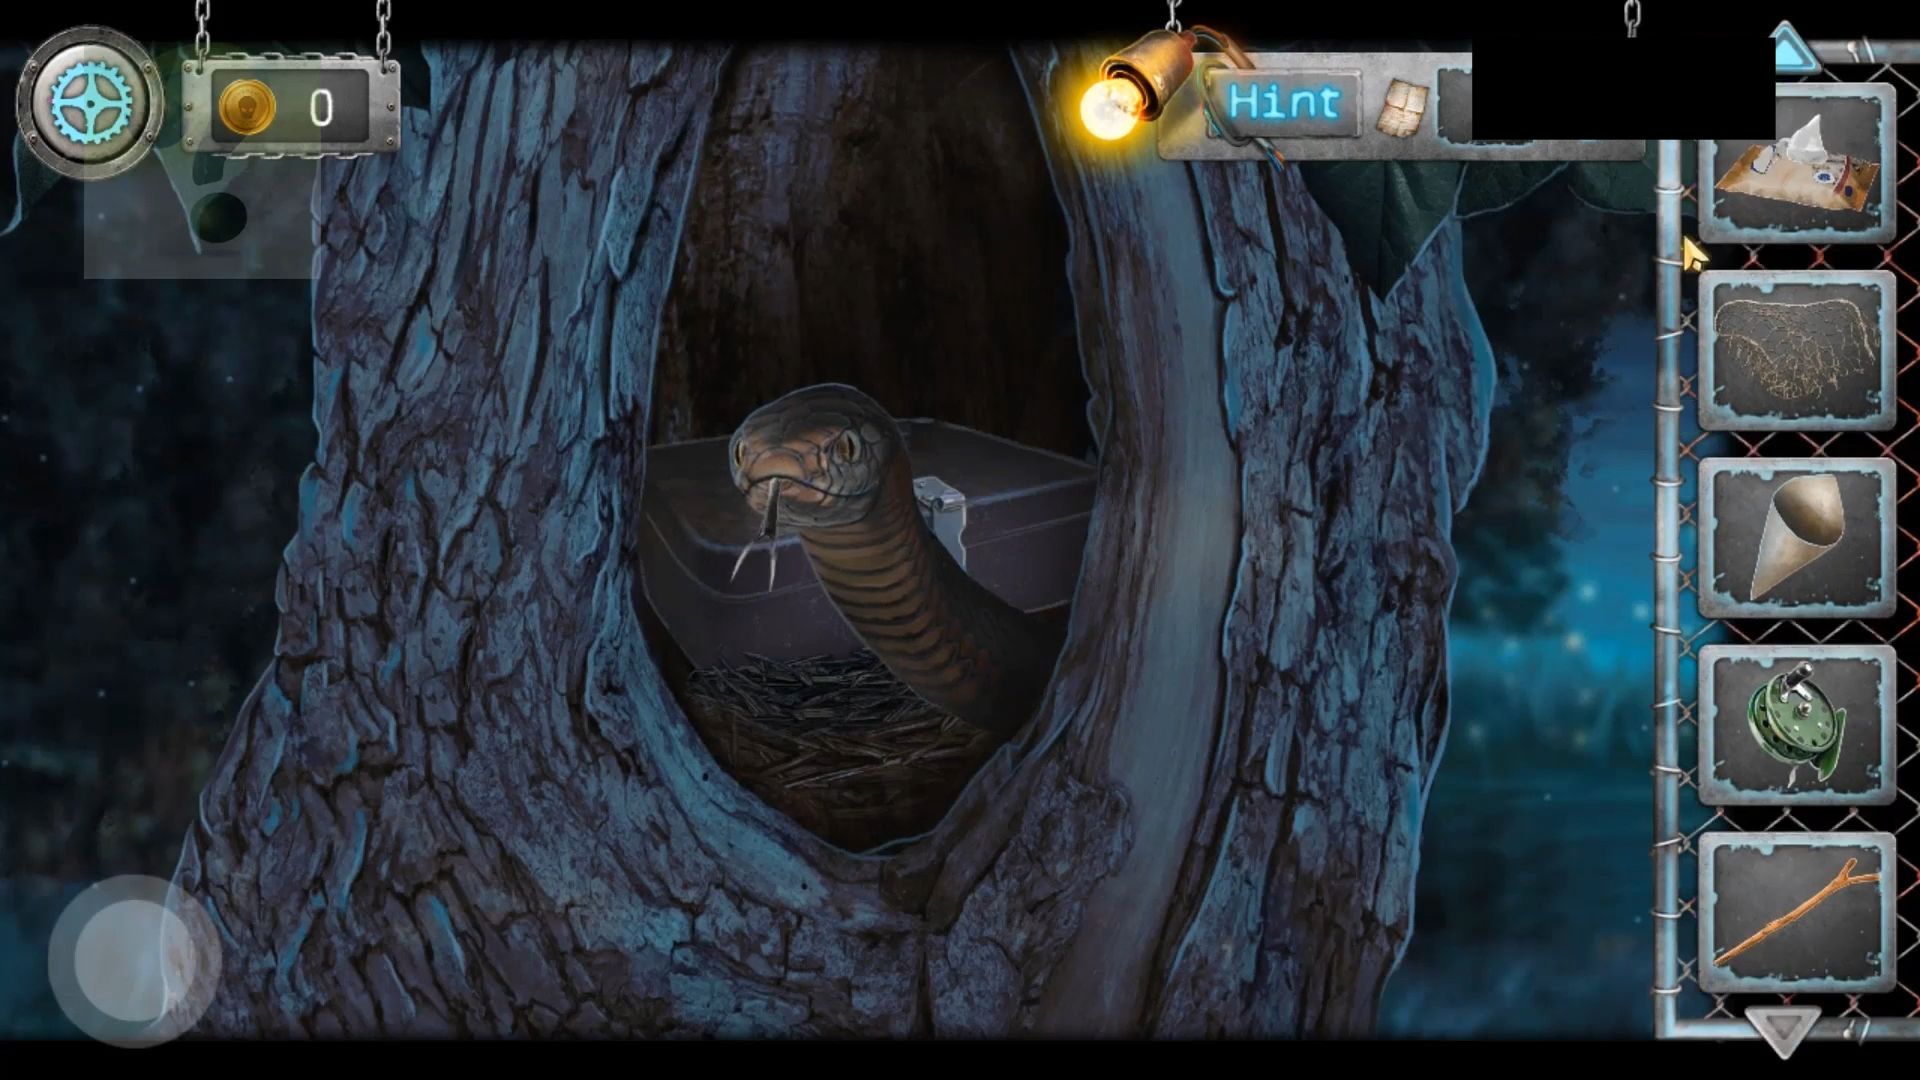
Next, collect the Forked Stick from the statue, then go back to the lake. Tap on the tree on the left with the hole, and when the snake appears, use the forked stick to clear it away. Now, tap on the box inside and the paper note at the top for another clue. After that, use the clue to open the lock.
Tree Lock Box Puzzle
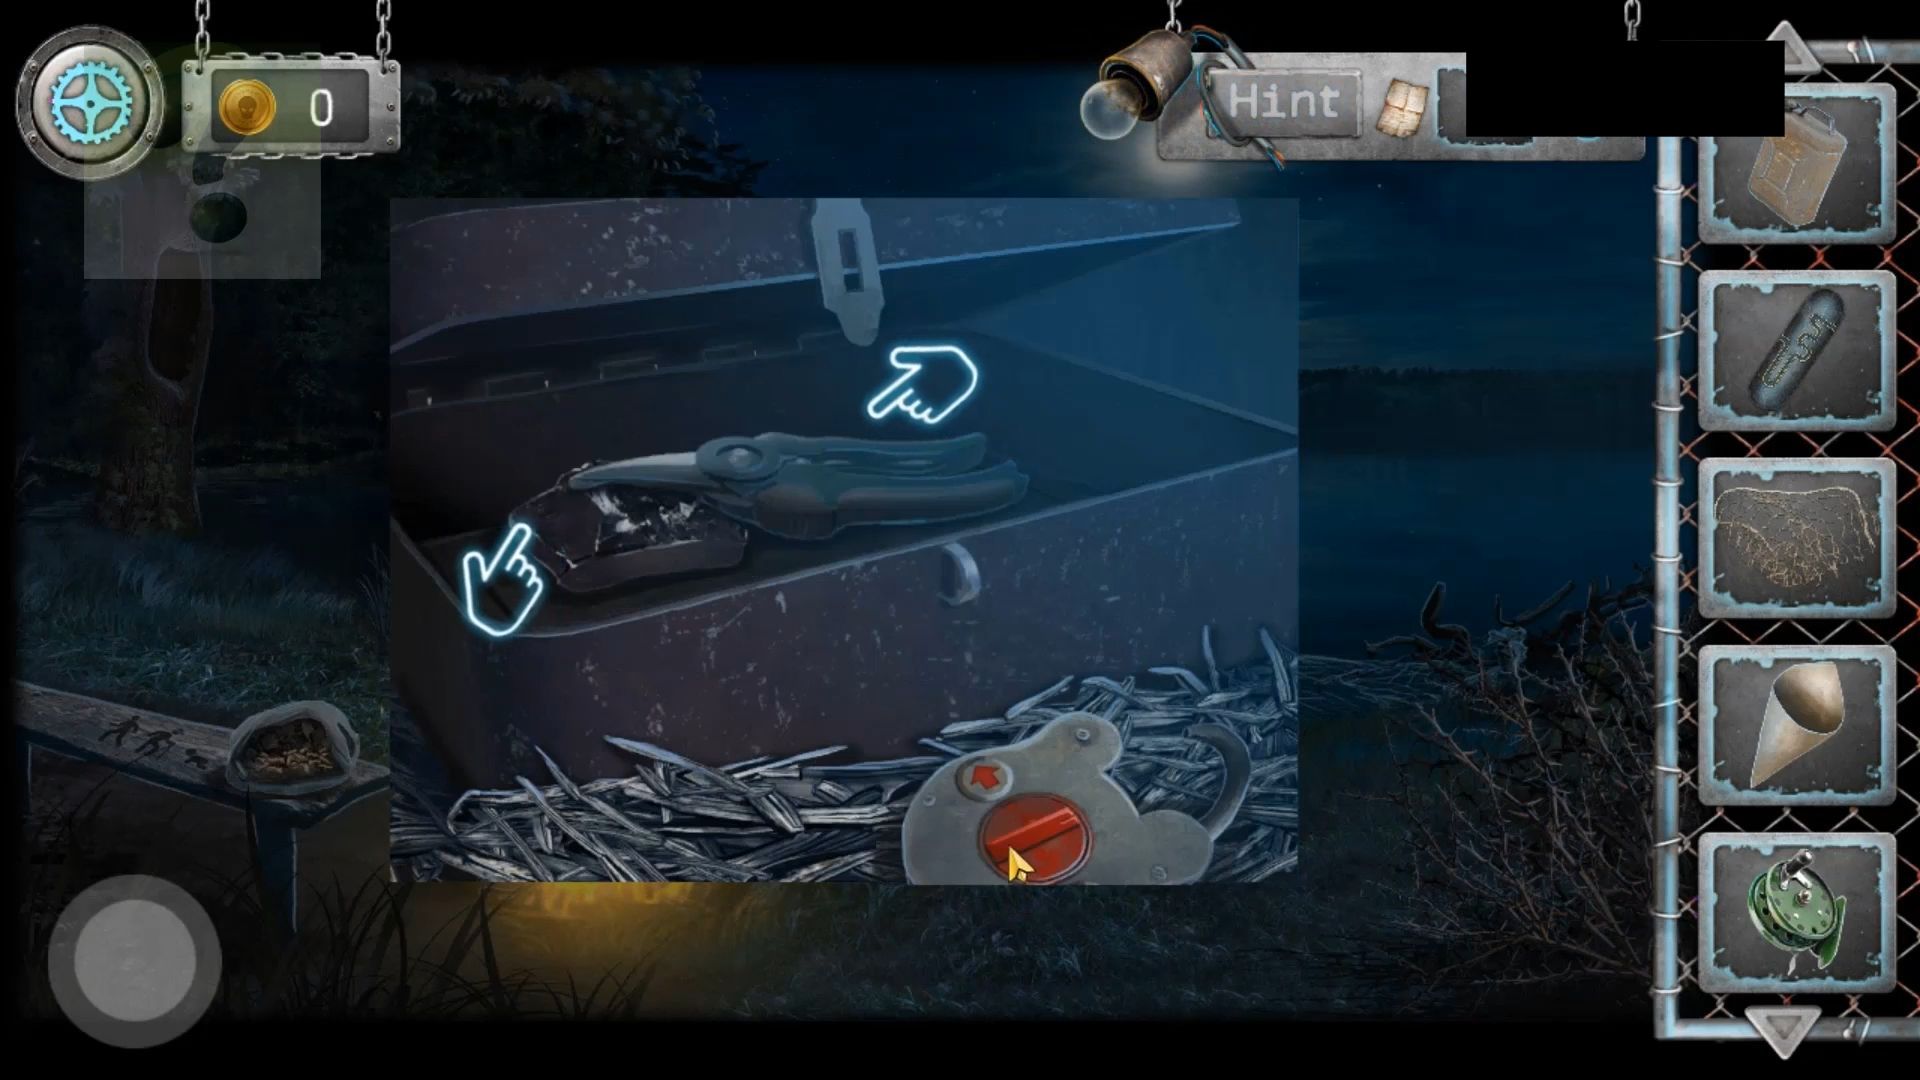
The paper clue is connected to the bench clue. The riddle’s answer is a person. It mentions 4 legs in the morning (baby crawling), legs at noon (middle-aged man walking), and 3 legs in the evening (old man with a cane). Check the bench for the order and directions. After that, tap the left or right red buttons in the correct sequence: left 2 times, right 3 times, left 4 times. Finally, pick up the Pruning shears and the Bitumen from the box.
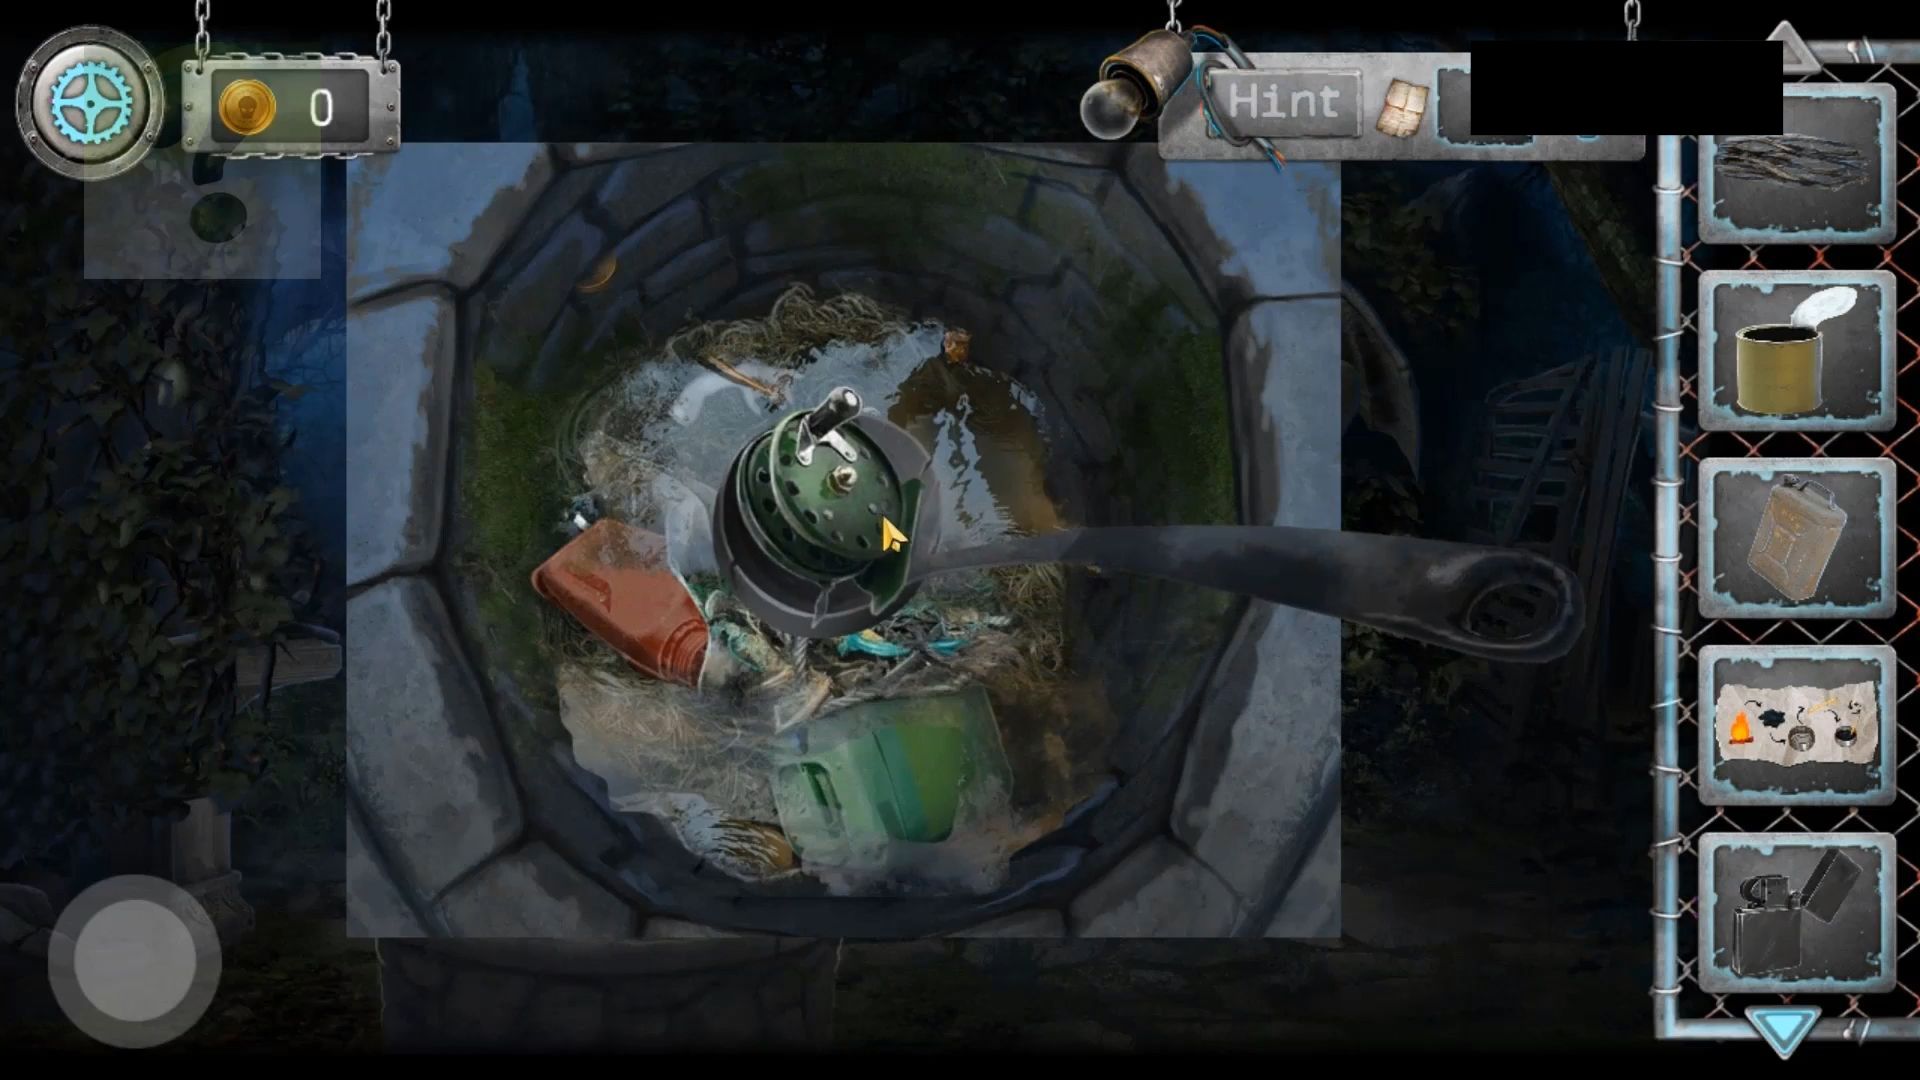
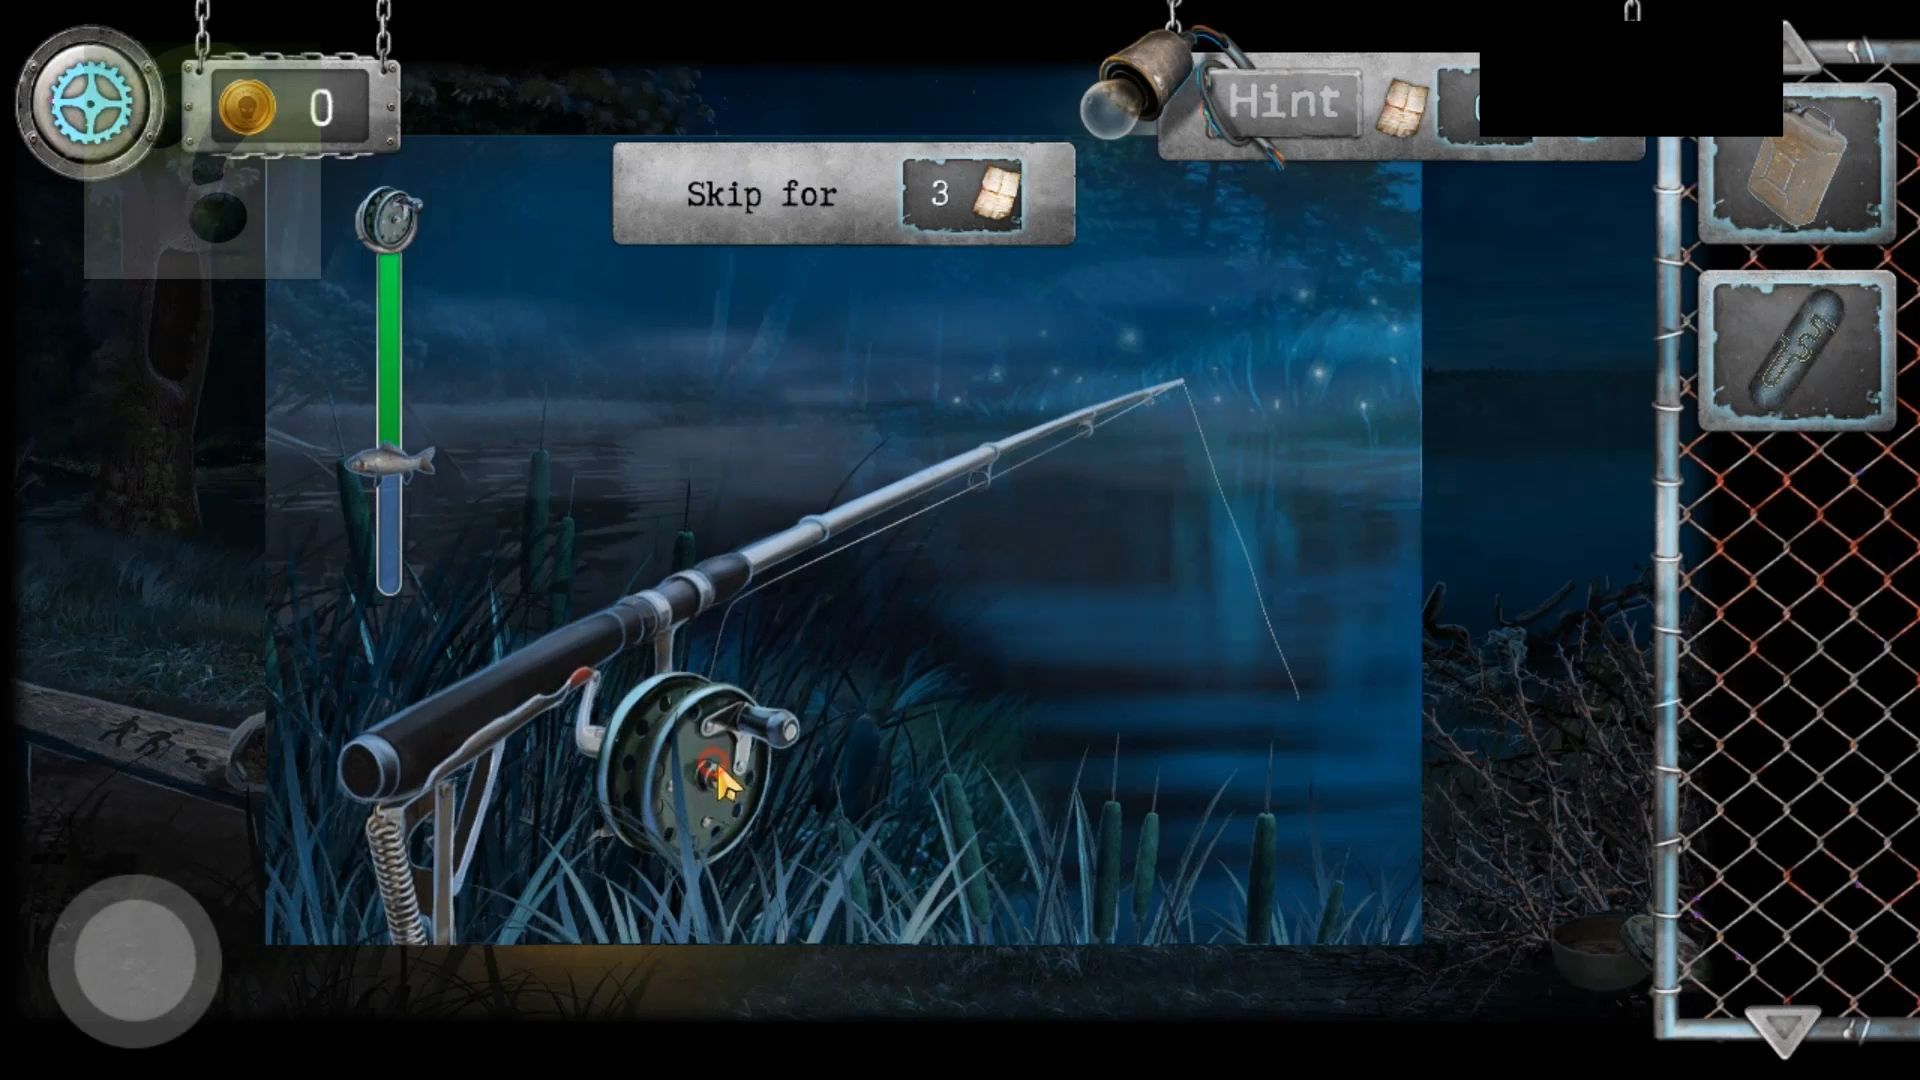
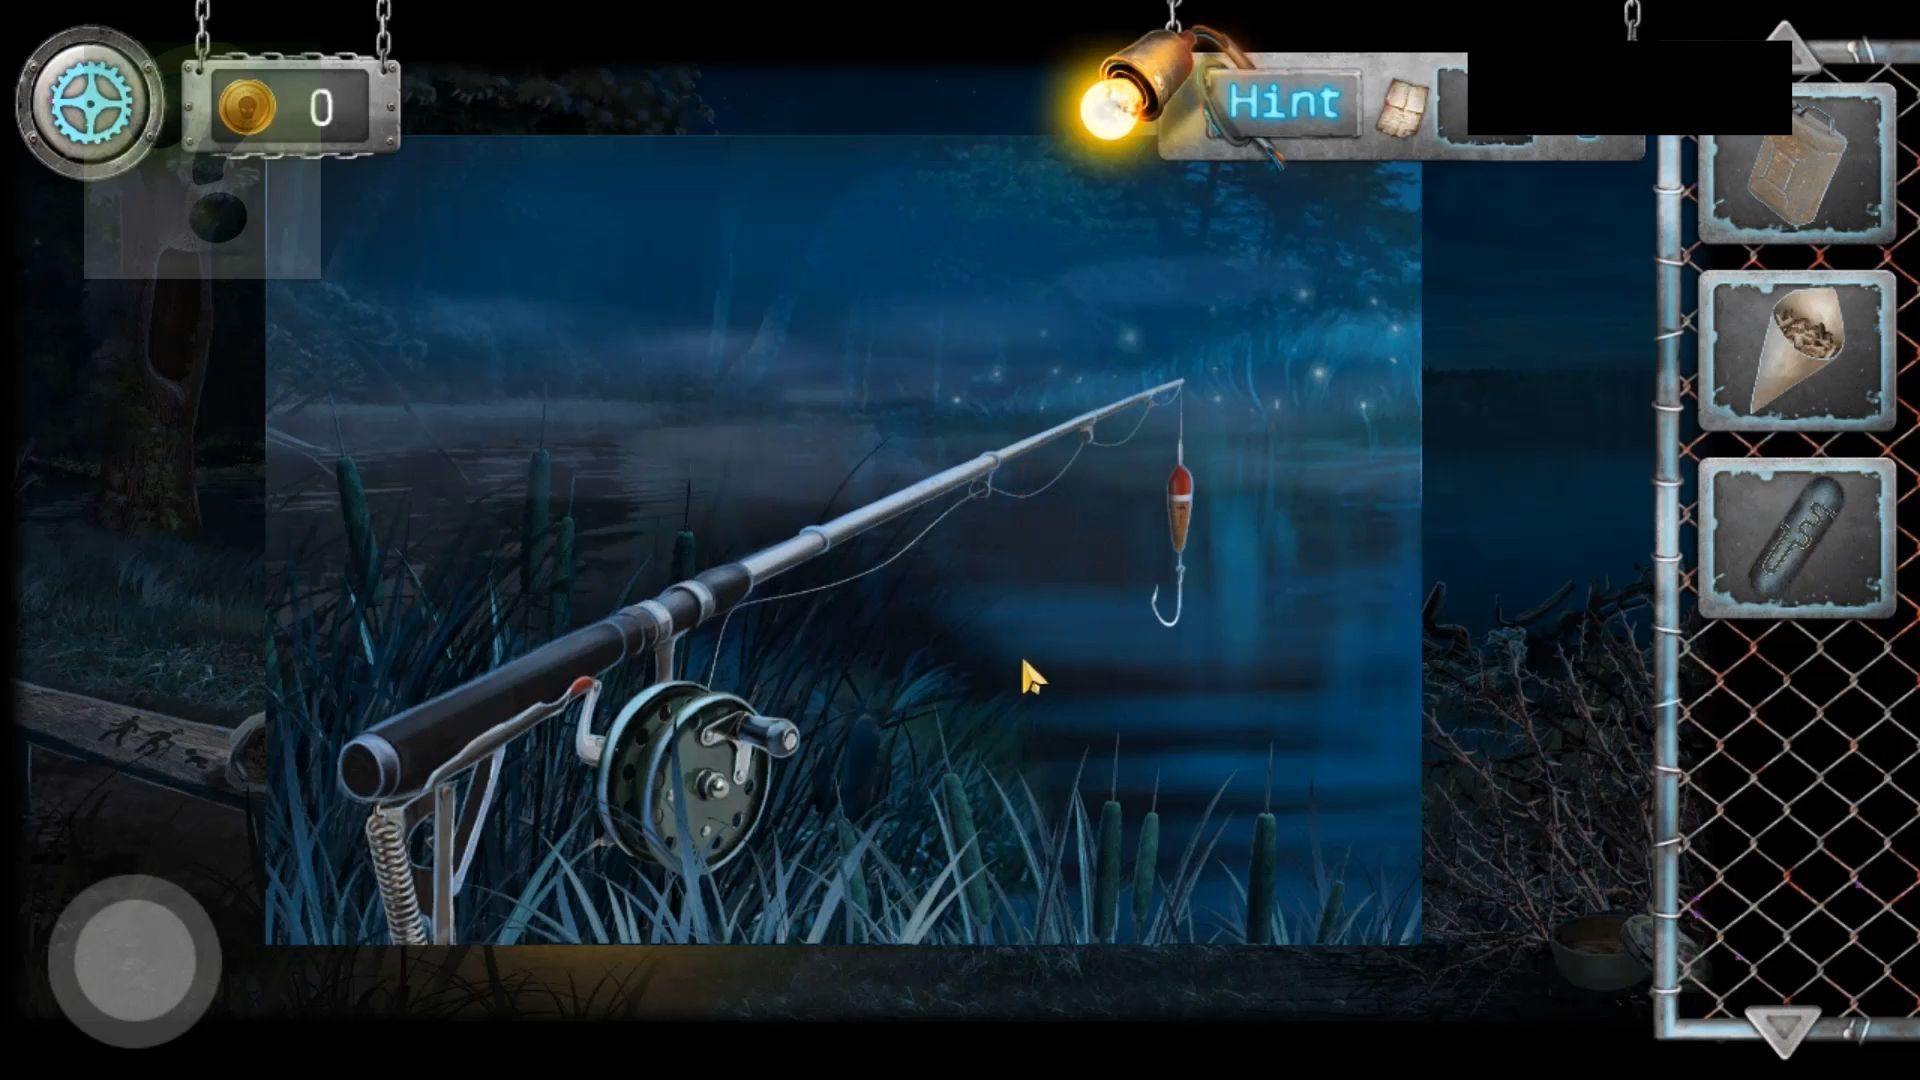
Go back to the lake, check the fishing rod on the shore, and assemble it by adding the reel, hook, and in the end, the maggots. This begins a fishing mini-game.
Fishing Game
On the left, there’s a green bag with a fish icon. When it’s still, tap the reel as fast as you can to bring it in. When it starts moving, stop tapping until it’s still again. Tapping while the fish is moving will make you lose it, and you have to start again. Keep going until the fish is at the top, and you’ve caught it. Return to the overgrown path, then tap on the broken fence on the far right where there’s a cruel dog.
Feed the fish to the dog, and you can then collect a blue Pump. Now, go back to the lake, use the net on the boat in the water, and bring it to shore. However, you can see it has a hole.

Next, check the thorn-covered bush on the right side of the lake scene, and use the Pruning shears to cut away the branches. You have to repeat this action three times.
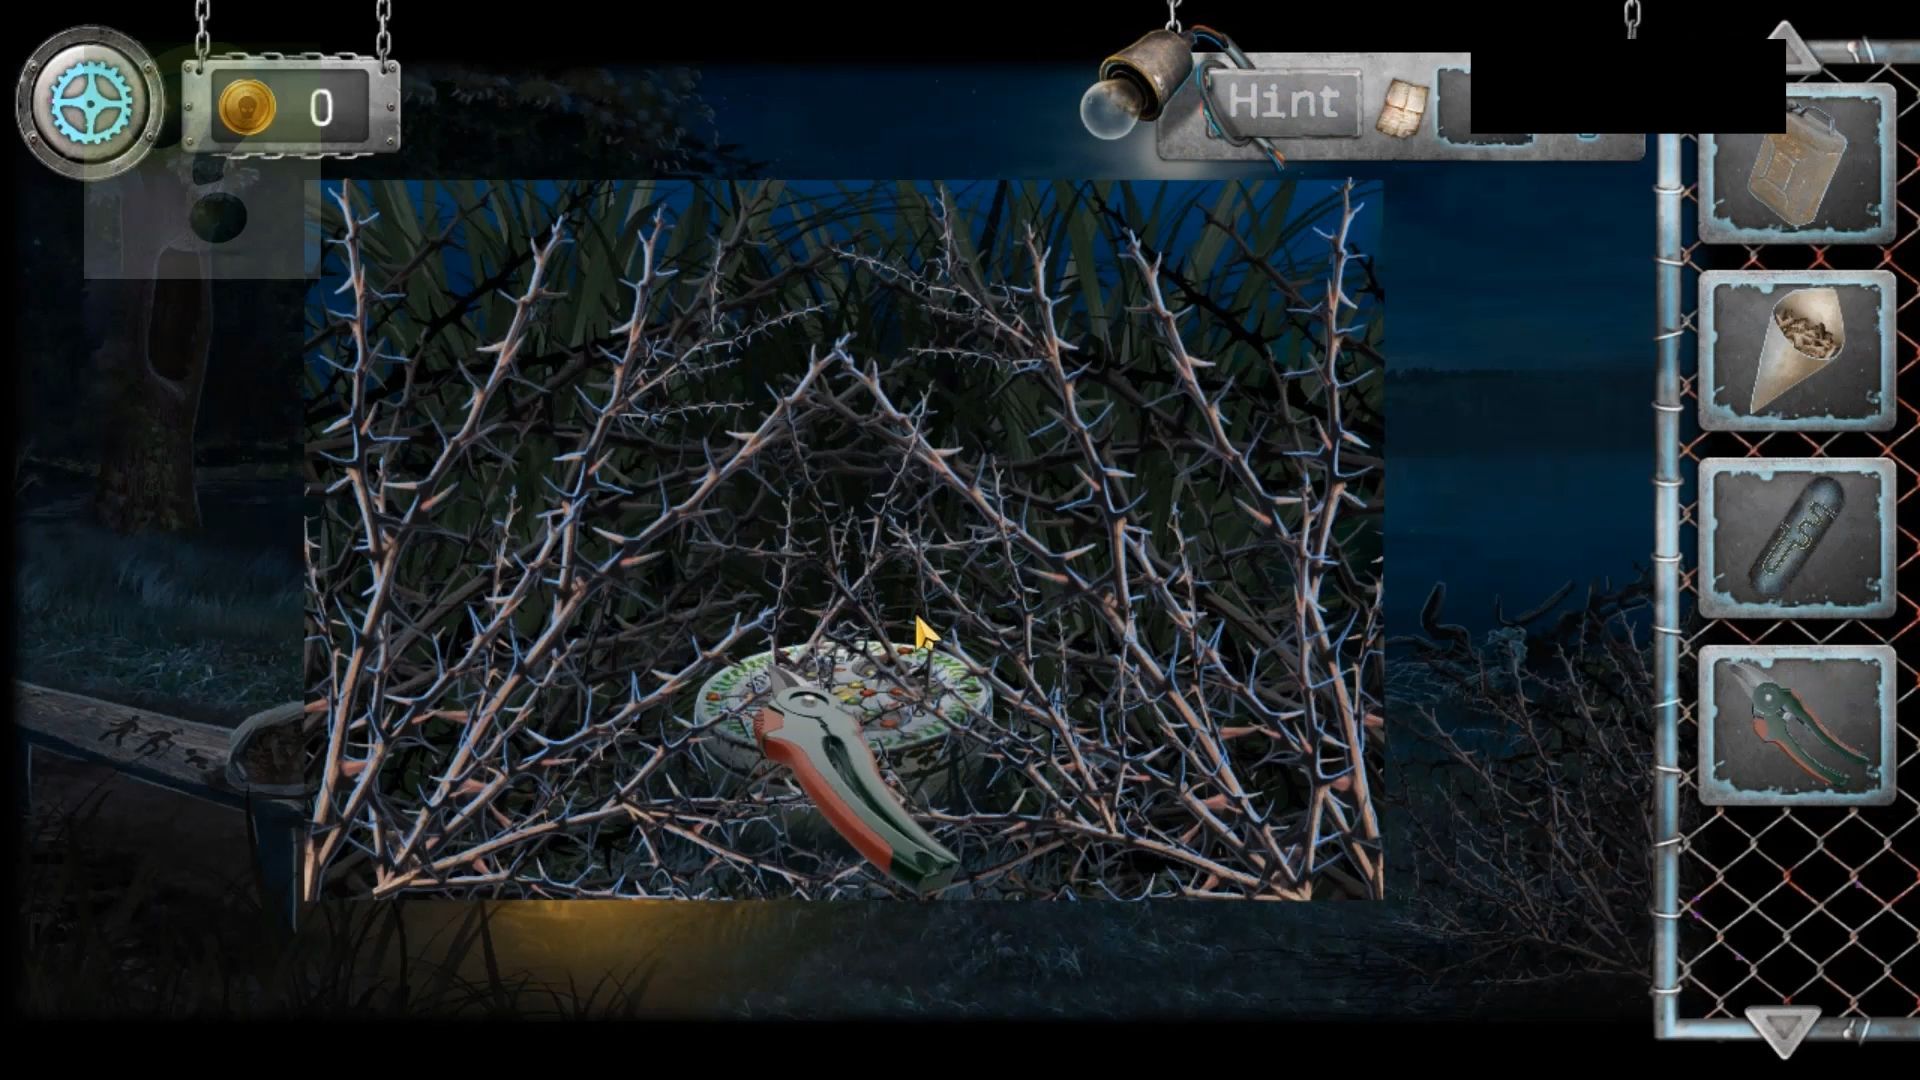
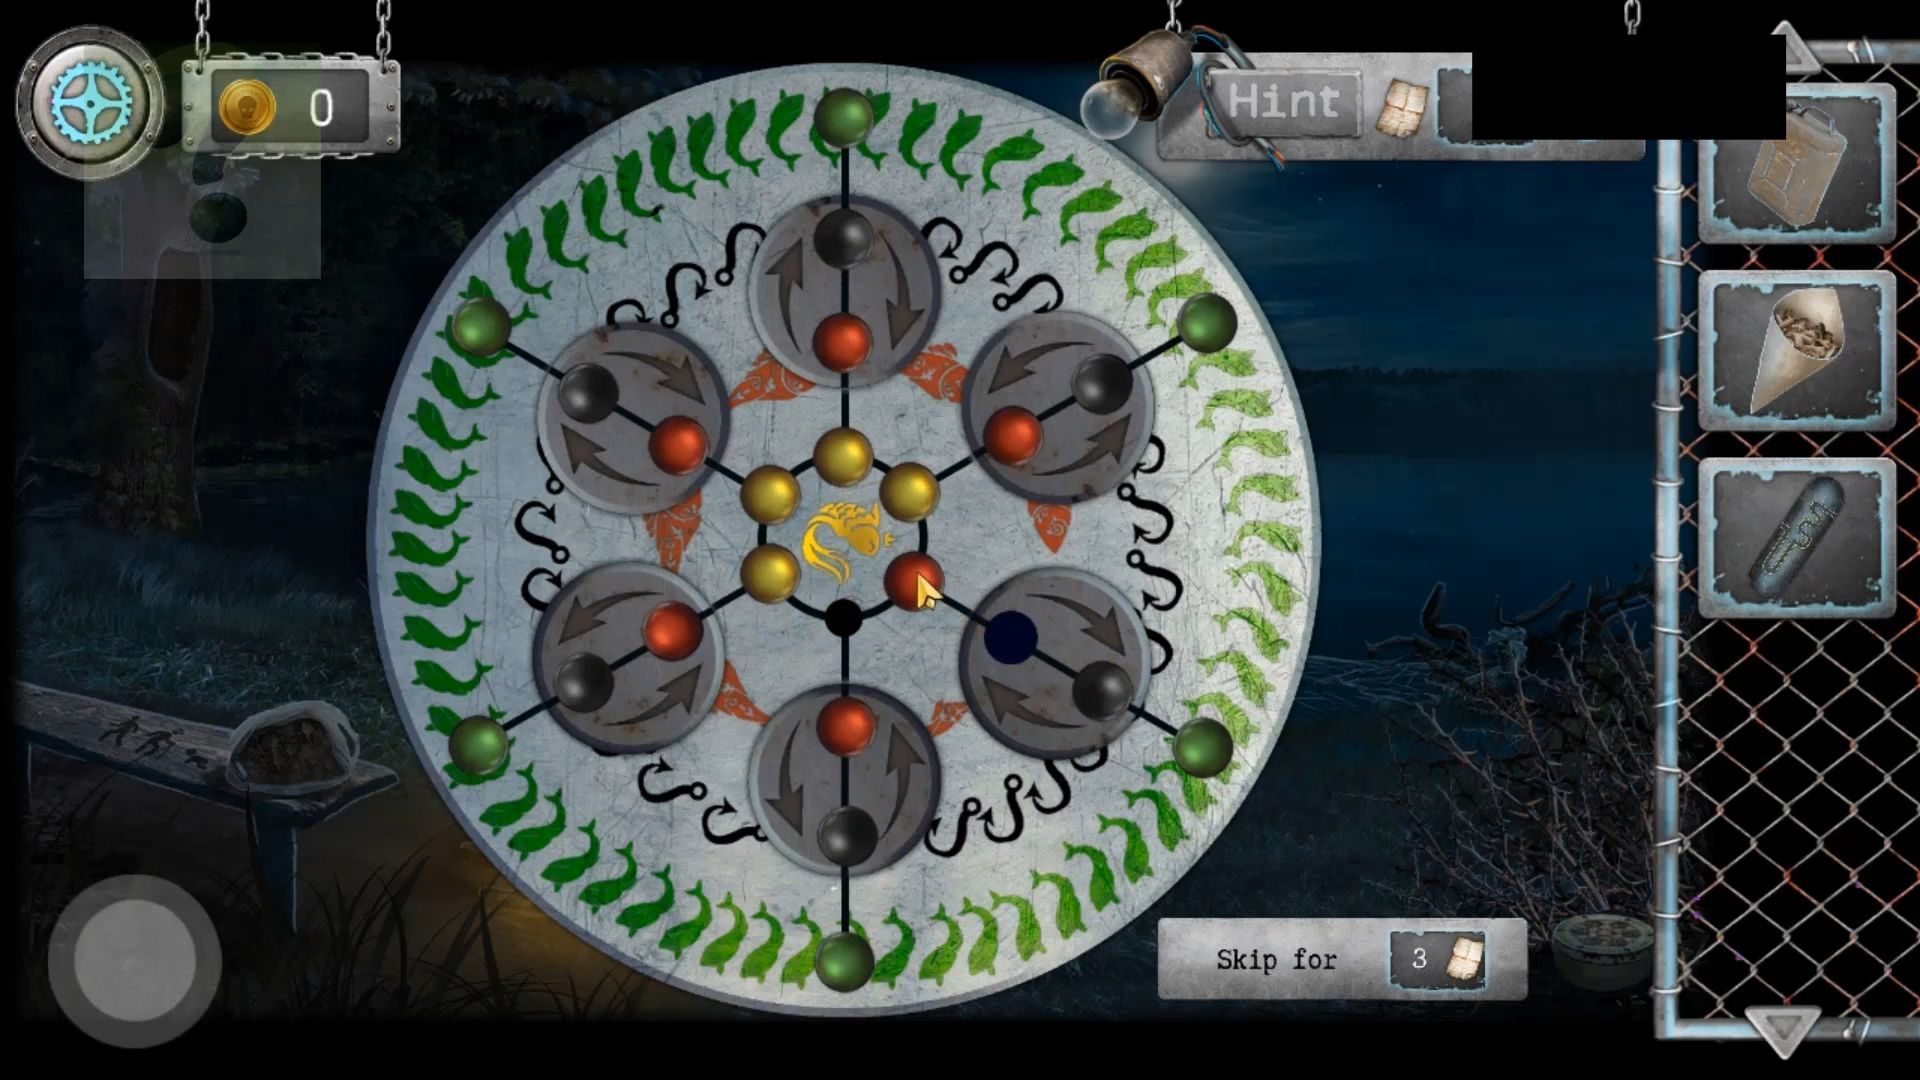
Round Tin Puzzle
First, slide the colored balls and rotate the circle elements to arrange them correctly, following the colored emblems on the tine for the color locations. Then place the green balls around the outer edge, then black balls, red balls, and yellow in the center. Once done, collect a hook from the tin. Throw a stone into the lake to disturb the strange creature-shaped shadow, revealing it to be a tangled net. Pull it in to start a puzzle.
Go back to the lake, check the fishing rod on the shore, and assemble it by adding the reel, hook, and finally, the maggots. This begins a fishing mini-game.
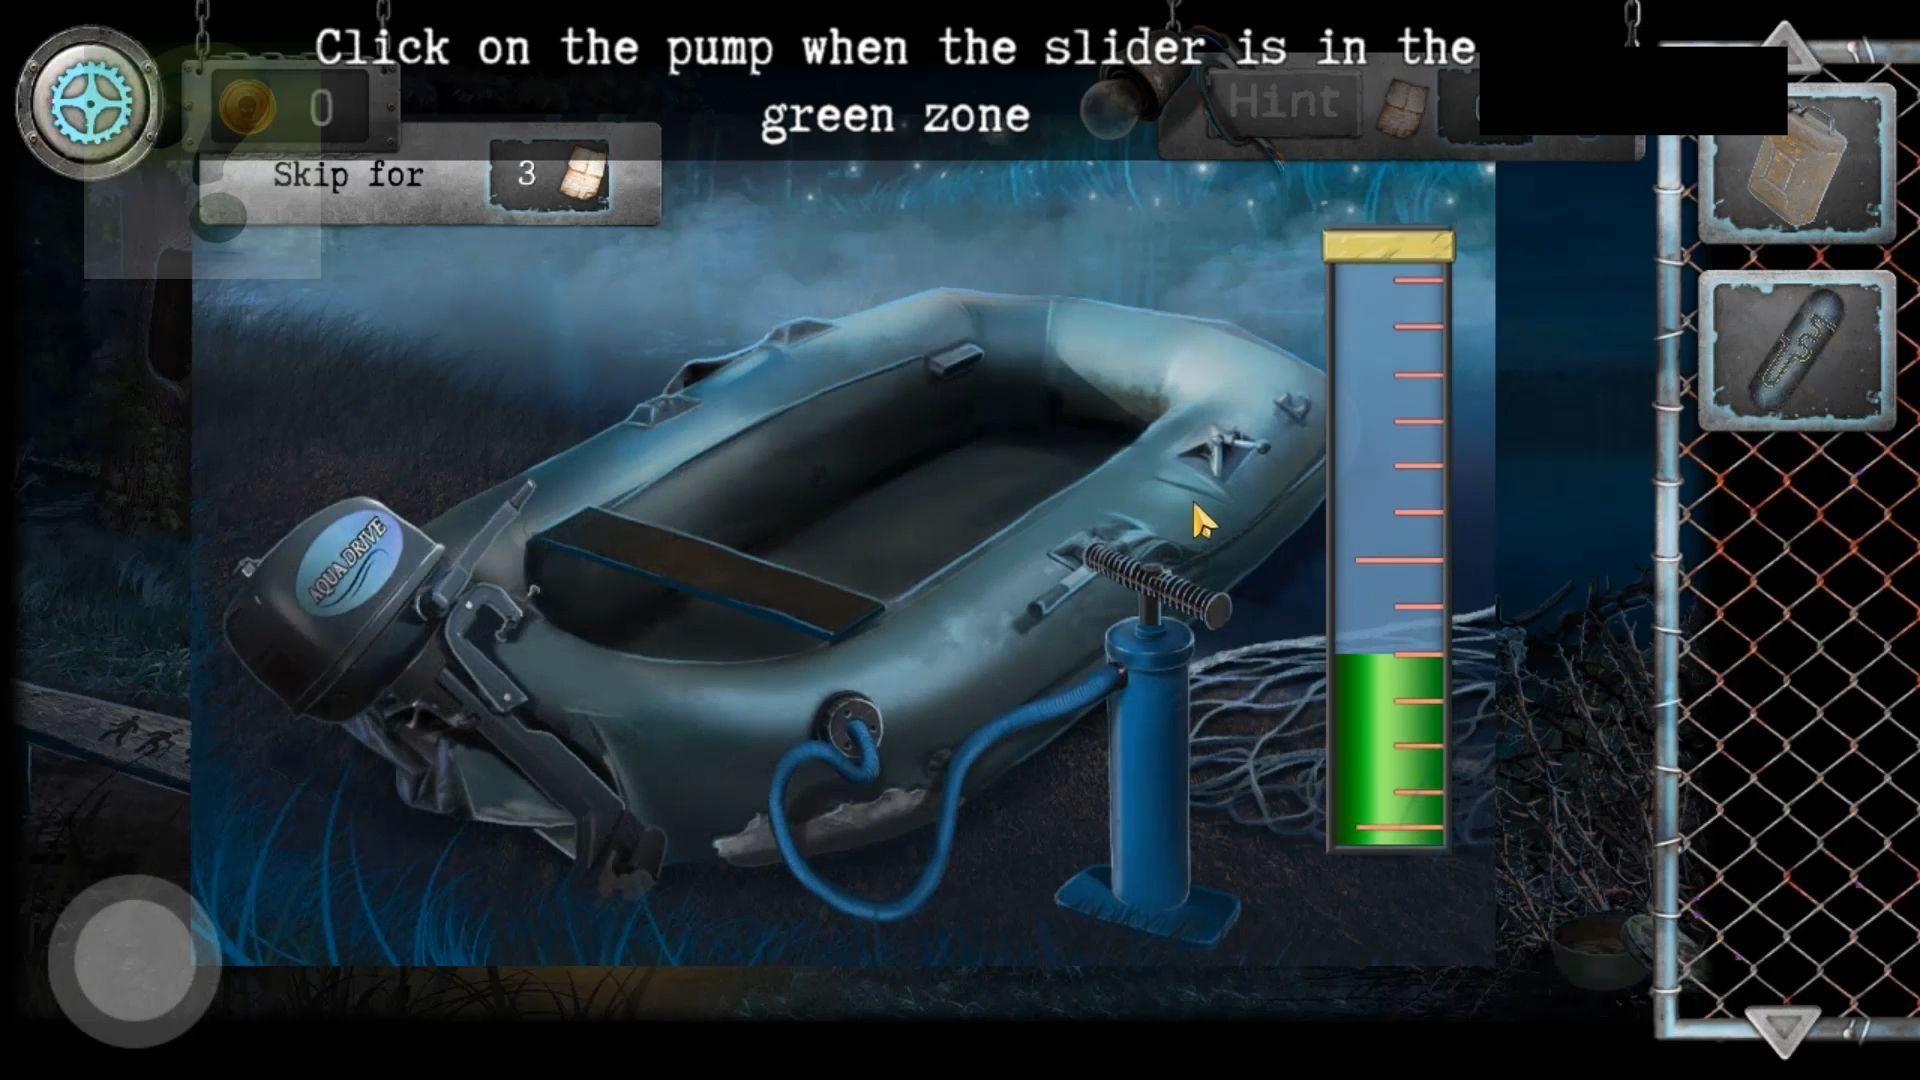
Use the pump on the boat to inflate it, which is a mini-game. Start by tapping the pump handle and continue tapping each time it returns to the green zone. After a few taps, the boat will be ready. Use the jerrycan with fuel on the motor to fill it and tap the boat to escape across the water.
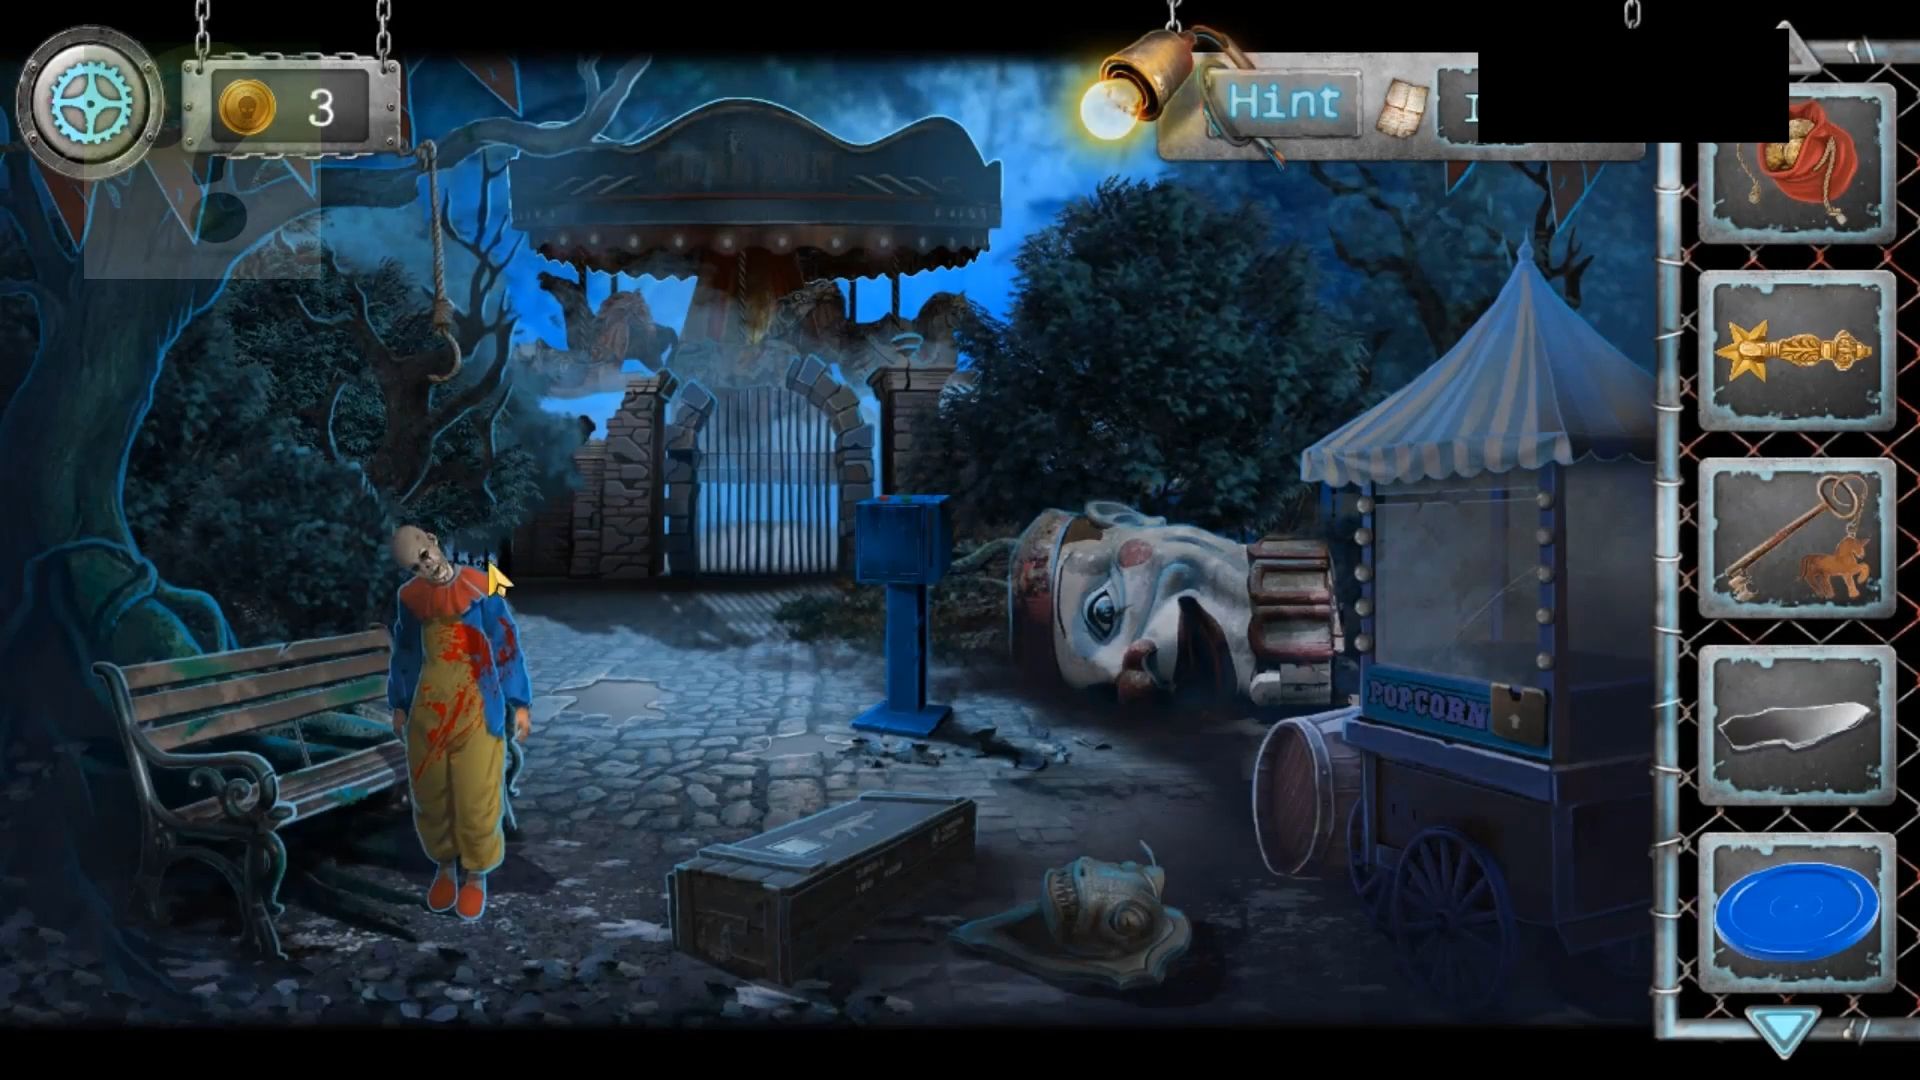
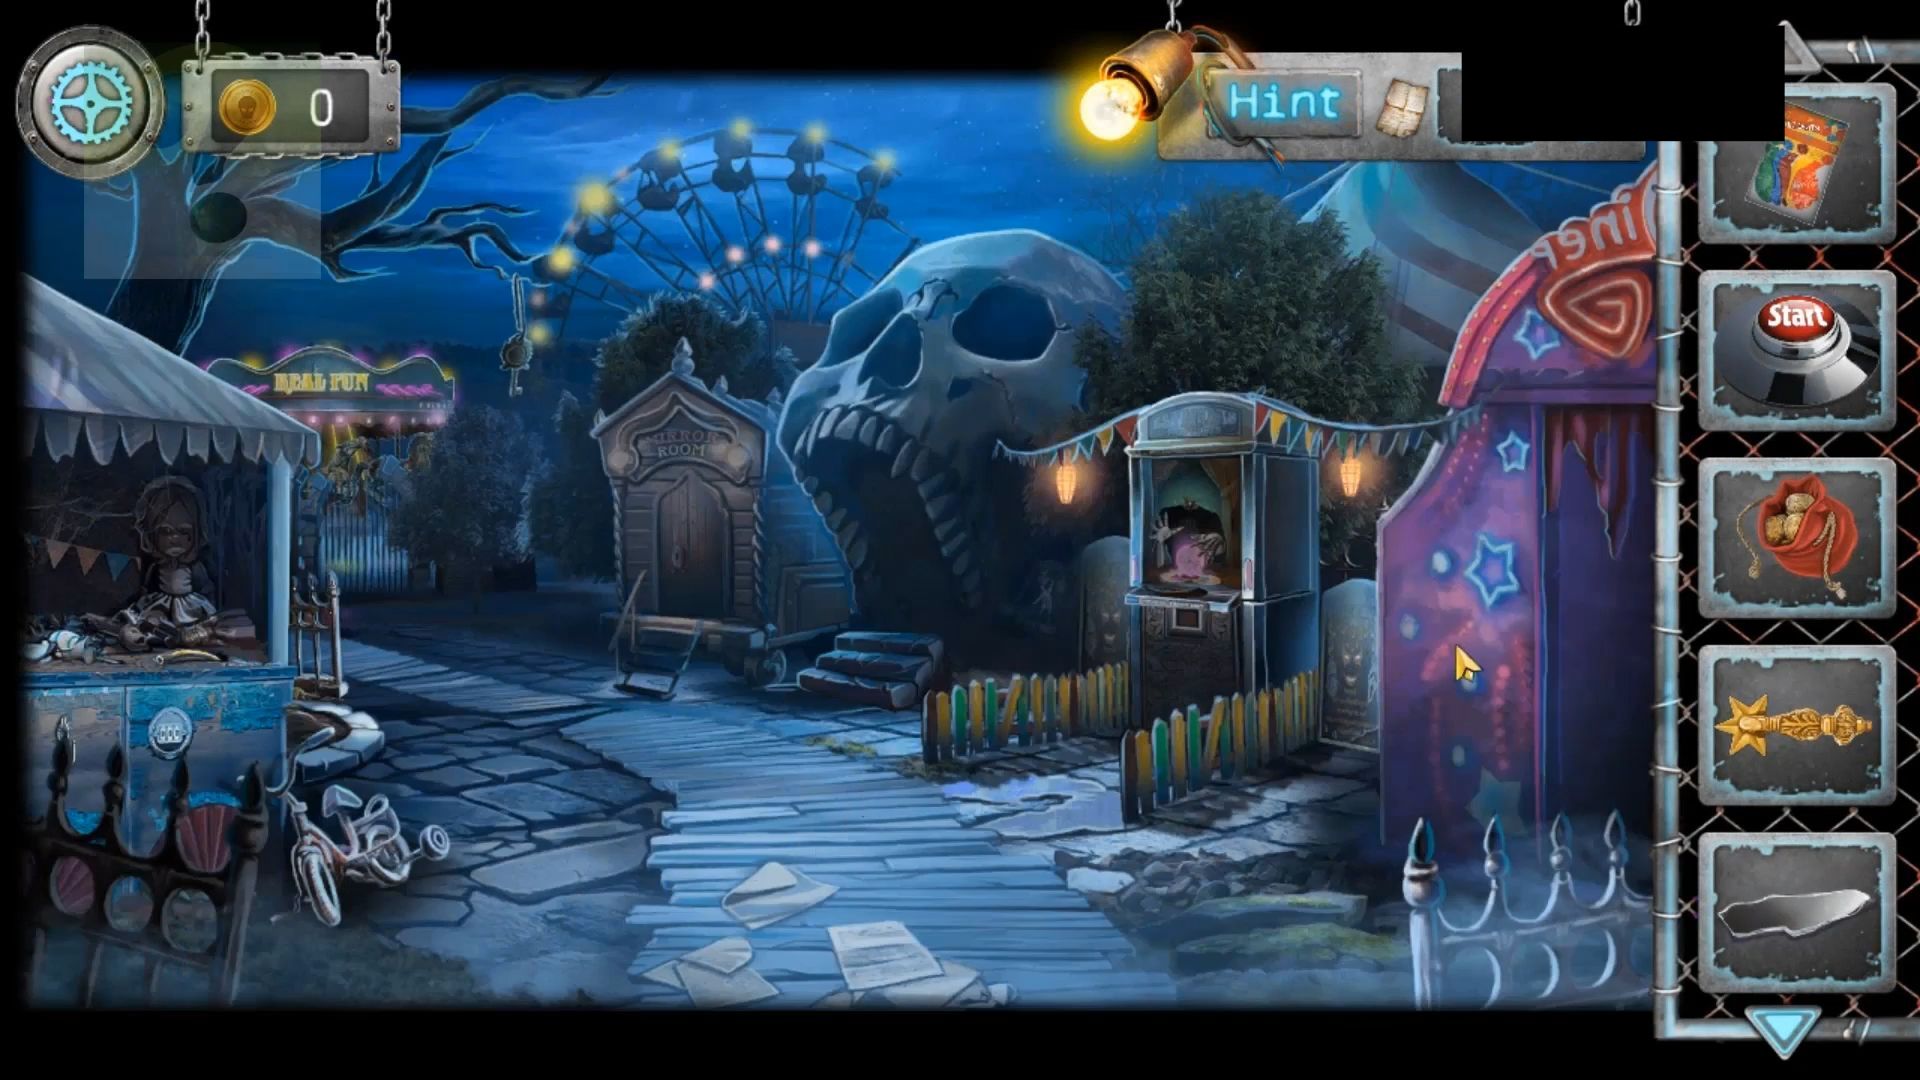
After crossing the lake in the repaired boat, you arrive at an abandoned amusement park. Look around for a watchman or a telephone to call for help. Collect a piece of a poster from the mouth of the gargoyle, then, return to the boat and cross to the other side again. On the side of the green building with lights is a torn poster; view this and add the piece to it to reveal 5 numbers.
Exit to the outside and view the viewing scope by the water. Now, return to the boat and back to the other side of the lake. Tap on the machines to the left of the main entrance to view them.
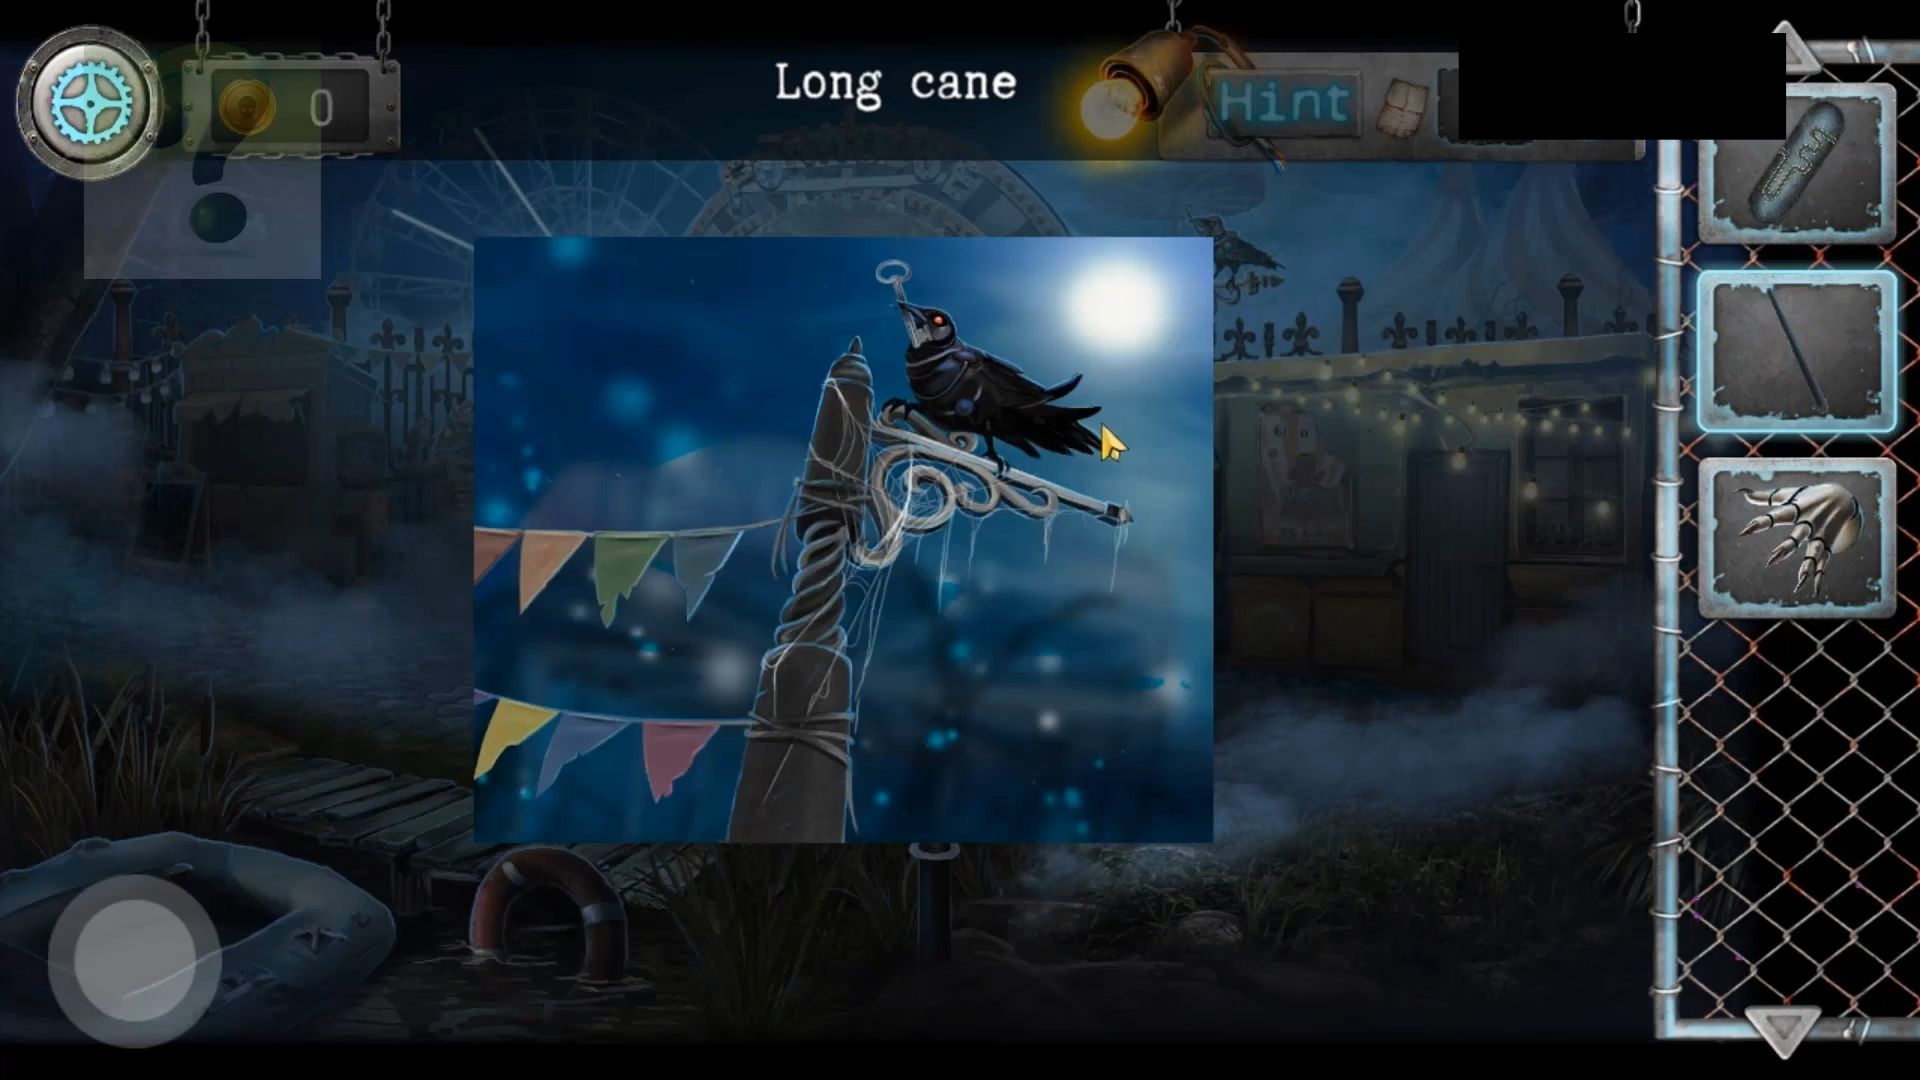
Back up and check the main entrance to the amusement park, noting the number clue on the left of it. There is a ticket booth on the left side; pick up the mechanical hand from it and view the switch panel inside. Add the toggle switch to it. Grab a Long Cane to the left of the center doorway and view the animatronic crow on the post to the right. Use the Long Cane on the crow to knock it down and collect the Key it is holding.
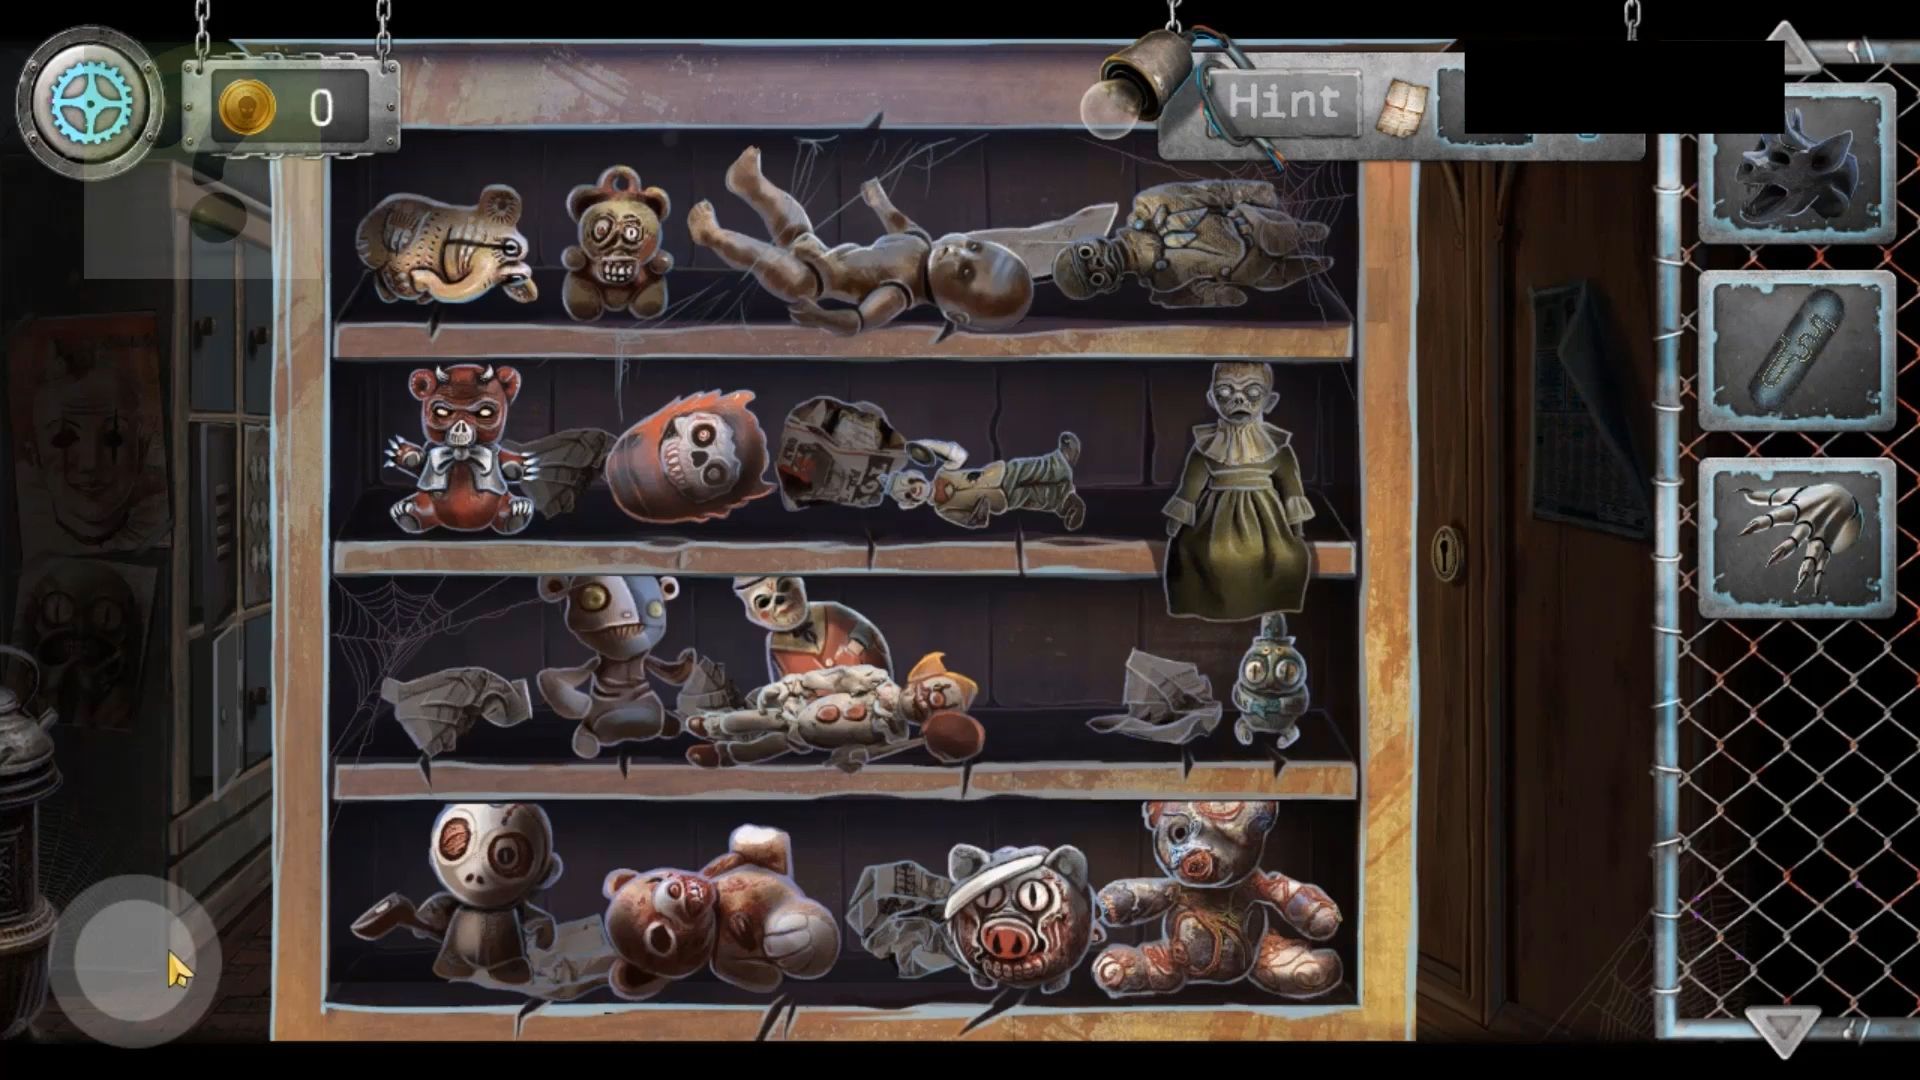
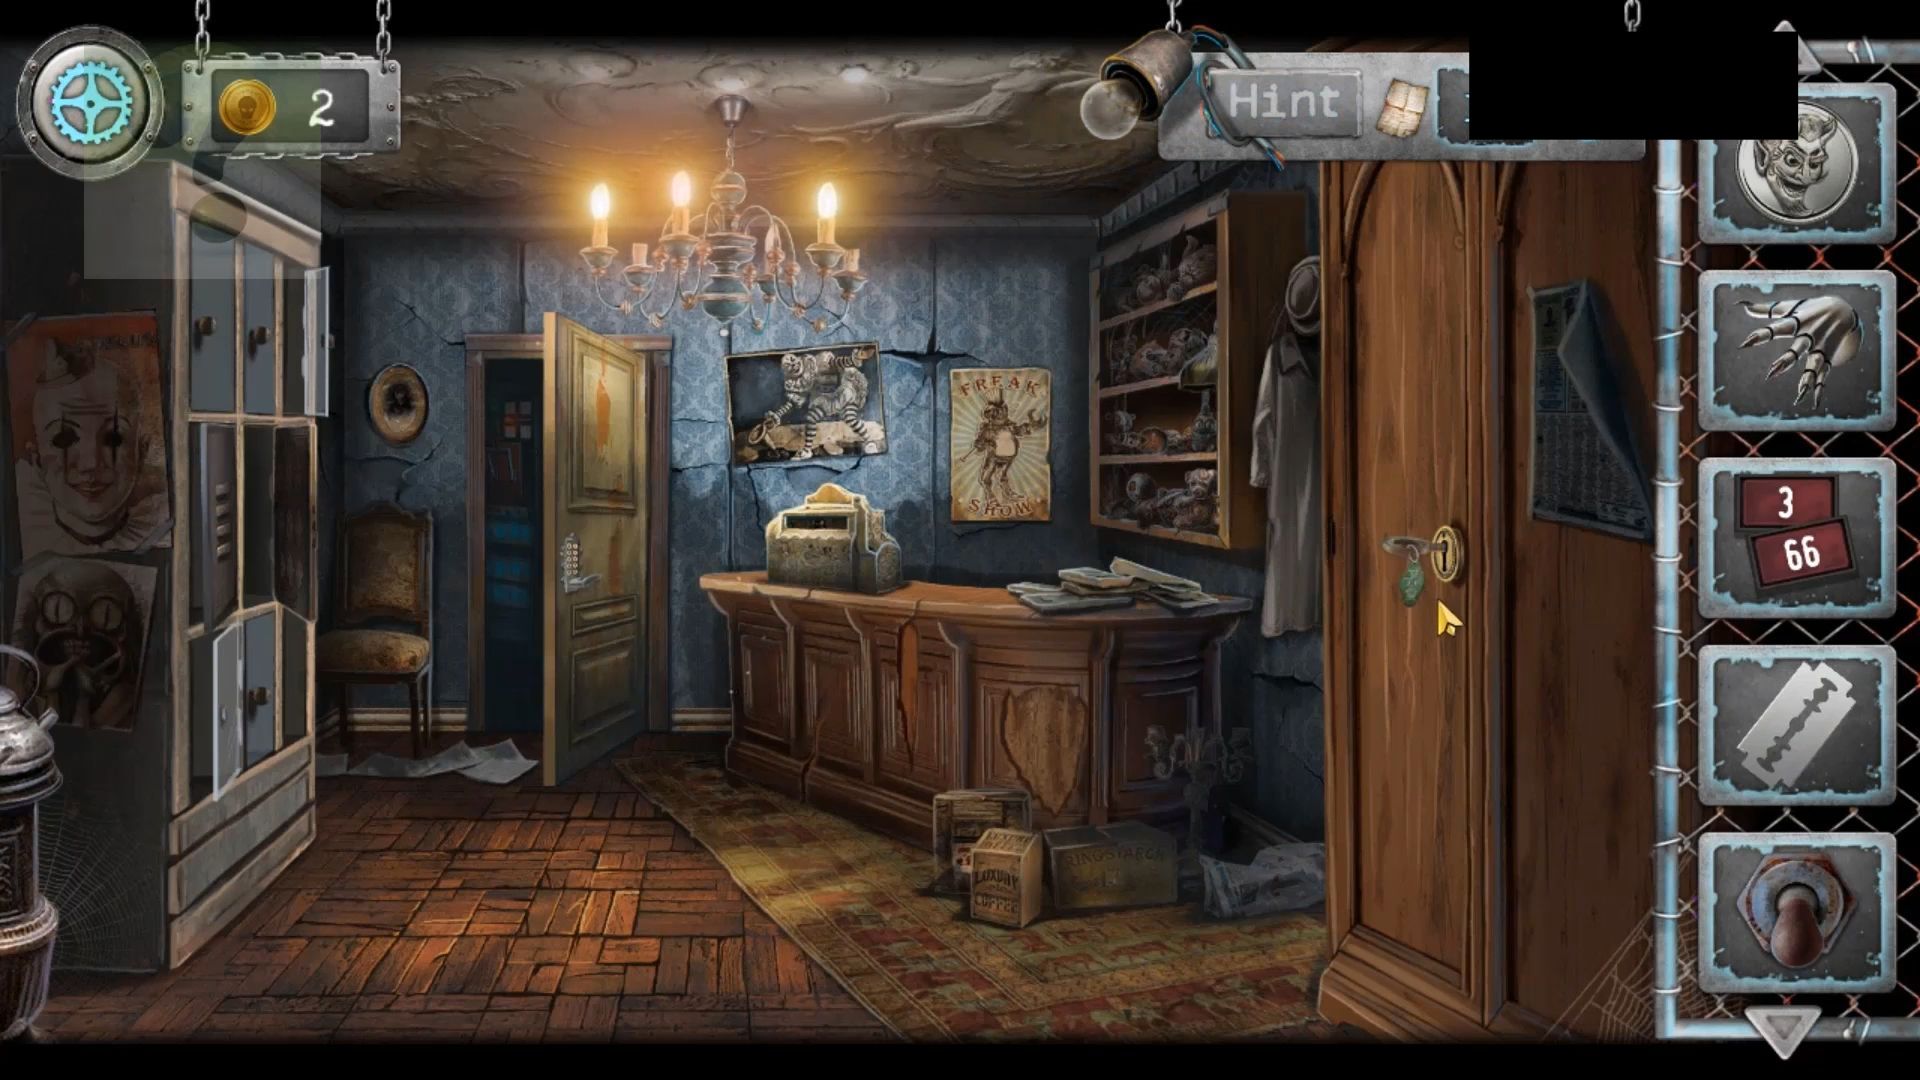
Use the key on the building with lights on the outside. This opens the door, and you can go in. Pick up a Toggle Switch from the open drawer. Now, view the shelves on the right above the counter, and move the items around to find and collect a Gargoyle Head.
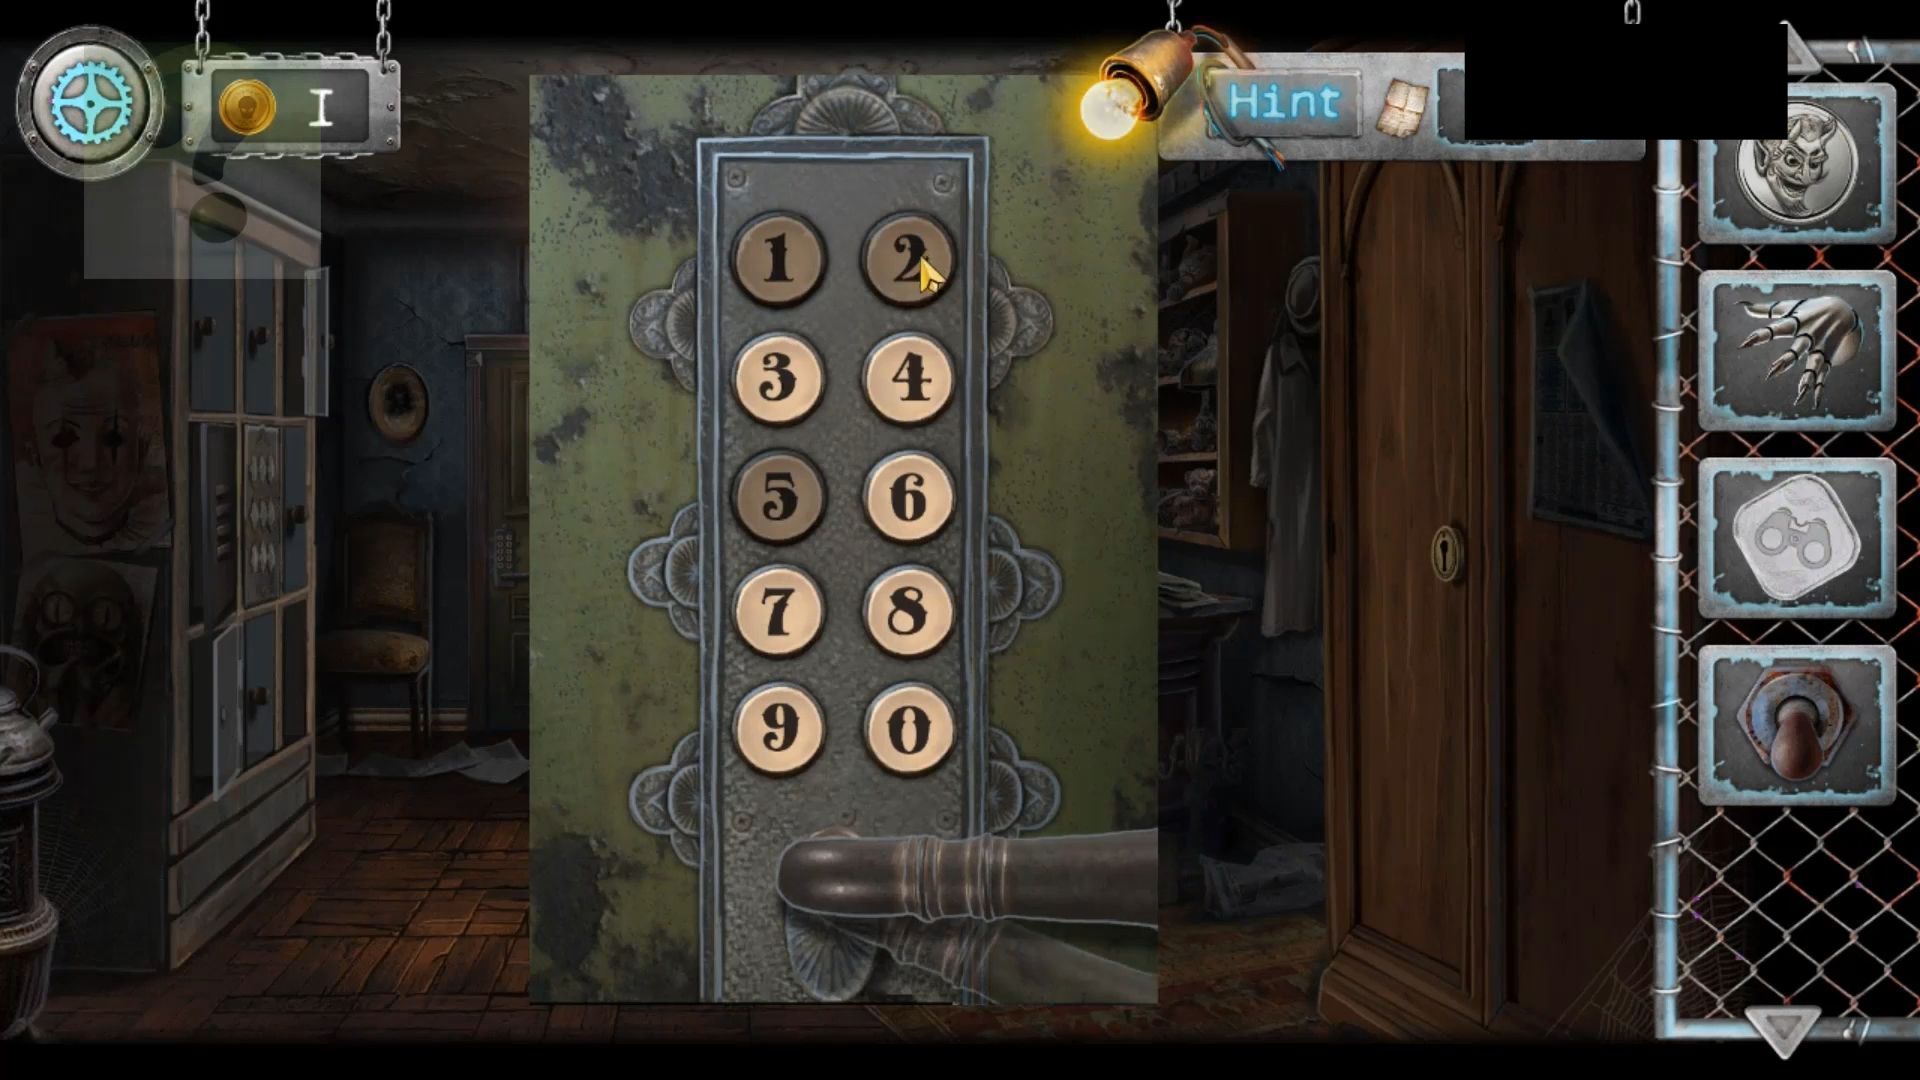
Tap on the cash register on the counter to view it, then tap on the drawers below the register to see a puzzle.
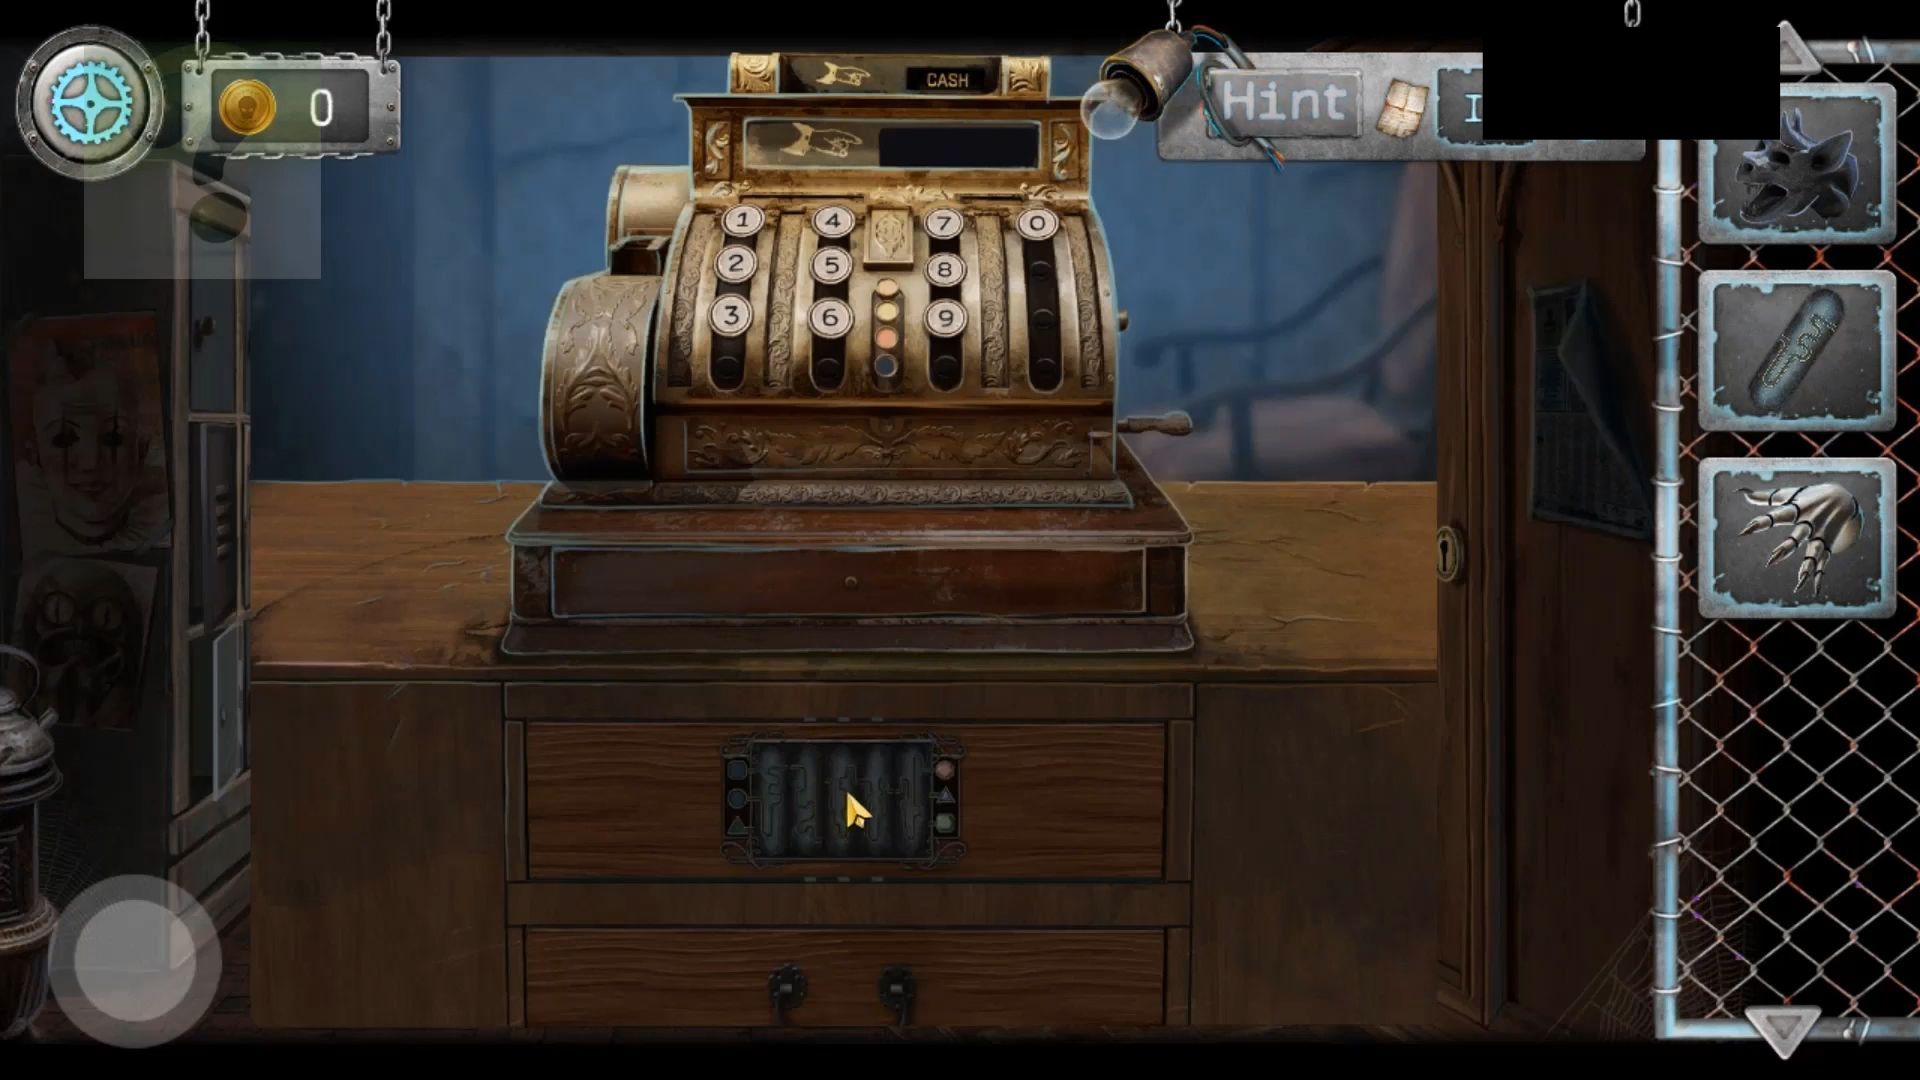
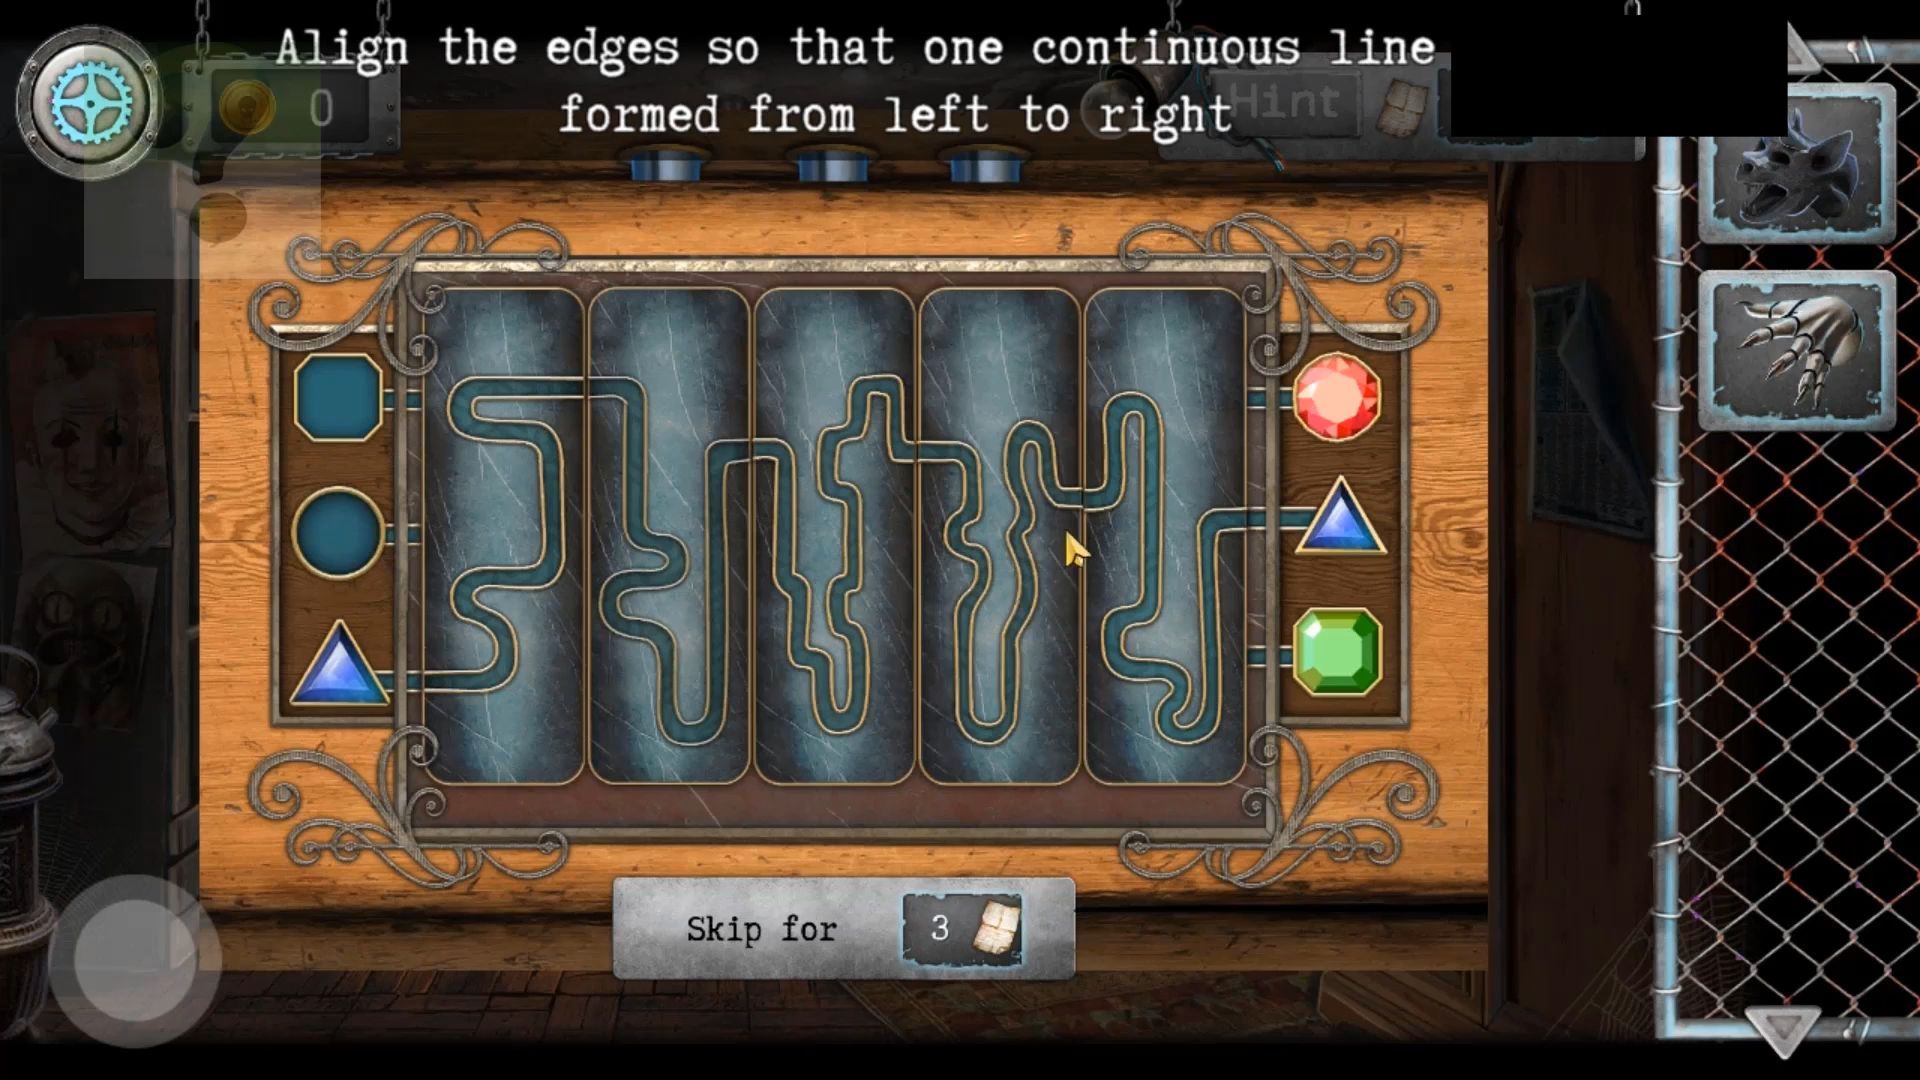
Counter Lock Puzzle
Add the part of a lock from your inventory to begin. Tap the lock sections to change them and make a line from the left to the right for each of the 3 shapes.
Exit the building and tap on the boat again. This will take you back to the other side of the lake. Return to the overgrown path with the statues. Place the gargoyle head onto the statue on the right to access a puzzle at the bottom of the statue.
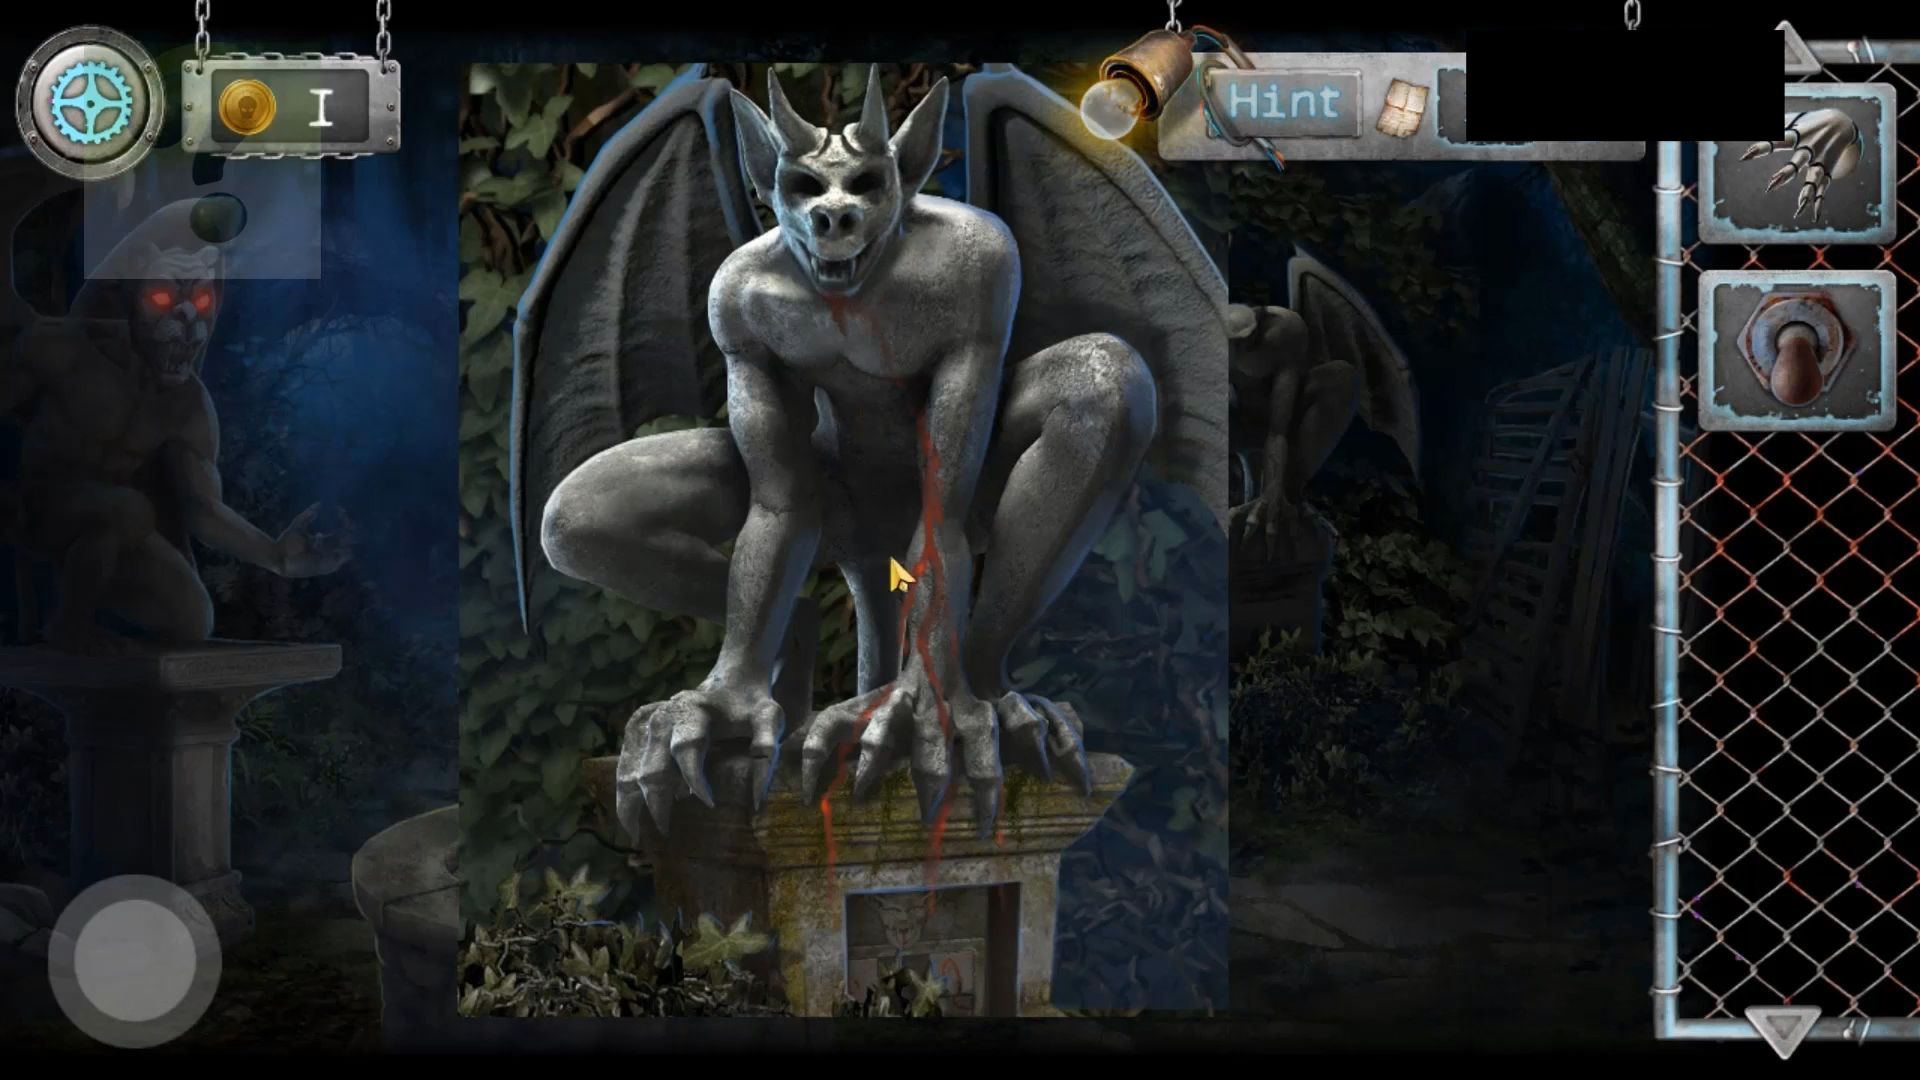
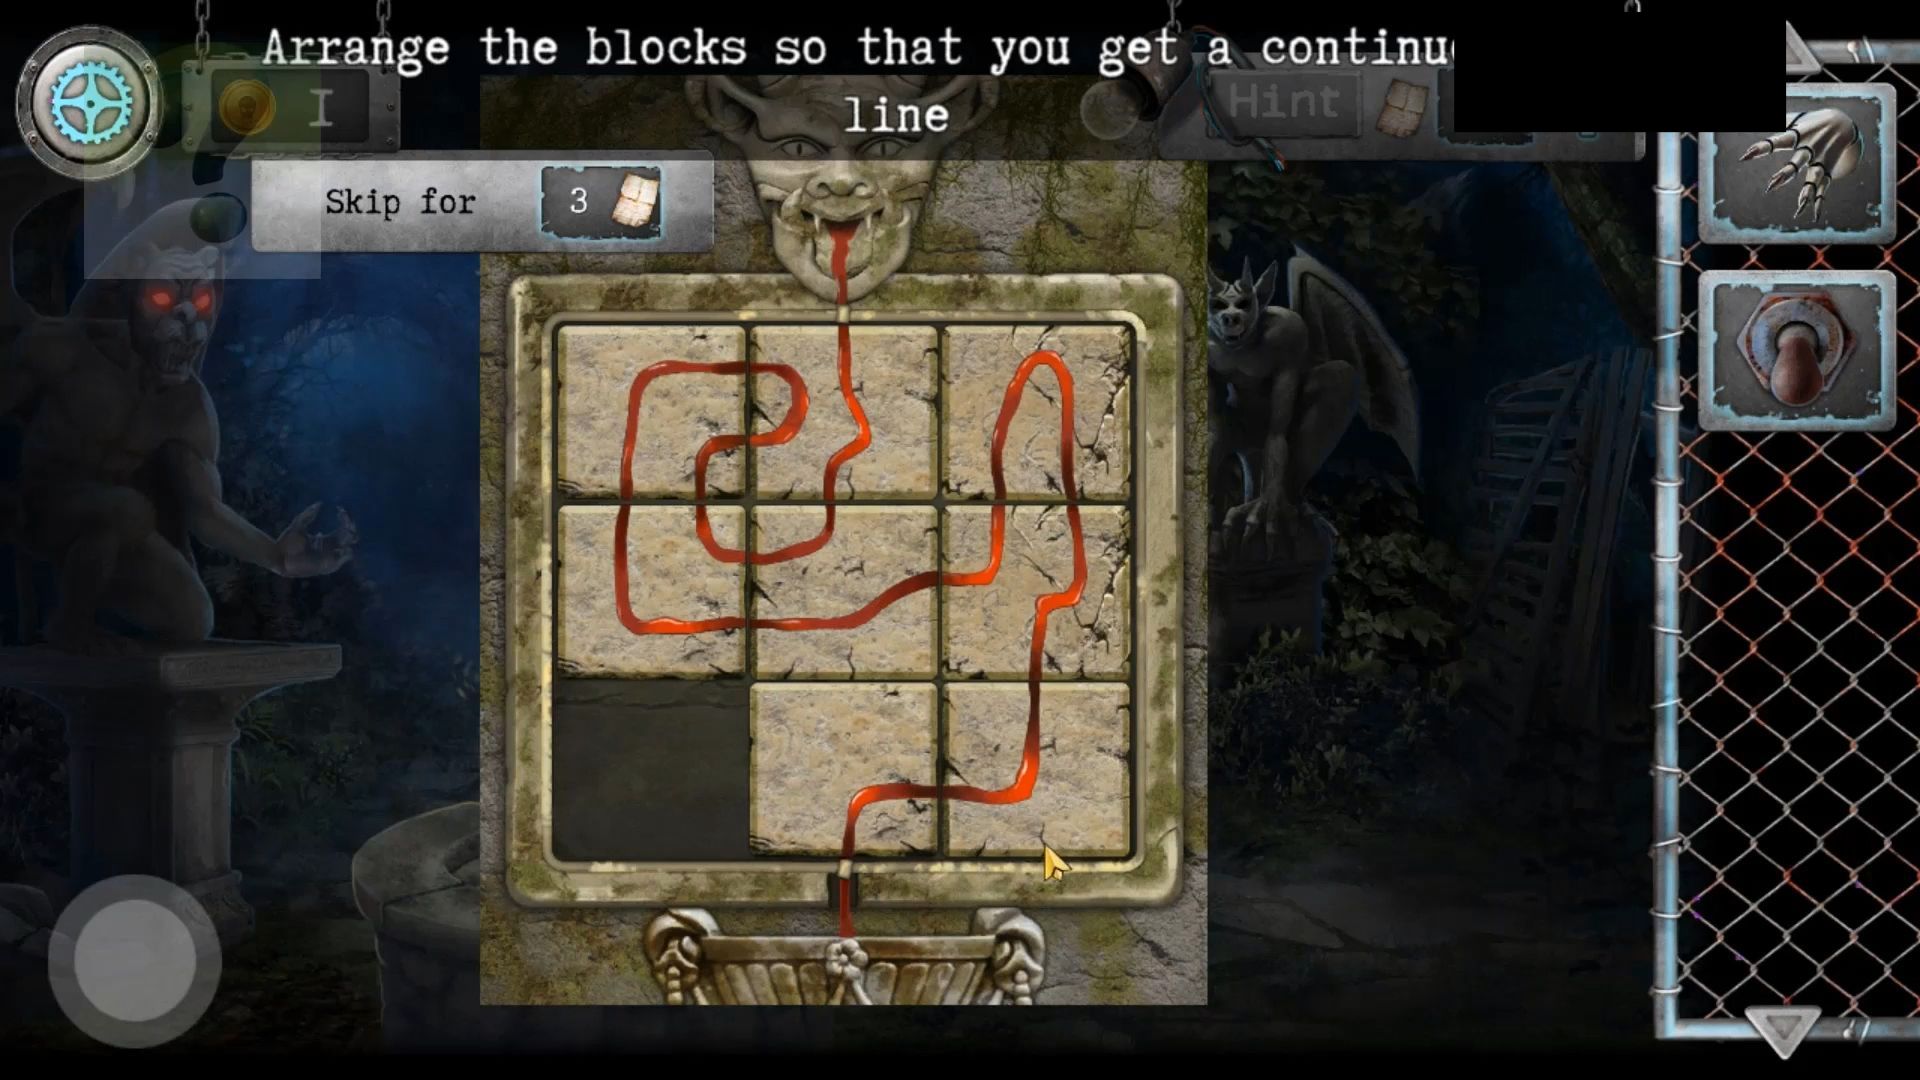
Gargoyle Statue Puzzle
Slide the blocks around to arrange them in a single line from the top center to the bottom center.
Collect a Piece of a poster from the gargoyle’s mouth, then return to the boat and cross to the other side again. View the torn poster on the side of the green building with lights and add the piece to reveal 5 numbers.
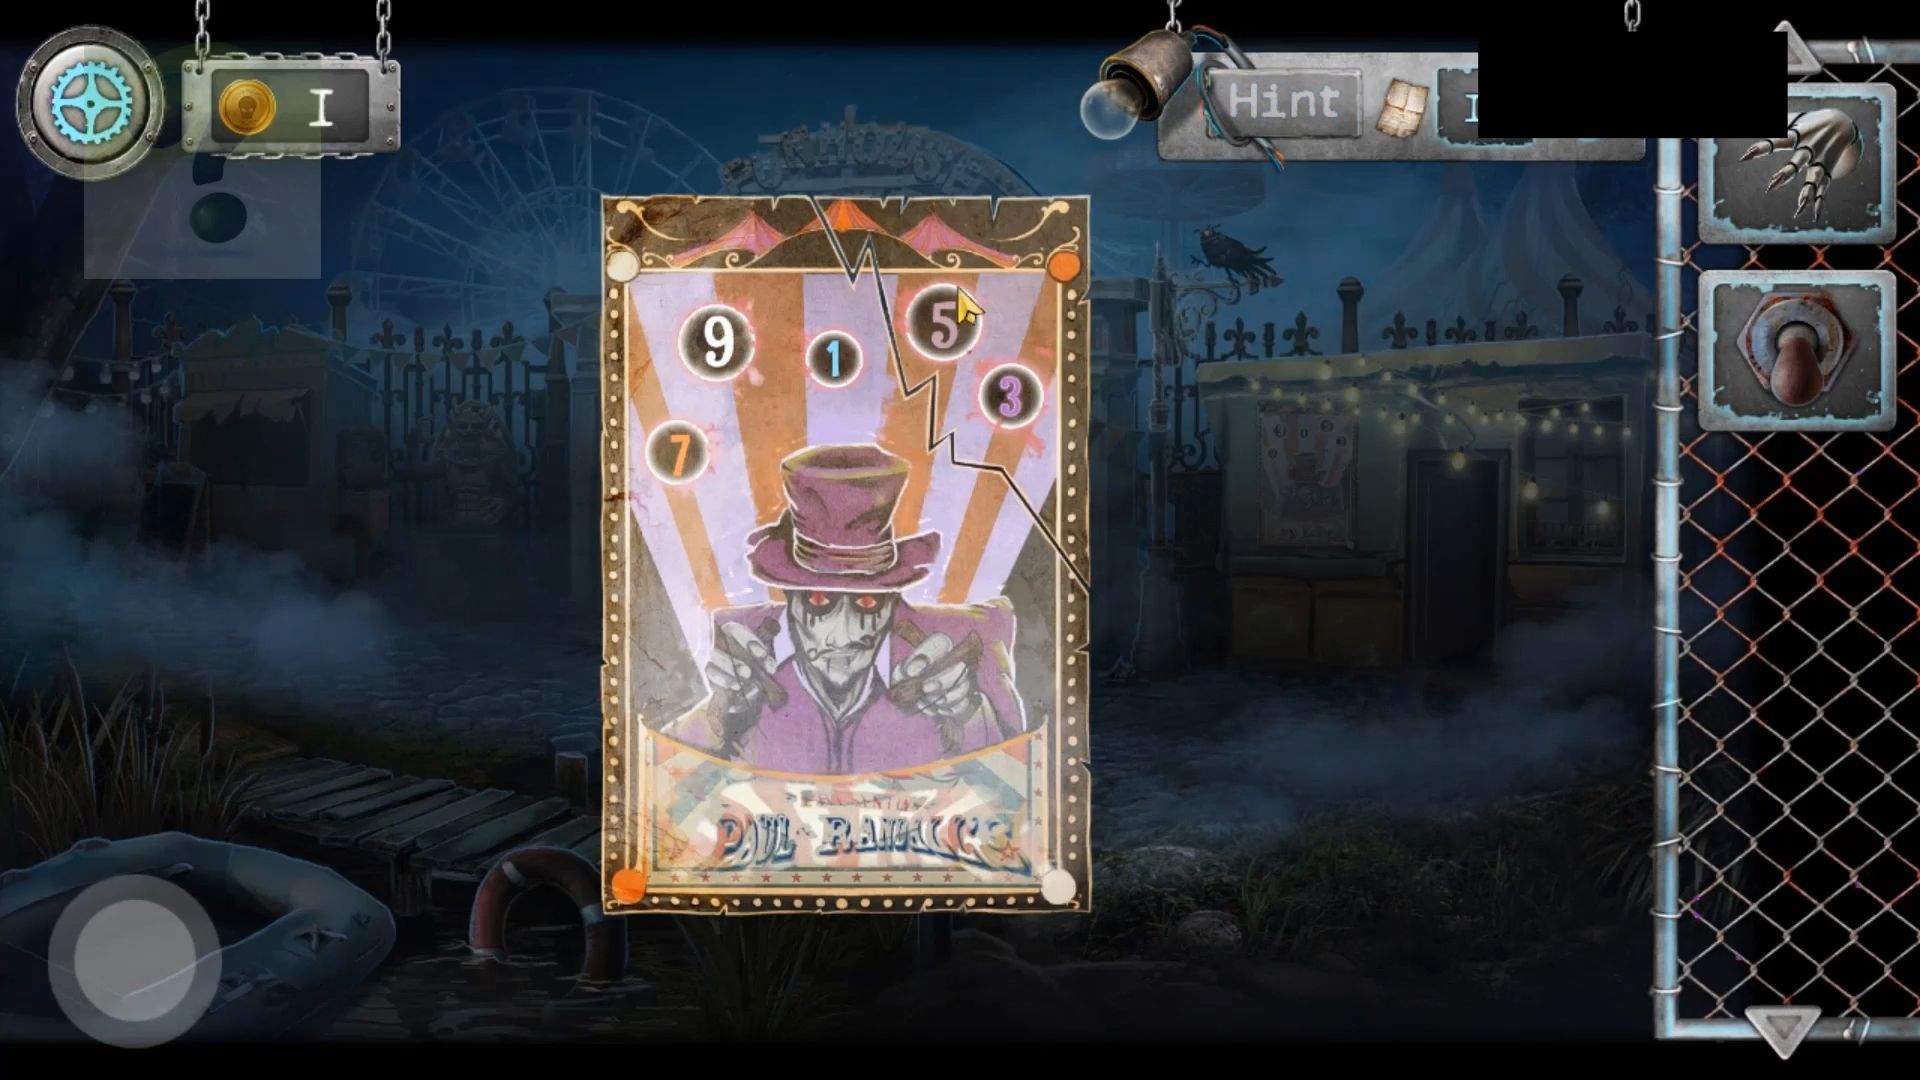
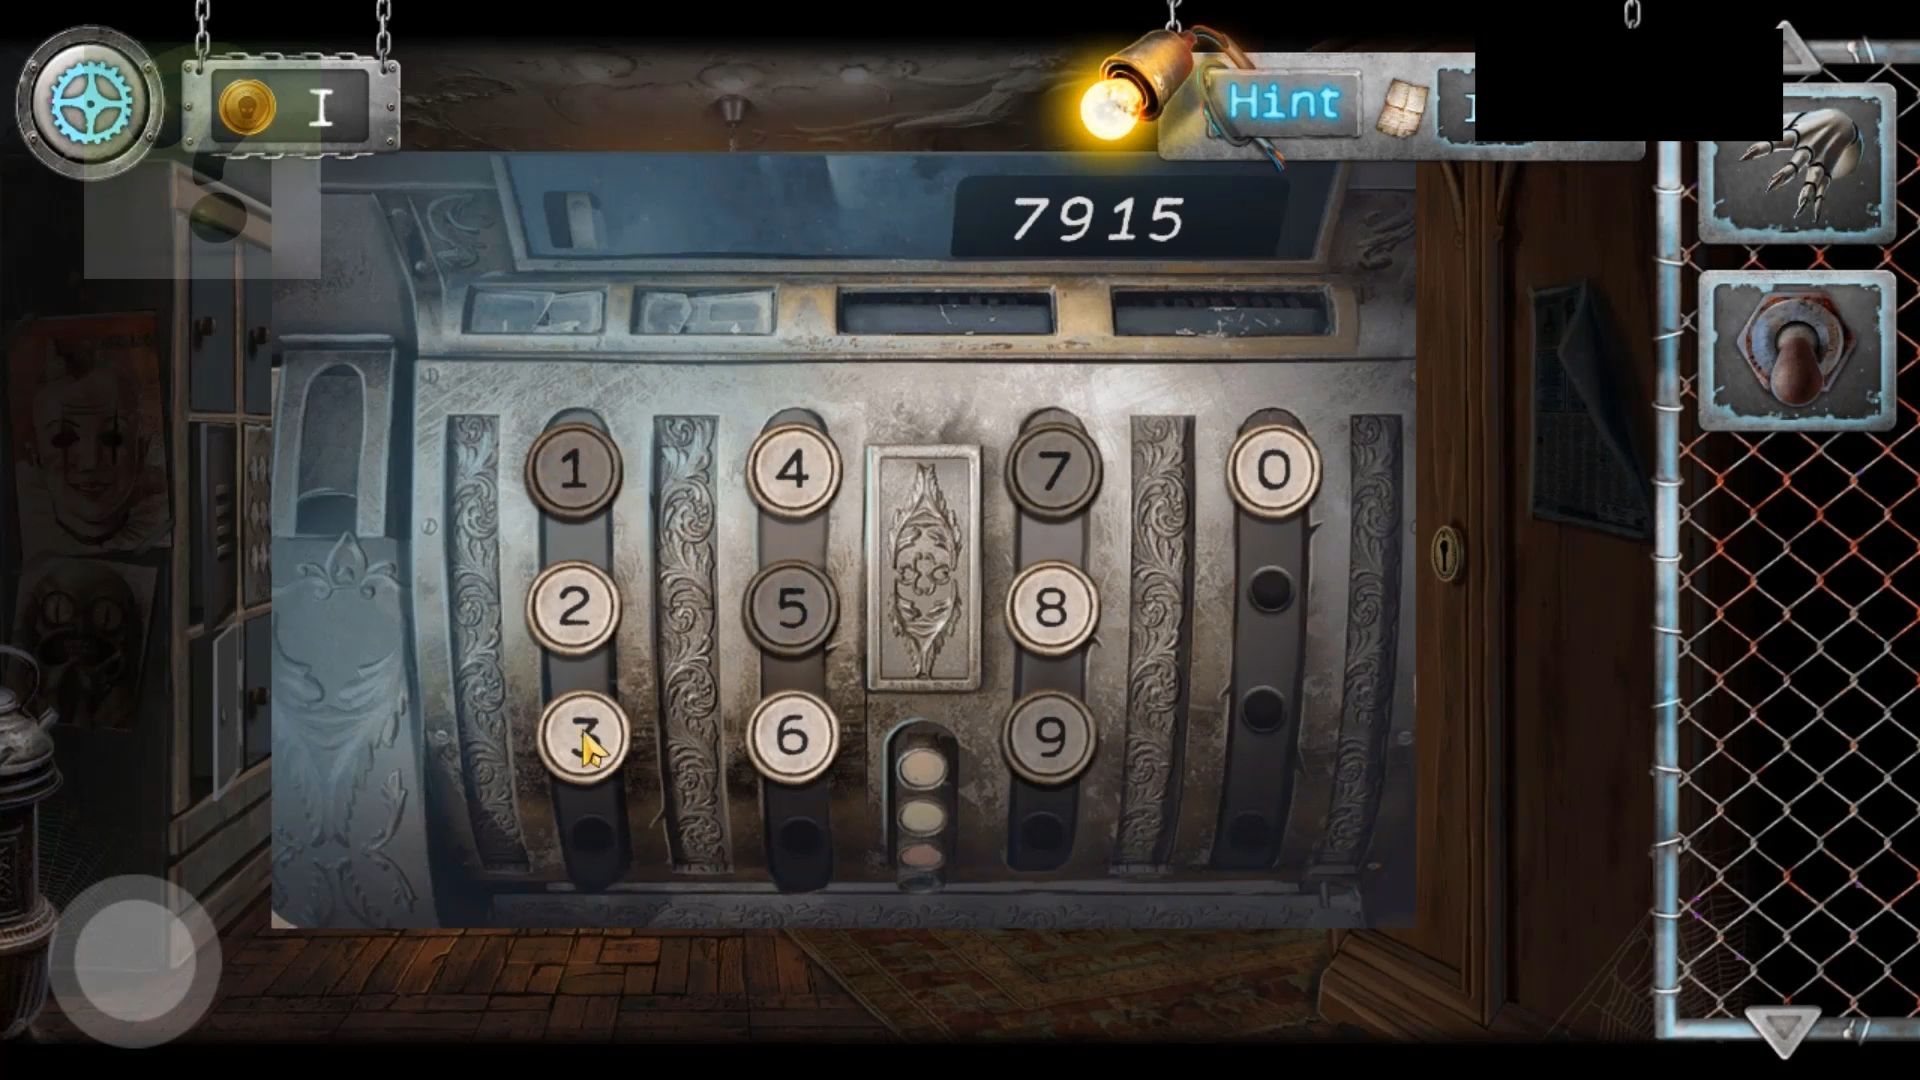
Go back into the green building and view the cash register again. Look at the buttons, then enter the code from the poster (79153). Collect a Square coin and a coin with a horned profile from inside, and also see a clue.
Next, tap on the door at the back of the room to see the code lock. Use the clue (512) from the register to open this. There are three sets of animals; 4 chicks + 1 joining them, 3 ducks – 2 going away, and 4 cats divided by 2 cats.
Enter the back room, tap the switch to turn on the power, and collect 2 number blocks from the floor.
Exit to the outside, view the viewing scope by the water and use the square coin on it. Tap the switch to activate it so you can look through it. Zoom in until you see the set of 9 lights on the right. Watch the sequence they appear in and remember this clue.
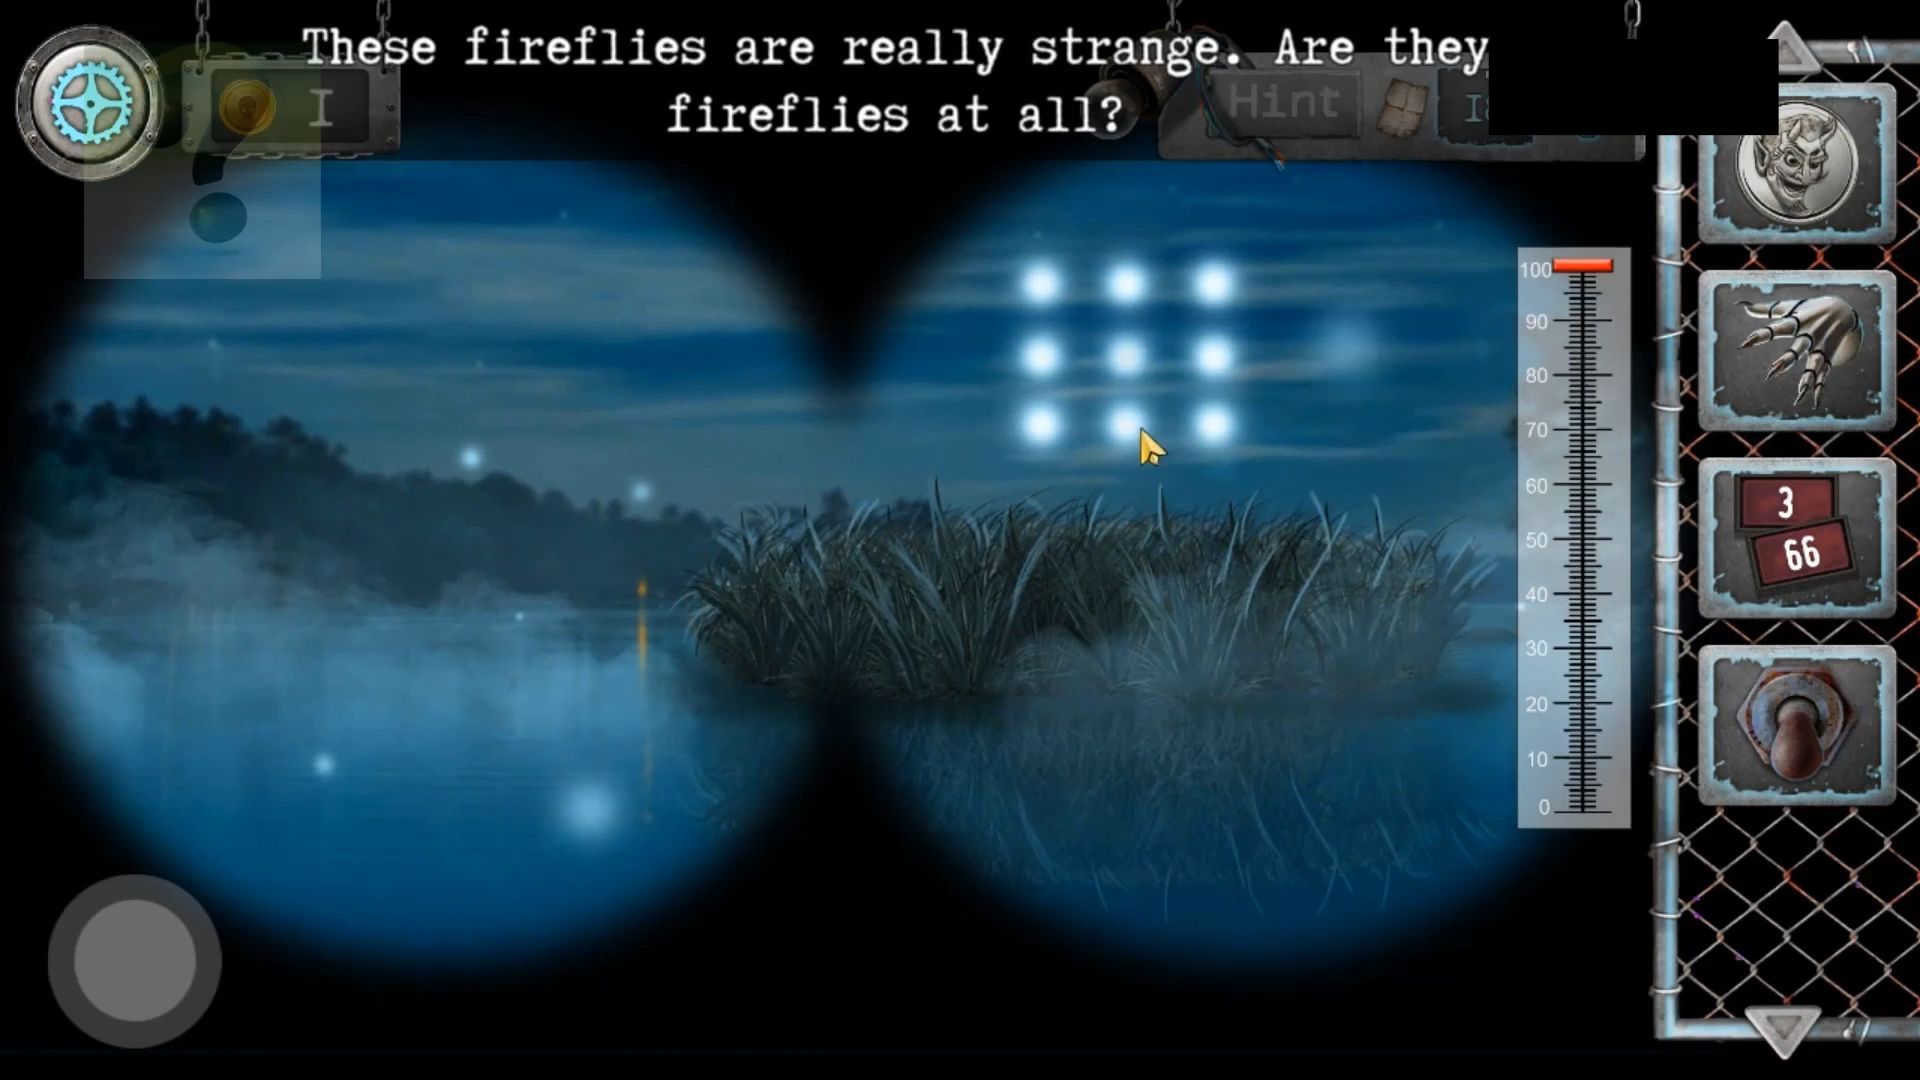
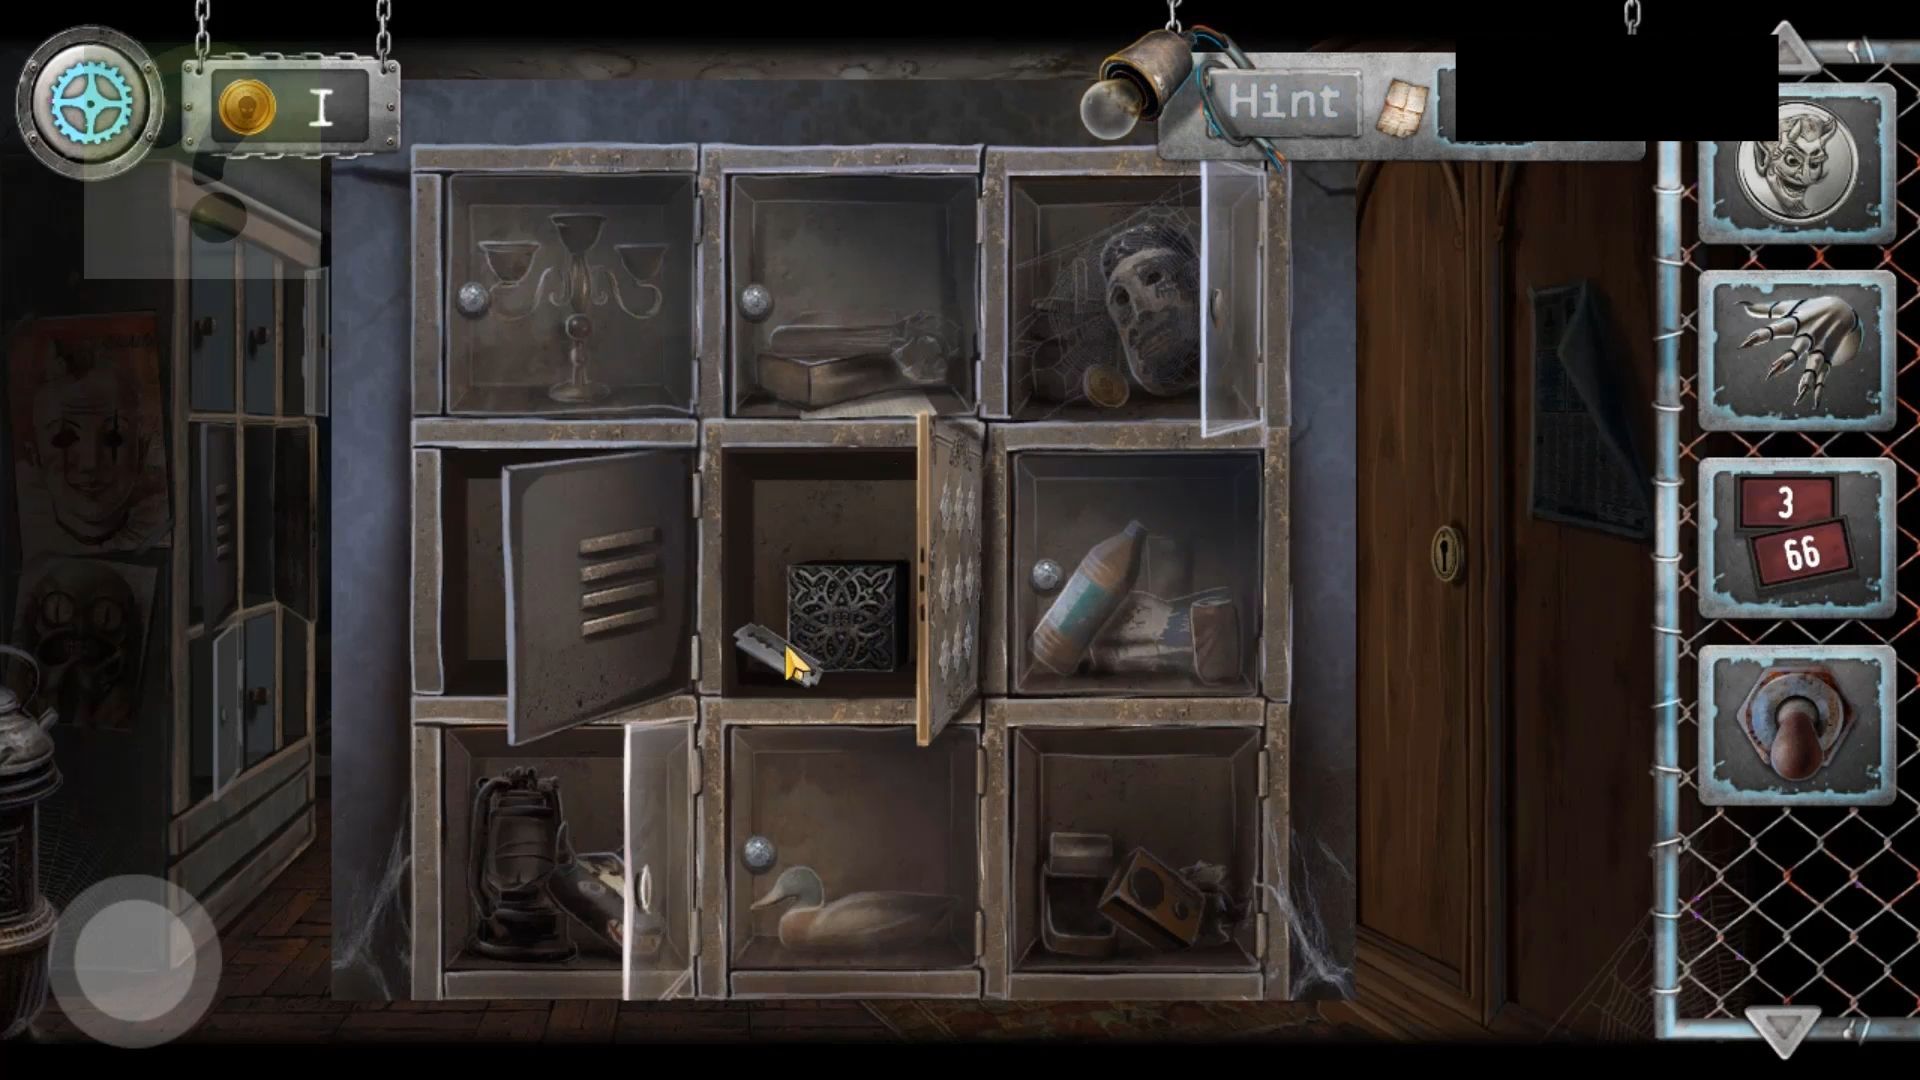
Return to the green building, tap on the square lockers on the left, and pick up a coin from the top right locker. Then, view the one in the center and tap the buttons on the front in the same sequence as the lights in the sky. Collect a Razor Blade and a Mysterious Cube.
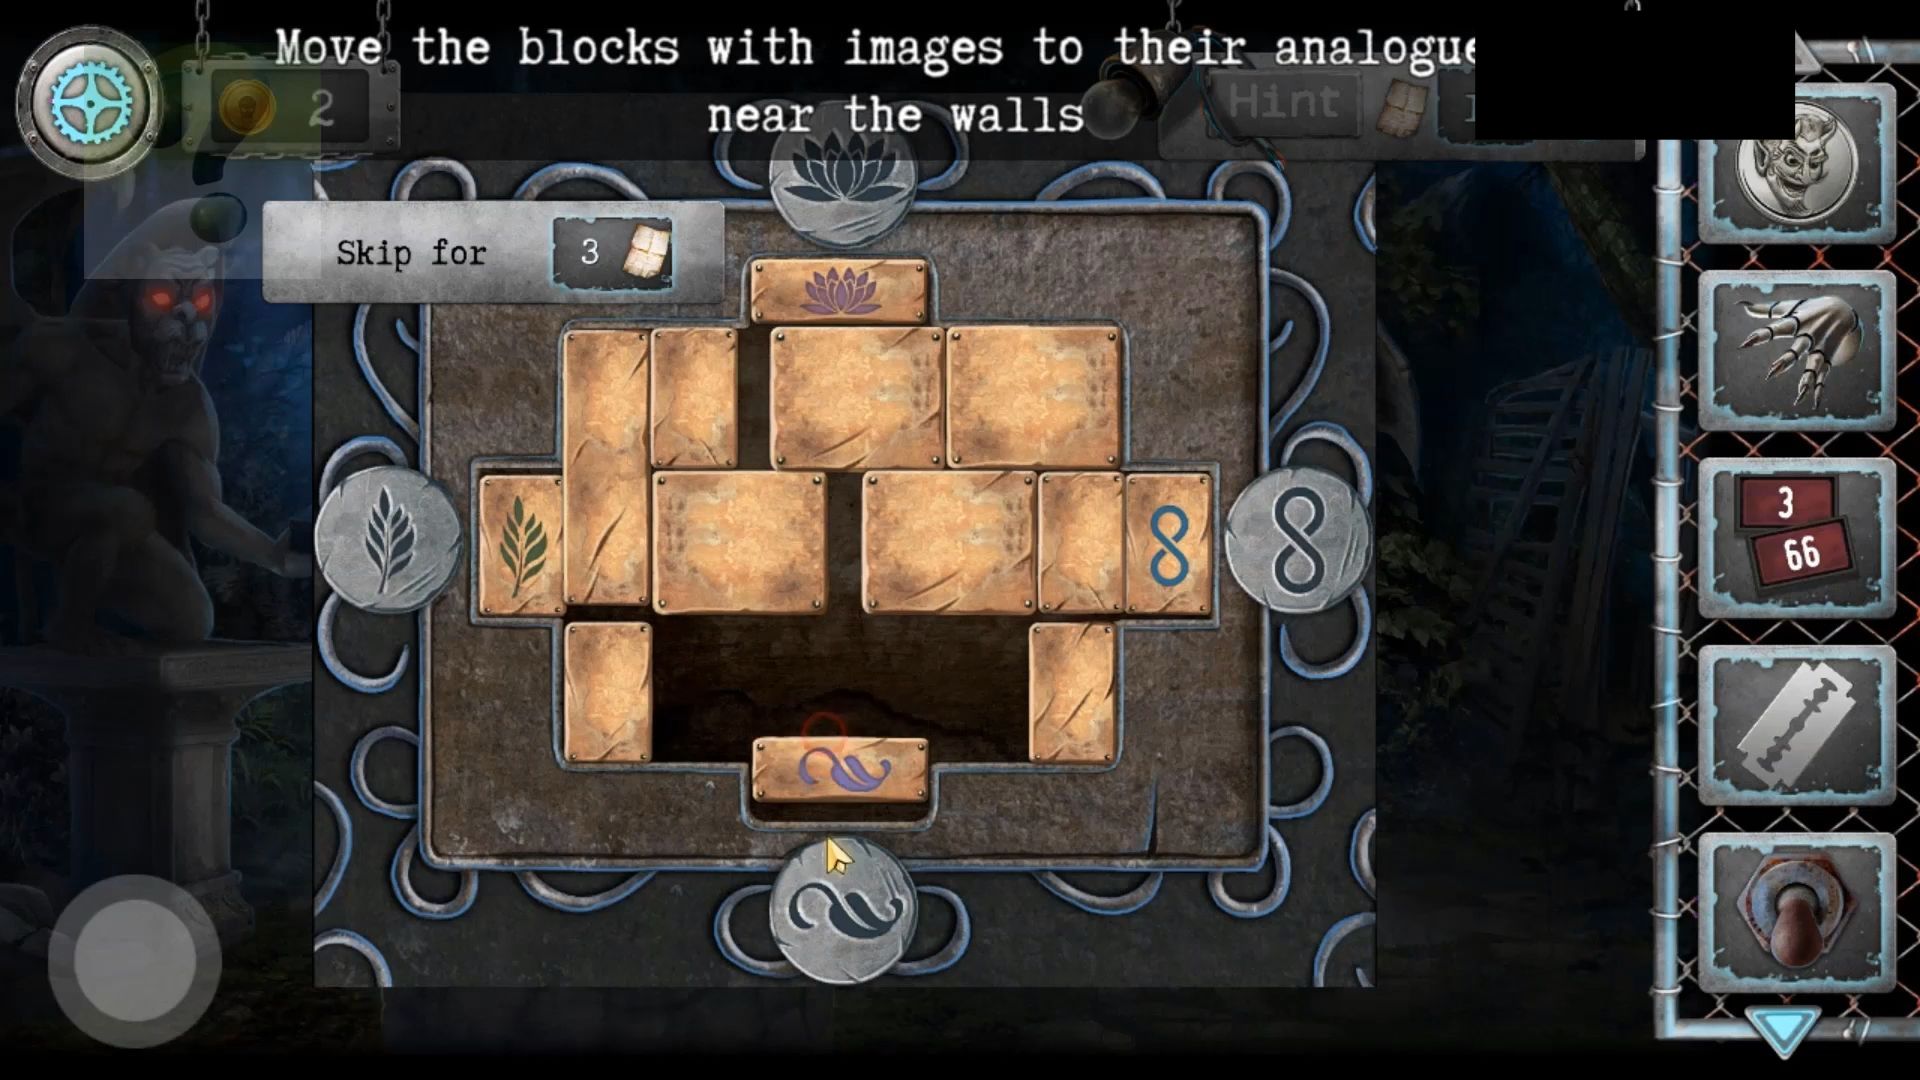
Back out to the lake, use the boat again to cross to the other side, and go back to the overgrown path. View the hand of the statue on the left, add the mysterious box to it, you will find another puzzle.
Mysterious Box Puzzle
Slide the blocks around the grid, moving the blocks with symbols next to the matching symbols on the sides. Collect the Locker Key.
Go back into the green building and use the Locker key on the wooden cupboard on the right to open it. Collect a panel key from the coat pocket.
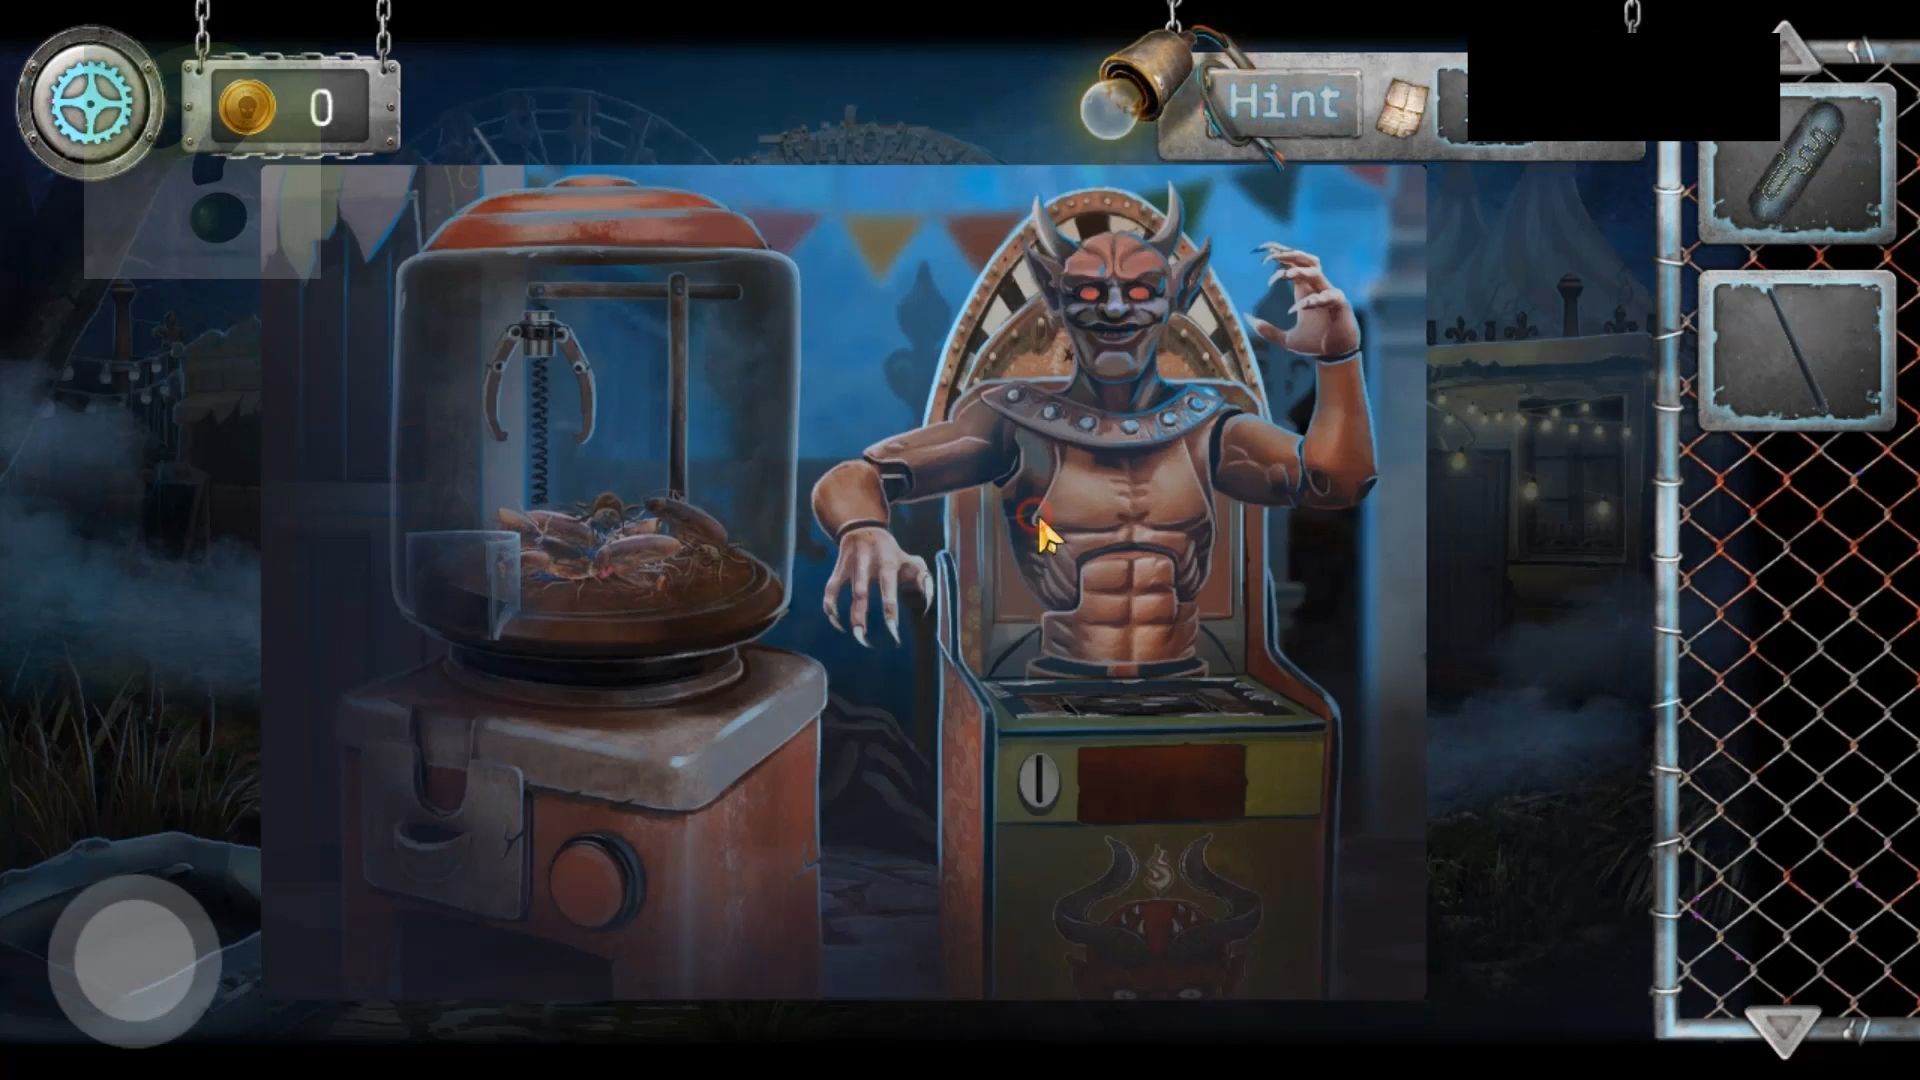
Return to the boat and go back to the other side of the lake. Tap on the machines to the left of the main entrance to view them, then use the coin with the horned profile on the devil machine on the right. This starts a mini-game.
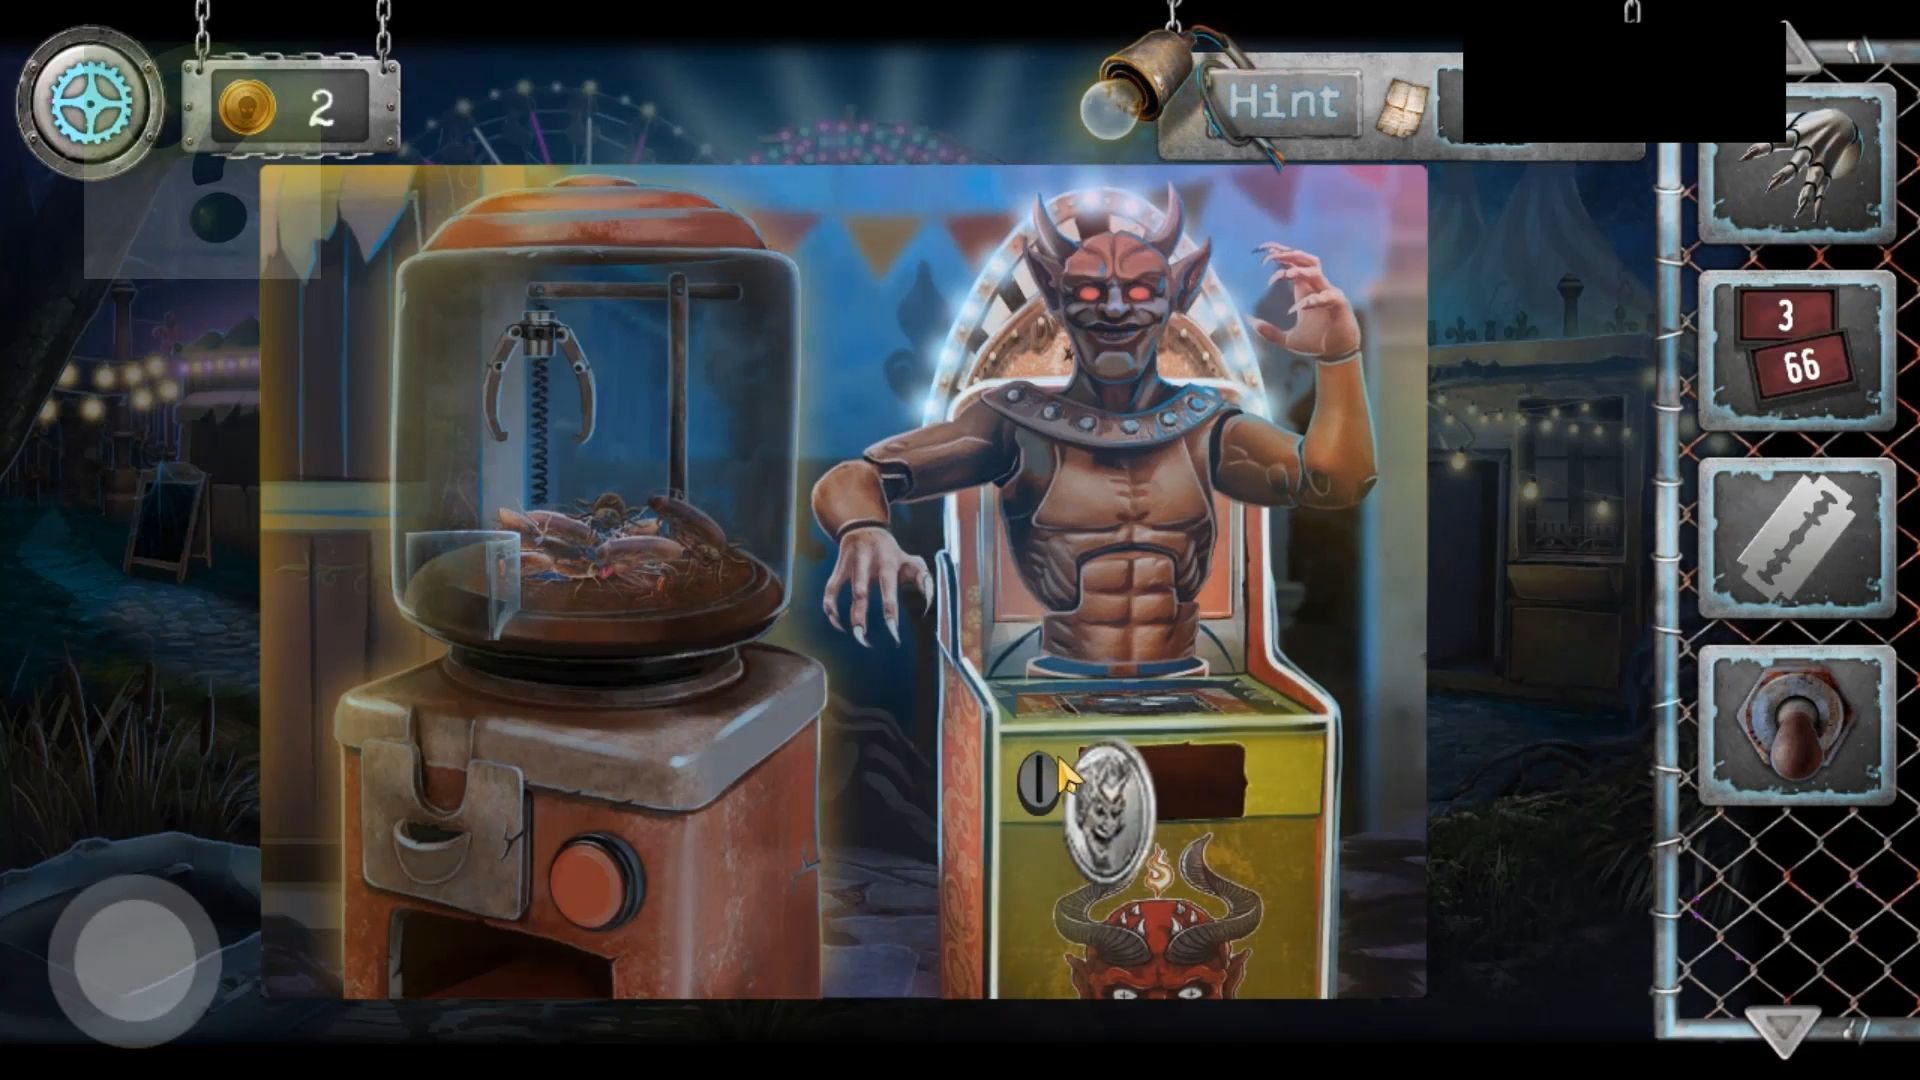
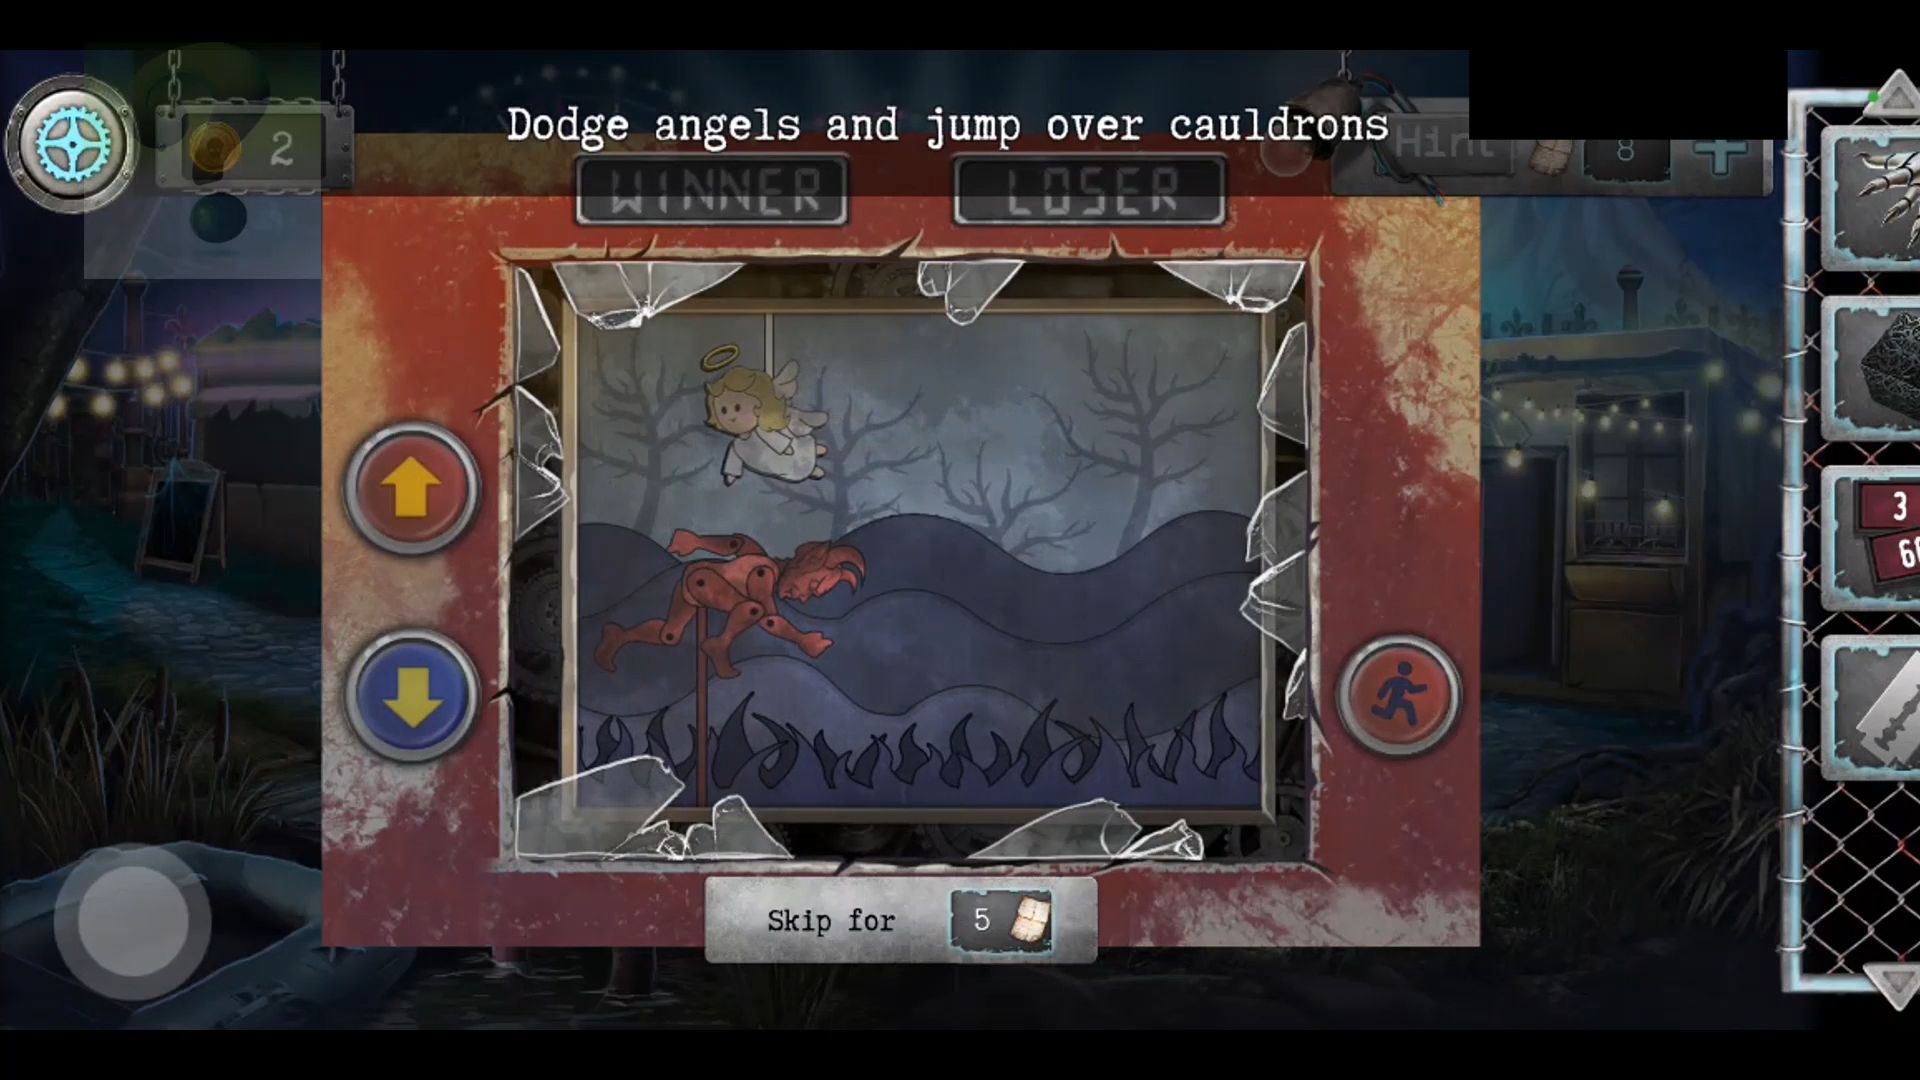
Devil Game
Tap the red button on the right to make the devil run. Then, use the up and down arrows to jump over cauldrons or duck under angels. Ignore the clouds. It speeds up as you go, so timing is crucial—don’t jump too early.
When you reach the end, you will receive a pouch with coins. Use the pouch on the machine on the left to start it. Press the red button to use the claw to take items until you collect both a blue Puck and also some chewing gum. Go back into the back room, use the panel key to open the small wall box, and look inside.

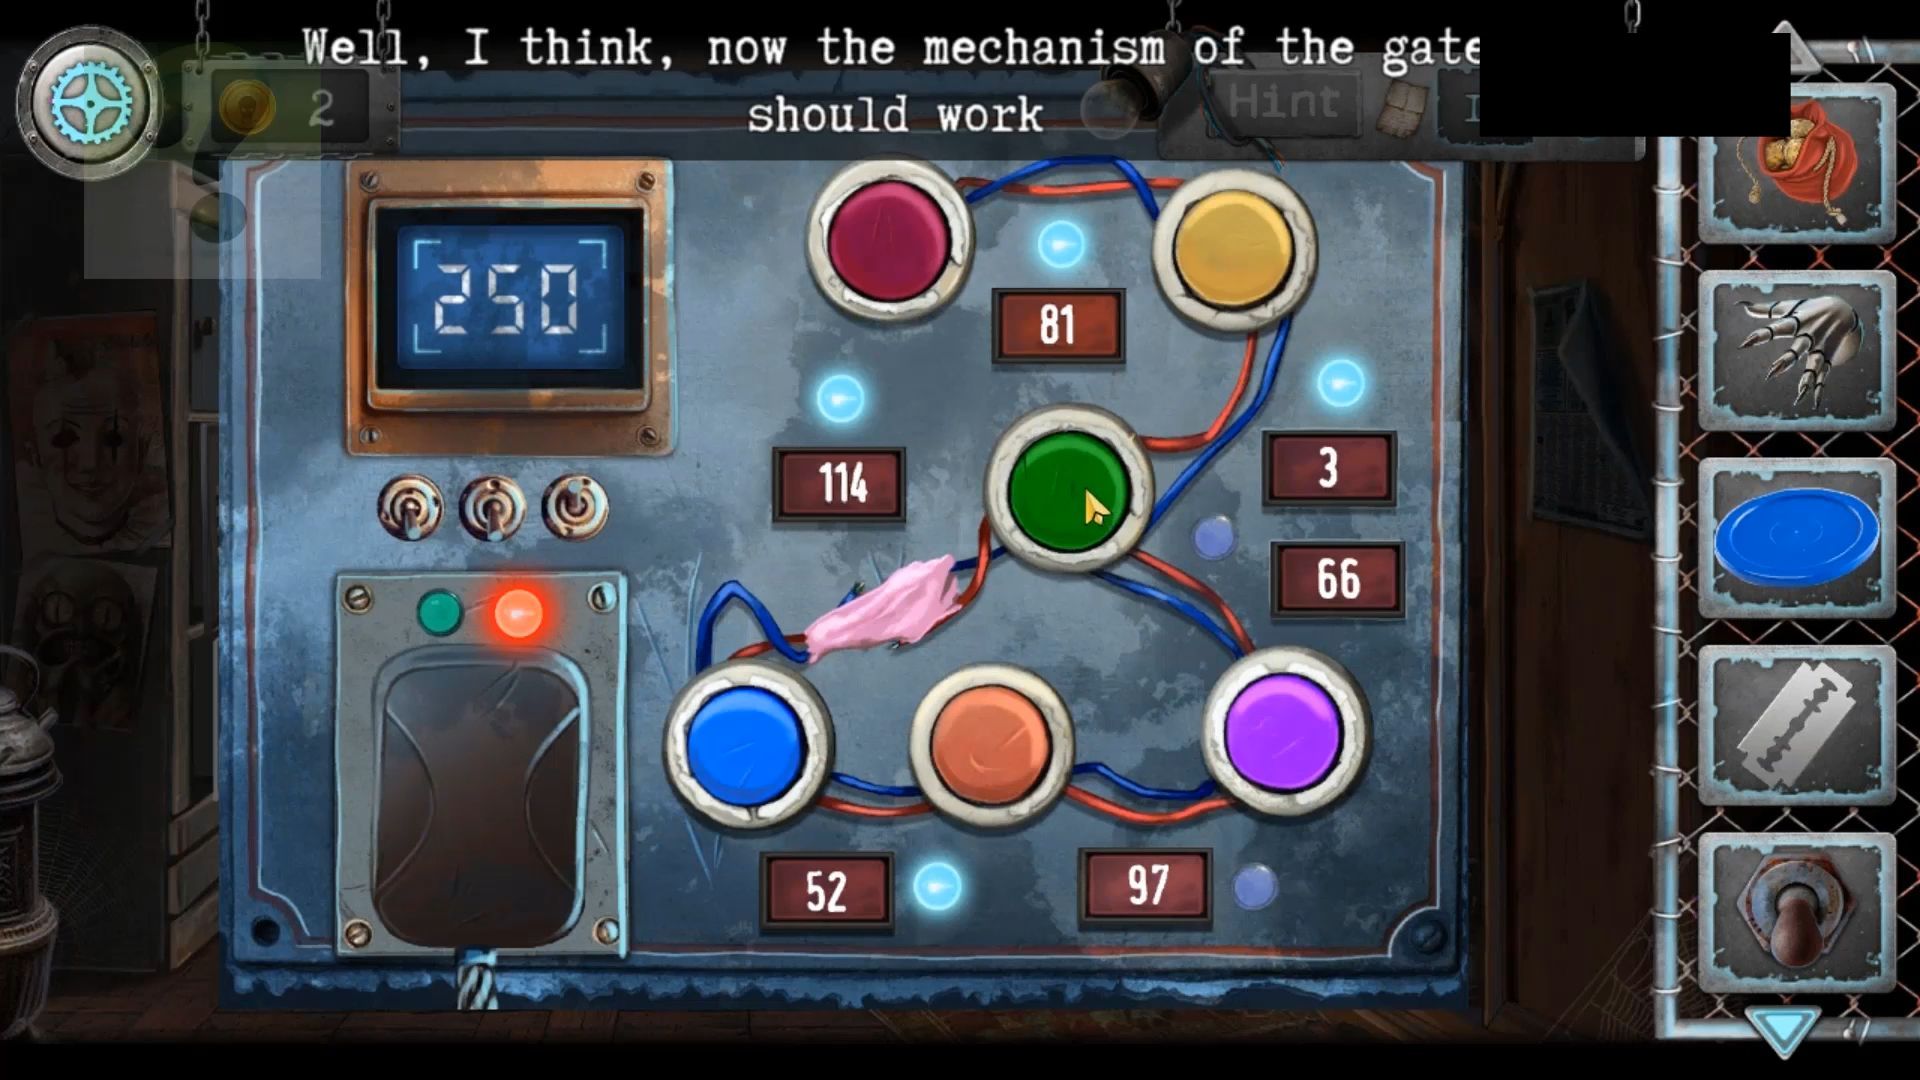
Power Box Puzzle
Notice that the number 250 is flashing. Add the Chewing gum to the broken wires to fix them and place the 2 number blocks to start the puzzle. Tap on buttons to connect up cables and set the numbers. Find the right combination of buttons to get the displayed number to 250.
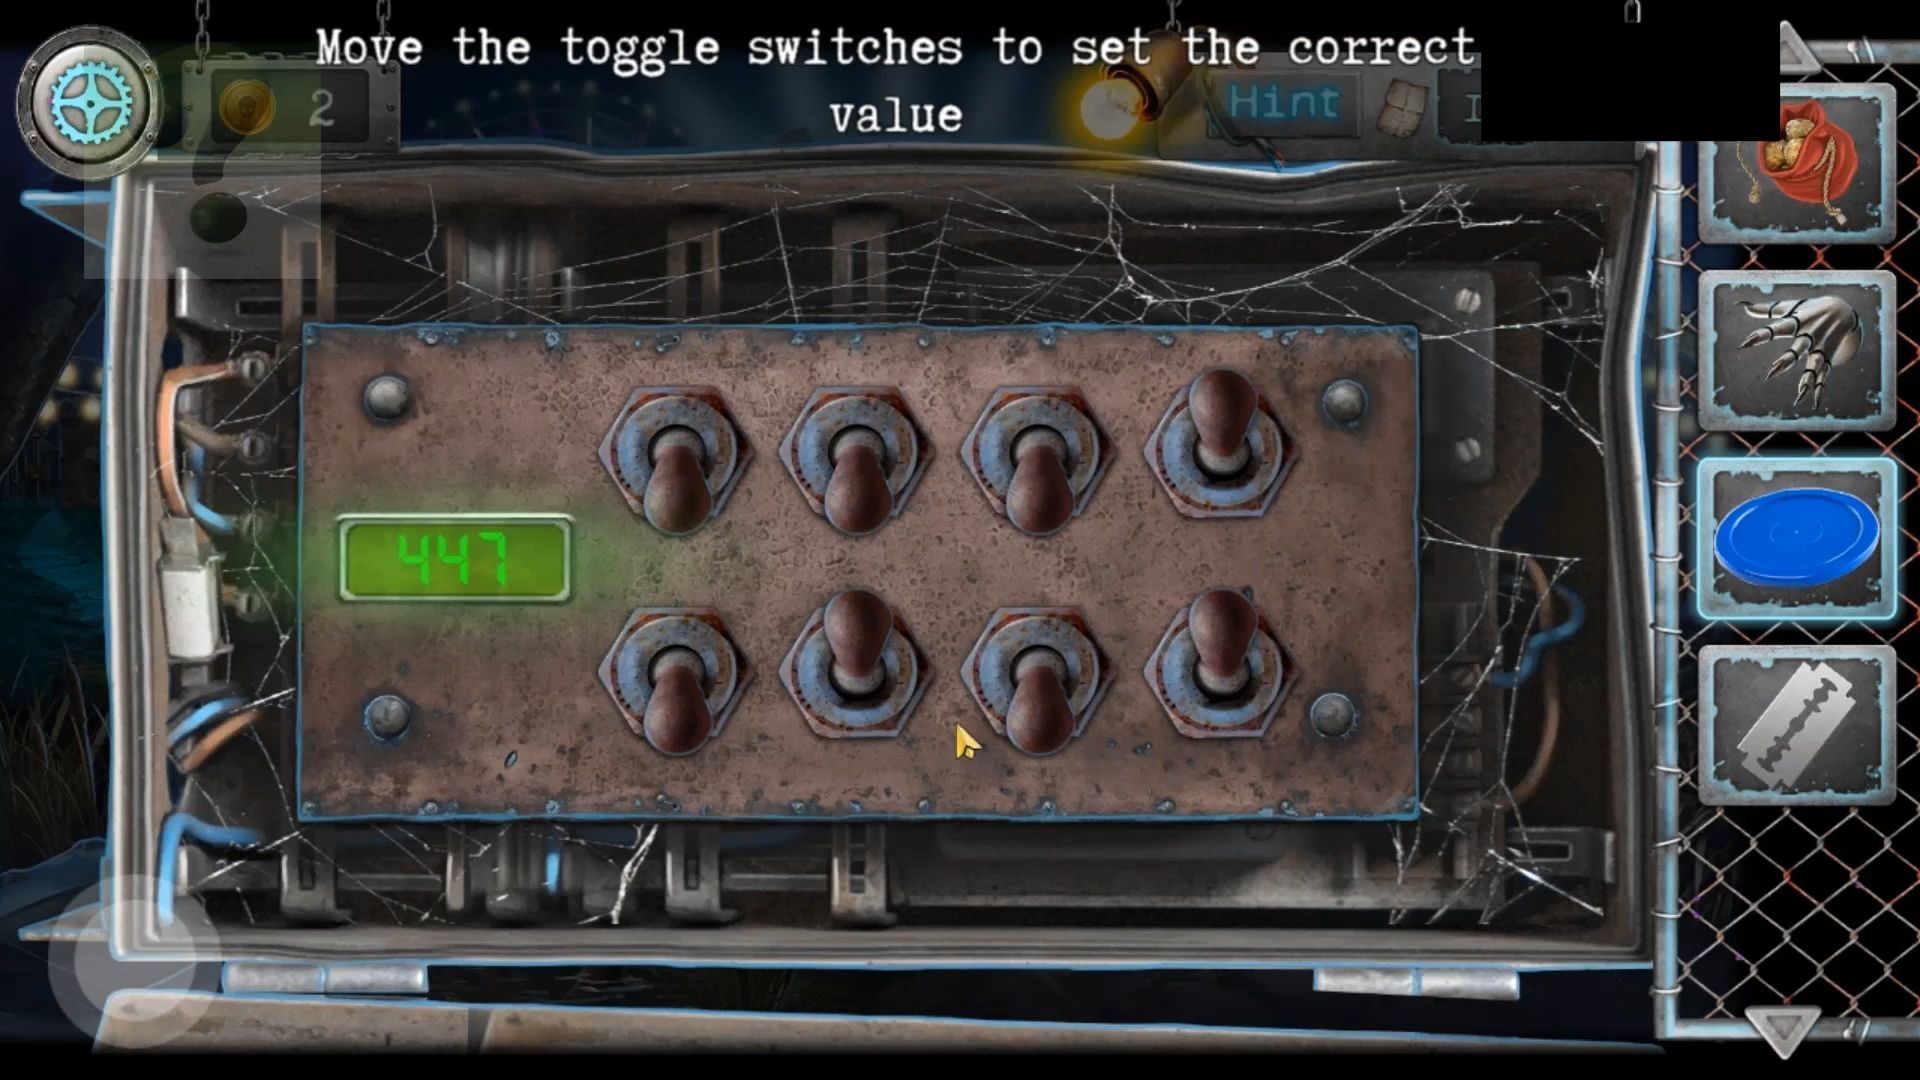
Toggle Switch Puzzle
At the ticket booth on the left, collect the mechanical hand and check the switch panel inside. Add the toggle switch. Set the switches to control the value on the left. Find the right combination to reach the clue value 648. Switch up 1 and 3 on the top, and 2 and 3 on the bottom (keep others down).
Inside the Park
Now, you can enter the park. First, check the display on the far left. Collect the Ginger wig, Mirror Shard 1, and a coin from the shelves. Also, read the note for a clue.

Use the pouch of coins to add one and fill it with popcorn, then collect another Mirror shard. Back up and now tap on the fortune-telling machine in the center. Add the mechanical hand and the pouch of coins to start a puzzle.
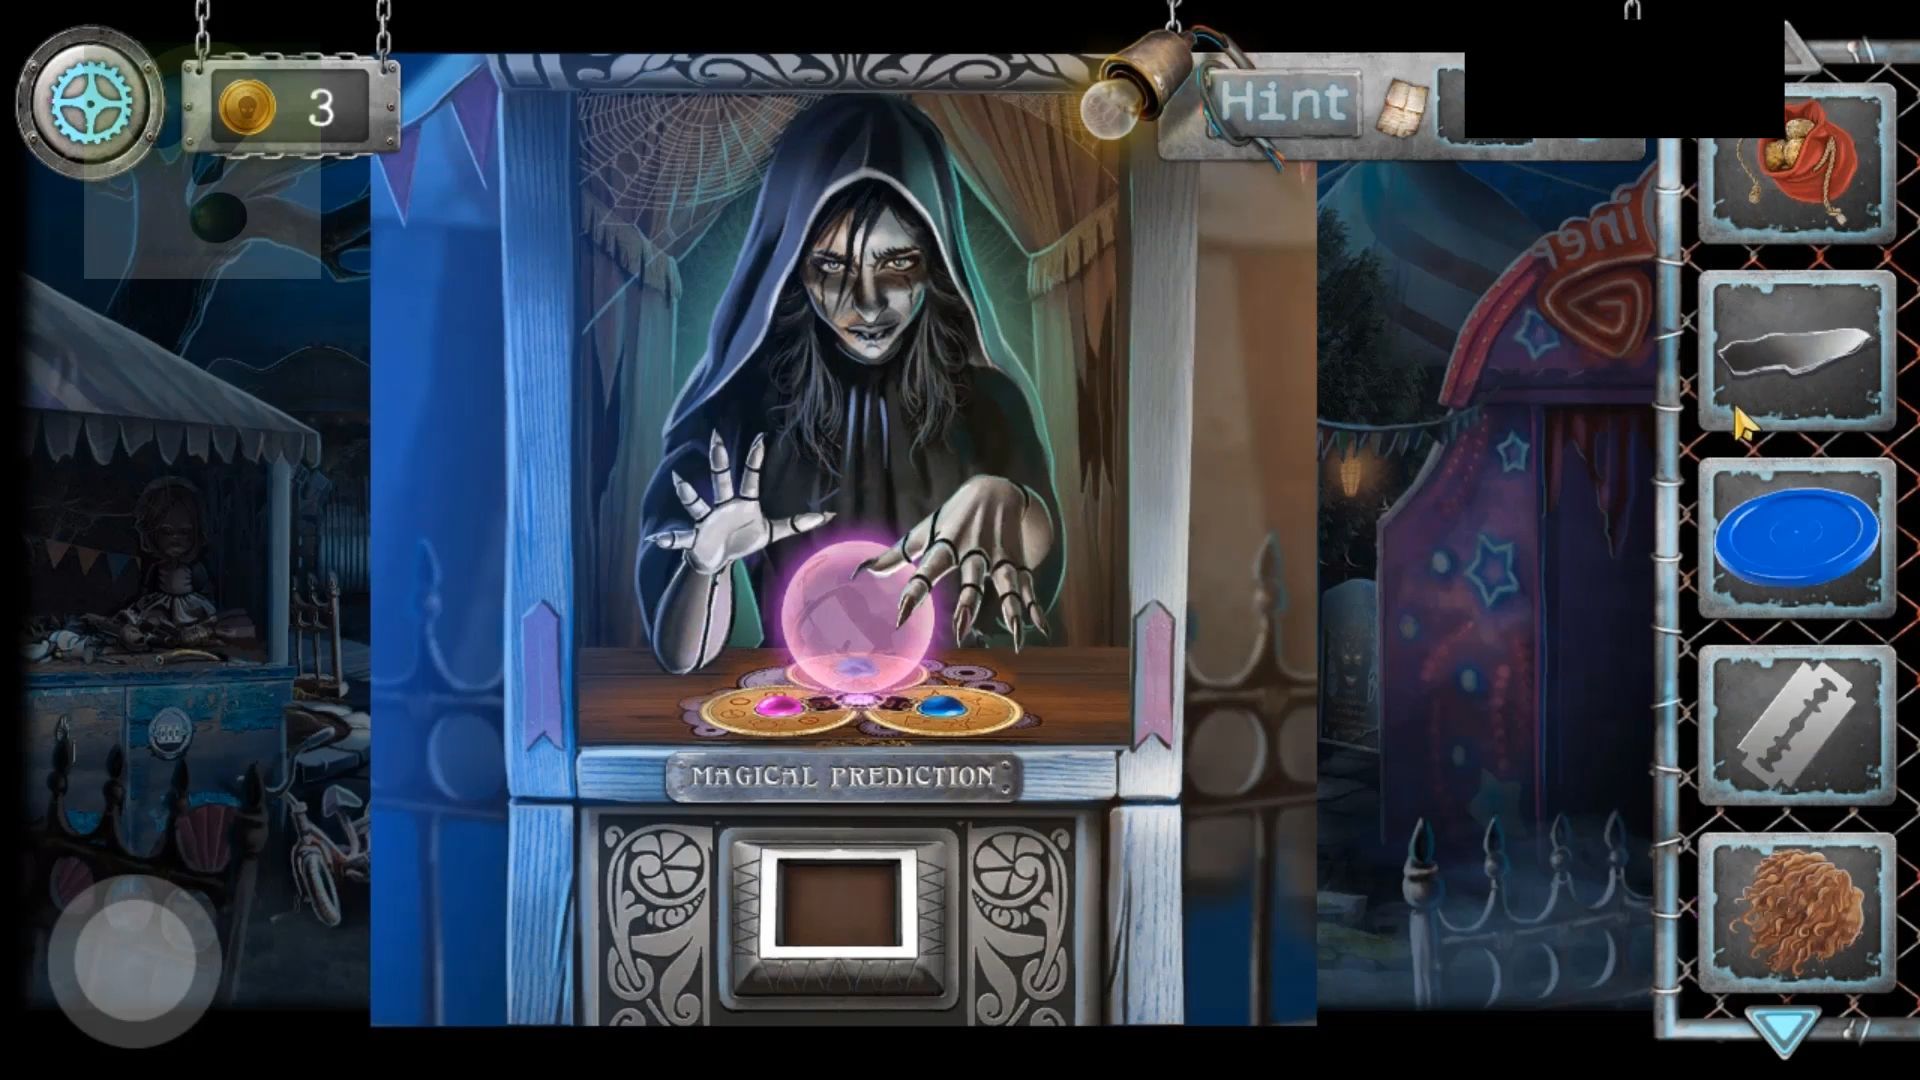
Fortune Teller Puzzle
There are 4 symbols on the hands, which are the clues. The puzzle has 3 disks that you can turn, each with symbol parts on them. Align the disks so that you combine the symbol parts to match the ones on the hands. Once done, the machine breaks, and you can then play a second puzzle.
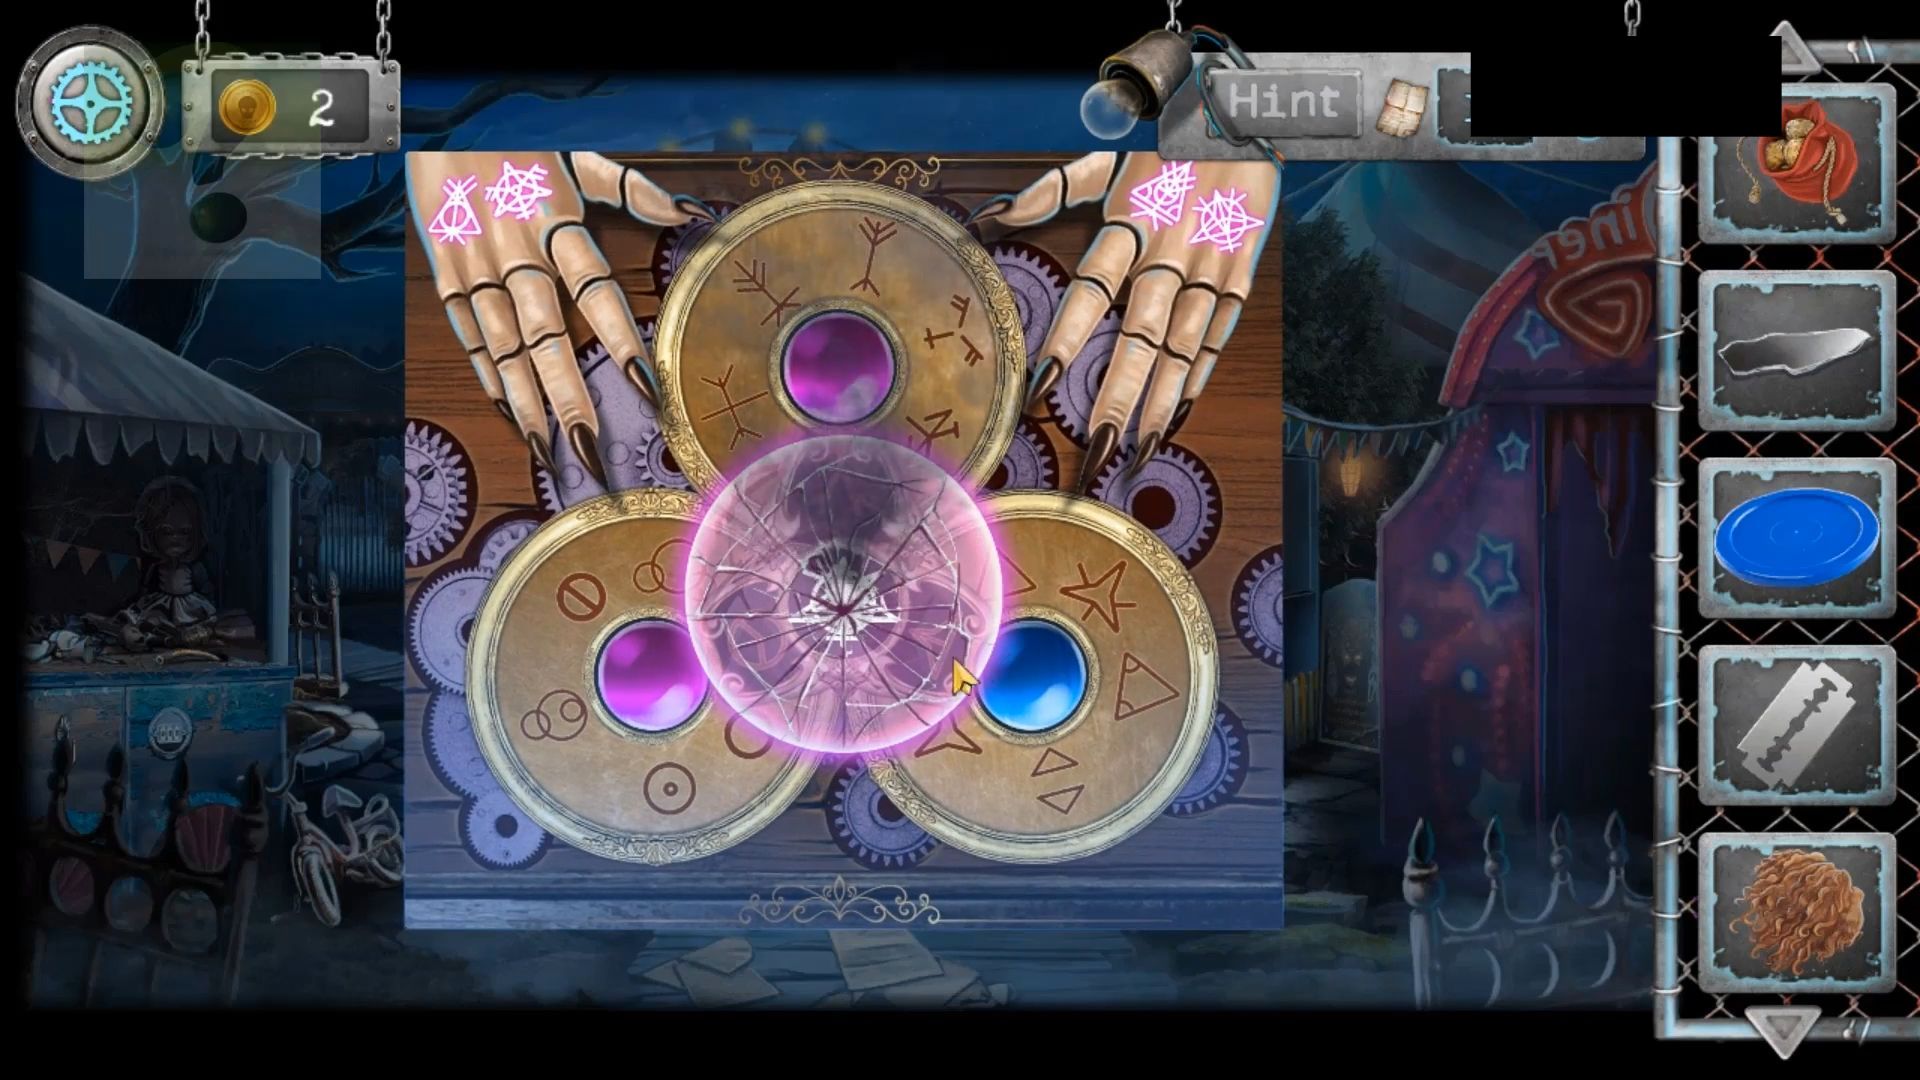
Tap pairs of the same-sized sections around the center to swap them and arrange them to form a complete picture. When a piece is in the correct location, it will turn green. Once completed, collect a Key with a horse and a Door Handle. Now, tap on the purple doorway on the far right to enter an arcade area.
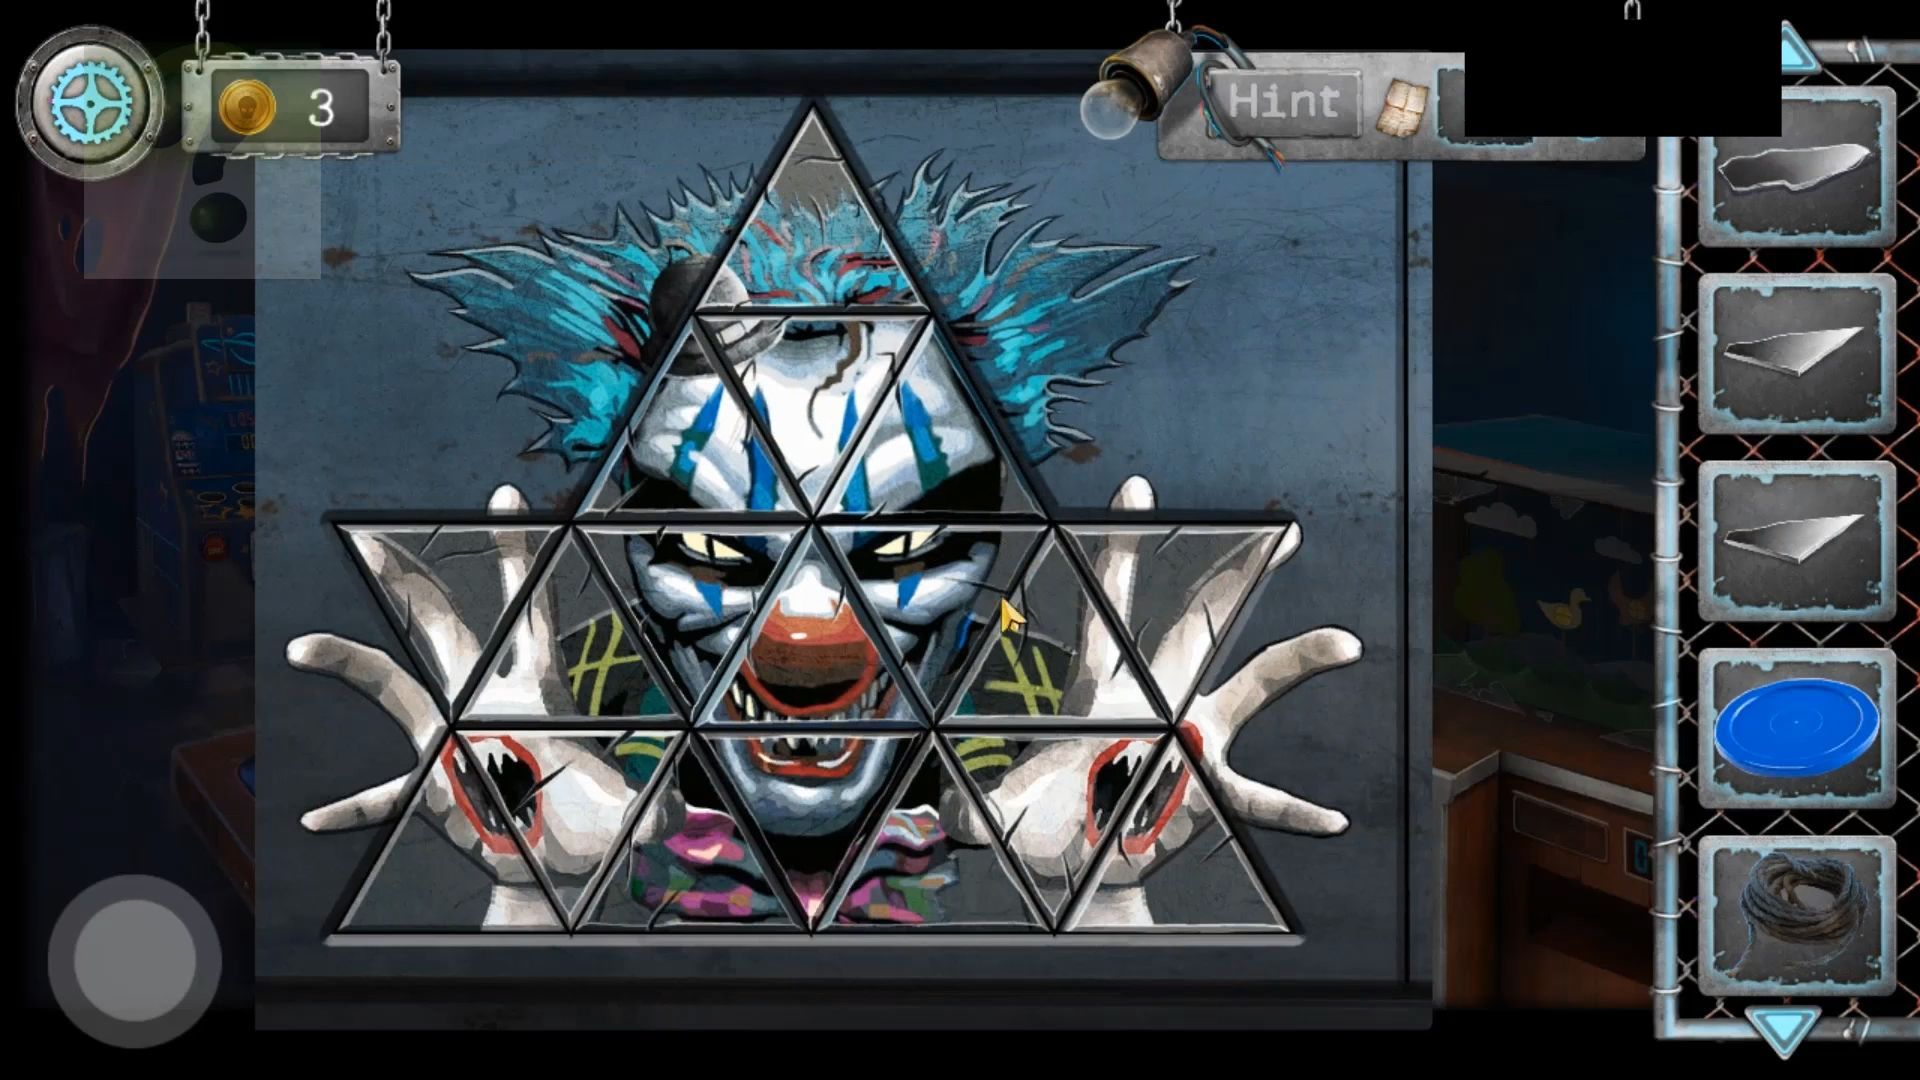
Next, tap on the tree in the distance on the left to view a second area, and tap on the hanging clown mannequin to collect the rope.
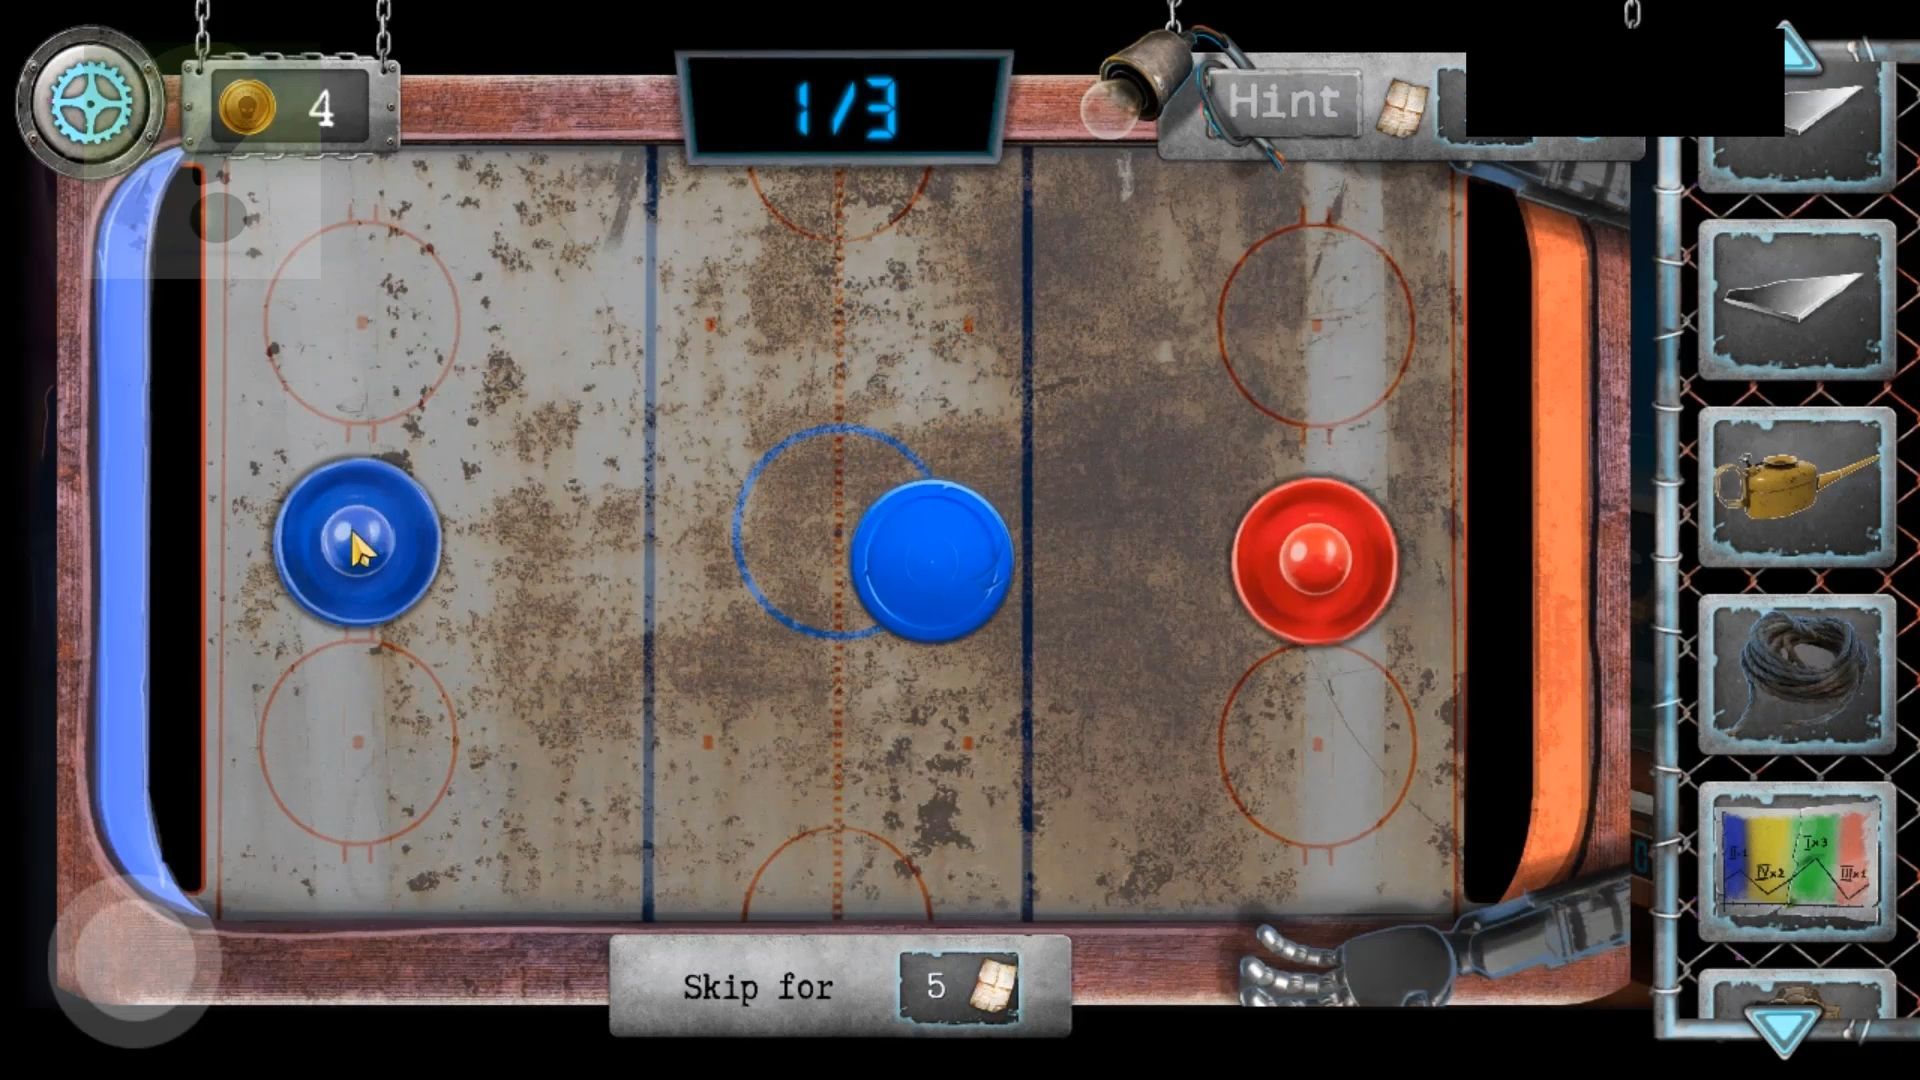
Enter the arcade area by tapping on the purple doorway on the far right. Collect a packet of Balloons from the floor, and add the Blue puck to the hockey table. Use the Pouch of coins on it to start a game.
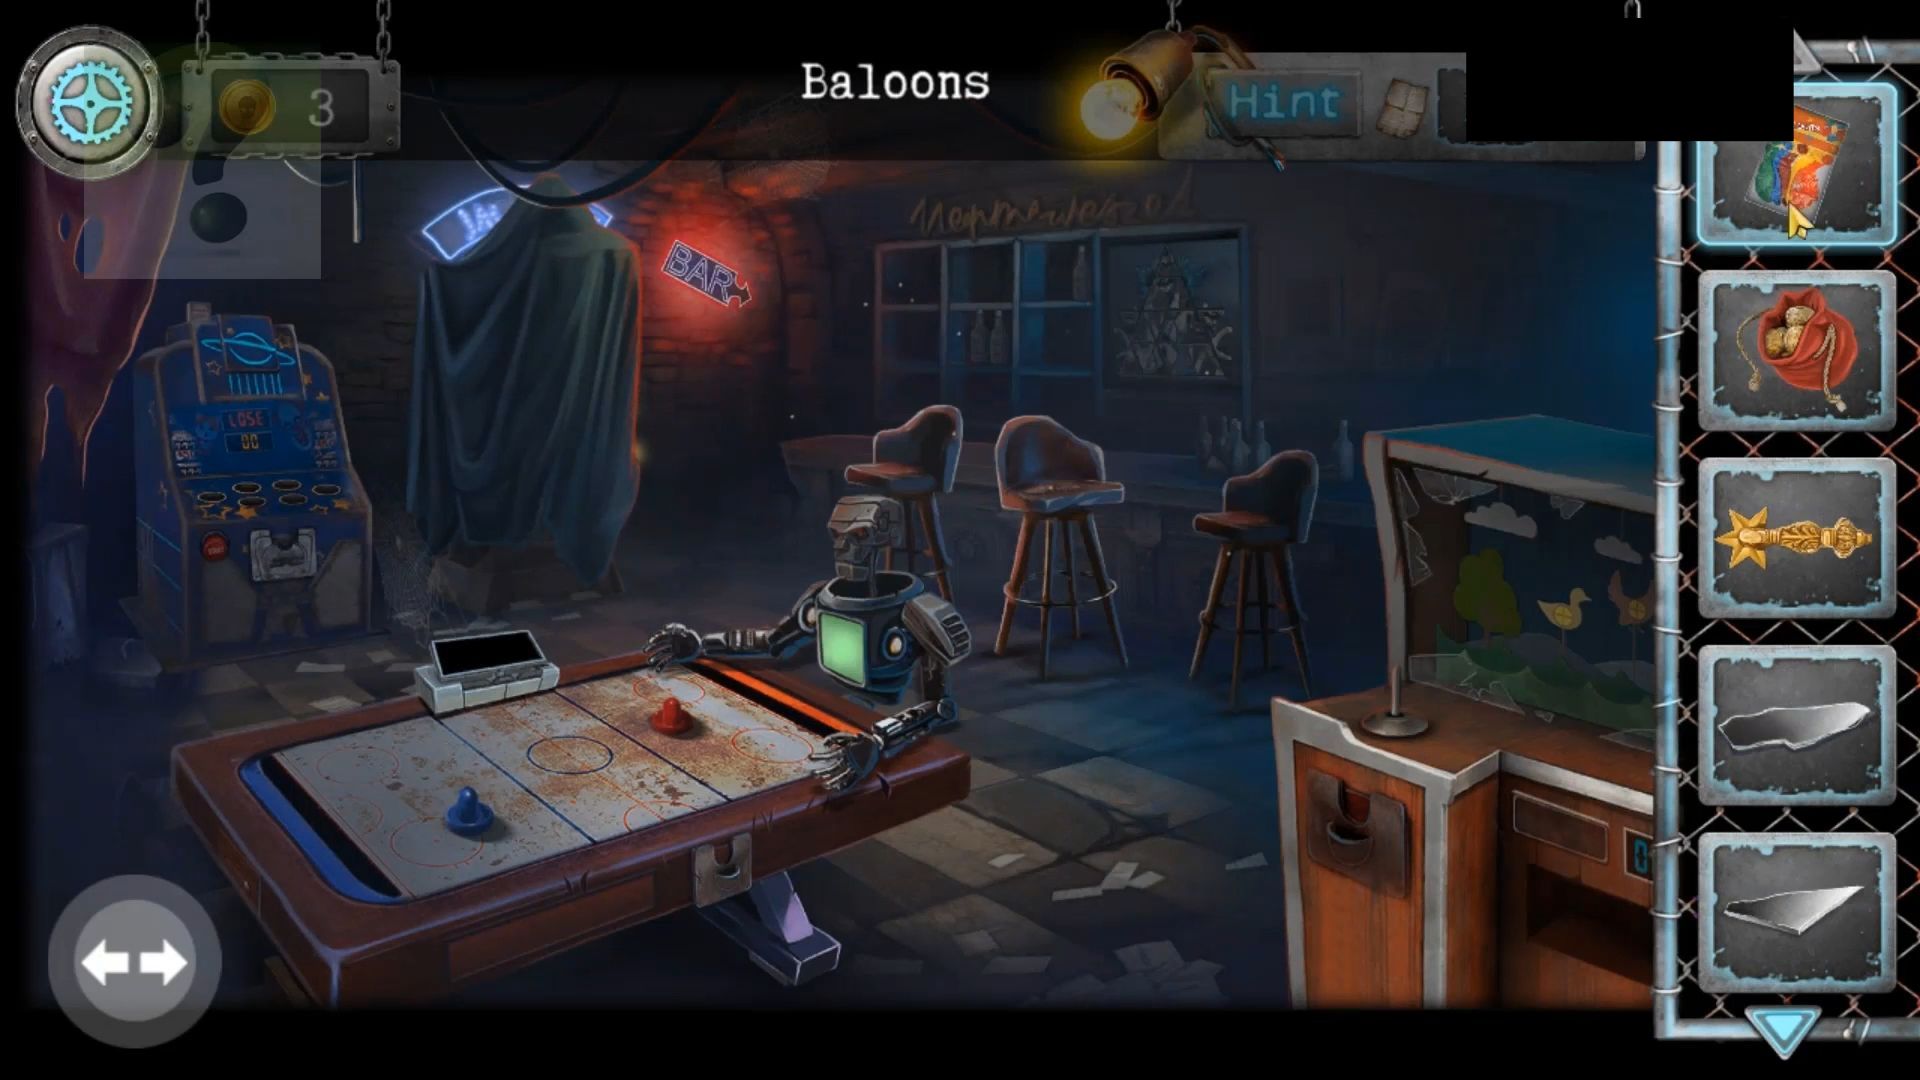
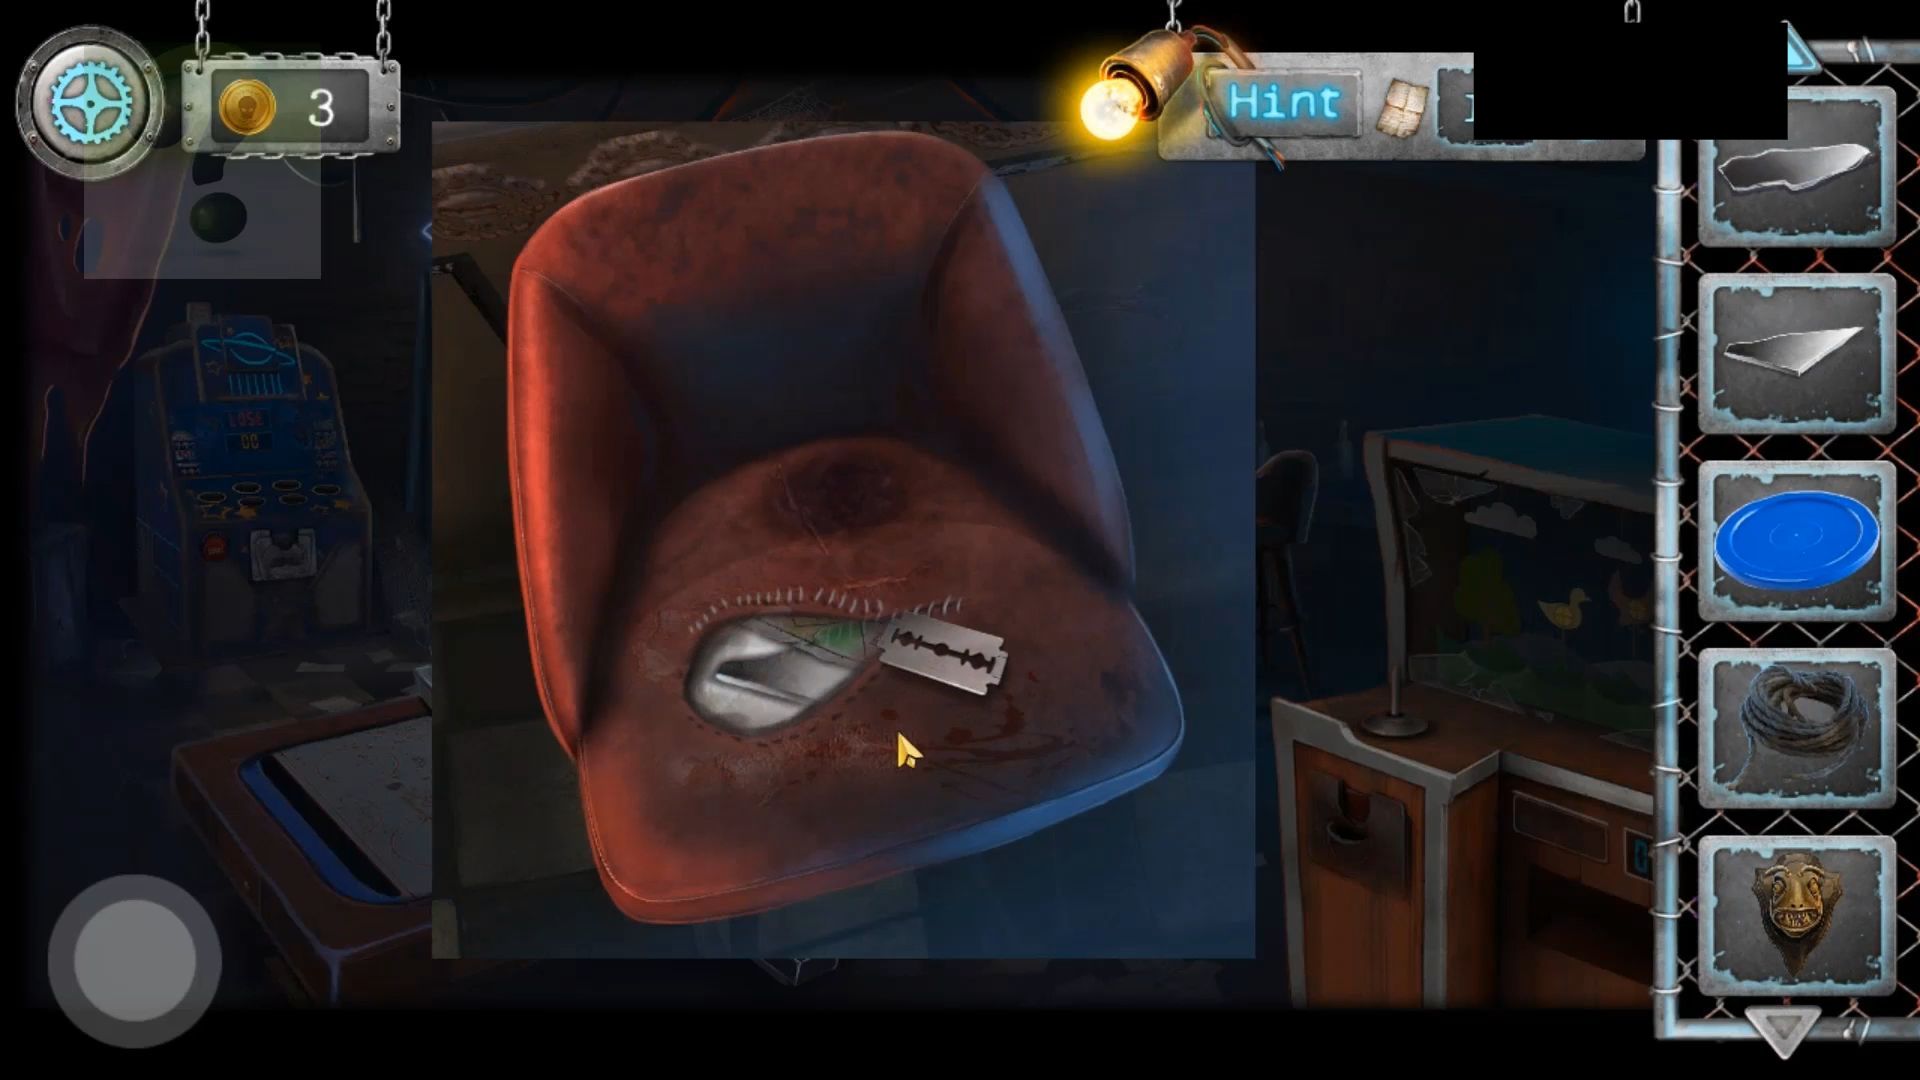
Next, tap on the red bar stools on the right. Use the razor blade to cut open the stitching, then collect a Start Scheme and another Mirror Shard. View the wall behind the bar stools to find a triangle puzzle.
Triangle Picture Puzzle
Tap pairs of triangles next to each other to swap their positions.
Hockey Game
Slide the blue paddle up and down to direct the puck towards the opponent’s side. Score 3 times in a row to win the game. Note that this game may not work well on older devices or those with slower responsiveness. After completing it, collect a red Lever from below the table.
Also, observe a display of a key on the chest of the robot, this is a clue for later.
Start Scheme Puzzle
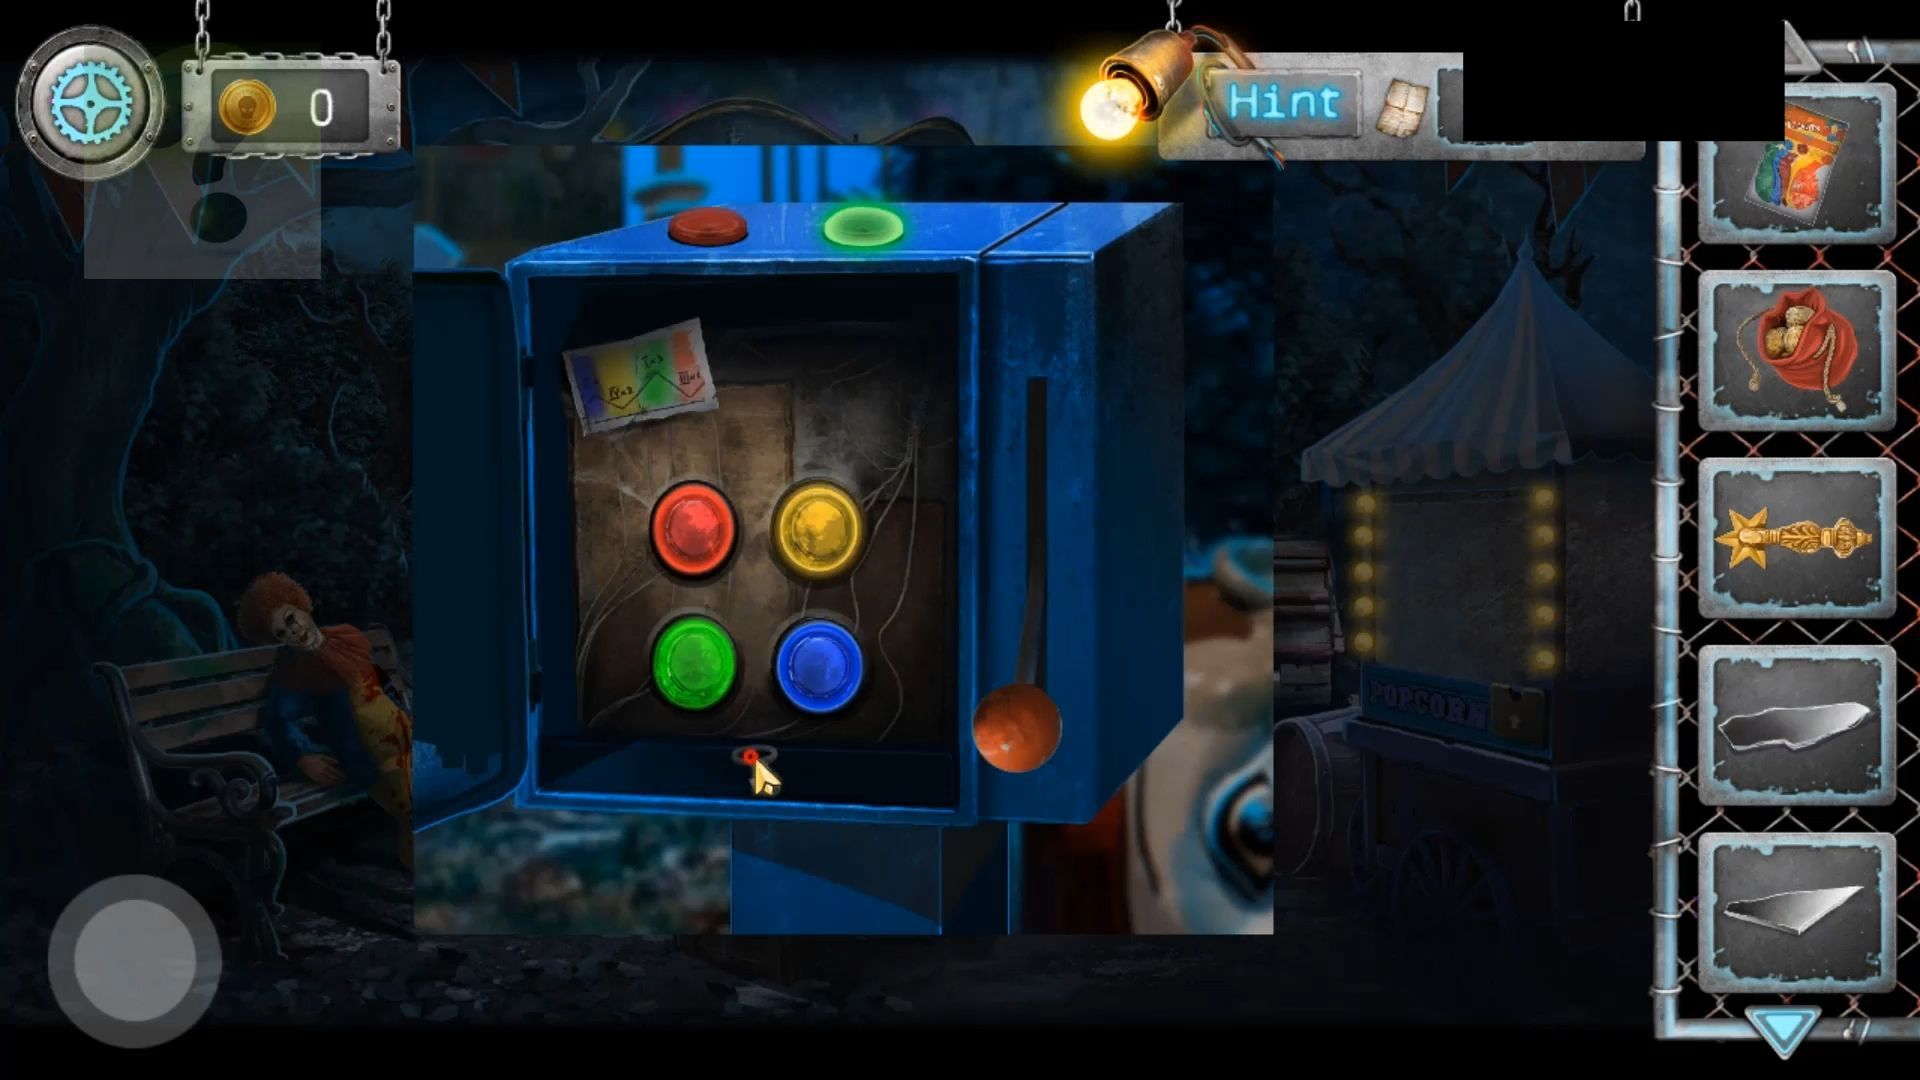
Tap the puzzle to open a door and collect an Oiler. Exit this room and go back to the tree on the left. There’s a blue control box on the path in front of the gate. Use the key with a horse to open it. Look inside and add the Start Scheme and the red Lever. The paper scheme has 4 colored sections that match the colored buttons.
Each section has a Roman numeral and a number. Start with Green (Roman Numeral I = 1) and tap this 3 times. Then continue the sequence: Green x 3, Blue x 1, Red x 1, Yellow x 2.
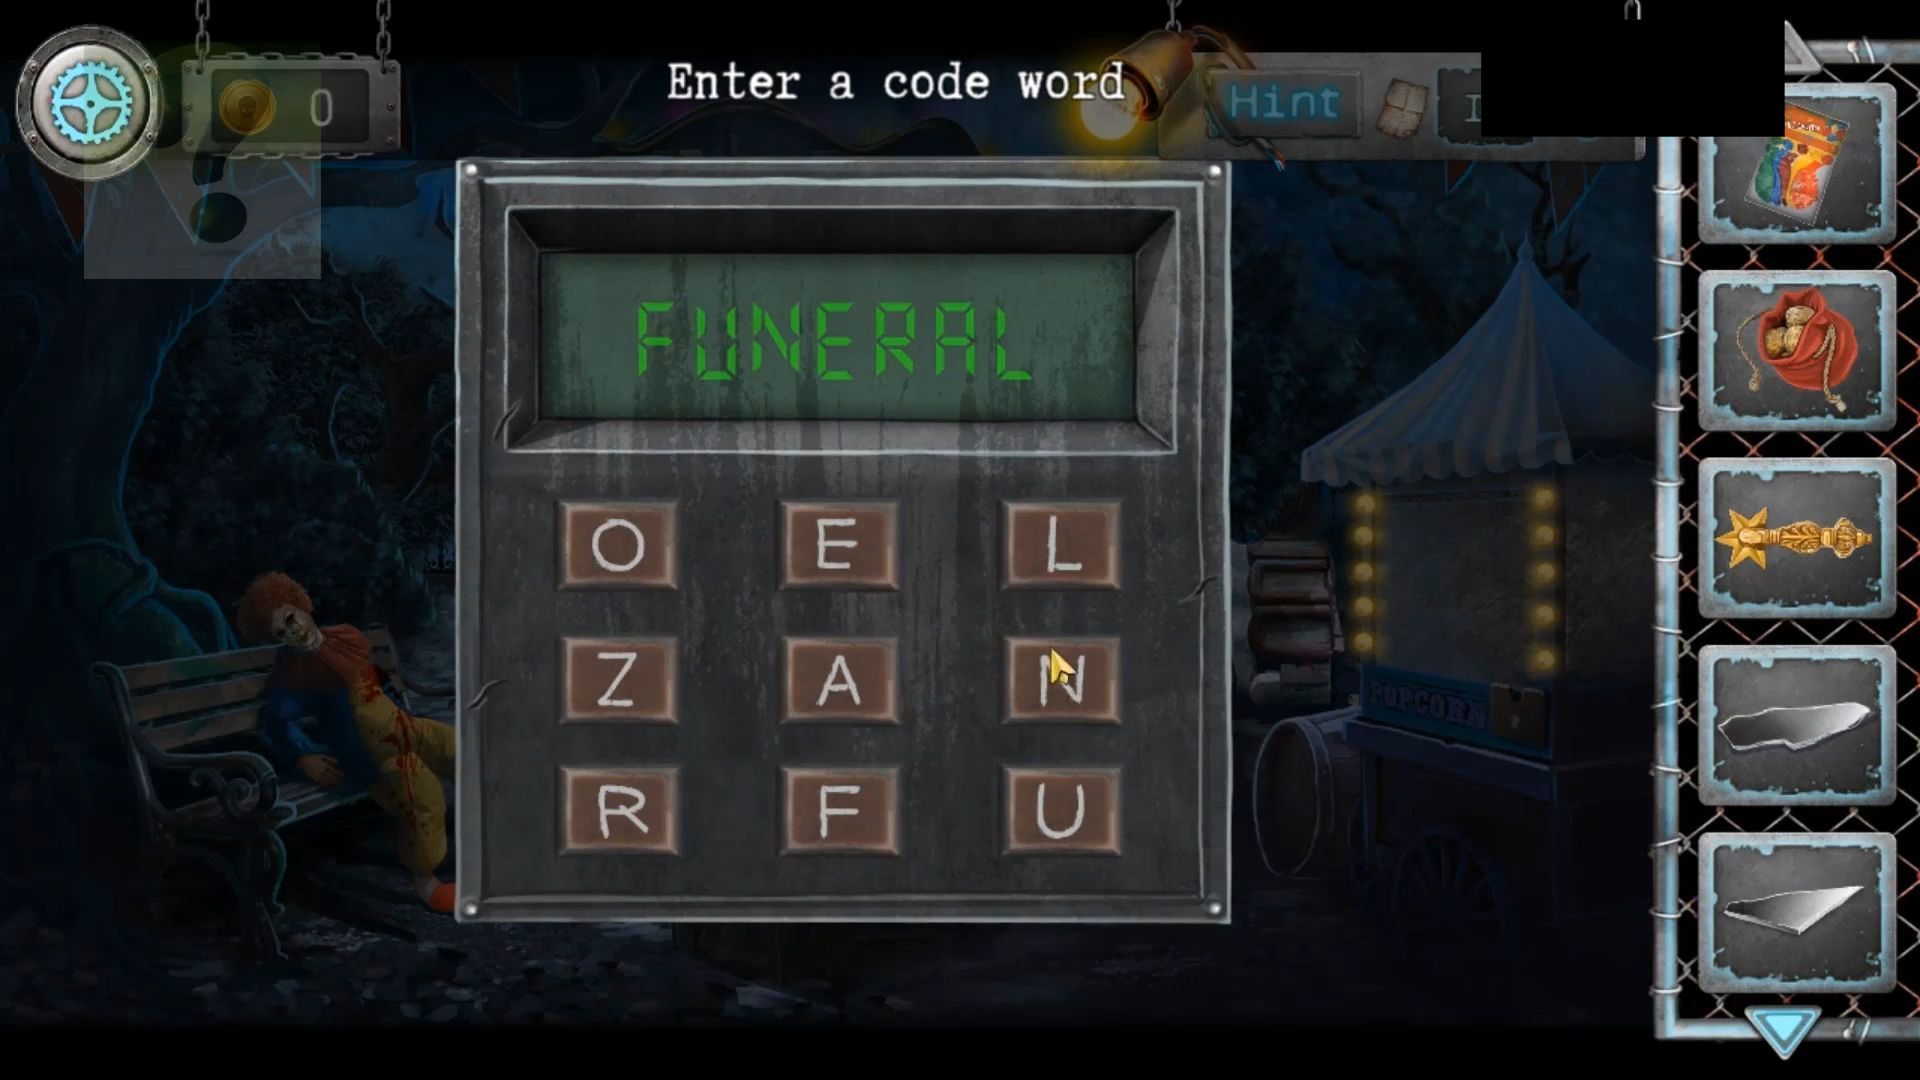
Tap the lever to turn on the power, and pick up a Small Key. Now, see that the merry-go-round is working. Tap it to view the sign for a clue and look at the gun case on the ground. Use the small key to open the panel on the top. You now need to enter a code word, the clue is the sign on the merry-go-round.
Follow the order in which the letters light up (FUNERAL). With the case open, collect a Toy Gun and a Start Button.
Explore the Amusement Park, and play old games to find items and clues. Keep going through the Park to see if you can find a way out. Go back to the arcade room and use the Toy gun you just collected on the shooting game on the right side.
Shooting Game
Insert a coin from the pouch of coins, then press start to begin. Move the crosshairs around on the screen and tap on the gun to fire. You have 5 shots to hit the 3 moving targets. There is a delay, so you need to anticipate the movement of the targets. Once done, you can collect a Creepy Eye from the machine. Also, observe 3 numbers on the targets as clues.
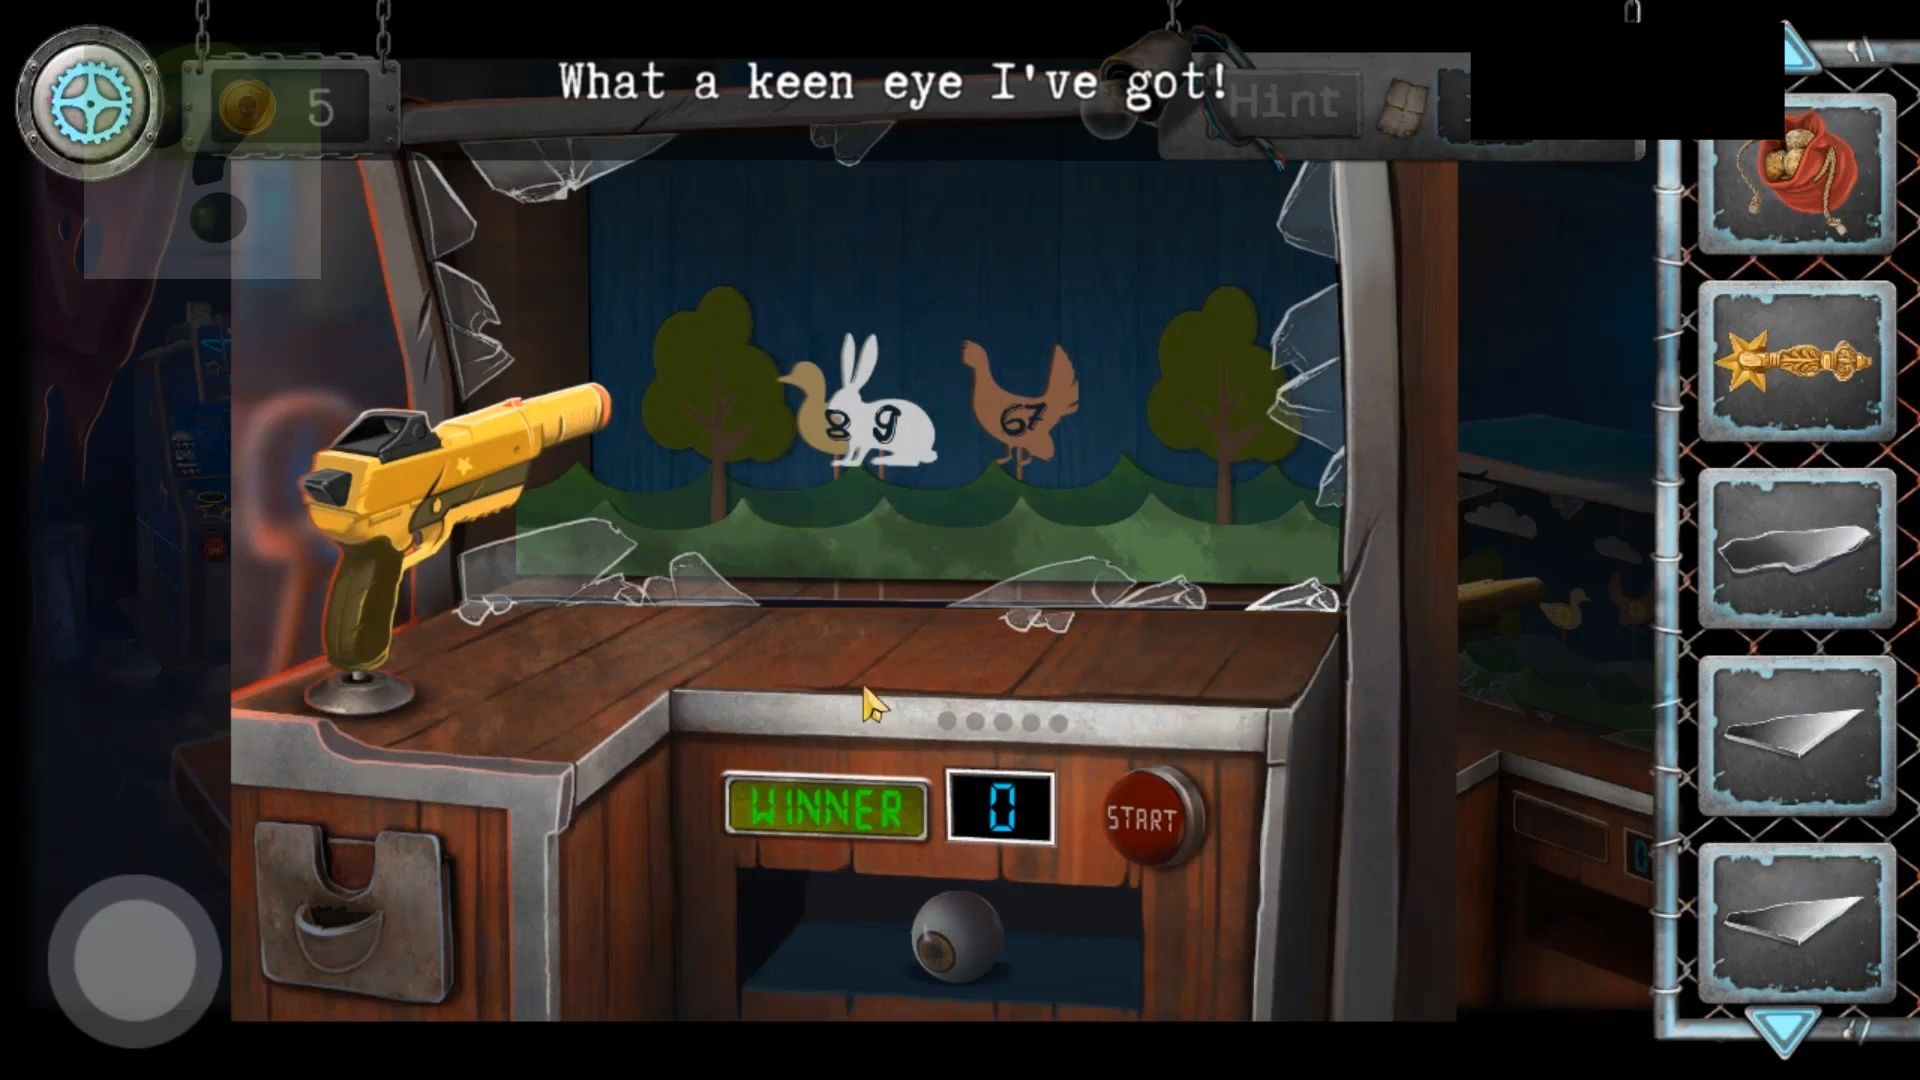
The paper clue tells you to multiply ducks by bunnies and add on capercaillies (chicken). The clues from the shooting game give you 8 x 9 + 67 (139). This opens a cupboard, and there is a handle for the pump. Collect a light bulb from inside the door, then use the balloons on the hose at the top. Tap and hold on to the red handle to inflate it. Be careful not to overinflate it.
Once it is ready, use the rope on the balloon, and it will be tied up for you. Repeat this two more times until there are three balloons.
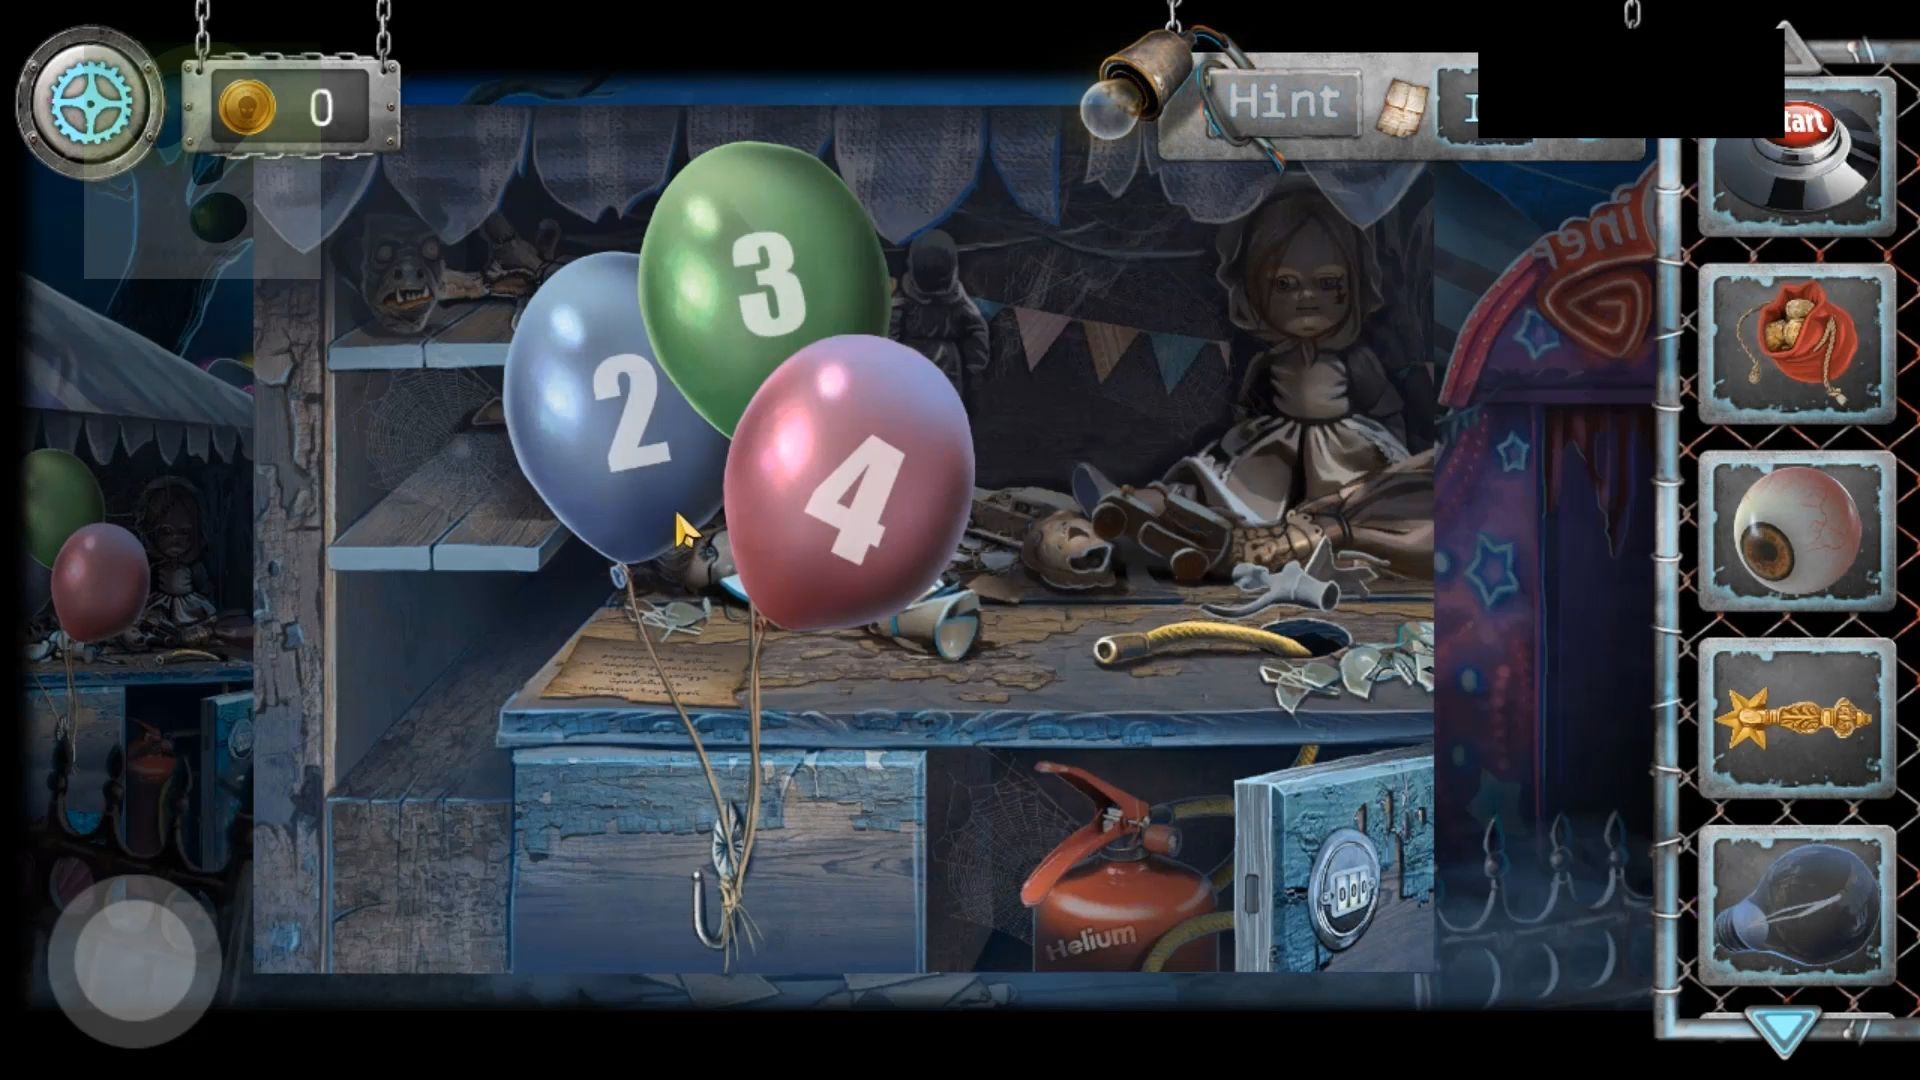
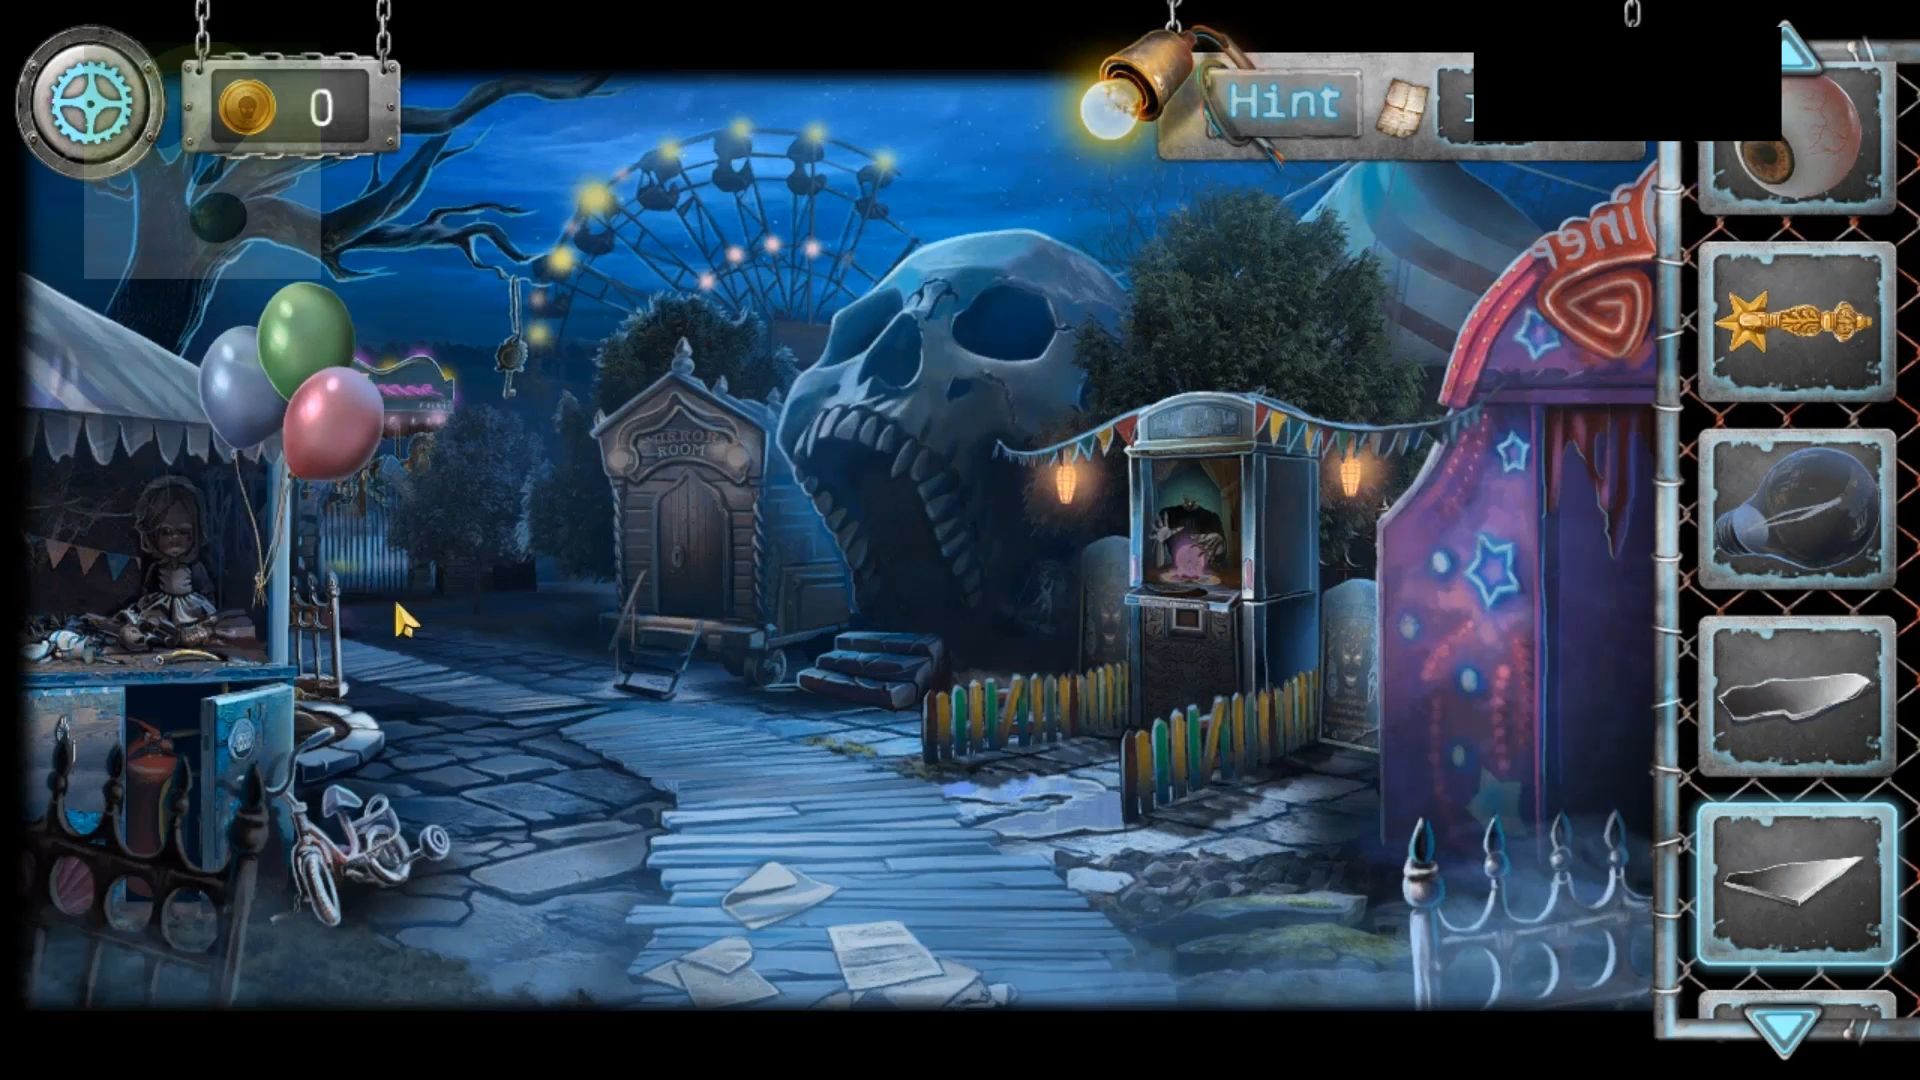
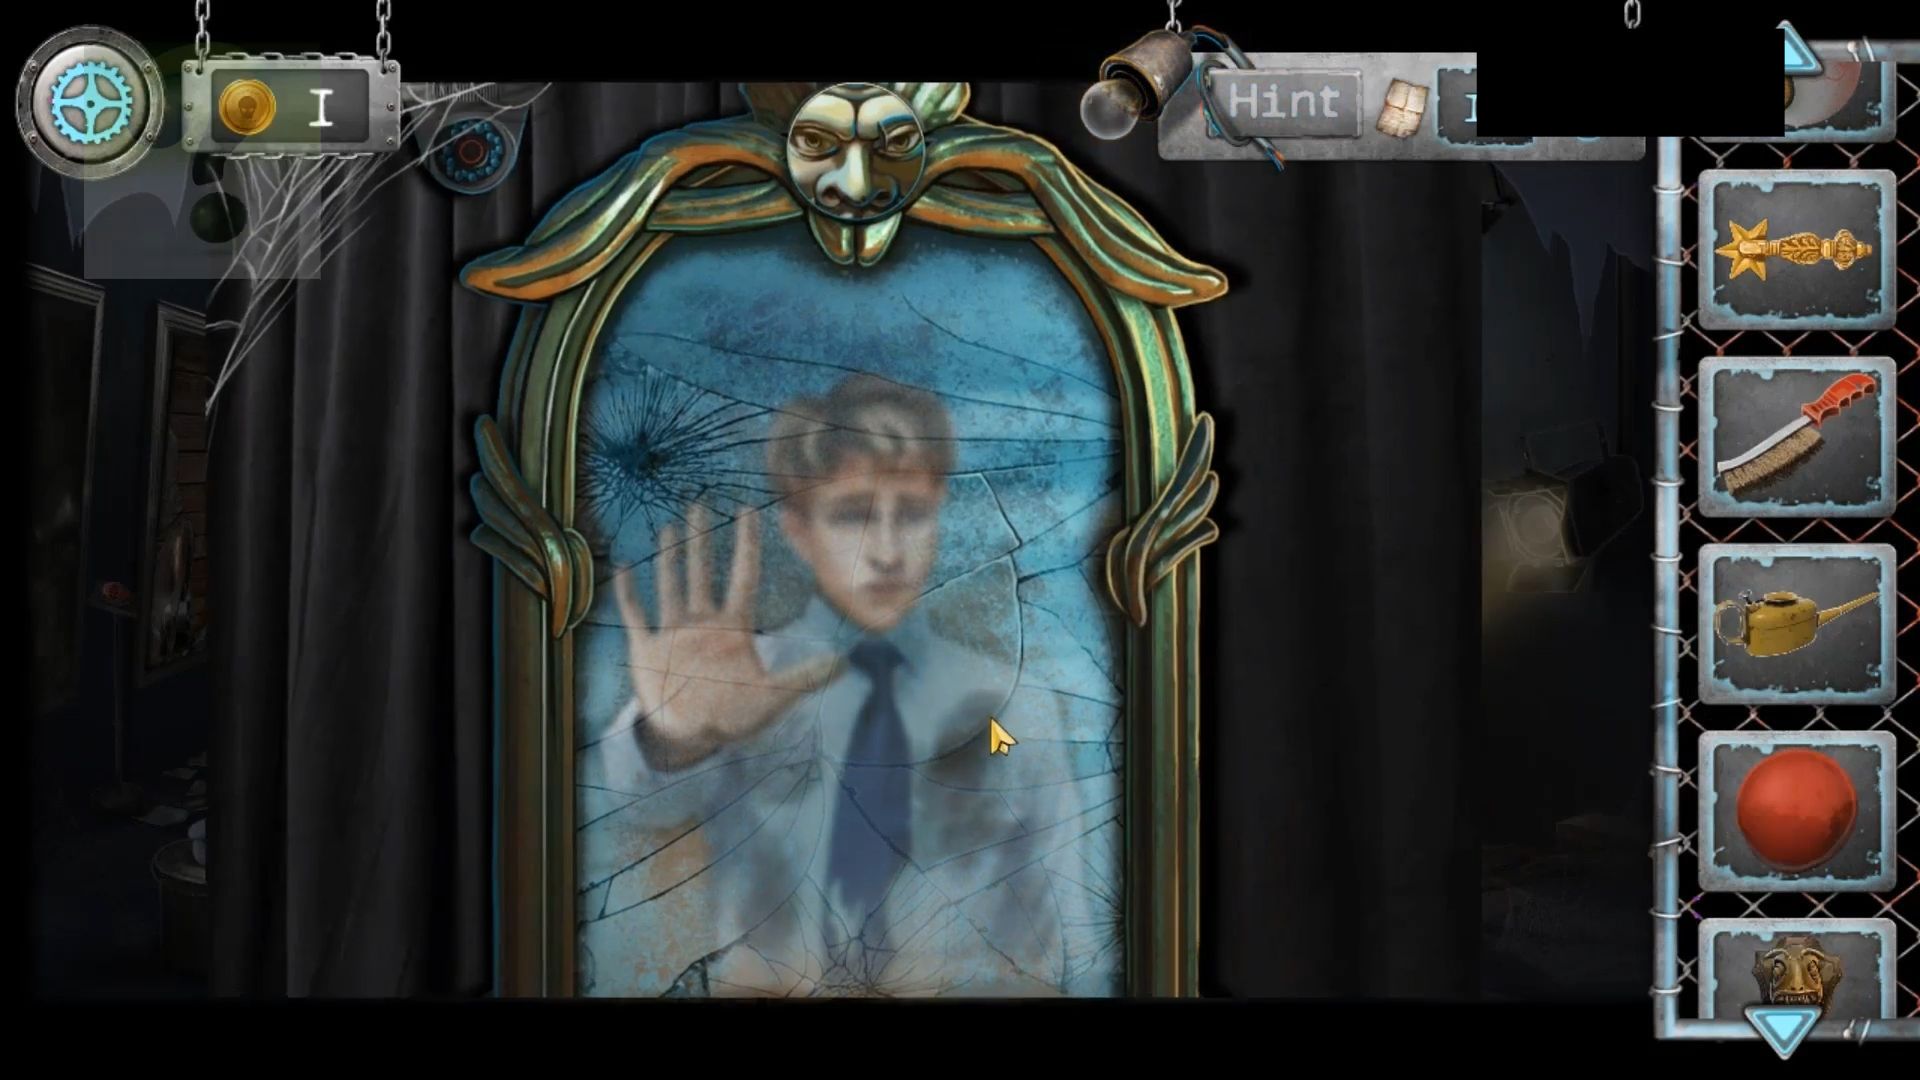
Step back from this view and then tap on the Balloons on the left side to release them. A mirror key will drop for you to collect. Now, view the wooden door to the left of the Skull, which says Mirror room above it. You will see a keyhole. Use the mirror key here to place it. This is a puzzle.
Mirror Key Puzzle
To open the door, tap the arrows to move the key in the right direction. The clue for this is in the Arcade room on the Robot. Watch the movements to the left or right of the key on the robot’s chest. Then copy those. Left, Left, Left, Right, Right, Left.
Mirror Room
You can now go into the Mirror Room; it’s dark. Collect the Cute Puppy toy from the floor, then tap the mirror on the floor that the light is pointing to, to shine more light on the room. After that, tap on some shelves on the wall.
Move the items around until you pick up a Cute Bunny Toy. Then, add the light bulb you have to the spotlight on the upper right. In the room, you can now see a large Chest on the left. Collect the Metal Brush from it and notice the clue images on the front (Carrot Fish Bone).
Chest Puzzle
You have to put all the eyes into the mouths. Tap a mouth to move the eye next to it into the mouth. The eyes will move each time. You may need to reopen mouths and take the eye out again to keep it moving until you can get them all in. Once done, you can collect another light bulb, a Little Kitten Toy, and a Token. Place the light bulb in the spotlight by the Chest to light up more of the room. You can now tap on the boxes in the center of the room to see a puzzle.

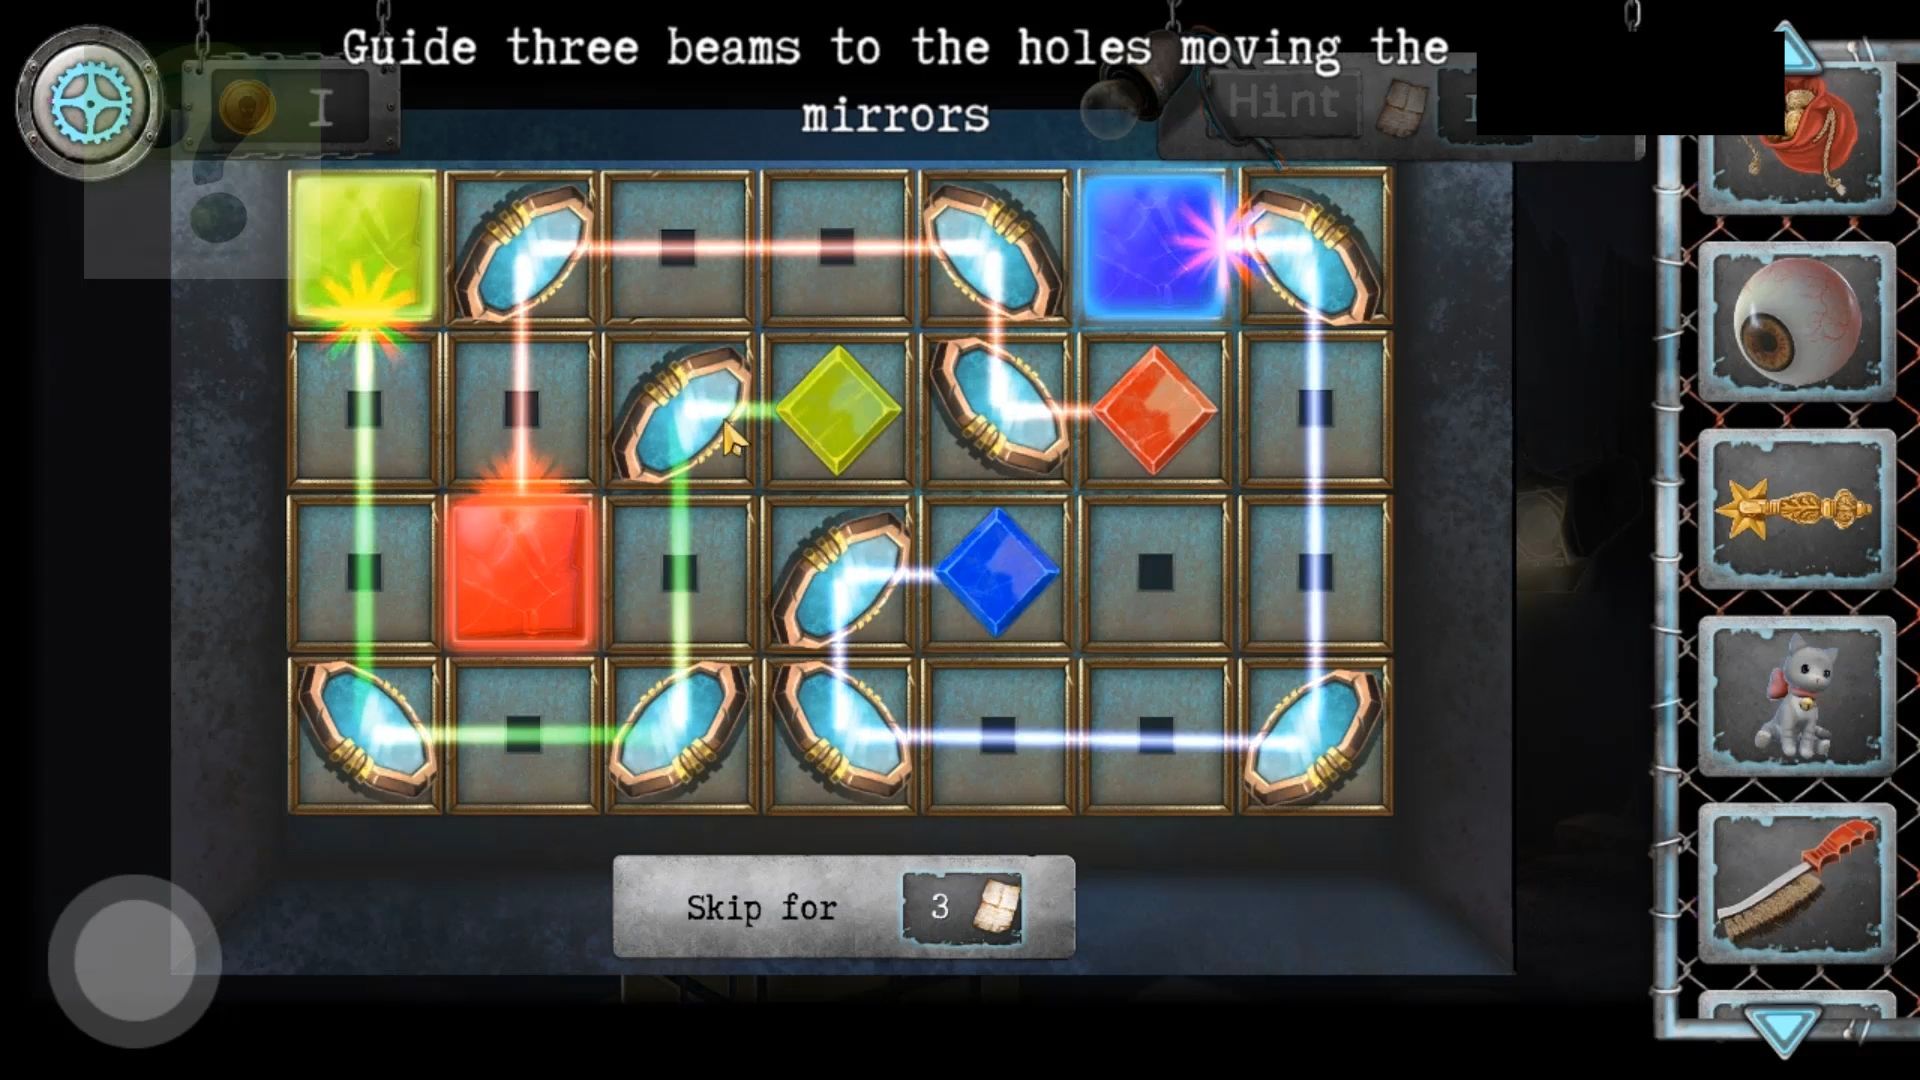
Mirror Puzzle
Drag and place the mirrors in the grid. You need to guide the 3 colored lights from the source (colored diamond shapes) to the correct colored square. The light beams cannot cross.
Now, you have the chance to explore the entire room. Simply touch the left side to reveal three doors and three stools. Arrange the three adorable toys on the stools in the right sequence, as indicated by the hint on the chest.
Next, adjust the three handles using the clue also found on the chest. Match Carrot with Rabbit, Fish with Kitten, and Bone with Puppy. Make sure the Carrot points up, the Fish points down, and the Bone is in the middle. After that, press the Fun button to open the doors and enjoy a surprise. As a reward, you can collect a Clown nose and a red Hammer.
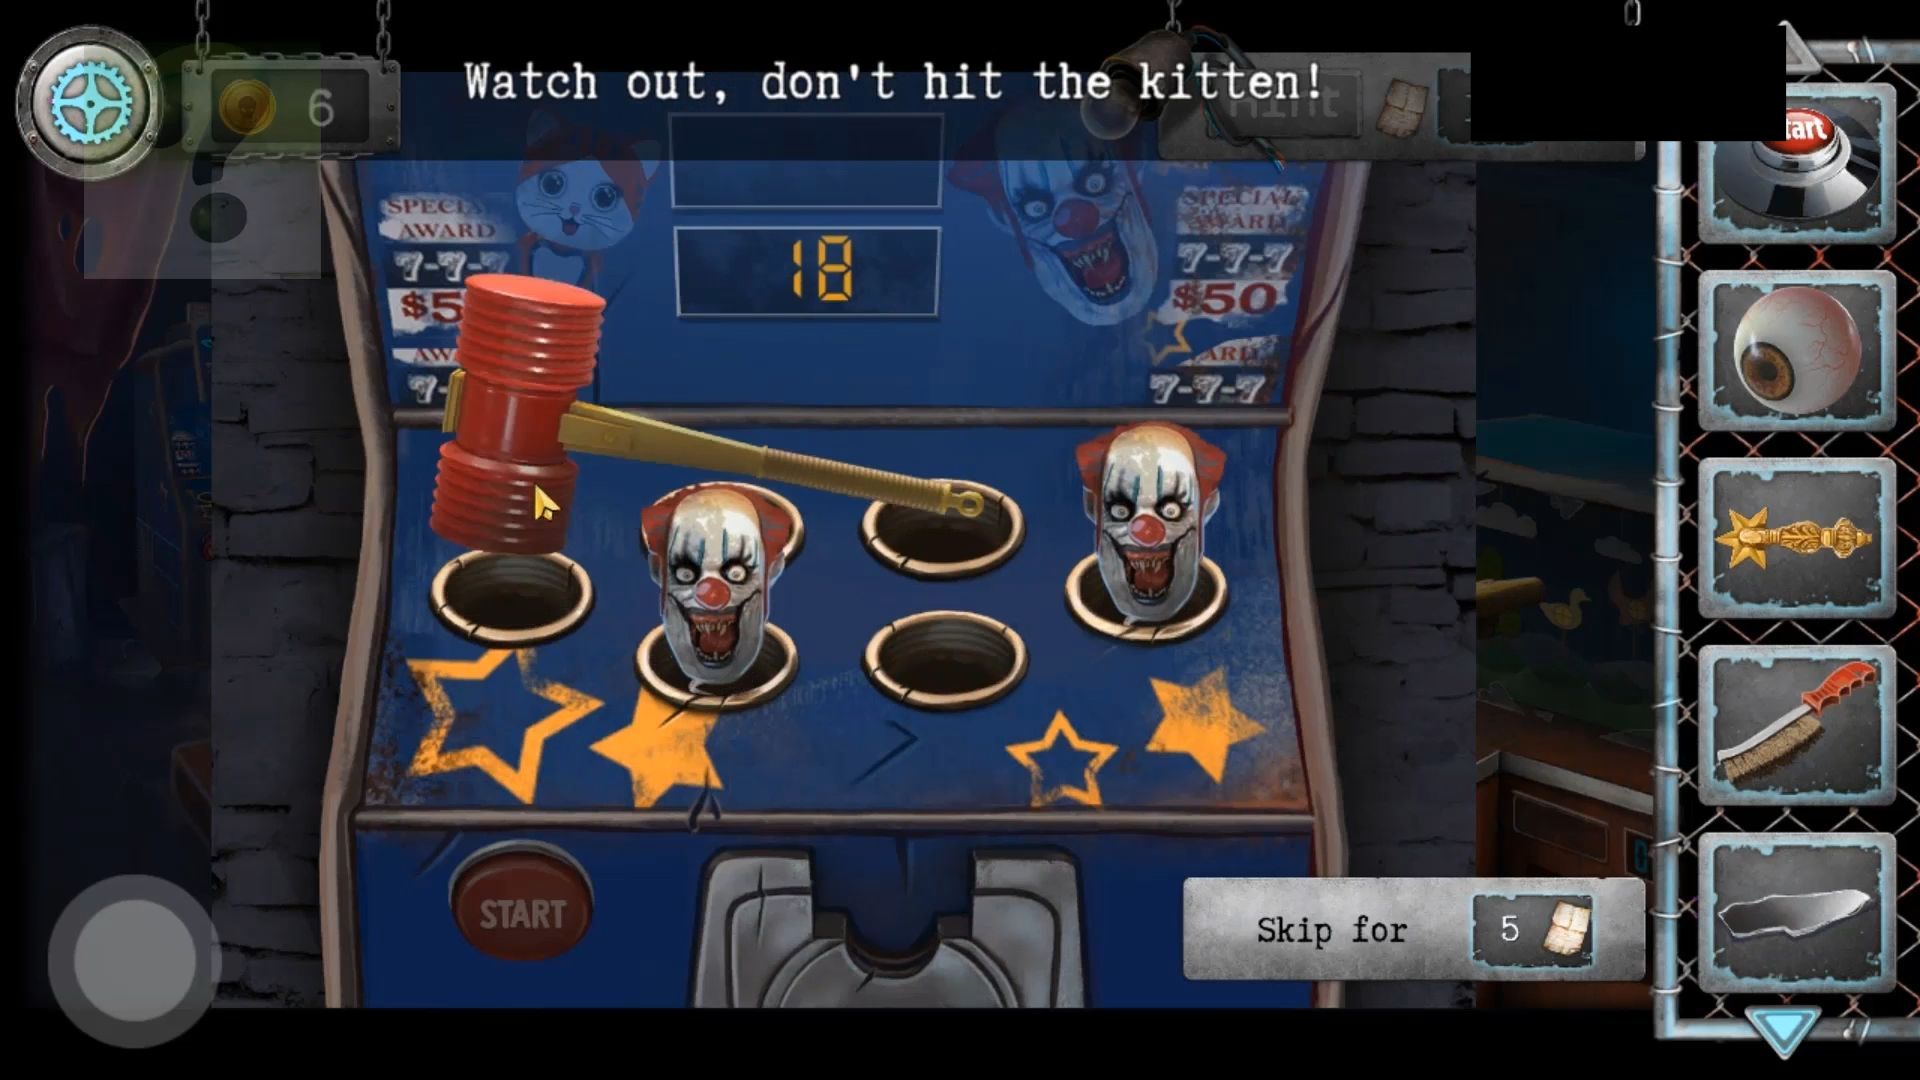
Go back to the Arcade room. In the back left corner, there’s a blue machine you can check out. Put the Hammer in it and use the bag of coins to begin playing the game.

Hammer Game
Touch the clown heads with the hammer to hit them. Avoid tapping on the kitten heads. When your score reaches 20, the game will finish, and you can then end it.
Take away the broken parts until you can gather another Creepy Eye and one more Mirror Shard. Return to the Mirror Room and look at the cracked mirror on the back wall. Put the 4 mirror shards you have to finish it, and something scary will happen. After that, you’ll get the Creepy Face part. Leave the room again and tap on the Skull in the Park to reveal a door puzzle.
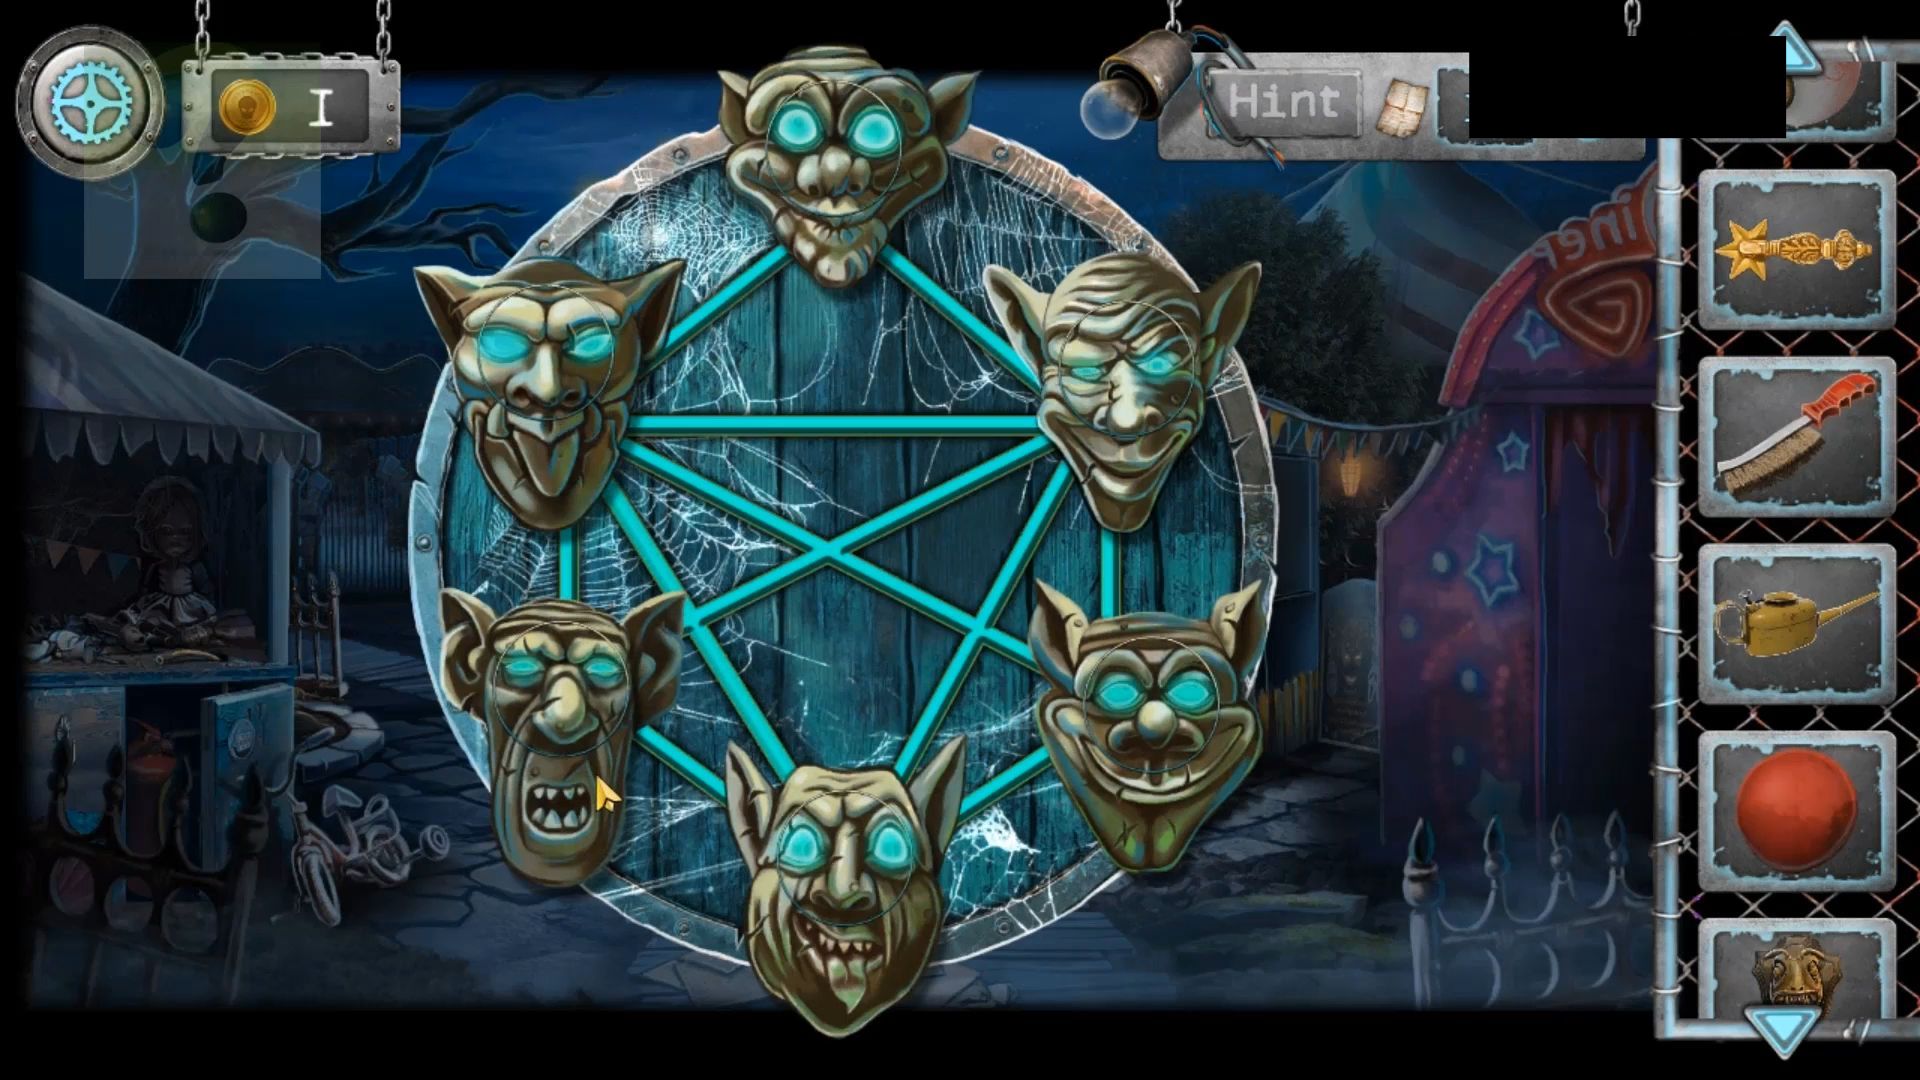
Creepy Face Puzzle
Place the Creepy Face on it to start. Touch pairs of faces connected by lines to switch them around. Move all faces to the right spots to finish the puzzle. After you finish, you can then reach a keyhole.
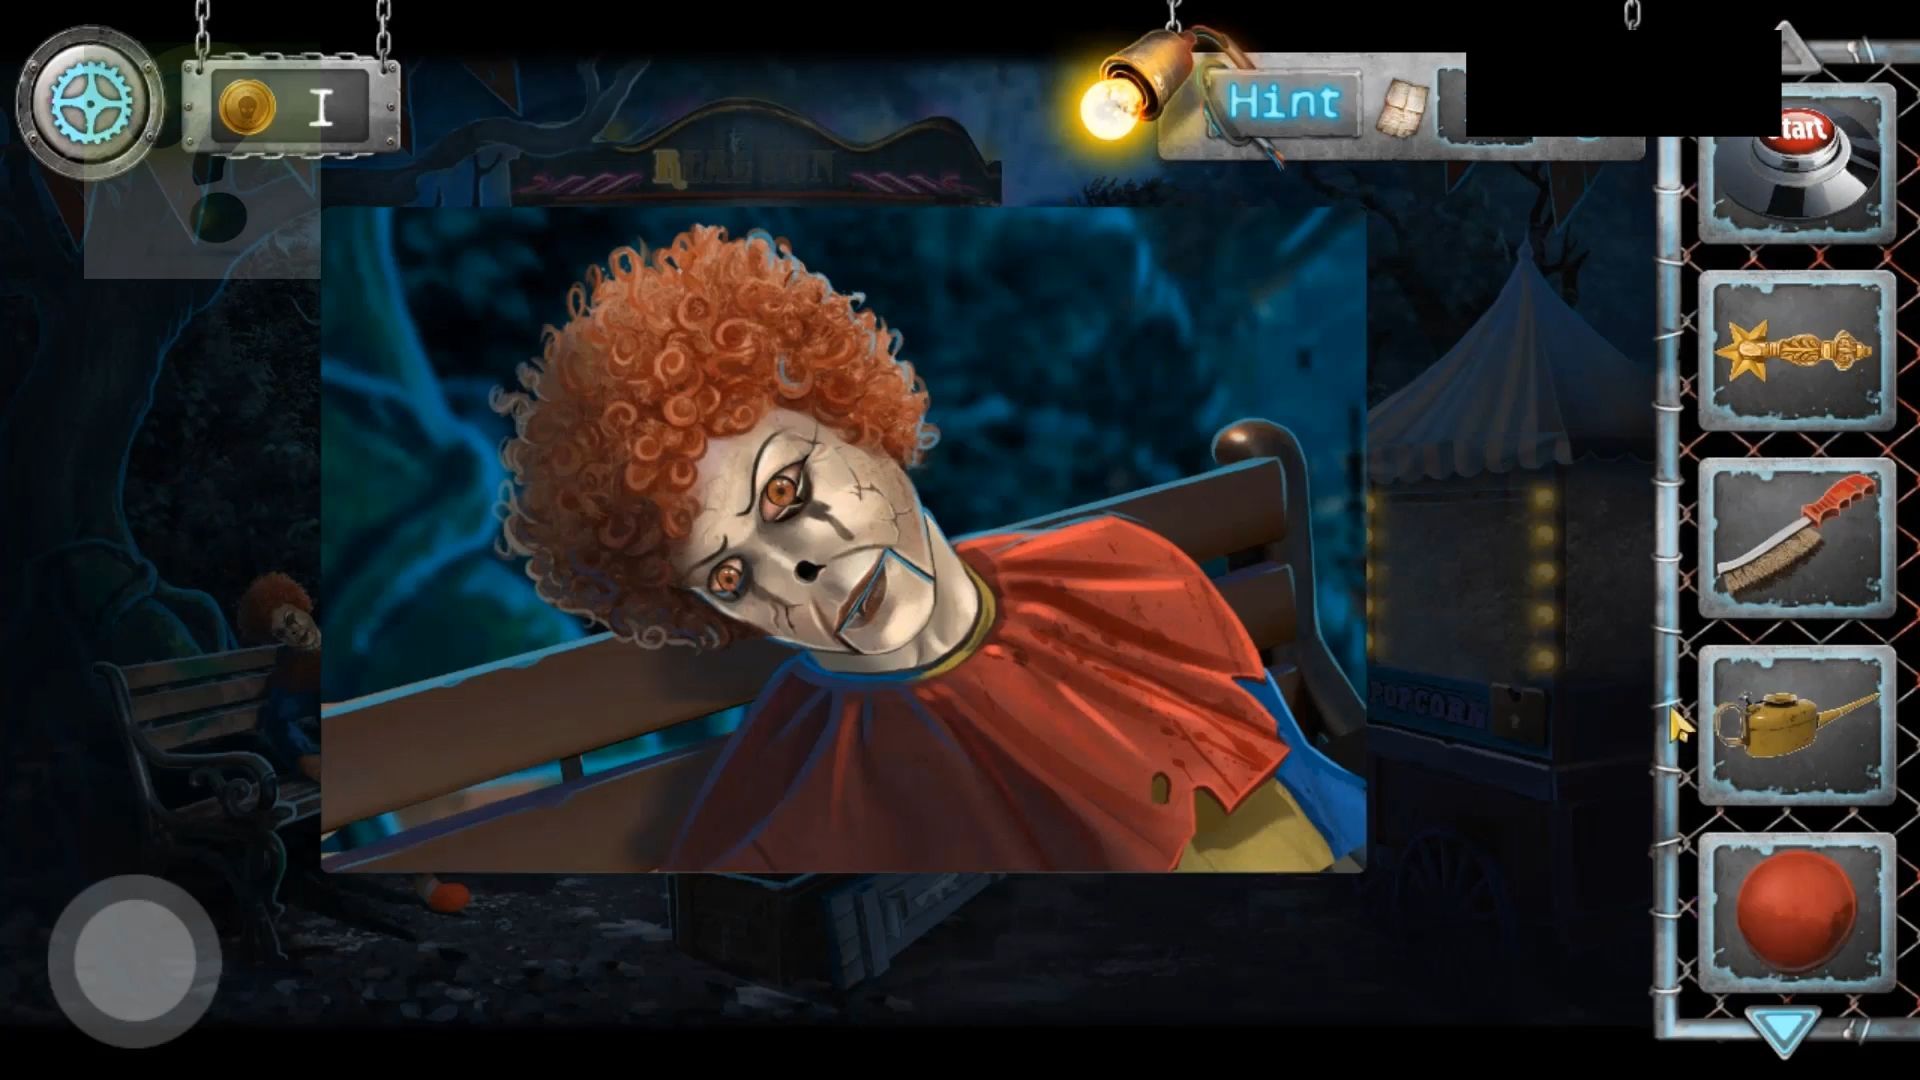
Now, go out and head to the tree on the left with the Clown mannequin on the bench. Put the ginger wig, the Clown nose, and then the 2 creepy eyes on the mannequin head. Pick up a Scary key and use it to unlock the door. Go through it to discover the beginning of a Ghost train ride.
Ghost Train
Pick up the Gas Lighter from the ground, touch the train, and you’ll notice the wheels are stuck. Clear away all the stones from the track, and you’ll discover a Radiotelephone Handset. Use the metal brush to clean the wheels and use the Oiler on the wheels to free them up. Now, go back and tap on the Level to get the train moving; this will break through the barrier at the end.
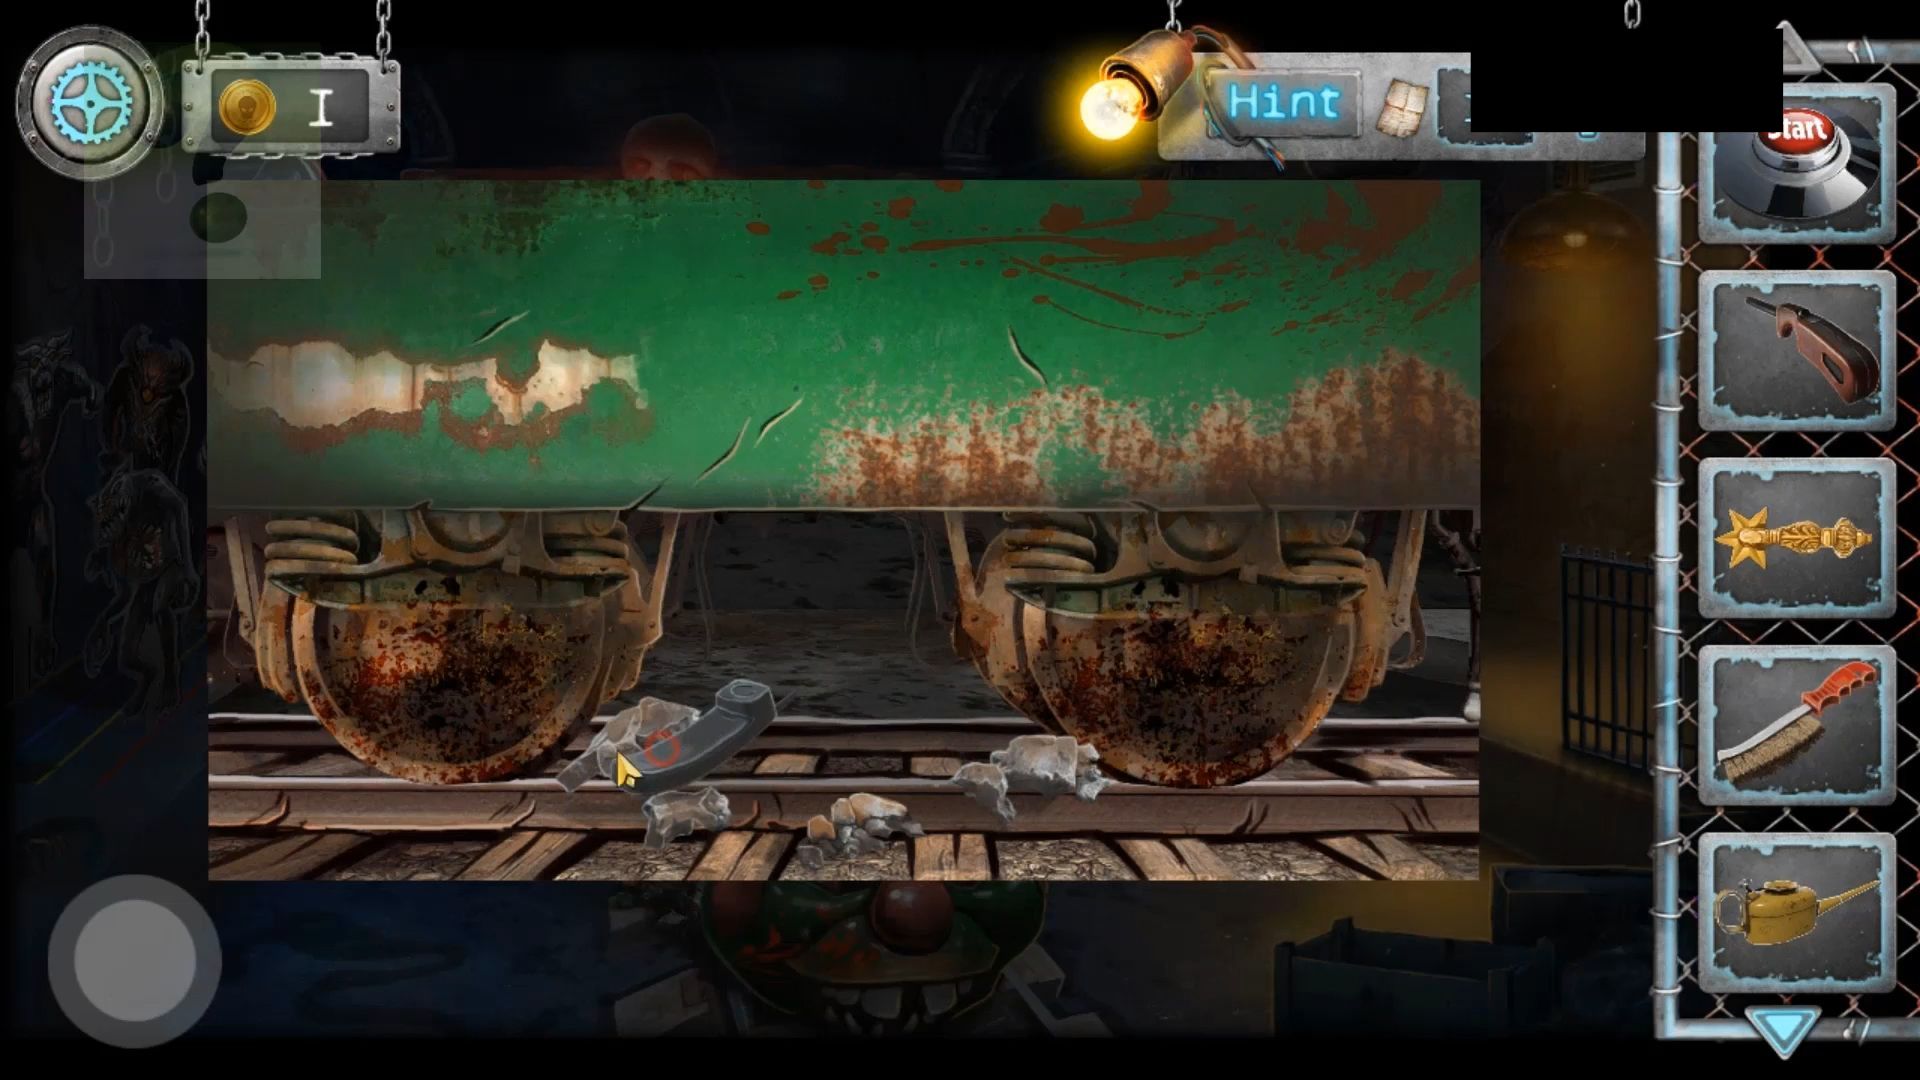
Pick up the Gas Lighter from the ground on the right. After that, tap to see a monster game on the wall on the left side.
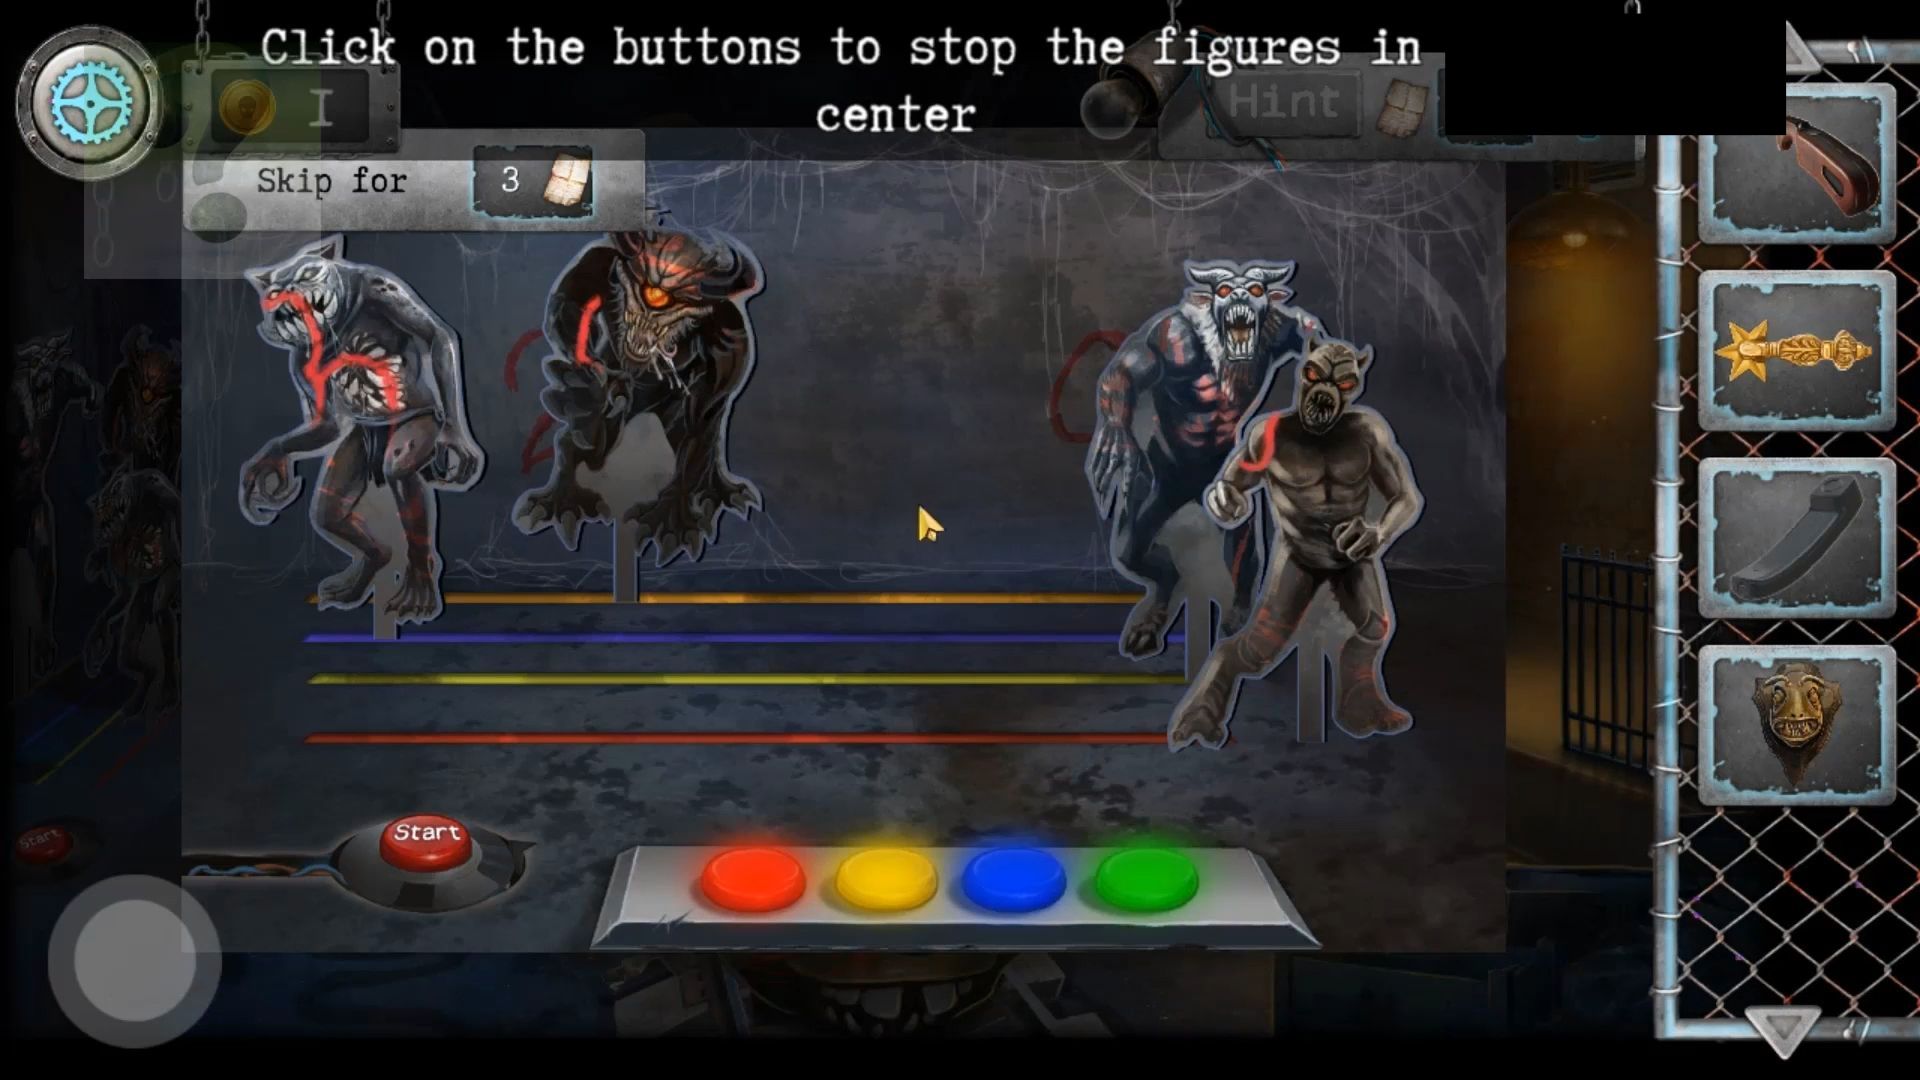
Monster Game
Press the start button to begin. After that, tap the colored buttons to stop each monster from moving. You can only stop them one by one. Try to coordinate their movements so they all reach the middle at the same time. When you succeed, they will align to show a number.
If that’s challenging, you can also try figuring out the single number written in the middle among the others on the wall.
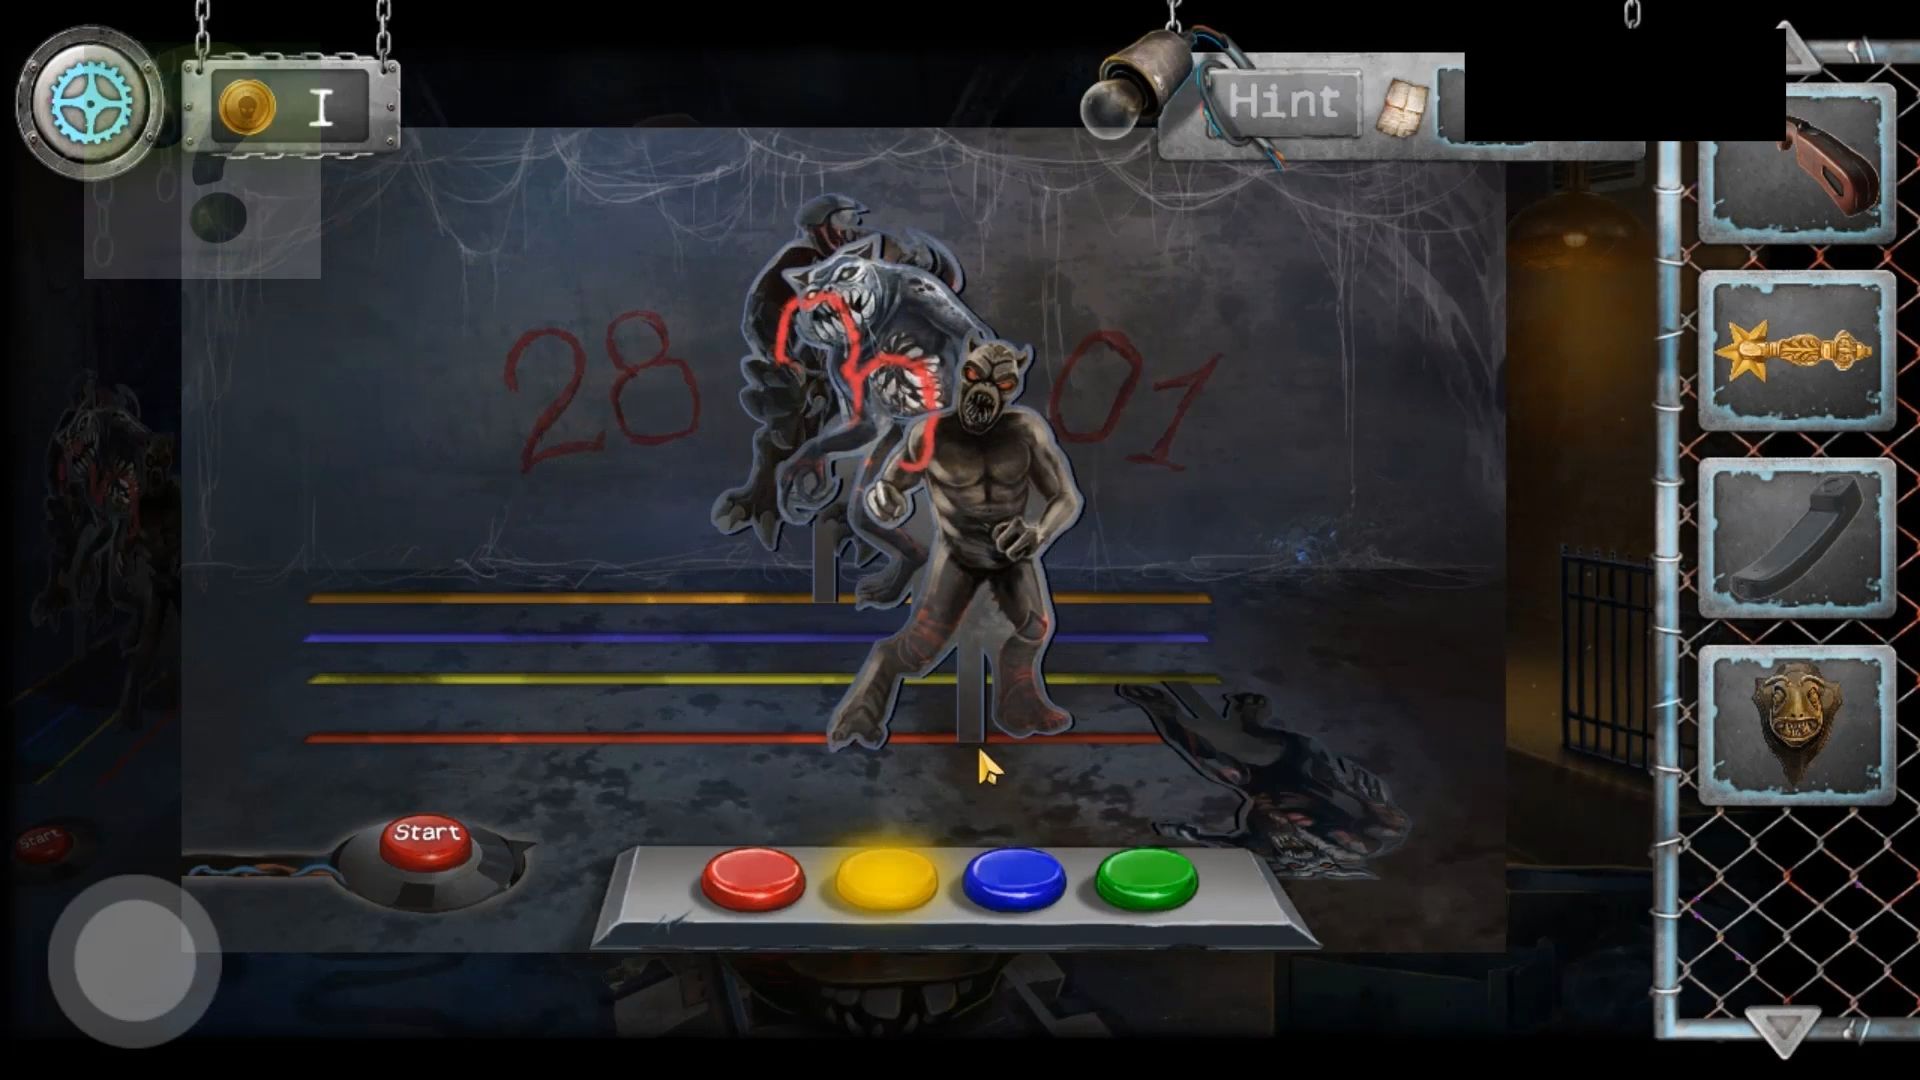
Now, check out a dark doorway in the back right of the room and use the Gas Lighter on the hanging lantern to make it bright so you can see. After that, look at the door handle panel and attach the door handle you have to it. Finally, enter the code (28301) from the previous game to unlock the door.

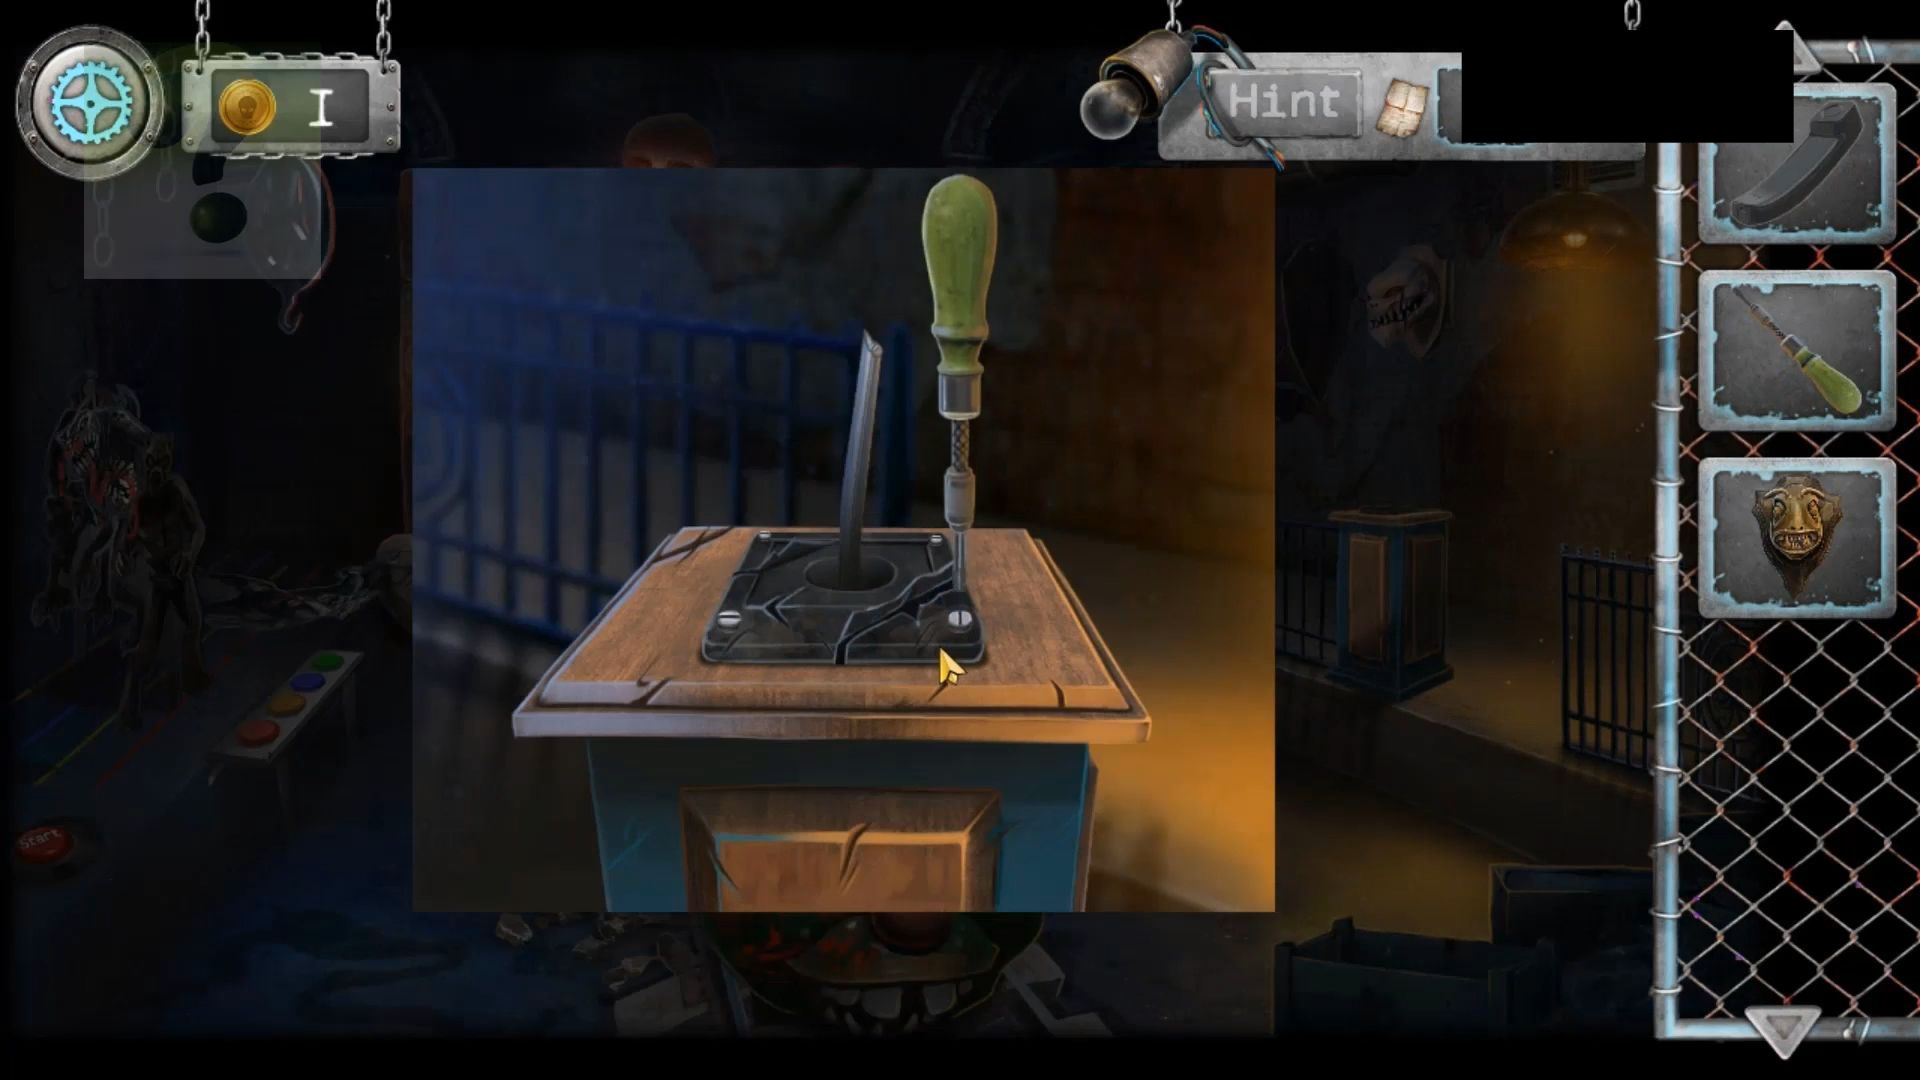
The room is on fire. Check inside and grab the screwdriver from the right. Step back and notice a broken handle on a stand on the right side of the train. Use the screwdriver to take off the broken handle, and you’ll get the Piece of Metal. After that, examine the two masks on the wall to the right. Place the Monster Head Trophy in the space.
Monster Head Puzzle
Touch the inside of the center head’s mouth to reveal a symbol puzzle. It’s divided into 4 sections. Tap the central triangle in each section to rotate and change the symbol parts. Align the parts to form the 3 symbols displayed on the monster heads.
After completing the puzzle, you’ll receive a Locker Room Key. The head on the right side will then fall. Use the Metal Piece on the glass panel behind the head to break it and get a Fire Extinguisher.
Return to the room that’s on fire and use the Extinguisher to stop the flames. Clear away the things on the floor to discover and gather a Lever. Step back and place the new Lever on the stand to the right. You can use the screwdriver to attach it.
Now, go back and tap on the Level to set the train in motion. This will break through the barrier at the end. Grab the lantern from beside the door on the right, and tap on the train to ride it through the tunnel.
Train Game
As you go ahead, monsters will show up on the left or right. Swipe to move the lantern towards them to make them go away. After that, you’ll reach a station room.

Station
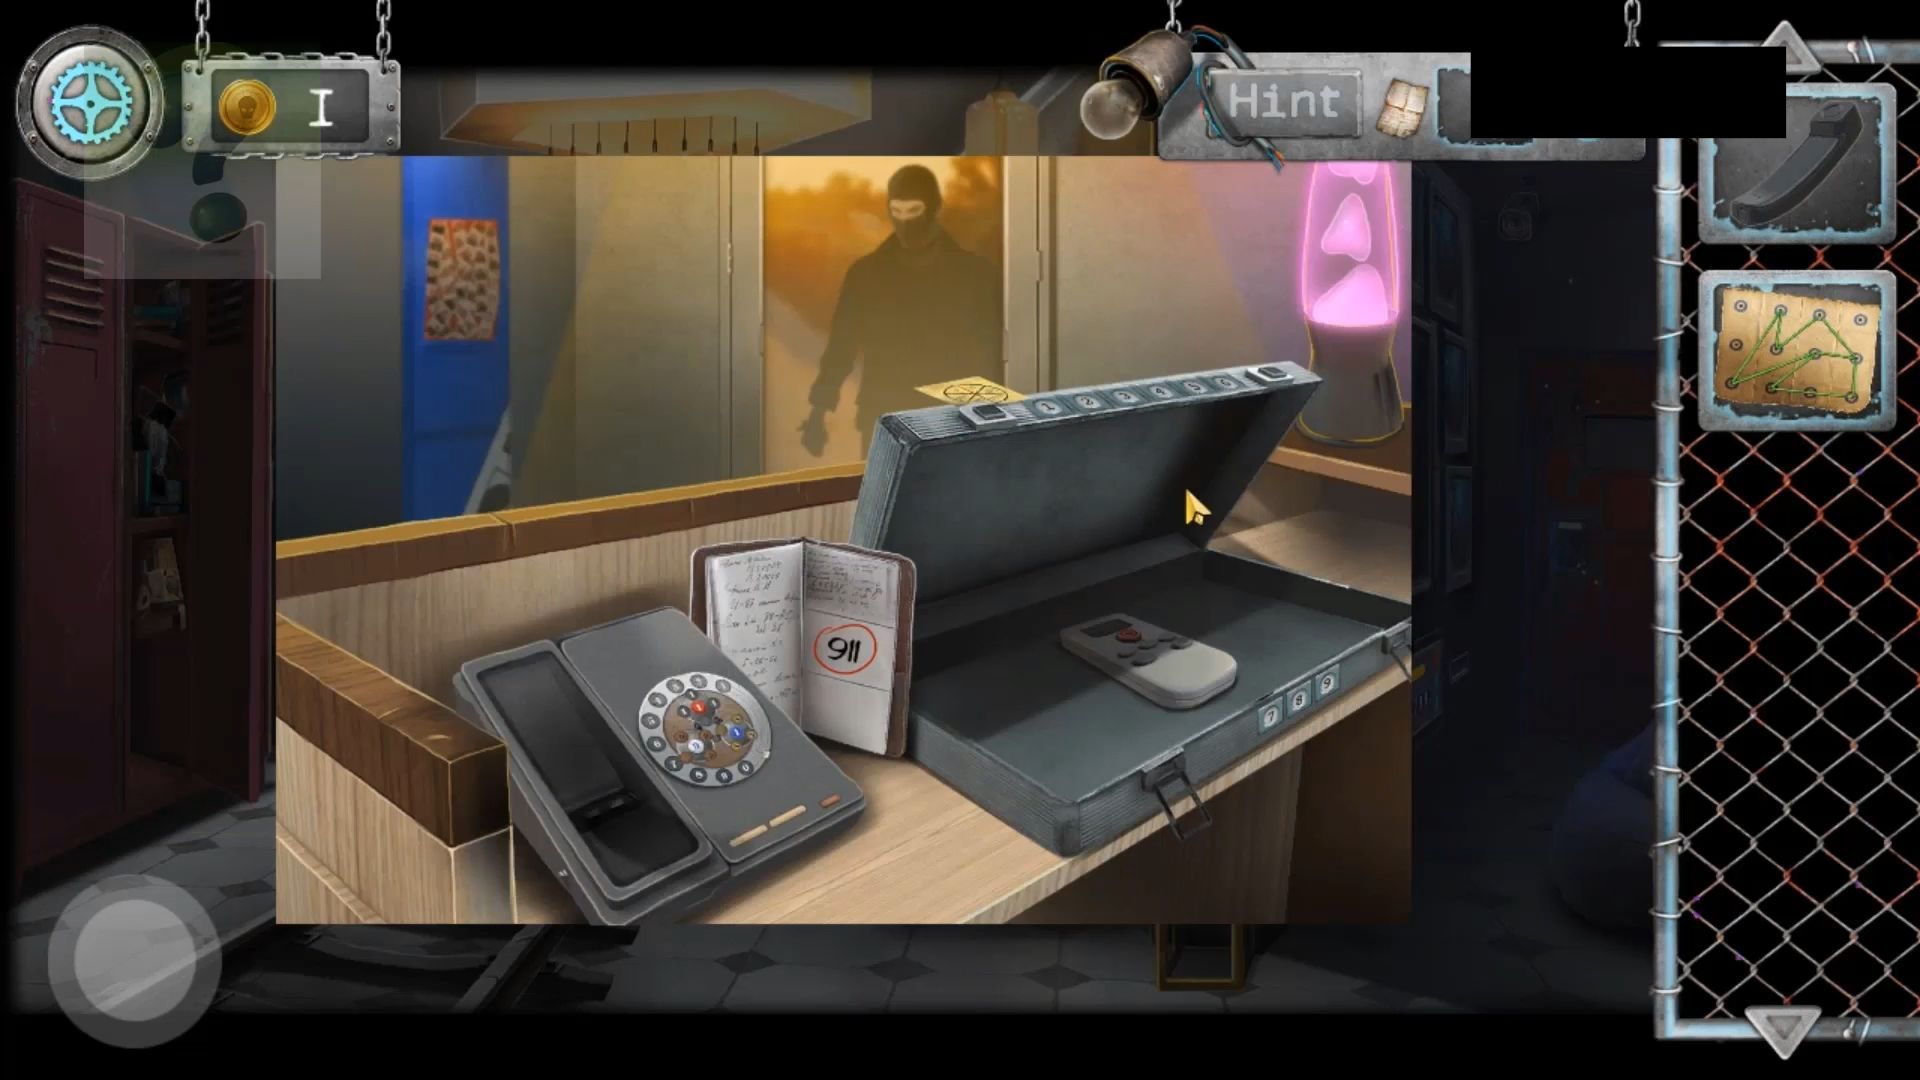
Afterward, touch the desk across from the lockers. Pick up a Crumpled Scheme paper from the floor and then check out the Red lockers on the left. Use the locker key you have to open locker number 3. Inside, there’s a Sheet with a code clue for you to collect. Put the handset on the phone to the left and look at the phone dial for a puzzle.
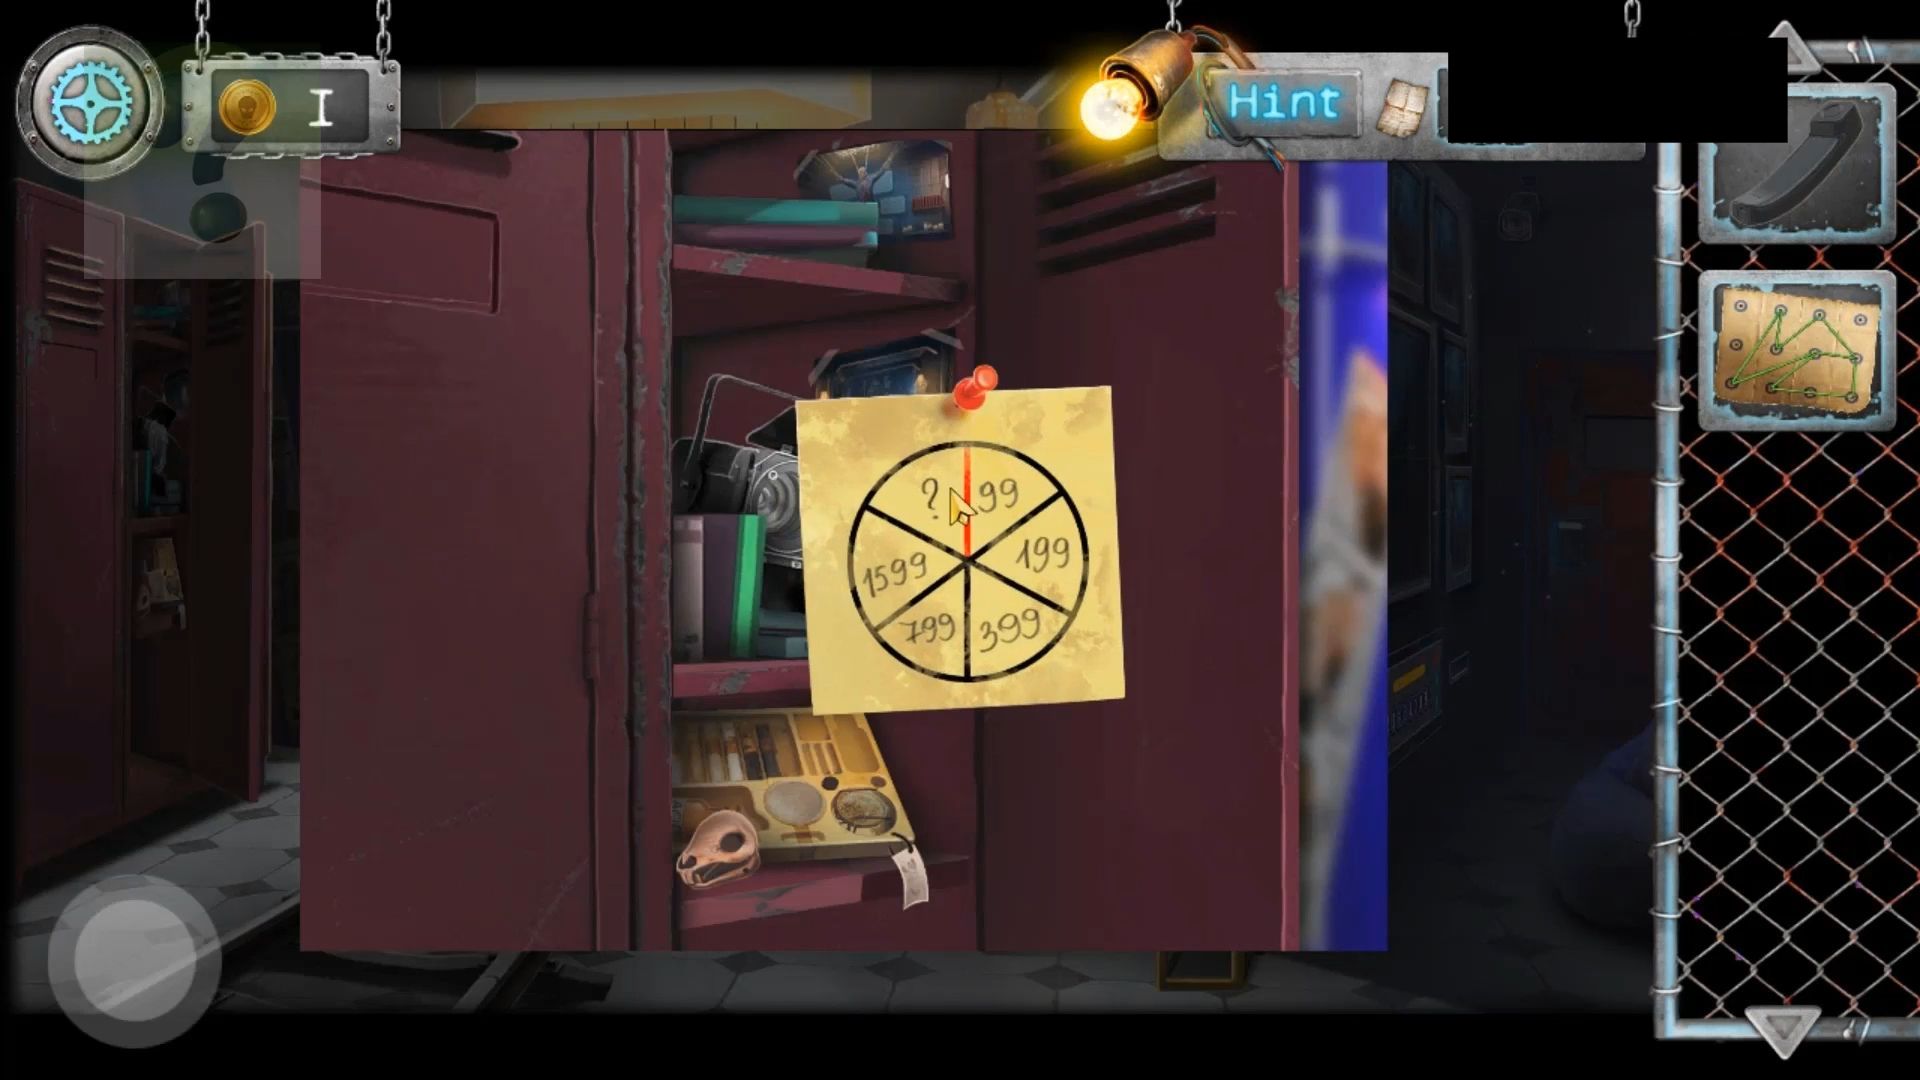
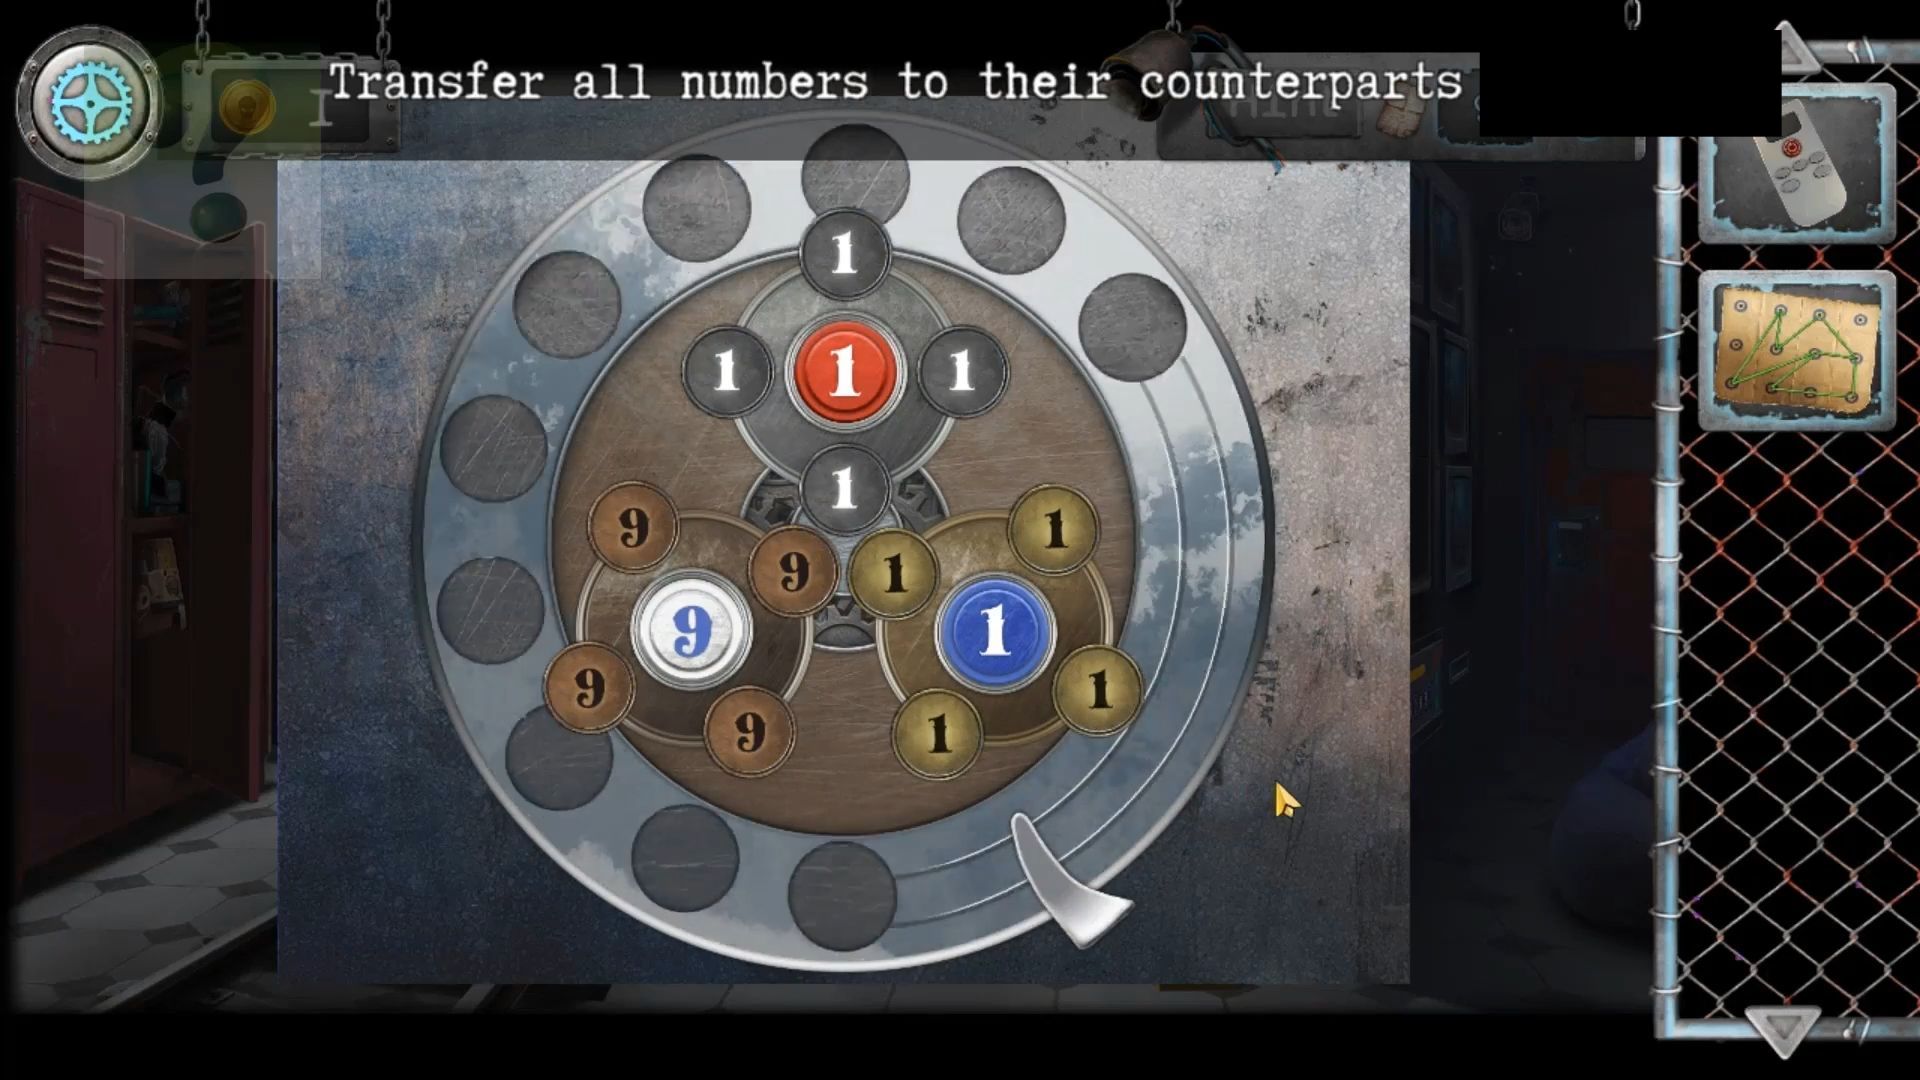
Phone Dial Puzzle
Now, look at the case to the right of the phone. The code sheet will be included. Follow the sequence of the numbers to figure out the code (3199).
Turn the 3 sections to shift the numbers around the circles. Move all the ‘9’s to the bottom left, the grey ‘1’s to the top center, and the gold ‘1’s to the bottom right. After you finish, you’ll dial the police, but it won’t work, and you accidentally break the phone. Gather the wires and check out the broken wires on the bottom left. Attach the Scheme paper and the wires you collected to it.
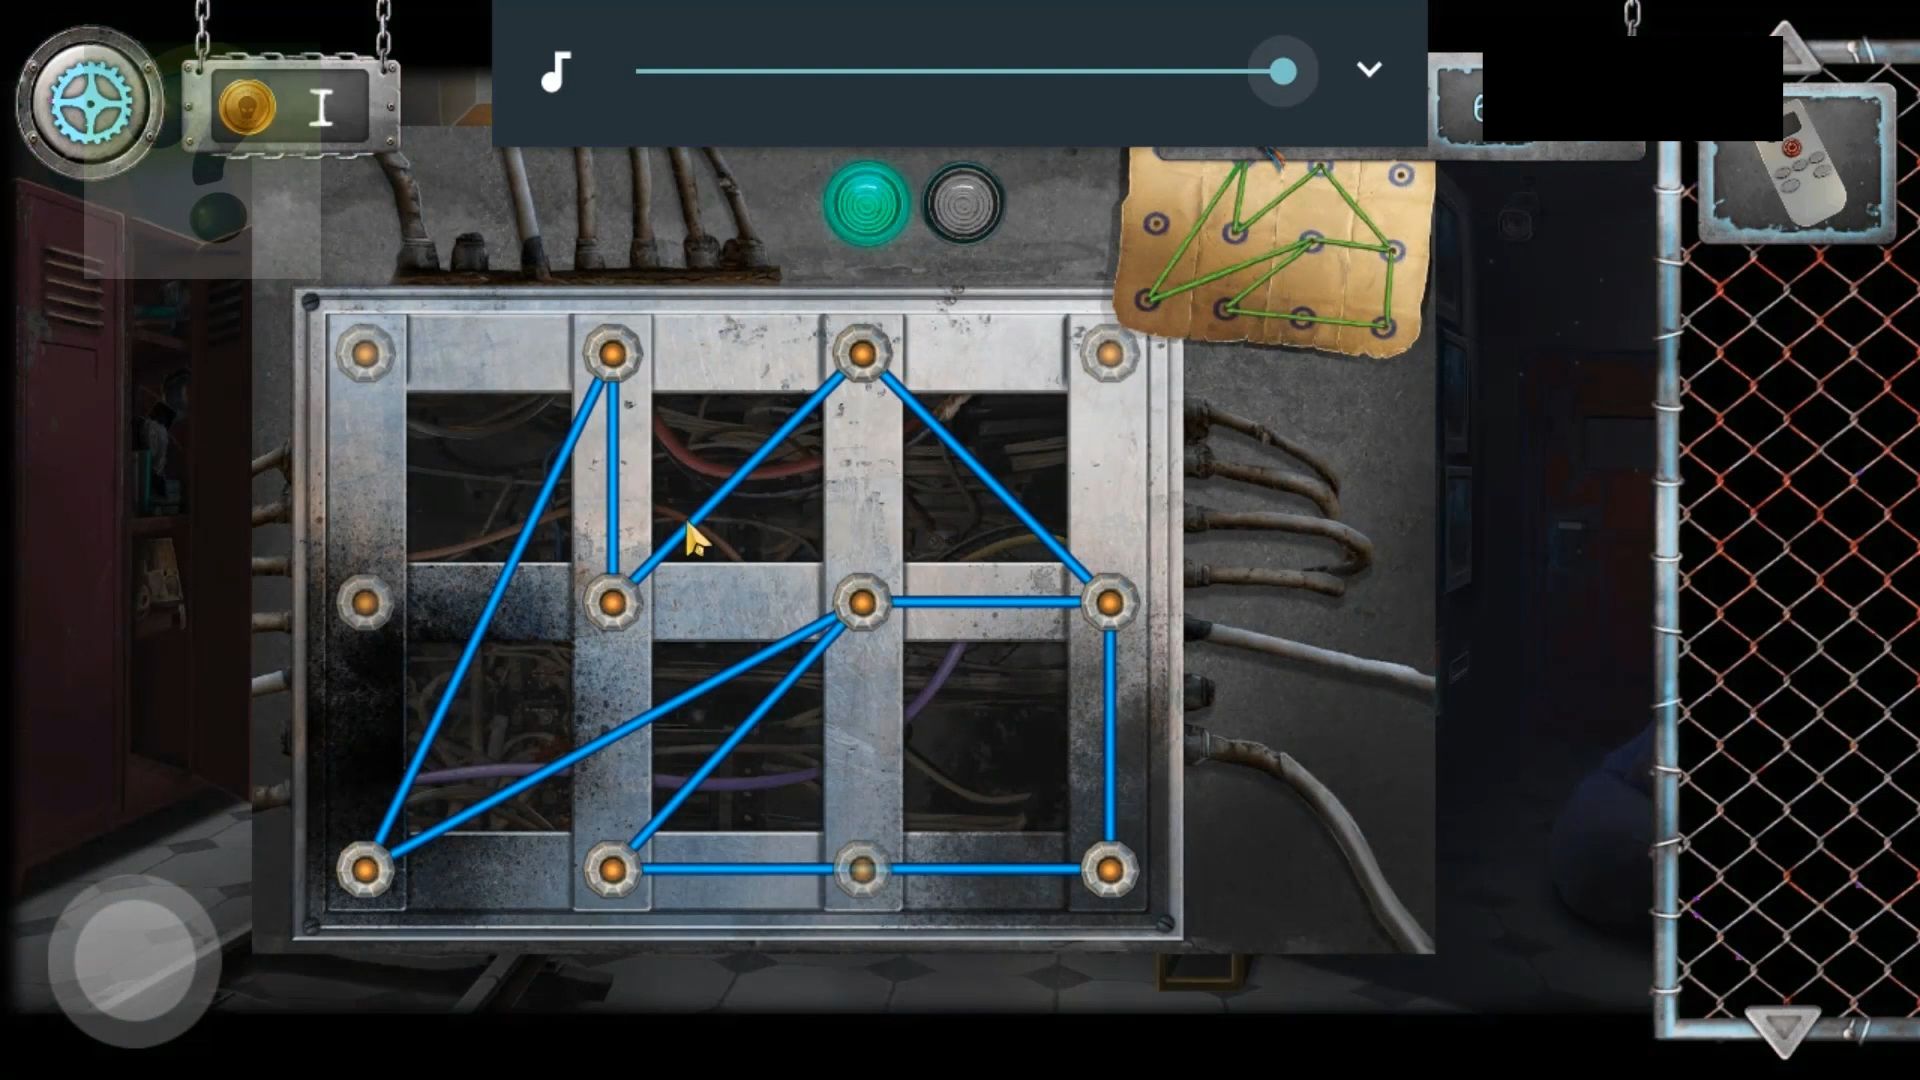
Wiring Puzzle
Drag and arrange the wires to match the pattern on the Scheme clue. There are two ways to match the same wire layout, but only one of them will be accepted. If you believe you got it right and the light doesn’t turn green, try to find another way. After that, use the screens again and use the remote control to turn them on.
Screens Puzzle
You will find a series of numbers show up. Tap those numbers on the keypad, this will make one green light appear. Repeat this process three times. The numbers change each time you play. You will view different camera feeds from the earlier parts of the game, including an image of the Photo Booth in the center.
You will notice numbers on the screens. Pick up a number Keyboard from the lower right. Step back and tap on the Photo Booth on the other side.
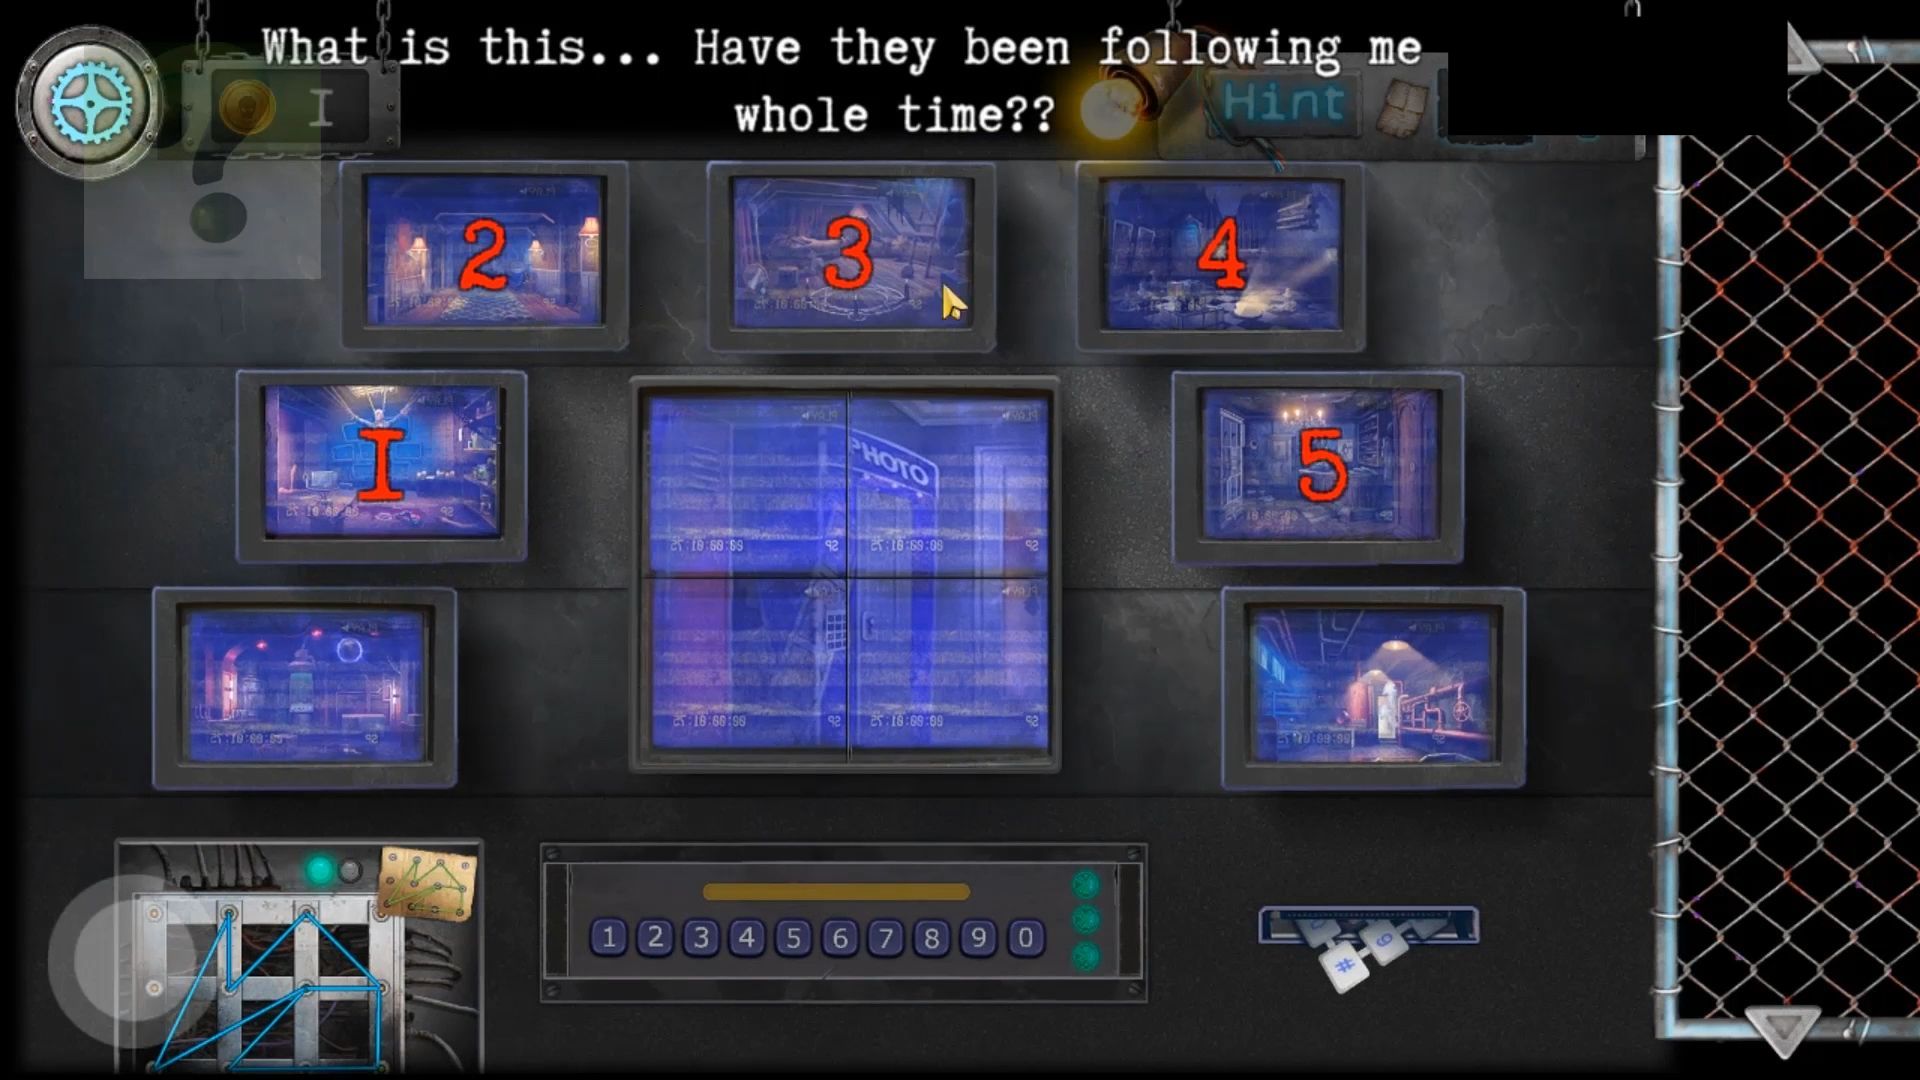
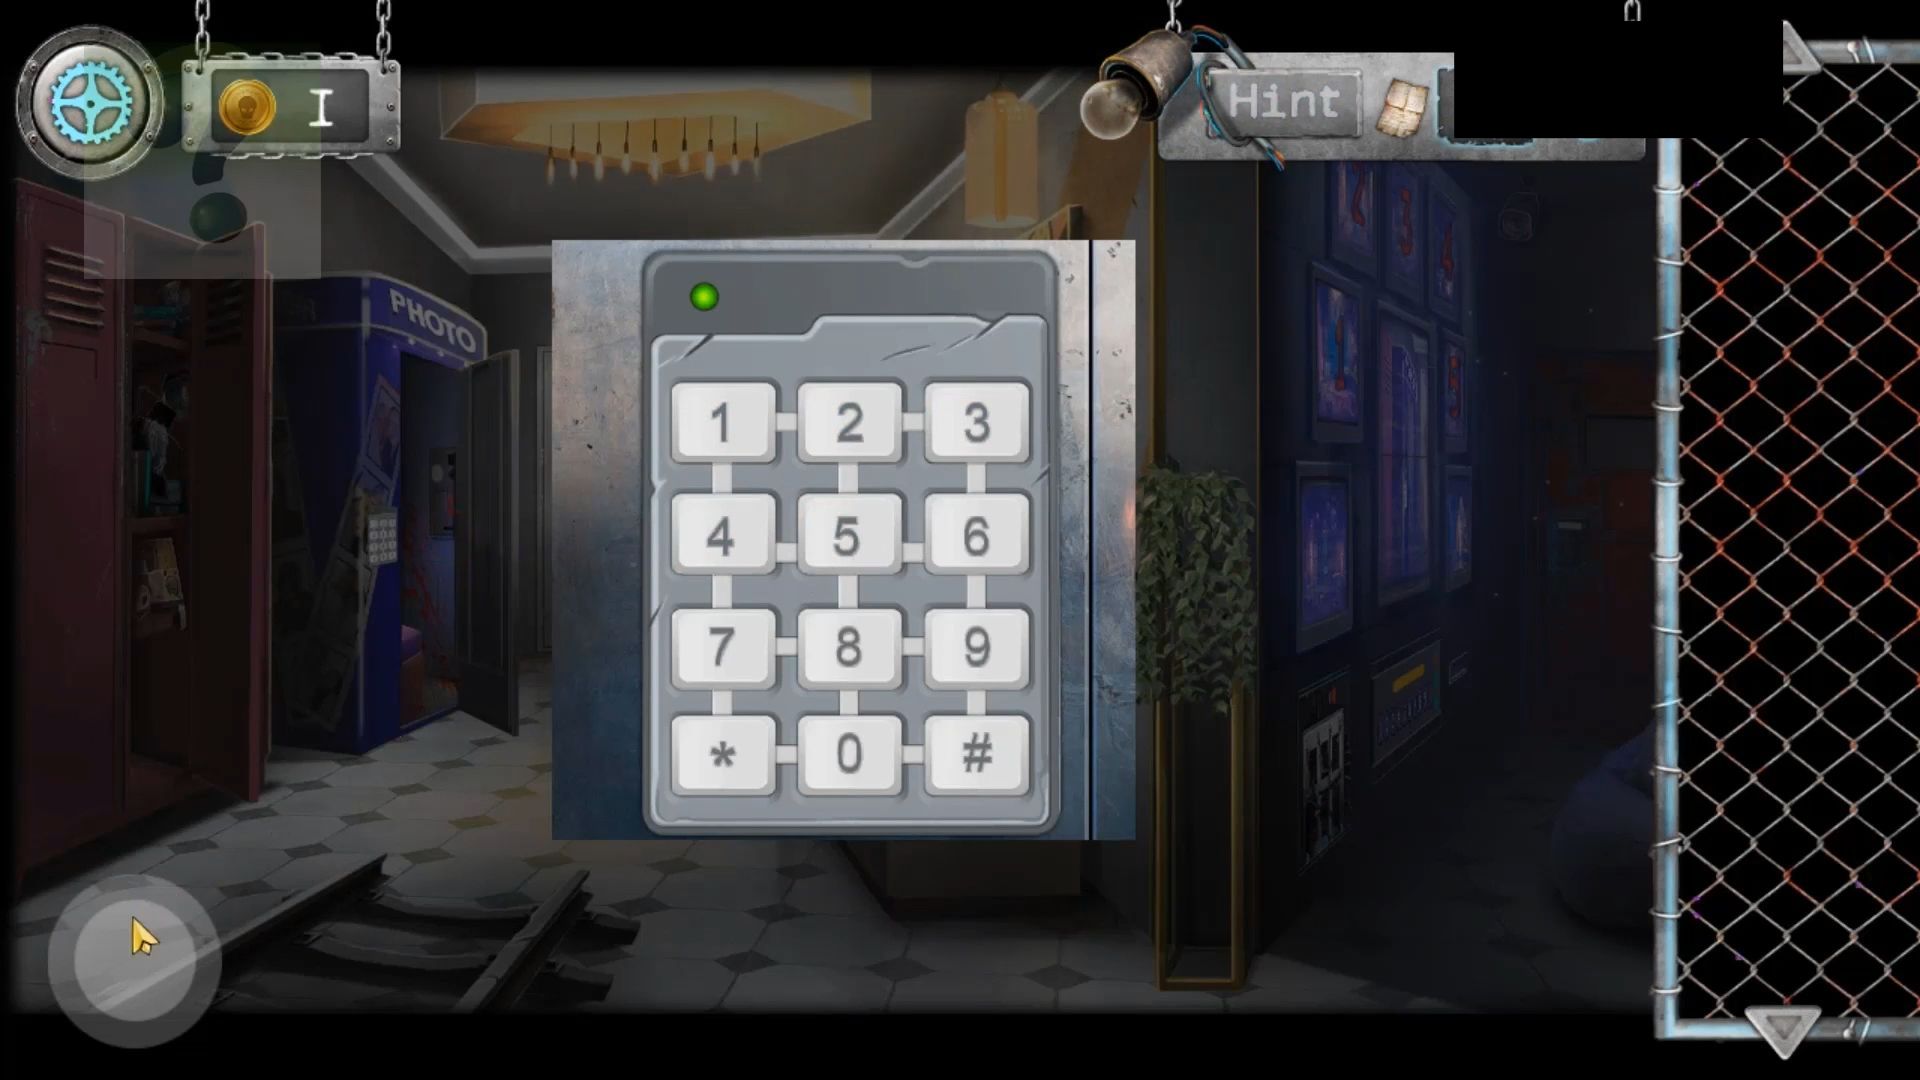
Put the keyboard on the panel, then tap on the numbers you saw (12345). The photo booth is now open, take a look inside.
Get the Baseball bat. You will see some photos on the floor. Now, use the baseball bat on the glass door with the Mysterious figure outside to break it. You escape and discover it was all a birthday prank.
