This guide will let you know how to get the most out of RPCS3. It will provide you with six important tips about RPCS3 which would make the RPCS3 experience much better.
- Disable Update pop-ups
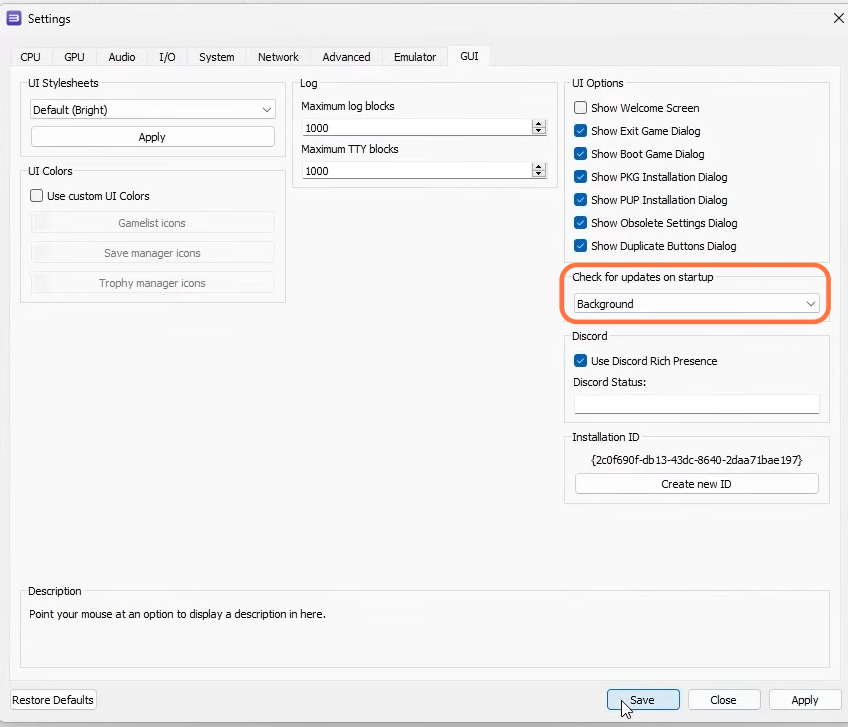
In this section, we will take you through the steps to disable update pop-ups in RPCS3, a PlayStation 3 emulator. To do so, the user needs to open RPCS3 and access the configuration settings.
- First, open RPCS3 and navigate to the configuration settings.
- Look for the GUI (Graphical User Interface) section within the configuration options and click on GUI to access its settings.
- Select the drop-down menu under the “Check for updates on Startup” option.
- From the available options, you need to choose Background.
It will disable the pop-ups but you can still find the updates on the top right corner of the screen.
2. Change Themes
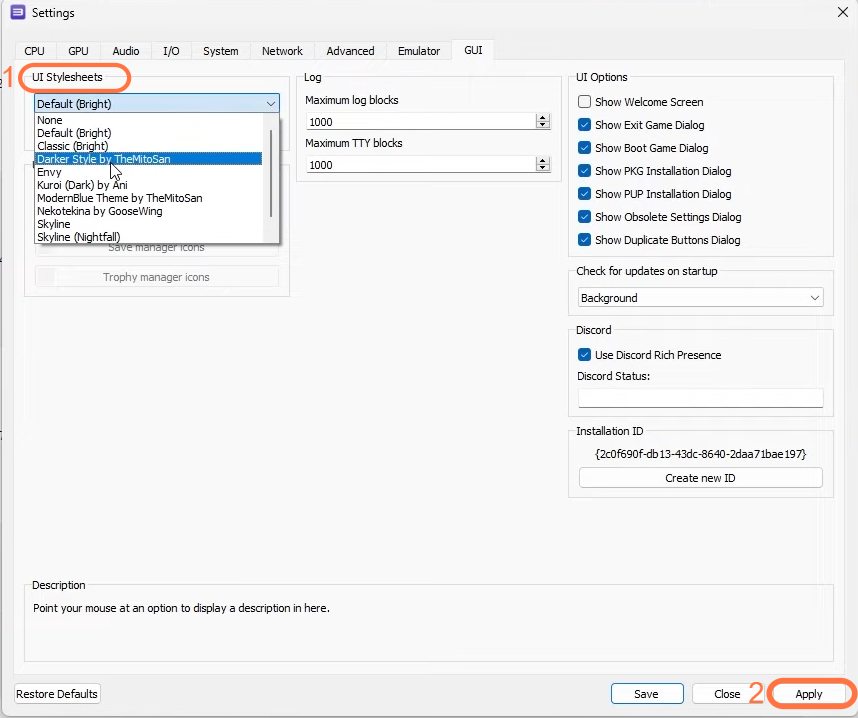
This section describes how to change themes. It advises the reader to access the Configuration tab to find the theme settings, select the GUI option within the Configuration settings and choose a theme under the UI stylesheets box.
- You need to change your theme by clicking on the Configuration tab to access its settings.
- Look for the GUI (Graphical User Interface) option within the Configuration settings and click on it.
- Within the GUI settings, find the UI stylesheets box and tap on the dropdown menu located under this box.
- After that, select any theme you want and hit the Apply button to save the settings.
3. Best Settings
This section provides instructions on finding the best settings for a game. By following the steps below, you will be able to find the best-recommended settings on a Wiki page and then apply them to your game to get the best out of it.
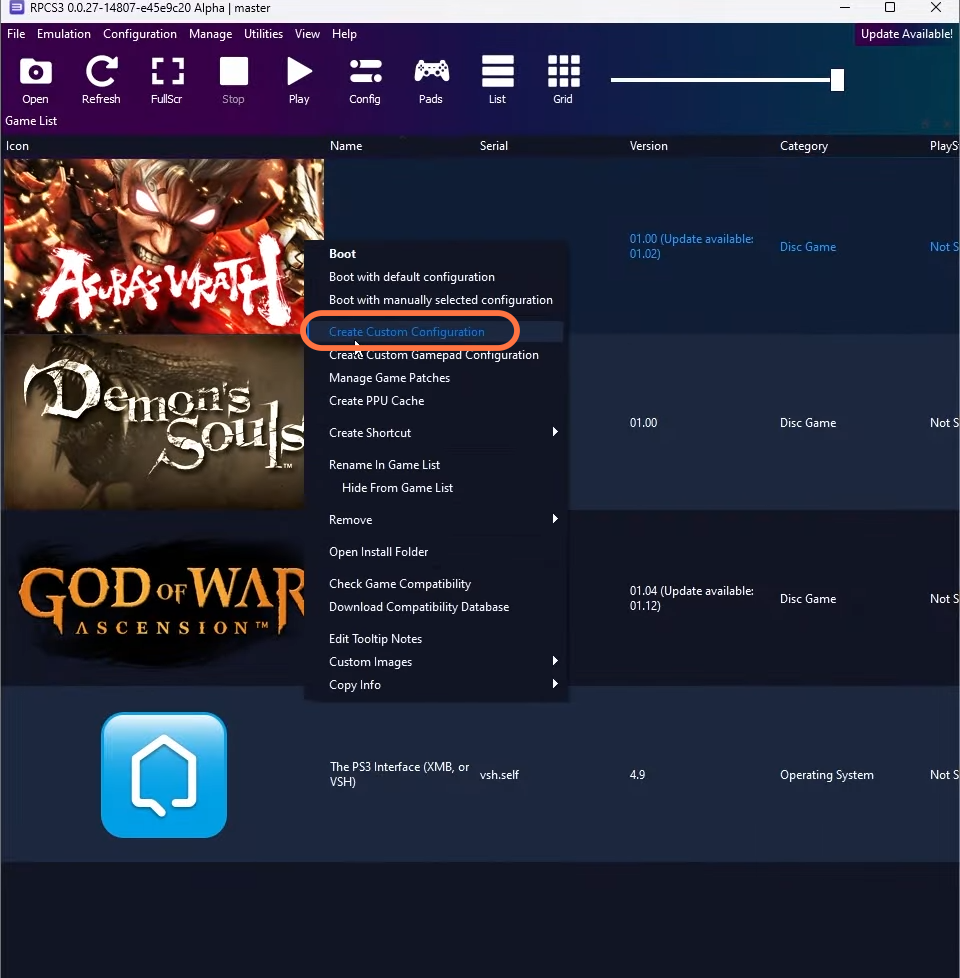
- To apply the best settings, you have to launch RPCS3 and locate the game you want to optimize. Right-click on the game to open the context menu.
- From the context menu, select the “Check Game Compatibility” option.
- After selecting it, tap on the game’s title.
A new window will open, displaying the RPCS3 Wiki page for the selected game. - On the Wiki page, navigate to find the section that provides important settings for the game.
- Take note of the recommended settings mentioned on the Wiki page.
These settings are crucial for achieving the best performance.
You must only change these settings by right-clicking on your game and selecting the Create Custom Configuration option.
4. Unlock FPS
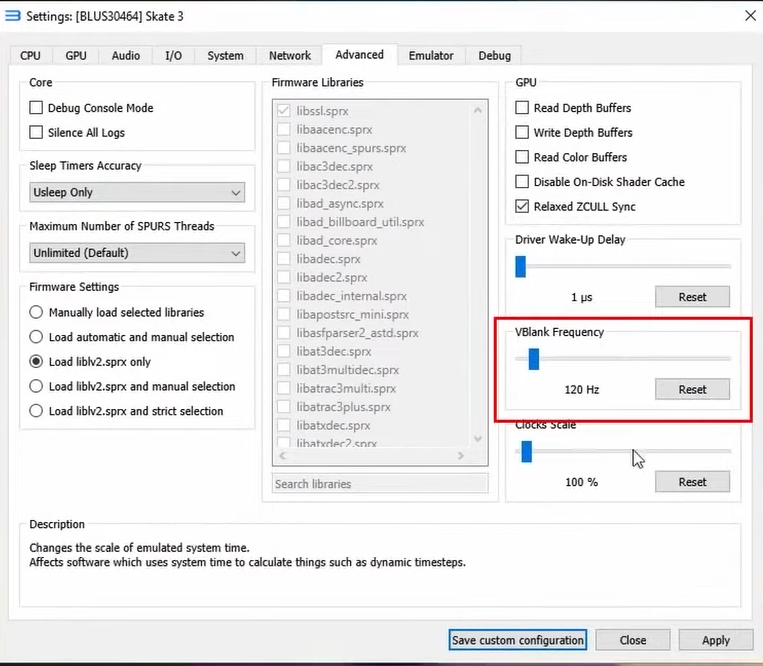
This section will take you through the steps to unlock the FPS (frames per second) in a game. By following the steps below, you will be able to increase the “Vblank frequency” to increase the frame limit.
You need to uncap the frame limit in the games in which the frame rates are capped at 30 or below or they do not have the unlock FPS patch
- Open the game in RPCS3. Right-click on the game to open the context menu.
- From the context menu, select the “Custom Configuration” option.
This action allows you to access and modify the game’s configuration settings. - In the configuration window, navigate to the “Advanced” tab.
This tab contains additional settings for fine-tuning the game. - Scroll down until you find the “Vblank frequency” option and double the value of the “Vblank frequency” setting.
For example, if the original value is 60, change it to 120.
Increasing the “Vblank frequency” effectively increases the frame limit, allowing the game to render more frames per second.
Remember that there’s no need to exit the game to do this.
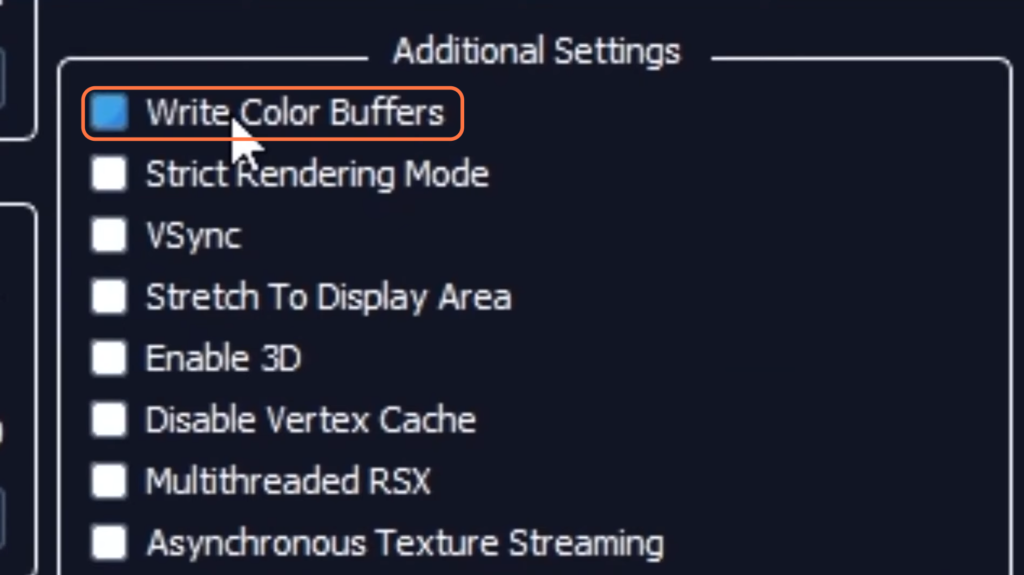
5. Fix Missing Graphics
There are some games that do not have a specific configuration on the Wiki page of RPCS3 and they have graphical issues running with the default settings. In this section, we will take you through the steps to enable the “Write Color Buffers” option if you are encountering graphical issues while running certain games on RPCS3.
- Launch RPCS3 and open the game that is experiencing graphical issues.
- Click on the “Configuration” tab to access the settings and then click on the “GPU” tab.
This tab contains options related to graphics processing. - Look for the “Write Color Buffers” option and enable it by checking the box
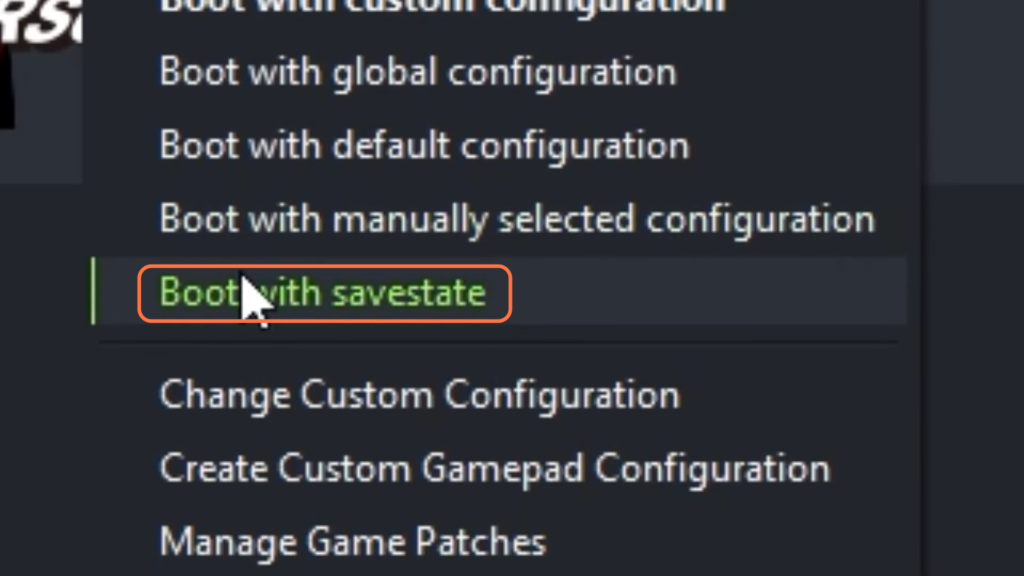
6. Create SaveStates
The last tip to get the most out of RPCS3 is to create savestates. This section describes how to create Savestates to get the most out of RPCS3.
- Launch RPCS3 and open the game you want to create a savestate for.
- Make sure the game is running and you’re at a point where you want to create a snapshot of your progress.
- Press the Ctrl+S keys simultaneously on your keyboard.
This will capture a savestate of your current game progress.
Remember that you can only have one savestate per game, so if you want to create a new one, you’ll need to overwrite the existing savestate. - Once you have created the Savestate, right-click on the game within RPCS3 and select the “Boot with Savestate” option.
It will boot your game with the snapshot you took earlier. It works for most of the game.