Adventure Escape: Murder Inn is an exciting puzzle game. It’s about solving a mystery in a quiet located up in the mountains. When a murder happens, you become a detective who has to find clues and question suspects to uncover the truth.
The game has 9 chapters, each with lots of different clues, objects to discover, and people to talk to. You’ll need to use your detective skills to investigate and ask the right questions to finish the game. In this comprehensive guide, you will learn how to find out how to go through the whole game, including where to find special hidden stars.

Chapter 1
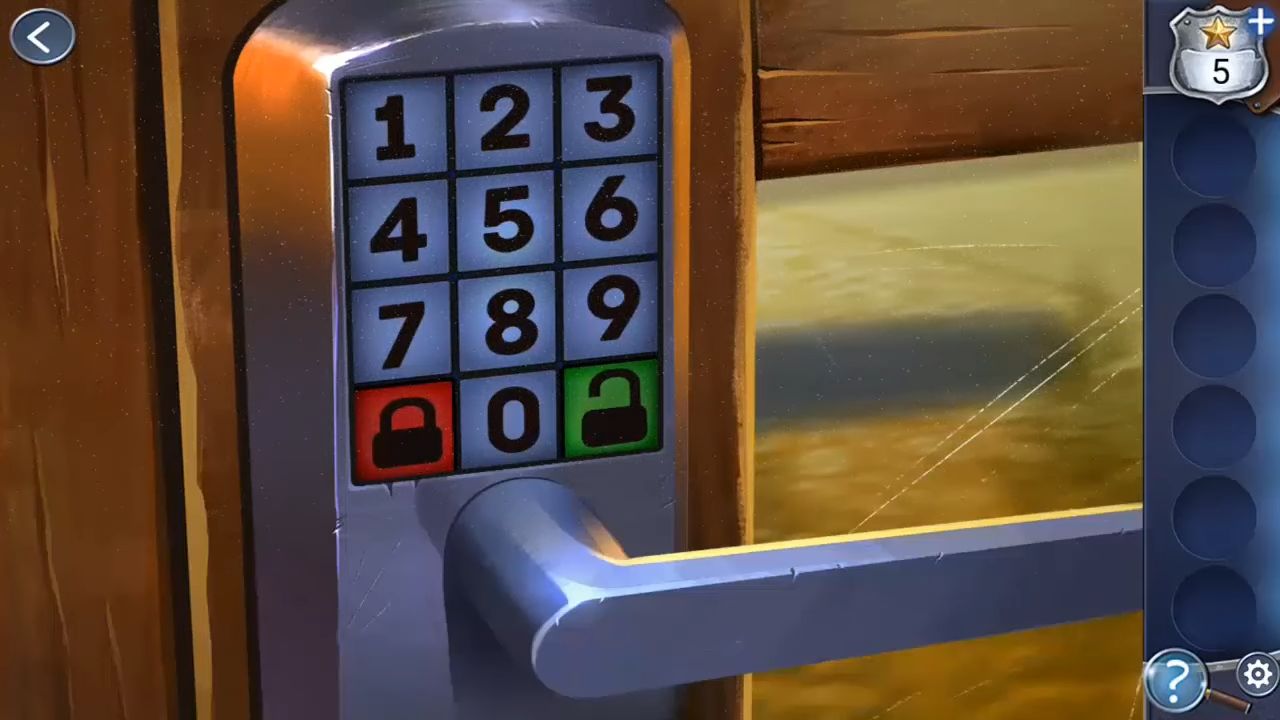
In the first chapter of the game, you’ll learn how to do things like grab a shovel, dig through snow, and unlock a door using a code.
Firstly, you’ll find a star on the steps of the closed door. To figure out the door code, you’ll get a hint from a sticker that mentions the security company SNOW Security. Look at the Winter Inn sign above the doors, where you’ll see four snowflake symbols. Each of these has a letter from the word SNOW on it and count how many times each letter appears (6674).
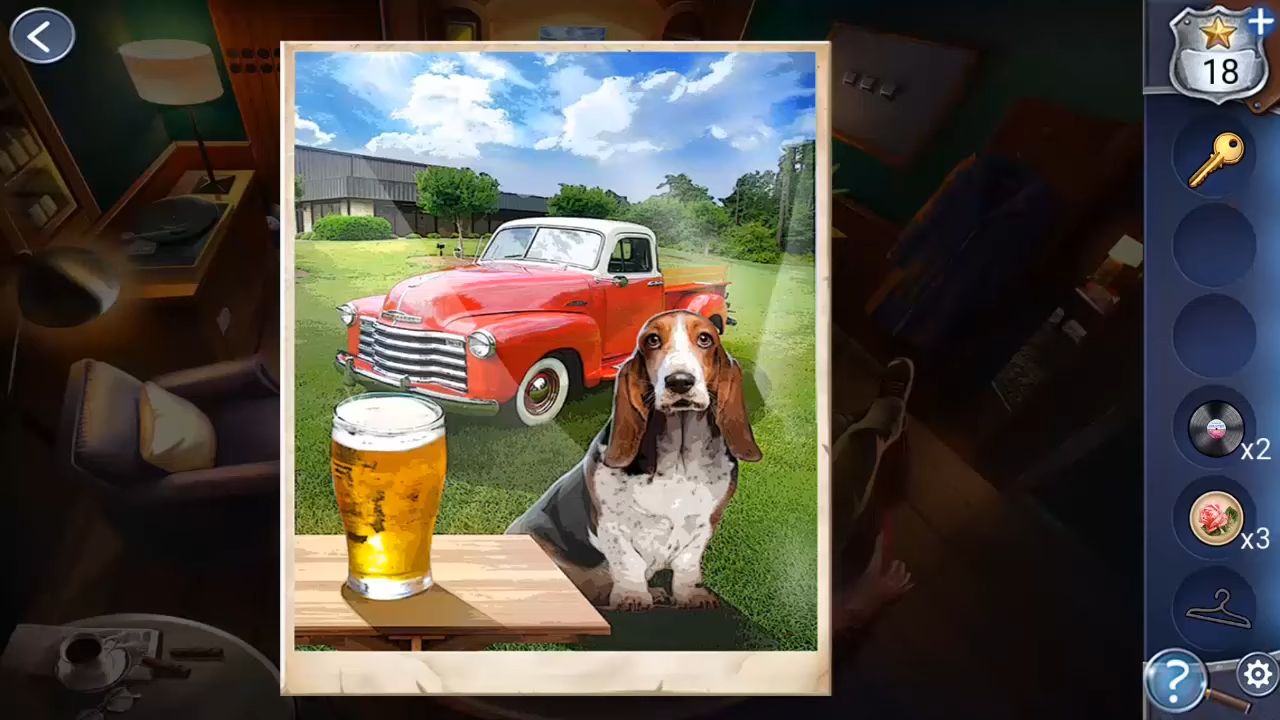
After entering, your job is to repair the photo display and touch six pictures scattered around the room. Also, don’t forget to pick up the dog’s bone lying on the sofa. There’s a star hidden inside a photo frame on the right side.
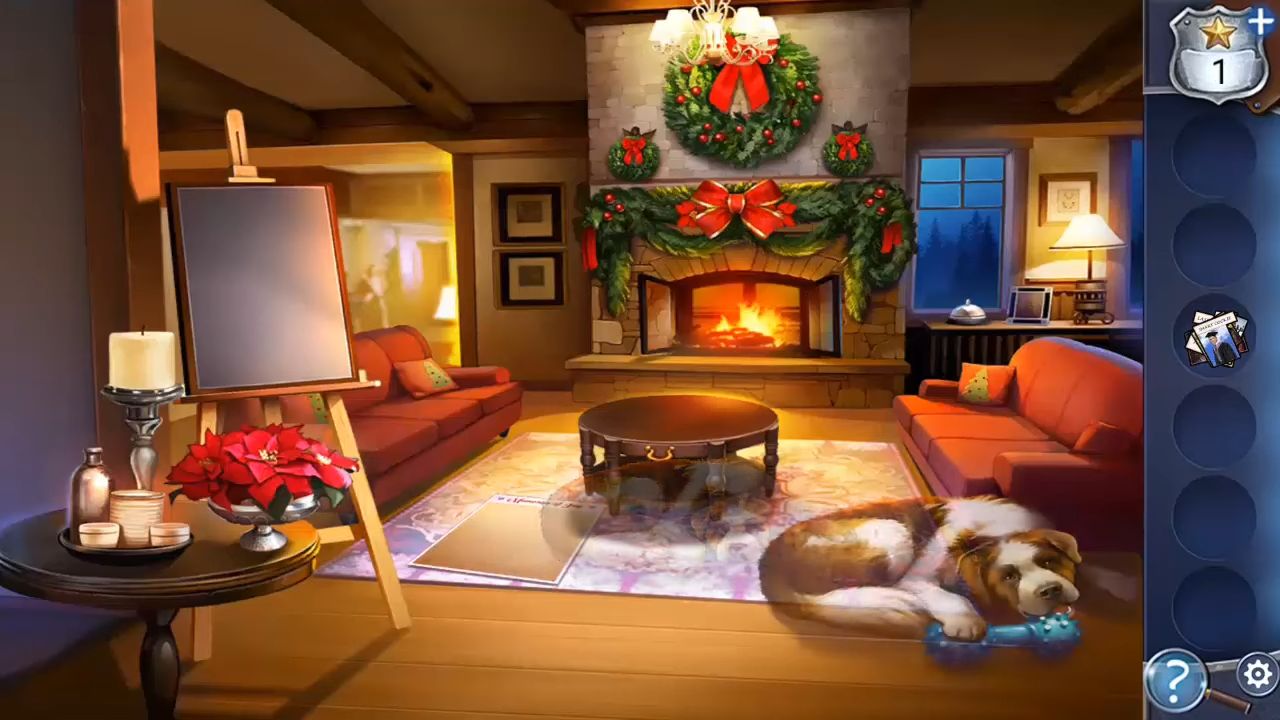
Offer the bone to the dog so it moves away from the board on the floor, and then, tap on that board. Pick up each of the six photos and arrange them neatly on the side of the board that was under the dog. Arrange the photos on the board so they fit perfectly without any gaps.

Touch the table in the middle to open the drawer and get some matches. Use these matches to light the fireplace. After that, use the lit match to relight the candle on the left side. Then, tap the bell on the counter to let everyone know you’re there.
You have to prepare the table and find three plates, three napkins, and three wine glasses in the area. There’s a star on the pan hanging above the stove in the middle.
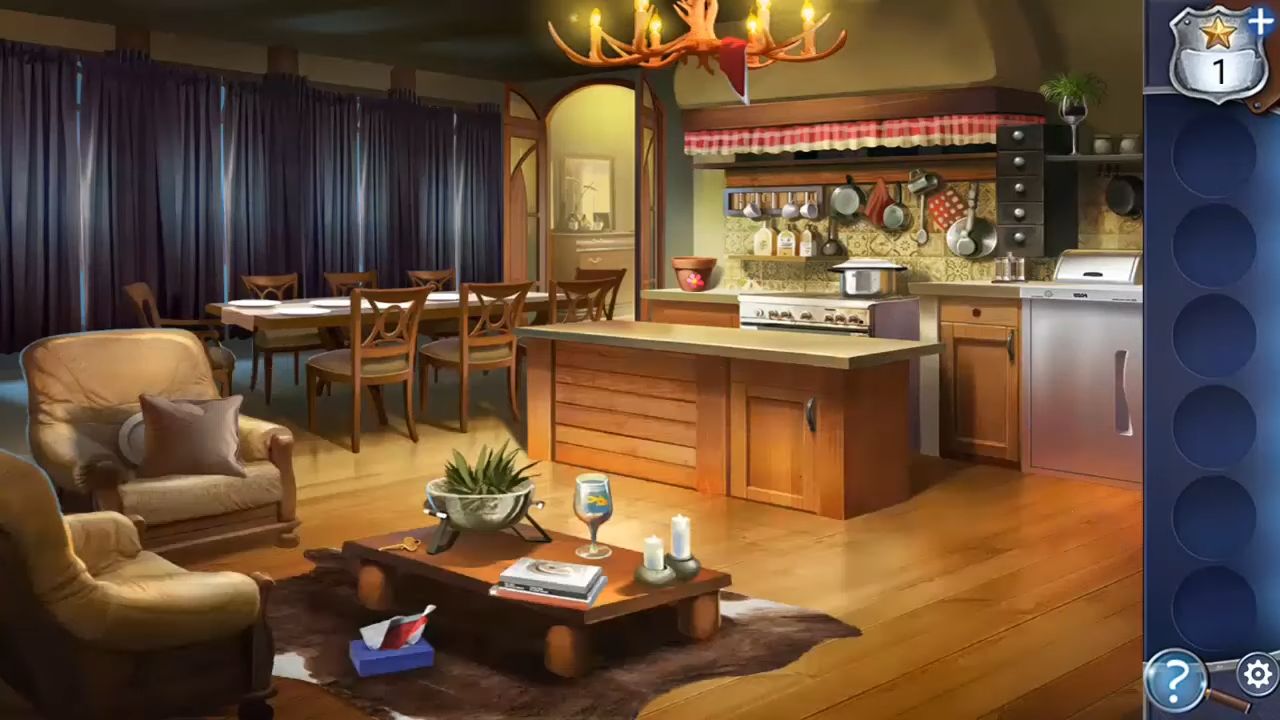
To find the plates: Tap the cushion on the left chair for the first plate and open the fridge on the right for the second one. Then, open the cupboard in the middle and grab the pot lid from the lower shelf. Use this lid on the big pot on the stove to get the third plate.
To find the Glasses: In the same middle cupboard’s top shelf, take the fishbowl. Use it on the glass holding the fish on the table to swap them. Take the key from the small table and use it to open the cupboard left of the fridge. Get a glass from the trash. Take the flowerpot from the left of the stove and use it on the glass with the plant on the top-right shelf.
To find the napkins: Get two from the tissue box on the floor. The second one hangs from the light above and opens the curtains to find the last napkin. Then, tap the big table and put everything you’ve collected there.
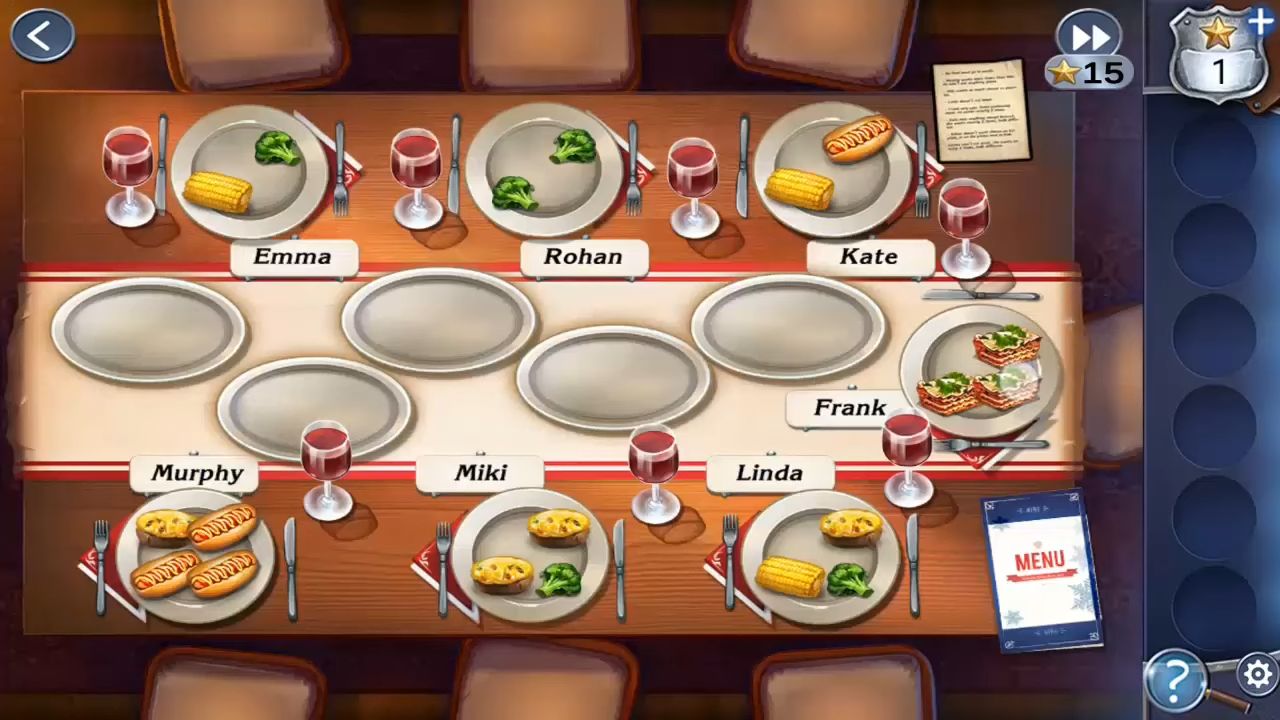
Next, tap the note on the table for clues about what food each person wants. Put the right items on each person’s plate. Once that’s done, the mystery will start, and the chapter will end.
Chapter 2
In Chapter 2 of Murder Inn, you’re looking into Emma’s disappearance. In the hallway, you’ll see boots and skis.
First, grab a star on the light bulb at the top center. Tap on the open doorway to the left to enter the laundry room and that’s where you’ll meet Greta.
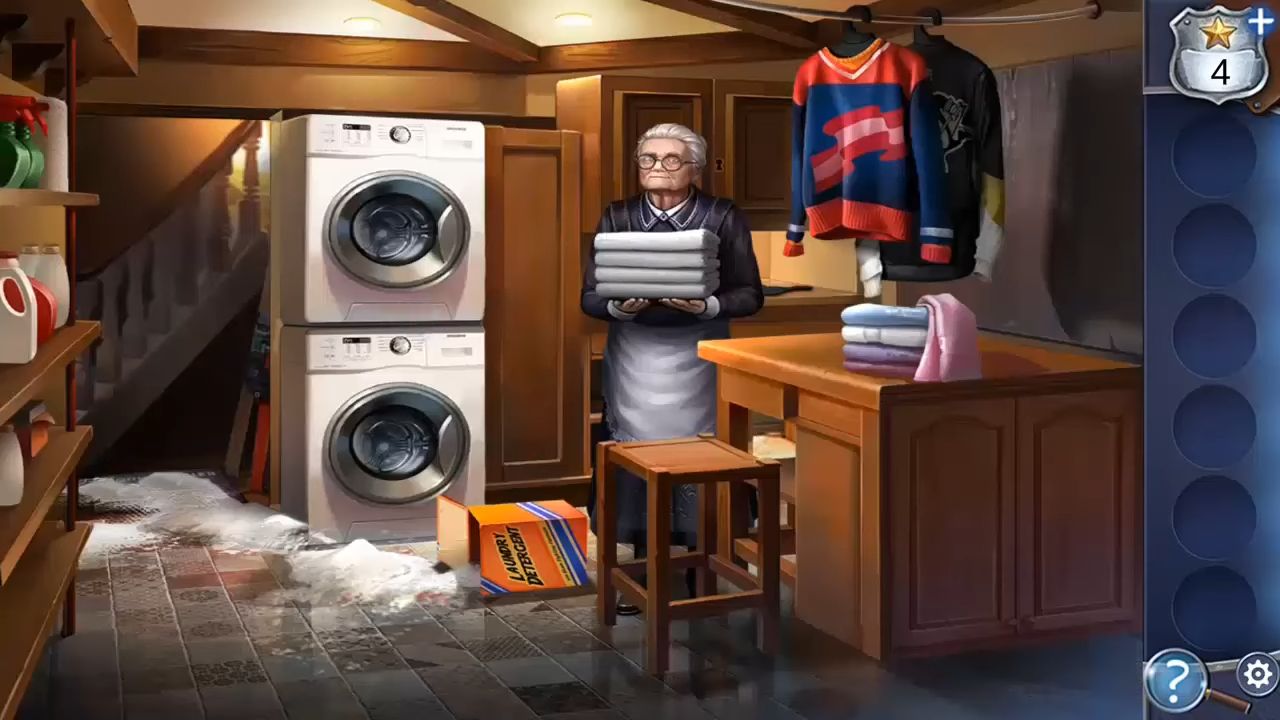
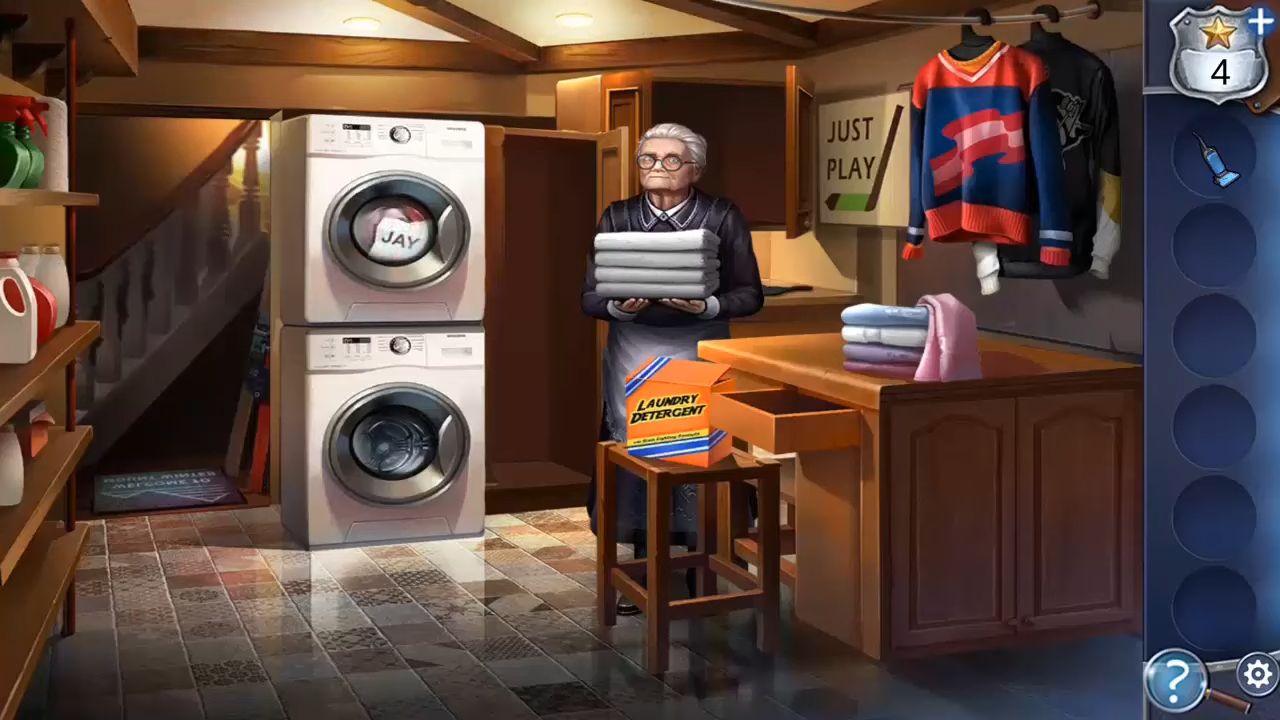
Click on the drawer beside the stool to open it and get a small key. Move the hockey shirts hanging on the right to reveal a hint that says Just Play. Use the key to unlock the cupboard and take the laundry basket. Put the laundry inside the top washing machine to clean it. While doing that, you’ll find a note with the name Jay. The star is on the light bulb at the top center.
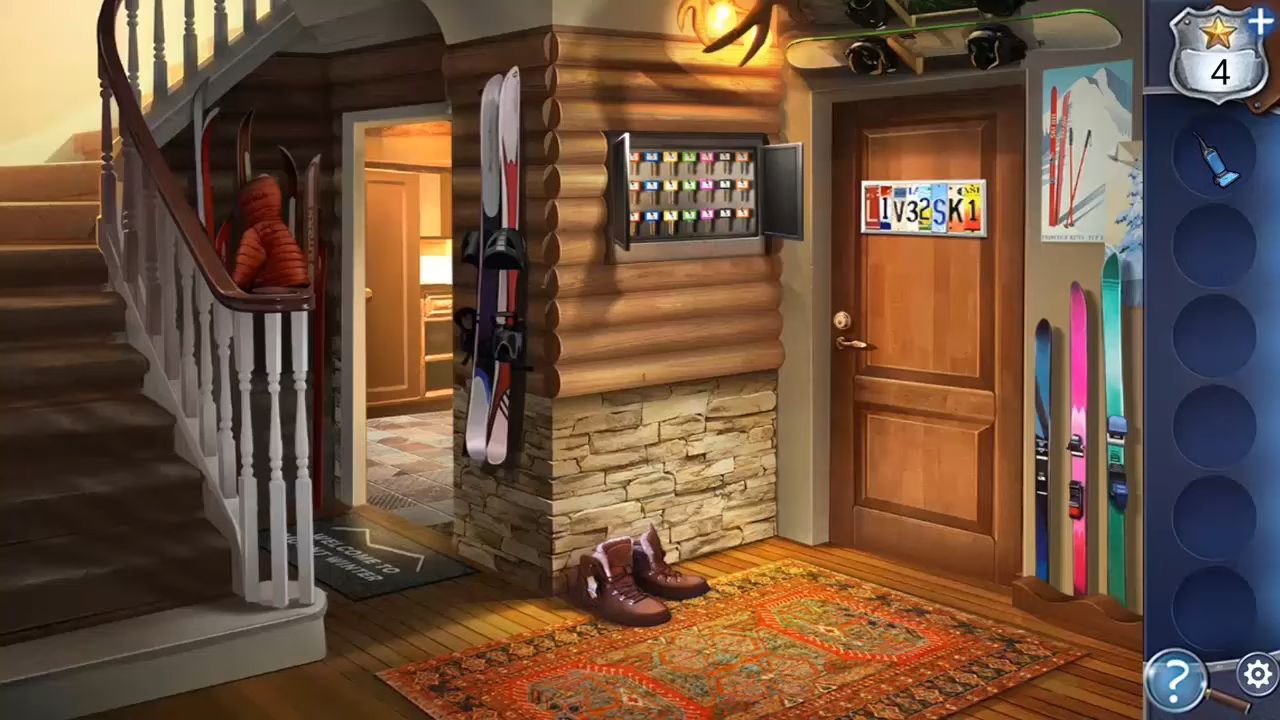
Touch the tall cupboard on the right side of the laundry machines to open it and get a vacuum cleaner. Use the vacuum on the spilled powder on the floor to clean it up. Go back to the hallway and tap on the skis to the right to see all of them. Your job now is to tap on pairs of skis to swap and organize them so that their heights match the pattern.

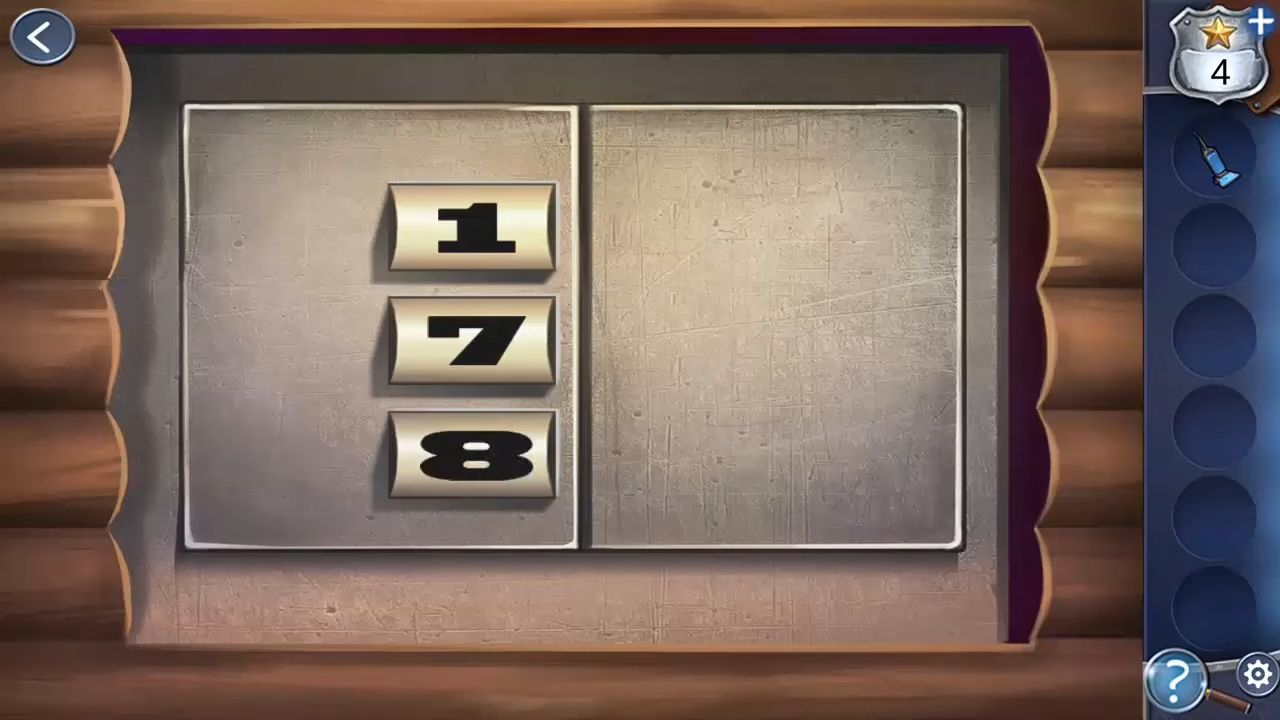
After finishing, the panel next to the locked door will open. The code with three numbers (178) can be discovered using hints from two places; the note found in the laundry and the picture message on the wall.
In the safe, there are several keys, but you only need two to unlock the door. Look at the clue displayed on the door to know which keys to use. The sign on the door contains four numbers within the letters. Get keys 13 and 21 according to that clue.
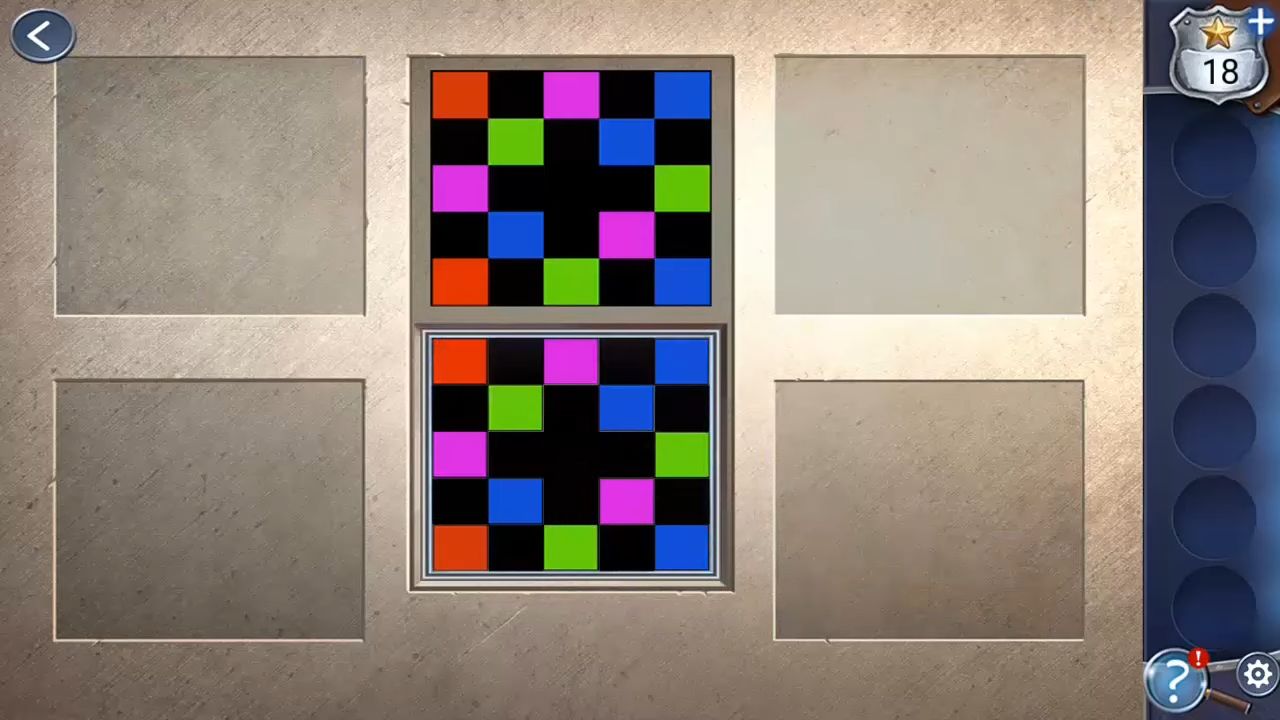
When you enter the room, you’ll discover Emma’s body. Tap different areas in the room to attach number tags to the evidence. On the left bed, tap the pillows to move one and collect a wooden tile. Find another tile under the body’s leg and the third tile is hidden under the red blanket on the far bed.
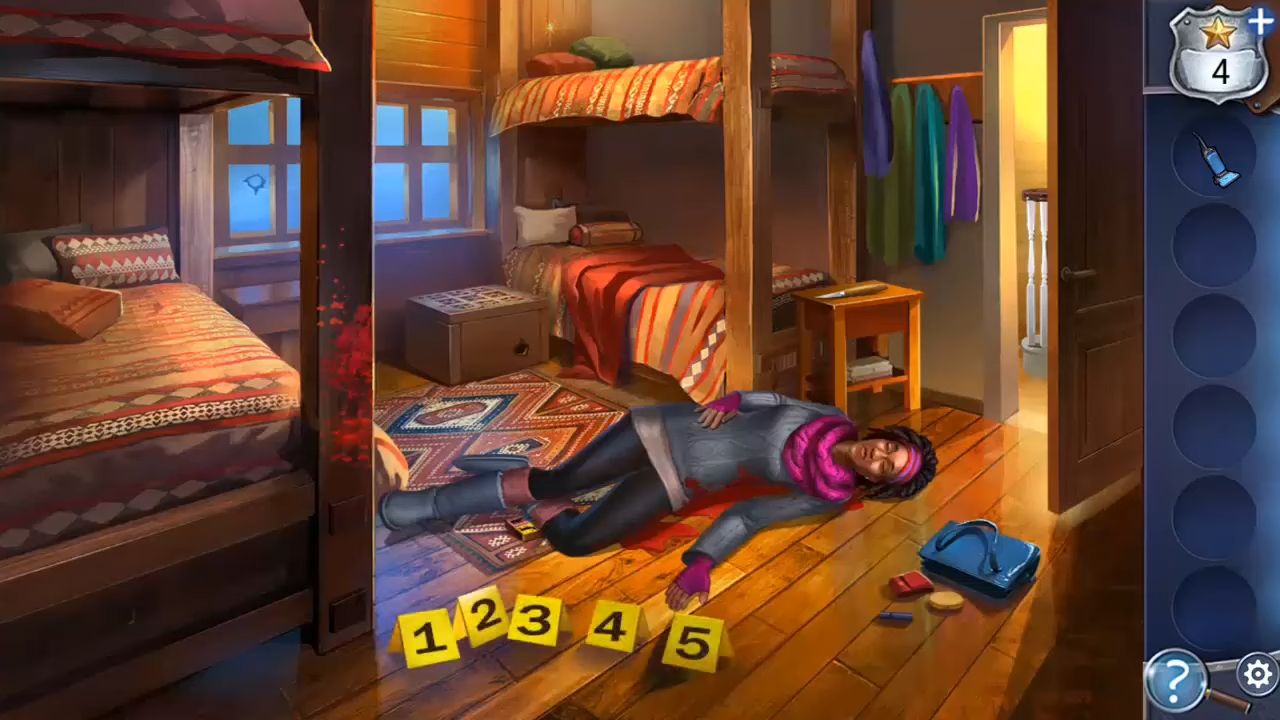
Also, pick up a carving knife from the table near the door and tap on the chest below the window to discover a puzzle. Begin by putting the three tiles on the puzzle. After that, tap on pairs of tiles to swap their positions. You can double-tap tiles to turn them around. Arrange them so that the symbols on the edges of the tiles match up with each other.
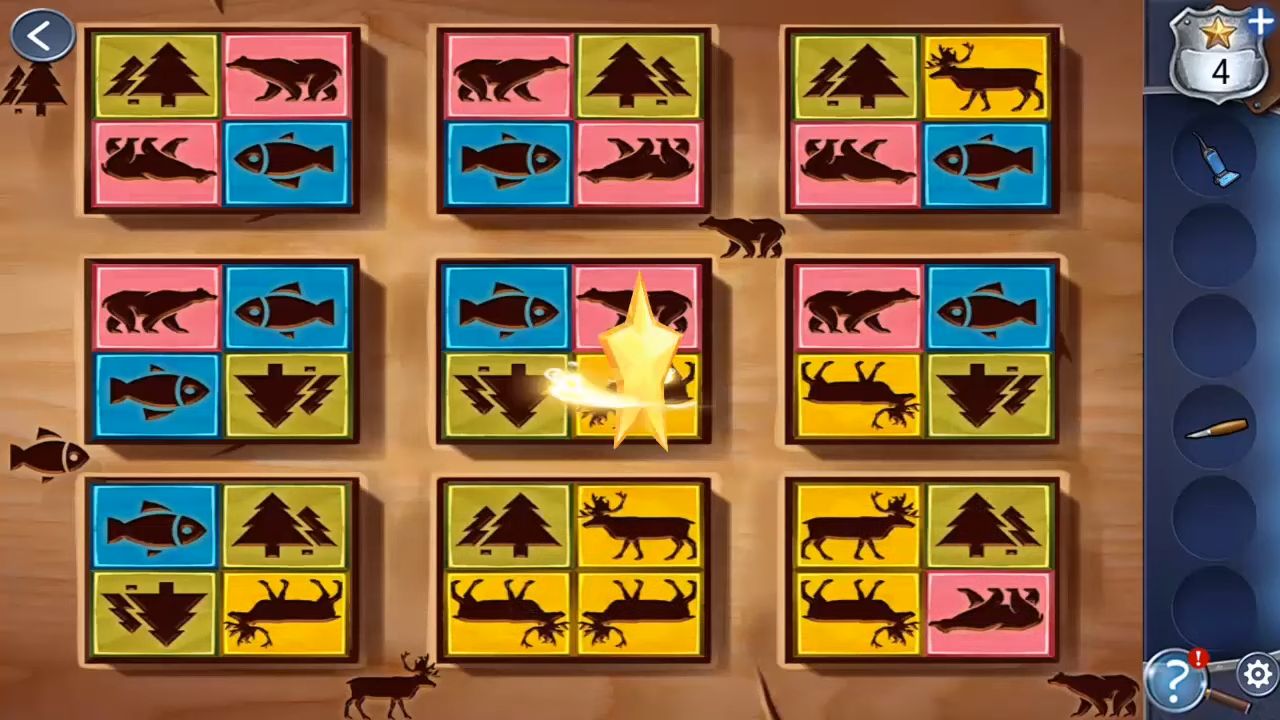
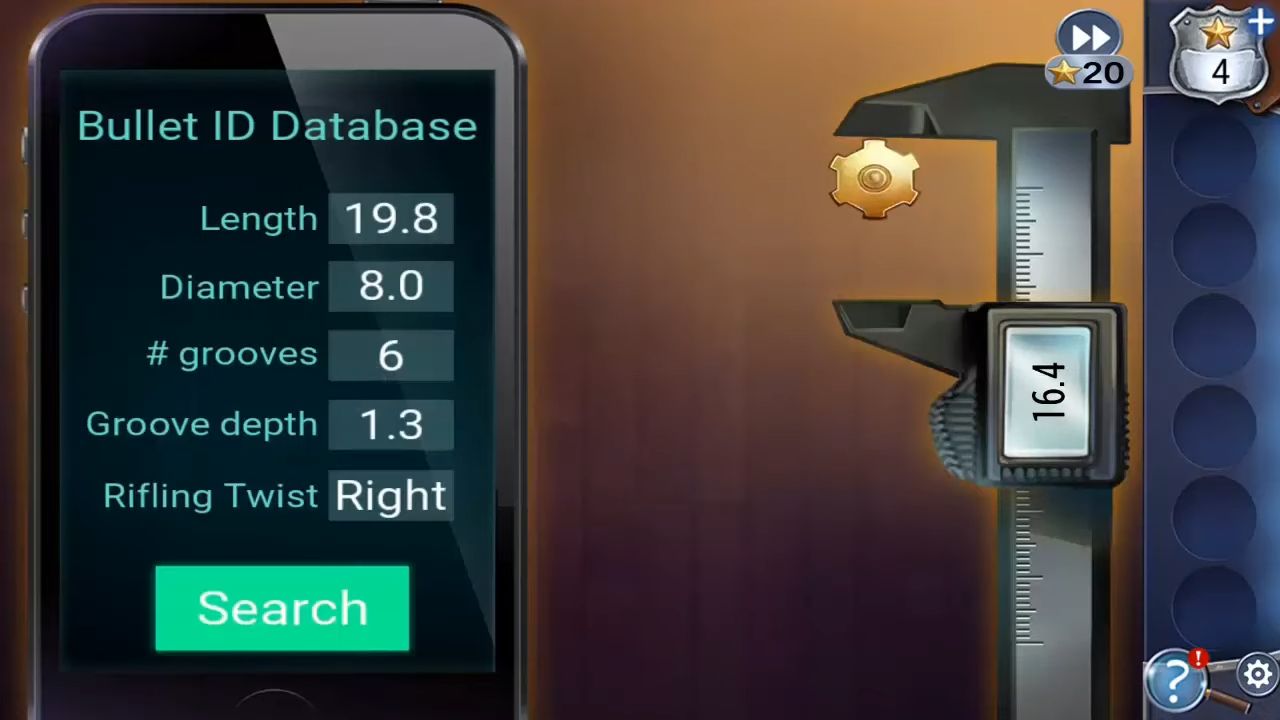
After finishing the puzzle, open the chest to discover a big spider and use the vacuum to get rid of it. Use the craft knife to collect the bullet and examine the bullet for some information, like its size, to search a database. This reveals it’s from a .270 caliber SlyHunter rifle and finding this clue marks the completion of Chapter 2.
Chapter 3
In Chapter 3 of Murder Inn, you’ve entered the office to inspect the security system. Unfortunately, the power outage has caused the system to shut down, so your first task is to restart it.
First, get a star from a water jug located on the far right. Then, take note of the photo on the wall to the right; it displays symbols and names for three ski runs.

Touch the knitting basket on the floor to get a knitting needle. Use this needle on the small hole in the wall near the potted plant on the left. Grab a paper with a clue about rebooting the system. Open one of the drawers on the right side of the desk to find another clue on paper. The symbol for the snow monster run looks like a diamond with its points facing up, right, left, and down.

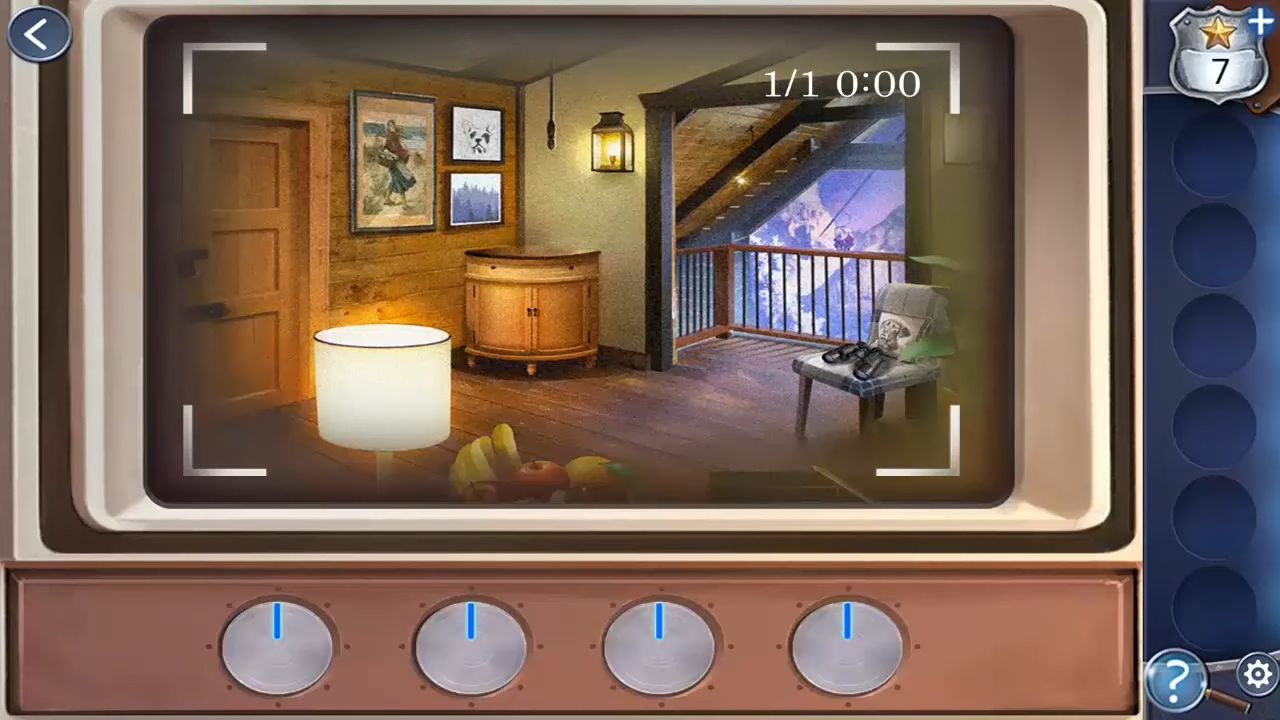
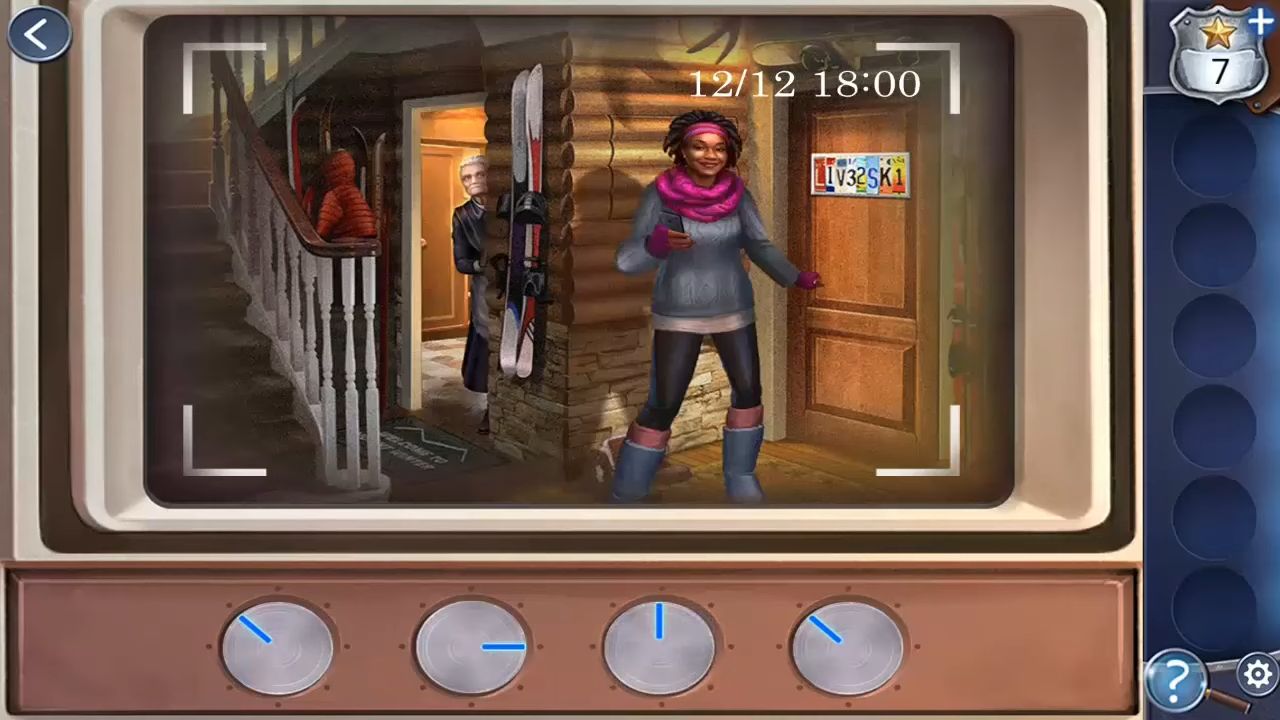
Now the system is fixed, you have to find the video of the person who committed the crime. Some dials change the date and time to show different views. The dials control the Day, Month, Time, and Scene. The calendar on the wall shows it’s December 12th, so the code is 12-12 and the clock on the wall displays 7:15.
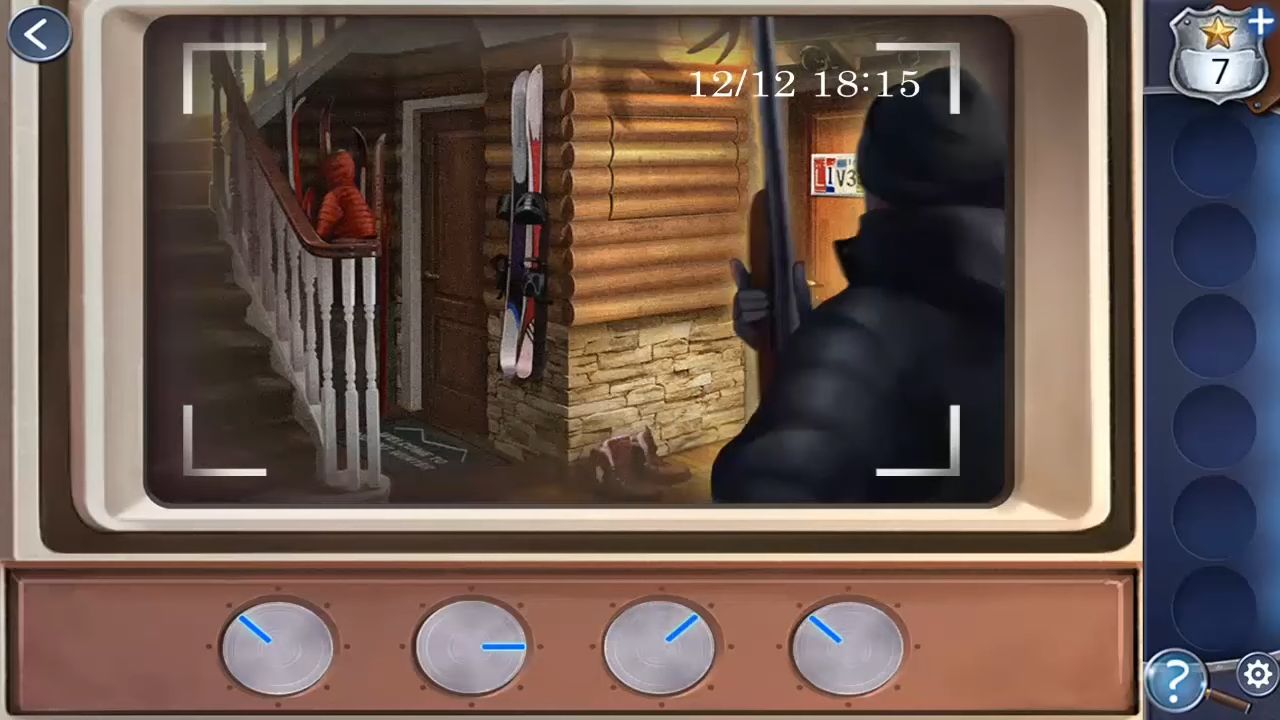
Another clock indicates that the power came back on 45 minutes ago, so you need to look at the footage before 6:30 PM (18:30). For the scene, it’s the hallway outside Emma’s room where you were before. The footage reveals Emma entering the room at 6:00 PM (18:00), followed by a figure with a gun approaching at 6:15 PM (18:15).
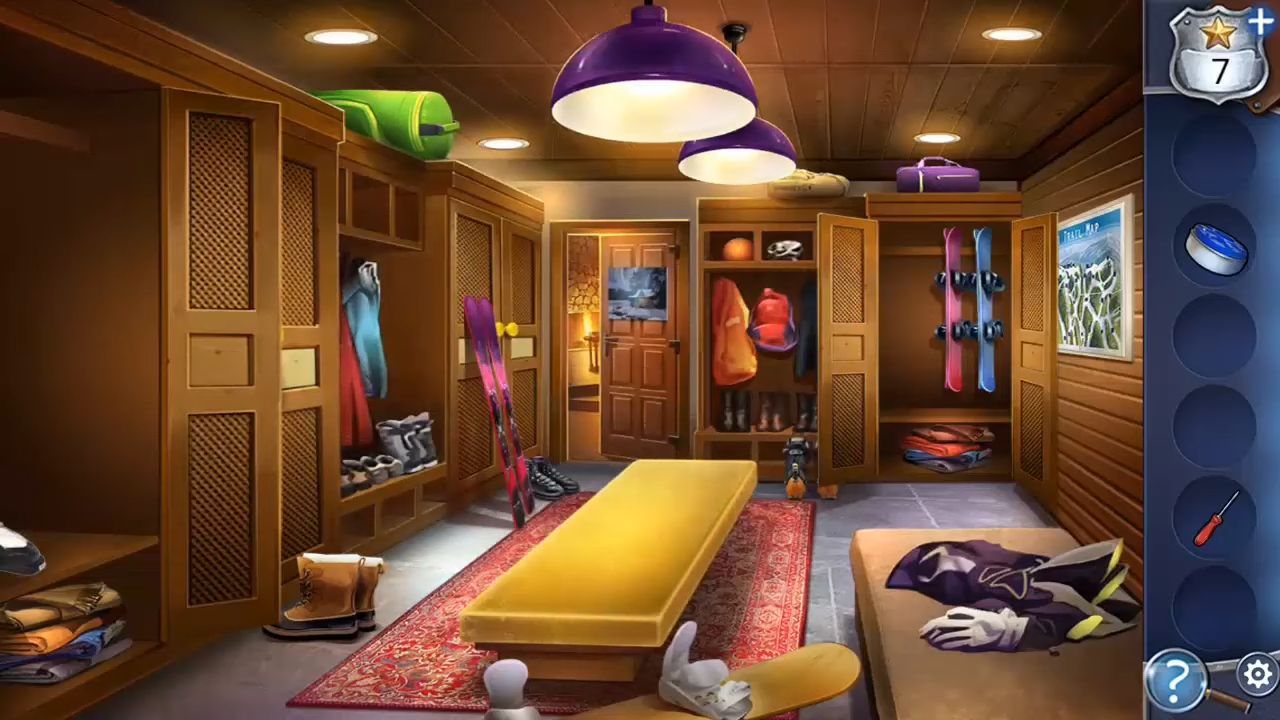
First, pick up the screwdriver from the floor by tapping on it. Then, grab the ski pole from the left side and use the ski pole to tap near the green bag at the top left to get a piece of a map. One of the lockers on the right is open, and you can open it to find another piece of the map. Tap to see it and then put the two extra map pieces in place to reveal the clue.

Look at the locker on the far left; it has a padlock with a combination and each dial on the padlock has symbols next to it. Use these symbols and the map above to figure out the combination (4859). Once unlocked, open the locker and move the shoes to collect the shuffleboard disc. Then, tap on the doorway at the back left to move to the next room.
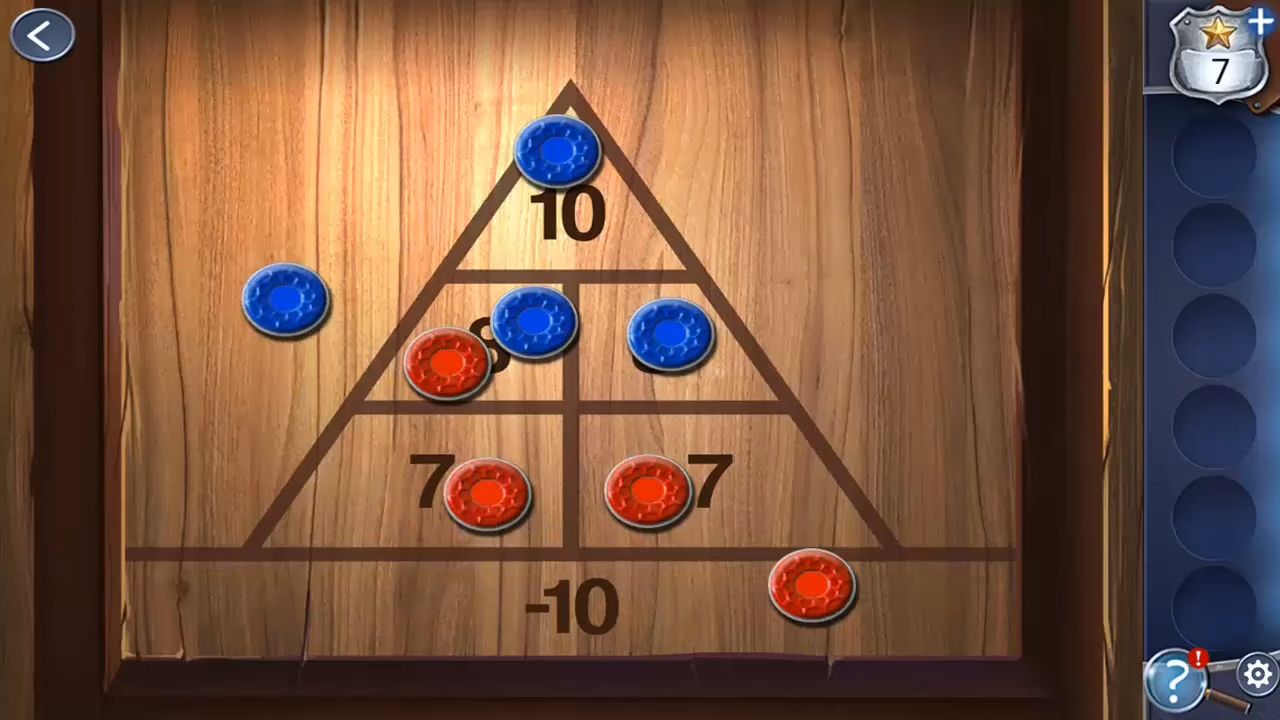
Find the star on the lampshade at the top left. Lift the center cushion of the sofa on the left and collect the batteries. There’s a photo screen on the table and rotate it by tapping, then open the battery compartment by tapping again to insert the batteries. On the table, there’s a shuffleboard game. Put the blue pieces on the board and arrange them to match a clue.
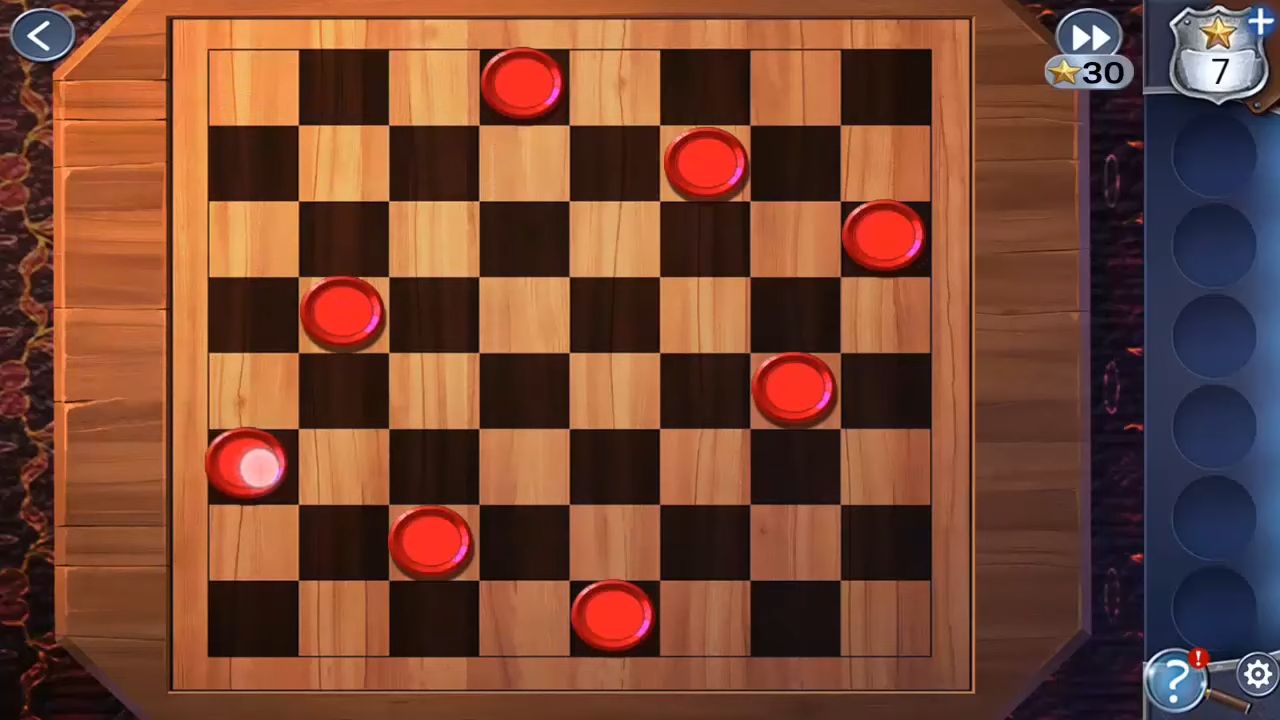
Now, take the red checker from the table and tap on the checkerboard to see it. Put the red checker in the right spot as shown. After following the instructions with the checkers, you’ll be able to get a key. Go back to the locker room and unlock the last locker. Tap on the coat to confirm if it matches the one you are searching for and this clue marks the end of Chapter 3.
Chapter 4
In Chapter 4 of Murder Inn, enter Jay’s previous room to find additional clues and get a safe escape.
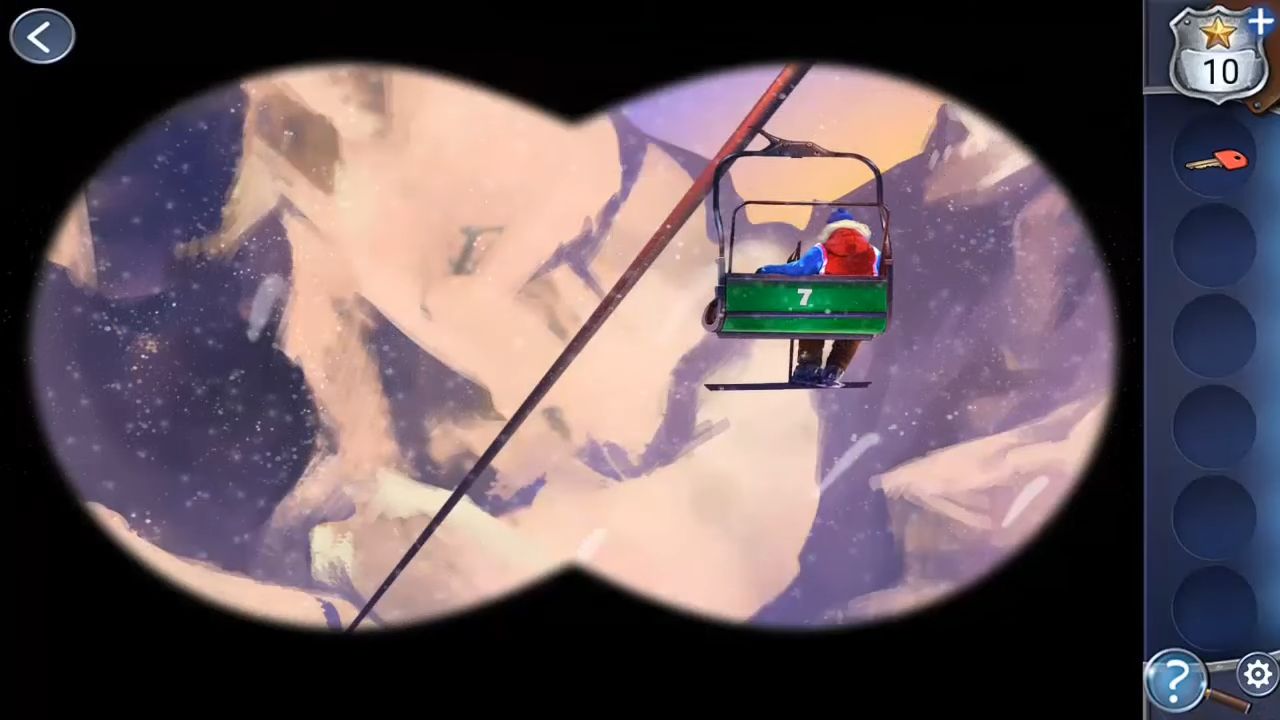
First, pick the star on the top of the table lamp to the left and tap on the binoculars found on the chair to pick them up. After that, open the curtains and take a look at the balcony. Tap outside to move and observe the view of the lift. Look through the binoculars at the ski lift view to spot number clues: Green is 7, Red is 9, Orange is 3, and Yellow is 5.
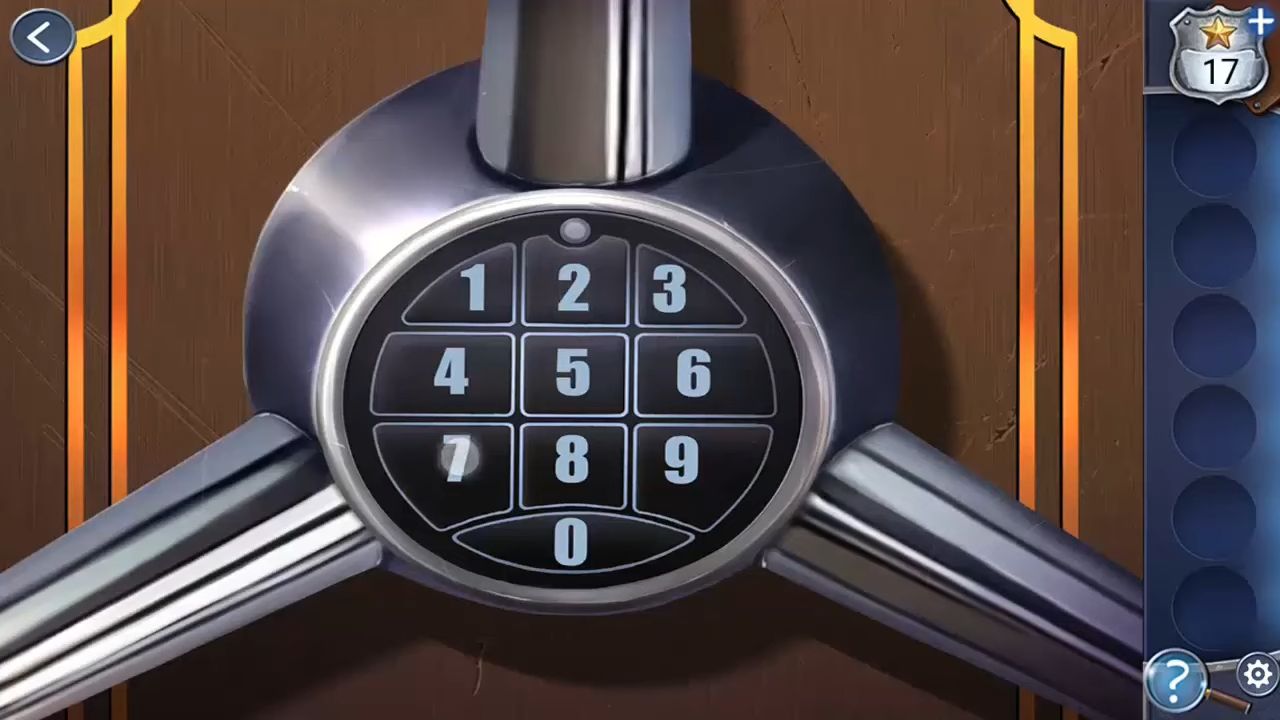
Observe the bowl of fruit on the table, and remember the four colors of the fruits along their respective numbers. Once back inside, tap and move the plant pot on the right to find a key. Use this key to unlock the cabinet in the middle and find a remote control. Enter a 4-digit code (3975) and now, you can enter the attic.
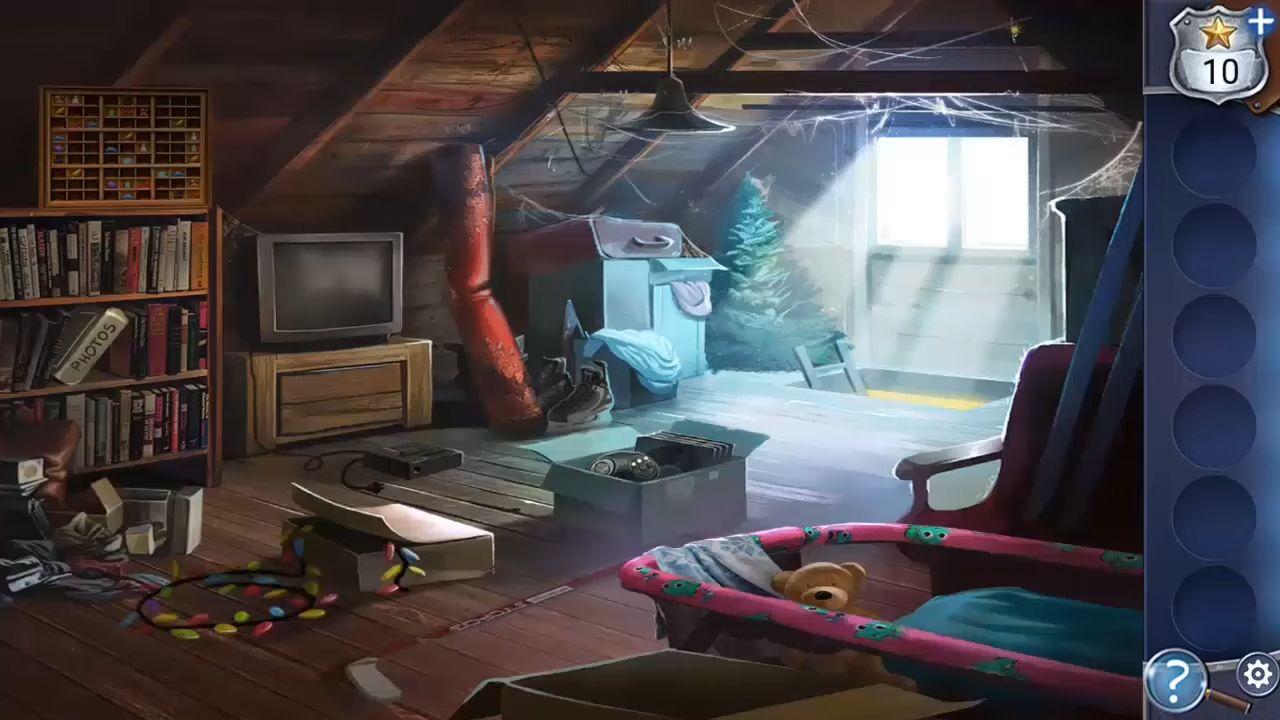
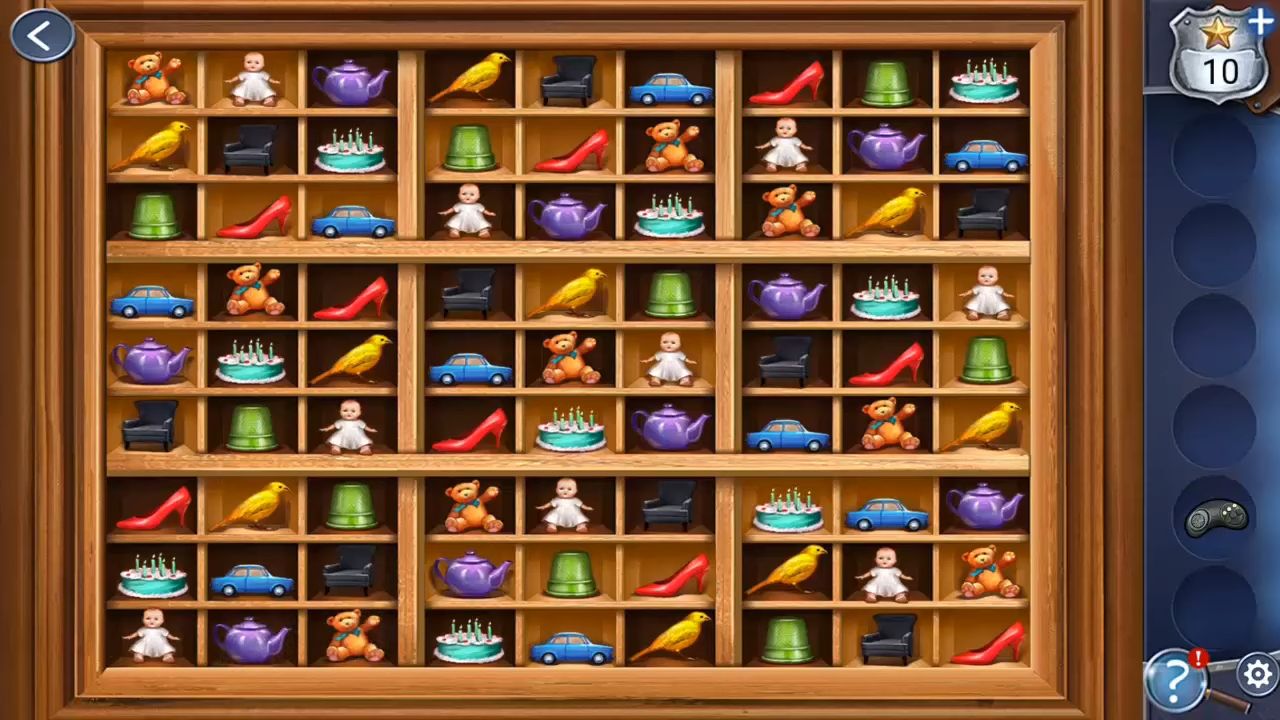
The star is on a roof beam at the top right and the photo album is on the bookshelf to see it. Look at the photo with the ice hockey player, the whale on the shirt, and the number 9. Then, tap the square display box on top of the bookshelf to begin a puzzle. It’s like a Sudoku game and you have to put different pieces in each row, column, and 3×3 square without repeating any. Tap on the un-highlighted box to change the piece in it.
Get a key and use it to unlock the small suitcase in the bed at the bottom right. Inside, you’ll find two hockey shirts; one for the polar bears (2) and another for the leopards (5). Return to the lower room and look at the Guest’s book on the table. The message there gives a clue about the sequence. Now, use the code (925) to unlock the padlock for the room and enter Jay’s room.
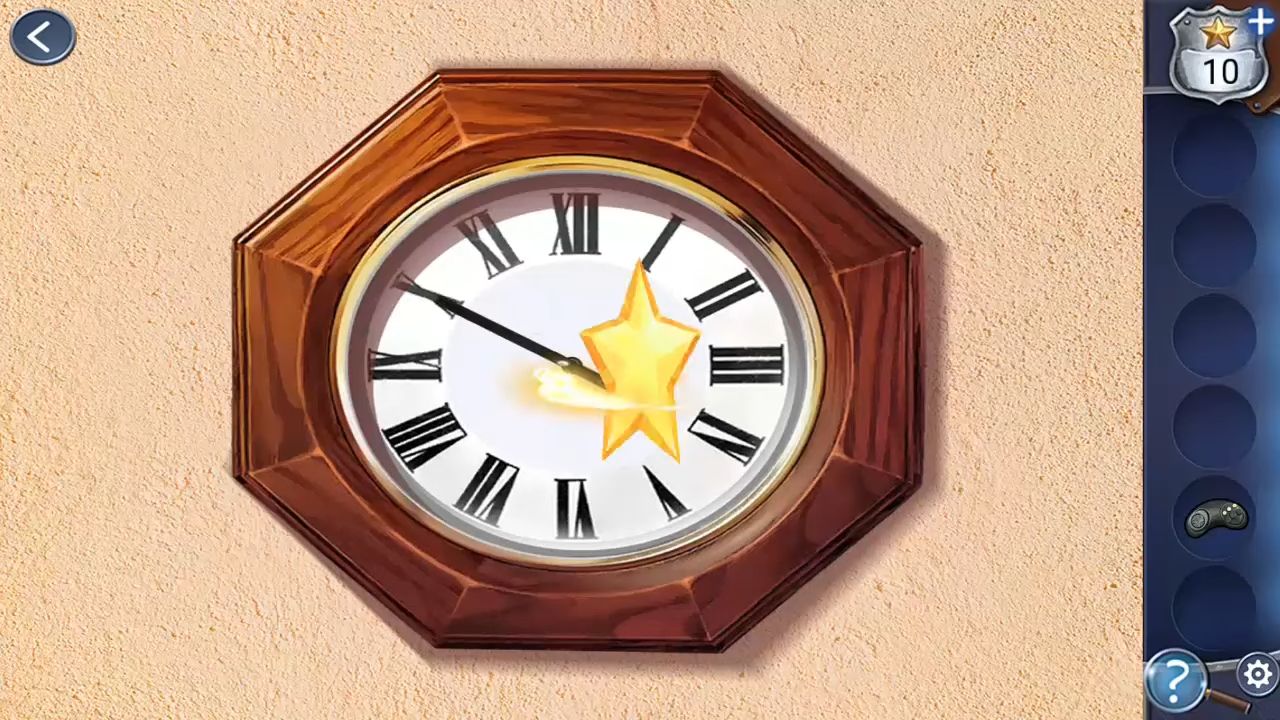
Start by tapping the trophy shelf at the back to check a clue. The two trophies display Roman numerals: I, V, and X. Then, tap the clock on the left wall and use the clue from the trophies to set the clock hands to show the time as 3:50 (ten minutes to four). Get the star from the desk lamp on the far right.
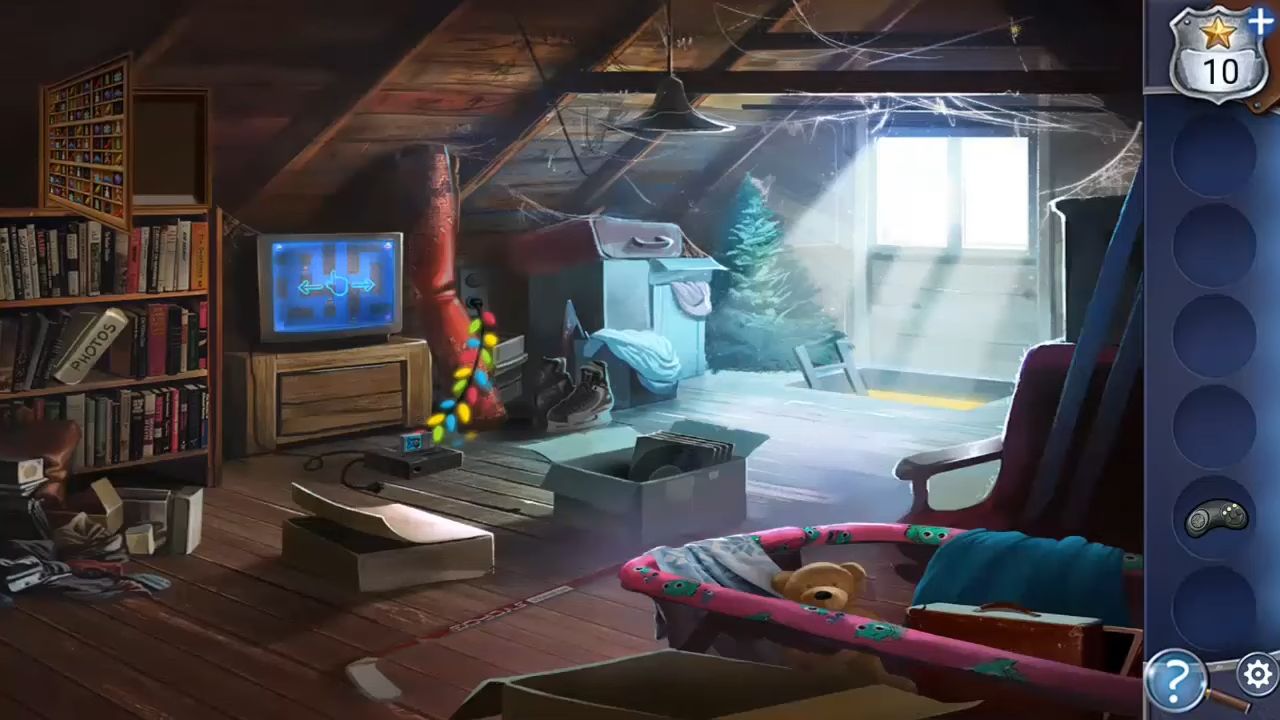
Now, you can get a key and use it on the left white drawer of the room to find a video game cartridge. Head back up to the attic and pick up the Christmas lights from the floor and also take the video game controller from the box. Move the red carpet roll to reveal a power outlet. Plug the Christmas lights into the socket and connect them to the game console for playing the game.
When you move, the mice will go in the opposite direction. Be careful to avoid the cats and guide the mice to the correct cheese plate. The blue and pink mice are on opposite sides.
Try to finish the game fast to get a high score and move forward. After completing the game, you’ll see Jay’s top score.
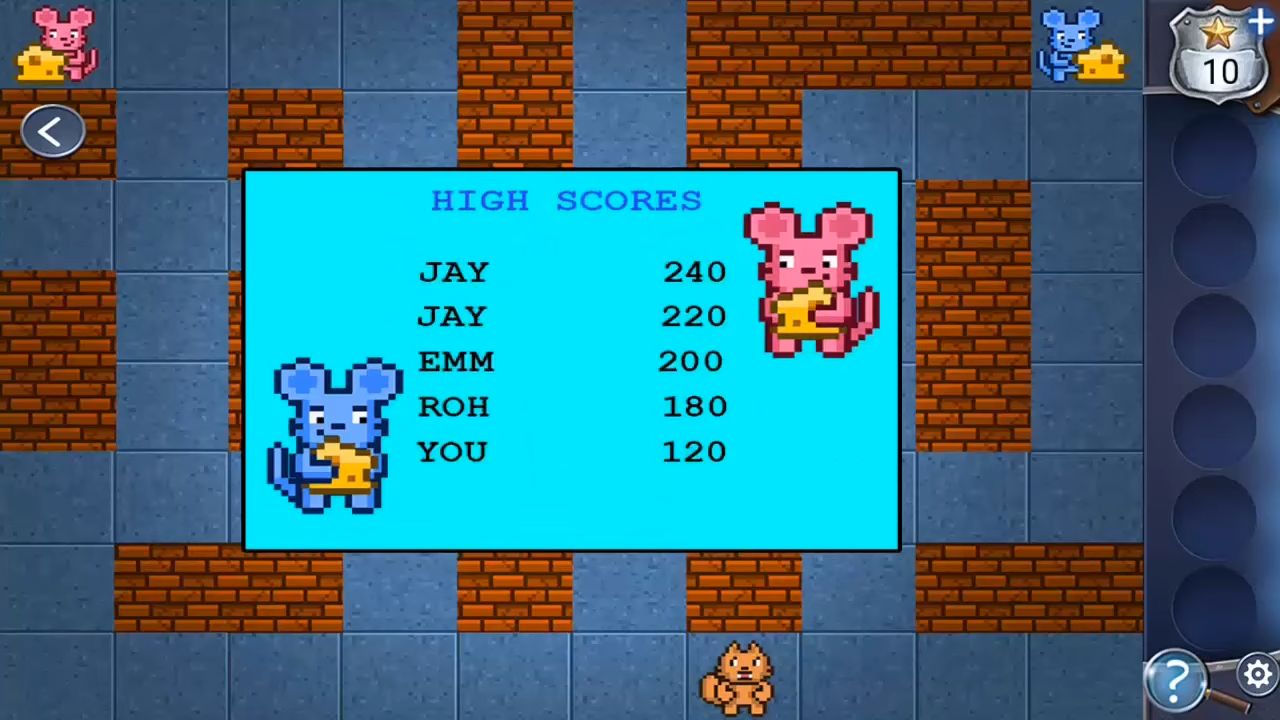
Return to Jay’s room downstairs and tap on the right white drawer to see a place to enter a code. Use the high score (240) from the video game to unlock it. You’ll discover a paper inside with a clue written on it.
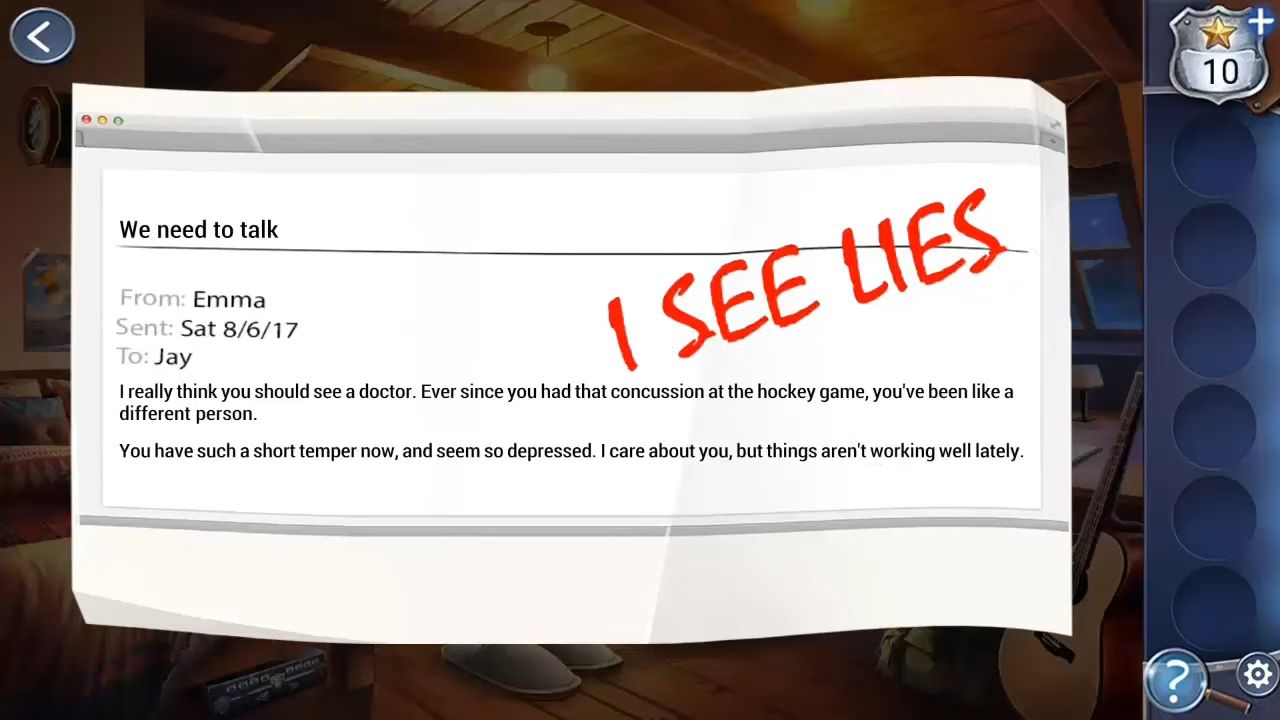
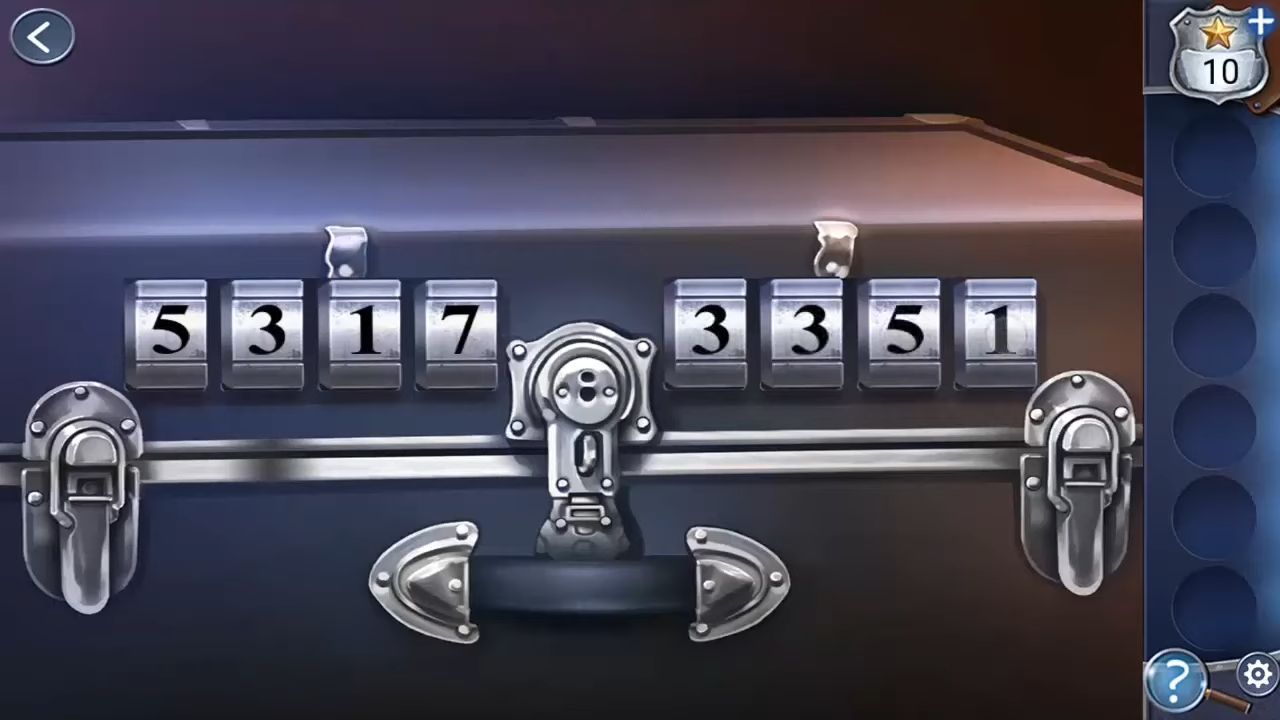
There’s a pad on the desk to the right and tap on it to see the code clue. Then, move to the foot of the bed on the left side of the room and search under the sheets on the floor to find a case. Use the clues you’ve gathered to figure out the code for this (5317 3351). Unlock the case to discover the final clue for this chapter and finding this clue marks the completion of Chapter 4.
Chapter 5
In Chapter 5 of Murder Inn, you need to look outside for any signs of a criminal and other clues to escape the room.
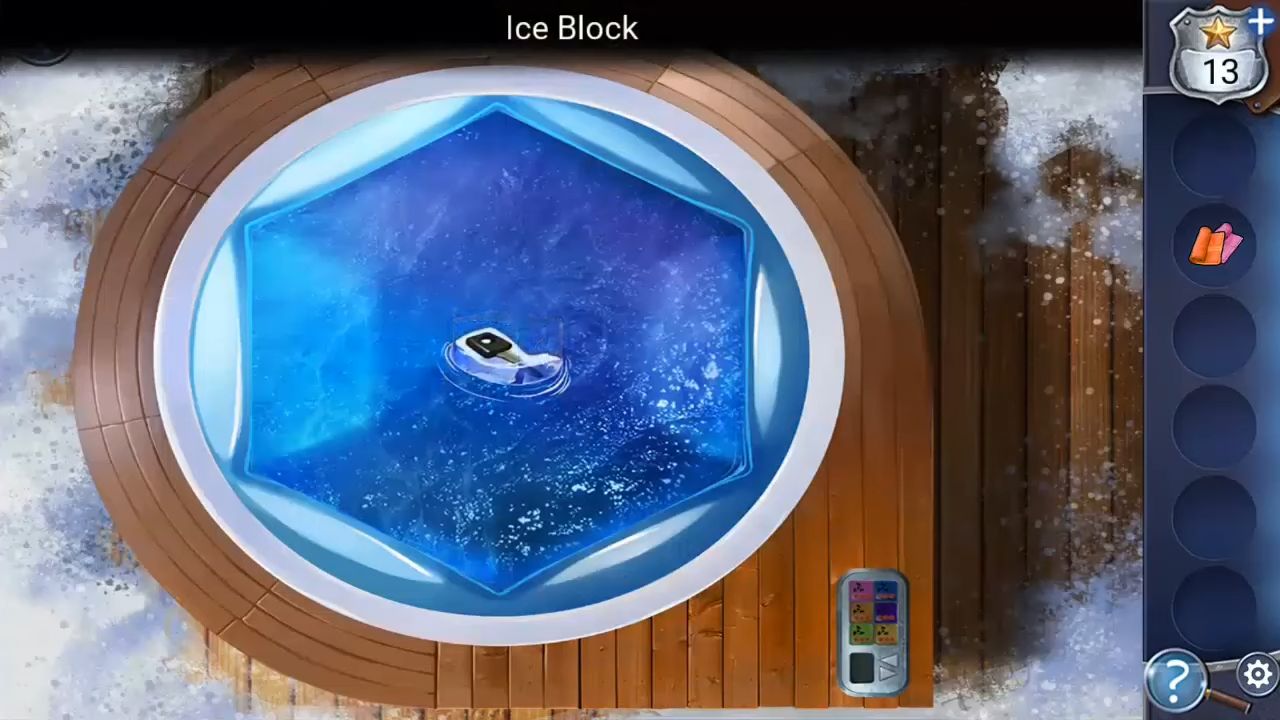
First, grab the star from the light at the top left. Then open the cooler box on the left and take the Ice block from inside. Grab the orange towel from the Jacuzzi and the pink towel from the chair. Look at the Jacuzzi and then put the ice block into the water by using it on the Jacuzzi.

Tap on the control panel, then change the heat control on the left to HI. Step back and the ice will melt, allowing you to collect a key. Return to the starting scene and use the key to unlock the door on the left. Inside, grab the green towel.
After that, choose the towels from your inventory and put them on the shelves to the left. Keep track of how many towels of each color there are. Tap once more on the Jacuzzi and then on the control panel.
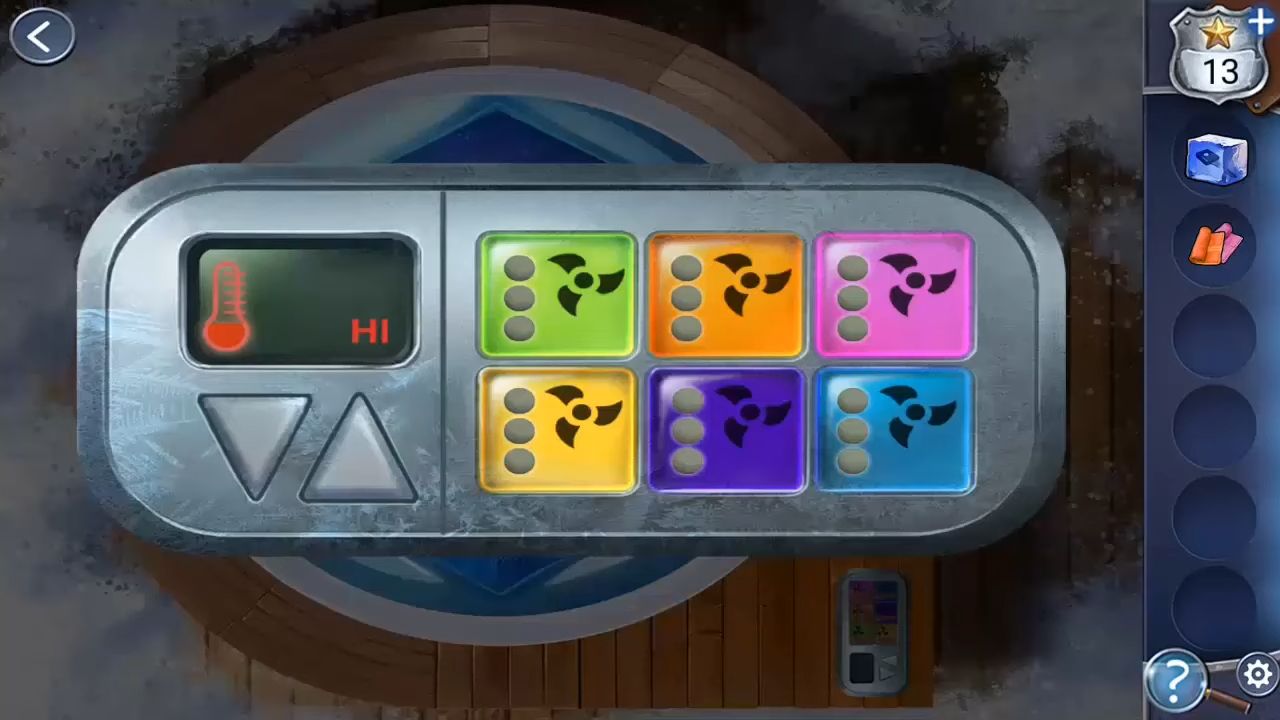
Adjust the controls for all six colored buttons to match the number of towels for each color. After finishing this task, you’ll receive a message. Then, examine the pattern of water jets in the tub.
After that, tap on the cabin that’s far away. You’ll find a star under the small window on the left side of the building. There will be some ice blocks on a frozen lake along with some ice skates. Collect the skates and tap on the ice blocks to begin a puzzle.
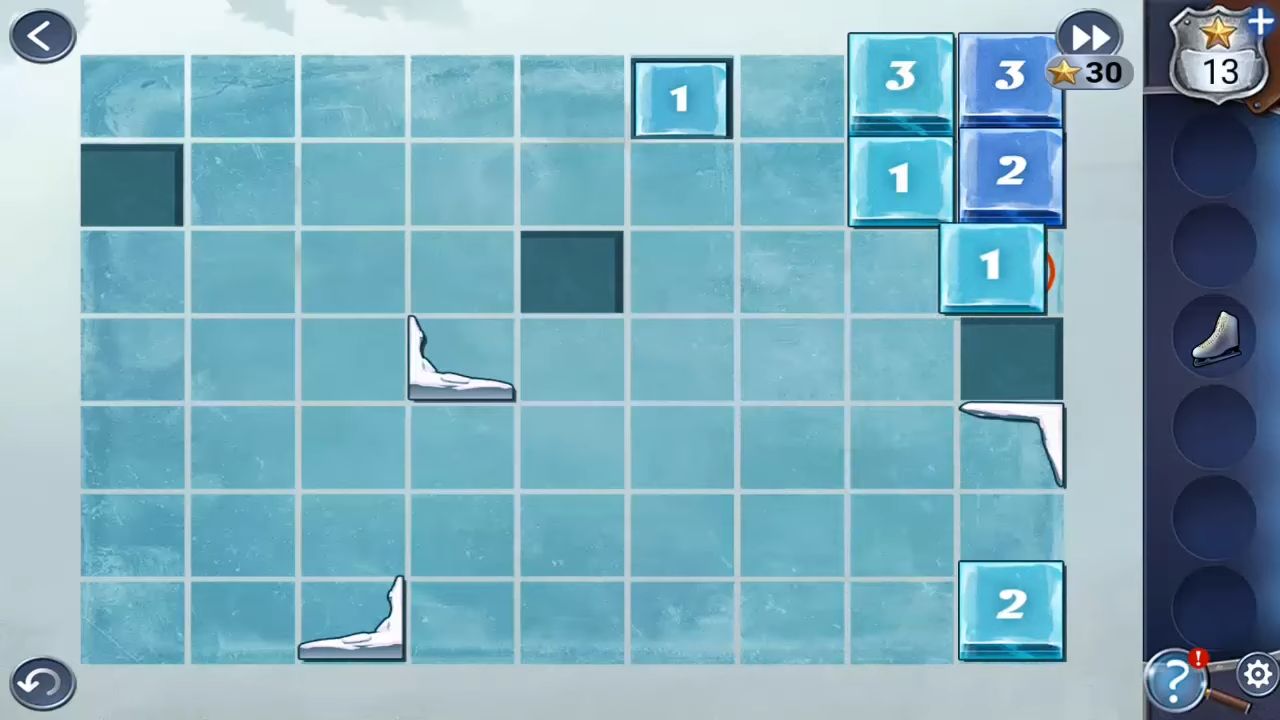
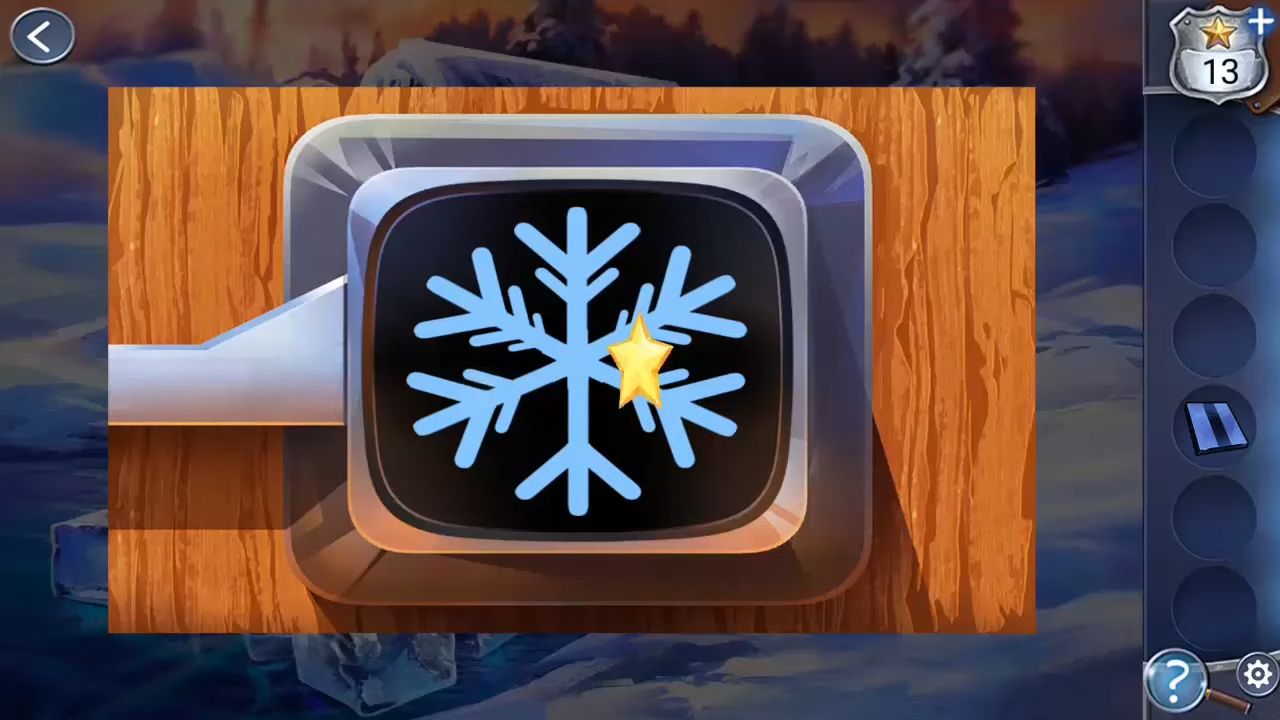
After finishing, tap on the roof of the cabin to pick up a square tile. Use the ice skate and tap on the front door of the cabin to remove the ice covering it. Tap the door to see the unique snowflake lock. Touch each arm of the snowflake to adjust the number of lines it shows.
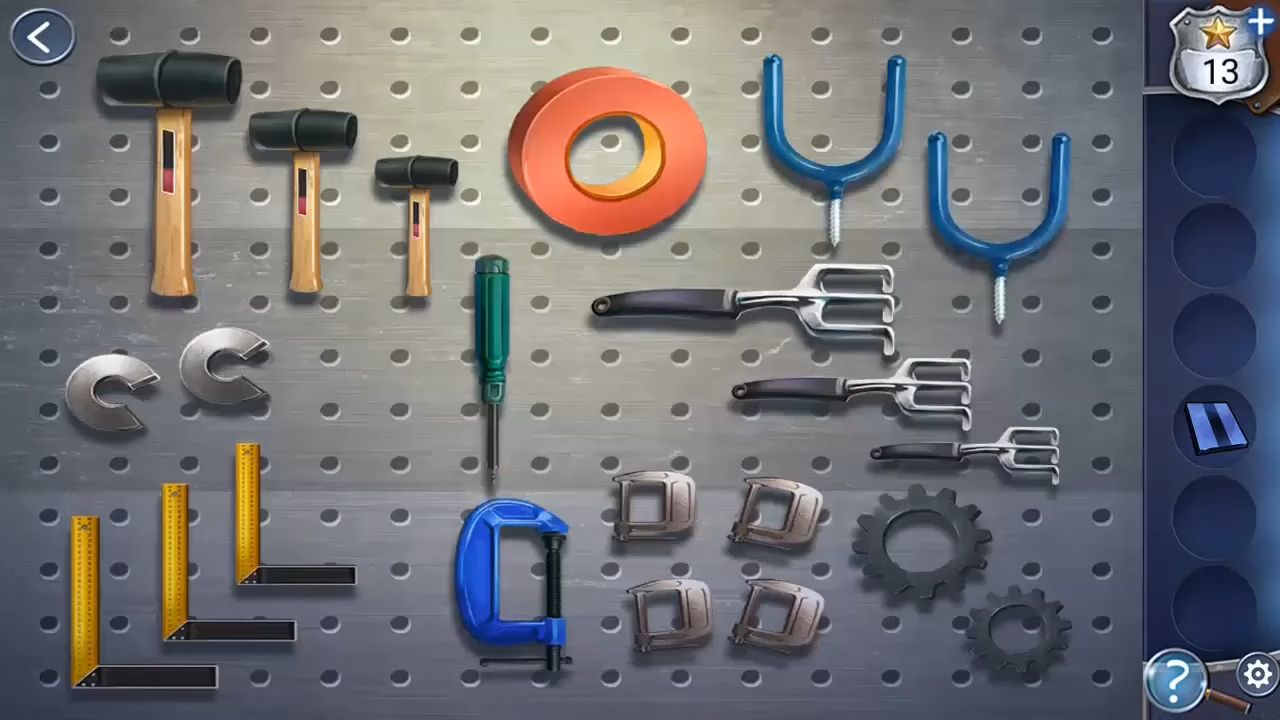
Now, you can go inside the cabin and collect the shovel from the back wall. After that, open the blue box on the left to get a basketball. Use the basketball to hit the plank on the left side of the roof and take a plastic key that falls. Use the key on the snow blower in the center to move it. Then, tap on the tool rack on the left wall to see a clue.
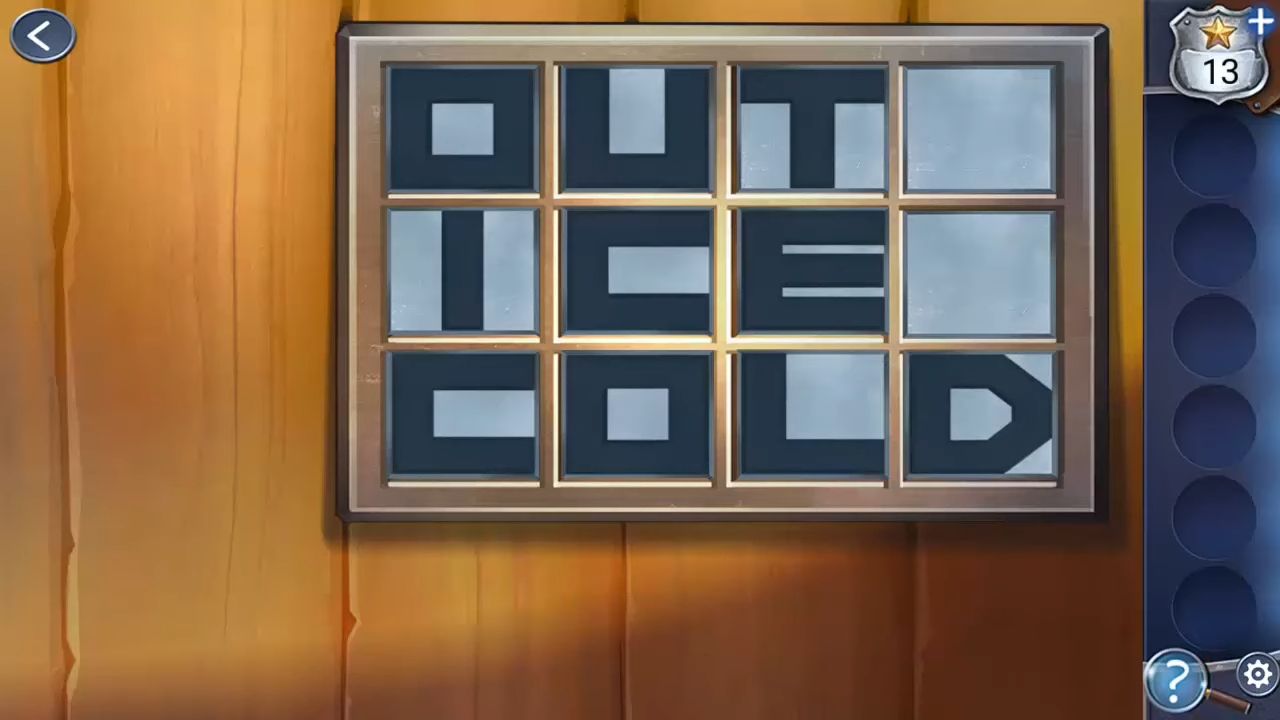
Afterward, use the shovel to lift the panel on the floor. Then, tap the floor to see this puzzle. Insert the extra tile you gathered earlier into the puzzle. Arrange the pieces into the squares by moving and rotating them with taps. As a result, you’ll discover a secret passage under the floor, and finding this clue marks the completion of chapter 5.
Chapter 6
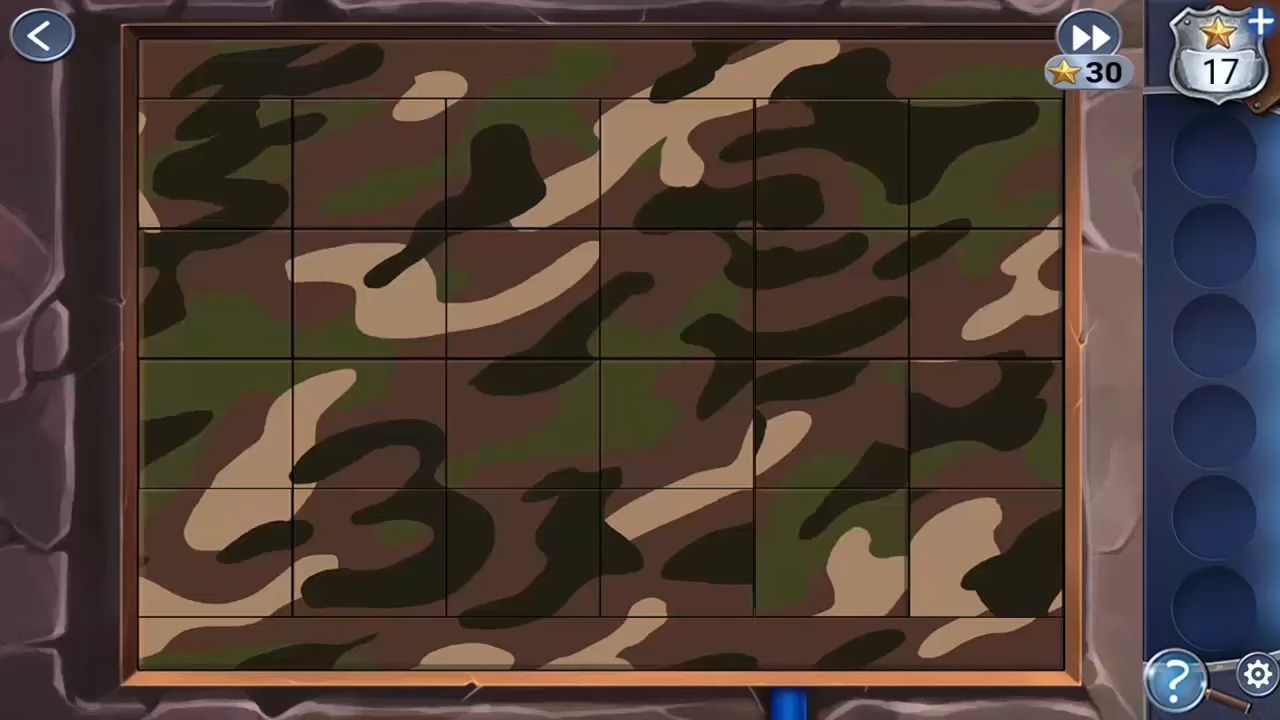
In Chapter 6 of Murder Inn, you’re in an underground room. Search this room for additional clues and collect black camo paint from the small shelf on the top right. Open the green bin on the floor and collect a Stencil from inside. Next, tap on the top of the safe on the left to see a puzzle board—swap pairs of squares to finish the pattern.
After completing it, take note of the hidden number, which is 3. The star is located on the top middle shelf.
Afterward, tap on the white camo jacket on the left to see it. Then, use the stencil on the square of the jacket. Apply the paint and tap again to remove the stencil. Take note of the new pattern, as there is a hidden number (2).
Tap on one of the lower shelves to discover a paper with a math clue: a, b, c, d = 3257. Next, go to the safe on the left and use the code to open it. Inside, collect the 4 arrows.
There’s a small black case on one of the small shelves. Tap on it and check what’s inside. You’ll see three colored lenses inside the case. Close it and use this clue to position three arrows in the holes on the right. This will open the way to the next secret room.

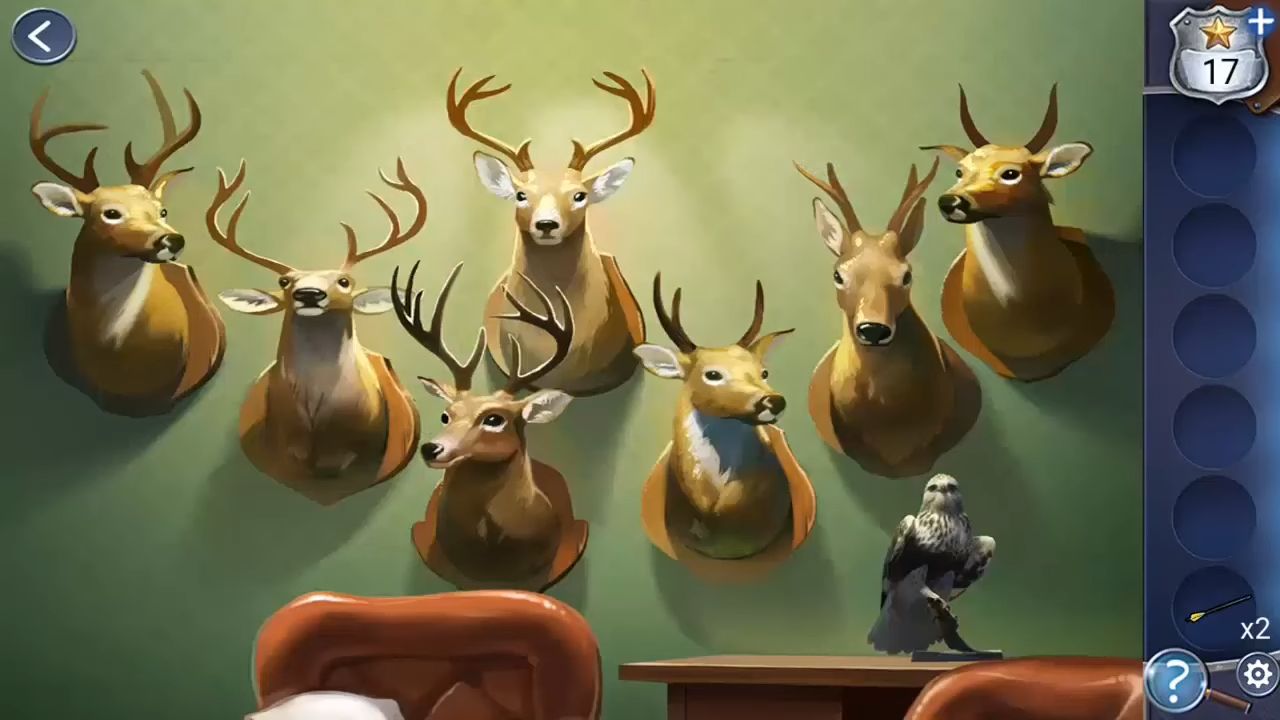
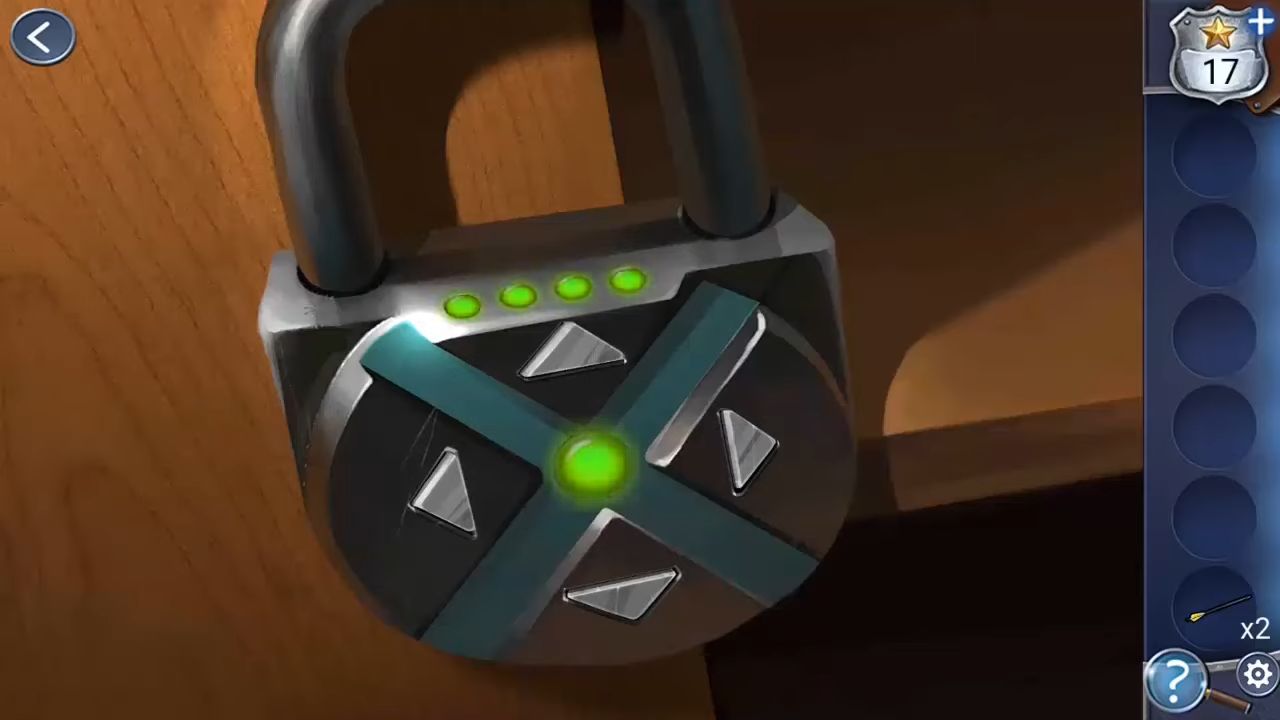
Tap to look at the deer heads on the wall and observe that each deer’s head is facing in a different direction. Tap on the cupboard unit at the back right to see a padlock with a directional input. Use the positions of the deer heads above as a guide to unlock it.
Pick up a metal dial and move the chair on the right to access a second yellow arrow. Put both yellow arrows in the holes on the right wall to reveal another secret, uncovering a metal door. Examine it and then insert the dial in the center to unlock it.
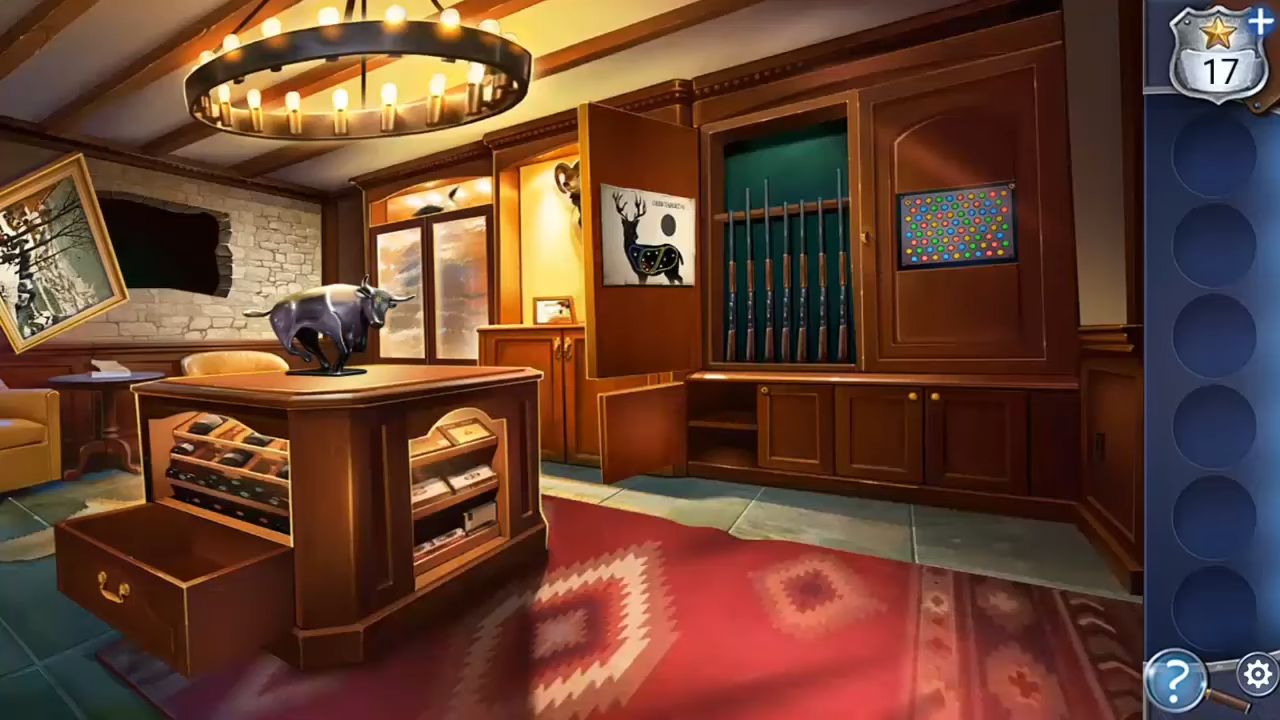
Go into the third secret room. Underneath the bull, tap the drawer located on the lower left side to get a key. Use this key to unlock the small cupboard near the center and take out some night vision goggles. After that, move the painting on the left wall to uncover a dark hole. Put on the night vision goggles and tap on this hole to see a clue.
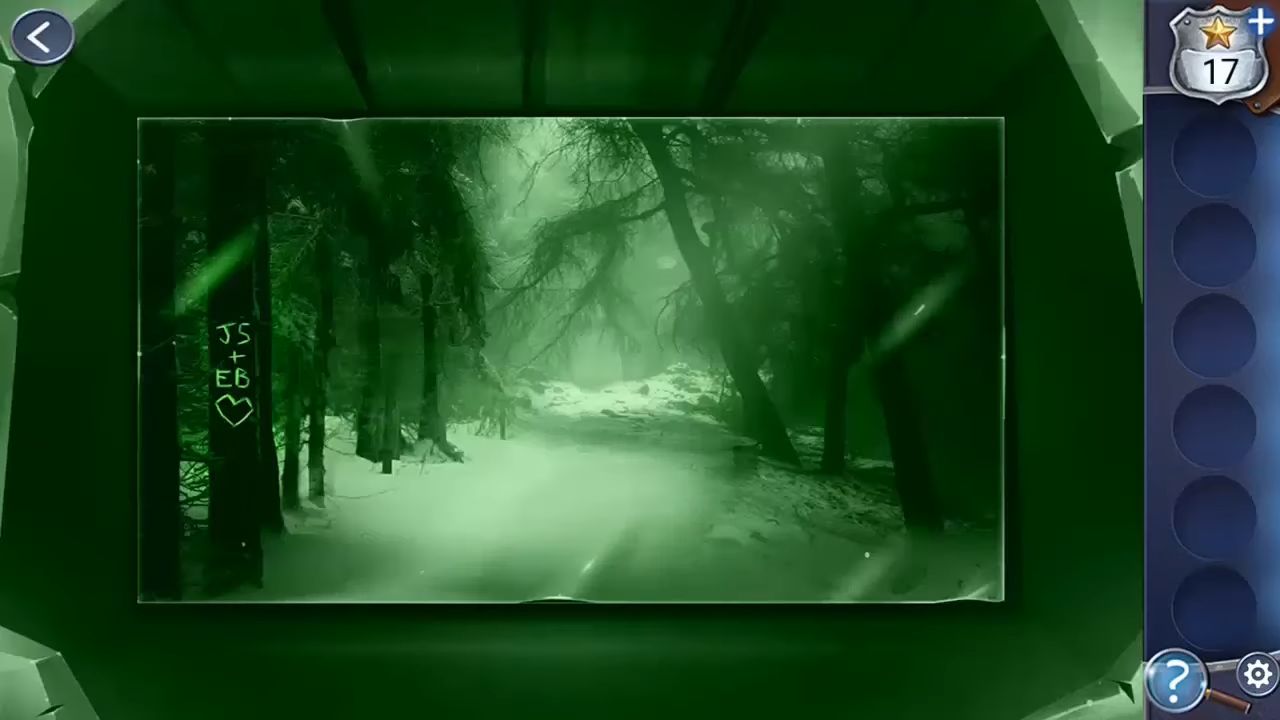
Now, tap on the tumbling lock situated on the big cupboard door to the right side of the room. This lock requires four letters (JSEB).
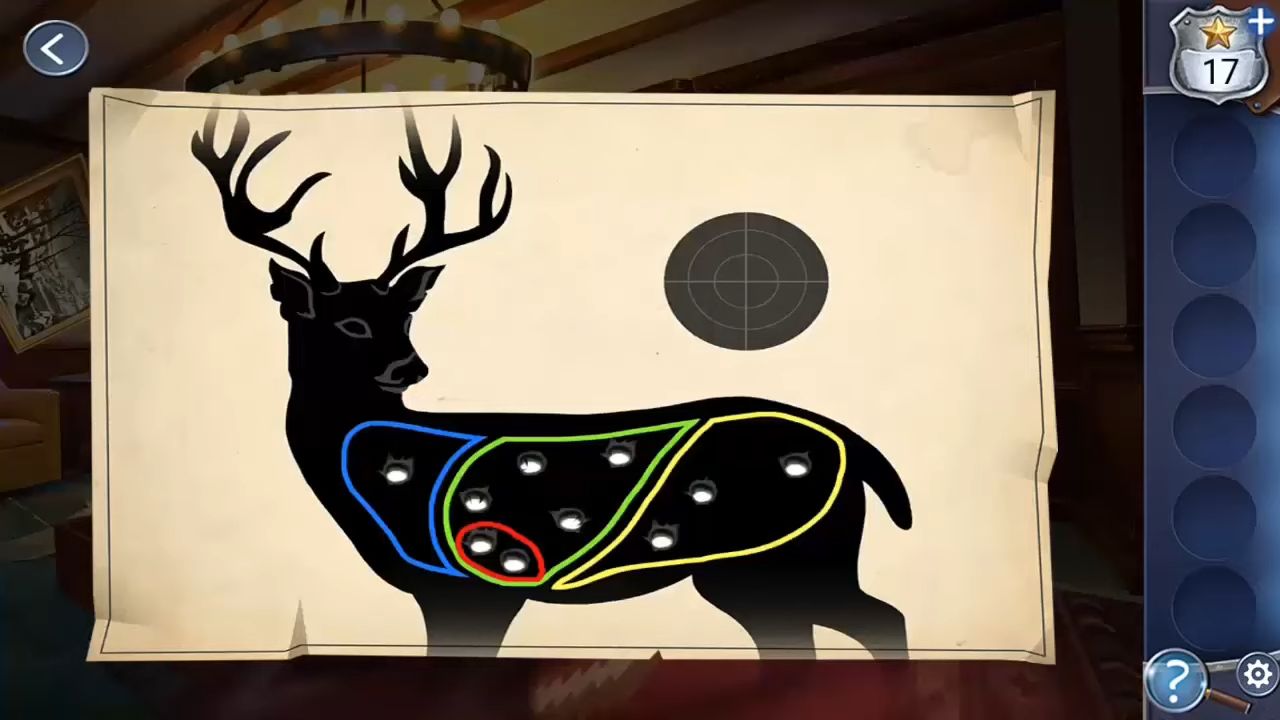
Look at the poster inside the cupboard door for a new clue. Pay attention to the number of holes for each color shown on the poster.
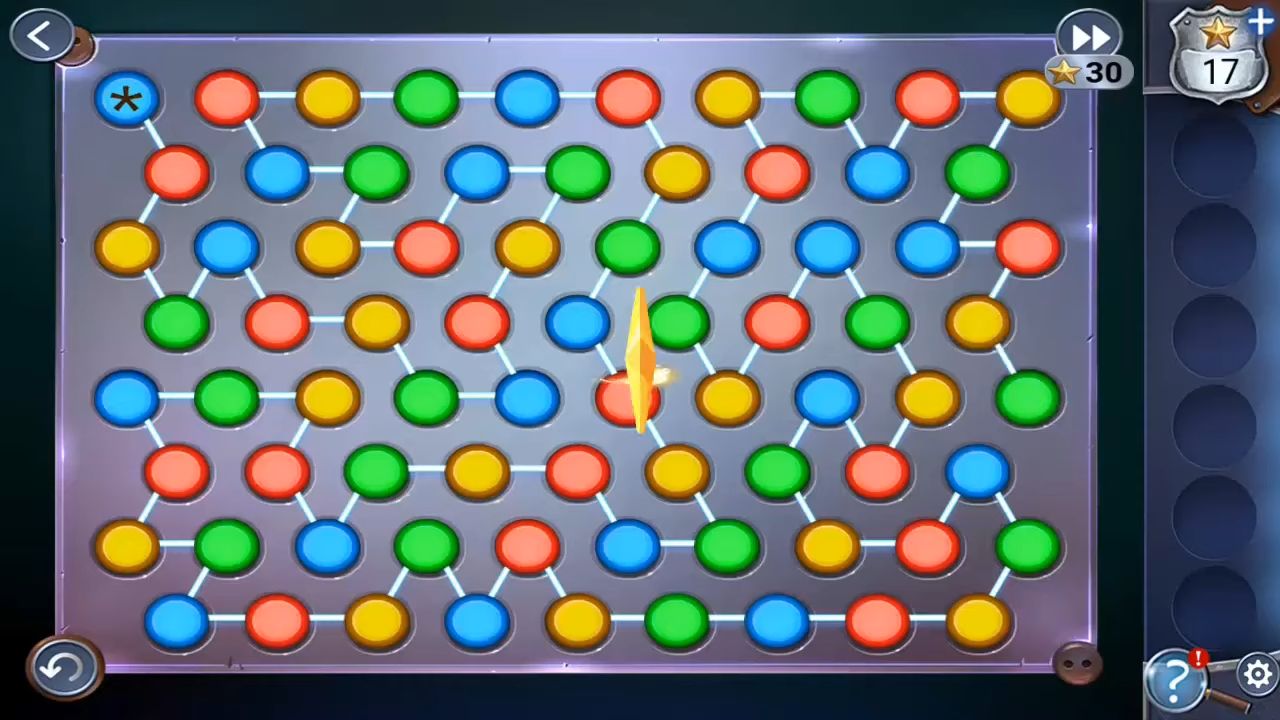
Afterward, tap the colored pattern of dots on the other door; it’s a lock. You need to connect all the dots in the correct order. Discover the correct pattern to follow this sequence in the puzzle, then tap on all the buttons accordingly.
Opening this last cupboard reveals that a rifle is not there. This discovery marks the end of Chapter 6.
Chapter 7
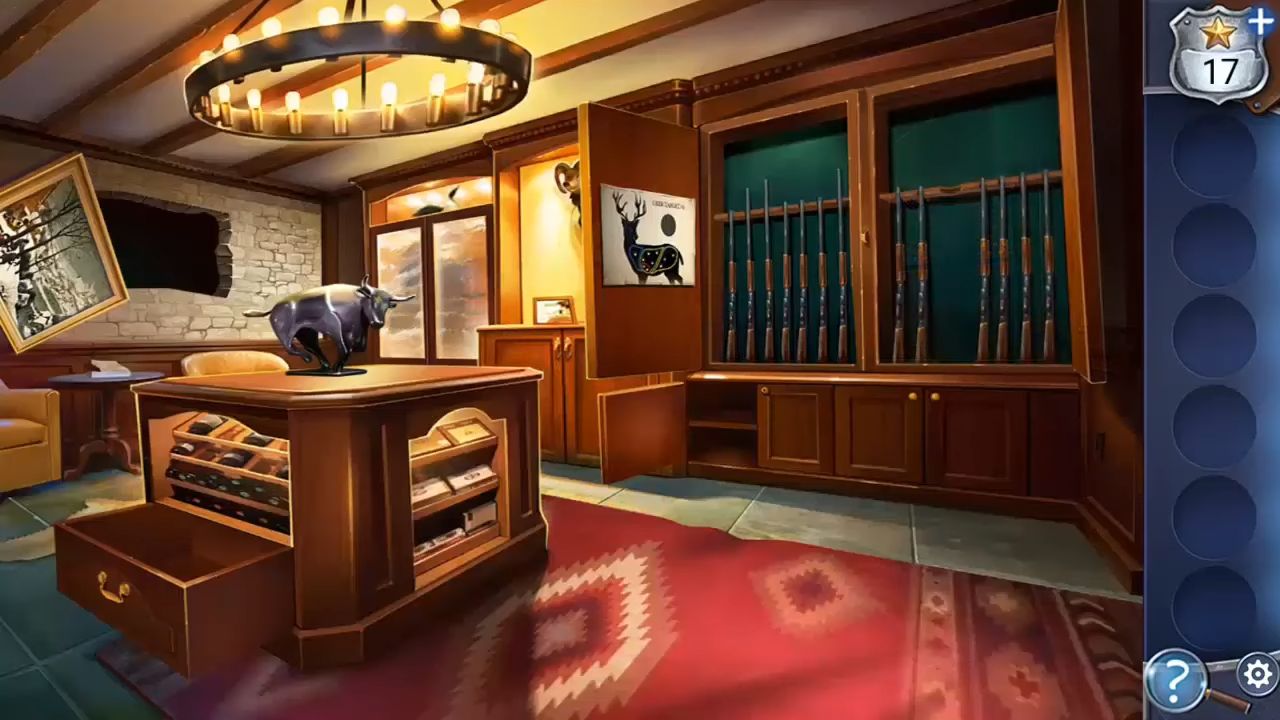
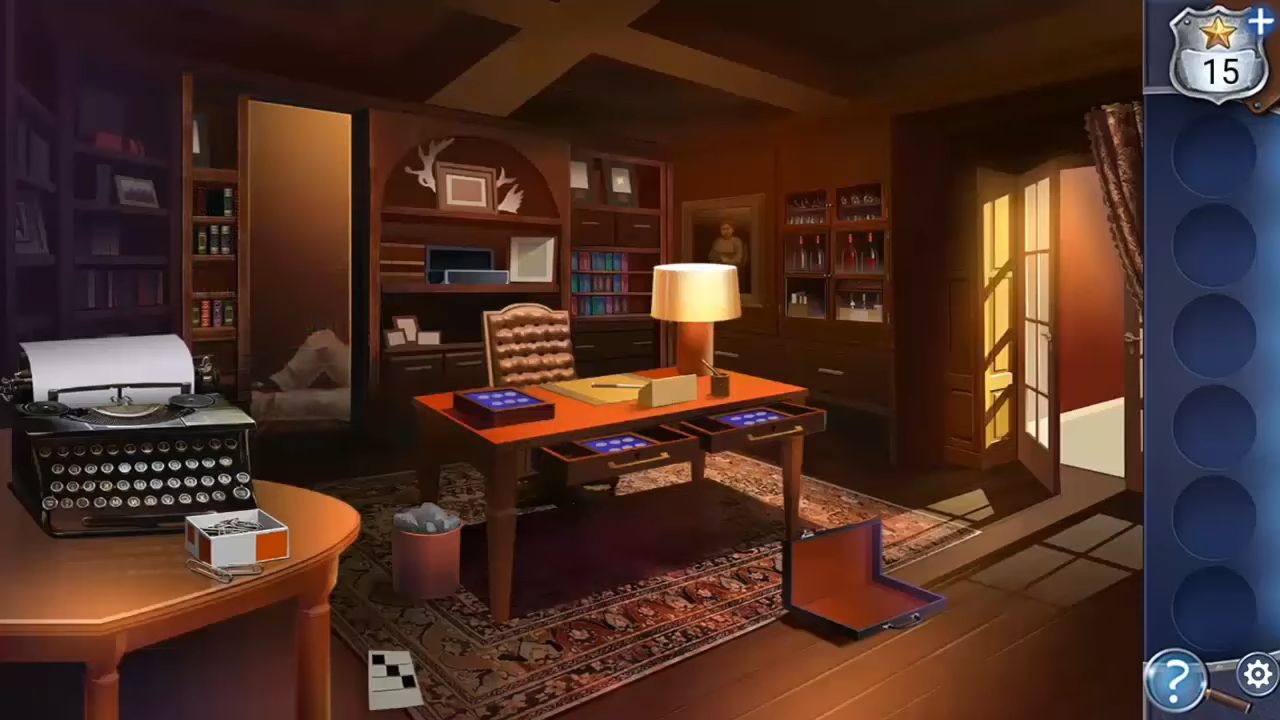
In Chapter 7 of Murder Inn, you need to go back to the main house to talk to Frank. But when you look for him in his study, he isn’t there. Search for clues to locate him.
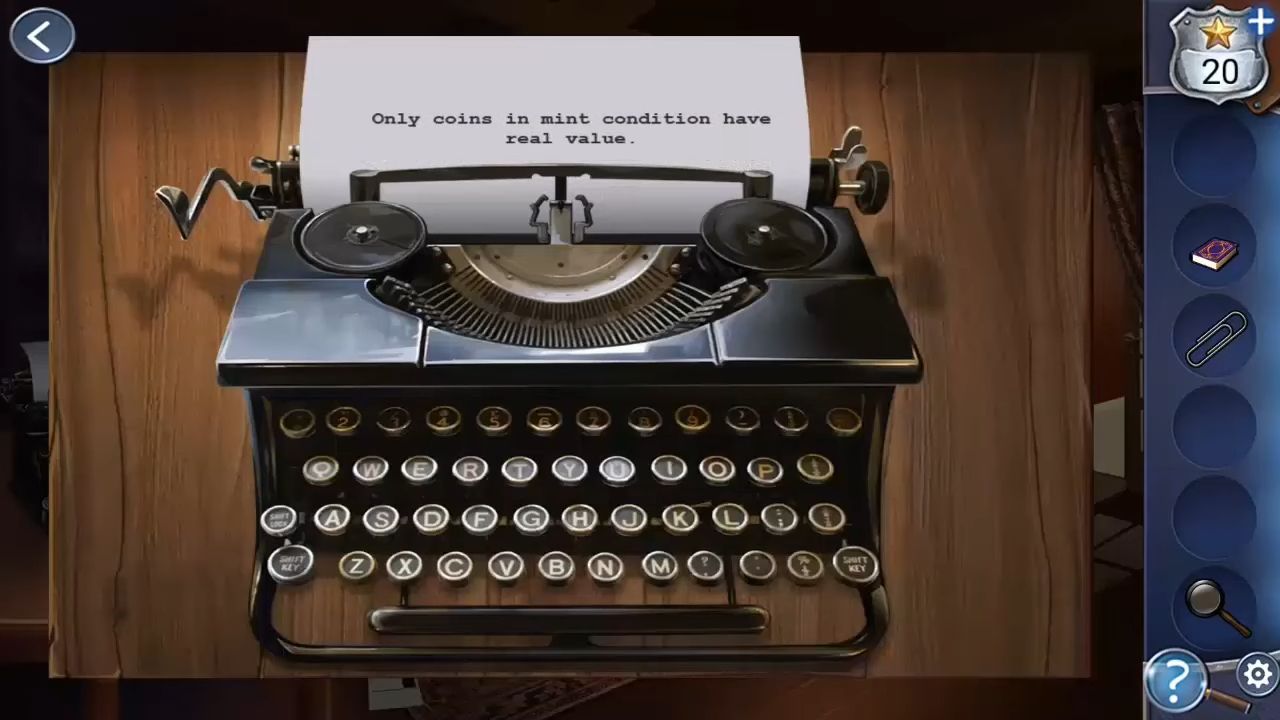
Firstly, collect the key from the table on the left and take a paper clip from the box next to it. Look at the typewriter and then view the page to find a clue message. The star is at the top center of the scene in a frame.
Tap on the gray box located in the middle of the bookshelf behind the chair. Collect a magnifying glass and check the bin near the desk to see a clue written on a piece of paper. Use the key to open the desk drawers. Afterward, examine the box on the desk’s left side, which holds a collection of US one-cent coins. Use the magnifying glass to take a closer look at them.
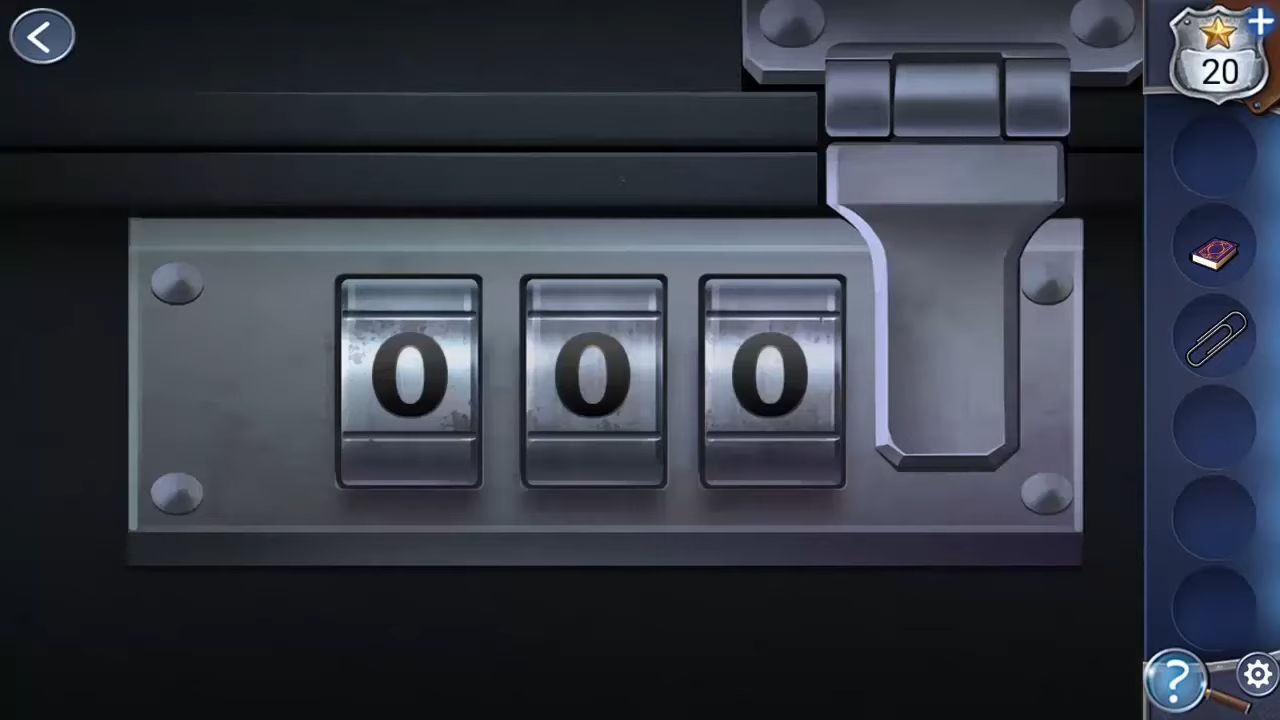
Move on to the other coin collections in the drawers and examine them too. Tap on the black case on the floor to see the lock. Input the 3-digit code (436) to unlock it and collect a book from inside. Also, collect a second book from the lowest shelf to the left of the desk. Finally, tap on the bookshelf to the right, just to the left of the lamp.
Tap on each shelf to shift the books left and right. By doing this, you’ll be able to collect a third book. Afterward, tap the door on the right to move into the next room.
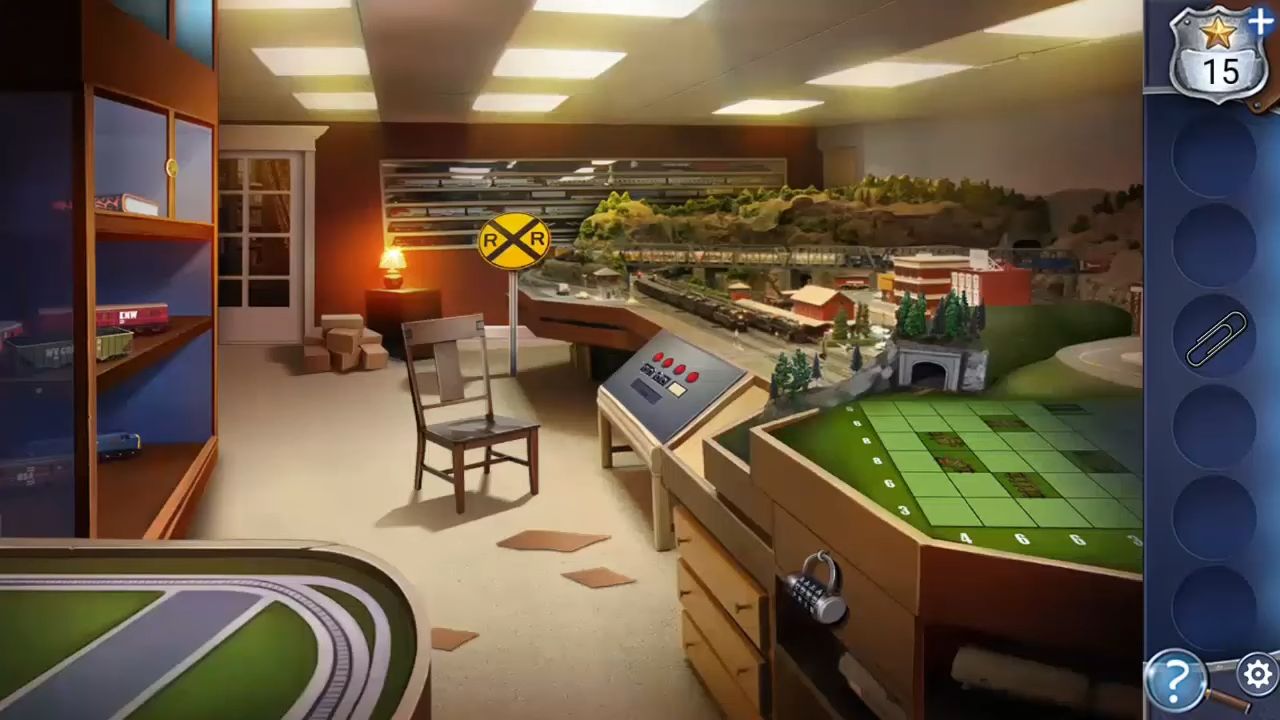
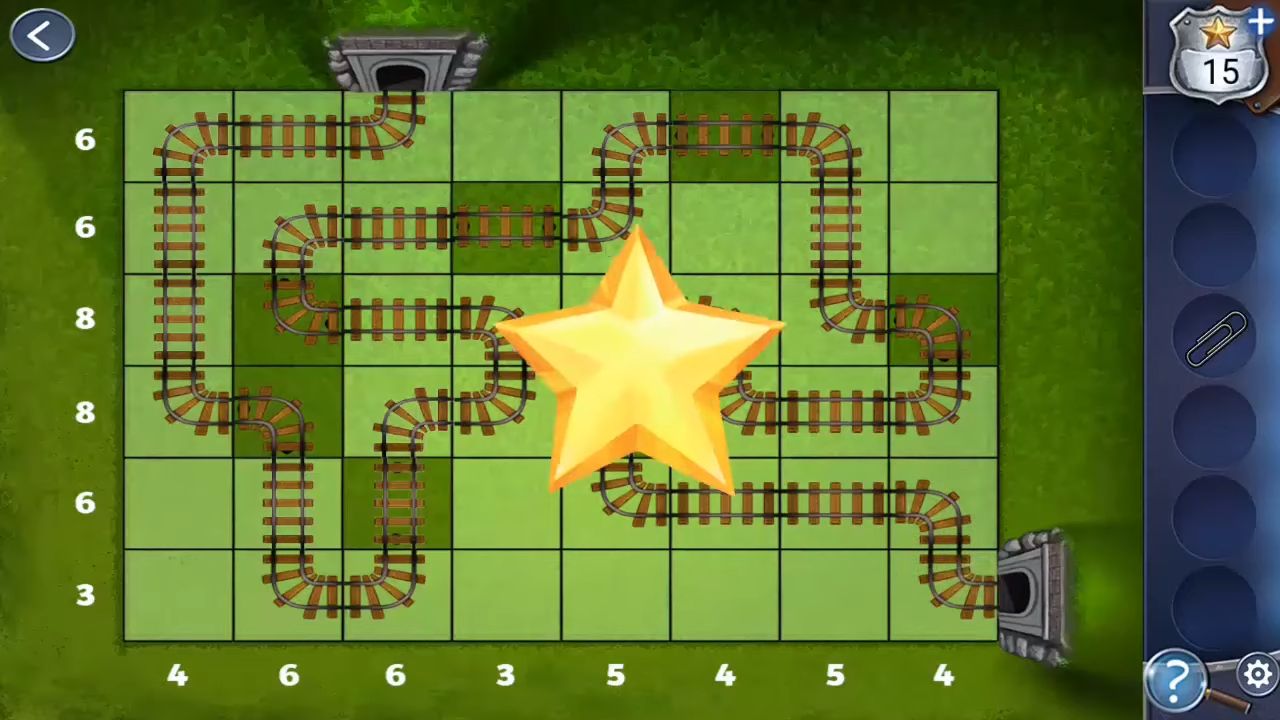
Tap it to view the case on the left, showing train carriages with letters. This is an important clue. Next, at the lower right of the room, there’s a lock on a drawer. Tap it and enter the code (VERA). Take out the track pieces from the drawer.
Tap on the board on the right to see a layout for the tracks. Now, place the box of pieces on the board to start a puzzle. You can get the star on the small lamp near the door.
Tap each square to add or change pieces. You need to gather the fixed pieces and build a track from one tunnel to the next. Also, ensure that the same number of pieces is included in each row and column as indicated by the numbers listed on the left and bottom of the board.
A train will show up and you have to remember the colors of the pieces it carries. Next, tap on the control panel located in the center. Touch the lower panel to take it off, and then insert the paper clip into the gap. The lights will turn on, all red. You can adjust the switches to set the colors of the lights. Match the colors as mentioned before. A train arrives on the left side, carrying a key. Utilize the key on the top left cabinet to obtain a fourth book.

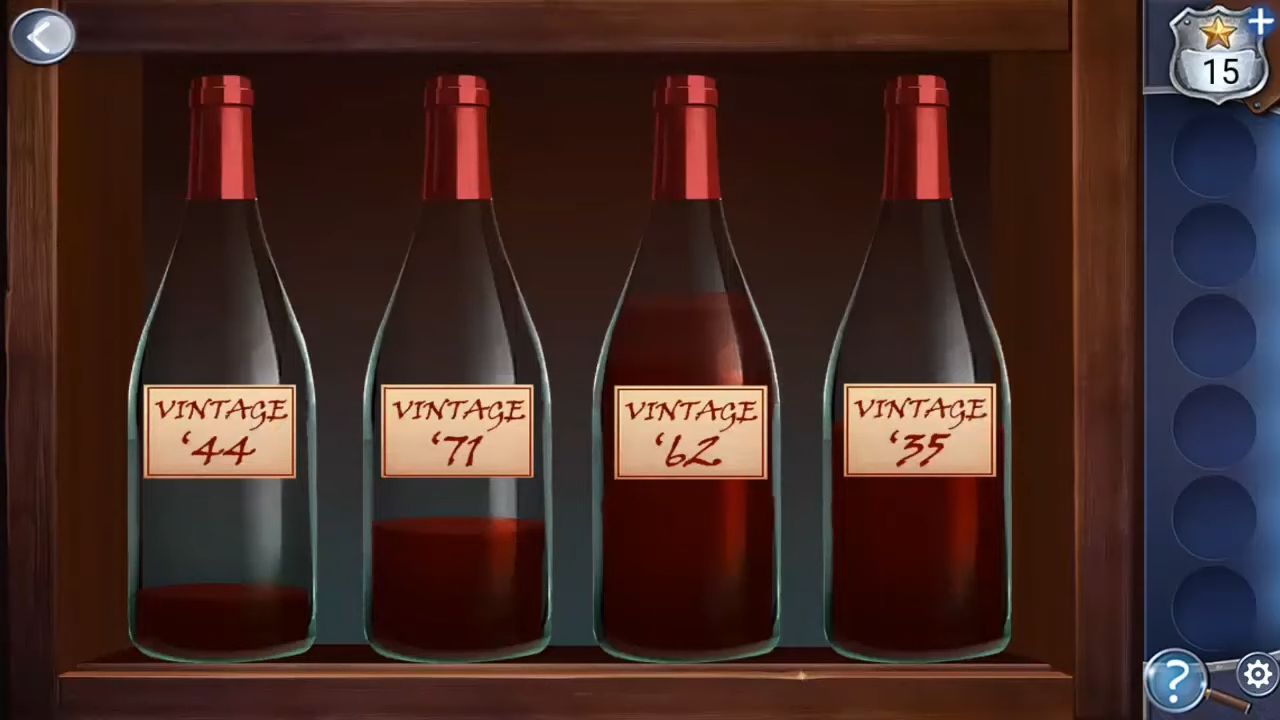
Tap the door situated at the back to go back to the study. Touch the shelf to the right, near the door, to view four bottles of wine. Each bottle contains a different amount and represents a specific year.
Afterward, move back and tap the bookshelf to the left of the desk to see it. Put the four books you found on the shelves. Each shelf has eight books, and you can tap them to arrange them from left to right. Make sure they are in the correct order.
Once this is completed, a doorway will open up, revealing something important, and finding this clue marks the end of Chapter 7.
Chapter 8
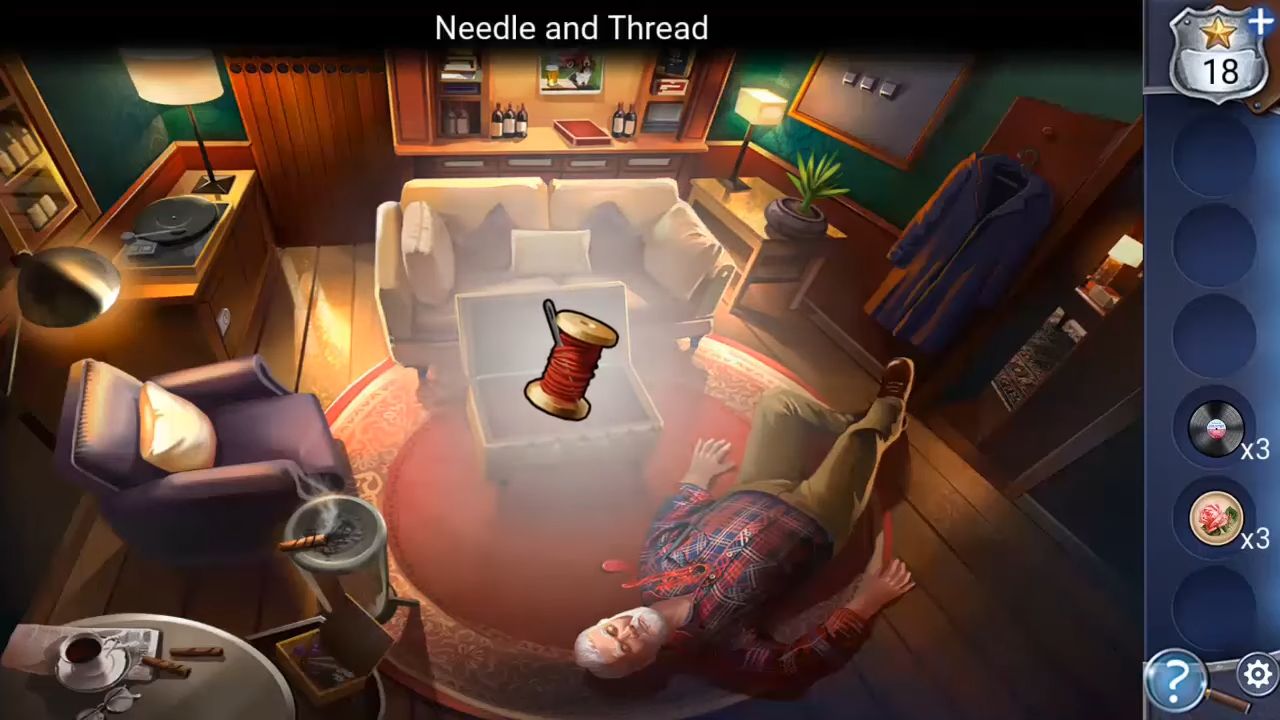
After discovering Frank’s body in Adventure Escape: Murder Inn, your task is to investigate and determine the cause of his death.
Firstly, tap on the body to examine it and then retrieve a key from the shirt pocket. Collect the record found beneath the body. Then, collect the rifle and use the key on the table in the bottom left to unlock the drawer. Inside the drawer, open the box and gather the needle and thread. The star is on the wall in the top right corner.
Tap the stool in the center to open it and discover a second record. Pick up the coat hanger from the wall on the right. Then, use it to find the third record on the floor in the far left corner of the room and view the picture on the back wall in the center. This picture contains an important clue.
Afterward, tap the record player on the left side of the room and place the three records beside it. Use the needle and thread on the arm to replace the stylus. Drag in each record and then use the arrow controls to position the arm to each track and read the titles.
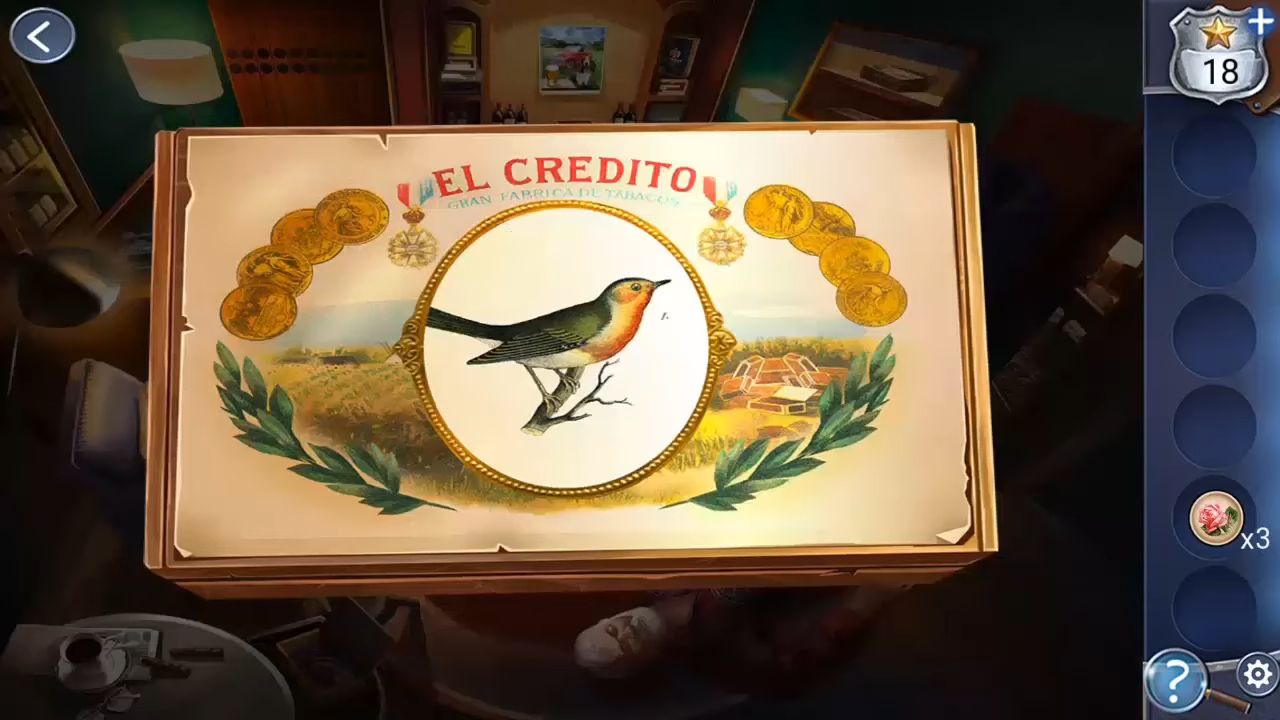
Once you’ve checked all three records, move back and tap the wall safe on the right with the three dials. Enter the code: (342). Tap each of the cigar boxes in the safe to see the images. One has a crown and roses, and the other has a bird and leaves.
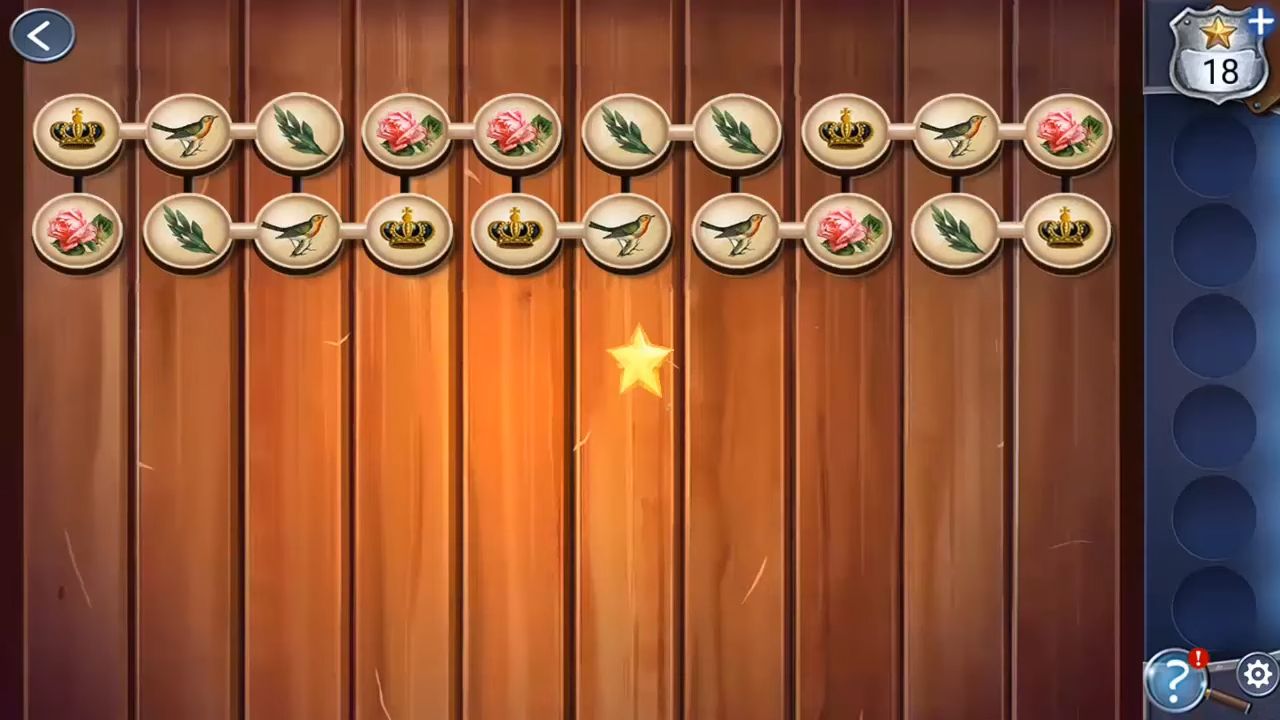
Tap on the ashtray located on the left to get a token. Then, touch the chair on the left to move the cushion and find a second token. Tap the pot plant on the small table on the far right to move it and collect a third token. Next, touch the wood paneling in the back left with the 2 rows of holes. Now, you need to put all the tokens into the holes to match a specific pattern.
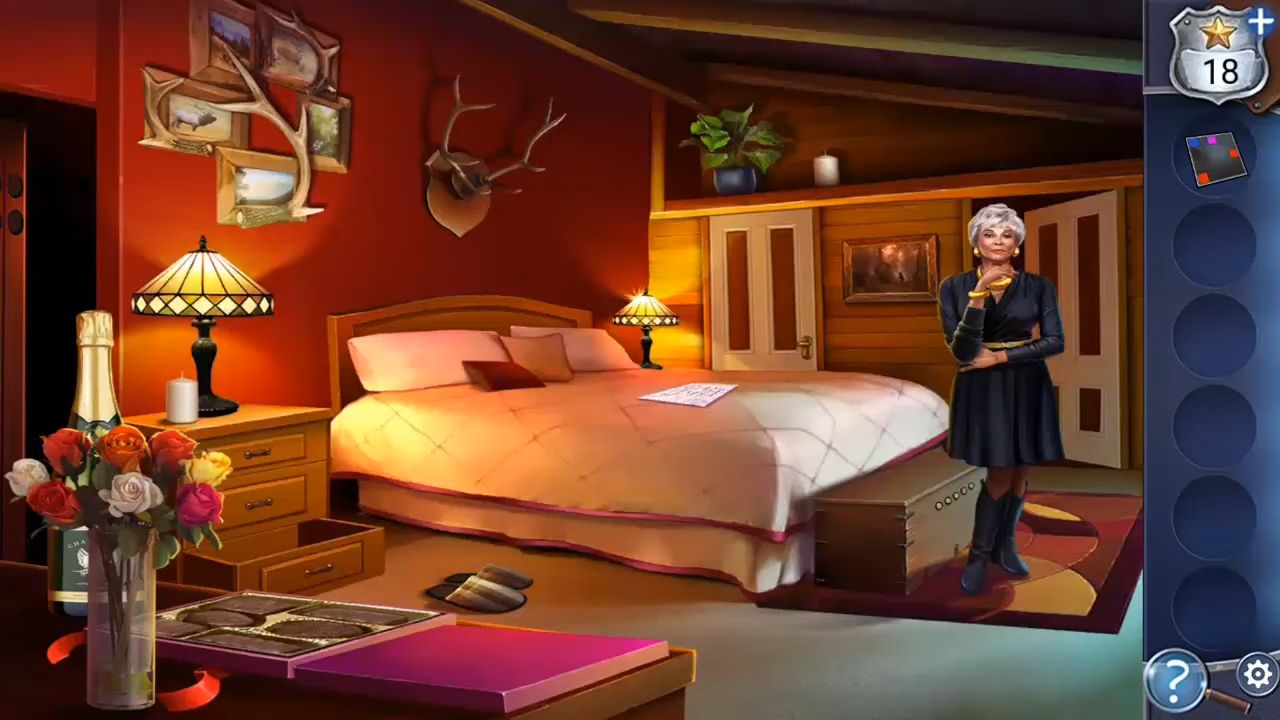
This leads to another hidden door and go through it to reach the secret bedroom. Open the bottom drawer on the left to get a key. Go back to the previous room and use the key to unlock the cabinet under the record player. Tap the record that is sticking out to find Our favorite love songs. Pay attention to one track that appears heavily scratched due to repeated playing.

Return to the bedroom and gather the paper from the floor. Move the slippers to uncover another paper, and shift the red pillow on the bed to reveal a third one. After that, tap the open door to the right to enter the bathroom.
Find another paper beneath the bathmat, and then tap the plug in the bath to empty it and discover one more paper. The star is located in the light at the top right.

Gather the yellow bath oil from the bath. Open the cupboard under the sink and apply the oil to the rusty pipe. This will allow you to retrieve a key and utilize this small key to unlock the top cabinet. Take the nail scissors and a glass tile from inside. Return to the bed and tap on the scraps of paper there to examine them. Add the extra ones you have collected.
Tap on the trunk at the end of the bed. Enter a 4-digit code, which is 9792, taken from the clue provided earlier. Open the box and take a second glass tile. Go back to the bathroom and tap on the tiles on the wall. For this puzzle, you need to move and rotate the four outer tiles to the bottom slot to match the image. After encountering the killer, they escape, which ends chapter 8.
Chapter 9
Chapter 9 marks the last part of Murder Inn. The killer has fled into the night, and your task is to catch them.
Firstly, use the flashlight in the dark to find and gather the snowmobile parts: Ski x 2, Track, Handlebars, Gear x 2. After collecting all the parts, find the main snowmobile and attach these pieces to it. The star can be found at the top center of the scene, just below the roof. Press the buttons near the garage door to open it, then tap on the dog.

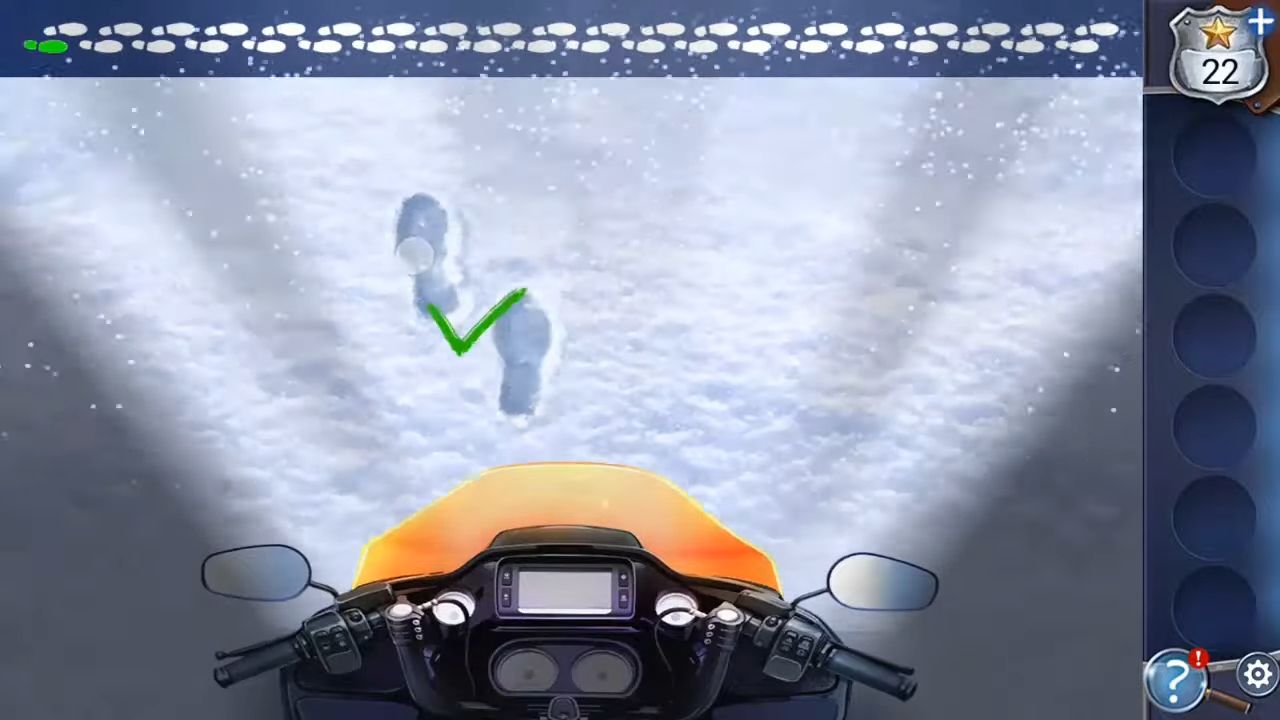
The next challenge is a game where you have to find human footprints while avoiding animal prints. You’ll need to tap on the human footprints quickly to move forward.
After finishing that, you’ll enter another puzzle. This time, your goal is to block Jay and prevent him from reaching the edge of the puzzle. Keep moving your pieces until Jay can’t move without meeting one of yours. When that happens, the puzzle ends, and you’ve captured him. The game finishes along with the rest of the story.