This guide is dedicated to optimizing your gaming experience in Warzone Season 2 by providing you with the most effective settings to achieve maximum frames per second (FPS), minimize input latency, and enhance visibility.
By adjusting all in-game settings as outlined, you’ll be able to unlock the full potential of your gaming hardware, resulting in unparalleled in-game performance.
- First, you have to open the game settings and navigate to the Display tab, Set the Display Mode to Fullscreen Exclusive for the lowest input latency. Set the Display Monitor and Display Adapter to the correct Monitor and GPU in your system.
- Set the Screen Refresh Rate to the number that is nearest to the refresh rate of your primary monitor. Set the Display Resolution and Aspect Ratio to automatic. Click on the Restart Shaders Pre-Loading option if you are running into any weird stuttering in the game.
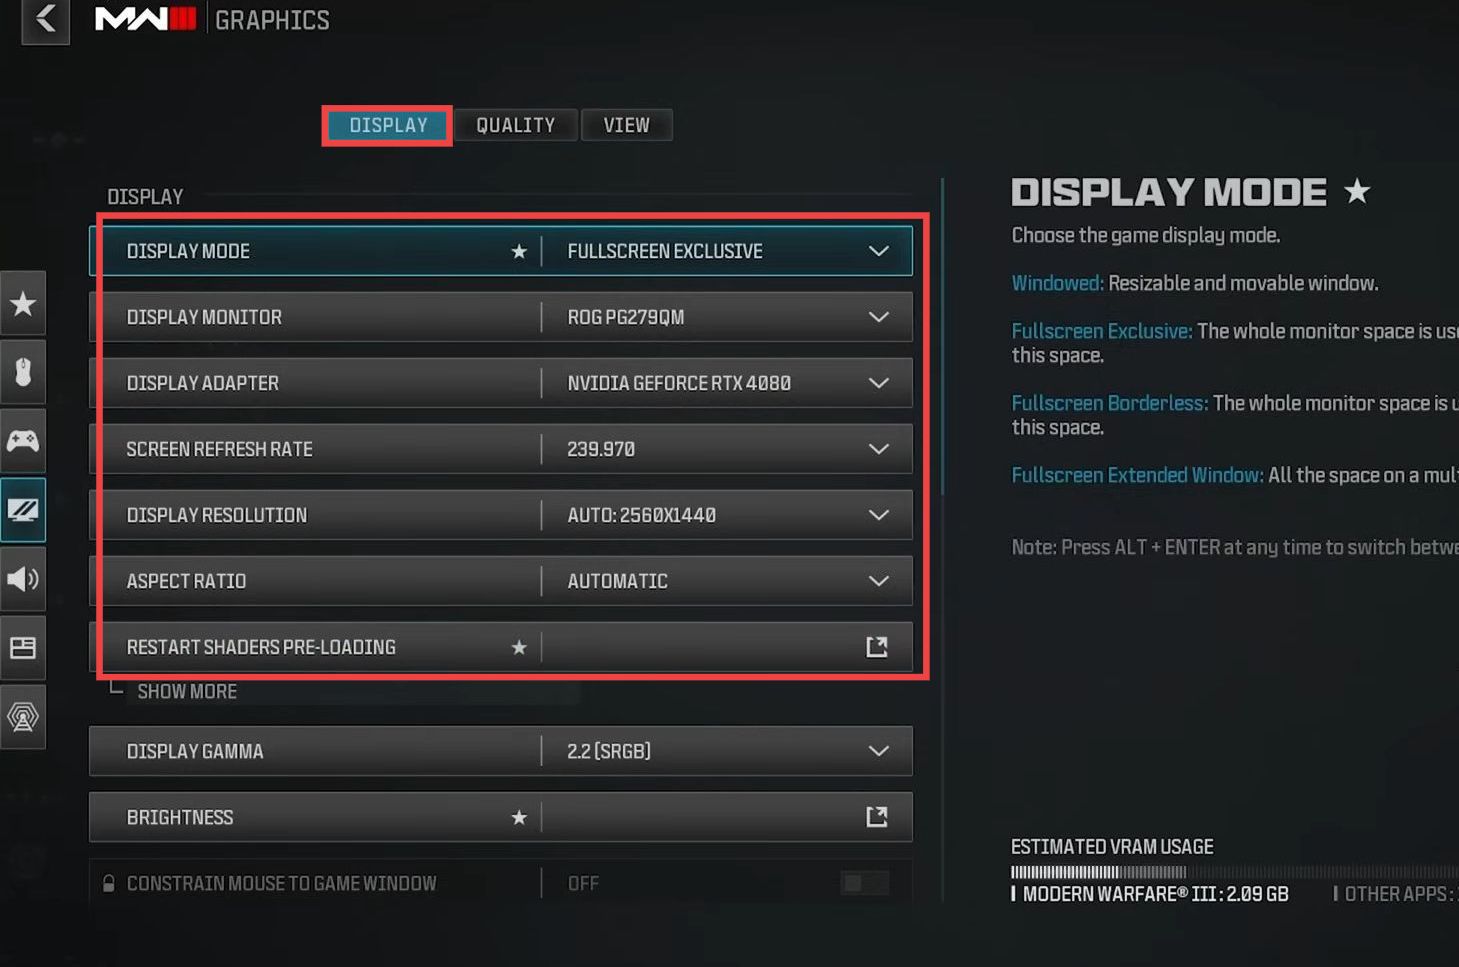
- Set the Display Gamma to 2.4 if you’re playing on a TV and 2.2 if you’re playing on a monitor. Set the Brightness to 55, and enable the Constrain Mouse to Game Window to let your mouse stay on the screen at all times.
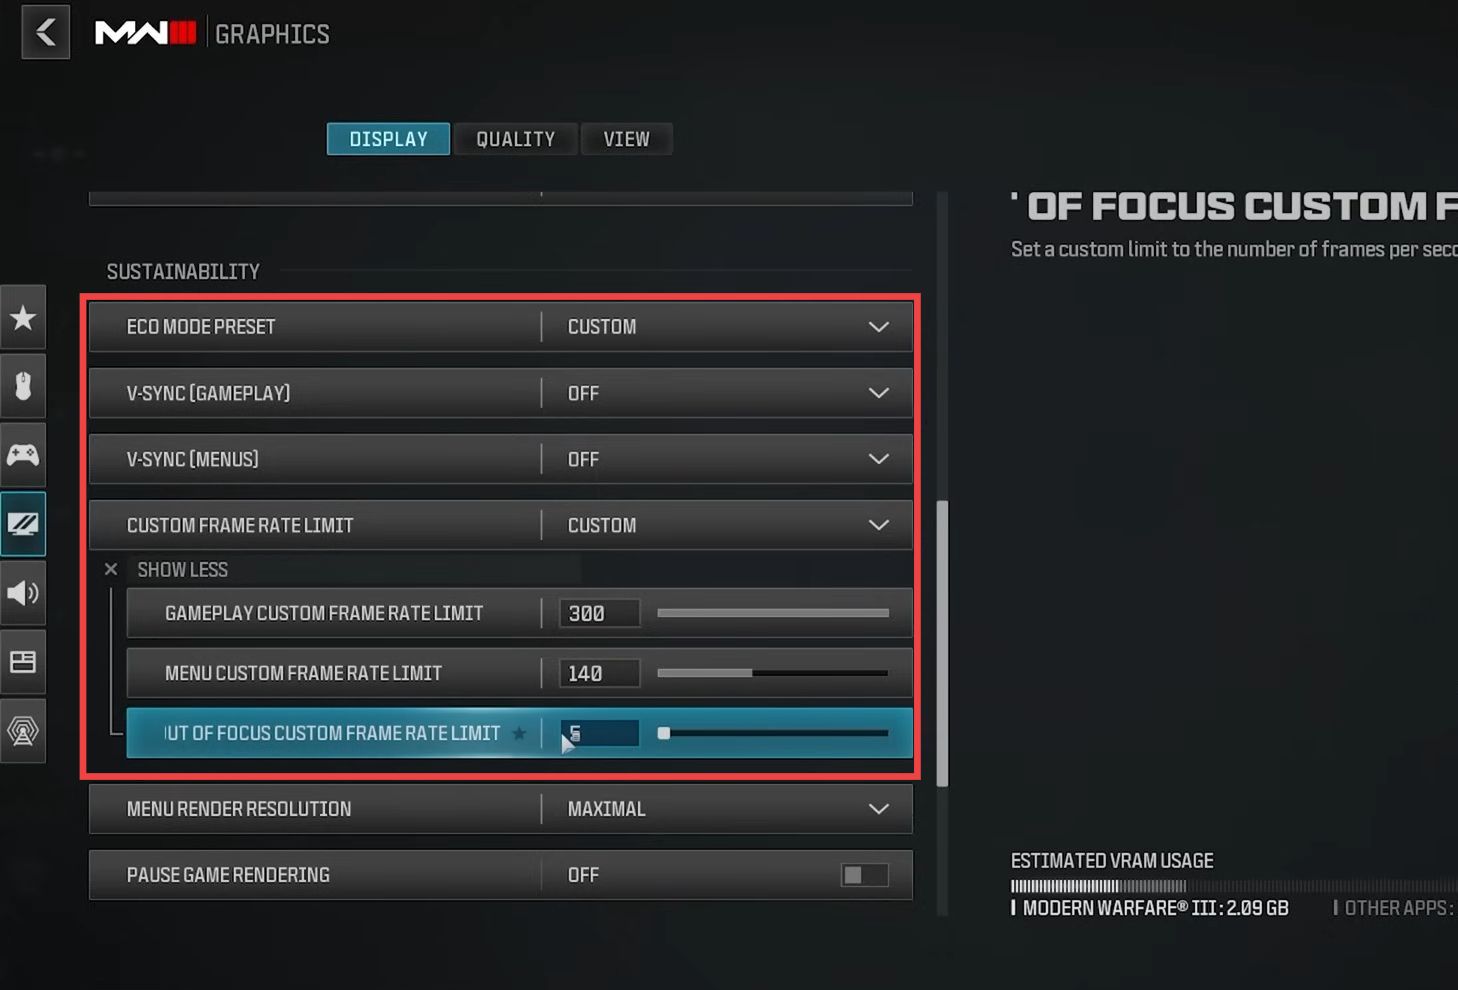
- Set Nvidia Reflex Low Latency to on or on-boost depending on your GPU. Set the Eco Mode Preset to Custom and turn off V-Sync (Gameplay) and V-Sync (Menus).
- Set the Custom Frame Rate Limit to Custom, then tap on Show More and set Gameplay Custom Frame Rate Limit to maximum. Set the Menu Custom Frame Rate Limit according to the refresh rate of your monitor. Set Out of Focus Custom Frame Rate Limit to the lowest option.
- Set Menu Render Resolution to Maximal and the Focused mode to 0. Turn off the High dynamic range or turn it on if you have very good HDR monitors or TVs. Navigate to the Quality tab and set the Render Resolution to 100.
- Turn off Dynamic Resolution and set Upscaling/ Sharpening to FidelityFXCAS if you want your game to look sharper better and you’ve got a decent enough system.
- Tap on Show More and set FidelityFXCAS Strength to 80. Turn off Path Tracing + Ray Reconstruction and set the VRAM Scale Target between 60 and 70 to prevent stuttering. After that, turn on Variable Rate Shading.
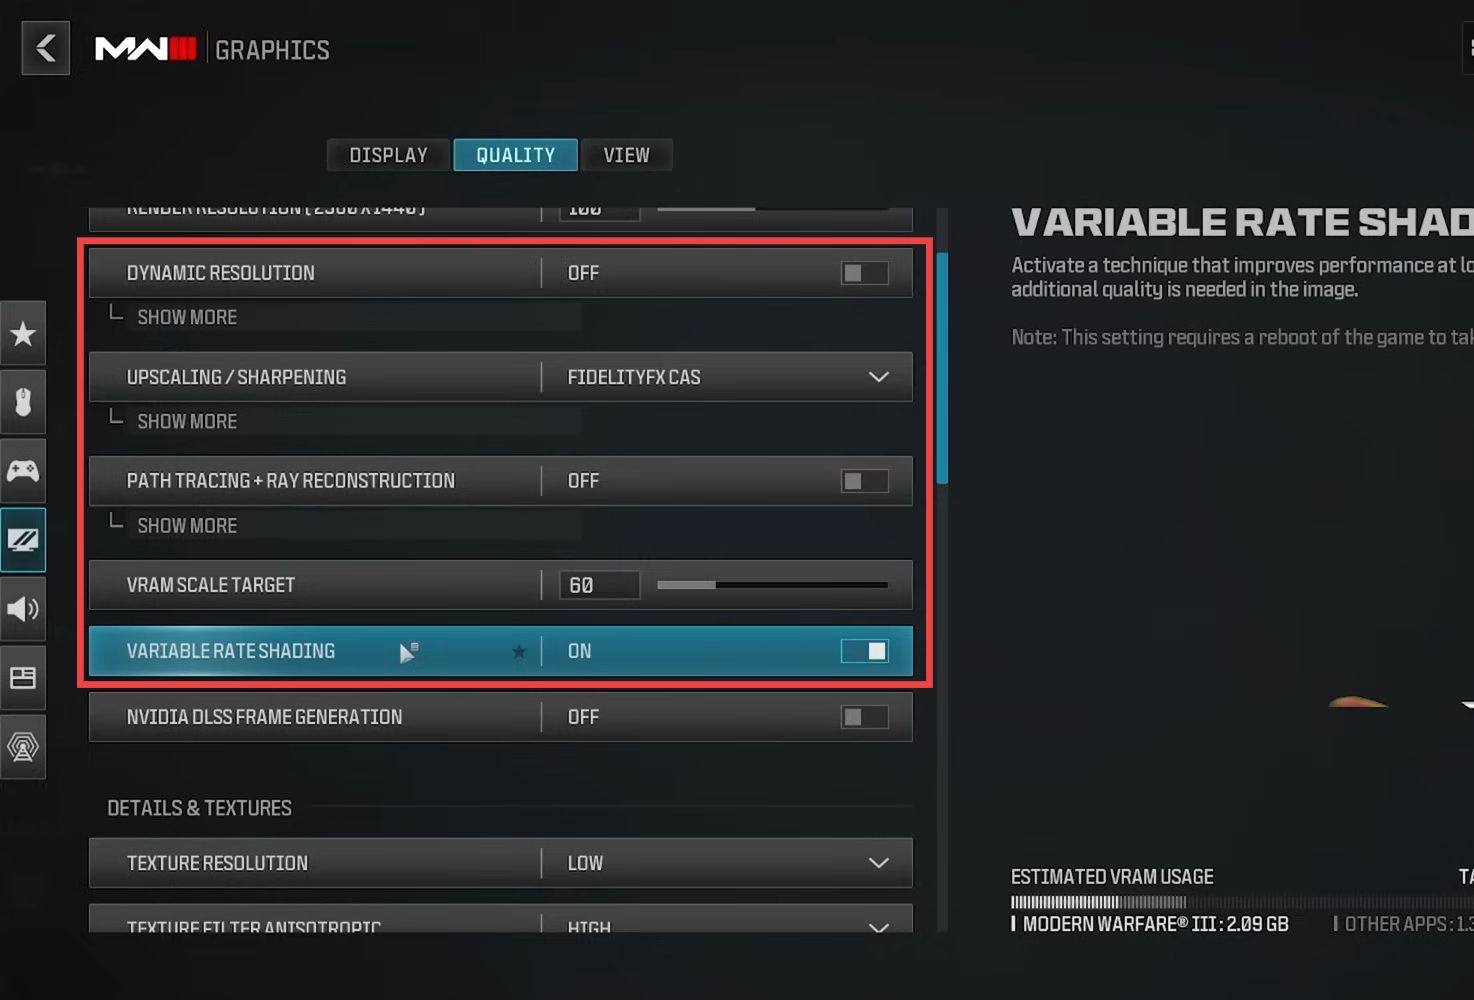
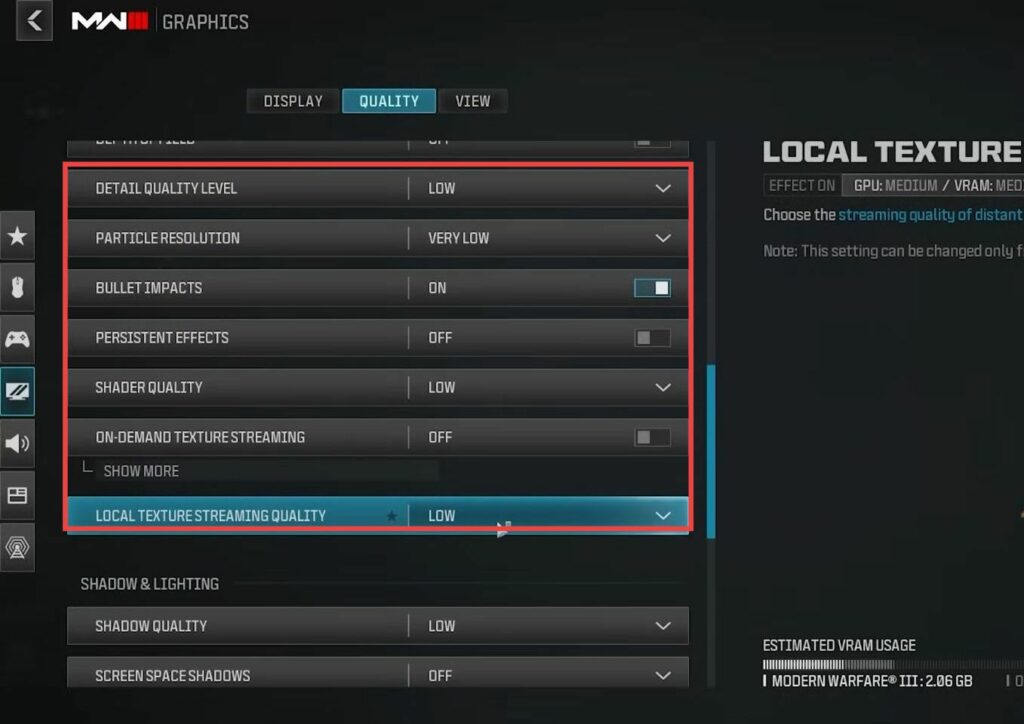
- Set the Texture Resolution to low and the Texture Filter Anisotropic to high. Turn off the Depth of Field, set the Detail Quality Level to low and the Particle Resolution to very low.
It will improve your FPS. - Turn on Bullet Impacts and turn off Persistent Effects. Set the Shader Quality to low to get some nice FPS gains. Turn off On-Demand Texture Streaming and set the Local Texture Streaming Quality to low.
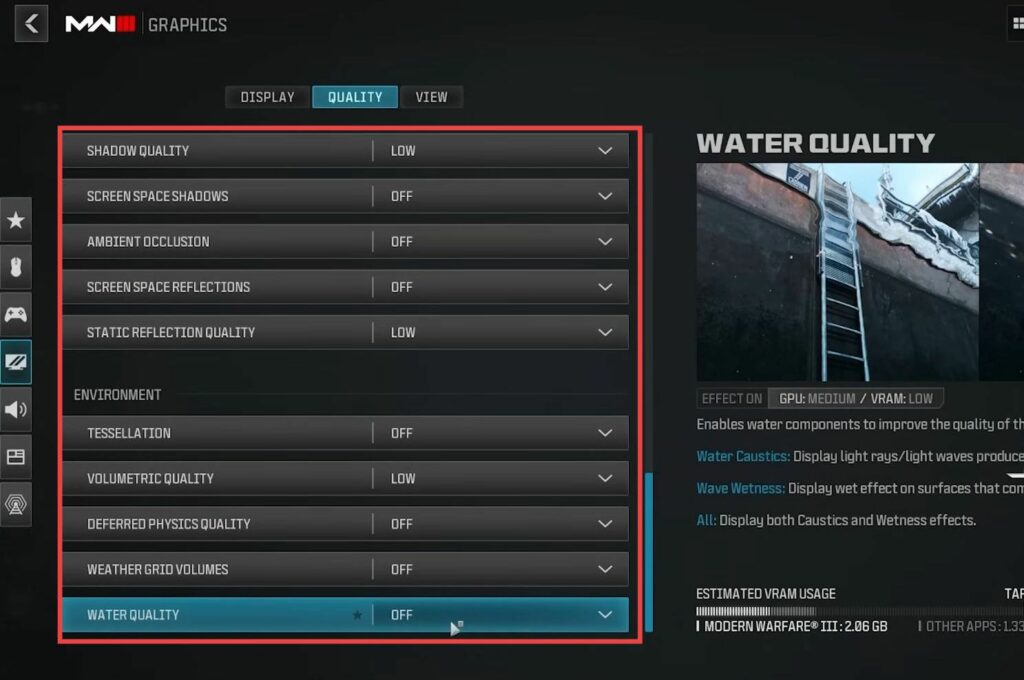
- Next, you have to navigate to the Shadow & Lightning section and turn the Shadow Quality to low. Turn off Screen Space Shadows, Ambient Occlusion, and Screen Space Reflections.
- You need to set the Static Reflection Quality to low, navigate down to the Environment section, and turn off Tessellation. Change the Volumetric Quality to low down and then turn off all other settings in this section.
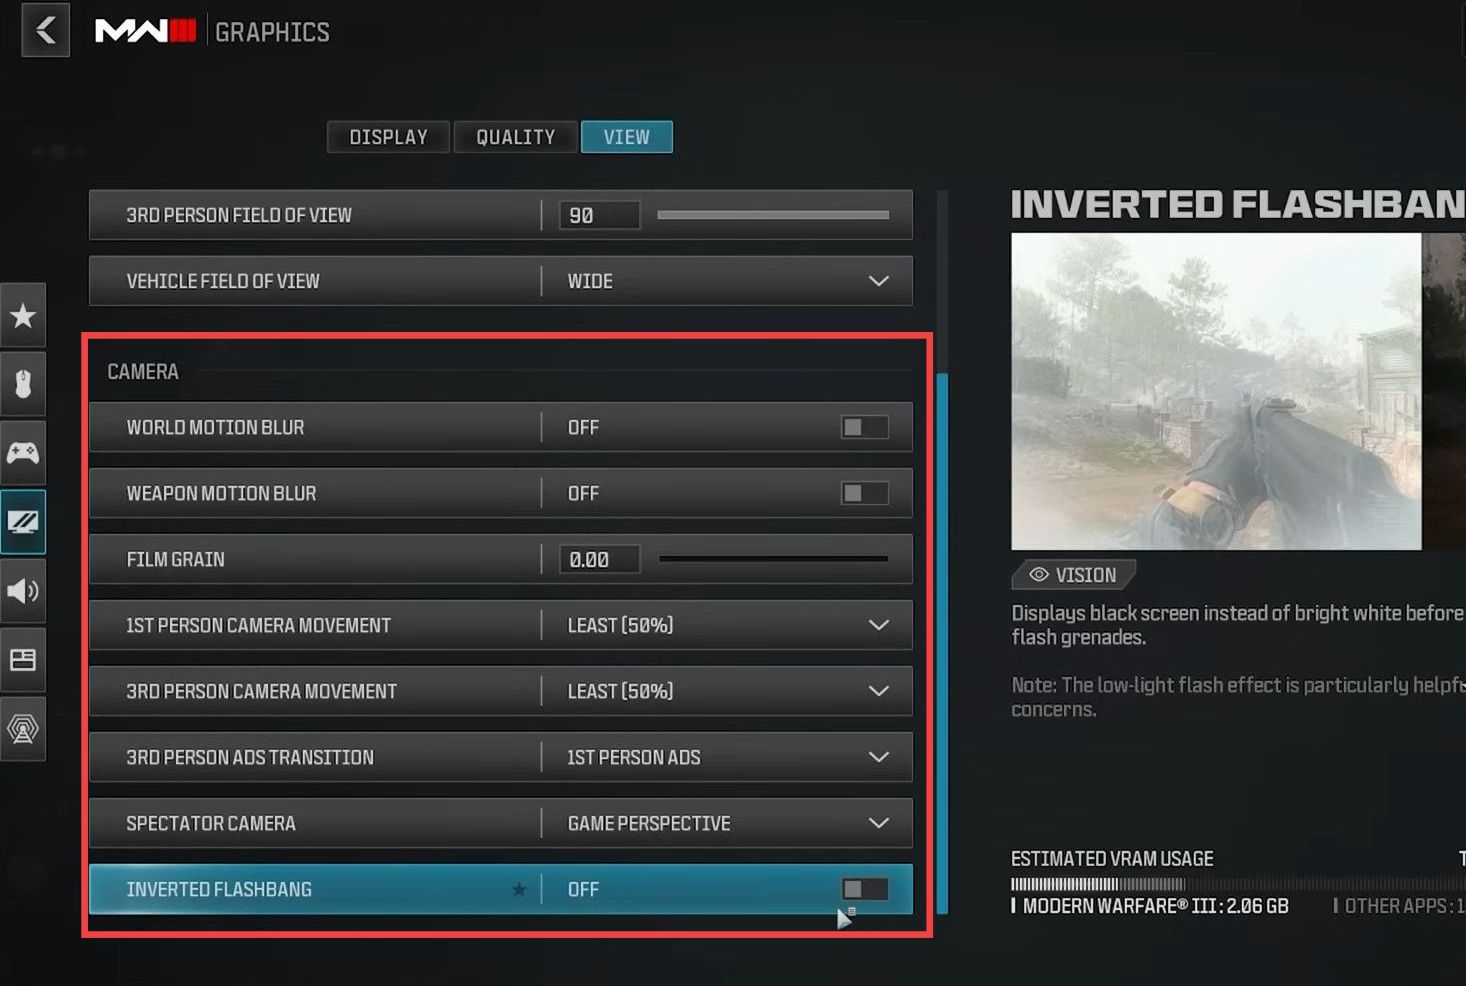
- Navigate to the View tab and set the Field of View to 120. Change the ADS Field of View to affected and set the Weapon Field of View according to your preference. You need to set the 3rd Person Field of View up to 90 and the Vehicle Field of View to Wide.
- Go to the Camera section to turn off World Motion Blur and Weapon Motion Blur. Set the Film Grain to 0, then turn the 1st Person Camera Movement and 3rd Person Camera Movement to the lowest options.
- Set the Spectator Camera to Game Perspective and turn off Inverted Flashbang to prevent your screen from going black.