If you are facing the “Can’t download games from Xbox Game Pass” error on Windows 11, then you have come to the right place. This guide will provide you with different solutions to fix this problem.
1. Change your region
In this section, we will take you through the steps to change the region on your Windows computer. Changing your region can be useful in various situations, such as accessing region-restricted content or resolving compatibility issues with certain applications.
- You have to locate the Windows button at the bottom of your screen and press it. In the Start menu, click on the settings icon.
- Within the Windows Settings menu, scroll down through the categories on the left-hand side and click on “Time & Language.”
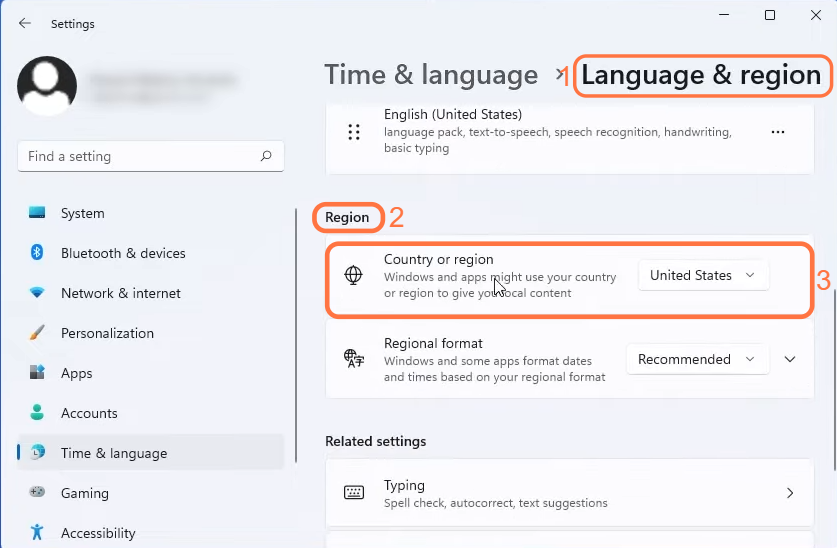
- In the Settings window, locate and click on the “Language & Region” option.
- Scroll down within the Language & Region settings until you reach the “Region” section and click on the drop-down menu next to Country or Region.
- From the drop-down menu, select “United States” as the desired region.
It may help to resolve the issue and you will gain access to the desired games.
2. Reset Windows Store cache
This section describes how to reset the Windows Store cache on your computer. By following these steps, you can clear the cache and refresh the Windows Store to resolve the issue.
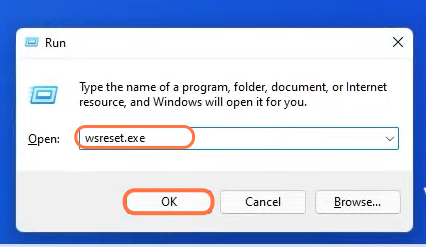
- On your keyboard, you have to simultaneously press the Windows key and the letter “R“.
This will open the Run window. - In the text box within the Run window, type “wsreset.exe” without quotation marks and press the OK button.
It will reset the Windows store cache.
- After that, you need to restart the Xbox app and check if the problem is resolved.
3. Run Windows troubleshooter
This section will walk you through the steps to run the Windows troubleshooter on your Windows system. It will help to resolve any problems you may be experiencing with Windows Store apps.
- Locate the Windows button at the bottom of your screen and press it. In the Start menu, click on the settings icon.
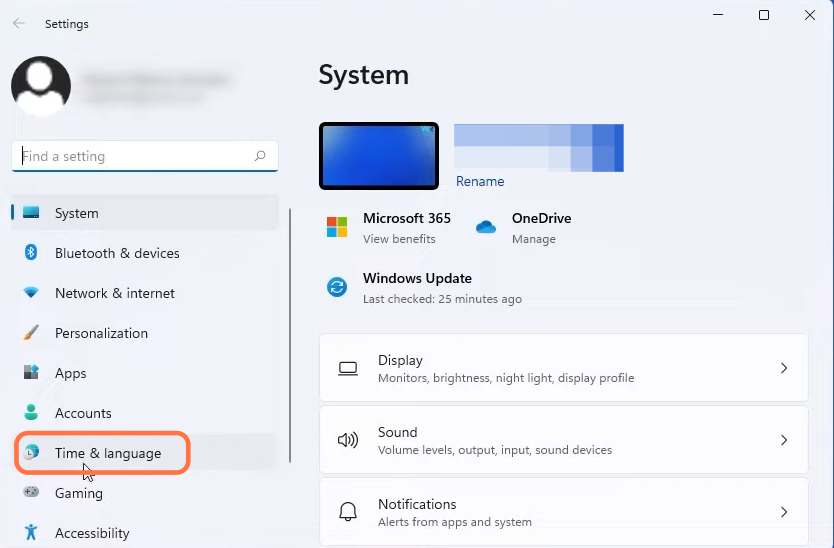
- Within the Windows Settings menu, scroll down through the categories on the left-hand side and click on “System.”
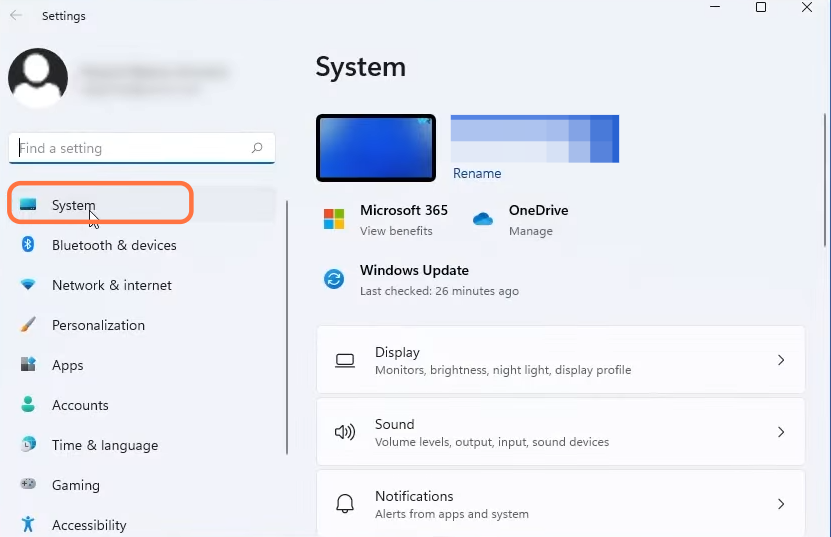
- In the System window, scroll down on the right side until you reach the “Troubleshoot” section and click on it.
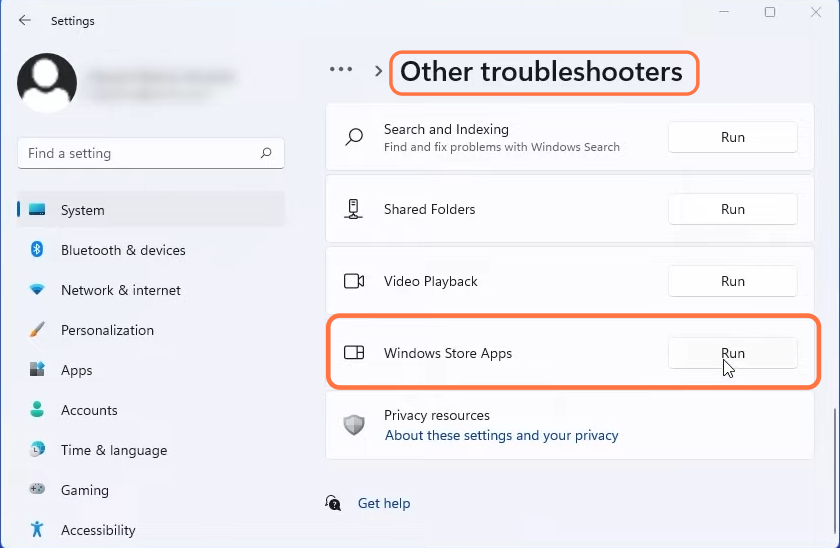
- Within the Troubleshoot section, select “Other Troubleshooters” and scroll down to Windows Store apps troubleshooter.
- Click on the “Run” button associated with the Windows Store apps troubleshooter.
Windows will now initiate the Windows Store app troubleshooting and fix any identified issues.
4. Repair or Reset the application
In this section, we will take you through the steps to repair or reset the Xbox application on your Windows system. Repairing or resetting the Xbox application will help to resolve any issues you may be experiencing.
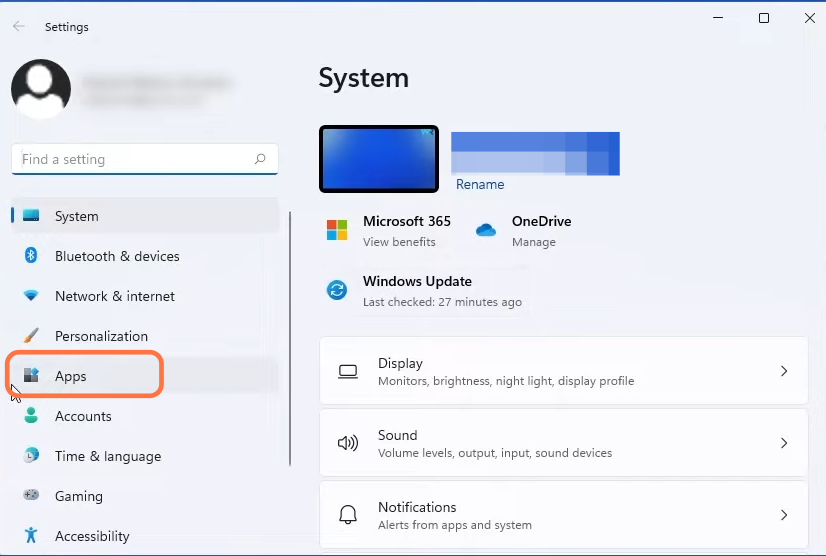
- Click on the Windows button at the bottom of your screen to open up the Start menu. In this menu, click on the settings icon.
- Within the Windows Settings menu, scroll down through the categories on the left-hand side and click on “Apps.”
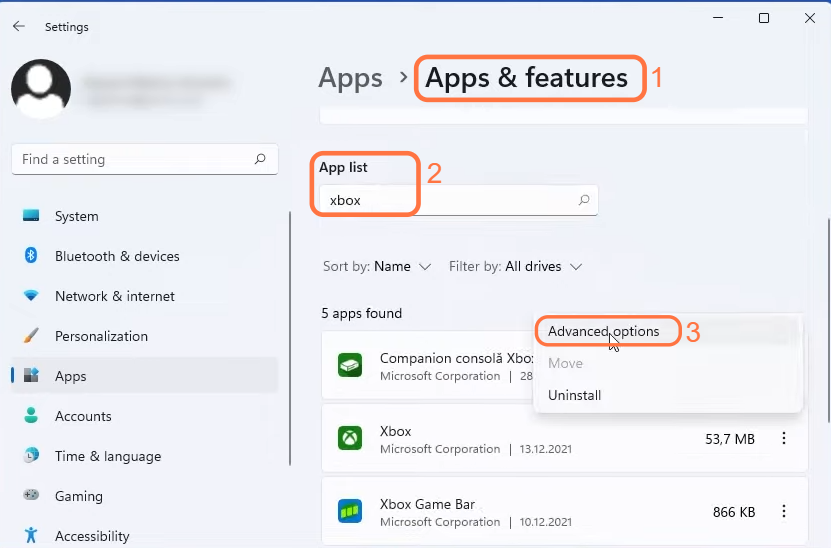
- Click on the “Apps & Features” section to access the list of installed apps on your computer.
Within the Apps & Features section, you will find a search box labelled “Search this list.” - Type “Xbox” in the search box and then scroll down to the Xbox software.
- Once you have found the Xbox software, click on the three dots located next to it.
This will open a drop-down menu with additional options. - From the drop-down menu, select “Advanced options.”
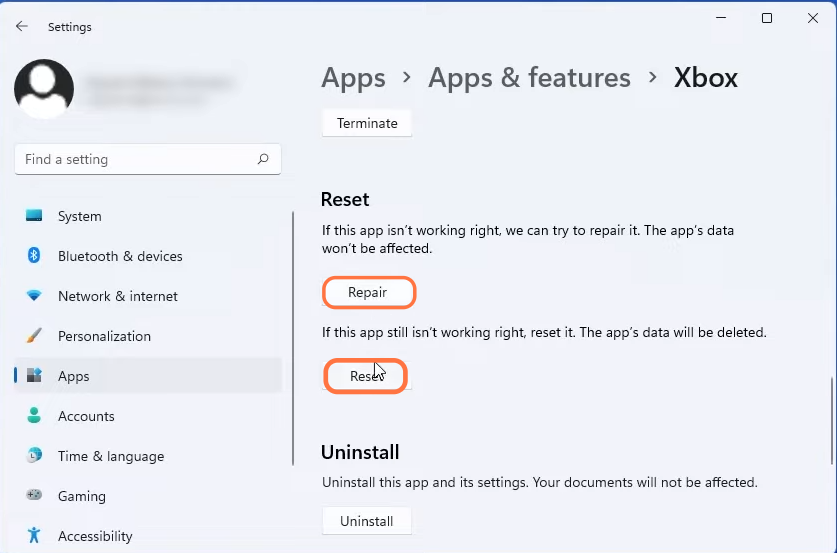
- Scroll down within the settings window until you reach the “Reset” section and click on the “Repair” button.
Windows will now attempt to repair any issues or inconsistencies with the Xbox software. - If the repair process did not resolve the issue, you can proceed by pressing the “Reset” button.
This action will restore the Xbox software to its default settings.