In this guide, you will find different methods to enable or fix the console in CS. You can either enable the console in CS2, change the console key in CS2, or fix the CS2 console not opening (reset console position) to resolve the issues.
Enable Console in CS2
In this section, we will take you through the steps to enable or fix the error by enabling Console in CS2.
- In the game, click on Settings, go to the Game section, and look for an option called Enable Developer Console.
Make sure this option is set to Yes or Enabled. - After that, open the console window by pressing the tilde key usually ~, which is typically located right below the Escape key on US keyboards.

Change Console Key in CS2
This section describes how to change the console key in CS2 to fix the error.
- Go to the game’s settings, look for the Keyboard and Mouse, and you may find an option called UI Keys.
- Check for the setting called Toggle Console Pattern, ensure that it is set to Tilde or Grave, and then save your settings.

Fix CS2 console not opening at all (Reset console position)
This section will take you through the steps to fix the “CS2 console not opening at all (Reset console position)” error.
- If the console is off-screen or inaccessible, you can change its position and size.
- First, close the game entirely, and navigate to where Steam is installed. Press Control + Shift + Escape to open the Task Manager. In the Processes tab, locate Steam, right-click it, and choose Open file location.
- Go back a few folders until you reach the Steam installation directory.
This is typically something like C:\Program Files (x86)\Steam. - Inside the Steam folder, find the userdata folder and open it. Next, find your Steam ID. If you have only one folder, open it directly. If you have multiple folders, go to the top right of the Steam client, click your username, go to your profile, right-click on the background, and choose Copy link location.
- Visit Steam, paste your link, and click Submit.
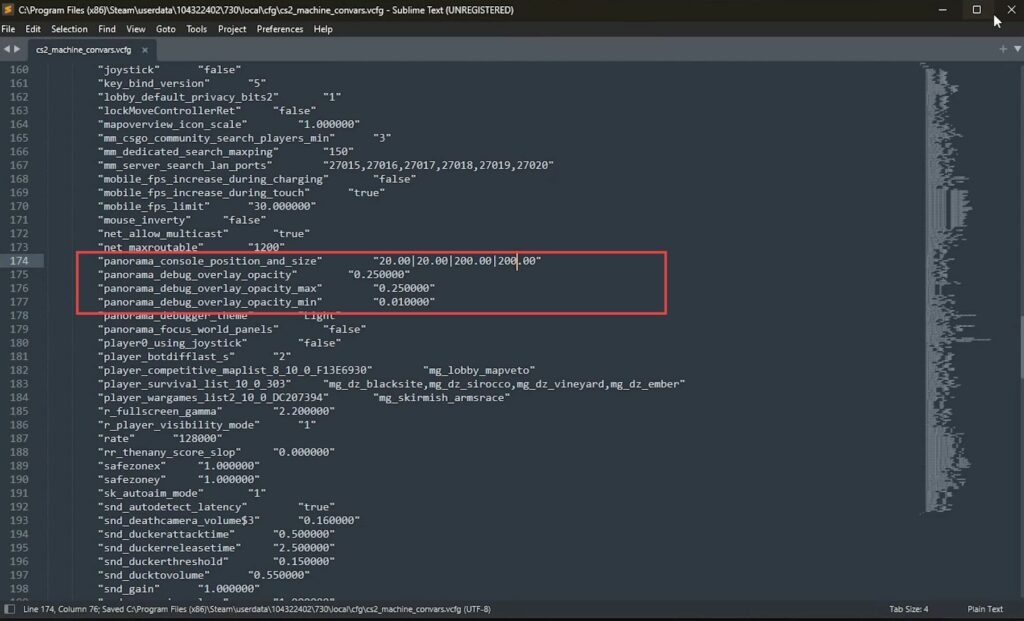
This will show your Steam 32 ID, which is the folder name. - Open your Steam 32 ID folder, navigate to the 730 folder, and note that the folder name may differ in the future, depending on the game. Then you have to find the local folder and open it. Look for the file named CS2_machine_con.cfg.
Open this file with a text editor like Notepad. - In the file, find the section related to the Panorama console position and size. Set the first two values to 20, and the second two values to 200, save the file, and close it.
- After making the changes in the configuration file, restart the CS2 game.
- When you open the game, the console should be back in the default position but slightly smaller than before.
- You can adjust the console’s position and size as needed. There are four values to adjust:
- The first value is for the X-coordinate i.e., horizontal position.
- The second value is for the Y-coordinate which is vertical position.
- The third value is for the width of the console.
- The fourth value is for the height of the console.
Experiment with different values for these parameters to set the console exactly how you want it.
