Configuring a manual IP address on your Xbox Series X can provide stability and specific network settings. Here’s a step-by-step guide to setting up a static IP.
Step 1: Access Network Settings
- Navigate to the Xbox dashboard and head to the top menu.
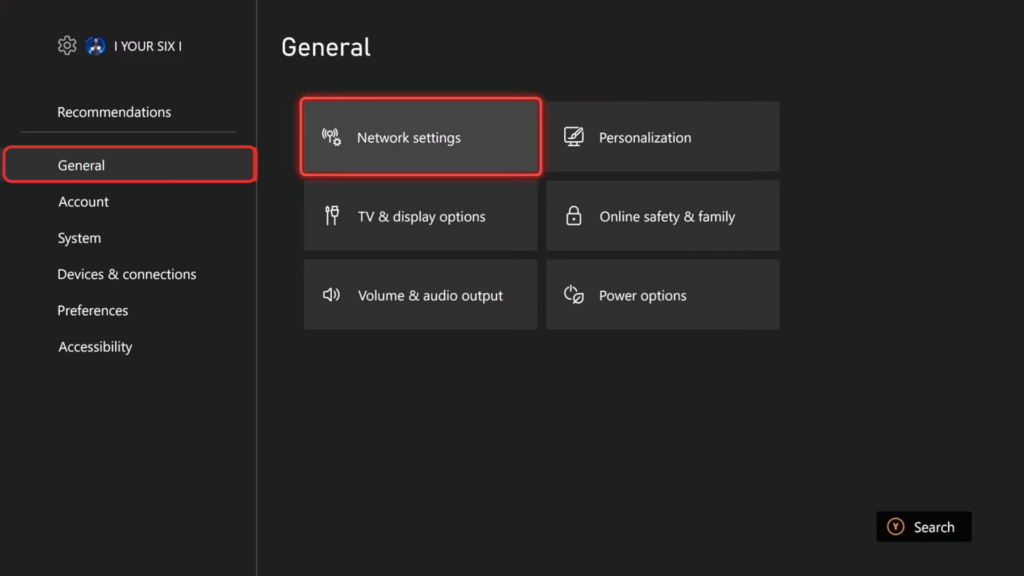
- Select the “Settings” gear icon and then choose the “General” tab from the left side panel.
- Within the General settings, locate and click on “Network Settings”.
Step 2: Access Advanced Settings
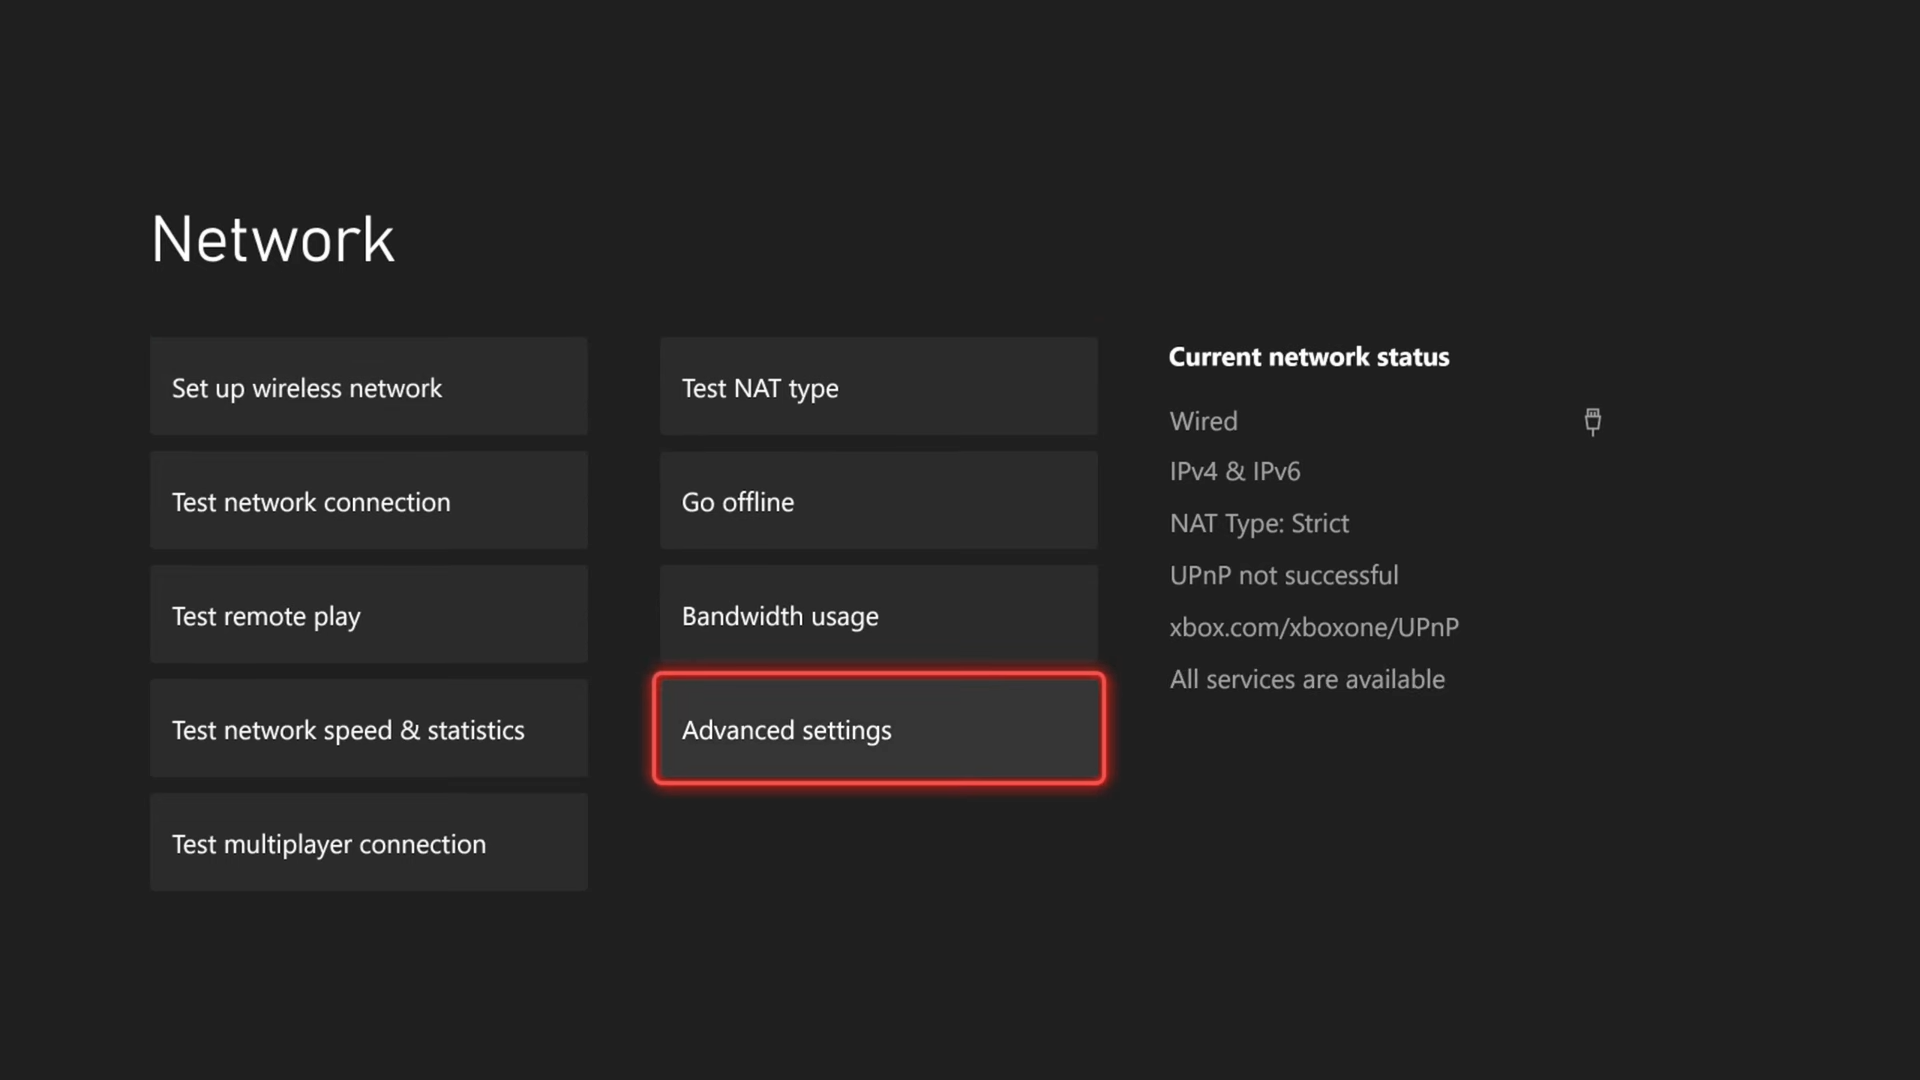
Under the Network settings scroll to the right and select “Advanced Settings”.
Step 3: Note Down Current Network Details
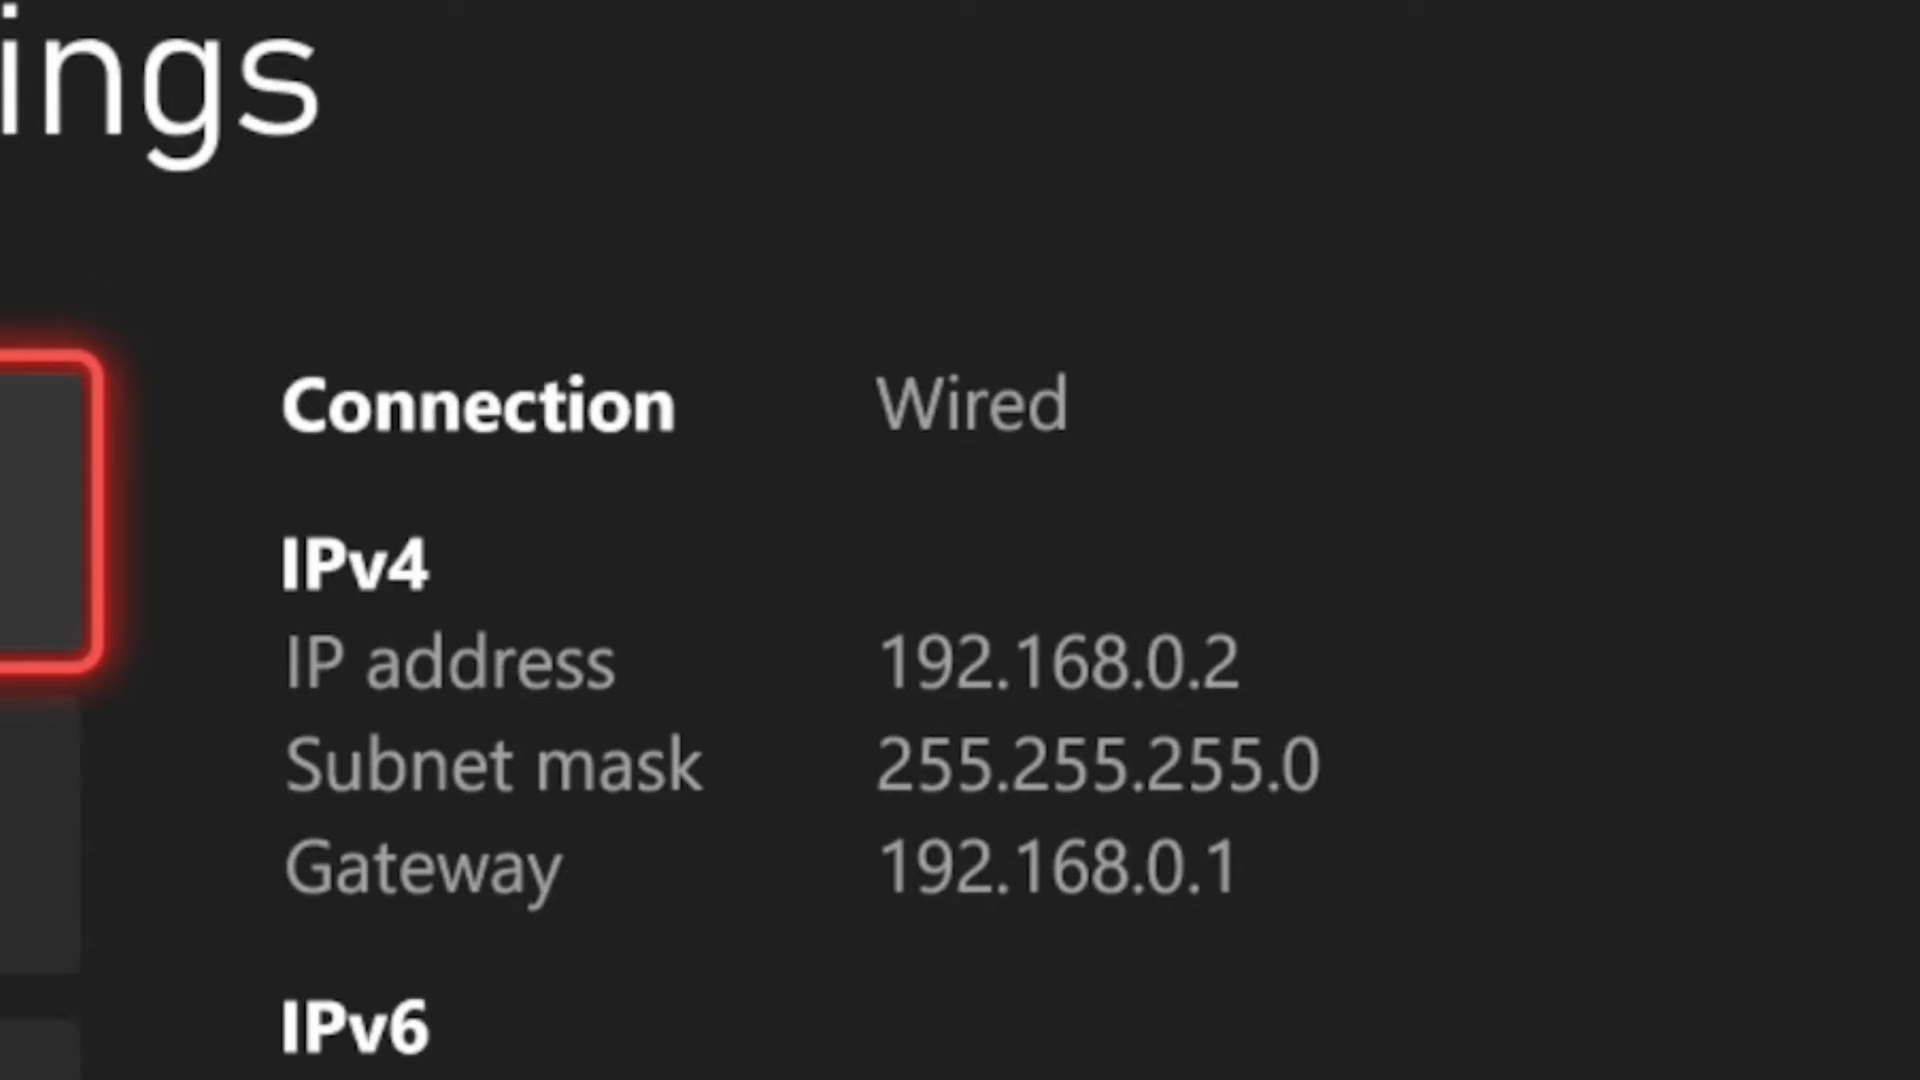
- Note Current IPv4 Details: Take a picture or note down your current IPv4 address, subnet mask, and gateway. This information is crucial for the manual setup.
Step 4: Set Up Manual IP Address
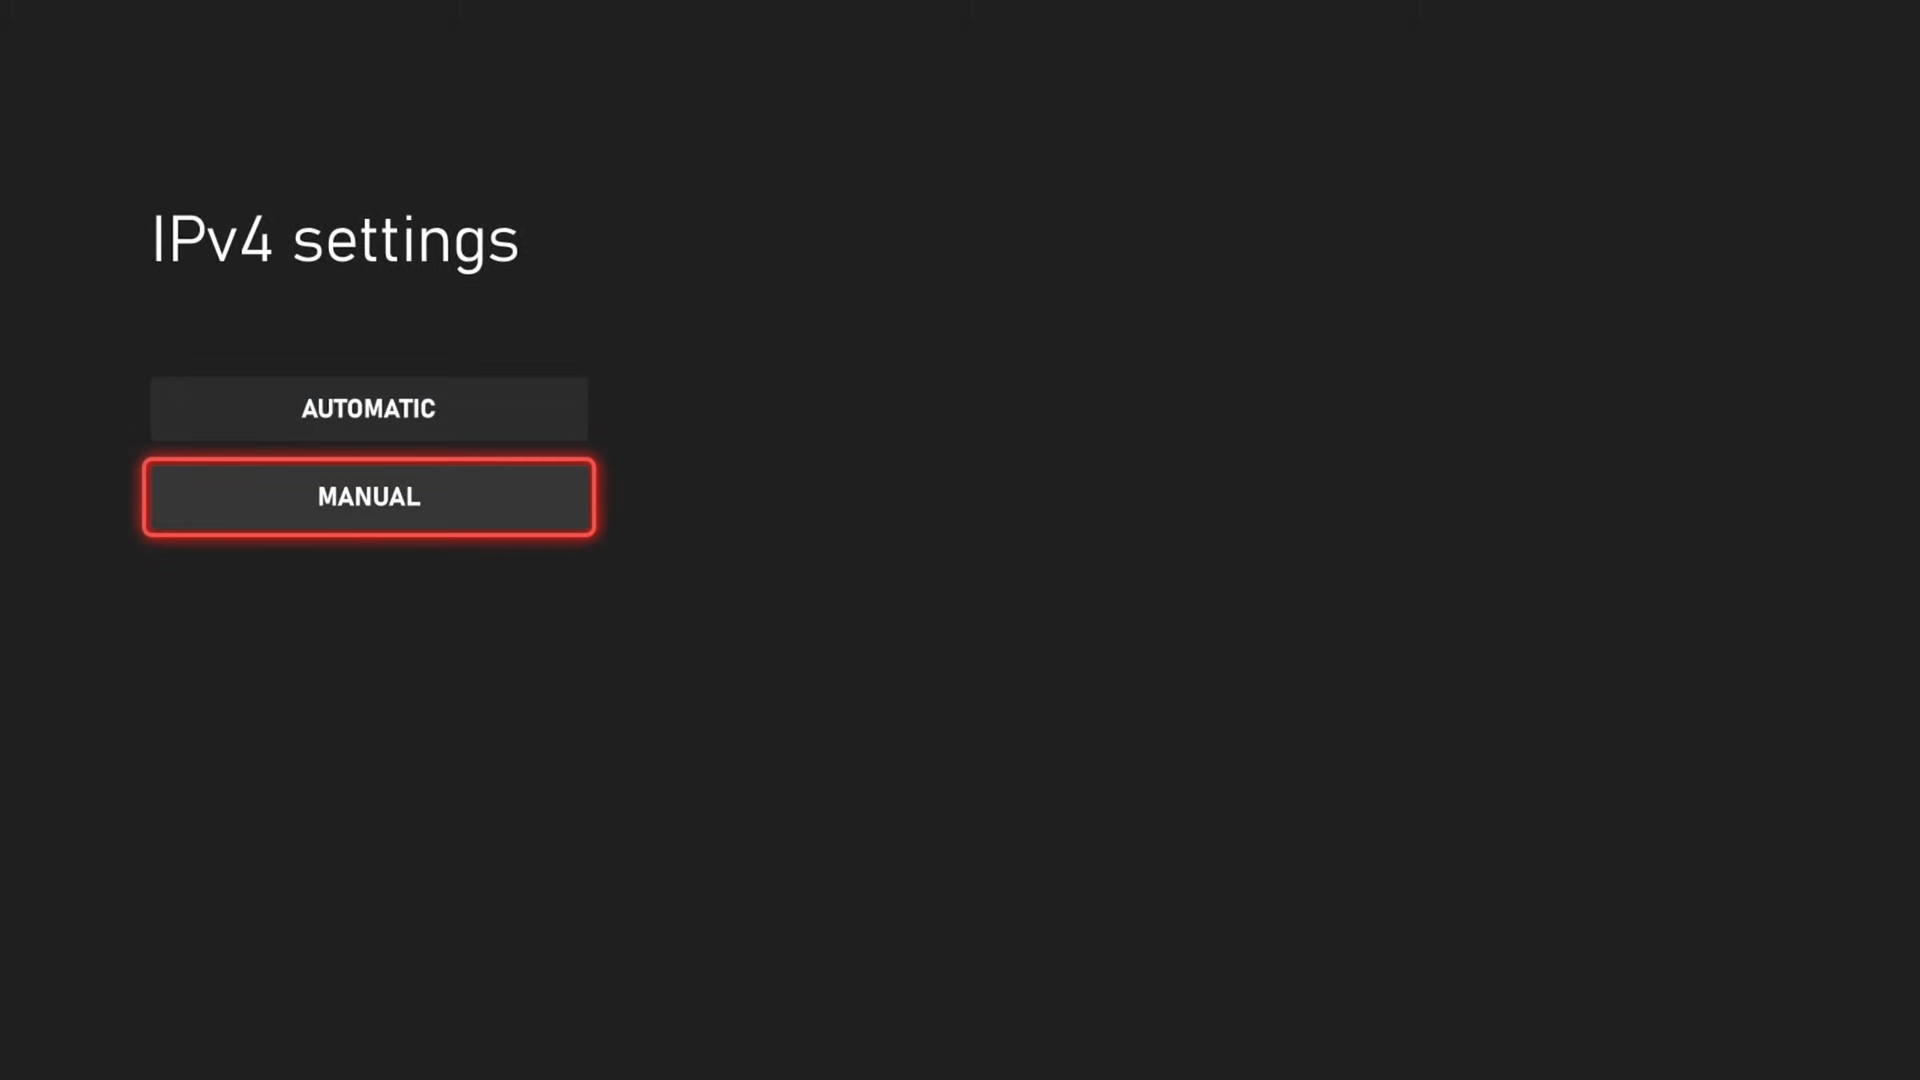
- Click on “IP Settings” and choose the “Manual” tab.
Step 5: Enter New IP Address
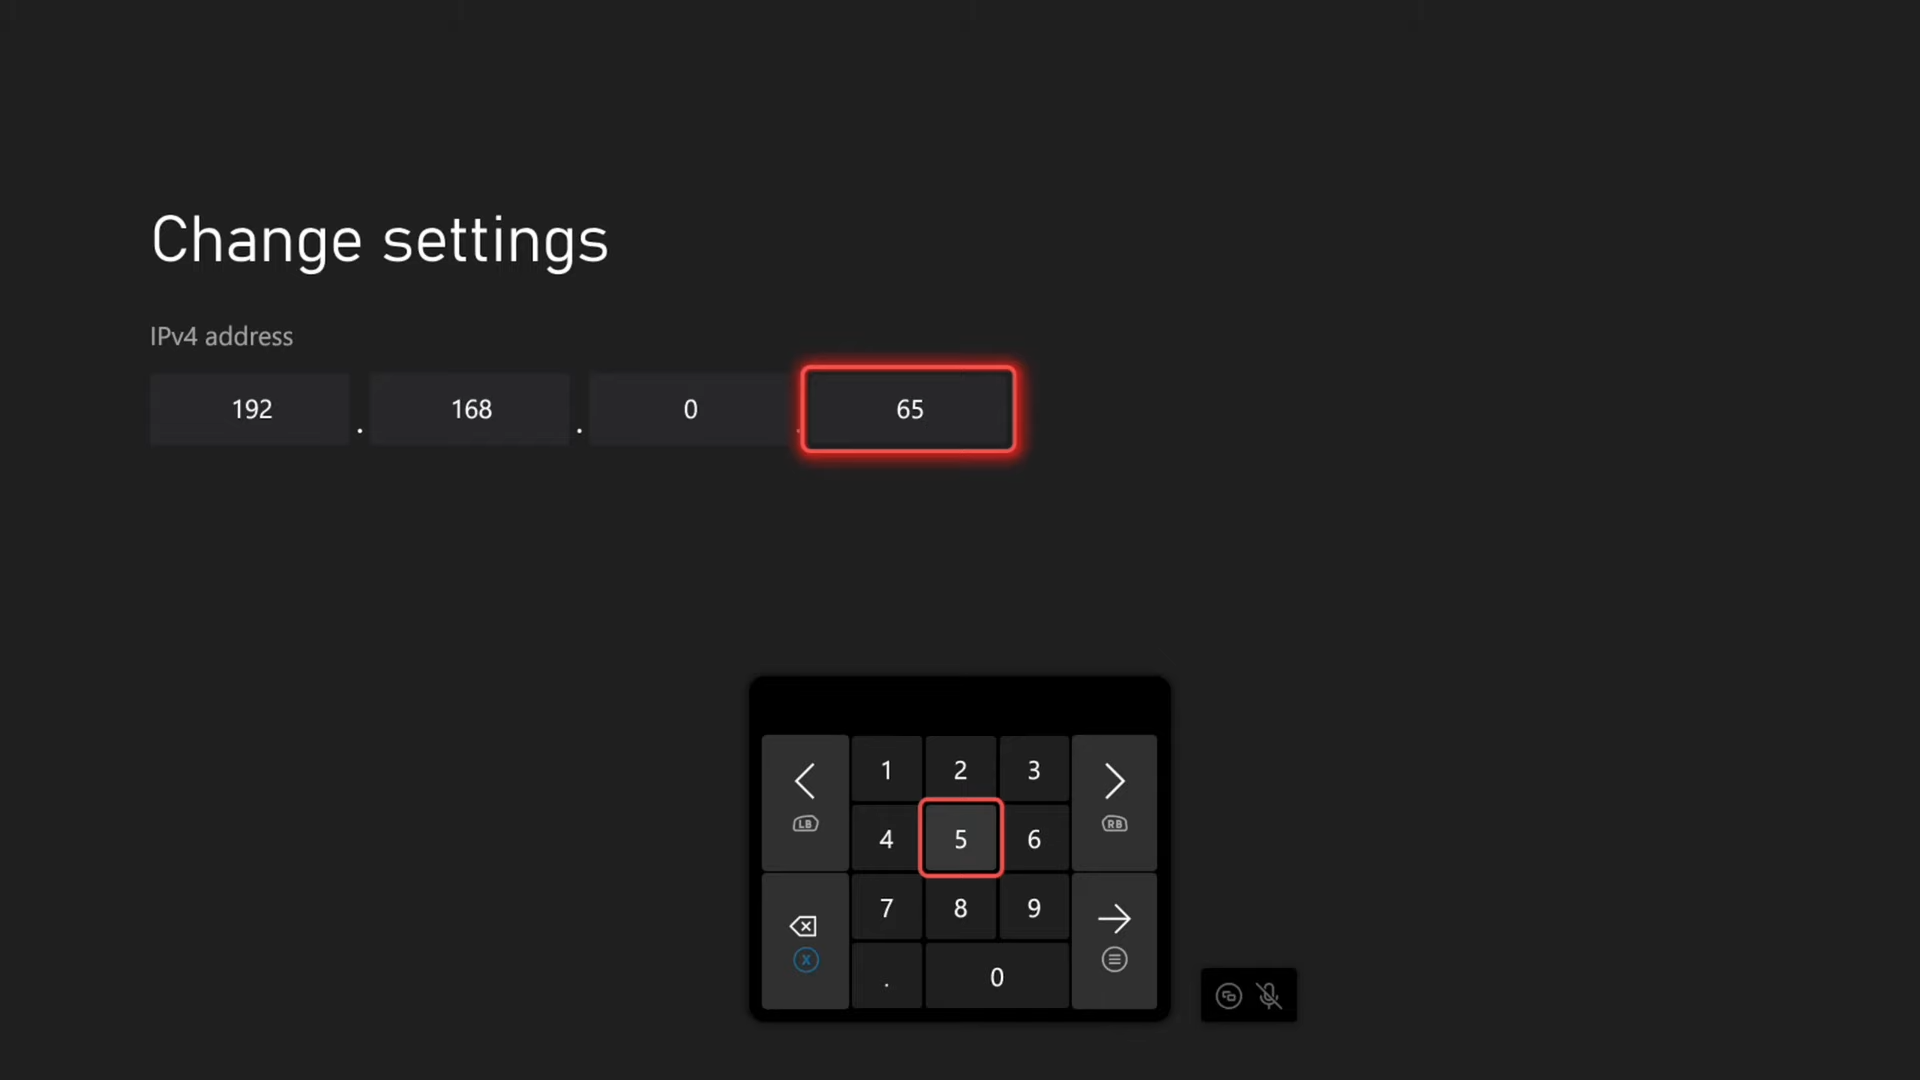
Enter IPv4 Address:
Input the IPv4 address. For example, if your current address is 192.168.0.X, where X is the last digit, modify it to a unique value. For instance, change the last digit to something like 65.
Step 6: Input Subnet Mask and Gateway
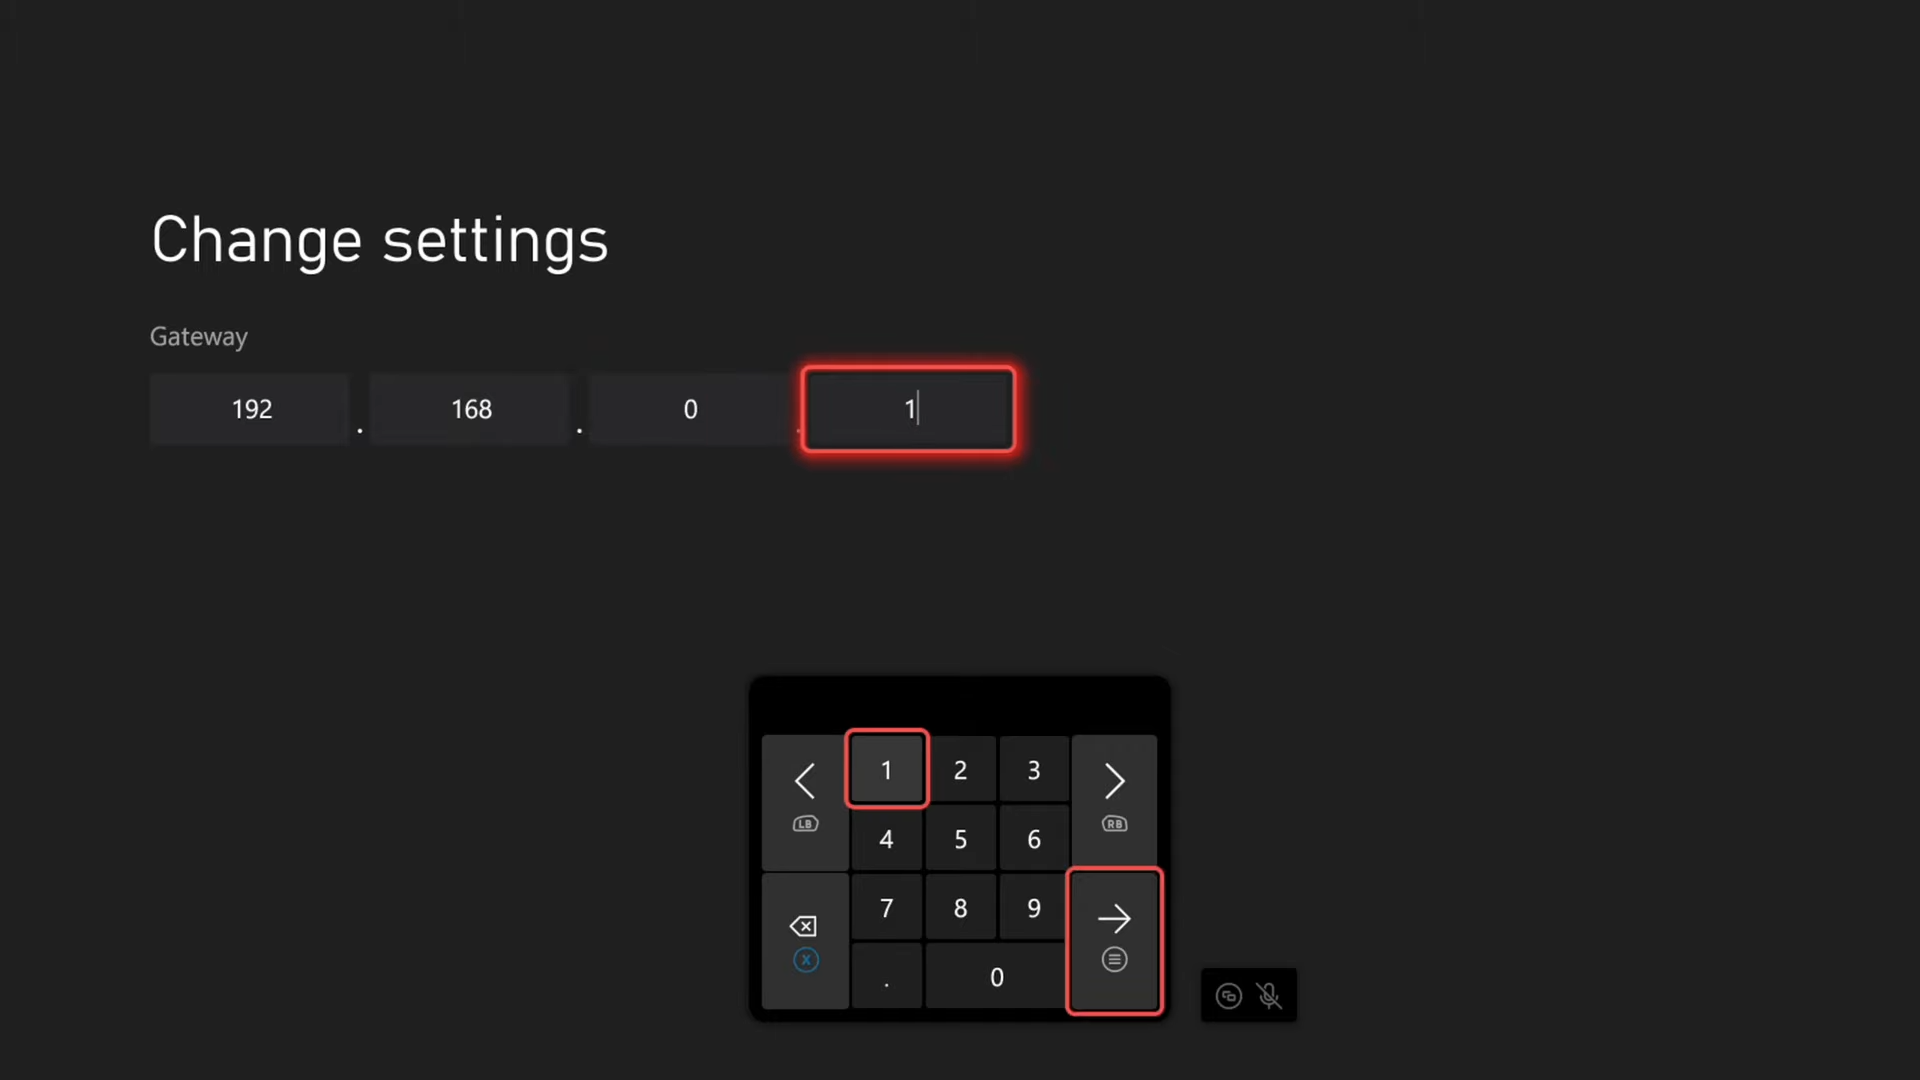
Enter Subnet Mask & Gateway:
- Referencing the information you noted earlier, type in the subnet mask (e.g., 255.255.255.0) and the gateway address (commonly 192.168.0.1).
- Then, press the button displaying the Right arrow with three bars to go ahead.
Step 7: Confirm Settings
Review Settings: Double-check all entries to ensure accuracy, verifying against the information you previously noted down.
Step 8: Verify Static IP Setup
- Test the network connection on your Xbox to ensure it’s working with the new static IP address.
- Upon successful setup, your Xbox Series X will display the newly configured static IP address in the network settings.
By following these steps, you can manually set a static IP address for your Xbox Series X, potentially enhancing network stability for your gaming experience.