This guide will let you know how to include Party Audio in PS5 video clips and record voices. Go through the guide and follow the step-by-step instructions to do so.
- Launch the Minecraft application on your gaming device. While playing Minecraft, locate the sharing button on your controller.
This button is located above the d-pad on the left side of the controller. - Press and hold down the sharing button.
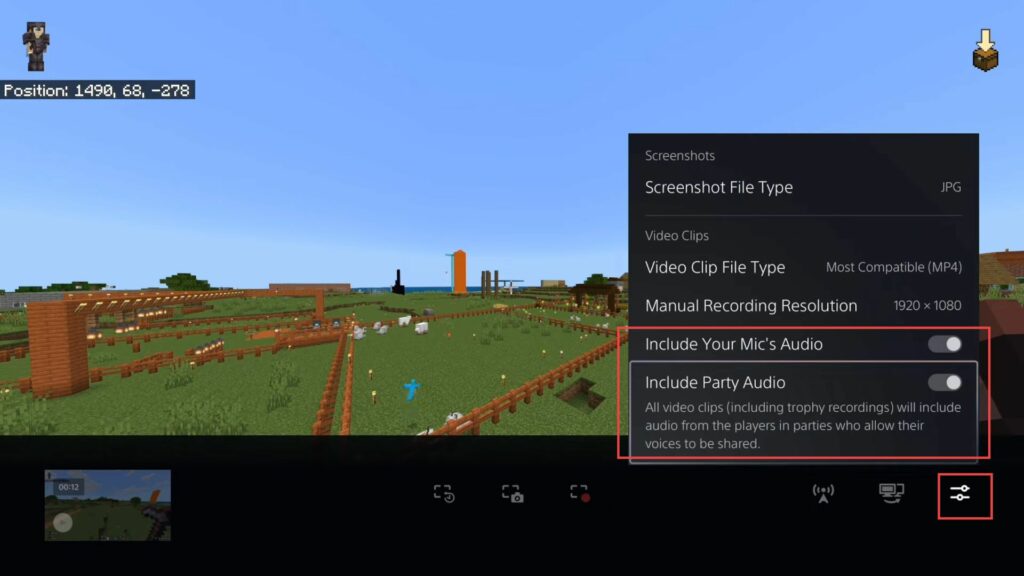
This action should open a screen with various capture options. - On the opened screen, navigate to and select the Capture Options section. Within these options, find the setting that allows you to include your microphone audio in your video clips.
- Checkmark the option to enable including your microphone audio in your video clips.
This will ensure that your in-game audio commentary is recorded in your video clips. - Further down in the settings, locate the option to include your party audio in video clips and checkmark the option to include your party audio in video clips.
This means that audio from players in your party who allow their voices to be shared will also be recorded in your video clips.
- To ensure that your voice is picked up in your friend’s video clips, you need to allow your voice to be shared.
This step is necessary for both you and your friends. - Press the PlayStation button on your controller to access the PlayStation menu while you’re in the game.
- Navigate to the Game Base option using the menu.
- In the Game Base, select the Party option from the left side panel and choose the Create a Party option to start a new party.
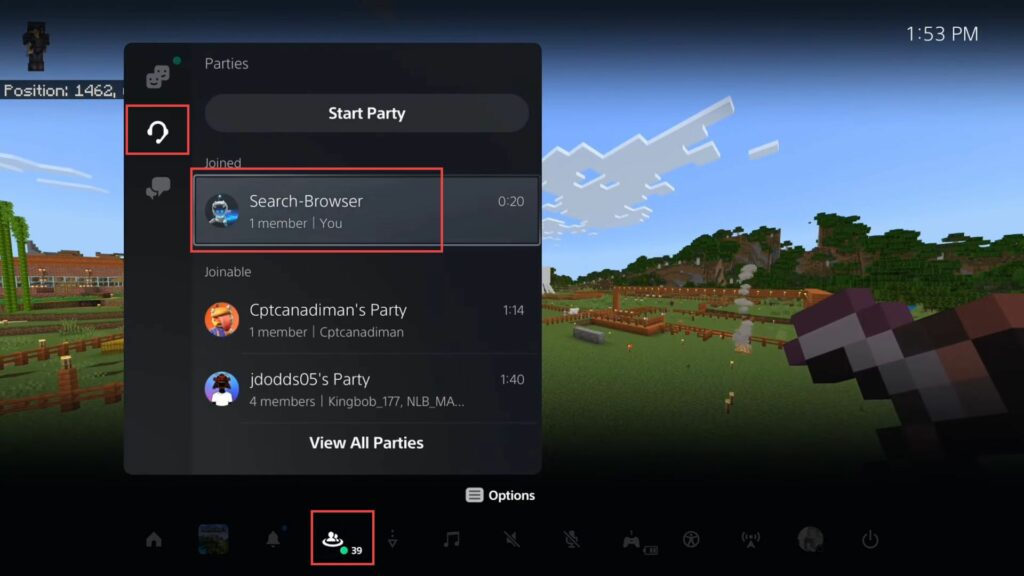
- If you already have a party open, then locate the three dots icon within the party interface.
This icon usually represents additional options or settings. - Click on the three dots icon to reveal a menu of party-related settings. From this menu, choose the Voice Chat Settings option.
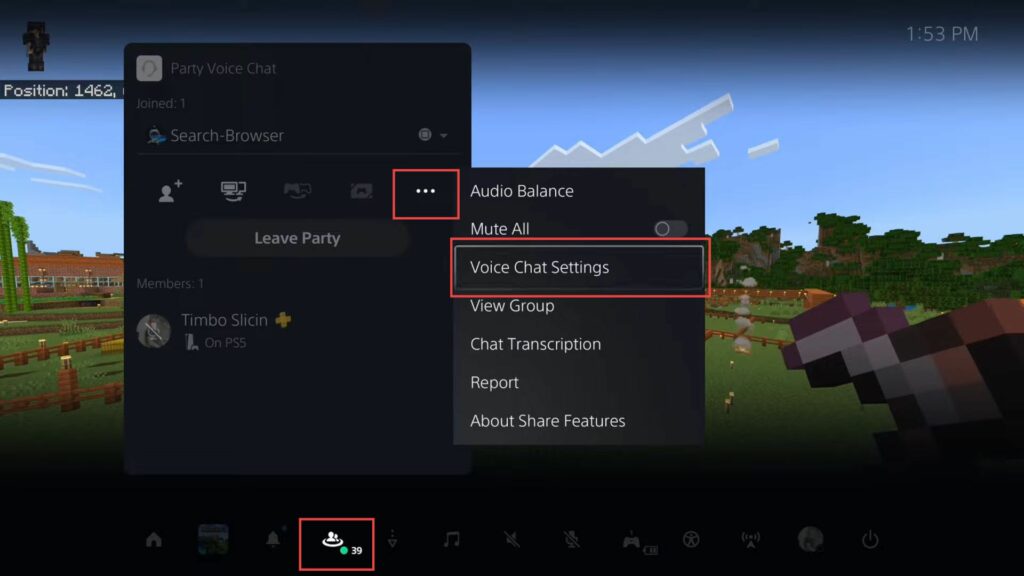
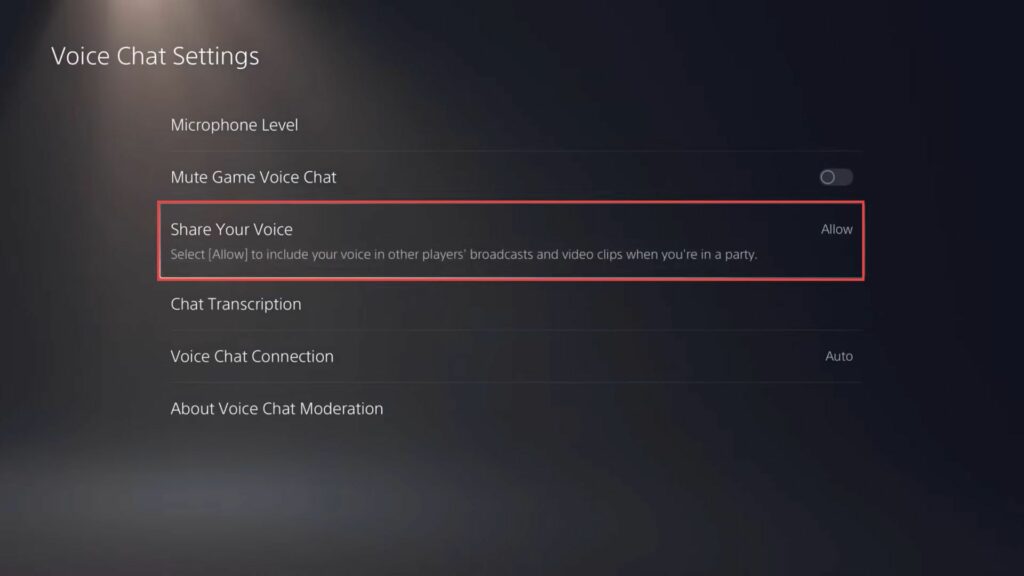
- Within the Voice Chat Settings, locate the option that mentions sharing your voice in other players’ broadcasts, live streams, and video clips.
Check the box that allows your voice to be included.
After selecting the option to share your voice, there might be a confirmation prompt. - Confirm your choice to allow your voice to be included in other players’ content when you’re at a party.
With voice sharing enabled in the party settings, your friends can now hear your voice, and you can hear theirs during gameplay and recording sessions.
- Navigate to the moment in your gameplay that you want to save as a video clip.
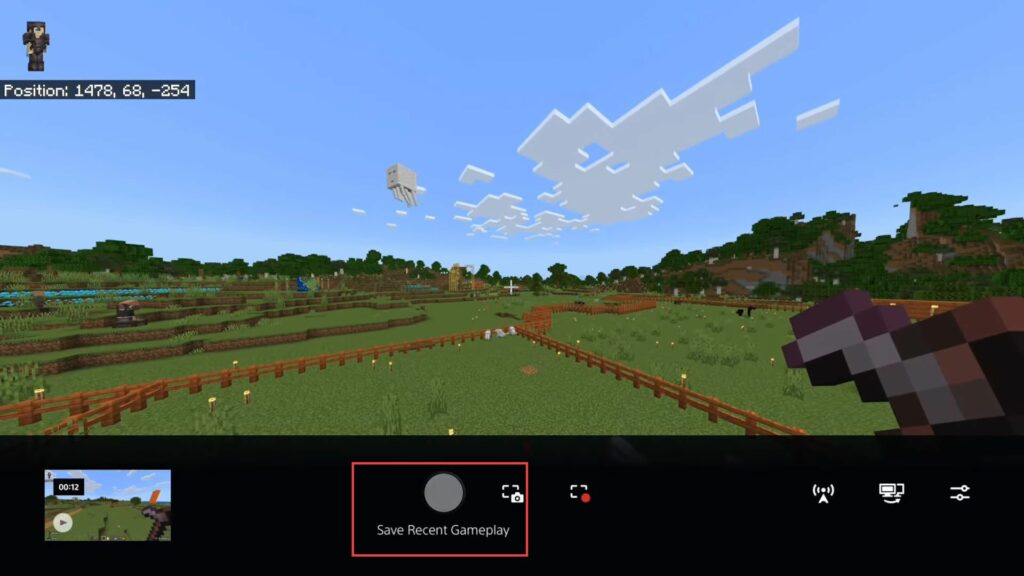
- Press the Share button on your controller.
This button is located above the d-pad on the left side. - From the sharing menu, choose the Save Recent Gameplay option.
This will capture the gameplay segment you want to save.
- Once the recording has started, continue speaking and providing commentary as you play.
This will ensure that your voice is captured in the recording. - When you’ve finished recording and have included the desired commentary, press the Share button again to stop the recording.
- From the sharing menu, select the option to save the recorded gameplay as a video clip.
- Access the saved video clip and play it back.
You should be able to hear yourself speaking and providing commentary during the gameplay.