In this guide, you’ll learn how to install FNIS vs Nemesis & RaceMenu in Skyrim. Go through the guide and follow the steps carefully to install it.
1. Before you get started, you’ll need to download and install SKSE on a clean Skyrim. It’ll allow for the best experience for both your game and mods. You need to install some mods or tools which work as the base for your mods. It includes FNIS or Nemesis, along with XPMSSE and RaceMenu.
2. The FNIS tool is a utility that allows the implementation of custom animations from other mods on your game. When it comes to their versatility, the possibilities are endless. FNIS has been around since 2012 and can help you recreate scenes such as NPCs walking style, or breaking out individual styles for characters like FlowerGirl.
3. With the arrival of Nemesis, FNIS faces strong competition. It can be difficult for users to choose between the two tools because they have different mechanics and qualities. But first, Nemesis was released as an initial Beta in 2018, not long after FNIS. The new tool sets out to be an improved version of what you already have. Firstly it was only available on GitHub but as of late 2021, Nemesis is available to download on Nexus Mods. Nemesis is still in development though but is constantly getting better and more user-friendly. It will improve over time with continual updates and hopefully fewer bugs. It will take place of FNIS with its advancement in the future with solid groundings but isn’t that ready yet.
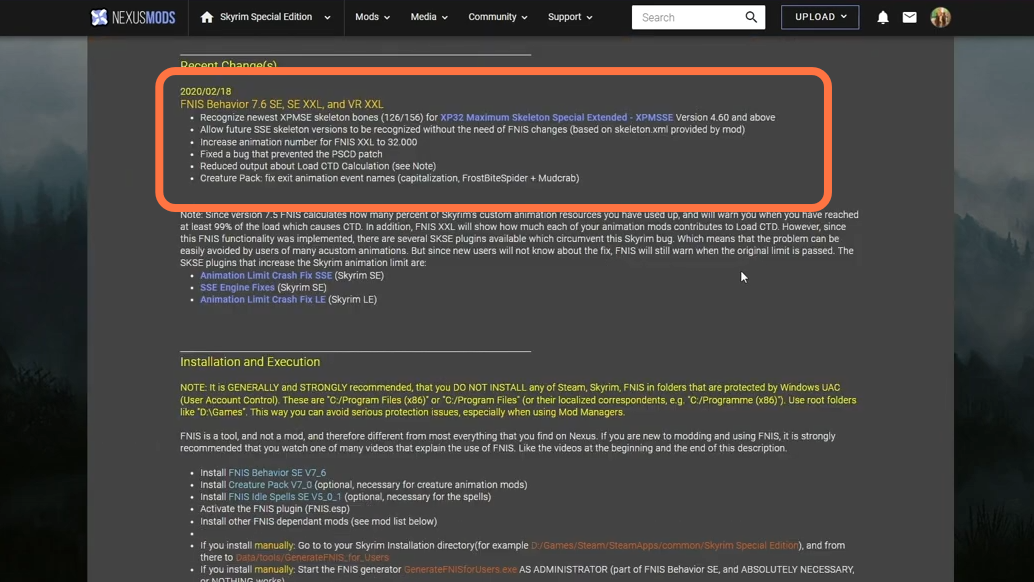
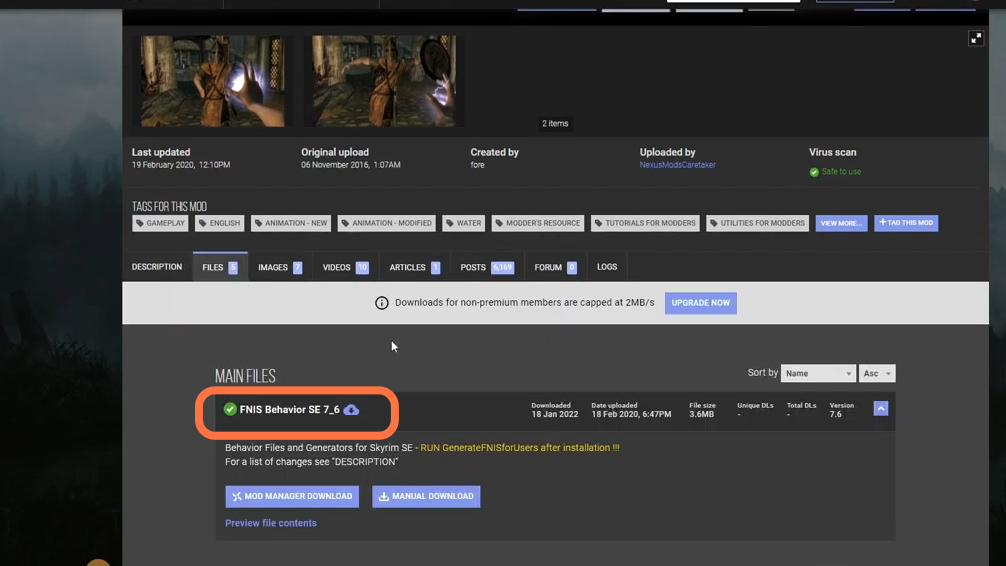
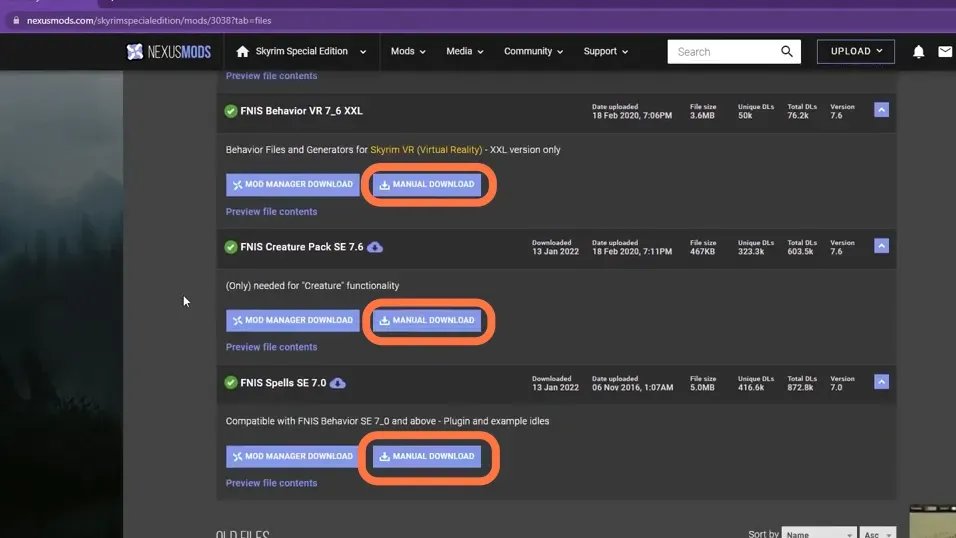
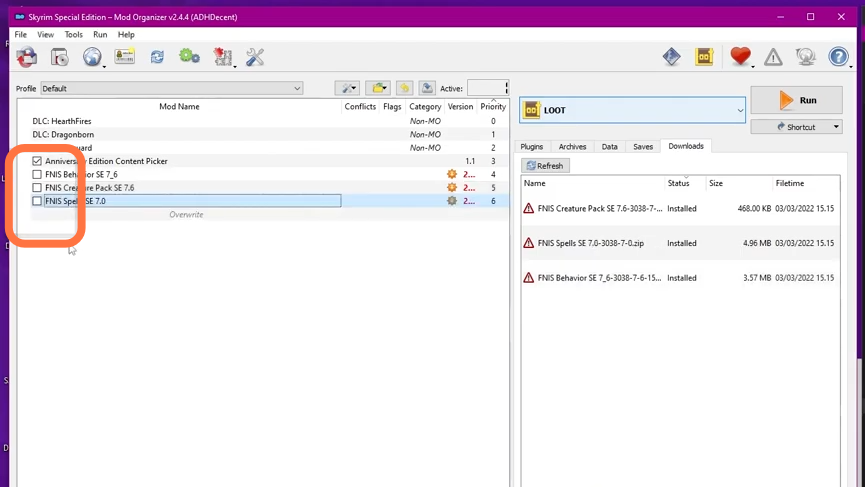
4. You can download the FNIS (Fores New Idles In Skyrim) from “https://www.nexusmods.com/skyrim/mods/11811“. Click on the Files Tab and download the ‘Behaviours’ file, ‘Creatures’ pack & the ‘Spells’ files.
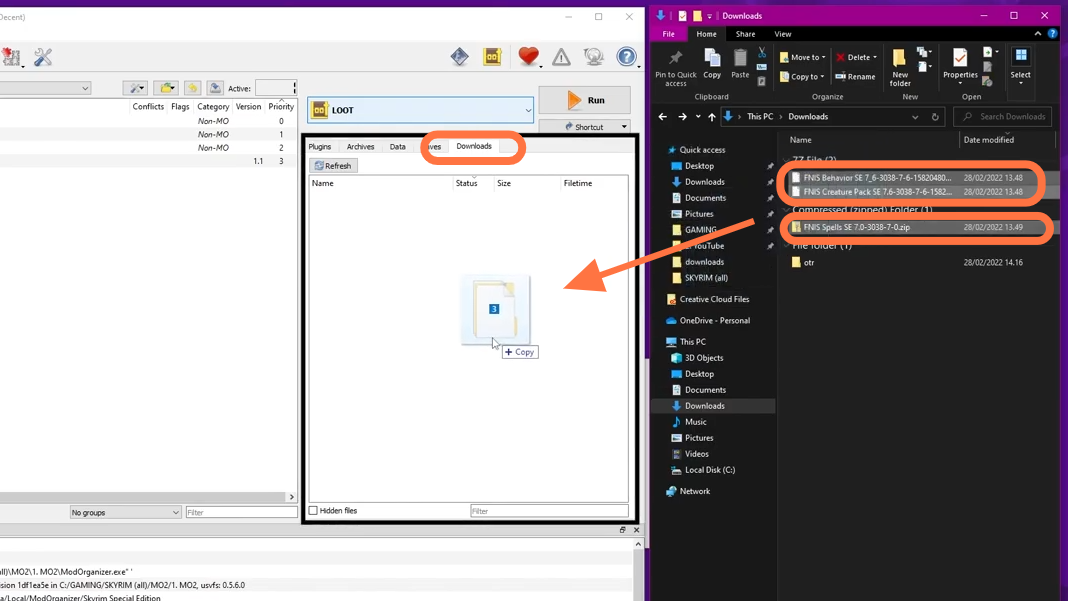
5. Now you need to drag & drop these three downloaded files under the ‘Downloads’ tab of Mod Organizer of Skyrim.
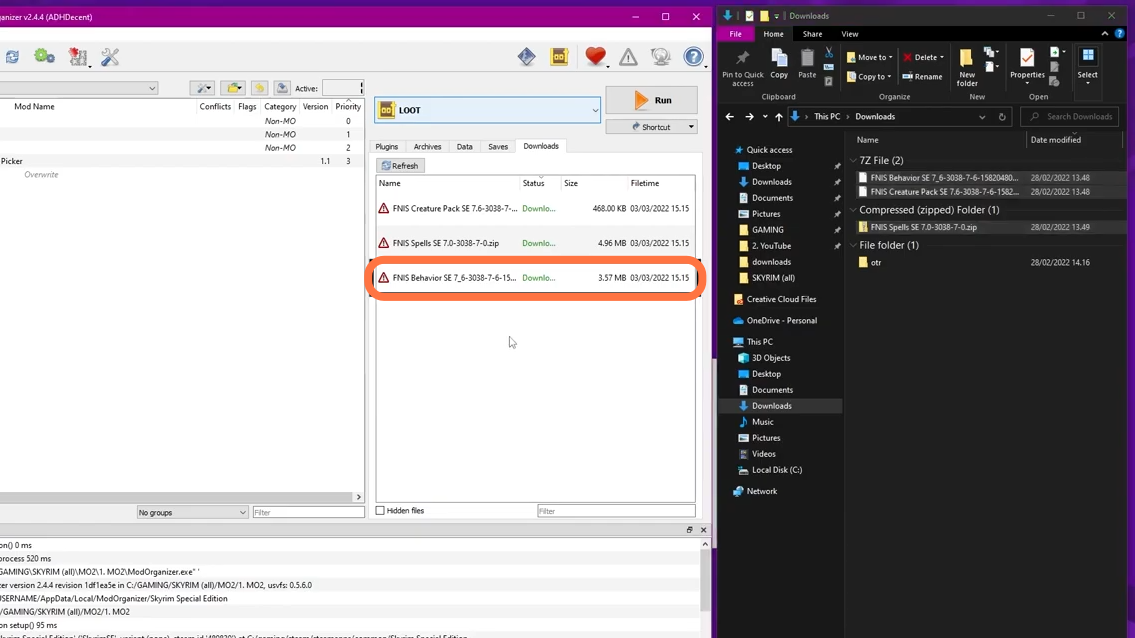
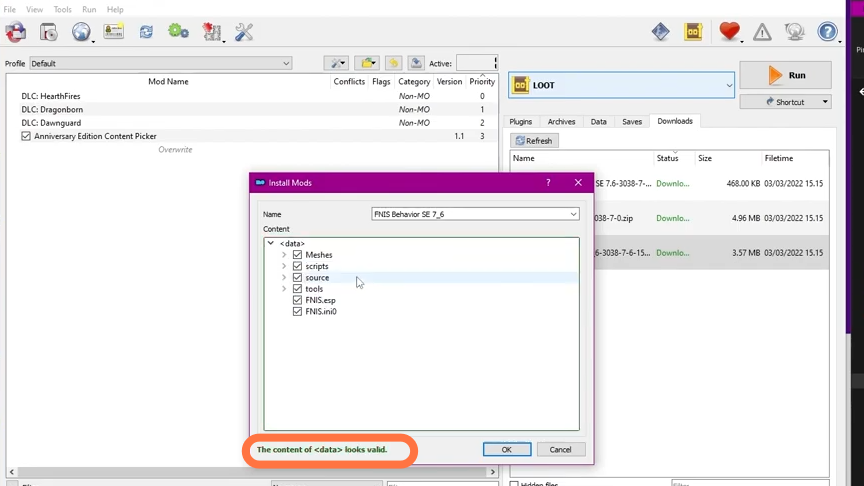
6. You will need to manually offset them to the data folder. Now Begin installation by double-clicking on ‘FNIS Behaviours’ and selecting Manual.
7. A pop-up window for the Install mods will appear where the data path most probably won’t be valid. You can see that at the bottom of the window.
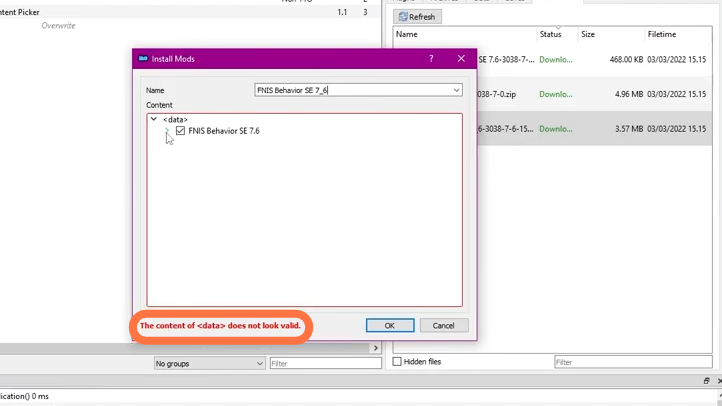
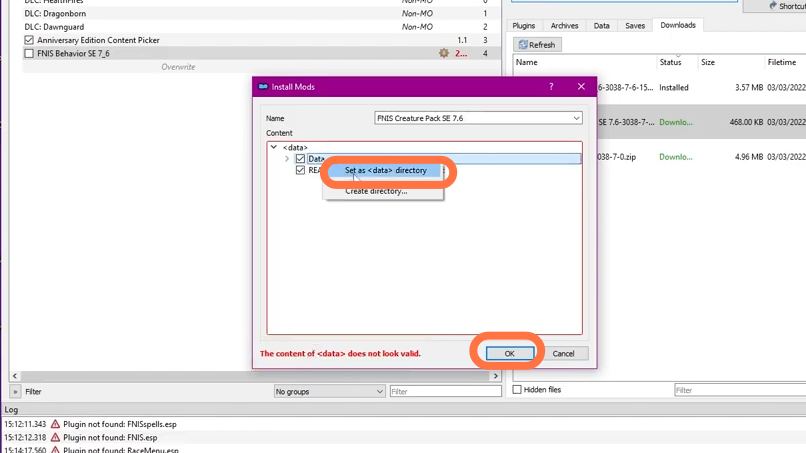
8. Now click the drop-down arrow and under FNIS behavior, right-click on ‘data’ and then select “Set As Data Directory”. The data path will turn green, it means it becomes valid. After that, you have to click on Ok.
9. Now Double-click on the ‘Creatures’ pack and press ‘Manual’.
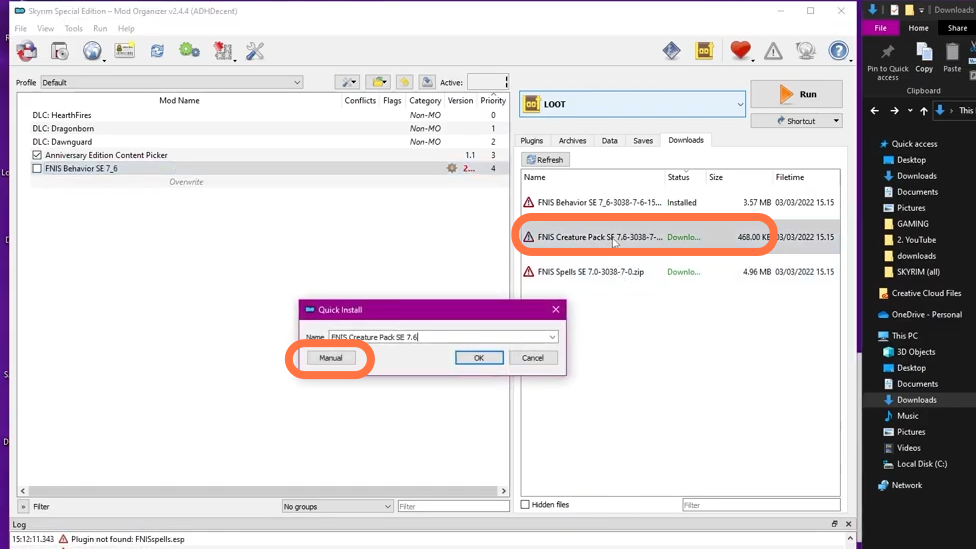
10. You need to set the data path for it as well if it shows red text at the bottom.
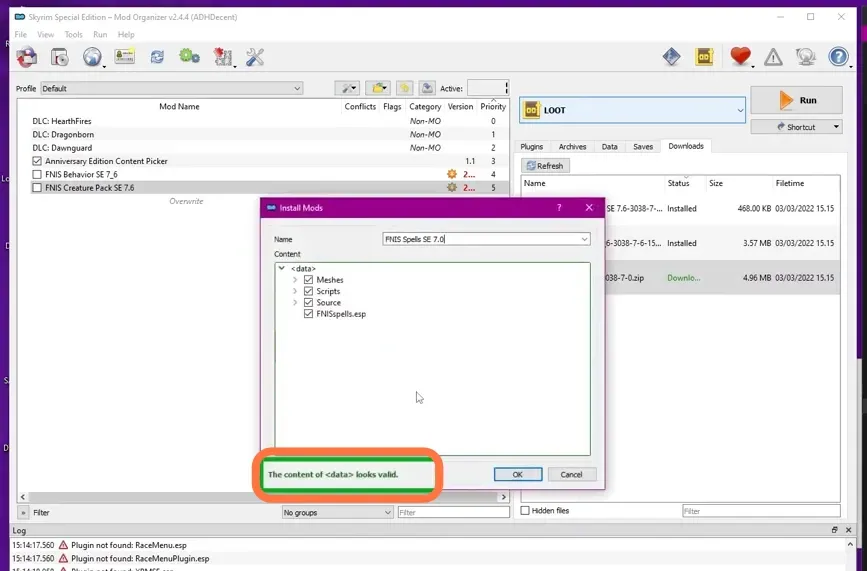
11. Double-click on the ‘Spells’ pack now, click the ‘Manual’ and set the data path for this too.
12. Check mark the boxes next to the FNIS files to ensure they’re Enabled.
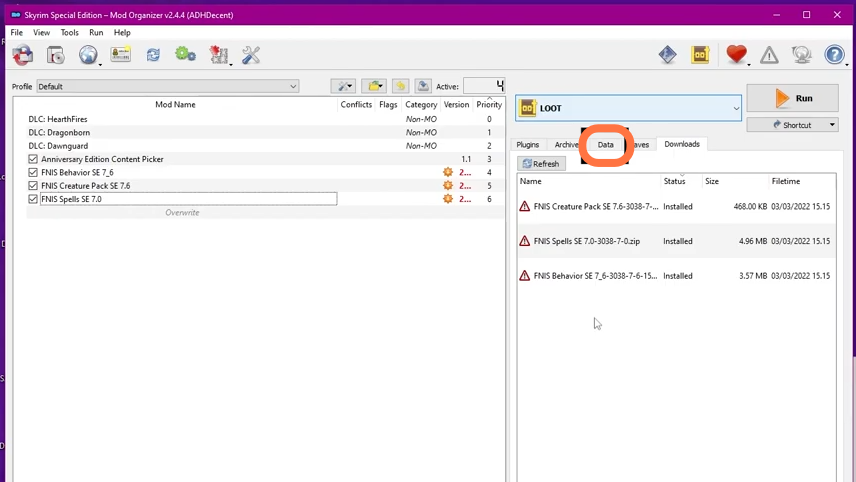
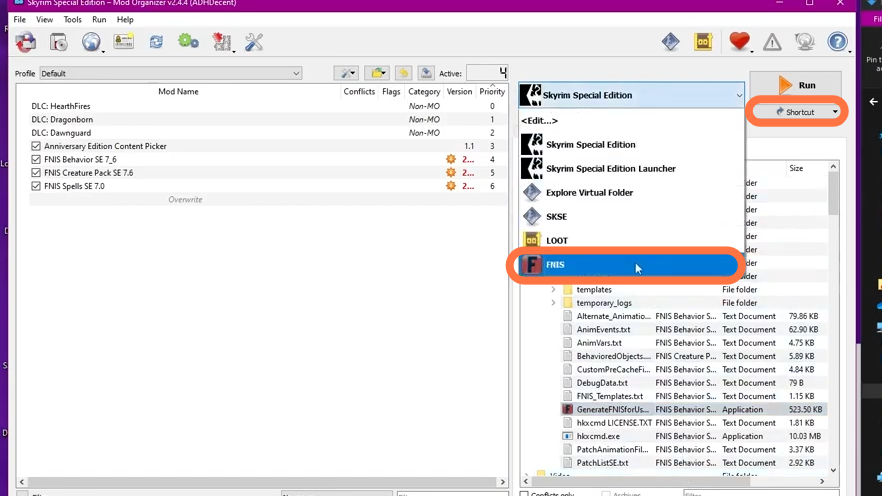
13. Now click on the ‘Data’ tab in the right-hand pane of Mode Organizer 2.
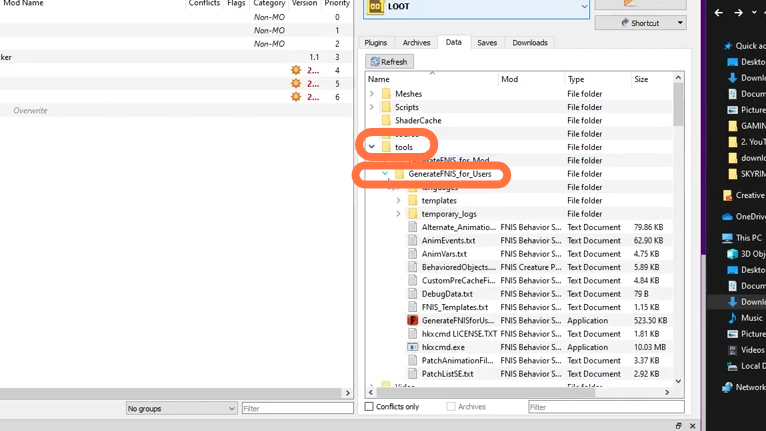
14. After that, expand the Tools folder and then expand the GenerateFNIS_for_Users folder.
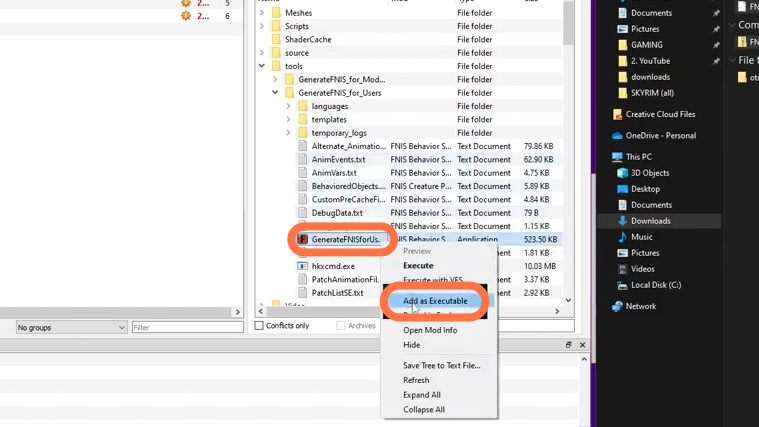
15. Right-click on the application ‘GenerateFNISforUsers’, select ‘Add As Executable’, and then click on ‘Ok’.
16. Now you can select FNIS from the dropdown list and also you can add a shortcut if needed. Now you have successfully installed Fores New Idles for Skyrim.
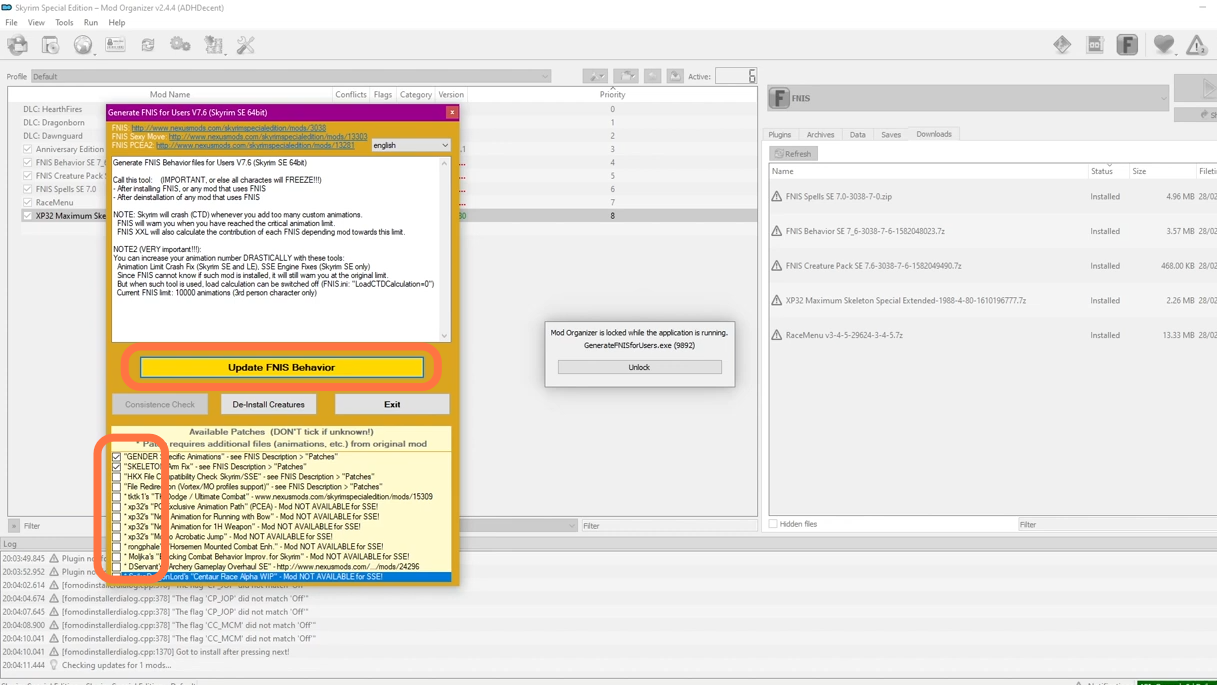
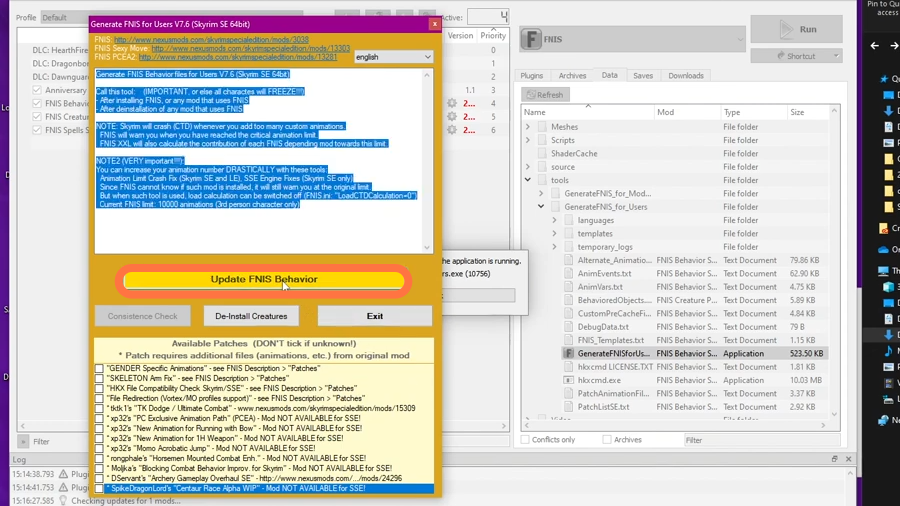
17. You have to select FNIS and click ‘Run’. You will find a launch window where you need to click on Update FNIS behavior each time you install.
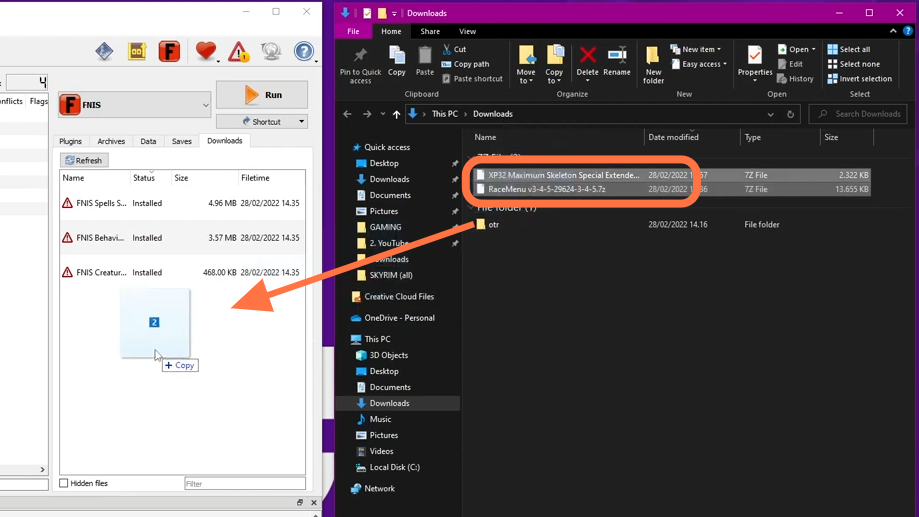
18. Now you have to download the Race Menu from “https://www.nexusmods.com/skyrimspecialedition/mods/19080“. Click on the Files Tab and then press the Mod Manager Download button to get it for free. RaceMenu is a character creation system that gives you complete control over how your character looks and acts. With an extensive list of options, you can truly make your character unique.

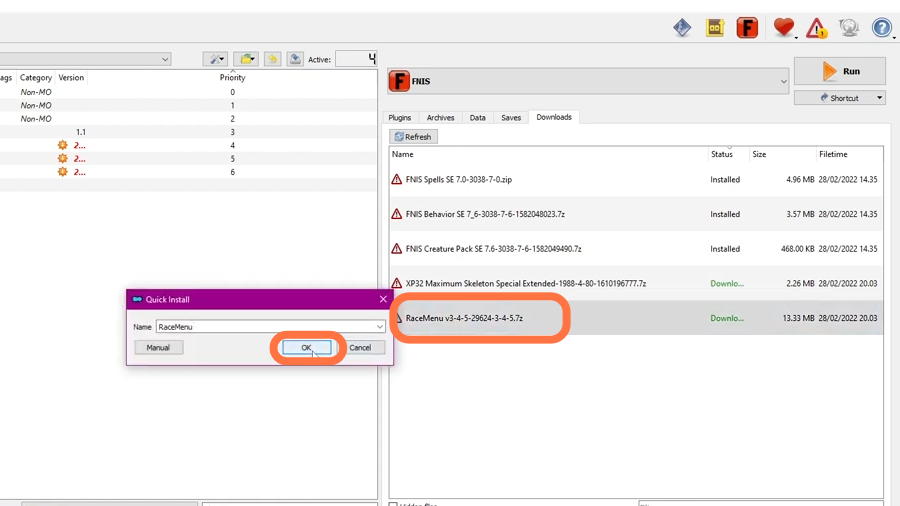
19. Now you need to Drag and drop these two downloaded files (RaceMenu and XP32) under the ‘Downloads’ tab of Mod Organizer of Skyrim.
20. Now install the RaceMenu by double-clicking on the ‘RaceMenu file’ and clicking Ok. As XP32 requires RaceMenu, it is important to install this before installing XP32.
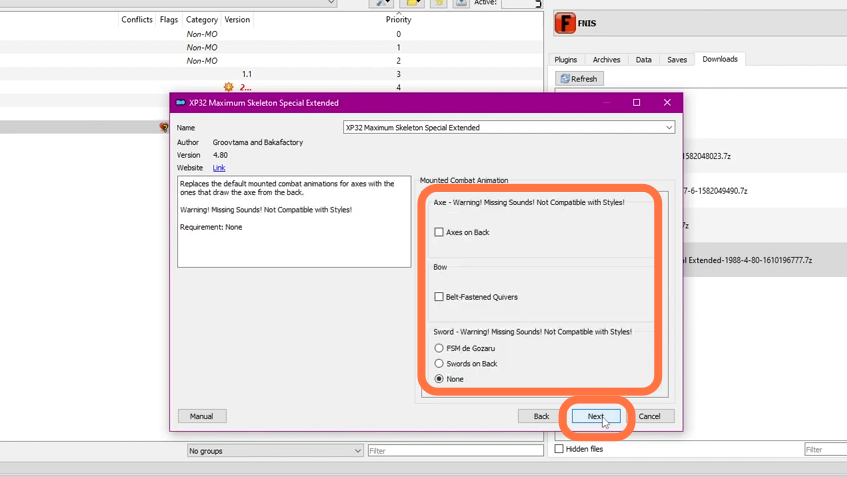
21. Now, double-click on XP32 to install it, and a pop-up window will appear giving you the opportunity to select different install options. For now, it is all that can be selected except for SoS which you want to be set to ‘None’.
22. Now you need to launch FNIS and update the behaviors for these to take effect. Under the patches, check the boxes for the “GENDER” and “SKELETON” patches. Once you update FNIS behaviors, you should no longer have warnings listed then you can close FNIS.