If you’re grappling with frustrating lag issues while immersing yourself in The Sims 4, worry not – this guide is tailored to help you conquer these hindrances and bring back seamless gameplay. The vexing problem of Sims getting ensnared in their activities during Sims 4 gameplay is a common one, typically spring from the presence of other mods within your game. This guide will walk you through the installation and utilization of two essential mods: “Simulation Unclogger” and “Simulation Lag Fix”.
Step 1: Initiating the Solution
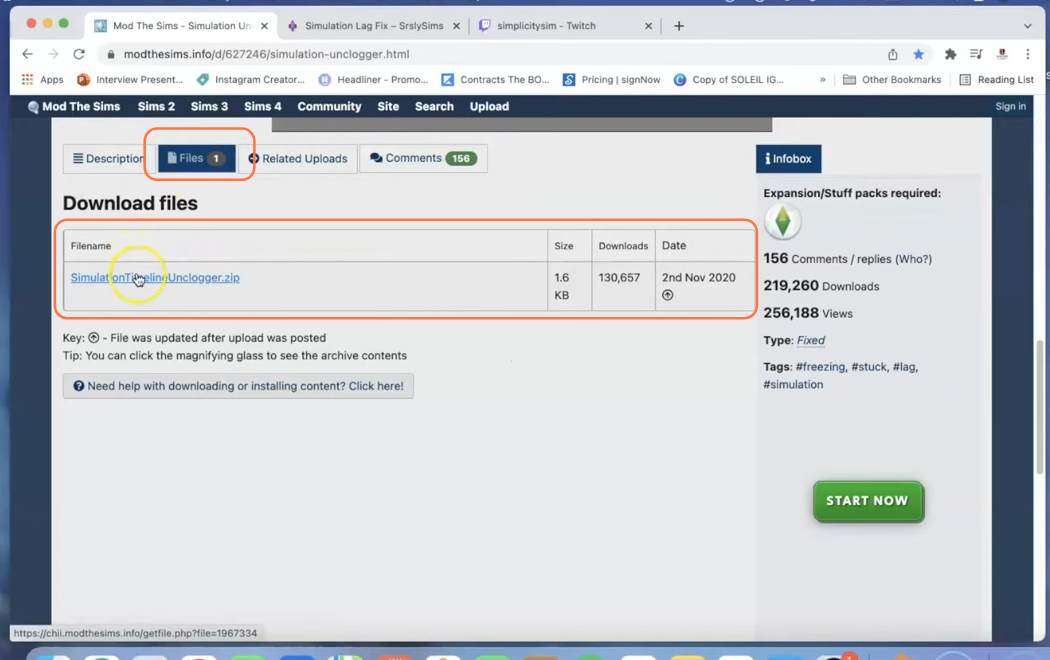
- To begin, let’s start by installing the ‘Simulation Unclogger‘ mod, which serves as a remedy for those unpredictable instances where Sims become trapped, rendering the game unplayable. This mod operates as a TS4script file. First, visit the designated page for the mod and navigate to the “Files” tab. From there, proceed to download the mod’s Zip file.
- Another vital mod in this endeavor is the Simulation Lag Fix engineered to resolve issues such as Sims’ odd head movements ans Sims remaining stuck for extended periods to combat extensive simulation lag. Similarly, visit the mod’s page, scroll down to locate the “Download resources” section, and pick any of the available resources to acquire the Zip file for this mod.
Step 2: Unveiling the Mod Archive
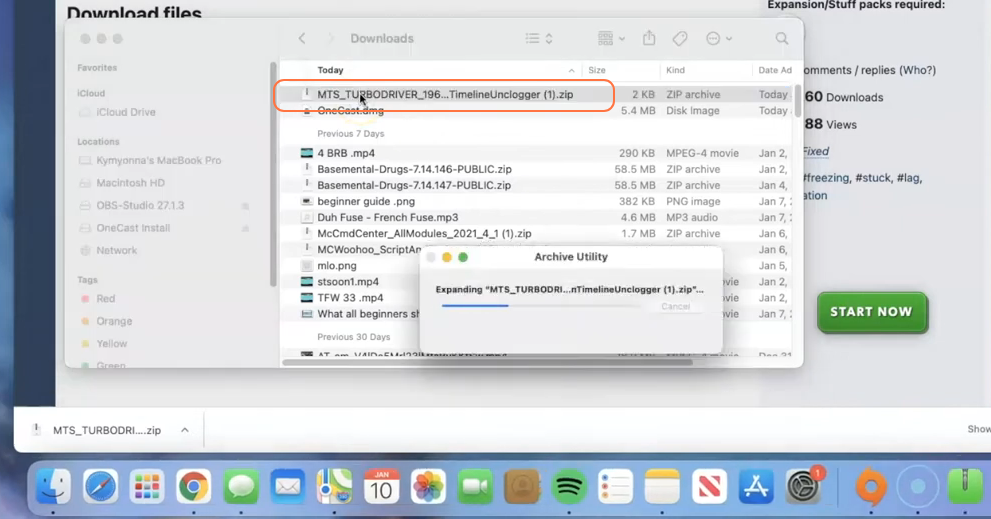
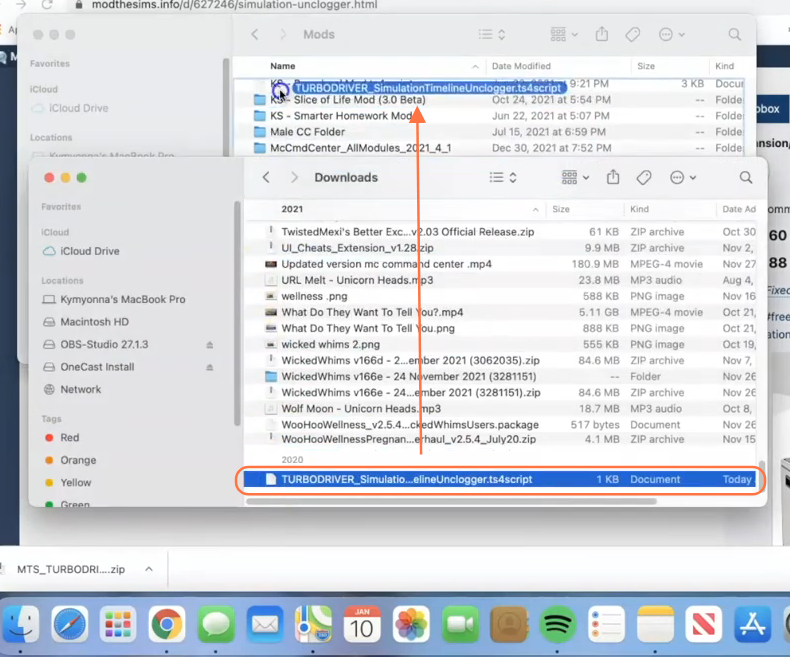
Once the download concludes, navigate to your File Explorer on Windows or the Finder application on Mac to locate the downloaded files. Given that the mods are bundled as a compressed zip or rar files, you’ll need a tool like WinRAR to extract its contents. Right-click on the downloaded file and select either “Extract All” or “Extract Here.” Specify the
destination where you want the extracted contents to reside and confirm your choice by clicking “Extract“. Mac users can effortlessly unzip the downloaded file by simply double-clicking it. After this process, you’ll find a TS4script file resulting from the “Simulation Unclogger” mod and both a package and a TS4script resulting from the extraction of the “Simulation Lag Fix” mod.
Step 3: Accessing the Sims 4 Mods Repository
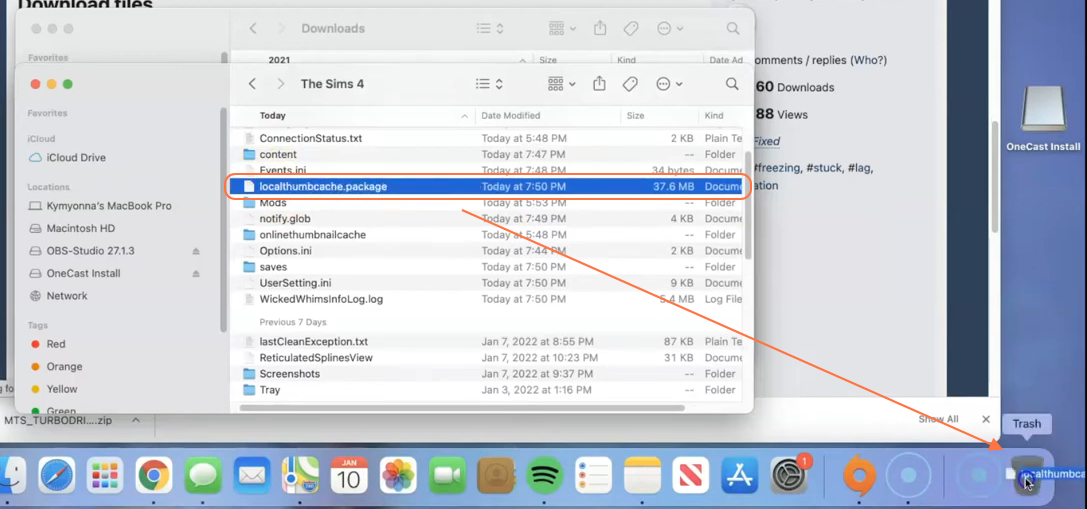
Proceeding onward, open another Finder window and navigate to the Mods folder within your Sims 4 game directory. Typically, you can locate the game directory at Documents > Electronic Arts > The Sims 4. In case you don’t have a Mods folder or have never installed mods before, create one inside “The Sims 4” folder. Alternatively, launching the game
at least once and then exiting will automatically generate the necessary folders, including Documents, Electronic Arts, and Mods. It’s crucial to ensure that the game is not running while you’re in the process of installing any modifications. Also, consider deleting the “localthumbcache.package” file from your Sims 4 folder for thoroughness.
Step 4: Installing the Mod
With the Mods folder ready, head to your downloads folder and select both the extracted TS4script file from the “Simulation Unclogger” mod and the Simulation Lag Fix folder. Effortlessly drag and drop these items into the Mods folder within the game directory. This action guarantees that the mods are placed accurately for the game to identify and
activate them.
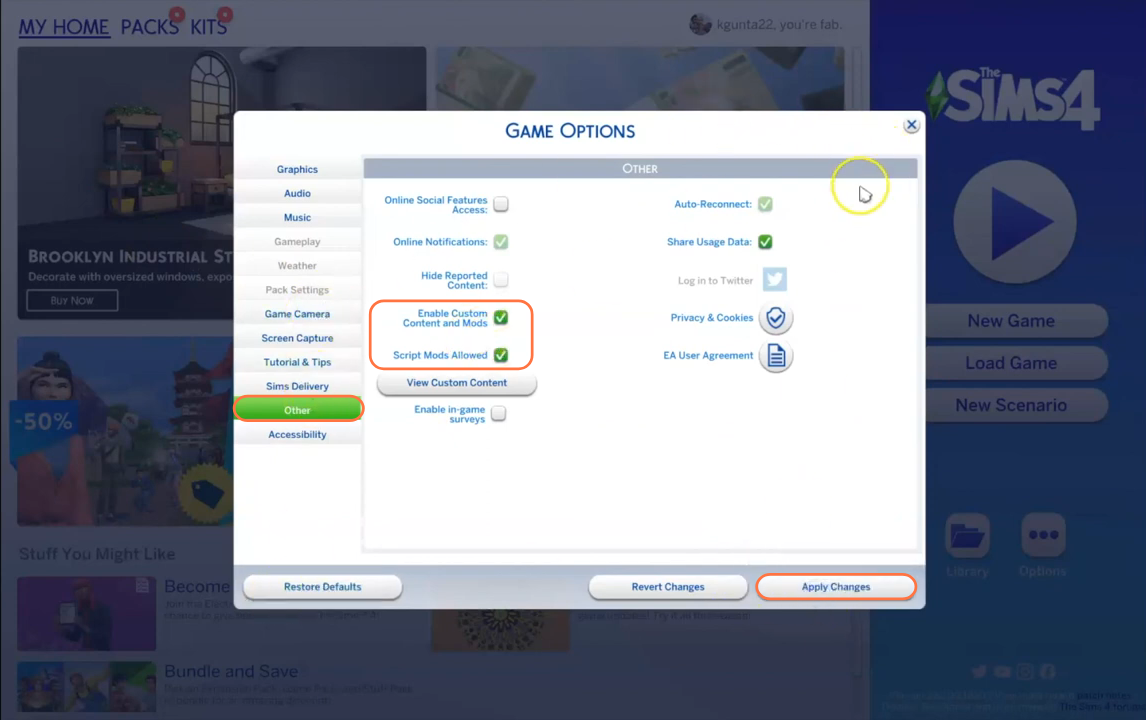
Step 5: Enabling Mods and Script Mods in the Game
Keep in mind that these mods necessitate script mod support, a requirement shared by many mods in The Sims 4. Launch the game and navigate to the main menu. Click on the “Options” tab and then select “Game Options“. Within this window, proceed to the “Other” tab. Here, you’ll find the options labeled “Enable Custom Content and Mods” and “Script Mods Allowed“. Ensure that the checkboxes beside these options are selected. To implement your changes, click the “Apply Changes” button situated at the bottom right corner of the screen.