The Create mod is a fantastic addition to Minecraft, introducing automation machinery and creative gameplay opportunities. This step-by-step guide will walk you through the process of downloading and installing the Create mod.
Step 1: Requirements
Before we start the installation process, there are a few prerequisites to cover:
1.1: Install Java 17
First, ensure you have Java 17 installed on your PC:
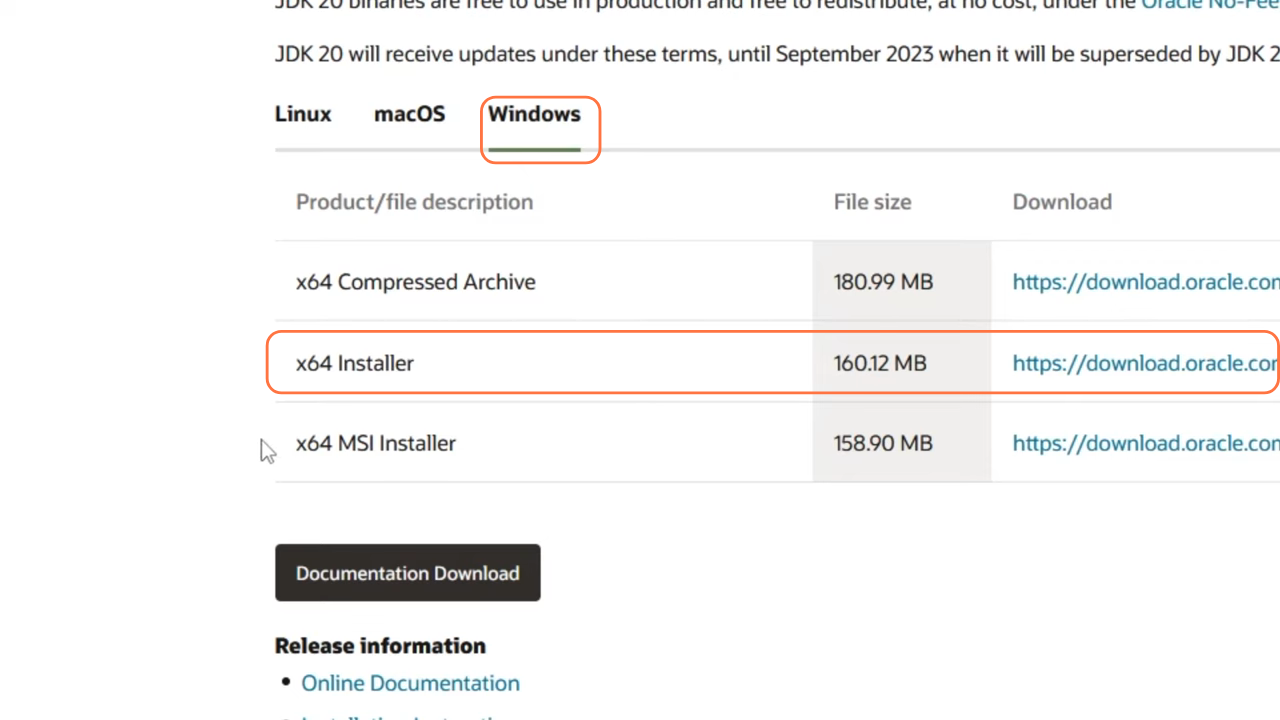
- Visit the official Java download page.
- Once on the page, select your operating system.
- Download the x64 installer (not the x64 MSI).
- Run the installer and follow the on-screen instructions to install Java 17.
1.2: Choose a Mod Loader
Now, let’s install the mod loader of your choice (Fabric and Forge). Fabric is ideal for lightly modded gameplay, while Forge is compatible with a wide range of mods.
For Forge:
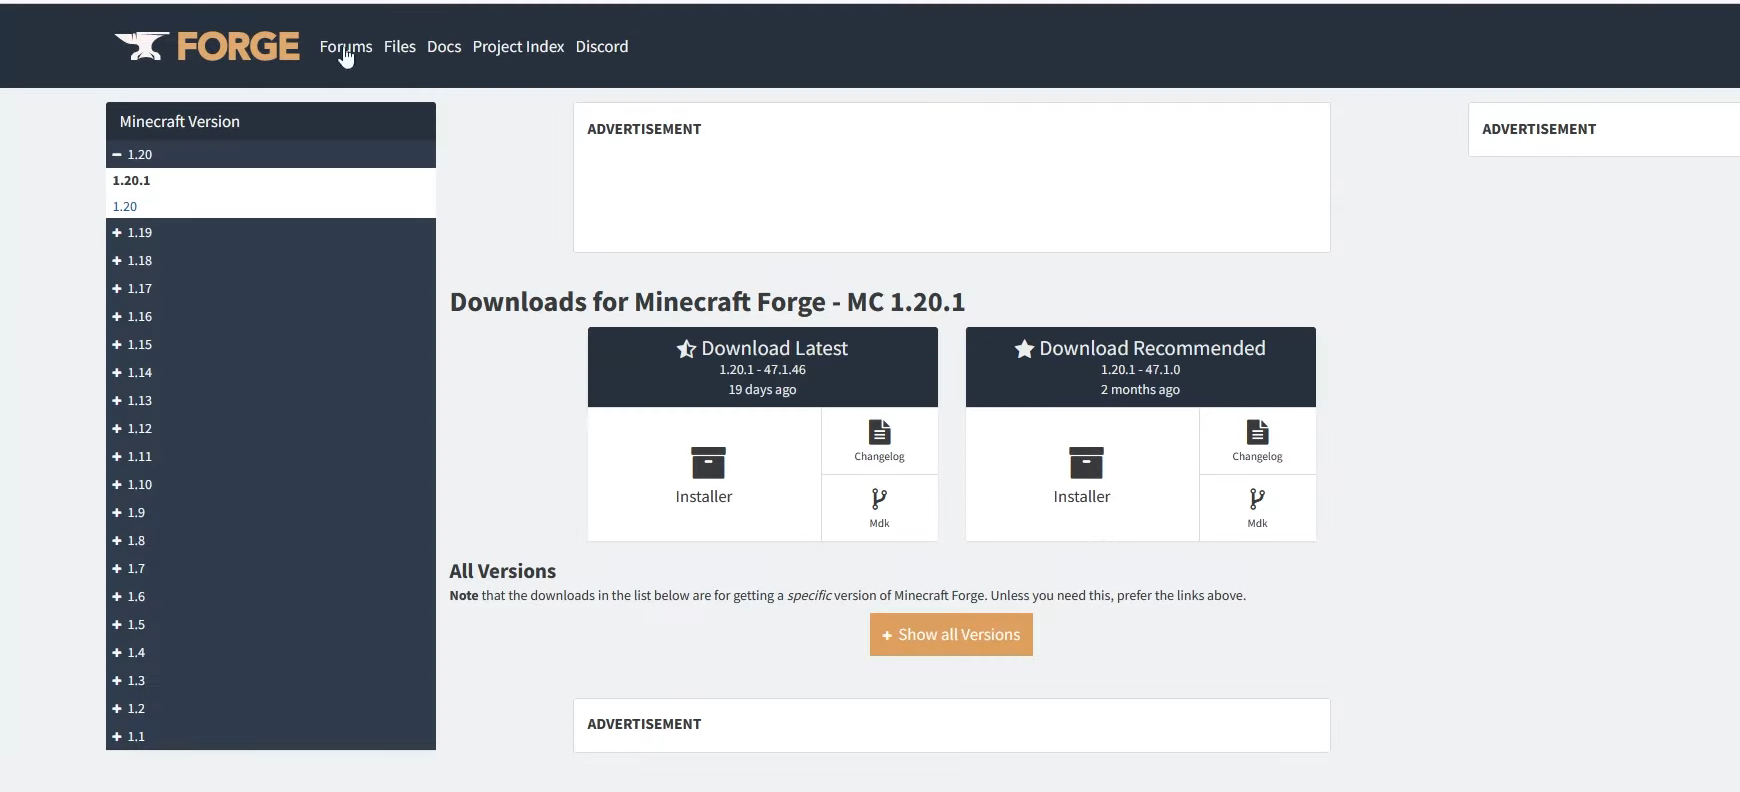
- Visit the official Forge website.
- Download the recommended installer and run it.
- Locate the ‘mods’ folder inside the .Minecraft directory. This is where we’ll also place the Create mod once we have it.Minecraft Drictory:(Drive)\Users\User_name\AppData\Roaming\.Minecraft\mods
For Fabric:
- Visit the official Fabric website.
- Download the installer and run it.
- Also, download the Fabric API.
- Place the Fabric API in the ‘mods’ folder inside the .Minecraft directory.Minecraft Drictory:(Drive)\Users\User_name\AppData\Roaming\.Minecraft\mods

Step 2: Installing MultiMC
For a more organized and user-friendly approach and also for a smoother experience, MultiMC is recommended.
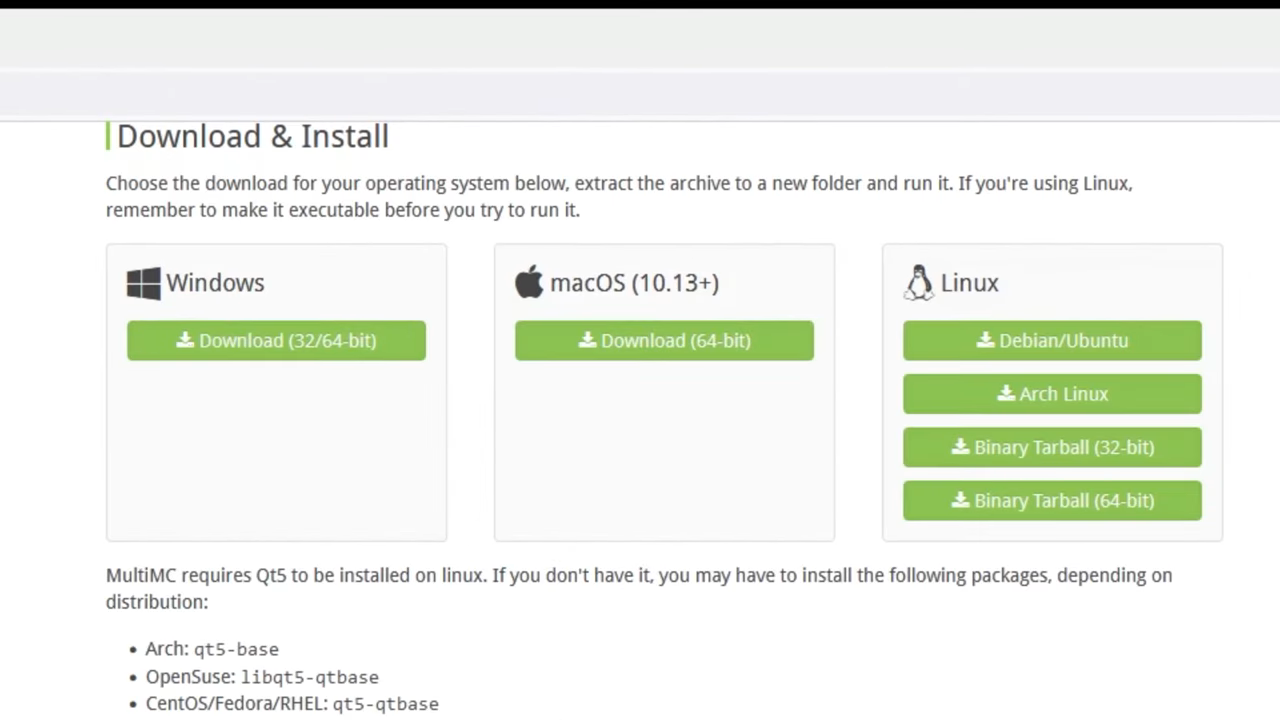
- Visit the official MultiMC website.
- Click on the ‘Download and Install’ section.
- Select the version compatible with your operating system (Windows, macOS, or Linux).
- Download it and extract the contents to a folder of your choice. Ensure you have enough disk space, as this is where your instances and worlds will be stored.
- Run the MultiMC.exe file to launch the program, select your language, and proceed through the setup.
- Log in using your Minecraft account and select your account type then you’ll see the main MultiMC interface.
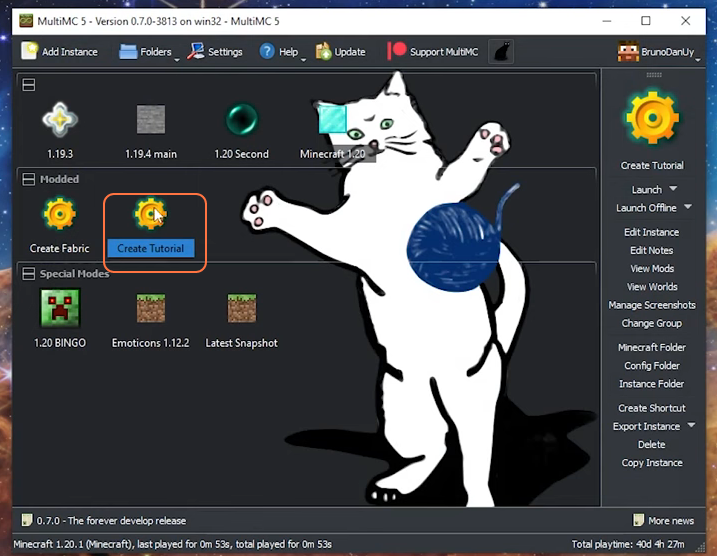
Step 3: Adding an Instance
Now let’s add a new instance to create a New Minecraft Profile:
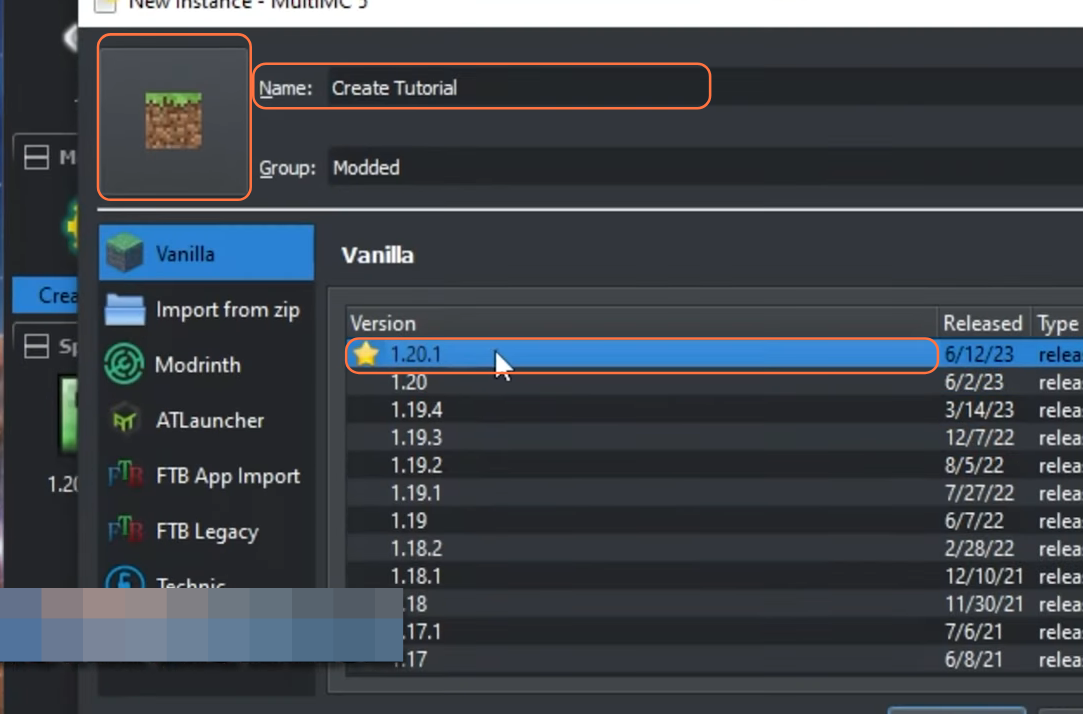
- Click on the ‘Add Instance’ button.
- Name the instance and select the Minecraft version you want to use (e.g., Minecraft 1.20.1).
- You can also change the instance’s icon then click OK, and your new instance will appear.
- Go to ‘Edit Instance’, and under the ‘Version’ tab, you can install Forge or Fabric by clicking the respective buttons.
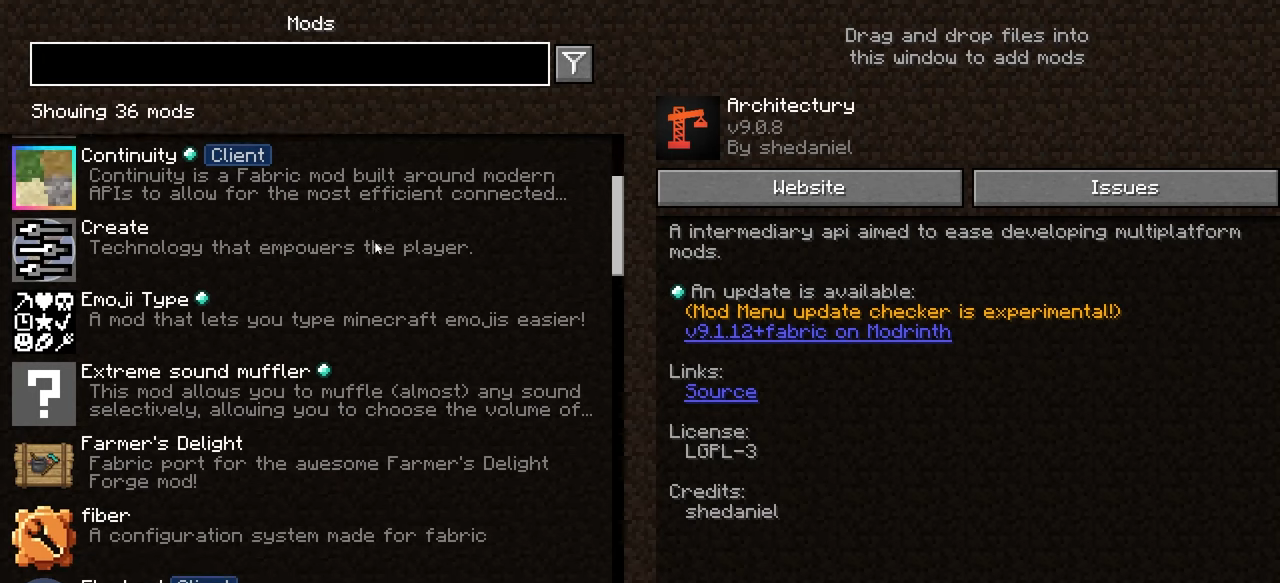
- In the ‘Loader Mods’ section, add the ‘Create’ mod file by dragging it. If you’re using Fabric, remember to download and place the Fabric API in this folder as well.
Step 4: Installing the Create Mod:
Now, it’s time to install the Create mod itself:
- Ensure to download the version compatible with your chosen mod loader (Fabric or Forge).
- After downloading the mod, place the file in your ‘mods’ folder or simply drag it into the MultiMC window.
- Finally, run the instance by double-clicking on it. If the game starts, then the ‘Create’ mod has been installed successfully in your game.
Step 5: Recommended Mods
As the Create mod successfully installed, you should consider installing these mods:
- Optimization Mods: These improve game performance, especially on lower-end devices. For Fabric, consider Sodium and Lithium. For Forge, Rubidium is a port of Sodium for optimal performance.
- Just Enough Items (JEI): This mod offers a user-friendly crafting interface, making it easier to manage recipes and crafting. It’s available for both Fabric and Forge.
- Mod Menu: An essential tool for managing and tracking the mods you have installed.
- Shaders: If you wish to use shaders with the ‘Create’ mod, you’ll need a mod that supports them. For Fabric, Iris is an excellent choice, and Forge users can opt for Oculus, which is a version of Iris compatible with Rubidium.
By following the above steps you can easily Install the Create Mod in Minecraft.