With the ECU Job in SP mod, players can savor the thrilling experience of a captivating mission which was introduced in the GTA V online tuners update. In this mission, players embark on an escapade that involves car theft, customized ECU installation, and high-stakes deliveries, all while evading police and adversaries. This dynamic experience demands players to skillfully navigate the realms of driving, marksmanship, and stealth in order to successfully accomplish their objectives.
Step 1: Downloading the Mod
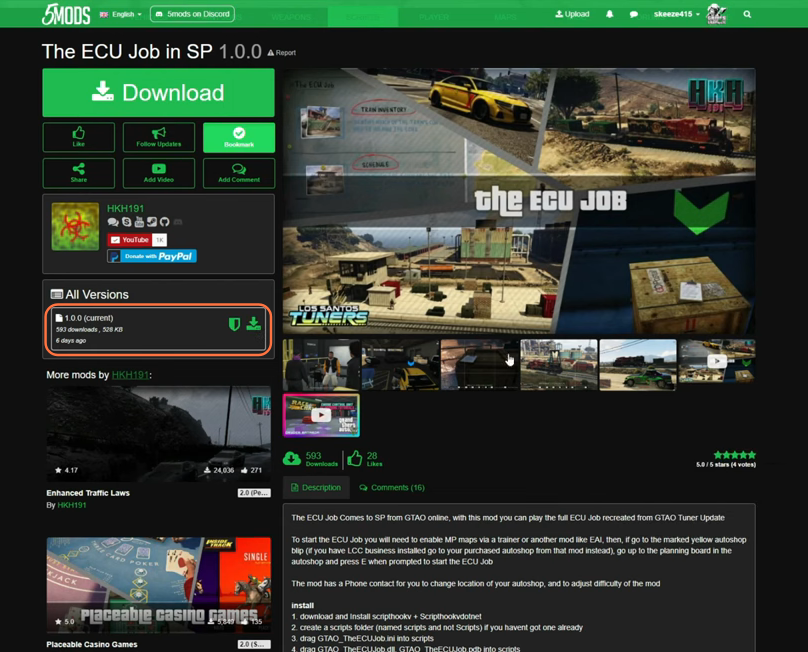
- To immerse yourself in the ECU Job, commence by securing the latest iteration of The ECU Job in SP mod tailored to your game version.
- Head to the designated web page, and under the ‘All Versions’ section, click the green download arrow icon corresponding to the current version. This action will fetch the mod’s compressed zip file.
Step 2: Acquire and Configure Essential Files
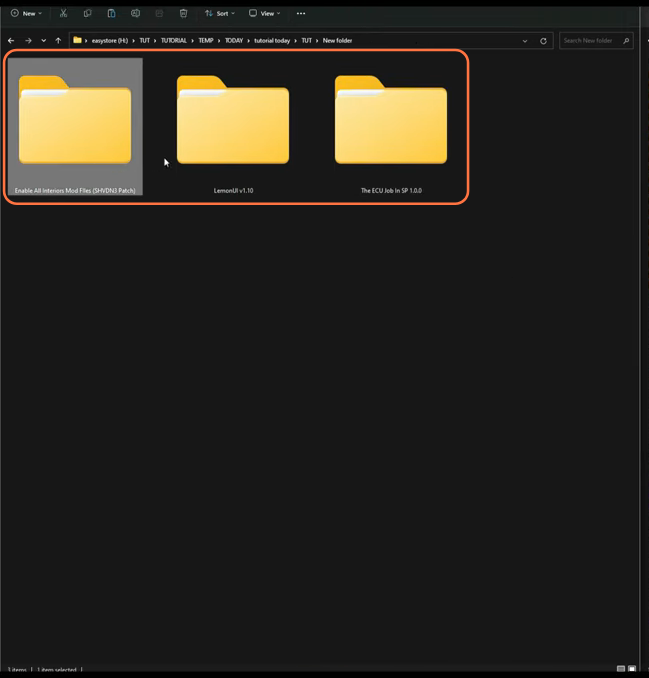
- To ensure a seamless fusion of the mod’s expansive features, a handful of prerequisites must be in place. The mod necessitates the inclusion of ScriptHookV, ScriptHookVDotNet, LemonUI library and Enable All Interiors Mod.
- Once all the files are in your possession, head to your downloads folder for the installation process.
Step 3: Navigating to the Scripts Directory
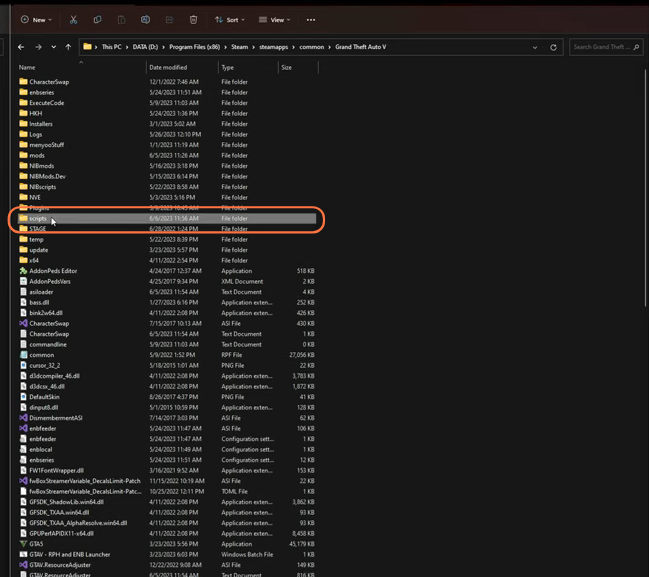
Now it’s time to move into the central directory where your GTA V installation resides. In this context, your goal is to locate or establish a designated “scripts” folder within the Grand Theft Auto V directory. This particular step is crucial for integrating the mod’s functionalities into the game.
Step 4: Installation of “Enable All Interiors” Mod
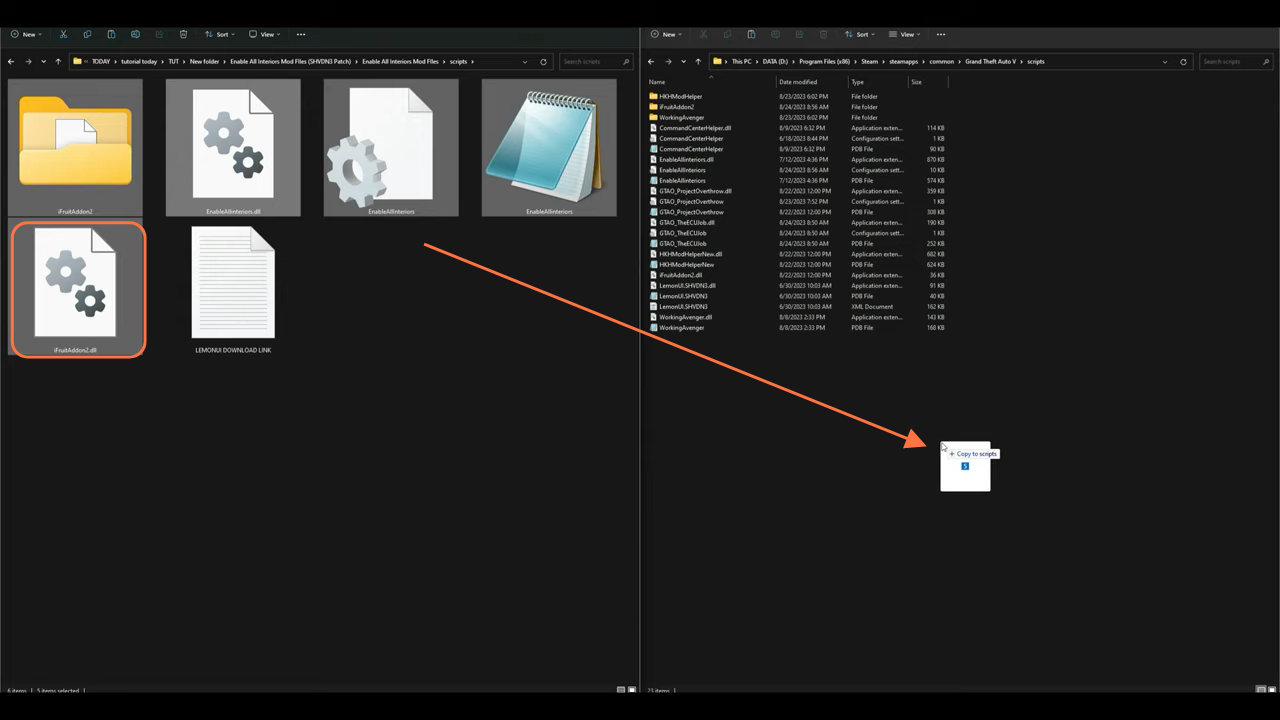
Return to the downloads folder and access the ‘Enable All Interiors Mod Files’ directory. Inside, you’ll find a folder bearing the same name—enter this folder. Subsequently, a “scripts” folder will come into view; access it and select all contents excluding text document. Perform a drag-and-drop maneuver to effortlessly transfer these files into the scripts folder nestled within your GTA V directory.
Step 5: Integrating the Lemon UI Library
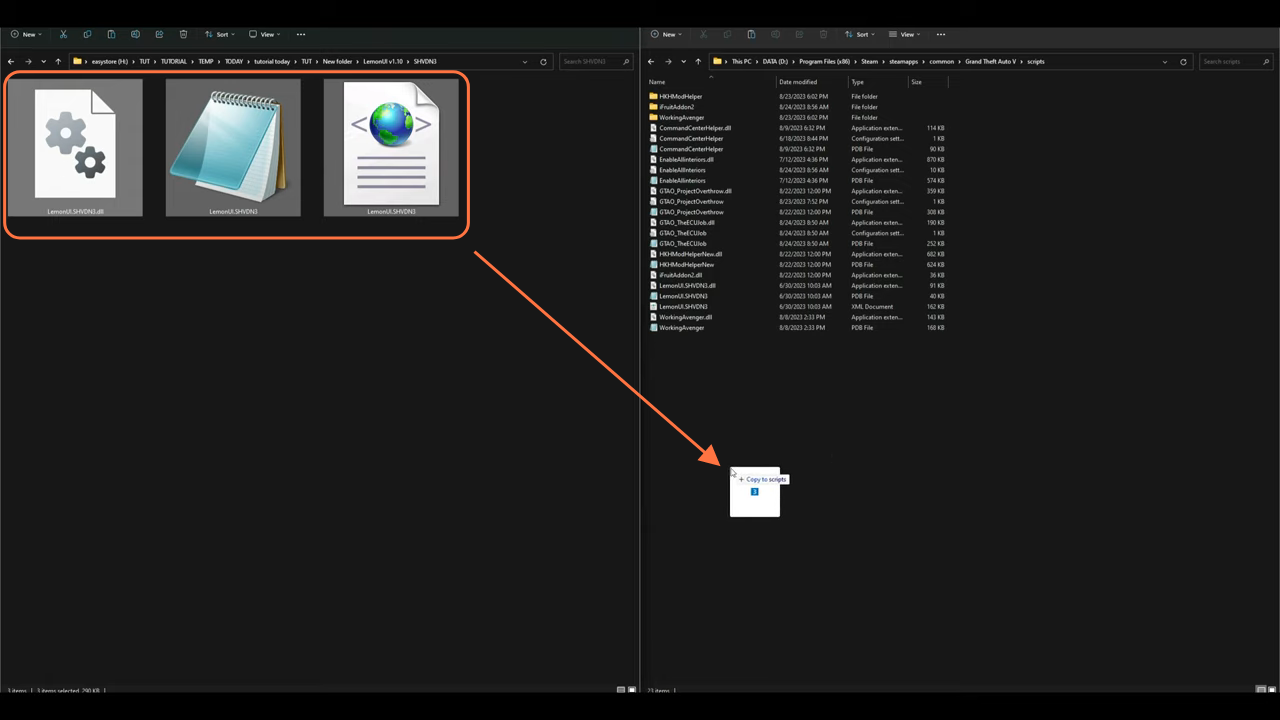
Revisit the downloads folder and enter into the ‘LemonUI’ directory. Within this repository, a cluster of folders awaits, but your focus should be directed towards the ‘SHVDN3’ folder. Execute a simple drag-and-drop process, transferring all enclosed files into the scripts folder nested within your GTA V directory, thus ensuring the seamless operation of the Lemon UI Library.
Step 6: Installing Main Mod
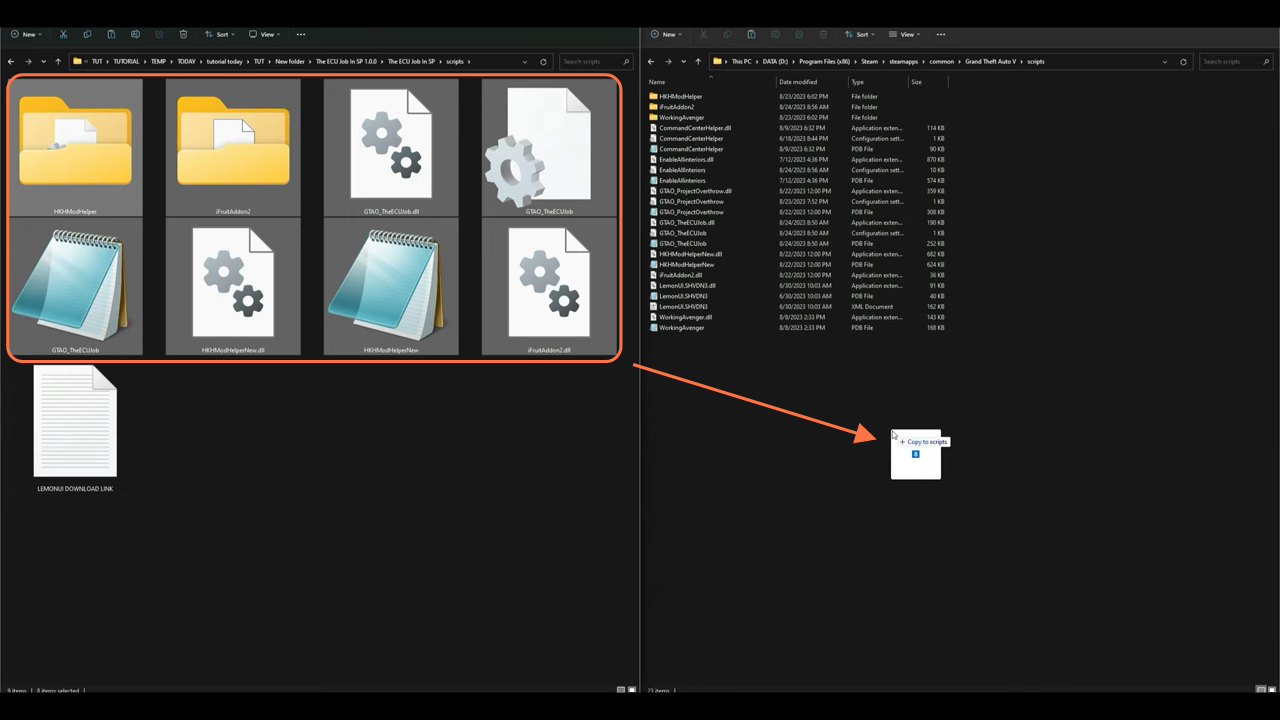
Return once more to the downloads folder, this time for the main mod’s installation. Access the ‘The ECU Job in SP’ folder and enter into the similarly named sub-folder. Here, you’ll encounter yet another ‘scripts’ folder—access it and select all items except for text document. Then drag-and-drop these files into the scripts folder ensconced within your GTA V directory, thus solidifying the core mod’s integration.
Step 7: Testing and Exploring the Mod
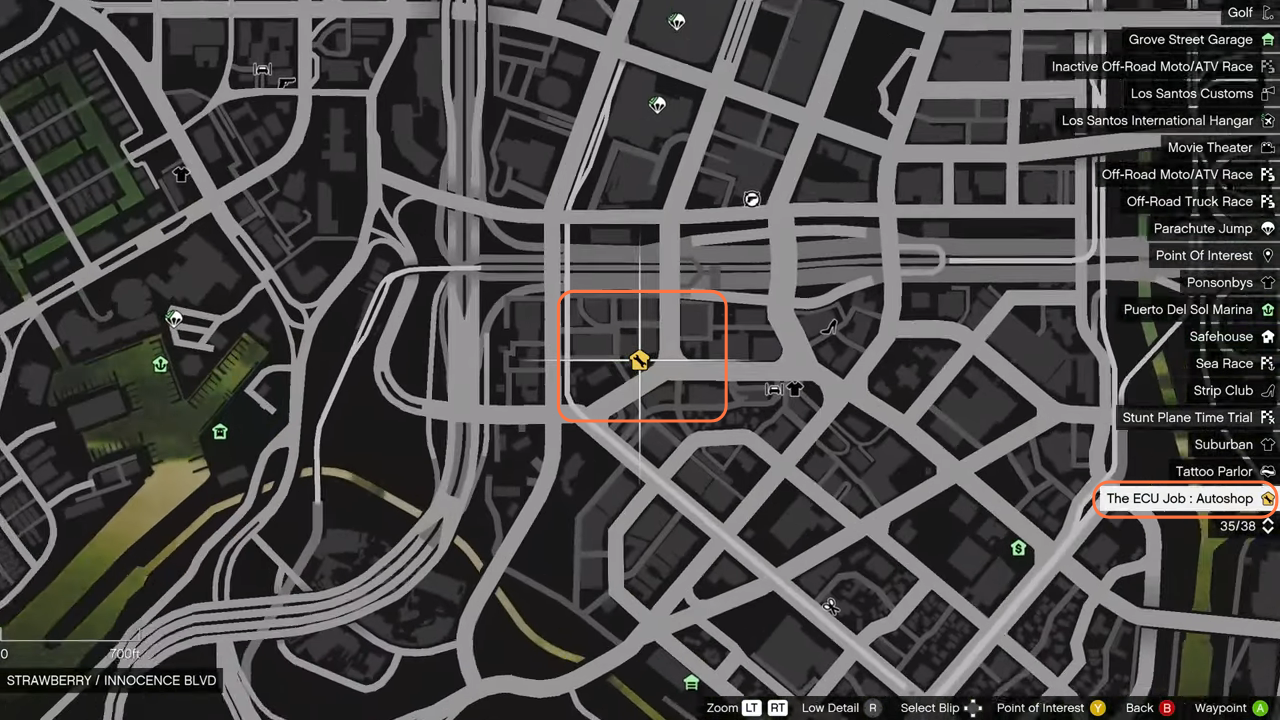
With the installation process finalized, you can close all windows and launch the game. Upon entering the game world, hit the pause key and open the map. A novel blip will catch your eye, denoting ‘The ECU Job: Autoshop’. This beacon signifies the mission’s initiation point. You can teleport there using simple trainer. Also if you don’t have installed ‘Enable All Interiors’ mod then you need to employ the ‘Simple Trainer’ and enable the MP Maps, but using “Enable All Interiors” mod is recommended.