This guide will help you to Lock Pick in Starfield. You need to follow each step mentioned to accomplish the task.
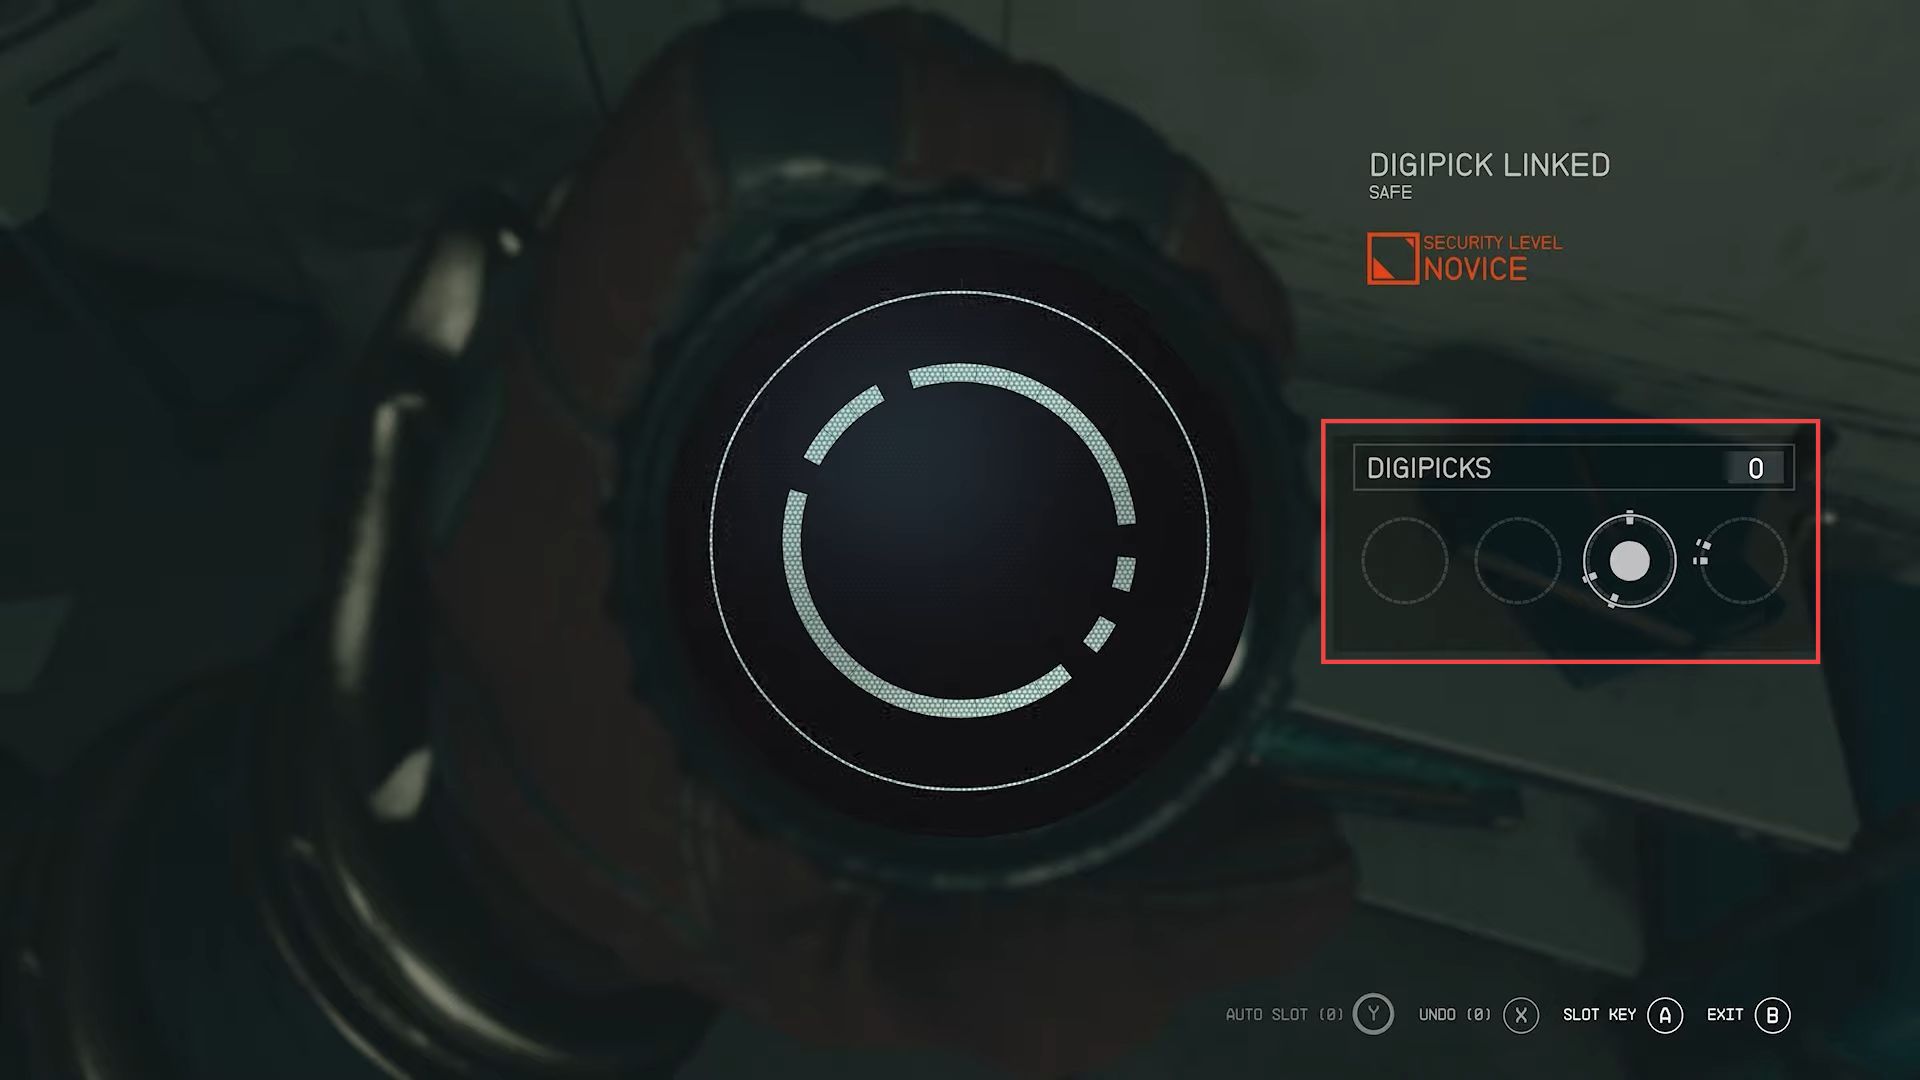
- First, you need to understand the lock pick mechanism you’re dealing with. In this case, it’s a set of lock picks or digipicks represented by the circle icons.
Depending on the game’s difficulty, you might have a specific number of digipicks available to you. - Use the right stick on your controller to cycle through your available digipicks.
Choose the one that seems most suitable for the current lock or puzzle. - Take a close look at the lock or puzzle you’re trying to solve. Observe the features and any cues that might indicate which digipick to use.
- Carefully insert the selected digipick into the lock or puzzle. Follow the on-screen prompts or game instructions for this action.
- Pay attention to how the lock or puzzle responds to your initial digipick insertion.
Some holes may close or other elements may change. - If your initial digipick choice didn’t work, use the right stick to select a different digipick. Experiment with different options until you find the right one.
- Insert the new digipick, continue the process of analyzing the lock’s response and making adjustments as needed. Continue switching between digipicks and making adjustments until you successfully complete the lock or puzzle.
This may involve multiple attempts and careful observation. Once you’ve successfully picked the lock or solved the puzzle, you’ll likely be able to progress in the game, access new areas, or uncover valuable items.
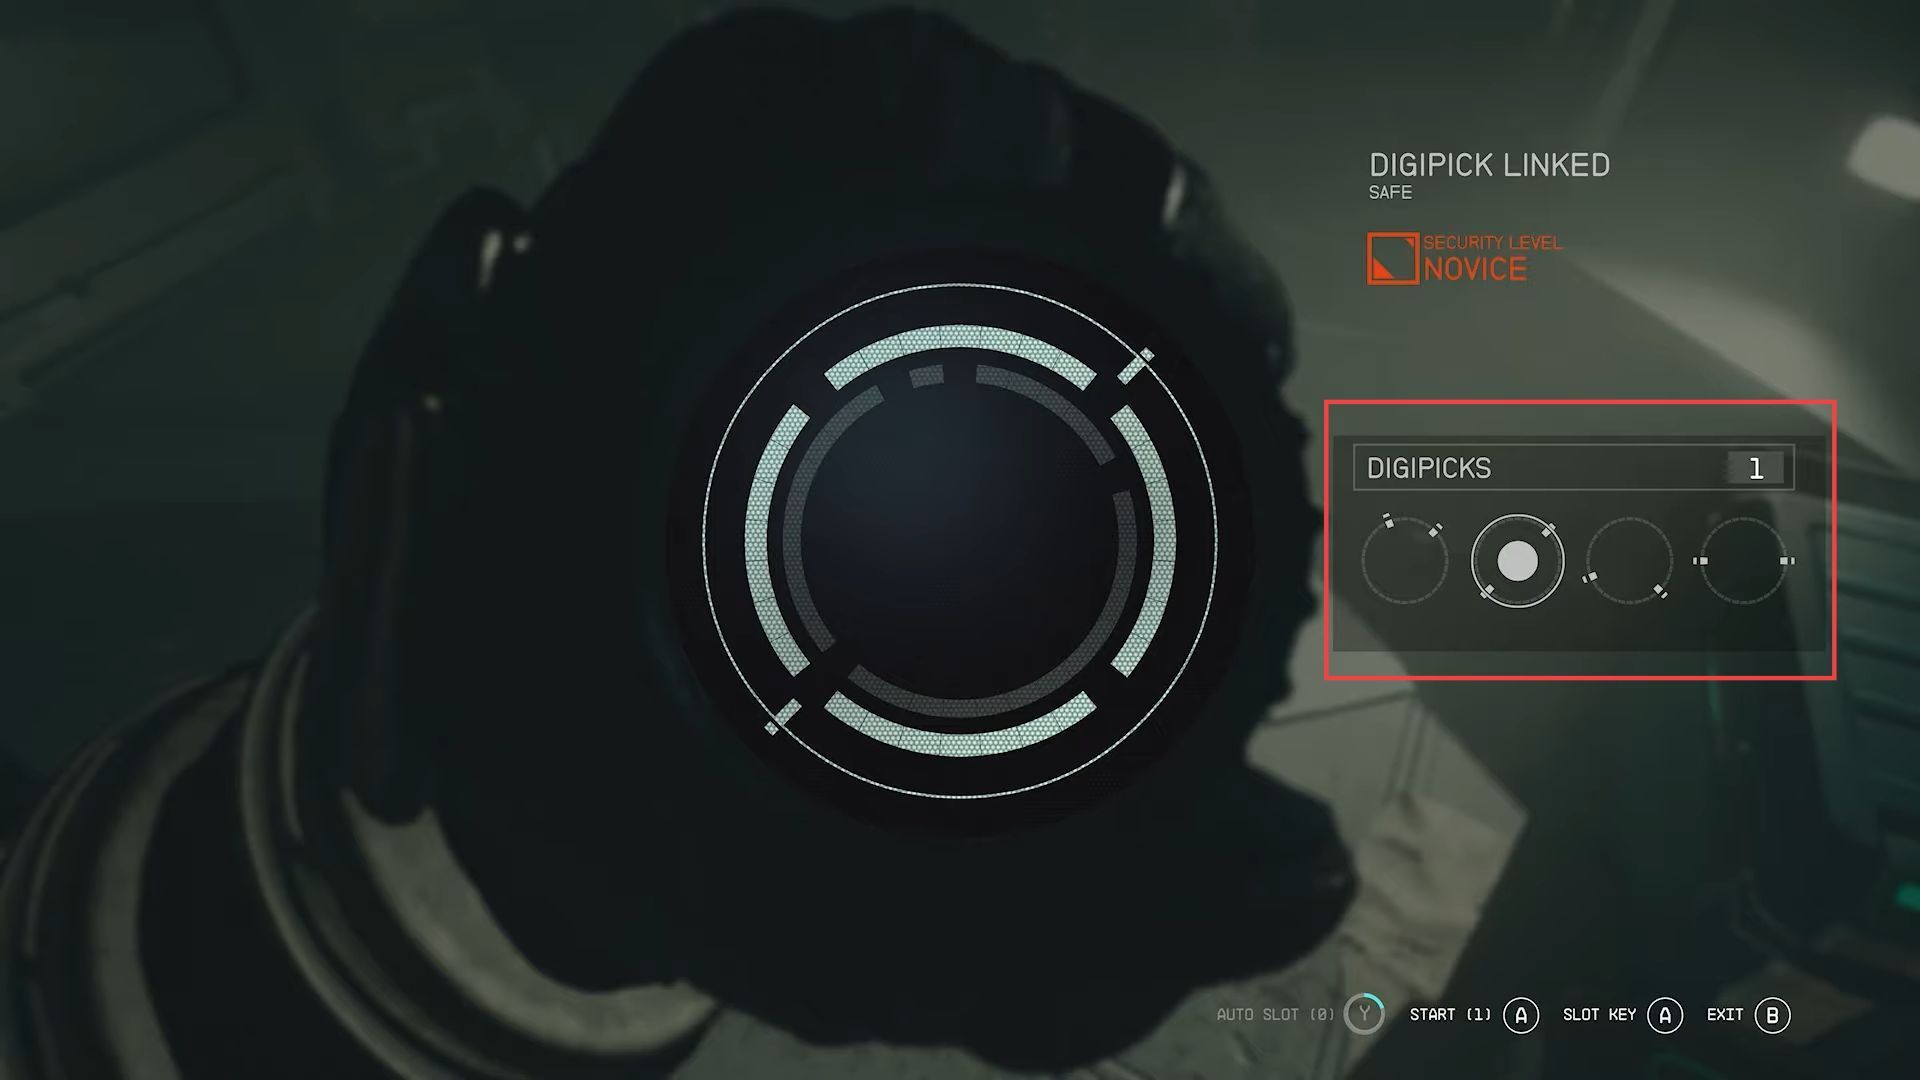
- Begin with the top ring of the puzzle. Examine the puzzle closely to understand the arrangement of the digipicks required.
- Choose the digipicks that fit the puzzle’s top ring.
In your case, you mentioned you needed both the straight and the crossing ones. - Carefully insert the selected digipicks into the corresponding holes in the top ring of the puzzle. Ensure they are placed correctly according to the puzzle’s requirements.
- You need to observe how the puzzle responds to the insertion of the digipicks into the top ring.
This may involve specific holes opening or closing, or other changes in the puzzle. - Once you’ve successfully arranged the digipicks in the top ring, proceed to the bottom ring of the puzzle.
You will need to repeat the process for this section. - Unlike the top ring, it appears that the specific digipick choice may not matter for the bottom ring. You can use any of the available digipicks.
- Insert the chosen digipick into the appropriate hole in the bottom ring. Ensure it fits correctly.
- Continue inserting digipicks into the bottom ring until you successfully arrange them according to the puzzle’s requirements.
This should unlock or complete this part of the puzzle. - If the puzzle doesn’t respond as expected, you may have to make adjustments. You can undo moves or pull a move back if necessary.
- Throughout the process, make sure you are not locking yourself out of completing the puzzle.
You need to be able to fit all four digipicks into their respective positions. - Once you successfully complete this puzzle, you can proceed to other challenges or areas of the game that require similar puzzle-solving skills.