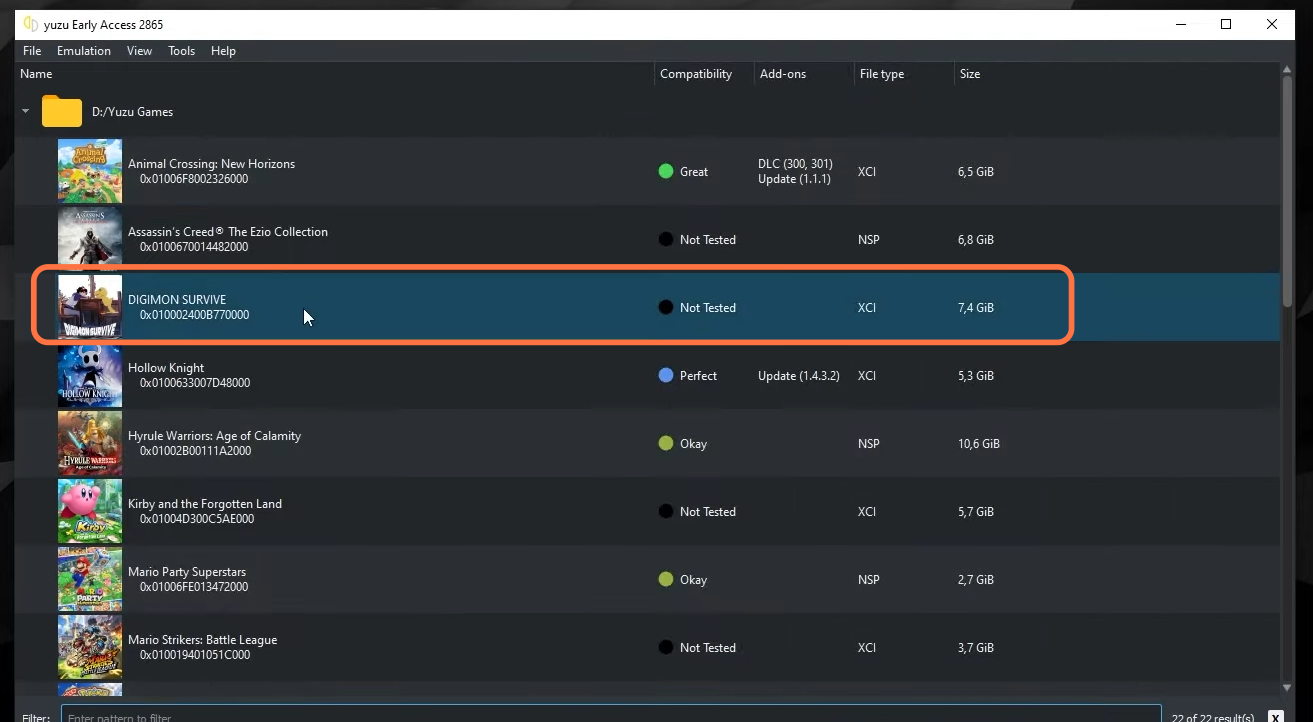
In this guide, you will find out how to Play Digimon Survive on Yuzu. You have to folloe the step-by-step instructions below to do so.
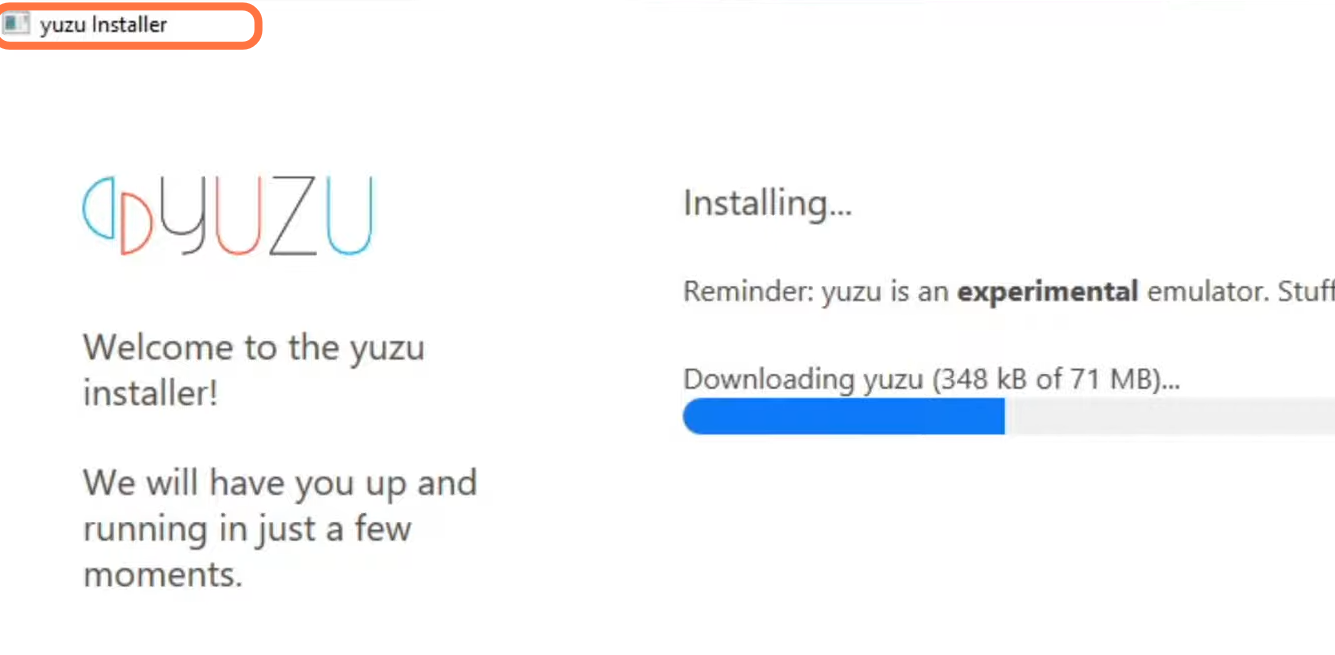
1- First, you have to download the Yuzu emulator from the following link https://yuzu-emu.org/. This link will take you to the main page of the official Yuzu, and you need to click on the Download button on the main page. After that, select the download type Windows 64bits, then click on Download, and the setup will start to download. When the download completes, click on it and the setup will pop up in front of you. You need to select the option that you want and then click on Install.
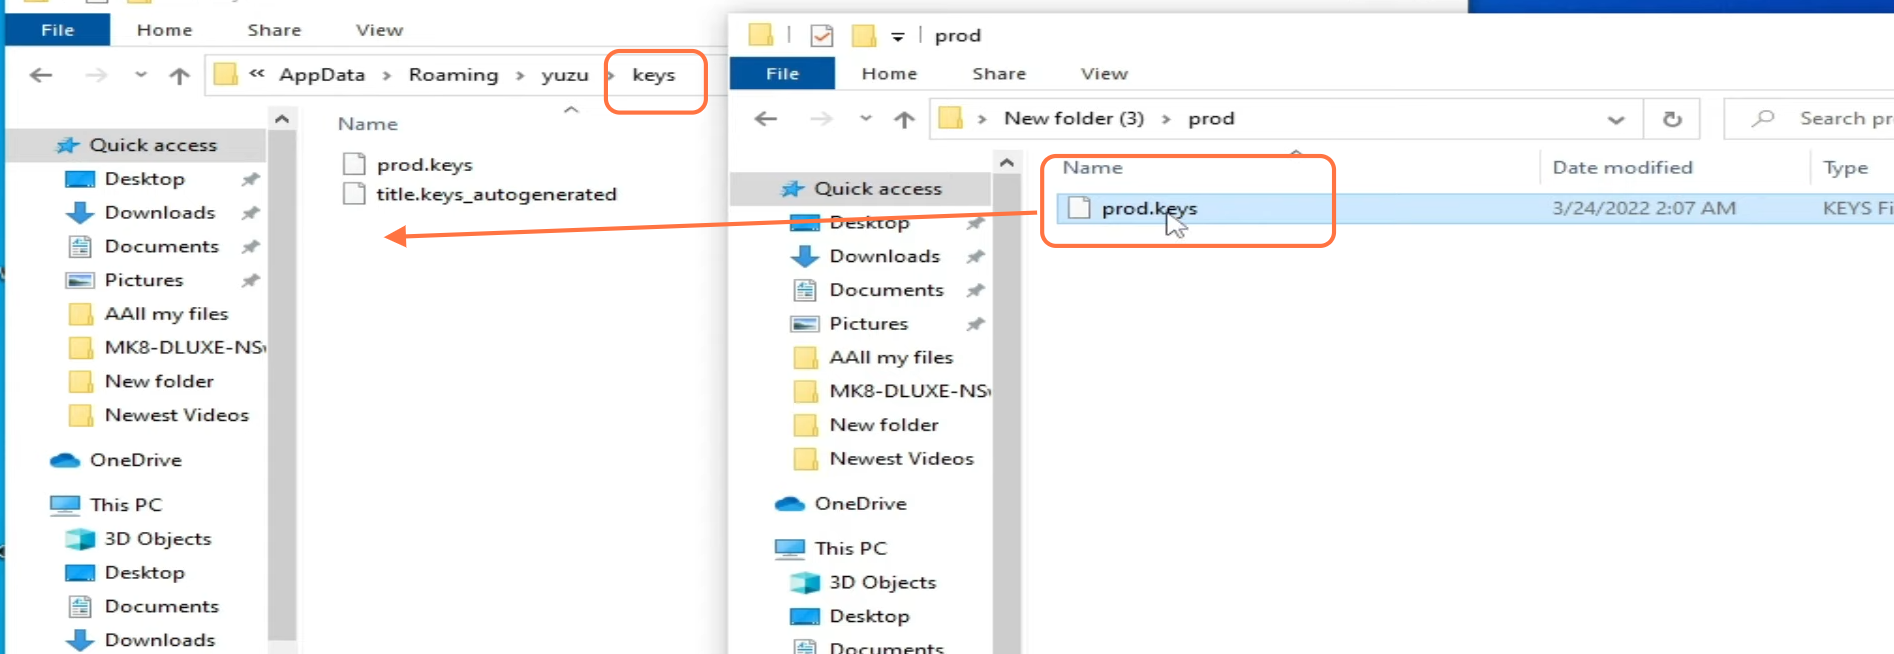
2- Once the installation finishes, exit the step and open the Yuzu emulator, then an error message will pop in front of you. Click on OK and you will be on the home screen of the Emulator. You need to add new keys from the following link https://gameskeysstorage.b-cdn.net/proddkey.7z. Download the new Key folder, and then go to your Yuzu emulator folder where you have installed it. For this, you have to open the emulator, then click on the file and tap on Open the Yuzu folder from the drop-down menu. Then you have to go to the Keys folder. After extraction, go into this folder and copy the two files in it, and paste them into the Key folder of the yuzu emulator. But first, you have to delete the previous files in it and then restart your emulator.
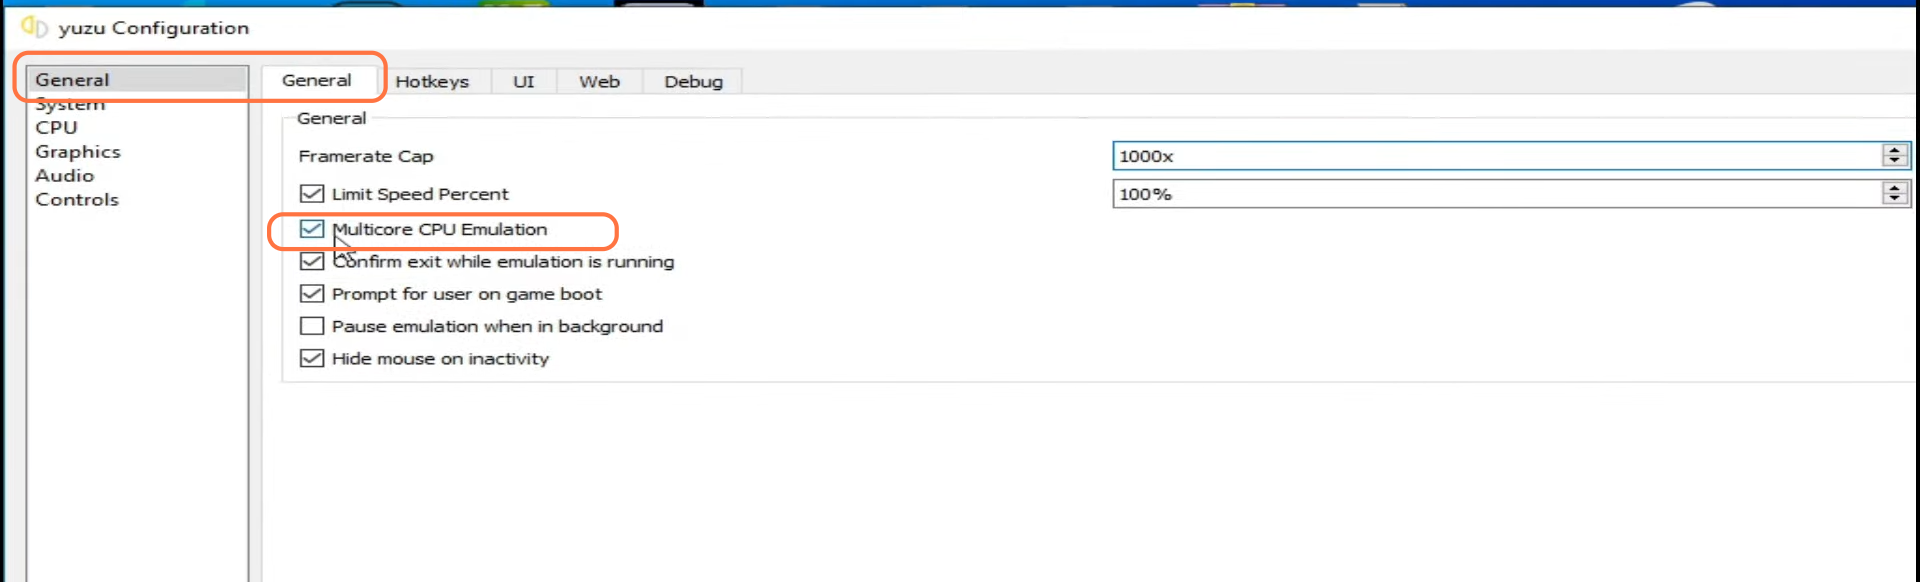
3- After that, click on the Emulation tab from the top of your screen and then tap Configure. In General, you have to make sure that the Multi-core CPU Emulation is check-mark and then right-click on the game. You need to go to the properties and under General, make sure that the Multi-core CPU Emulation is check-marked. You can also checkmark the extended memory option as it will fix your performance issues.
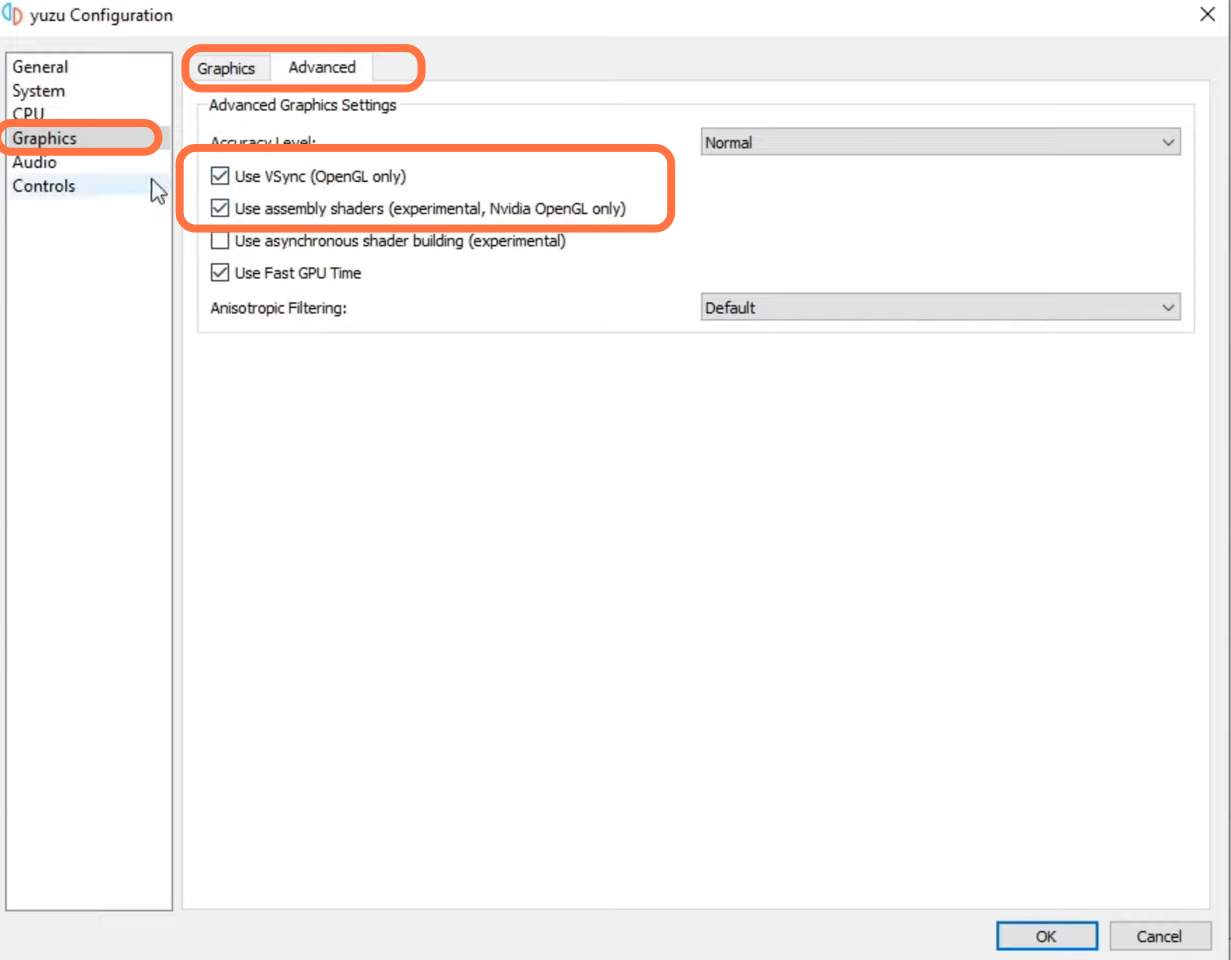
4- Now you have to click on the Graphics tab, you have to make sure that API is set to Open GL. After that, click on advance under the accuracy level, you have to make sure that v-sync and use assembly shaders both these options are check-marked.
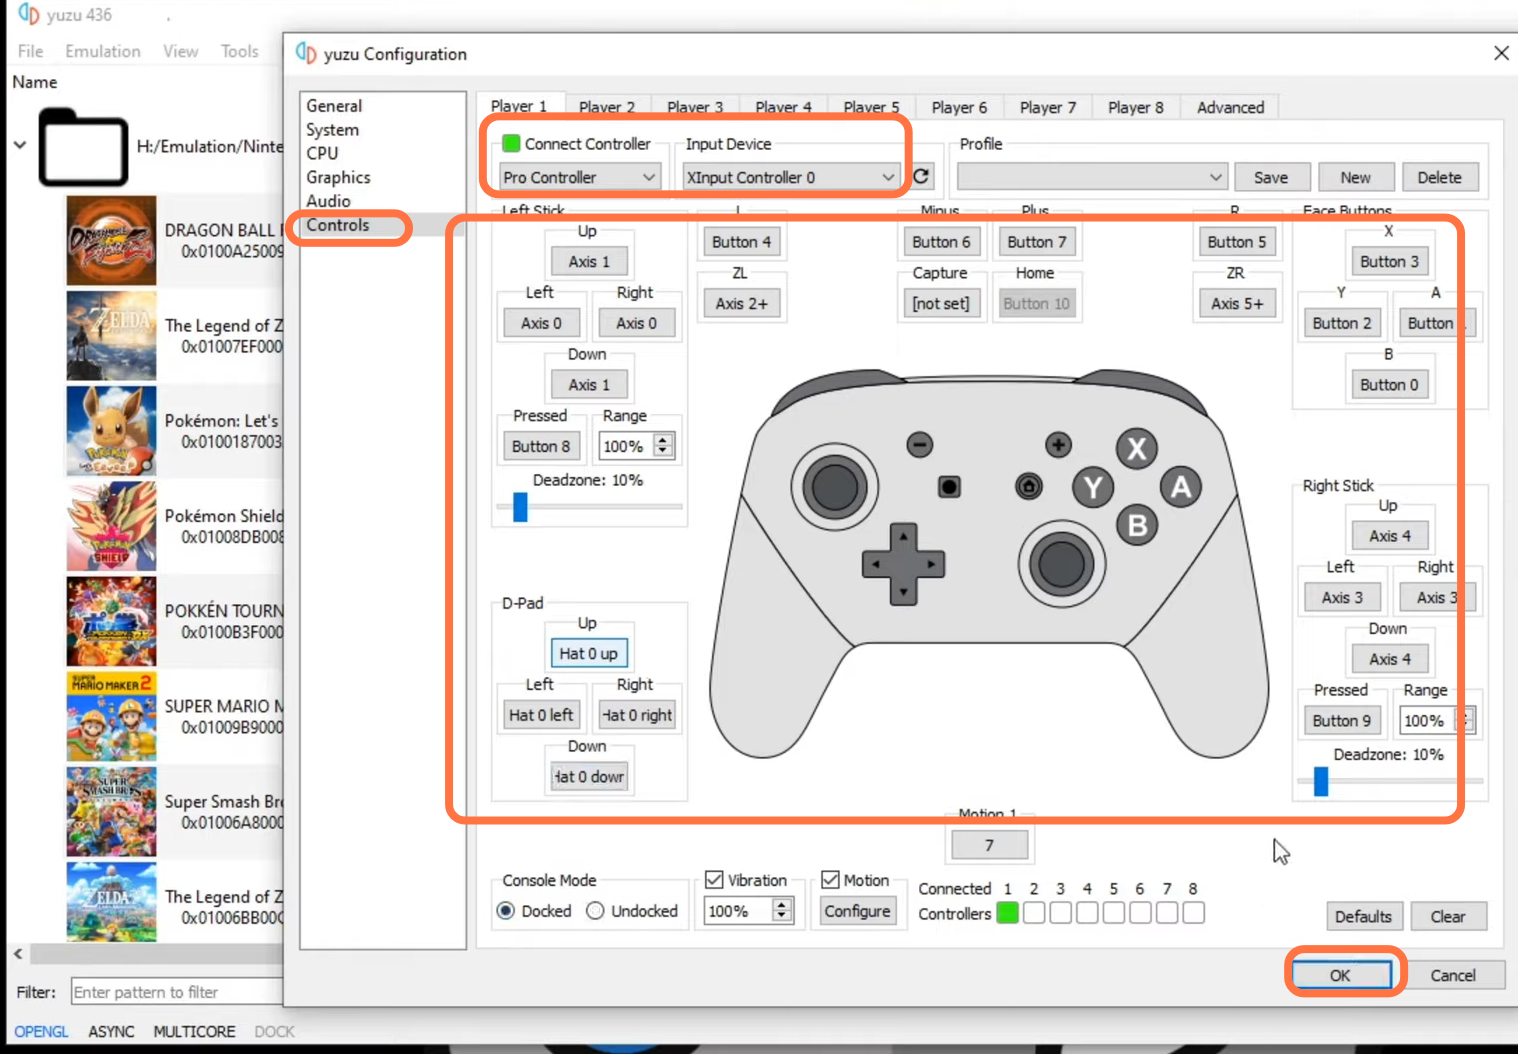
Now, you have to make sure that your controller is connected to your PC and then the emulator will automatically detect the controller. Now you have to click on Emulation at the top and then click on Configure. After that, tap click on the controls tab, click on the button you are ready to emulate as it will be highlighted in green. Then hit the button you have to set up in place of that button on your controller. Once you are done, click on OK.
After that, right-click on the game and then click on properties. Under Add-ons, you have to make sure that update is checkmarked and then click on the Graphics tab. You have to make sure that the API is set to Vulkan. After this, launch the game and your game will be ready to play.