This guide will let you know how to set up The Isle dedicated server. You first need to Download and install SteamCMD, then download game files and create a start file. After that, get dependencies, setup Game.ini, create an update script and open firewall ports.
Download SteamCMD
In this section, we will take you through the steps to download SteamCMD on your PC. By following the steps below, you will be able to download the Windows version of SteamCMD.
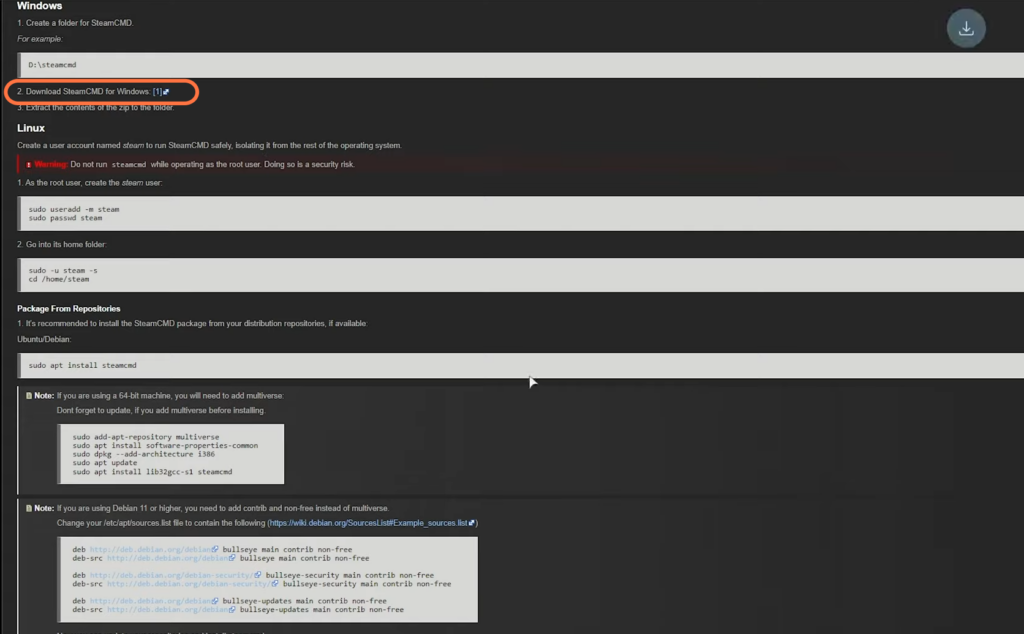
- First, you will need to open up the web browser on your PC and download SteamCMD. Once you reach the web page, click on Windows.
This will take you to a new page. - On the new page, look for the download button that corresponds to the “Download SteamCMD for Windows” option and press it.
The browser will start downloading the SteamCMD file in a zip format.
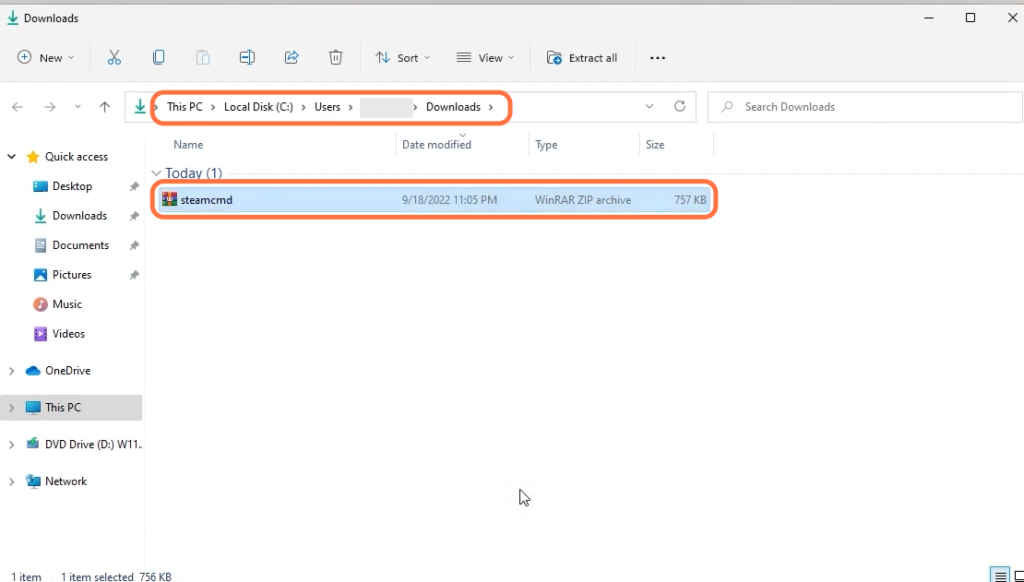
- Locate the downloaded Zip file on your computer and right-click on it.
- From the context menu that appears, select the option to “Extract” option to extract the contents of the file.
Install SteamCMD
This section describes how to install SteamCMD after downloading it on your PC.
- Open the File Explorer on your computer and navigate to the C drive.
- Right-click inside the C drive and select “New” from the context menu. Create a new folder and name the folder “servers“.
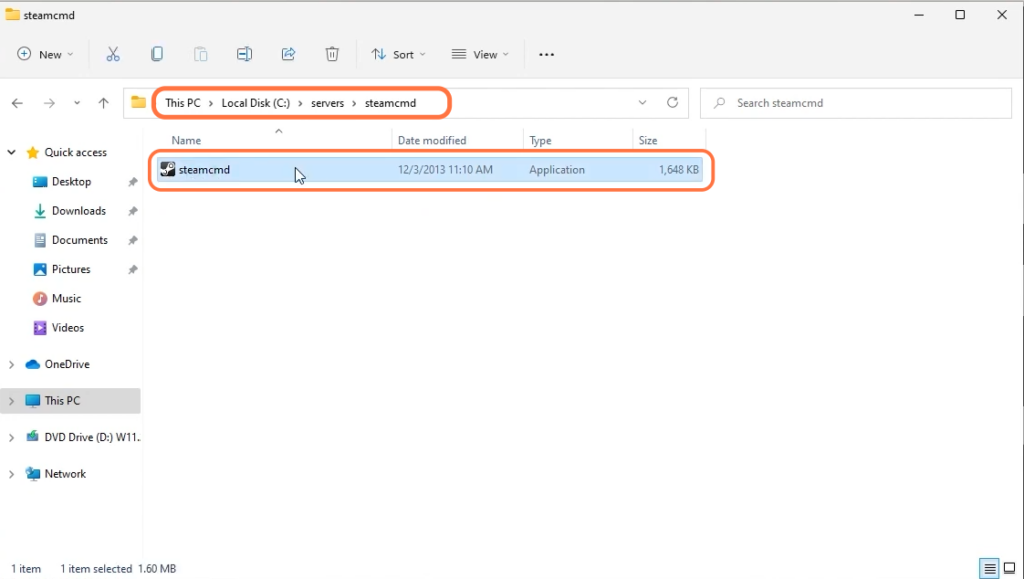
- Double-click on the “servers” folder to open it and paste the Steamcmd folder inside it.
- After that, create another new folder and name it “the isle“. Double-click on the Steamcmd folder and open the Steamcmd application.
Download Game Files
This section will take you through the steps to download the game files. You will need to input some commands to download the files.
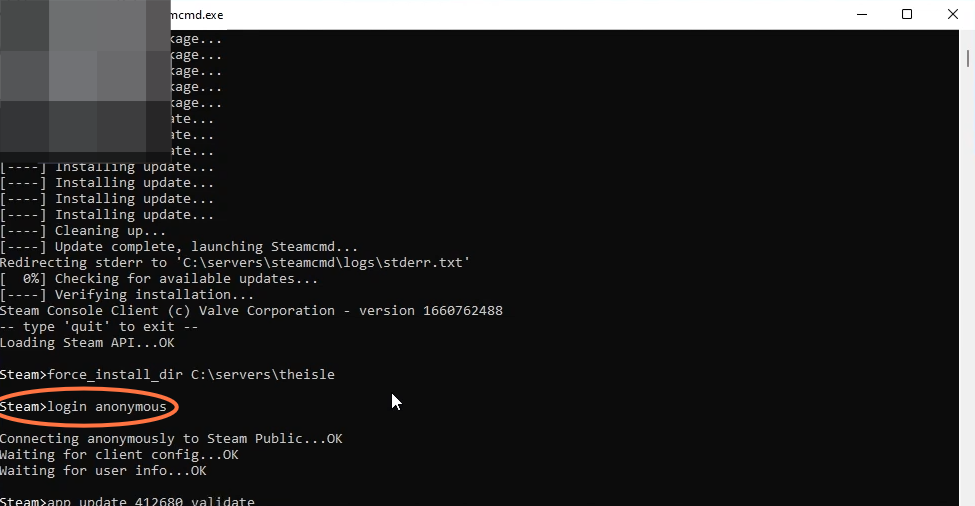
- Go back to the servers folder and navigate to the isle folder. At the top of the file management tool, click on the address bar to select the entire address and copy it.
- Launch the Steamcmd application, type “force_install_dir” and then paste the copied address. Type the login anonymous command and then input app_update (app id) validate.
Creat Start File
This section describes how to create the start file. By following the steps below, you will be able to create a shortcut file and then drag it on the desktop.
- Locate the “Theisleserver” file on your computer, then right-click on it to open the context menu.
- From the context menu, select the option that says “Create shortcut.”
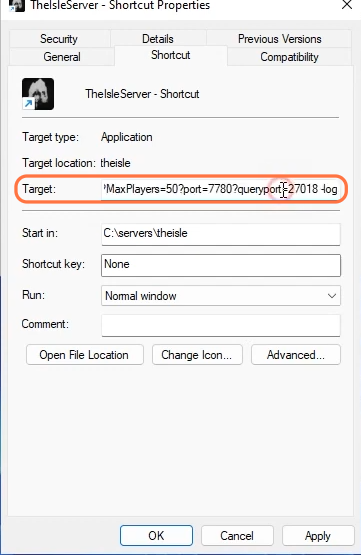
This will create a shortcut to the file. - Right-click on the shortcut to open the context menu and go to properties.
- In the properties window, paste the following text in the text box under the “Target” section.
- After pasting the text in the Target section, click on “Apply” and press the “OK” button.
- Click and drag the shortcut file from its current location to your desktop.
/Game/TheIsle/Maps/Thenyaw_Island/Thenyaw_Island?listen?game=sandbox?MaxPlayers=50?port=7780?queryport=27018?Mods=1136354137 -log |
Get Dependencies
In this section, we will take you through the steps to get dependencies.
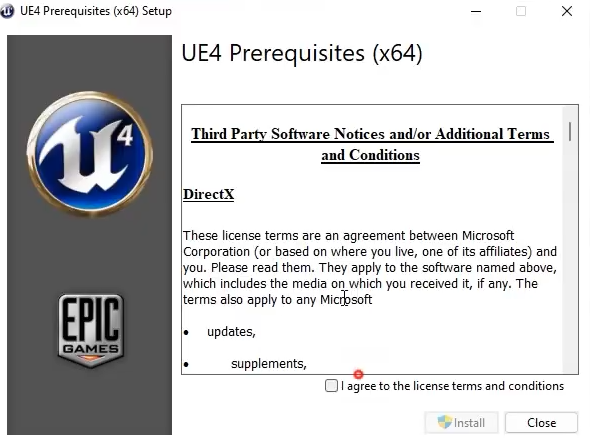
- Double-click on the shortcut file to run it. Look for the Agree button and click on it to proceed.
- Press the install button and tap on Yes when the window pops up.
It will generate all the files you need.
Setup Game.ini
This section describes how to set up Game.ini. First, you have to navigate to the Windows server folder and edit the GameUserSettingsfile to set it up.
- You have to navigate to the servers folder, open up the theisle folder and go to Theisle folder.
- After that, open up the Saved folder, navigate to Config and open the Windows server folder.
- Right-click on the GameUserSettings and click on the Show More options from the drop-down menu.
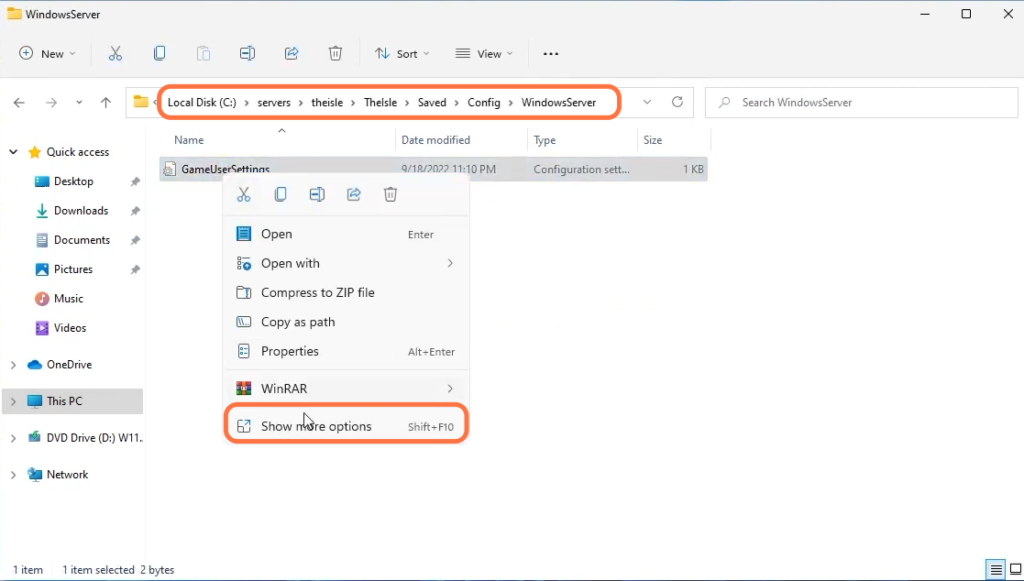
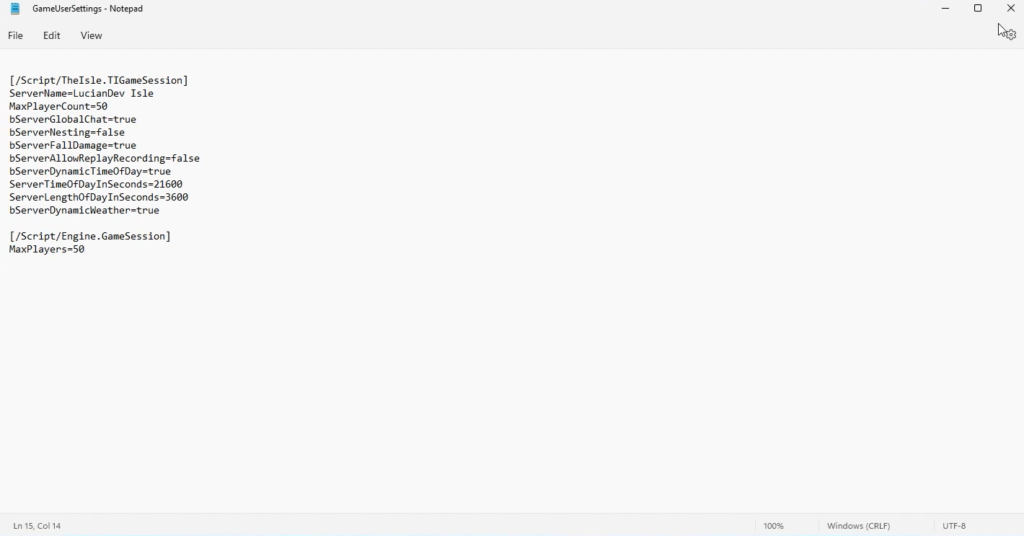
- Click on Edit and input the following commands inside it.
- After that, press the Control and S keys on your keyboard to save the file and then exit.
| /Script/TheIsle.TIGameSession] |
| ServerName=LucianDev Isle |
| MaxPlayerCount=50 |
| bServerGlobalChat=true |
| bServerNesting=false |
| bServerFallDamage=true |
| bServerAllowReplayRecording=false |
| bServerDynamicTimeOfDay=true |
| ServerTimeOfDayInSeconds=21600 |
| ServerLengthOfDayInSeconds=3600 |
| bServerDynamicWeather=true |
| [/Script/Engine.GameSession] |
| MaxPlayers=50 |
Create Update Script
In this section, we will take you through the steps to create an Update Script. You have to use the following commands in order to create it.
- Head to the theisle folder inside the servers folder and right-click anywhere in the folder.
- Create a new document and name it “updateserver“. Change the extension from txt to “bat“.
- After that, right-click on that file, select the Show More Edit option and then select the Edit option.
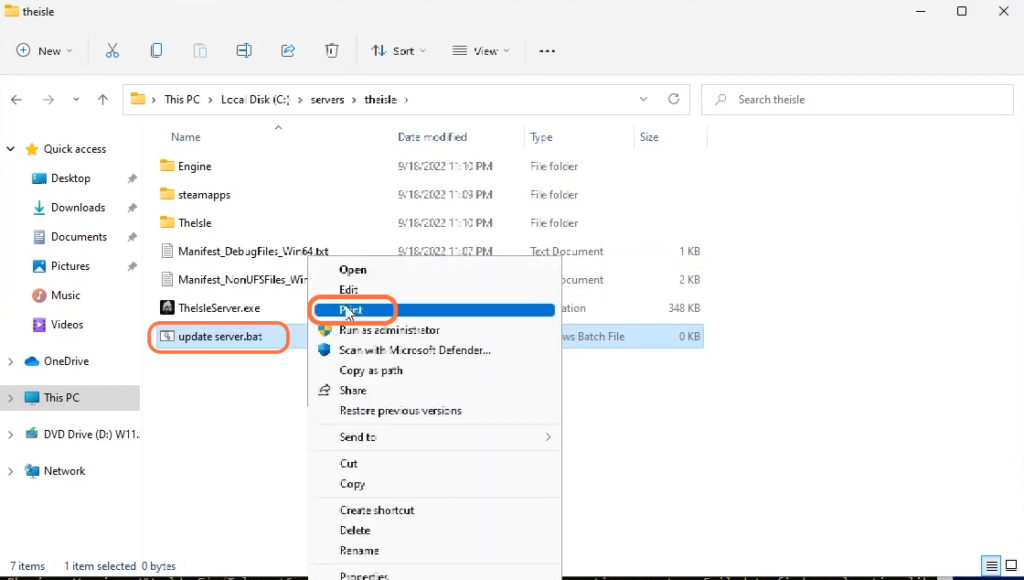
- You have to input the following update script in this file.
- Press the Control and S keys on your keyboard to save the file
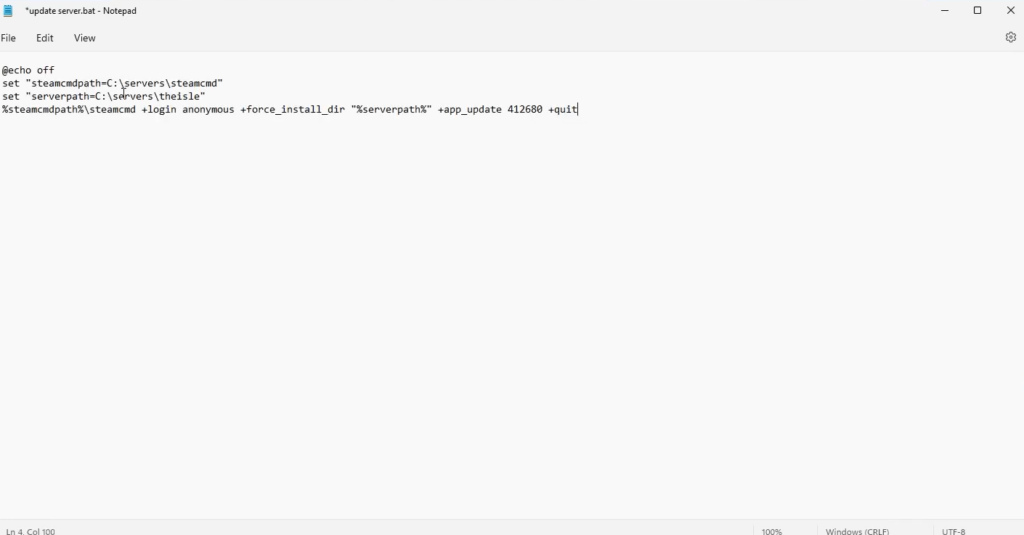
| @echo off |
| set steamcmdPath=”C:\servers\steamcmd” |
| set serverPath=”C:\servers\theisle” |
| “%steamcmdPath%” +login anonymous +force_install_dir “%serverPath%” +app_update 412680 +quit |
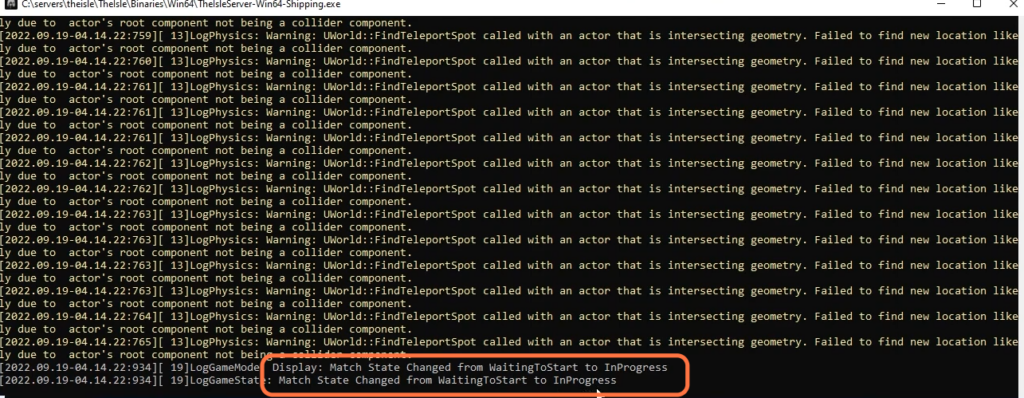
It will say “match state change from WaitingToStart to InProgress“. It means the server is ready to start.
- Now launch the game and log into your account.
- Next, search for the name you gave it to.
Open Firewall Ports
This section will take you through the steps to set port forwarding and allow other players to join your server. By following the steps below, you will be able to set the ports manually.
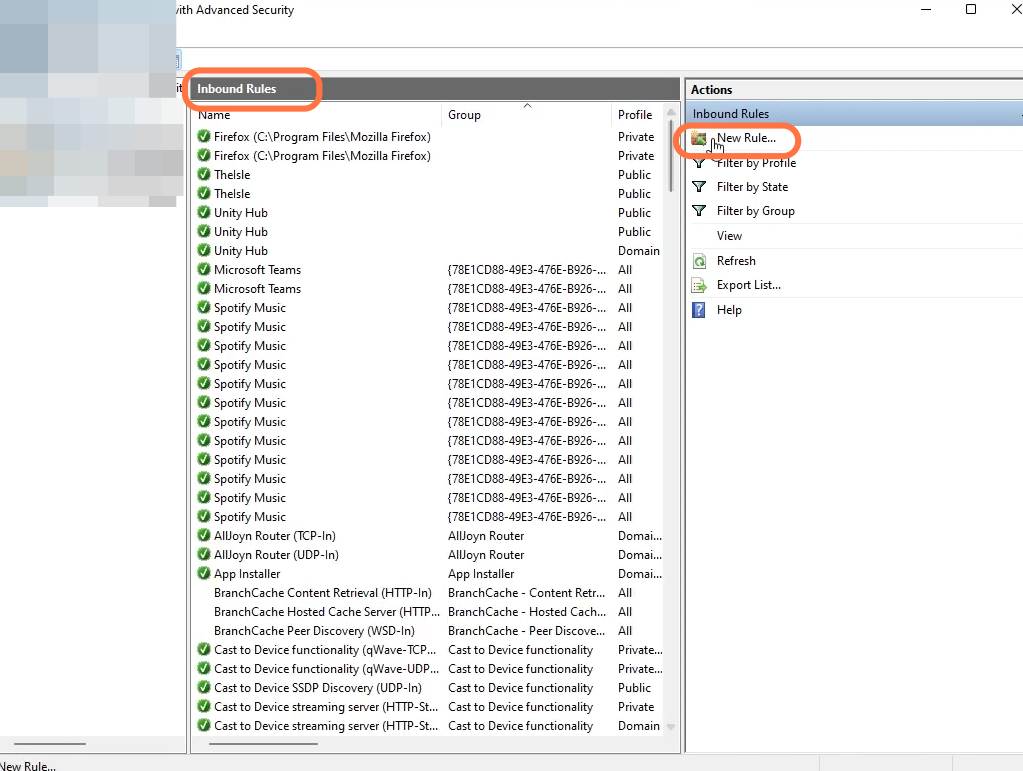
- You will need to search Windows firewall in the search bar and navigate to Advanced security settings.
- Go to Inbound Rules and tap on New Rule on the right side of the window.
- Select the Port option, and then click on Next.
- On the next window, select TCP and input 7777 7778 ports in the text box.
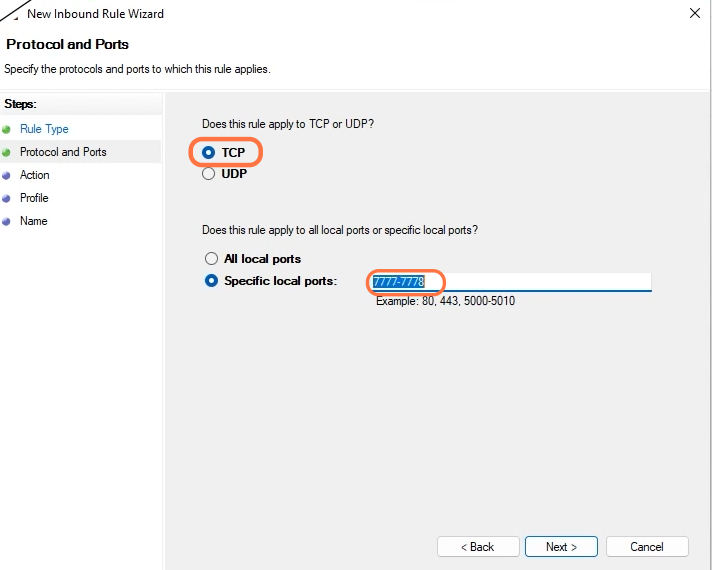
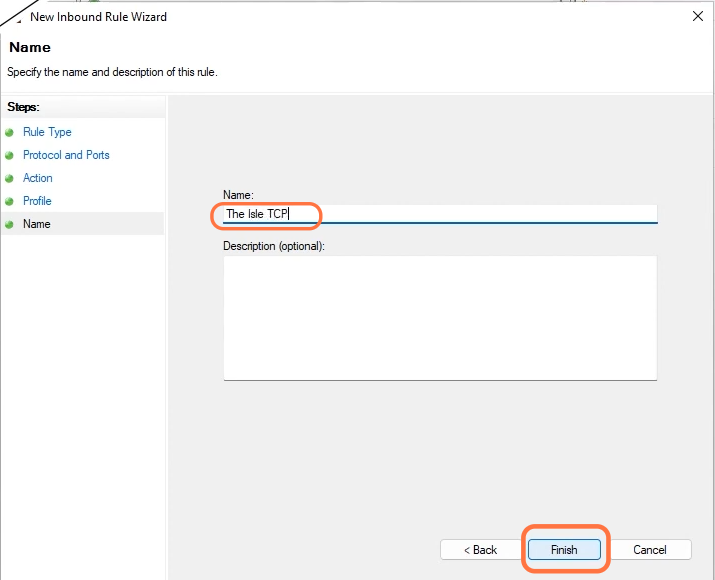
- Click on Next, then tap on Allow and input The isle TCP as the name.
- After that, hit the Finish button.
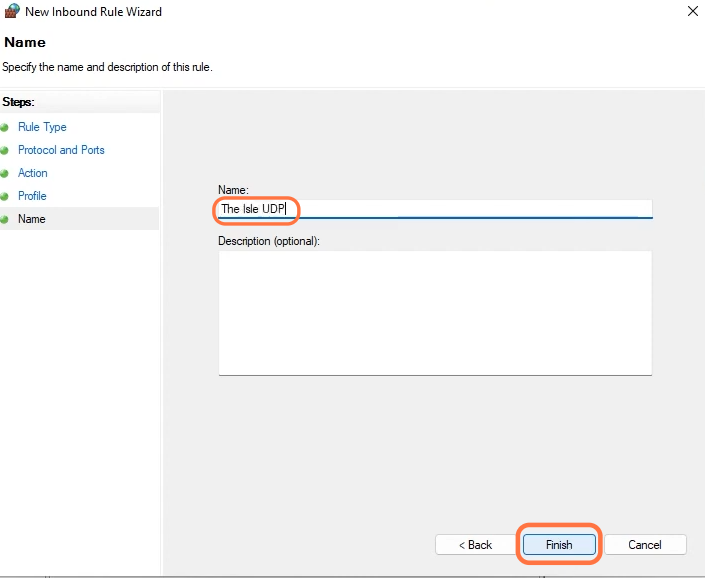
- After that, do the same thing again but select UDP instead of TCP this time.
- Input 7777 7778 ports in the text box. Set the name as The isle UDP and press Finish.
- You have to add another port by selecting the TCP option and inputting 27105 as the port. After that, follow the same for UDP.
- Finally, go into your router and port forward these same ports to your router.
It will allow outside connections to connect to your server.