This guide will let you know how to download and install the updates of the BIOS of ASUS ROG Ally.
Step 1: Prepare Your Setup
- Ensure that your device is connected to a stable power source throughout the update process. Plug in the power cable to avoid interruptions during the update.

Step 2: Accessing My Asus
- Go to the “Search” function on your Asus ROG Ally.
- Locate and open “My Asus” from the search results.

Step 3: Navigating to Updates
- Within “My Asus,” look for the update section. If you don’t immediately see this option:
- Look for a menu icon or an expandable section that reveals further options.
- Select “Live Updates” or a similar option.
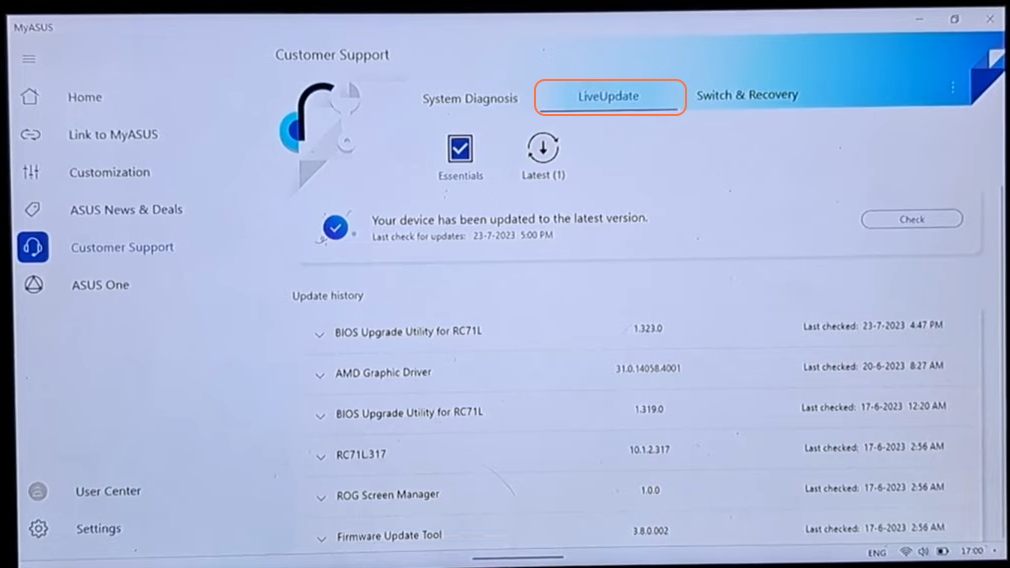
Step 4: Checking for Available Updates
- Once in the updates section:
- Click on the “Check” button to scan for the latest BIOS updates available for your device.
- If updates are displayed, you’ll see a download icon next to them.

Step 5: Downloading Updates
- Click on the download icon to initiate the download process for the updates.
- Allow the device some time to download the necessary files. This duration may vary based on your internet connection speed.
Step 6: Restarting the Asus ROG Ally
- After the download completes, restart your Asus ROG Ally to initiate the installation of the updates.
- Let the device proceed with the update installation. This might take several minutes. Do not interrupt this process.
Step 7: Post-Installation Reboot
- Once the update installation is complete, your Asus ROG Ally will automatically restart.
- After the restart, the BIOS update should be successfully applied.
Step 8: Verification
- To ensure the update was successful:
- Go back to the update section in “My Asus”.
- Confirm that there are no pending updates or that the latest BIOS version is now installed.
By following this brief guide, one can easily update the BIOS of the Asus ROG Ally.