This guide will show you how to increase FPS/performance in Warzone in Call Of Duty and maximize your graphics settings. This can be accomplished by tweaking some settings in the game’s launcher options and in Windows, as well as things like updating your browsers and solving any application issues. After these tweaks, you’ll need to adjust your BIOS/GPU settings to optimize them. Finally, you should tune your graphics settings before playing Warzone so that they’re running at the best performance level possible.
Window Settings
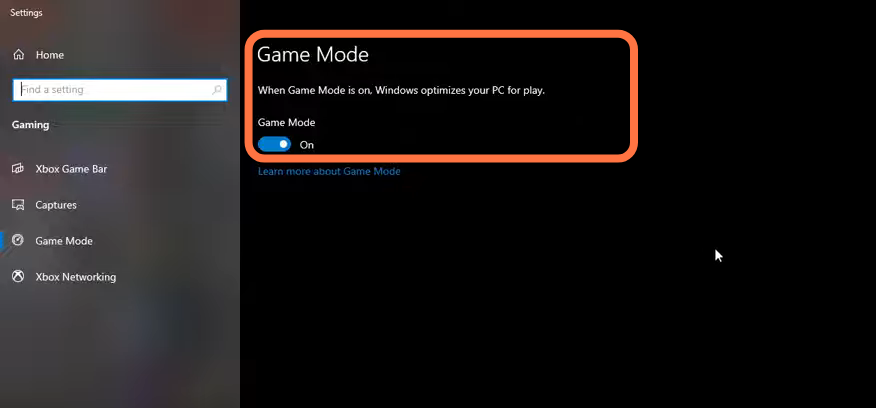
1.1- You have to search game mode in the search bar and press enter. Make sure that the game mode is activated and then you will get decent performance. You have to make sure that all your resources are focused on the game that you are playing.
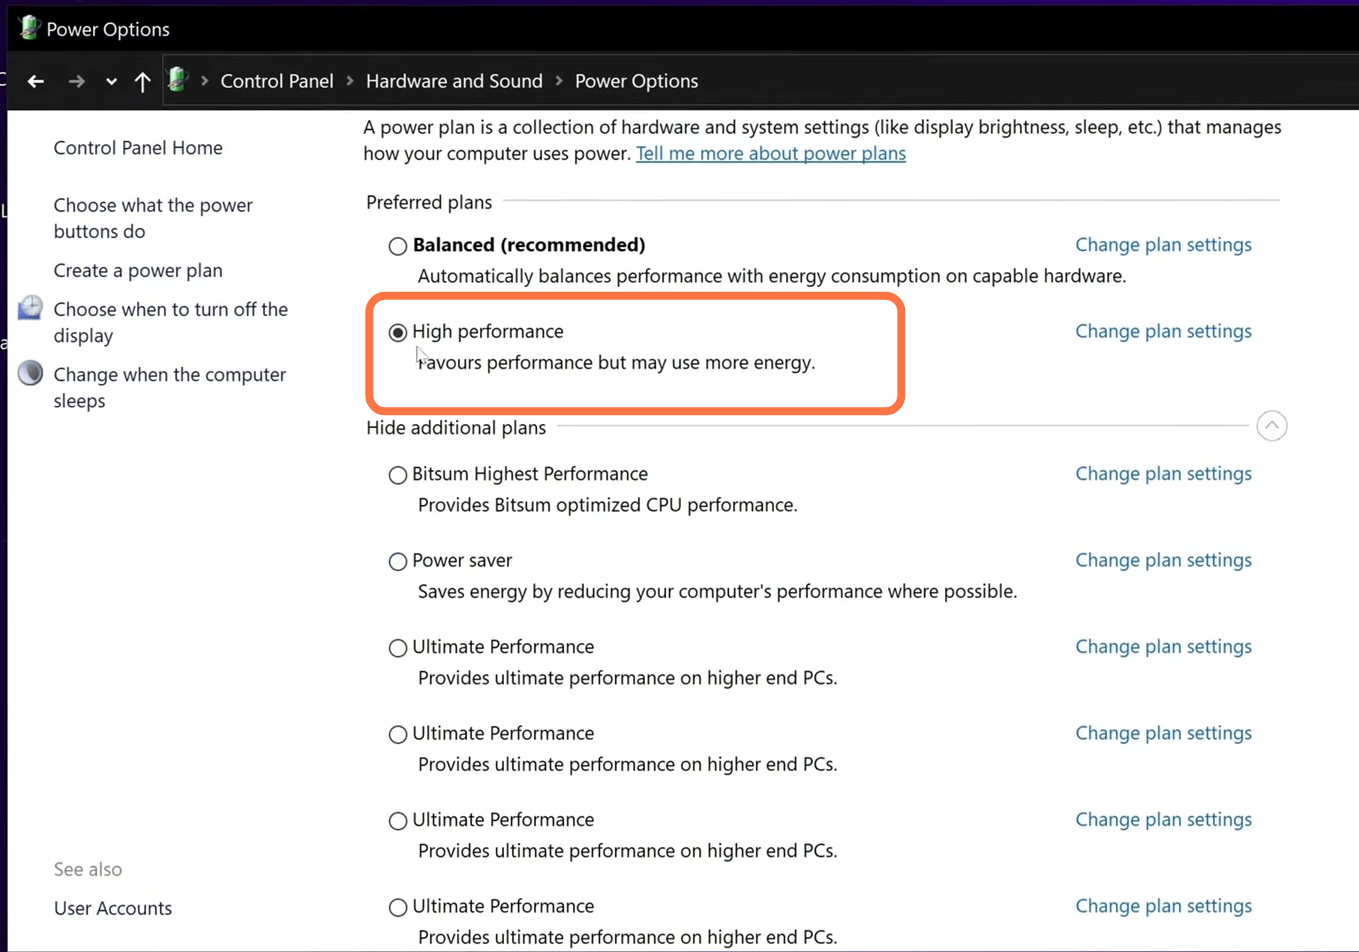
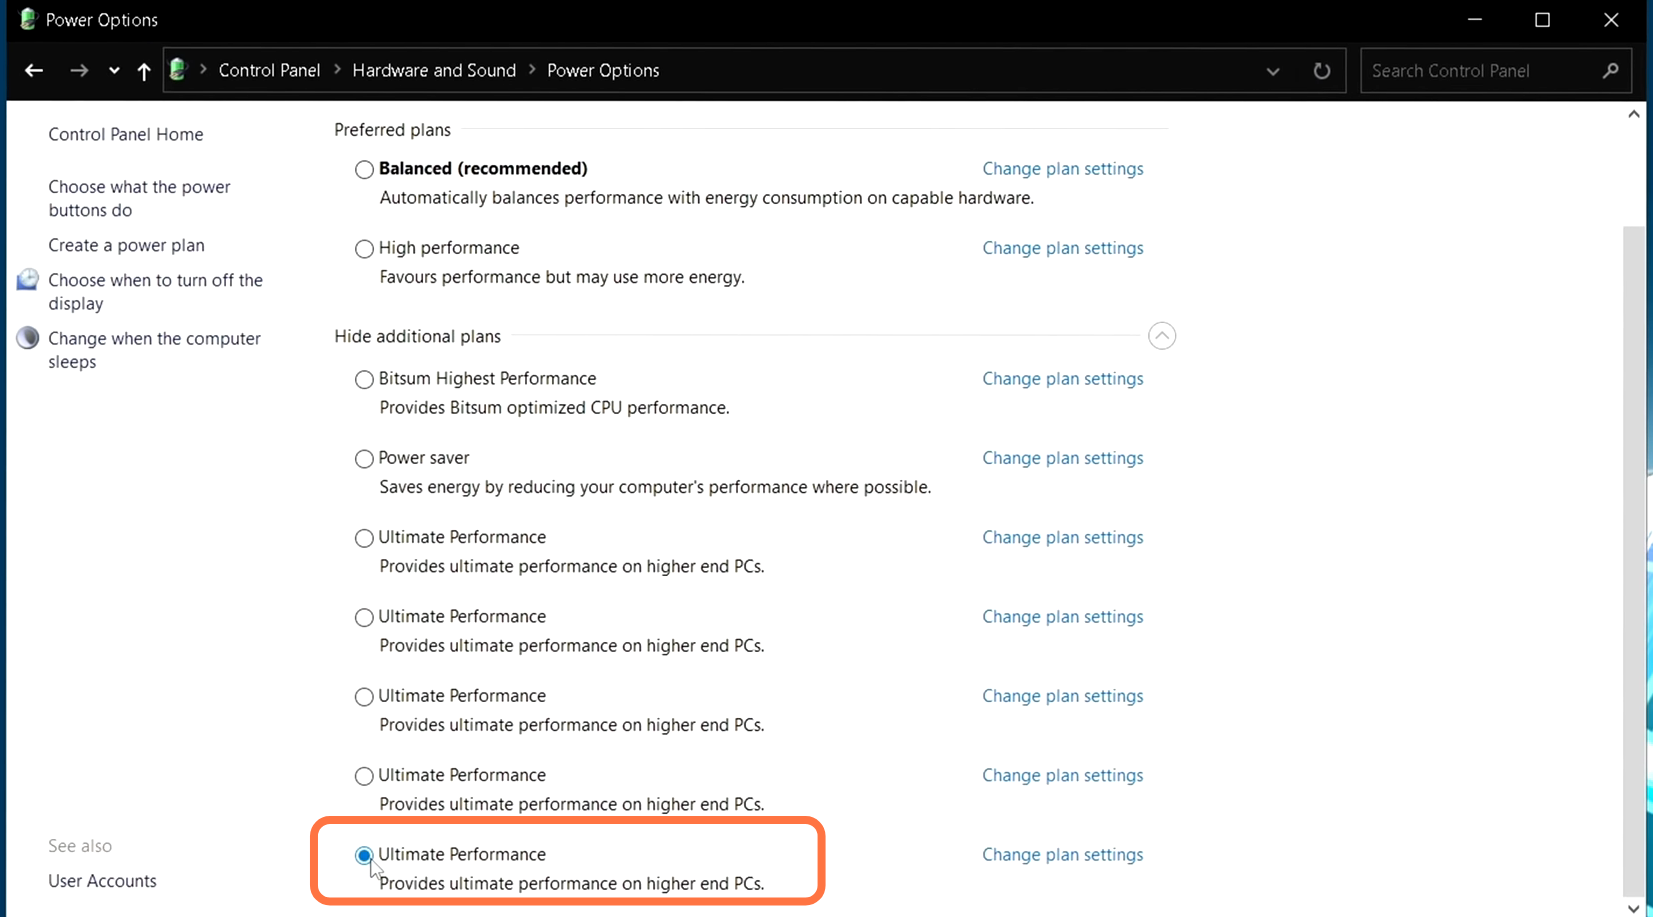
1.2- You need to type “edit power plan” in the search column and press enter. Now inside this menu, go to the power option on the top, click on show additional plans and scroll down to select the High-performance power plan.
1.3- Now again go to the search bar and run the Command prompt as an administrator. After that, input “powercfg -duplicatescheme e9a42b02-d5df-448d-aa00-03f14749eb61” in the Command prompt and press enter.
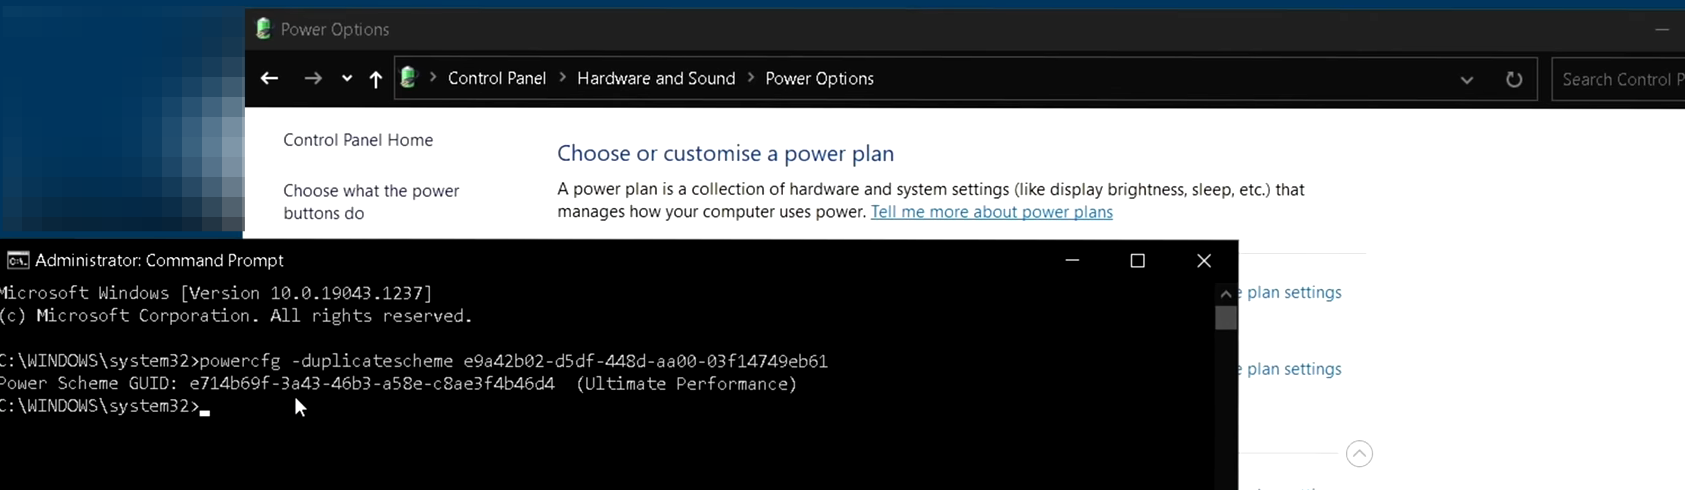
Then go to the power play menu and press the Refresh button on the top right corner. You will find the ultimate performance power plan, you have to select it.
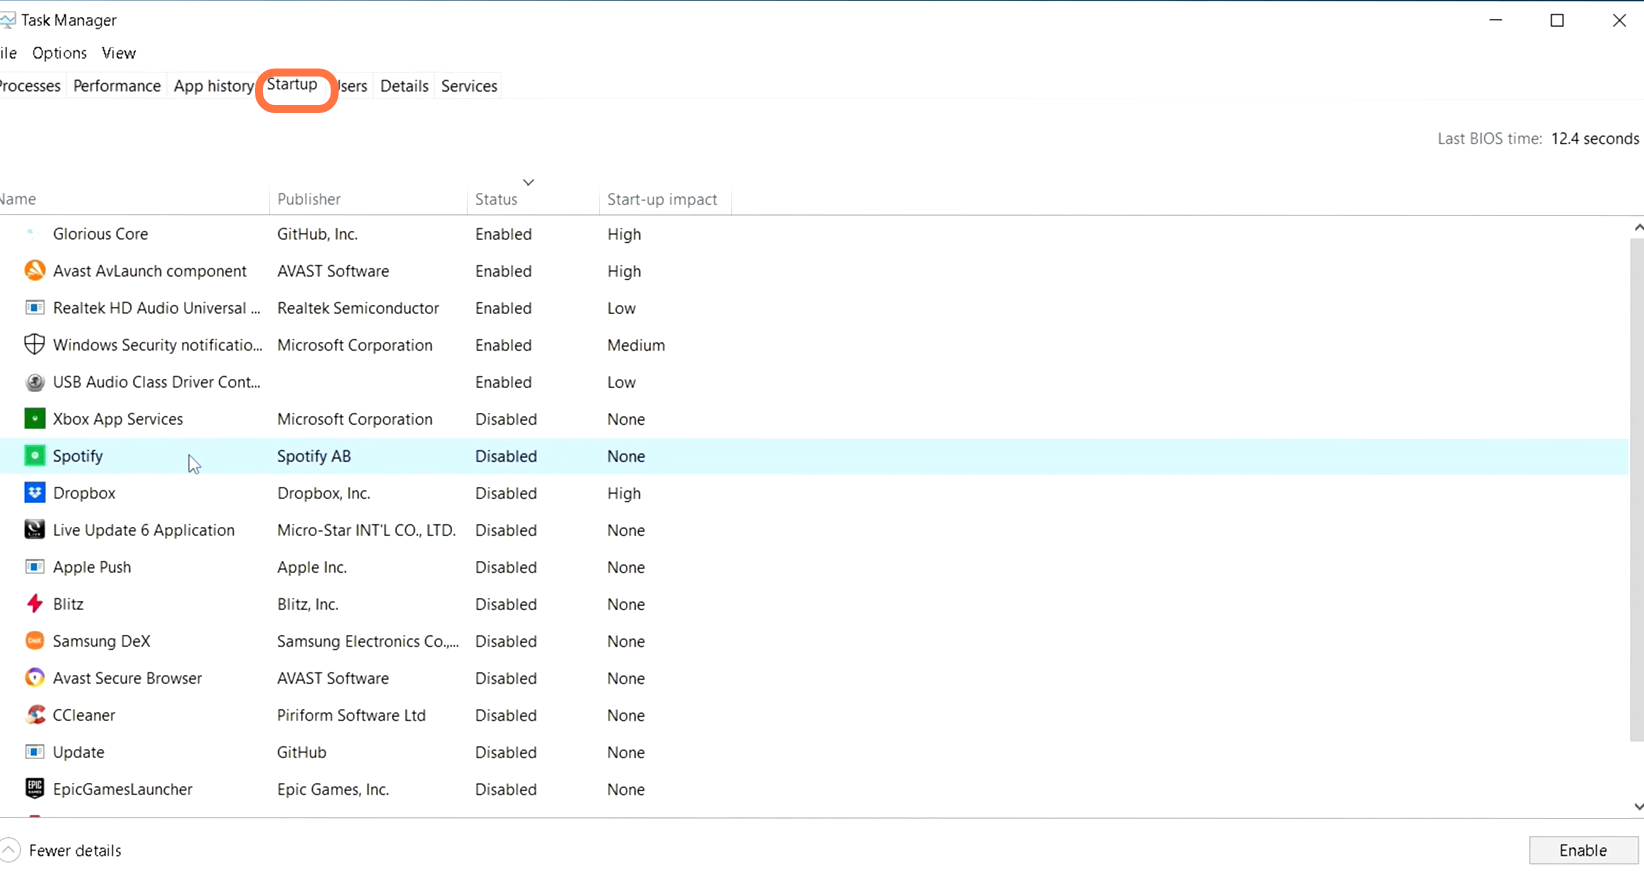
1.4- After that, navigate down to the taskbar, right-click on it, and then select taskbar. Then you have to go to the startup tab and disable all the apps that you don’t want to boot up with your PC automatically. As these programs are taking GPU cycles while you are playing the game.
Web Browser Settings
You will need to go to your web browser and open it up. After that, click on the three dots on the top right-hand side of your screen and go to settings. Tap on three bars on the left side and scroll down to find Advance, and scroll down again to find the system. You have to make sure that the first option is switched off. If it is turned on then all your plug-ins, and extensions will still run in the background even when you close the browser.

Application Fixes
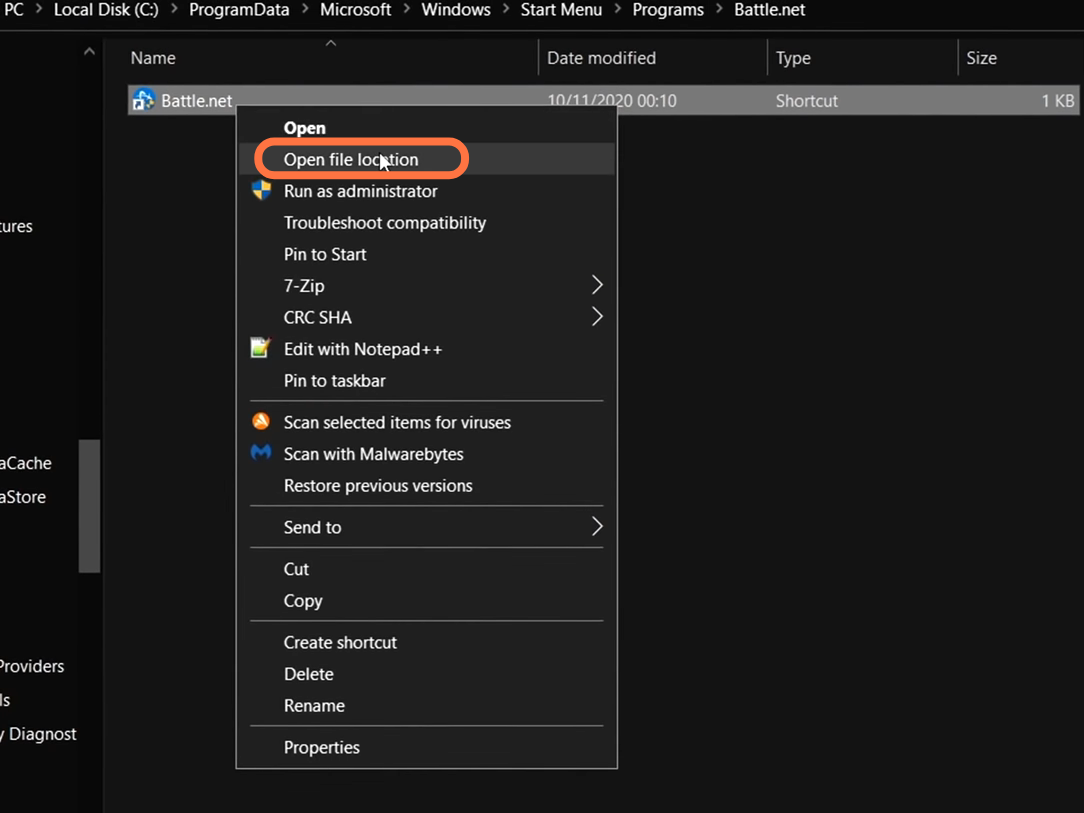
3.1- You have to go to the bottom left-hand side of the screen to the search button and search for battle.net. Then right-click on it and select “open file location. A new window will pop with one file, you need to right-click on that file and tap on “open file location”.
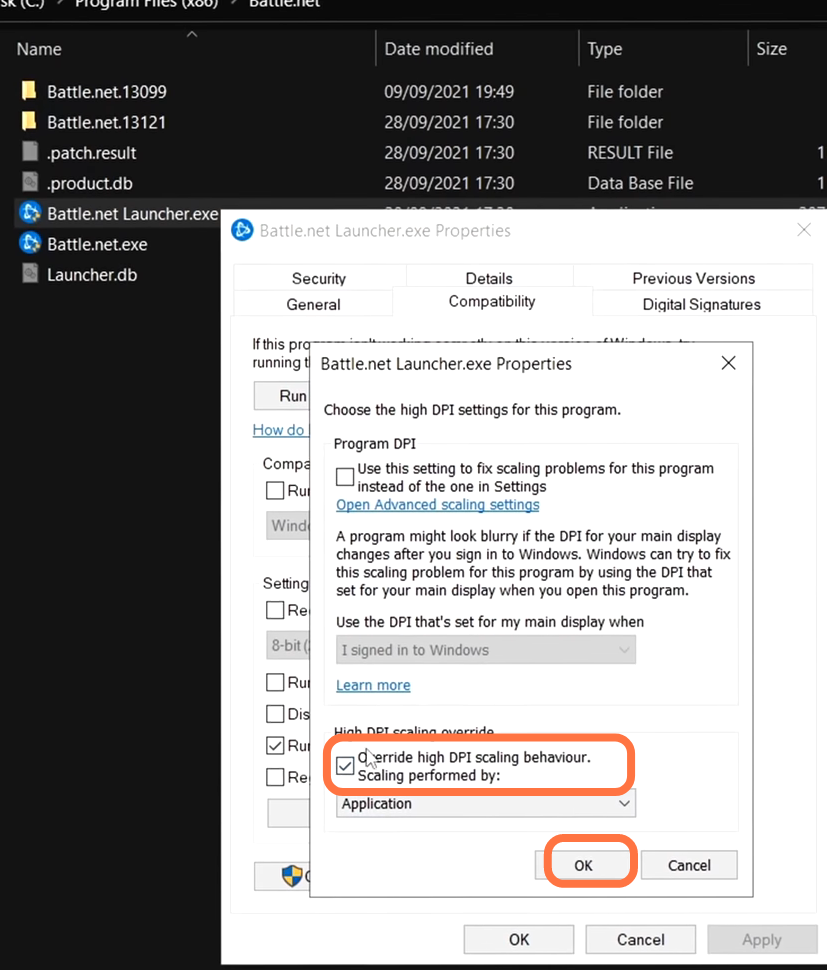
You will find another folder with many files, you need to select battle.net launcher.exe, right-click on it, and then go to properties. After that, go to the Compatibility tab and make sure that “run this program as an administrator” is checked.
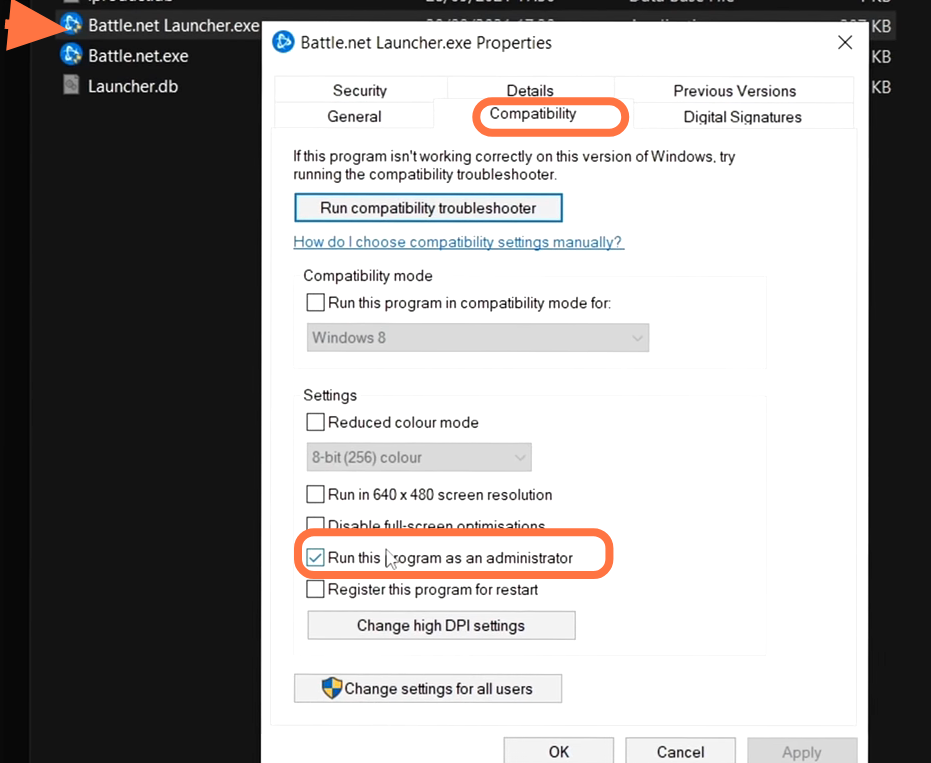
After that, go to change high DPI settings and make sure that “override the high DPI scaling…” is selected, and then press ok.
3.2- Now come down to the battle.net.exe file, right-click on it, and then go to properties. Make sure that this is also selected as run as administrator.
Launcher Settings
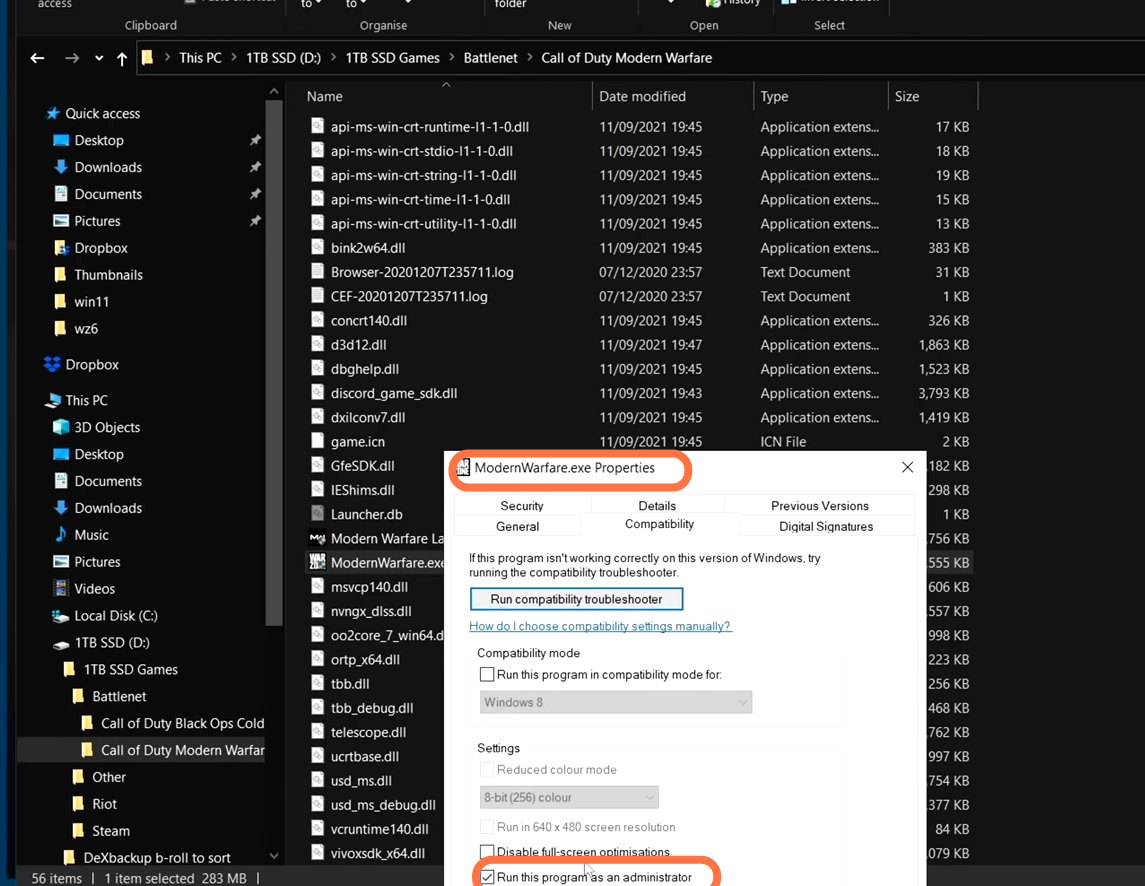
Now you can launch the battle.net launcher from there, go to the Options menu next to the Play button, and then select “open in explorer”. A new window will pop up and you need to go to the call of duty modern warfare folder and scroll down until you find the modern warfare launcher.exe and modern ware.exe and apply the same optimization changes to these two files that you have made earlier files. Make sure that both are selected as run as administrators.
Big FPS Fix
Removing old, outdated settings can fix FPS Issues.
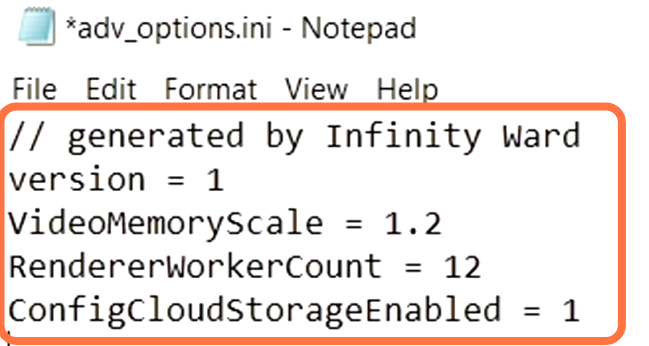
5.1- You have to go to the file explorer and go to documents to find the Call Of Duty Modern Warfare. Go inside this file, then go to the player’s folder and open the first text file. Now you have to make changes in this according to your PC specs. Set your video memory scale to 1.1. After this, go to file and select save.
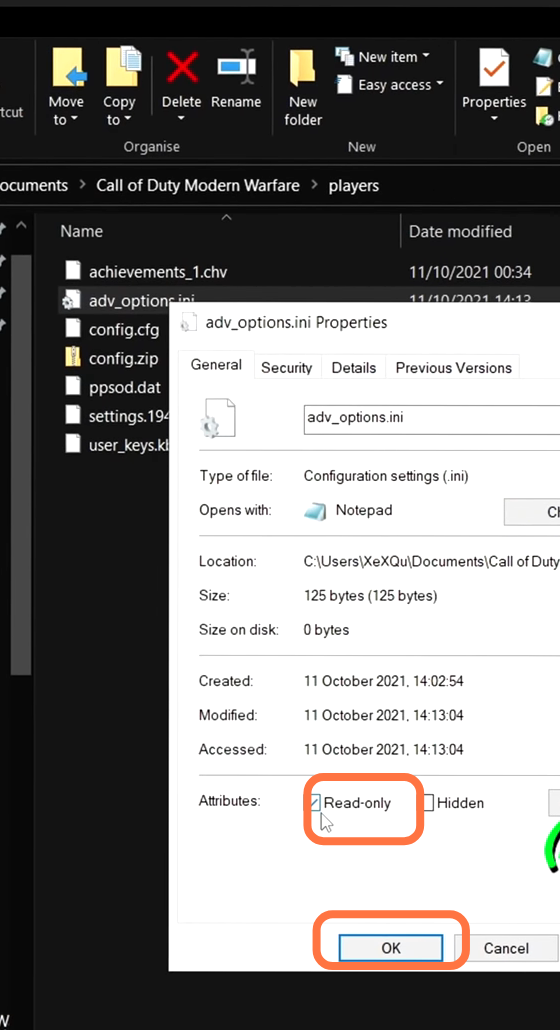
Now come back to the file, right-click on it, go to properties, and select read-only. It will lock the file and no one can make changes to this.
Bios Settings
It is a very advanced setting, you have to run your memory into XMP mode. You have to apply all-core CPU overclock rather than using something, like ryzen PBO as it will optimize your PC towards multi-threaded performance where CPU-bound games really come alive. You can also experience by turning ON or OFF the cppc preferred cores options with inside of ryzen biases, especially for ryzen 3 or 5000 series. It will give you the best performance possible. These features will optimize your bios and ensure that you are getting the most out of the hardware as you will see a 30% increase in your performance.
GPU Settings
Update and optimize your GPU as it will give you the best performance possible. First, you have to make sure that all your GPU drivers are fully updated which is totally free as it will remove any errors and boost FPS.
7.1- You have to right-click on the desktop and open the NVidia control panel. On the top left side, you need to click on the “adjust image settings with preview”, use the advanced 3D image settings that have been selected and click on Apply.

7.2- After that, head to Manage 3D settings, scroll all the way down to power management mod, and set it to maximum performance. It will raise your idle clock slightly and also can help to solve the stuttering issues inside of the game. You must set Open Render GPU to your GPU and set the preferred refresh rate to the highest. After that, scroll down to anisotropic optimization and enable it. You need to allow Negative lod Bois and set the texture filtering quality to high performance. Try linear optimization to threaded optimization and then click on Apply.

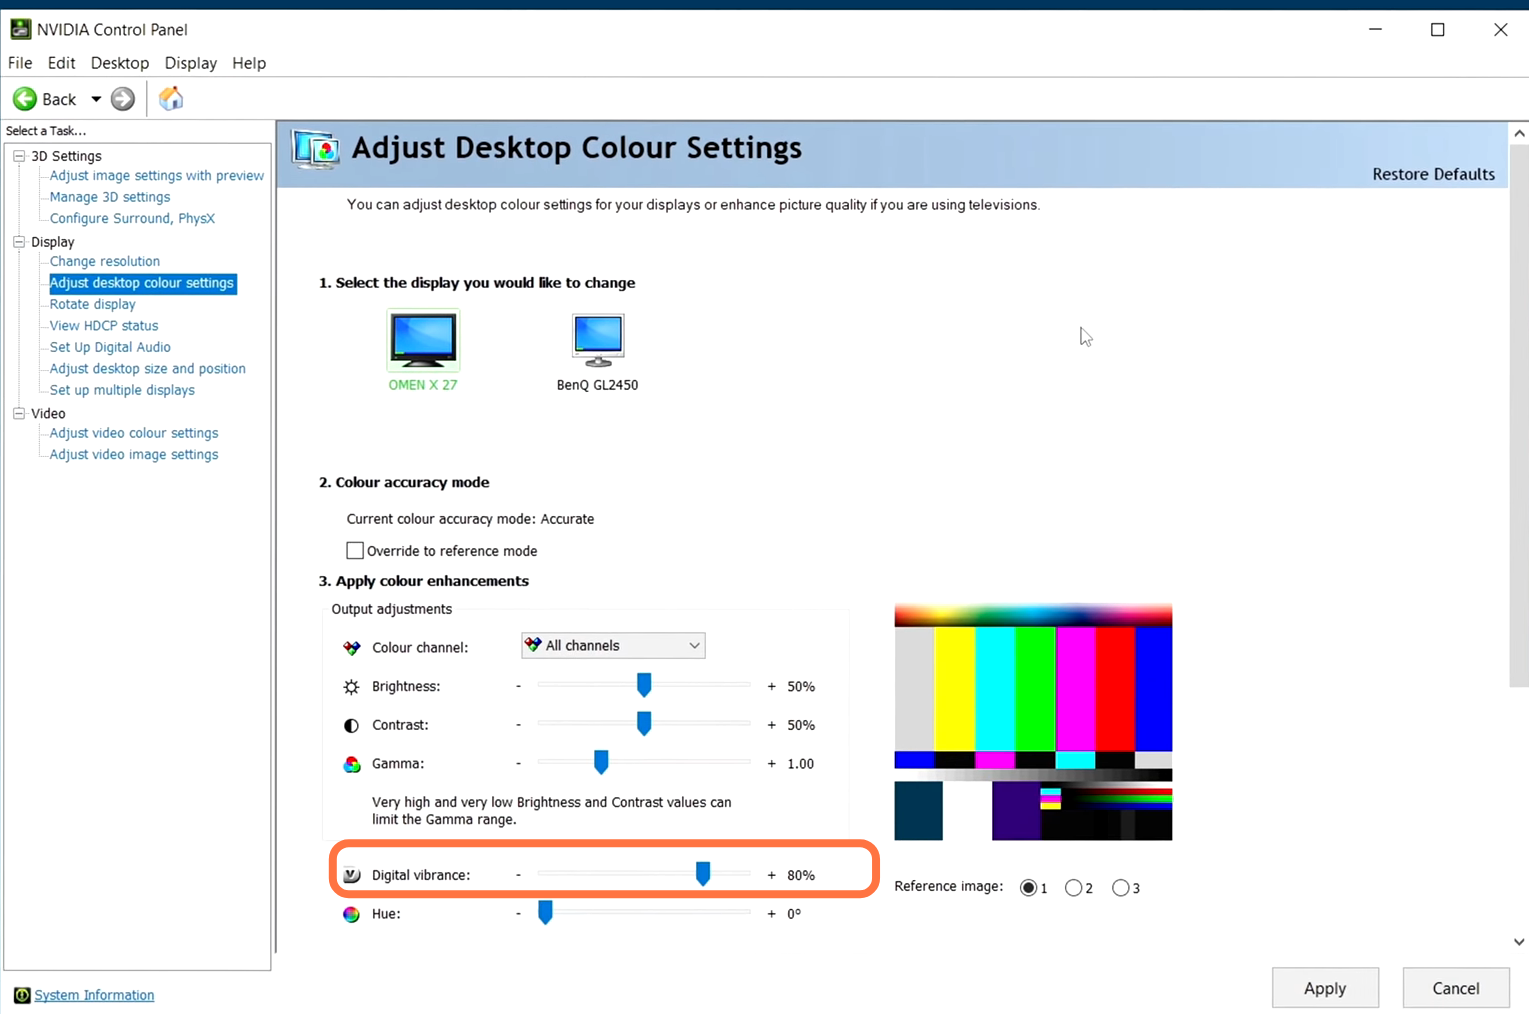
7.3- Now go to the Adjust Desktop color settings on the right-hand side and adjust your digital vibrance which will increase your saturation and give you a much nicer image result without using any NVidia filter or other techniques.
7.4- You have to open up the MSI control panel and click on settings. Then find monitoring inside this you will find all of the options which you want to see inside of the game. To enable the option first click on the left side of the option then select the option and then click on the show on-screen button.
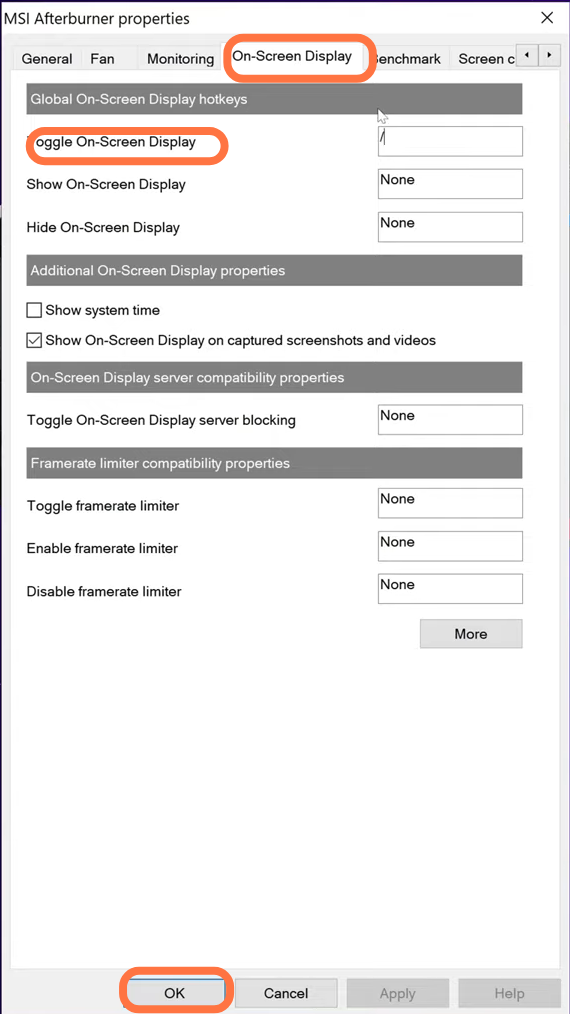
Now you also have to make some changes to the MSI control panel. Go to the on-screen display, then go to the toggle on-screen display on the top and set it to any key on your keyboard, and then tap on the Apply button.
In-Game Settings
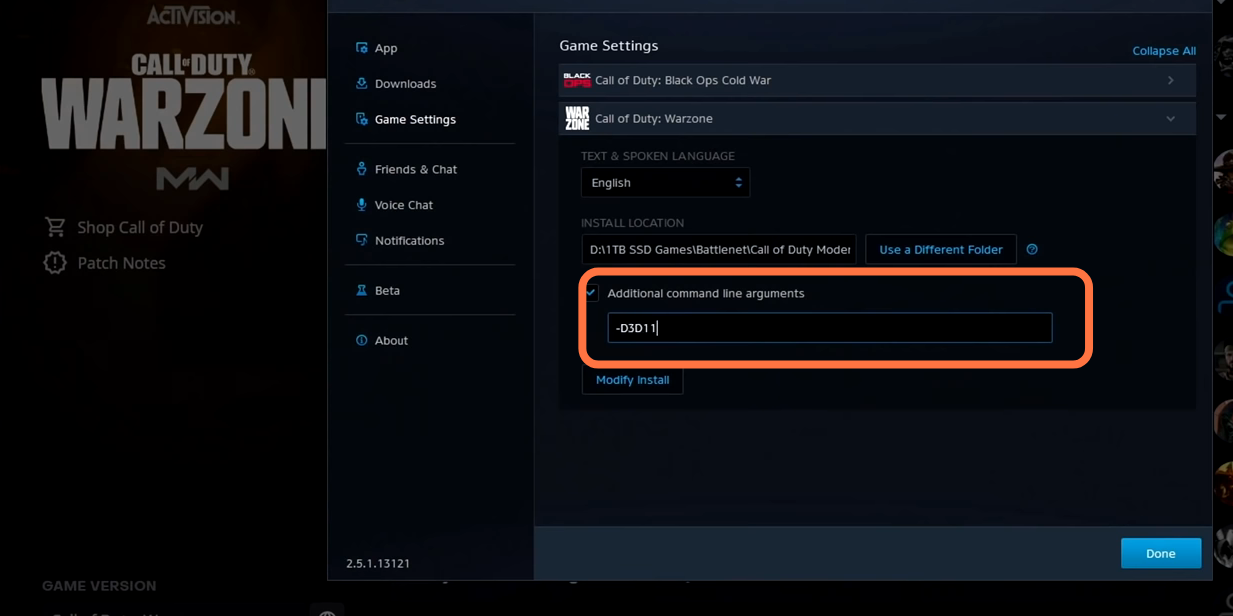
8.1- Before booting into the game, you need to go to the settings button on the right side of the Play button and then select game settings. On this page, you have to select Additional Command Line Arguments, type -d3d11, and then select Done.
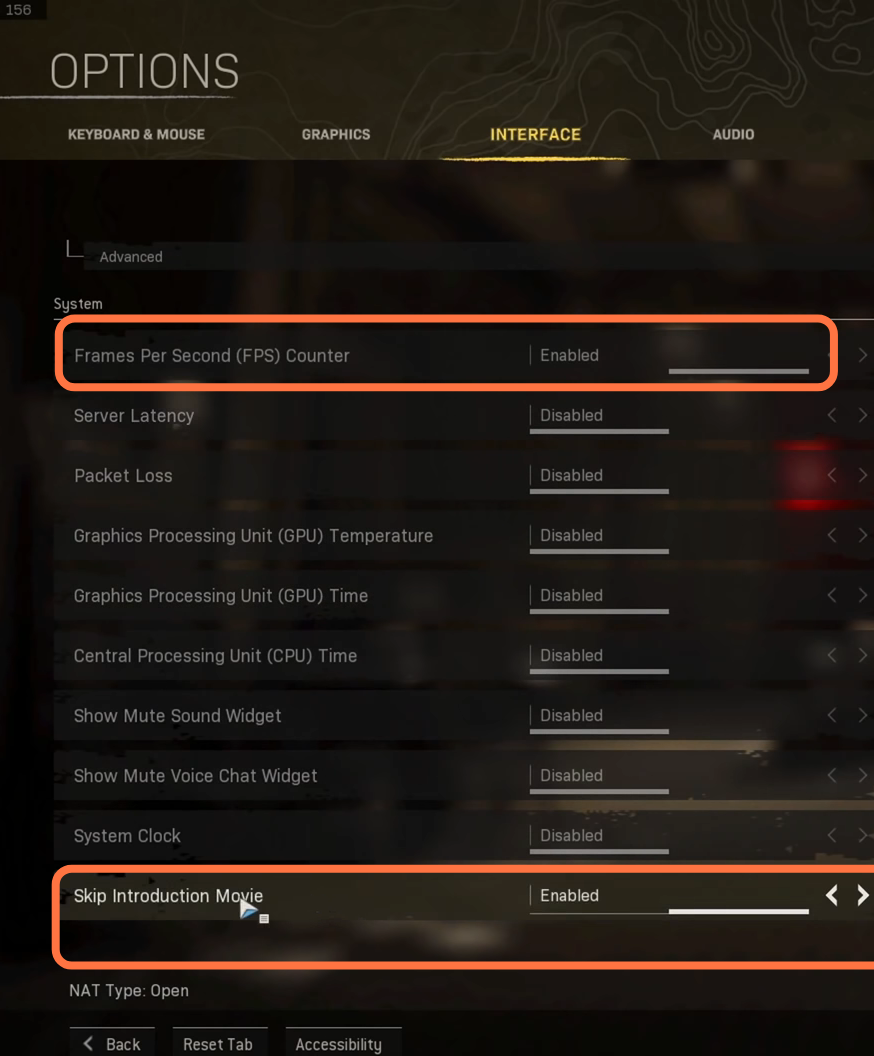
8.2- After this click on Play, stay in the main menu go to the bottom left-hand side, and select options. Now you are in the brand new in-game settings, you have to go to the interface on the top. You have to set your mini-map shape to a square and then scroll all the way down to the bottom to enable the in-game FPS counter. And another setting you have to make here is to skip the introduction movie.
8.3- After doing this, go to the Graphics tab. The first thing you have to set here is in the quality tab, scroll down to the on-demand texture scaling option and disable it. Then go to the advance selection and if you have an option called clear texture cache, select it and then select continue.
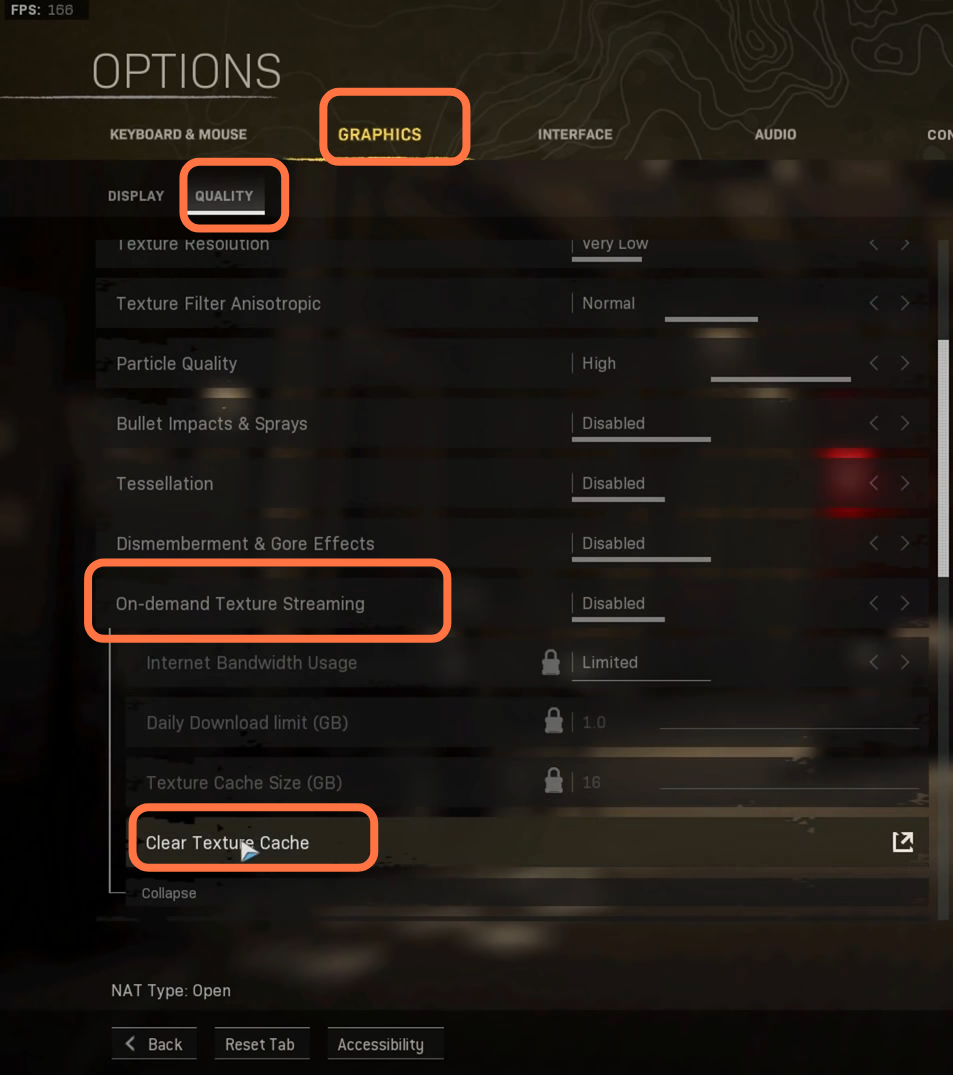
Now go back up to the streaming quality, set it to low, and then select Apply.

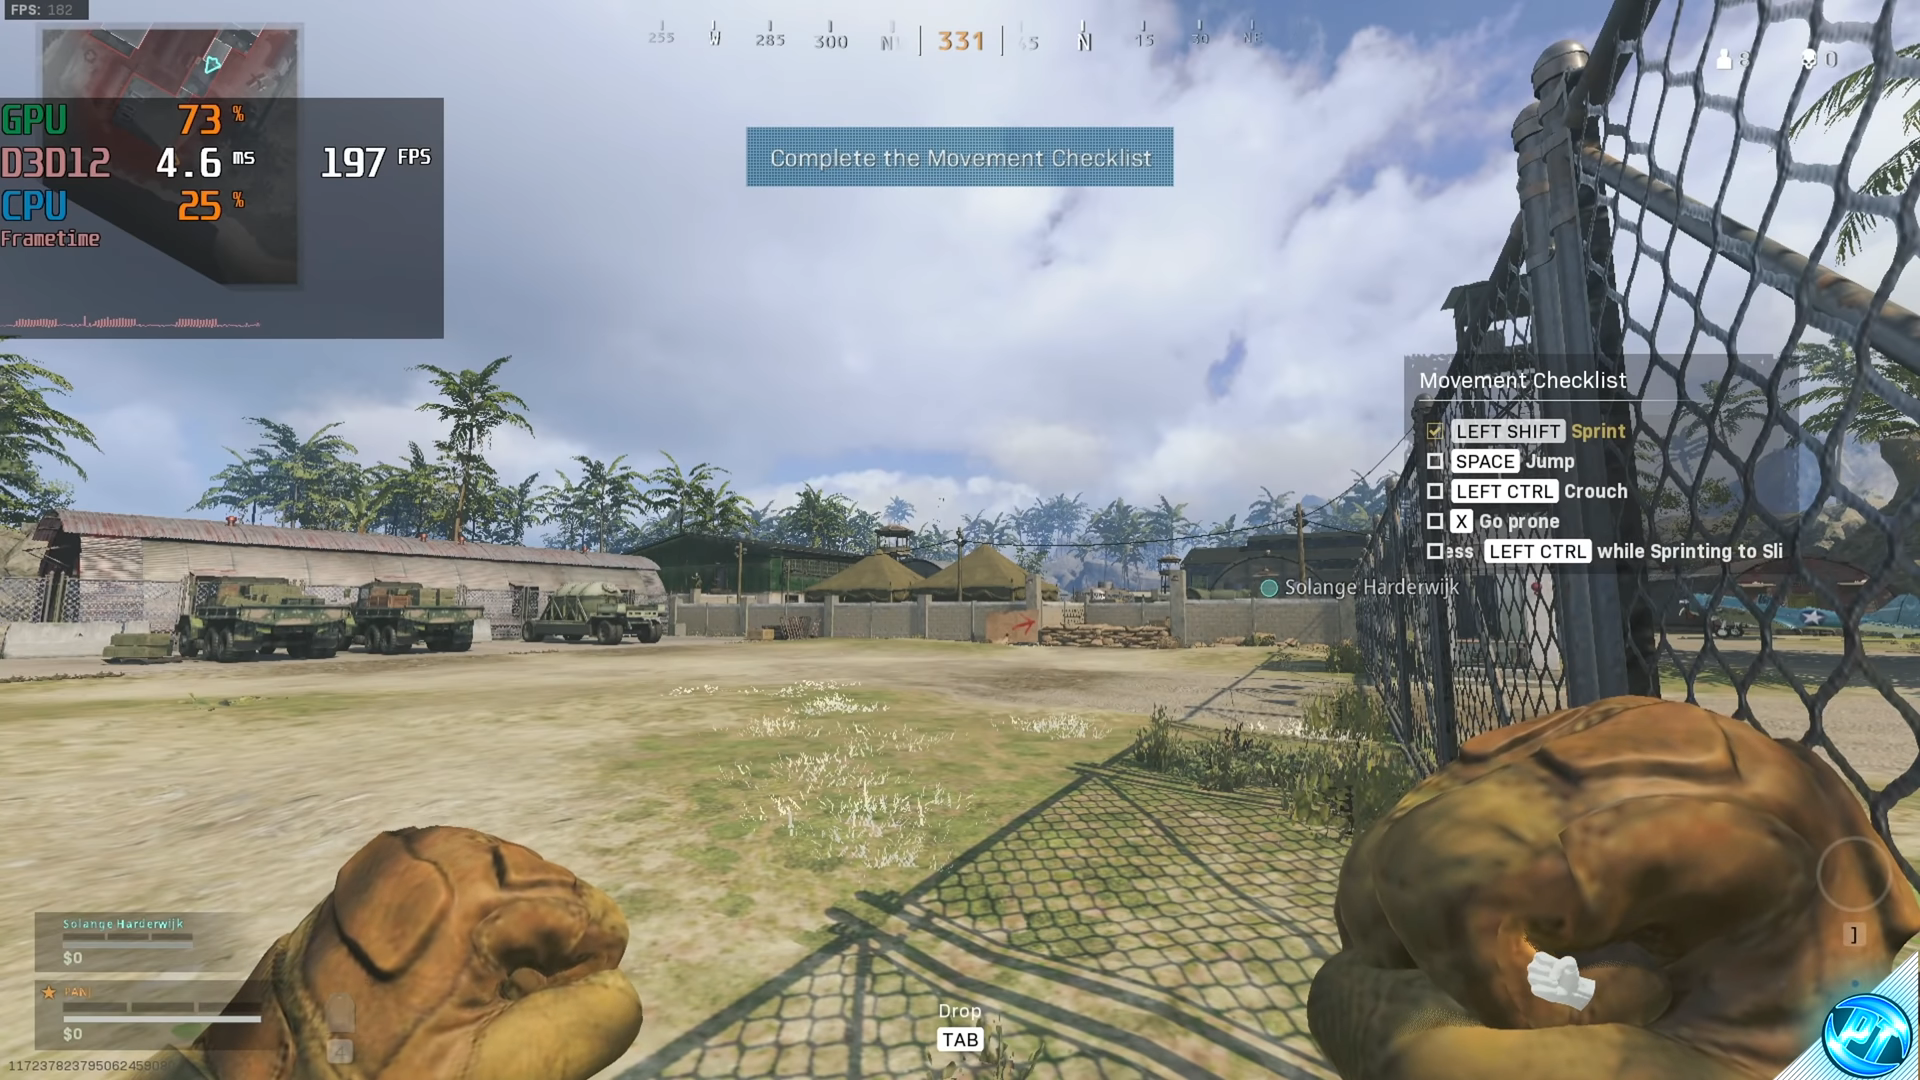
8.4- After that, go to the Private Match and Practice, then select Warzone orientation. When the game starts, you need to aim towards the telephone pole as it will give you a good visual representation of close-up foliage details on the fence on the right.
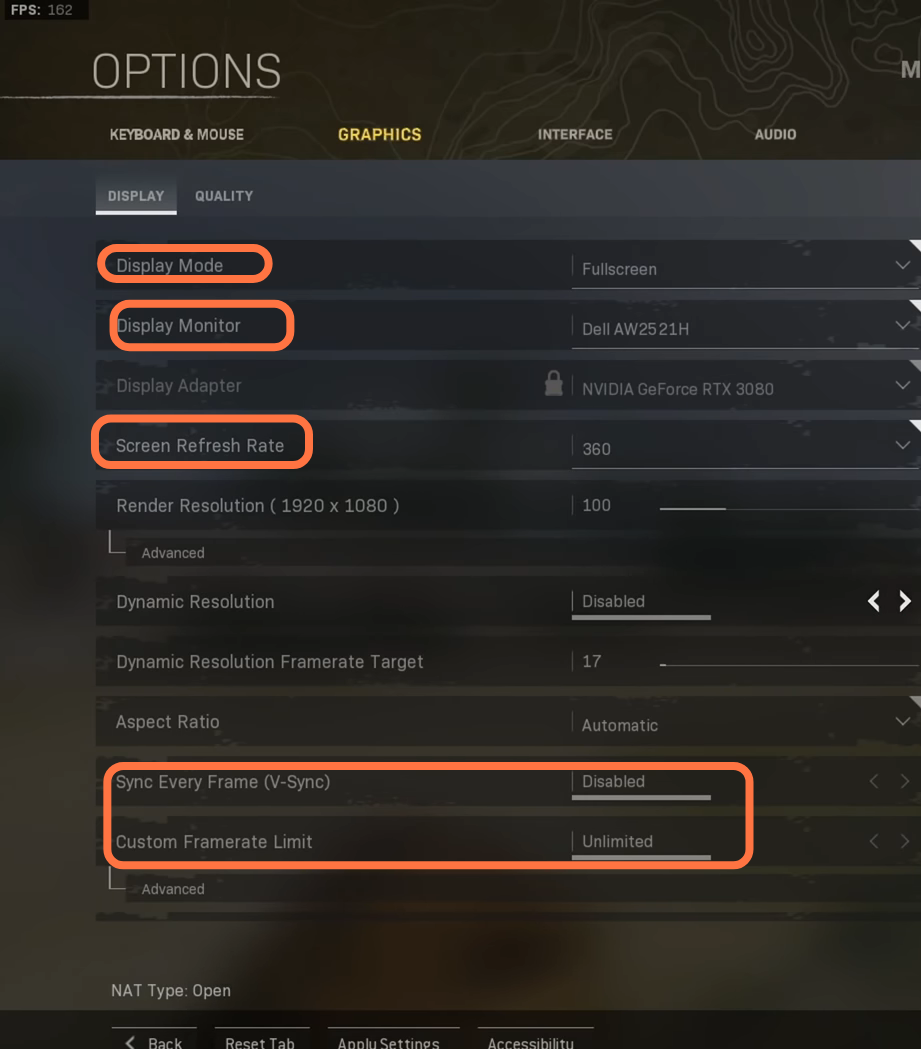
8.5- Now pause the game, go to the options menu and then head over to graphics. For the display mode, you need to set it to full-screen as it is the best option and will provide you with the lowest level of latency. You have to set the Screen refresh rate to the highest value available and disable Sync every frame. You need to set the Custom Frame rate limit to unlimited but don’t do anything to the resolution settings, you have to come back to this at the end.
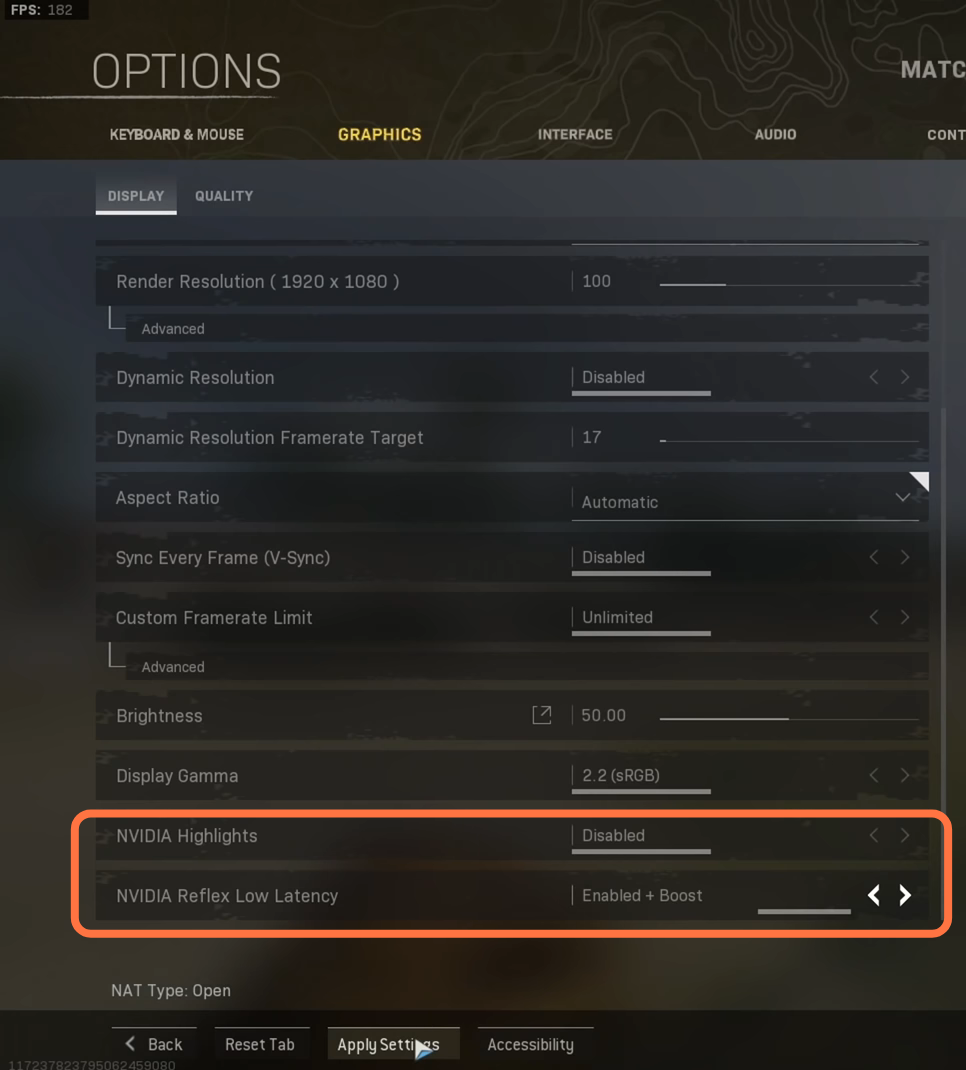
You must keep the NVidia highlight disabled. Keep the NVidia reflex low latency to enable+boost. After doing all this click on apply settings.
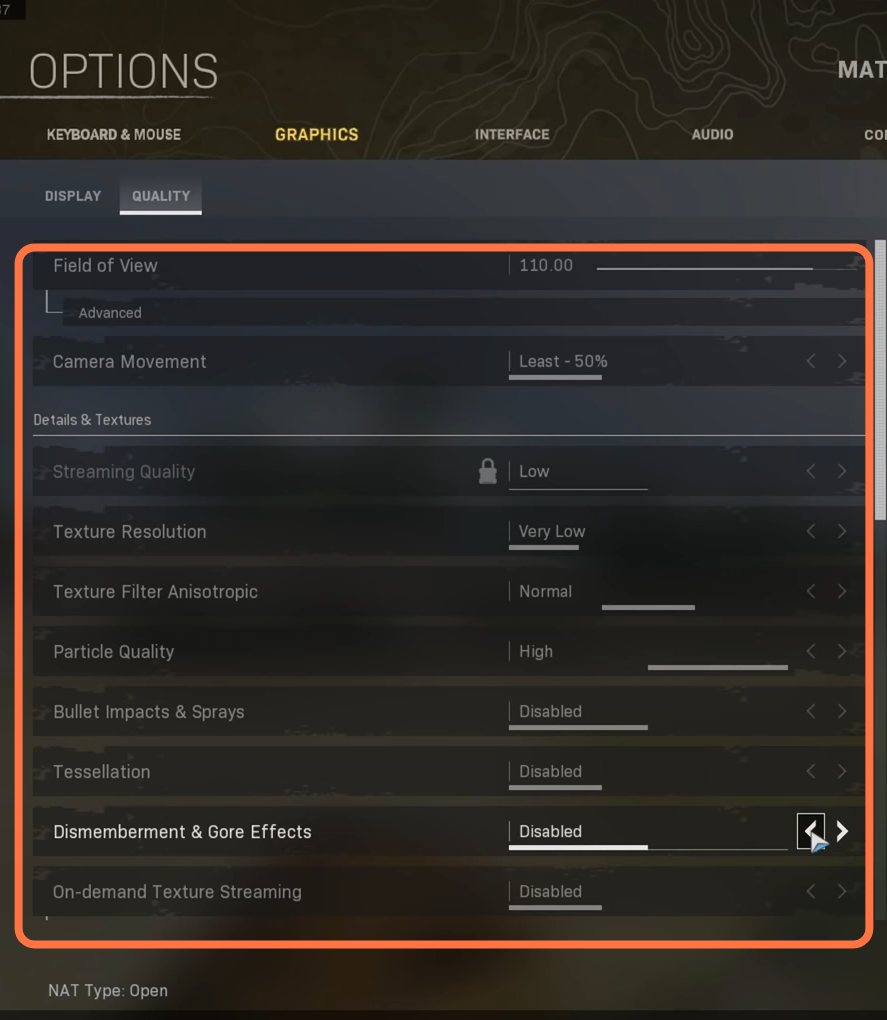
8.6- After that, go to the Quality tab, and keep the field review to 110. The latest option is camera movement, you have to set it to 50% and set the texture resolution very low as it will reduce the VRAM usage and lowers input latency. You can set the Texture filter anisotropic to normal or high and set the particle quality option to high position. Bullets packs and sprays keep this disabled and also keep tesselation disabled. Keep dismemberment and gore effects disabled and also keep on-demand texture scaling disabled.
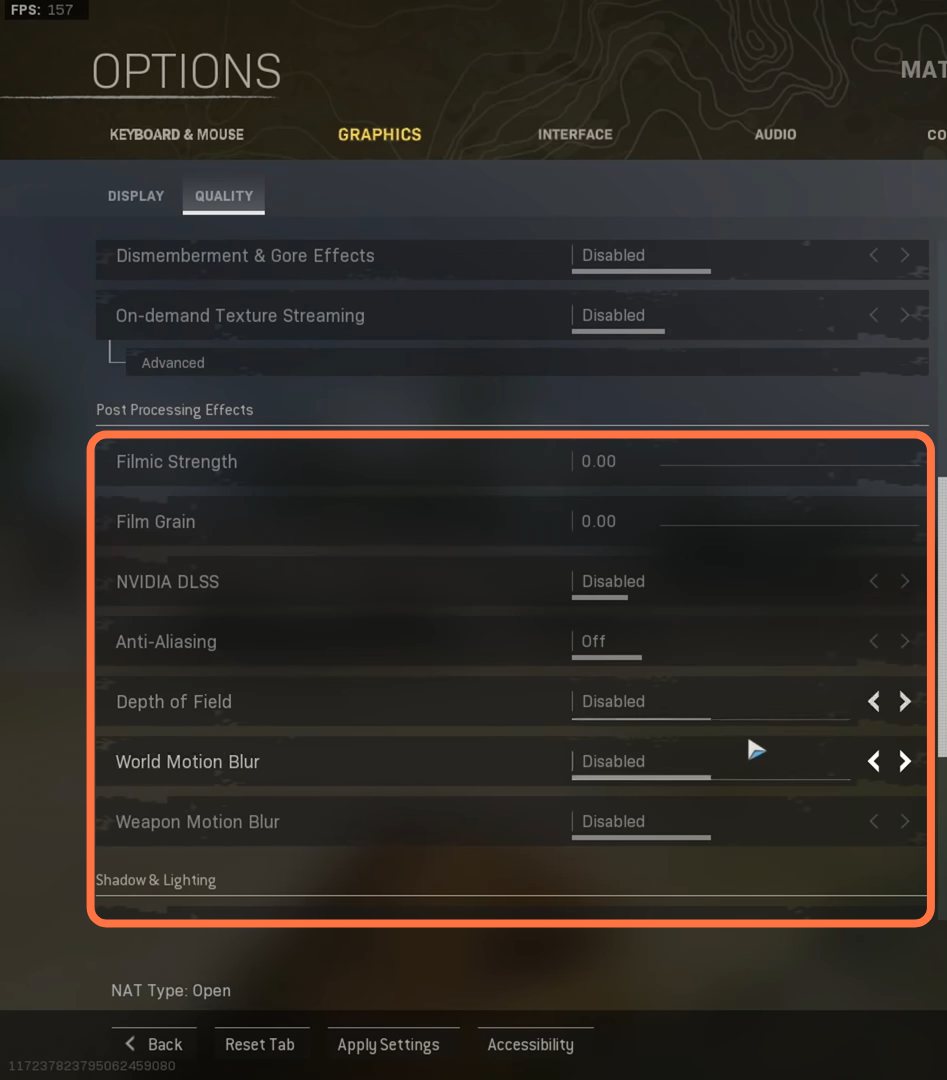
You have to set the filmic strength and film grain options to zero. For anti-aliasing, you have to keep this to disable position or you can keep this to SMAA 1X. Keep the depth of field, world motion blur, and weapon motion blur to disable position.
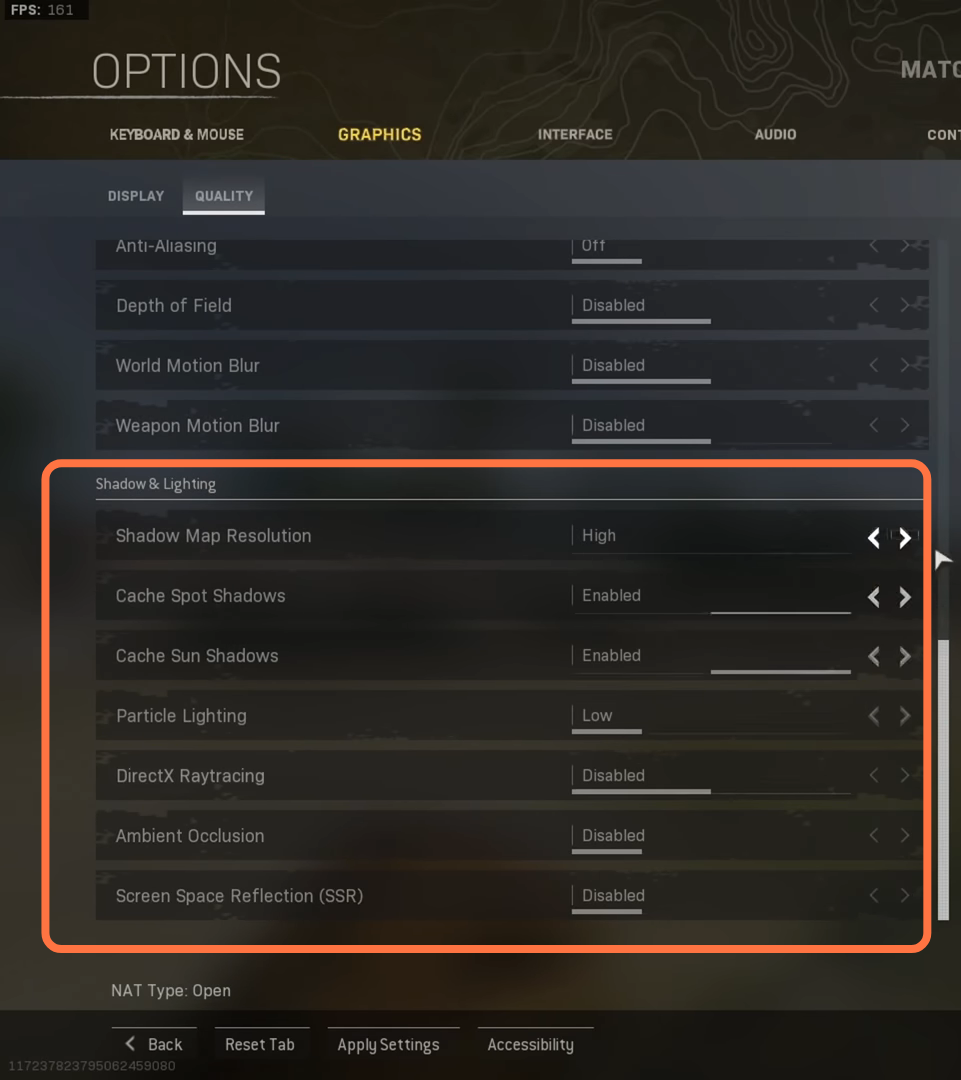
You need to set the shadow map resolution to high. Cache spot shadow and cache sun shadow must be enabled. You have to set the particle lighting low and keep the Direct X-raytracing, ambient occlusion, and SSR to disable position. After doing all this, click on the Apply button.
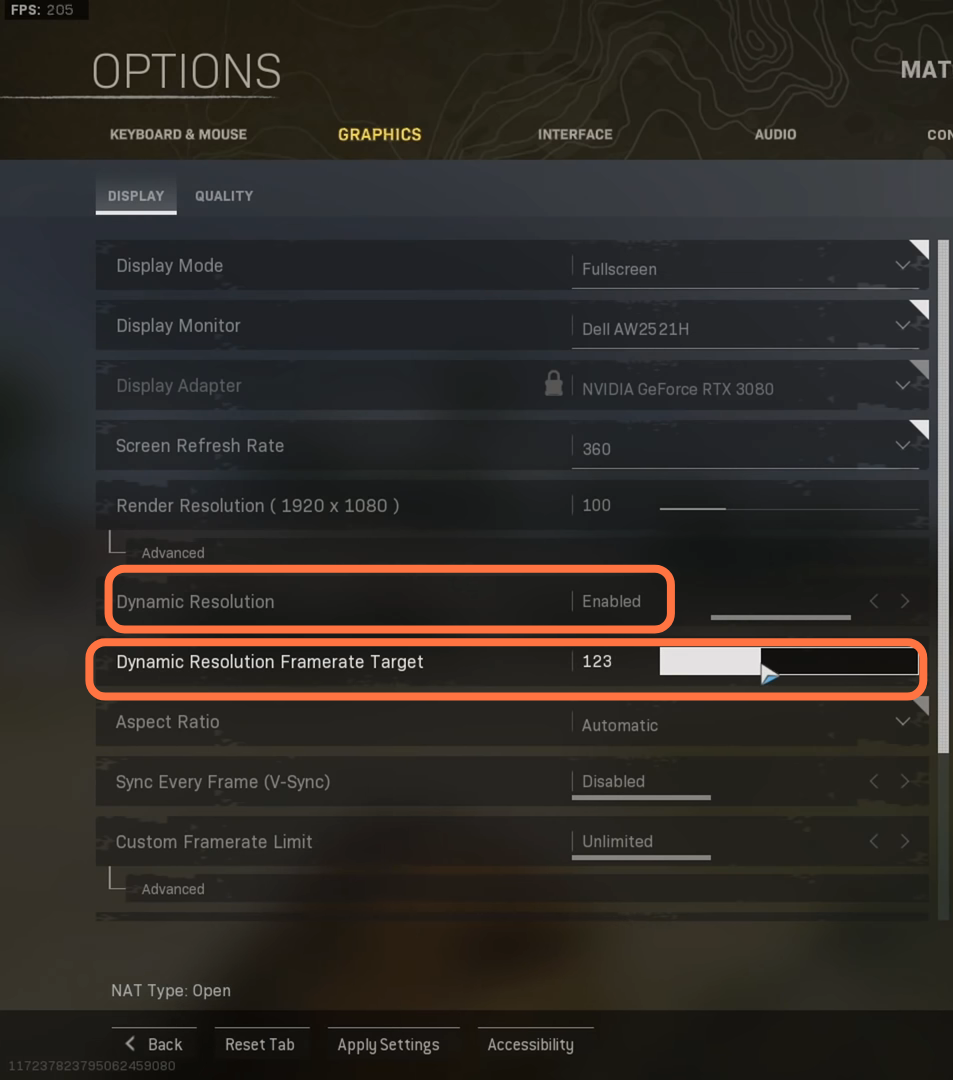
Now if you are still not satisfied with this, then again go to the option and navigate to graphics. You have to enable the dynamic resolution and set your dynamic resolution frame rate target to 120. If you set it high, then this will result in a decrease in your FPS.