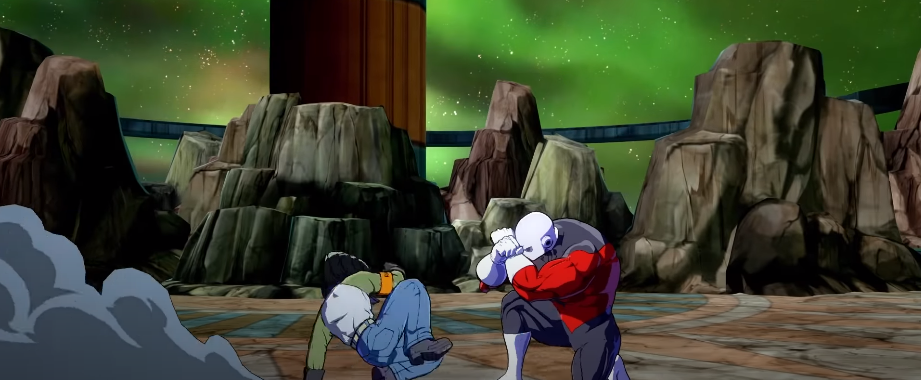
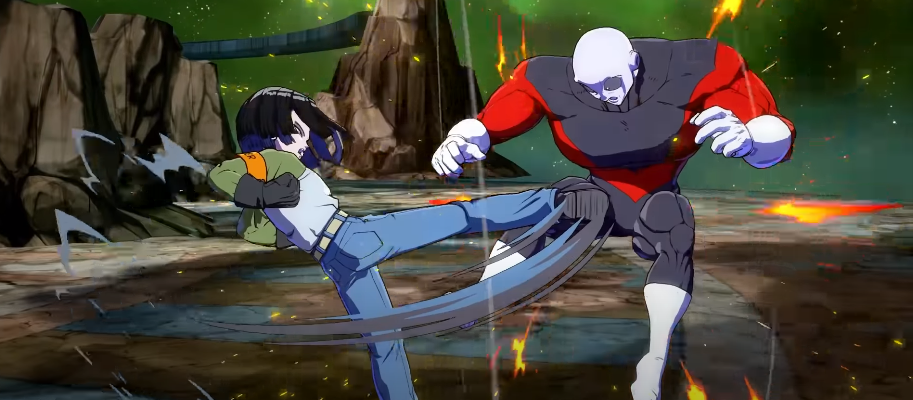
This guide will provide you with basic 17 BnB combos and basics in Dragon Ball Fighterz Season 3.
17’s 5L is a rather short jab and is safe, along with all his other Lights.
5LL moves 17 forwards slightly, but its speed is more important. It’s fast enough to combo after 215L, even if 5L whiffs. 5LLL goes far and low crush, which means it’s invincible to low-hitting attacks.
5M is the definition of average and safe on block. 2M is short-ranged and barely unsafe (-6). The characters with a 7-frame 5L can’t punish it.

2H has terrible horizontal range and leaves him airborne, so it’s a little hard to make safe. 17 has a 3H, sliding low with great range and a low profile, but it is unsafe.
VIS 5S shoots up to 6 Ki Blasts, and it is safe on the block.

jS shoots up to 6 Ki Blasts downwards. It has enough hitstun to combo Super dash in the corner and builds tons of meters. His air buttons (jL, jM, jH, and j2H) are standard. The only thing worth noting is that jM is very bad at cross-ups.
Power Blitz (228)

A two-part move, first use charges, second use throws two projectiles that beat SD and give sliding knockdown, has to be recharged after every use. The charge is only grounded, but the actual Power Blitz is air OK. The charge is very punishable on the block, and the Blitz is plus (+6) which gives you a “free” turn. Charge hits on both sides and has very high hitstun and should only really be used in combos.
Acrobatic Assault (236/214S, Air OK)

It makes 17 jumps towards a wall, then bounces off; 17 cannot block for the entire duration. 17 can cancel into any aerial move he has once, even into another Acrobatic Assault at any point after the bounce. This move is pretty niche; you can use it for some saucy combos and mix or move around the screen.
Accel Driver (236X)

Dashes forwards and attacks, starting a string of follow-ups called “gears” or rekkas. The initial dash and attack are anti-airs and extremely punishable on block, VN/ Light version is short and fast, and Medium goes almost full screen and is slower. The heavy version goes behind the enemy and can even steal the corner. Medium and Heavy versions can also hold their buttons down to only dash forwards.
Finishing Driver (214)

The same thing as Accel Driver, but 17 spins backward first. The only difference is that you can do follow-ups immediately after the spin.
Gears

The same thing as Accel Driver, but 17 spins backward first. The only difference is that you can do follow-ups immediately after the spin.
Top Gear (Driver > 5L/M)

Contrary to its name, it’s mid. The medium version has slightly more range than the light but is also slightly slower.
Second Gear (Driver > 6L/M or j236X)

Overhead followup. It is not considered aerial, so it can’t be 21’d, but some buttons can still beat it. The light version is fast but doesn’t give a knockdown, so it’s only really useable with assists. Medium will give a sliding knockdown, but only in the corner because it is too slow for midscreen. The heavy version gives a ground bounce sliding knockdown and connects midscreen, extending your combos easily.
Low Gear (Driver > 2L/M)

The low-hitting follow-up. Again, the Medium version has slightly more range but is slower than Light.
Fake Out (Driver > 4L/M or j214x)

The Aerial Light version hops forwards, medium hops backward, and heavy stays in place with less recovery. It makes the same motions as Light and Medium Second gear without the attack so that you can feint an overhead into a real one. Keep in mind that you can continue a gear string after landing to do some experimental mixups.
Reverse Gear (Driver > 5S/H)

It has a Heavy version that costs half a bar. It can block Supers and attack without having to block something first. It puts up a counter barrier, which can counterattack by pressing any attack button again if it blocks something that isn’t a Super or grabs. It also ends your string entirely; you can’t do anything after it unless you hit it.
Small Gear Tip

For Acrobatic Assault and Power Blitz, you don’t have to do the full inputs during a gear string. 45/6S and 28 respectively will do the job.
A Assist

It is called the defensive barrier and always counterattacks. The attack has a long startup but the wall bounces and has a very good blockstun 35f). It’s especially good with command grabs as it can both eliminate mashing and keep your turn.
B Assist

Only CHARGES Power Blitz, so 17 can use it as soon as he is tagged in. It’s fast but has low blockstun (23f), so it isn’t well suited for block strings. The hit stun is great, however.
C Assist

Tracks to the enemy, and the first hit is an anti-air. It has 50 frames of blockstun, which is huge, but all the other downsides of a C Assist.
Barrier Explosion (236H+S, Air OK)

Frame 1 is invincible, so this can be used as a DP for 1 bar. Gives a sliding knockdown on hit and the grounded version tracks vertically.
Endgame (236L+M)

A highly damaging Level 1 teleports behind the enemy and results in a side switch, only usable when grounded and has a special finish if it kills.
Basic Safe Gapless Blockstring
You can swap 5M, and 2Ms order and 5H can be added before 55, but it’s better to save it to frame trap than save it to tam.

2L5LL > 5M2M > 3H5S
5H553H is another option. Guard canceling Superdash will completely punish the 3H, but you can also use 236L to punish Super dash.
2L5LL > 2M5M > 5H5S3H
Praise Autocombo

Don’t sleep on SLLL it’s speed and range are quite scary, and it enables some mind games with Rekkas.
5LLL > j214M-5L
Staggers

2L, 5L, 5LL, 5M, and 5S are all staggers and pressure reset points.
2L5L > 5LL > 66 5LL > 2M5M > 66 5LL > 2M5M > 3H5S
Frametraps

17 doesn’t have built-in frame traps outside the rekkas, so manual delays after his staggers will have to do.
2L5LL > 5M2M > 3H5S(dl)5H > …
You can also do 5H553H to hit them with an unexpected low.
2L5LL > 2M5M > 5H553H > 236L-LLL > …
Rekka Pressure

Staggers and Frametraps are fine, but the Drivers is where 17 gets most of his mix
2L5LL > 5M2M > 3H5S5H 236L-LLL
Rekkas: Drivers
The first step is to know when to use which Driver.
… > 236L-LLL > 214L-LLL
You can use both Drivers once per string. You can gaplessly go into 236L. off any Medium or Heavy
5M/2M/5H/3H > 236L
214L can cancel into Gears immediately after the spin, annotated as 214L-LLL with a dash instead of a tilde.
214L-6L
Rekkas: Manual Gears
Step 2 is to stop mashing Light and manually input the gears in different orders to throw off your enemy.
2L5LL > 5M2M > 3H5H > 214L-4L2L5L6L > 236L-4L6L2L5L
Noteworthy combinations are Fake Out into Second Gear and Fake Out into Low Gear. Also, keep in mind that there isn’t much point in using Fake Out AFTER Second Gear
236L-4L6L.
Rekkas: Conditioning

Step 3 is to bait the enemy into doing something. All gears are unsafe on the block, which may tempt your enemy into mashing. Slightly delay your follow-ups to beat mashing by creating frame traps. Immediately canceling 214M into 5M is great for punishing buttons because both versions of Top Gear are Medium starters. Any combo starting with Top Gear will do full damage and can even TOD.

2L5LL > 5M2M > 3H5S5H > 236L-5M > 214M-5MLL2S > A1 > …
Trying to Level 3 against the Rekka can easily be shut down with a Heavy Barrier in reaction to the Super flash.

2L5LL > 5M2M > 3H5S5H > 236L-2L(dl)5L5H-S > …
Second Gear and Fakeout will both lose to mashing 5L unless you cover it with an assist.
2L5LL > 5M2M > 3H5H > A1 > 236L-LLL >
Mashing can be hard since you only get 19 frames to react and you risk getting frame trapped.
It is when you can bait them into pressing buttons using the Barrier. Once you condition them enough and they just block, you can reset your pressure after Fake Out.

2L5LL > 5M2M > 3H5H > 236L-5LL2L > 214M-5S >
In the corner, 214M-5M is very strong. The spacing on 214M makes it hard to punish because most buttons don’t reach. You can reset pressure into 5 Mor frame traps with low gear if Medium Top Gear is blocked. Great for conditioning.

2L5LL > 5M2M > 3H5H > 236L-2LLL > 214M-5M > 5M2M > 3H5H>236L-5L2L
Rekkas: Anti-Reflect

Reflect can be countered by Fake Out pressure resets or Finishing Driver into immediate Second Gear
2L5LL > 5M2M > 3H5H > 236L-5L4L > 5M2M > 3H5H > …
If You’re willing to spend bar, 214M in instant Ex Barrier will both punish reflect and can continue your turn using Vanish if they keep blocking.
2L5LL > 5M2M > 3H5H > 236L-5L2L > 214M-H-S > 66 5LLL > …
Even if 17 does get reflected, it is rather hard to get him off of you if he’s in the middle of his rekkas.
Rekkas: Hitconfirm
If you land a hit, confirm with an assist after Power Blitz Charge if possible. If you get to the end of your blockstring, call an assist and go again.
Rekkas: Disengage

You can disengage relatively safely at any time with 45 and 6s, but be ready to use your DP Super if the enemy comes after you.
2L5LL > 5M2M > 3H5H > 236L-5LL4S >
Rekkas: Power Blitz

With Power Blitz charged, you can have a free turn since it’s a plus on block 3H that will beat buttons, but it can still be jumped so it’s not ideal. This is stronger in the corner where you can micro dash 5M instead, making them block even if they jump.
2L5LL > 5M2M > 3H5H > 236L-2L5L25 > 3H > …
Rekkas: Left/Right Mix
On top of these options, 17 can cross you up using Heavy Drivers anytime he wants to. Even if the enemy reacts to the EX move flash, 17 can still stay on the same side if Finishing Driver is canceled early
2L5LL > 5M2M > 3H5H > 236H-LLL2S > …
With an assist, you can get a very dirty left/right mixup utilizing its pushback. Call the assist late to push the enemy underneath 17 during Fake Out and cross up or call it early to stay on the same side.
2L5LL > 5M2M > 3H5H > A1 > 214H-6LLL >..
To add another layer, you can steal the corner using 2365 Cor 236L-6S) and an assist. Time it right, and the assist will spawn behind the enemy, pushing them out of the corner for you to add more cross-ups to your pressure. It should work with most assists but keep in mind this is pretty fake and can be mashed out of, but that’s what frame traps are for.

2L5LL > 5M2M > 3H5H > 236L-LOS > A1
Rekkas: Rock, Paper, Scissors

Using the air Rekkas, you can put the enemy into another mixup between overhead, low, the frametrap, and anti-reflect. This mixup can be fuzzy-guarded like most of his pressure, but the more options you have, the better
… > 2H > j214H-2L..
You can get this mixup off anything that leaves you airborne, like ZH, jump-ins, and SLLL.
96 JML > j236H-…
Okizeme

After any 236M knockdowns, you can get a really strong OS (Option Select) setup. An OS is when you do one input and get two different results depending on what the enemy does.
5H > SD > JLL2HjCLL > js(6) > j236M > 214M-(dl)6M5S5M > …
Upon landing, do 214M and slightly delay Second Gear. As 17 attacks immediately input Special followed by Medium. If -6MIS blocked, 17 would continue the Rekka. Against invincible moves, it will whiff, and 17 will automatically Barrier.

5H > SD > jLL2HjCLL>S(6) > j236M > 214M-6M5S5M > …
To beat wakeup Level 3, replace the Special input with Heavy so that the Barrier can absorb the Super.
5H > SD > jLL2HjCLL > $(6) > j236M > 214M-6M5H5M > …
Off of Charged Power Butz, you get a meaty (coversolltech options and hits frame 1) setup, though. It’s safe from Level 3’s since you can just Barrier on reaction. They can only reflect OP, which can be baited by holding the Driver not to attack and blocking.
… > 236L-L2S > A1 > 236L-LLL2S > 214M-6M …
Alternatively, hold up forwards, whiff aM on the way up, then airdash. It will hit the meaty and safe jump.
… > 225 > 19] (whiff jm) 66 jH > …
Level 3 Okizeme
After Level 3 in the corner, 12 gets a 50/50 mixup between L and 2L. Super jump float for the high option, fast fall instead for the low. I’ve explained super jump floats in detail in both the Kid Buu and 21 Guide, so please watch those if you don’t know about them.
… > 214L+M > 296[8] (dl) L >…
Mid screen BnB
4085 dmg/ 3682 scaled | +1 bar
2M5M – jMLL2H – SD – jLL2HjcLLL
(Can do jLML2H for most characters for more damage.)
Near Corner Ender
4288 dmg/ 3867 scaled | +1.35 bar
2M5M – jMLL2H – SD – jLL2HjcLLS(6) – j236M
(Can squeeze out even more damage and bar with jcL(dl)L2H – jS(6) – j236M. Works with many combos.)
Vanish Extension
520 dmg extra
…jcLL – jS(6) – Vanish – j214S – jLLL
• Also lands behind enemy
Mid screen BnB Metered

5076 dmg/ 4352 scaled | +0.85 bar
2M5M – jMLL2H – SD – jLL2HjcLLS(6) – j236H~2L5L – 236L~6L5LL2S
5H Route

4130 dmg/ 3772 scaled | +0.85 bar
5M2M – 3H5H – SD – jLL2HjcLLL
(With PB charged do …jcLLS(6) – j22S for more damage, meter, and SKD)
5H Route Metered

5396 dmg/ 4542 scaled | +0.8 bar
5M2M – 3H5H – SD – jLL2Hjc(dl)L(dl)L2H – jS(6) – j236H~2L5L – 236L~6L5LL2S
5H Route with Assist
5300 dmg/ 4400 scaled | +1.9 bar
5M2M – 3H5H – 236M~MMM2S – A1 – 669 jLL2HjcLLS(6) – j22S
(Various ways to extend from assists, try it with yours.)
5H Rejump

5917 dmg/ 4832 scaled | +1.6 bar
Play hard, but the damage and meter is nasty.
5M2M – 3H5H – (dl) SD – 66 jM – (land) 669 jLL2Hjc(dl)L(dl)L2HS(6) – SD – jLL2H – jS(6) – j236H~2L5L – 236L~5L2S
Corner BnB

4619 dmg/ 3919 scaled | +1.3 bar
5M2M – 3H5H – 214L-LMM – 236M~MMM2S
(You’re canceling 214L into immediate Light Top Gear, don’t just let 214L rock.)
Corner BnB with Assist
5560 dmg/ 4437 scaled | +2.15 bar
5M2M – 3H5H – 214L-LMM – 236M~MMM2S – A1 – jLL2HjcLLS(6) – j236M
(For scaled end in A1 – jL(dl)L2H – jS(6) – j236M or replace j236M with j22S. Forgot to mention it in the guide itself!)
Corner BnB with Rejump
5339 dmg/ 4447 scaled | +2.15 bar
5M2M – 3H5H – (dl) SD – 66 jM – (land) 669 jLL2HjcL(dl)L2H – jS(6) – SD – jLL2H – jS(6) – j236M
Solo Rekka Hitconfirm
3800 dmg /-0.5 bar
Damage is assuming low gear starter. Other follow-ups have different damage scaling.
(Any Rekka hit)~H~S – 66 2M5M – jLL2HjcL(dl)L2H – jS(6) – SD – jLL2H – jS(6) – j236H~2L5L – 236L~L2S
Assisted Rekka Hitconfirm
3150 dmg| 1.8 bar
(Any Rekka hit)~2S – A1 – 669 jLL2H – SD – jLL2HjcLLS(4) – j22S
SD Confirm
2805 dmg +0.25 bar
SD – jMLjcLLS(6) – j236H~2M5M – 236M~MMM2S
SD Confirm Reset
1620 dmg +0.3 bar
It only works if the enemy is grounded when hit, hits up, and back tech meaty.
SD – jLLL – (land) 236L~6MMM2S
(Only works if the enemy is grounded when hit. Hits up and back tech meaty.)
2H Punish/DR Route
3400/2812 dmg| 0.75/ +1.45 bar
2H/DR – SD – jML2HjcLLL
(In the corner end in …jcL(dl)L2H – jS(6) – j236M.)
Vanish, Confirm Simple,
2112 damage
… – Vanish – 66 2M3H – 236L~MMM2S
Vanish Confirm Optimal

2695/3080 dmg
With power, blitz charges end in j22s without it.
… – Vanish – 66 2M5M – jLL2Hjc(dl)L(dl)L – jS(6) – SD – jLLS(6) – j22S or j236H~2L5L – 236L~5L2S
Example Combo with 2 Assists

7951
5M2M – 3H5H – 236M~MMM2S – A1 – 669 jLL2HjcLLS(6) – SD – jLLS(6) – j22S – A2 – DR – 22S – 214L+M
0 Bar 5M Rekka Starter TOD (Beerus A/Z Broly)

Barely kills need high-damage supers.
…~5M – Sparking – 2M3H5H – 236M~MMM2S – A1 – jLLS(6) – SD – jMS(6)jcLLL – A2 – jS(6) – j22S – 236L+M – Level 1 Level 3
5 Bar Limit Break TOD

5M3H5H – 236M~M~H~H – 214L~M~H~H~2S – Sparking – 3H5H – j2HS(6) – SD – jMS(6)jcMS(6) – j22S – (dl) Vanish – 66 236L~2S – [Vanish] – DR – 214H+S