This guide will show you how to set up your external hard drive or USB for emulation for the Xbox series S or X. You first have to format your USB drive and then change the permissions settings in the USB drive properties.
Format USB drive
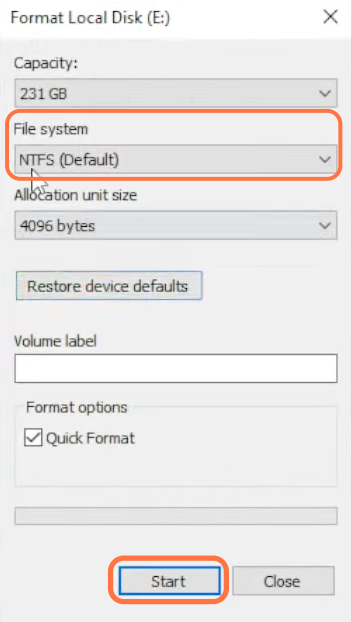
In this section, we will take you through the steps to format a USB drive. The user is instructed to plug the USB device into an available USB port on their computer, set the File System to NTFS (Default) and then click the Start button to format it.
- The first thing you will need to do is plug your USB device into an available USB port on your computer.
- Right-click on the USB device icon to bring up a context menu.
- In the context menu, find and select the “Format” option.
A format dialogue box will appear, presenting you with various options for formatting the USB device. - Set the File System to NTFS (Default) and then hit the Start button.
This will initiate the formatting process for your USB device.
Configure permissions settings
This section describes how to configure permissions settings for external hard drives. The user needs to set everything to allow under Permission for all application packages.
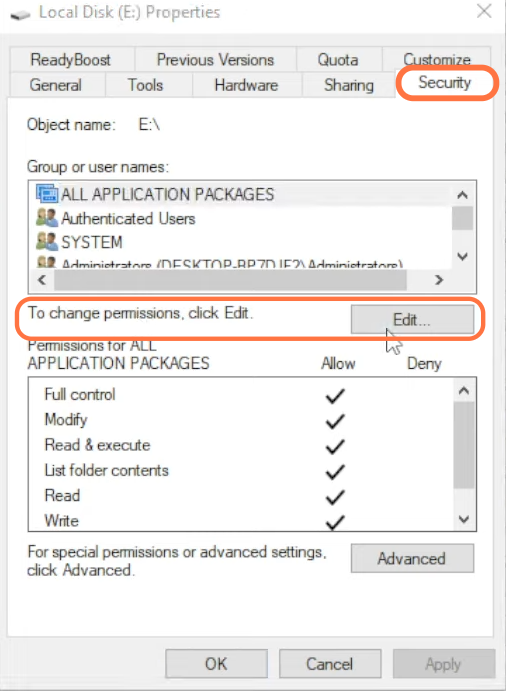
- After the formatting process is completed, right-click on the USB device icon and select the “Properties” option.
- In the properties window, click on the “Security” tab to access the security settings for the USB device.
- Now to change the permissions, click on the “Edit” button.
This will open a new window specifically for modifying permissions.
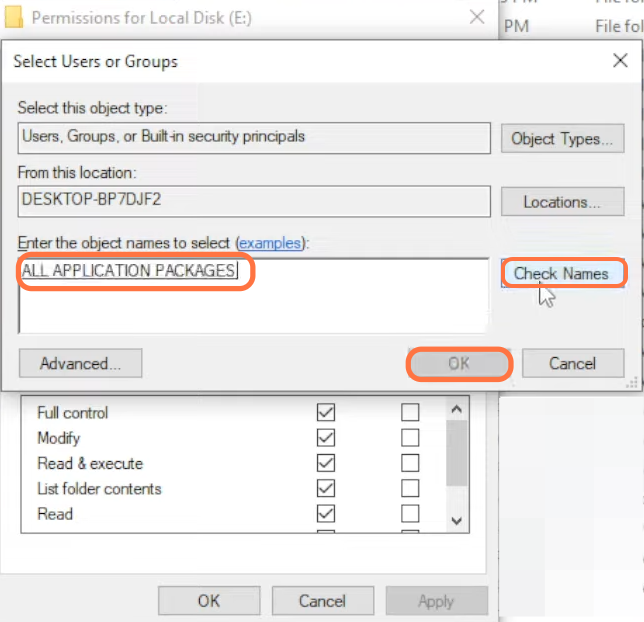
- Once the new window opens, look for the “ADD” button and click on it.
- Type “all” in the text box and click on “Check names” on the right side.
It will change the name to “all application packages“. - After that, hit the OK button.
- After that, set everything to Allow under Permissions for All application packages.
- Finally, click on OK and Apply.
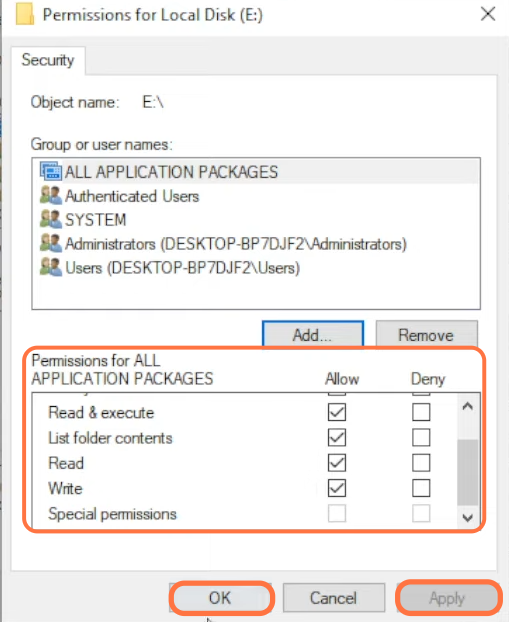
Now you will get the full performance out of your external hard drives.