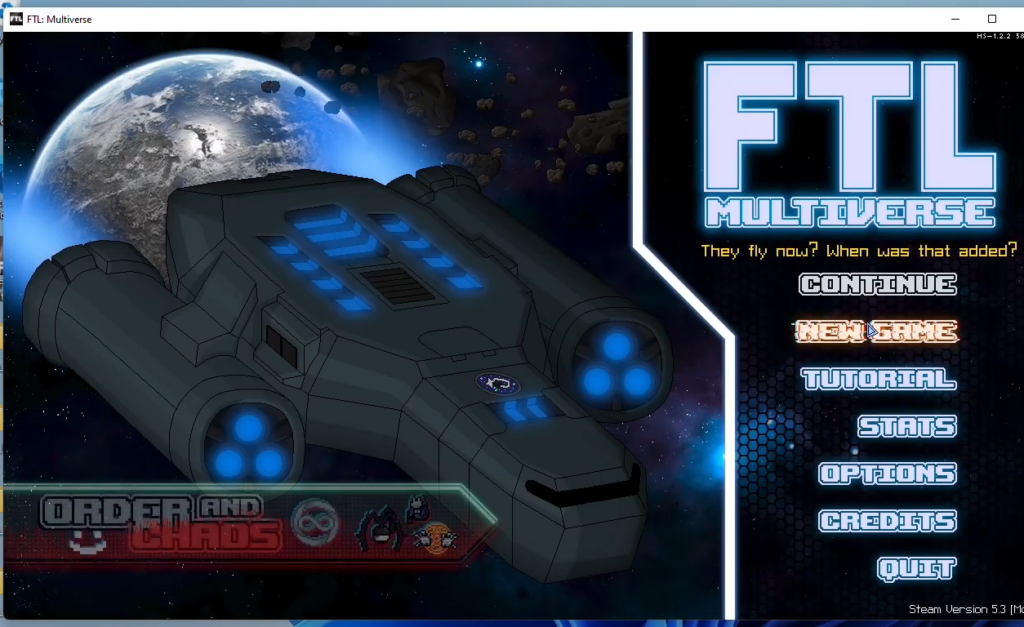
FTL: Multiverse is a captivating game that can now be installed on Apple Silicon M1/M2 Macs with the help of Parallels. In this guide, we will walk you through the process of setting up a virtual machine, installing Windows 10, configuring the virtual machine settings, and finally installing FTL: Multiverse on your Mac.
Download and Install Parallels Desktop
In this section, we will take you through the steps to download and install Parallels desktop. Parallels is a virtual machine software.
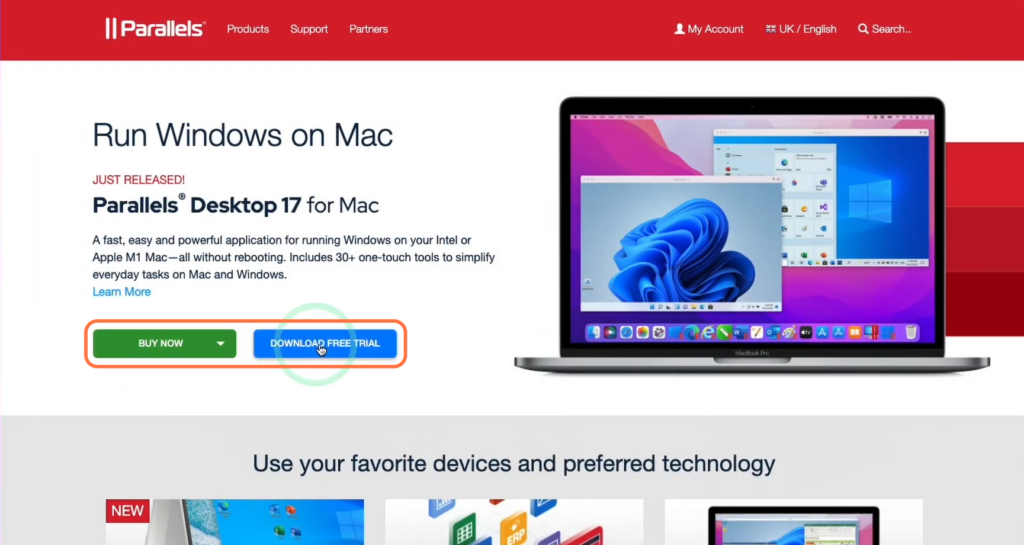
- First, you need to download Parallels Desktop for your Mac. Once you reach the download page, click on Download Free Trial for 14 days or tap on Buy Now to purchase a new license.
- After choosing the Download Free Trial option, click on the Download button to download it.
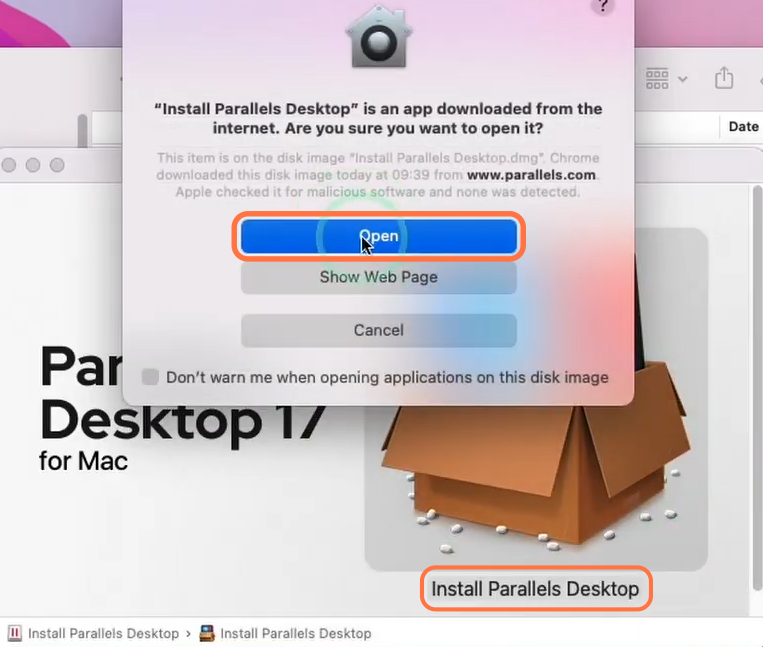
- After that, navigate to your Downloads folder and double-click on the downloaded Parallels Desktop file.
It will open up the installer.
- Click on Parallels Desktop and then tap on Open.
- Let the downloading process complete, input the password and hit the OK button.
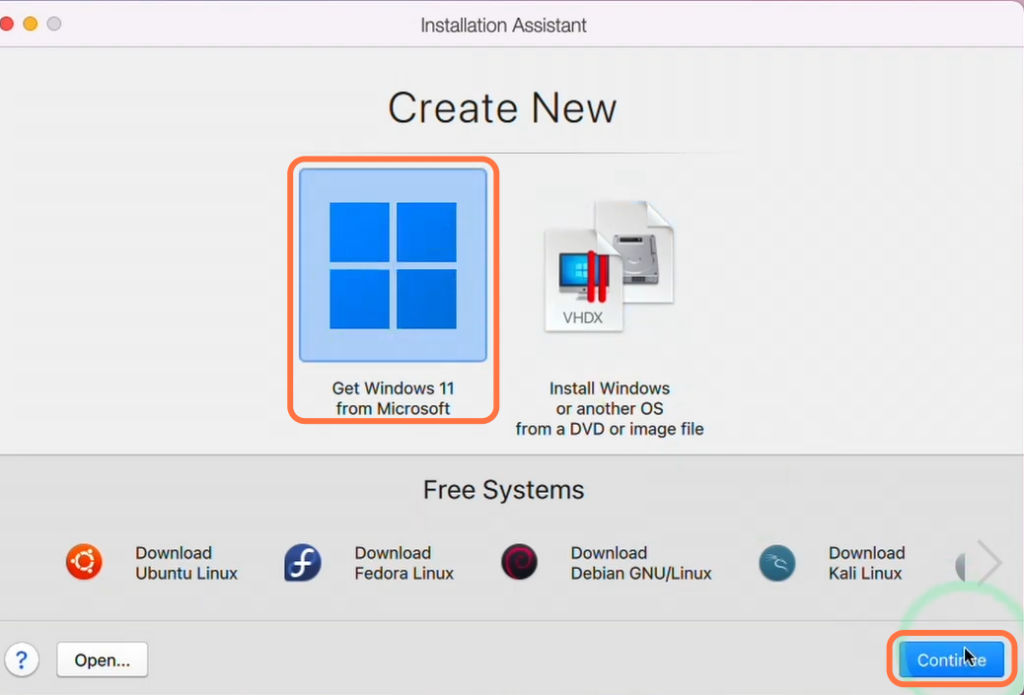
- Once it is installed, go to the Applications folder and double-click on Parallels Desktop.
It will open up a new window.
- Click on the Continue button, select the “Get Windows 11 from Microsoft” option and then click on Continue. After that, click on Install Windows.
It will install Windows directly from the Microsoft service. - You need to wait for it to complete and then tap on “Click to continue“.
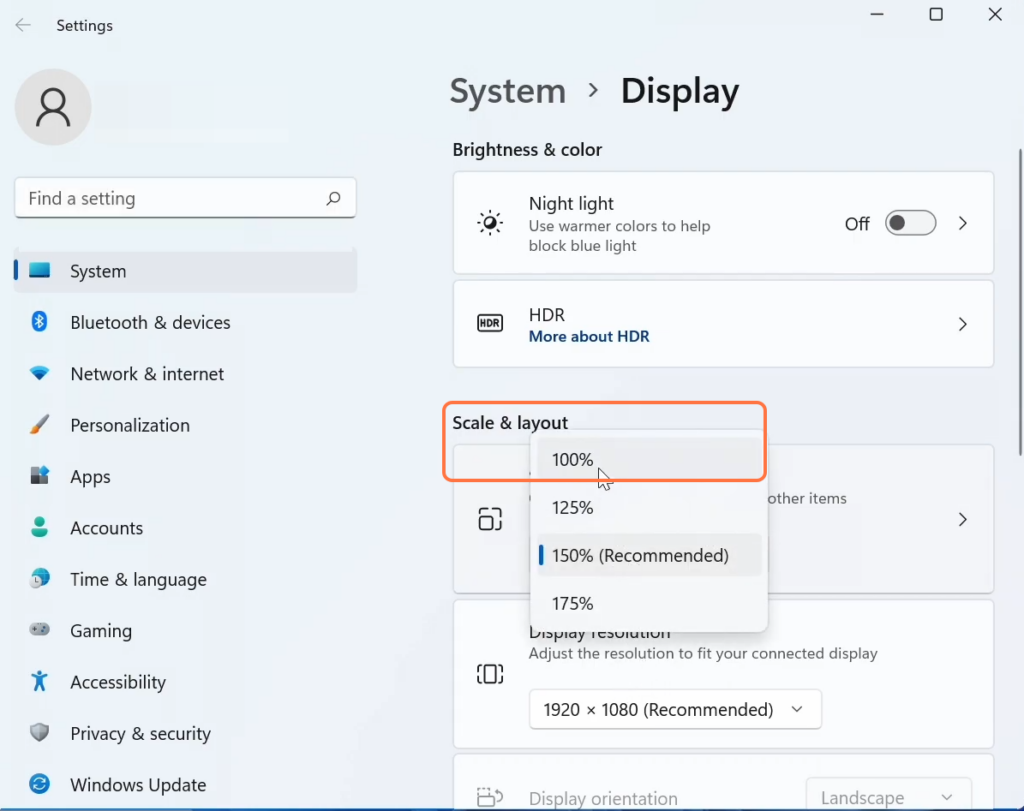
- You need to let all the updates complete, then right-click anywhere on the desktop and go to Display Settings. Change the Scaling to 100%.
Steam Installation
This section describes how to install Steam on your computer.
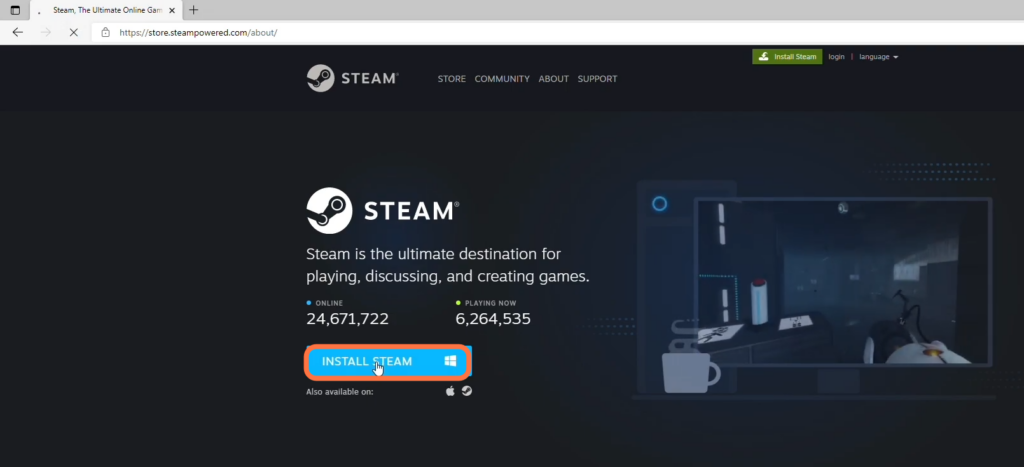
- Now you have to open a web browser to download Steam. Once you reach the webpage, click on the “Install Steam” button at the top-right corner of the screen.
- Click on Install Steam to download the Windows version.
- Open the downloaded file and go through the installation process to install it.
- Once installed, log in to Steam using your existing account or create a new one.
Install FTL: Multiverse
This section will take you through the steps to install FTL: Multiverse. By following the steps below, you will be able to navigate to Game Library in your Steam and search FTL to install it.
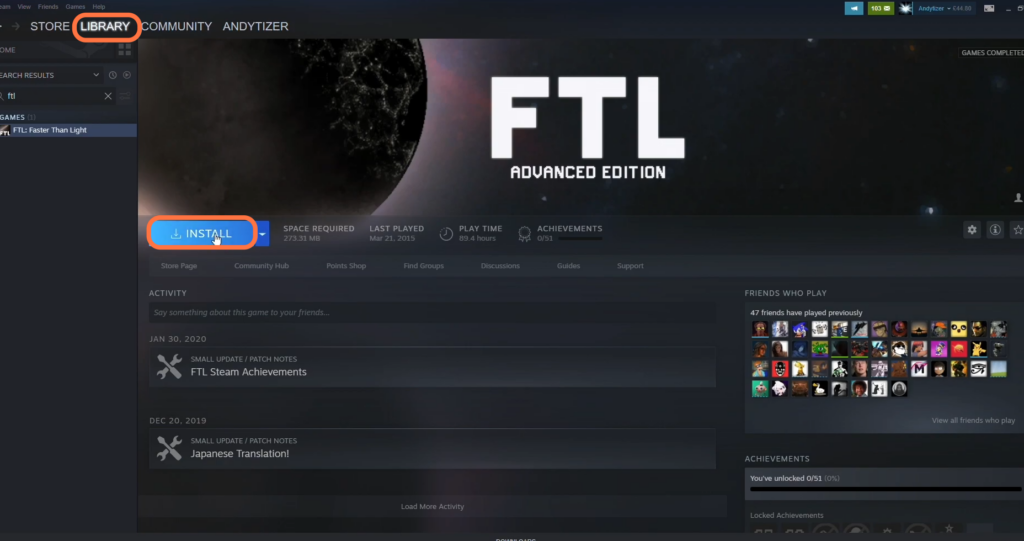
- Within Steam, click on “Library” and use the search bar to find “FTL.”
- Select “FTL” from the search results and click on “Install” to begin the installation process.
- While FTL is installed, you have to download FTL Multiverse.
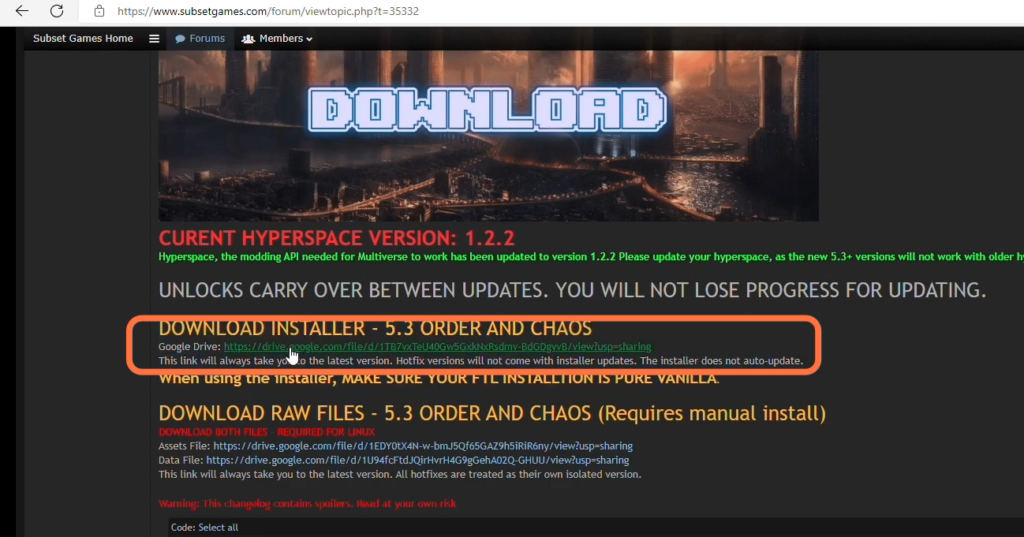
- Scroll down on the page and click on the download link for the latest version of Multiverse.
It will take you to the download page. - Once there, you need to click on Download to download it.
Download Java
The next thing you need to do is download Java. In this section, we will take you through the steps to download Java.
- Once the download completes, go to the Downloads folder and double-click on the downloaded file.
If prompted to download Java, click “Yes” and follow the instructions to install Java. - After Java is installed, return to the Multiverse installer and click “Next” to continue.
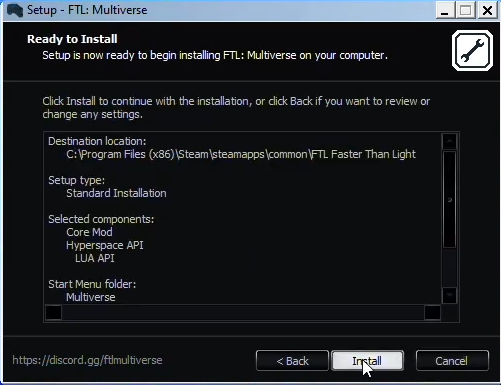
- The installer will detect the default Steam installation location. Click “Next” to proceed.
- Follow the remaining prompts in the installer to complete the installation of Multiverse.
Launch the game
After settings and downloading everything, you have to make some changes in the game properties and Zip the Multiverse 5.3 file. After that, you will be able to play your game. This section describes how to do it.
- Right-click on the game icon and select “Properties.”
- In the “Target” section, add “-DirectX” and click “OK.”
- To ensure FTF launches correctly, navigate to your C drive, then go to “Program Files” and open the “Steam” folder.
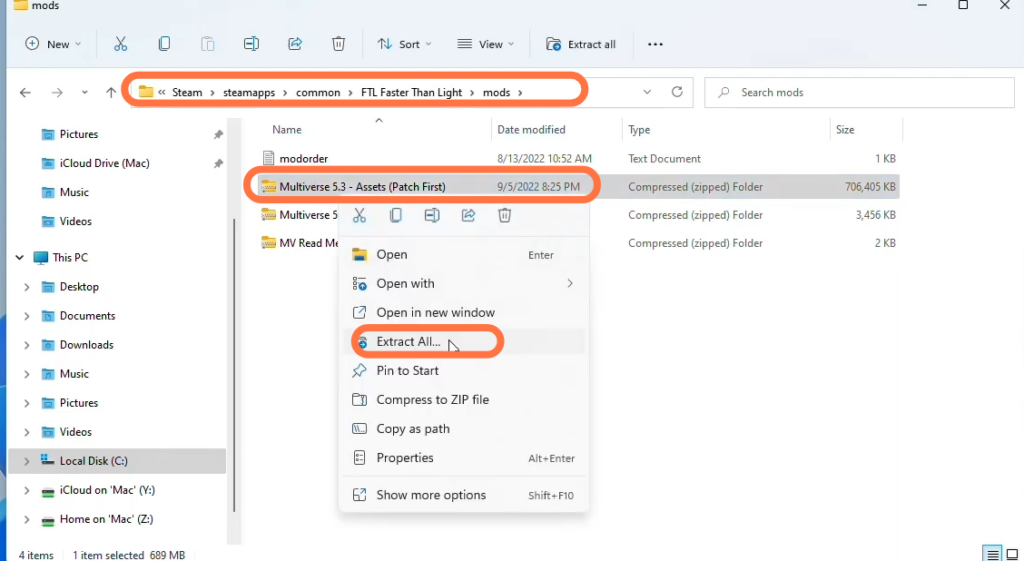
- Enter the “steam apps” folder and locate the “common” folder. Inside, you’ll find the FTL folder. Open it and navigate to the “mods” folder.
- Right-click on “Multiverse” and select “Extract Files.”
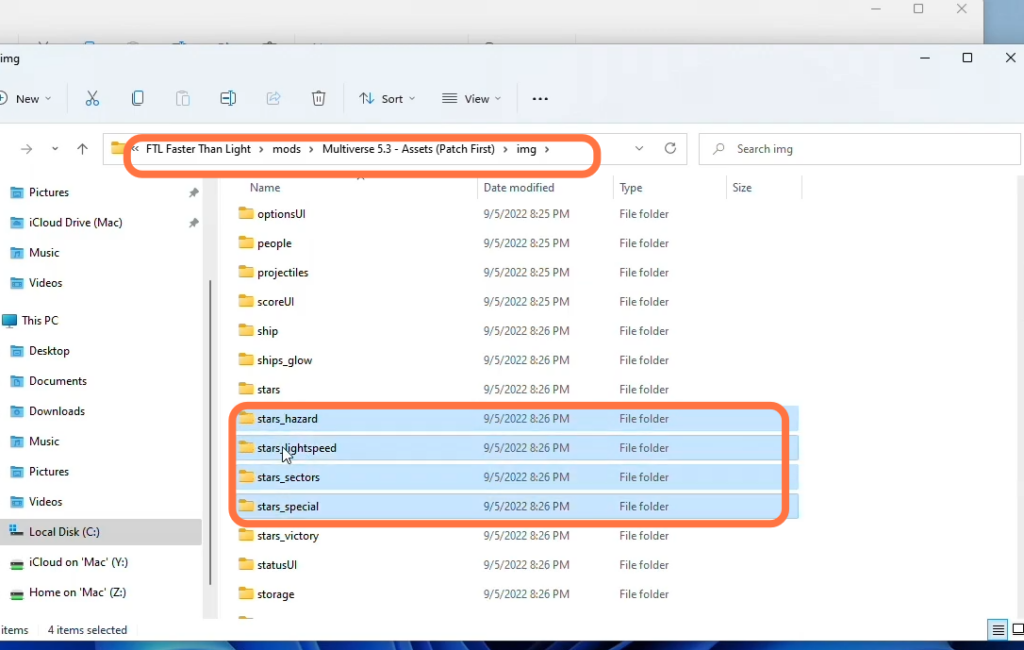
- Open the extracted folder and go into the “images” folder.
- Cut the first four-star folders and paste them onto your desktop.
- Zip the “multiverses 5.3″ file again to create a friendly format mod with the same size.
- Once the zipping process is complete, you will have the new “Multiverse 5.3” mod.
- Right-click on the “Multiverse” game icon on your desktop, and click “Properties.”
- In the “Target” section, add “-OpenGL” and click “OK.”
Launch the game, which will load with some assets removed and open in OpenGL mode.
Your game should now function properly, allowing you to enjoy your gaming experience.