In this brief guide, you will get to know the method to install Mods from the Steam workshop in Halo MCC. It works for the campaign and Multiplayer mods. The MCC update of December has made it much easier to install and play mods in the MCC.
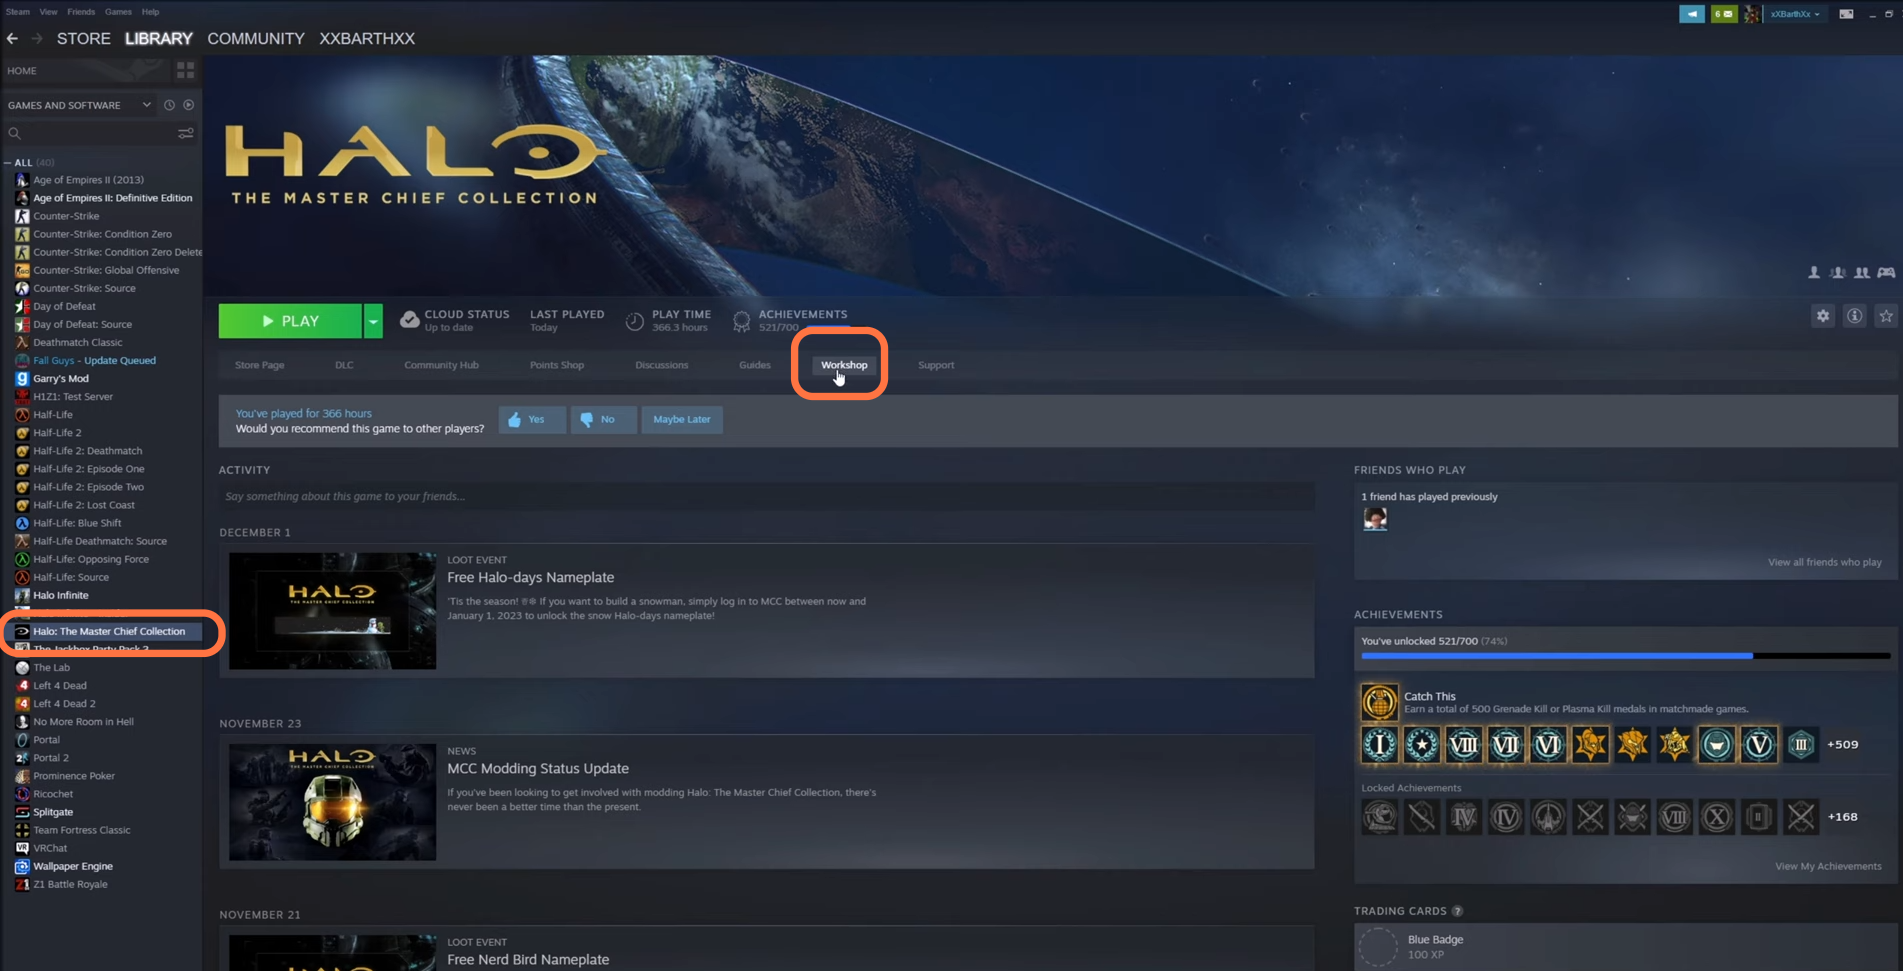
1. The first thing you will need to do is open the Steam library and find the Halo: The master chief collection in the left panel under Library. After that, click on the Workshop Tab.
2. Under this workshop section, you will find a list of every single MCC mod that has been uploaded to the Steam workshop in the Steam community.
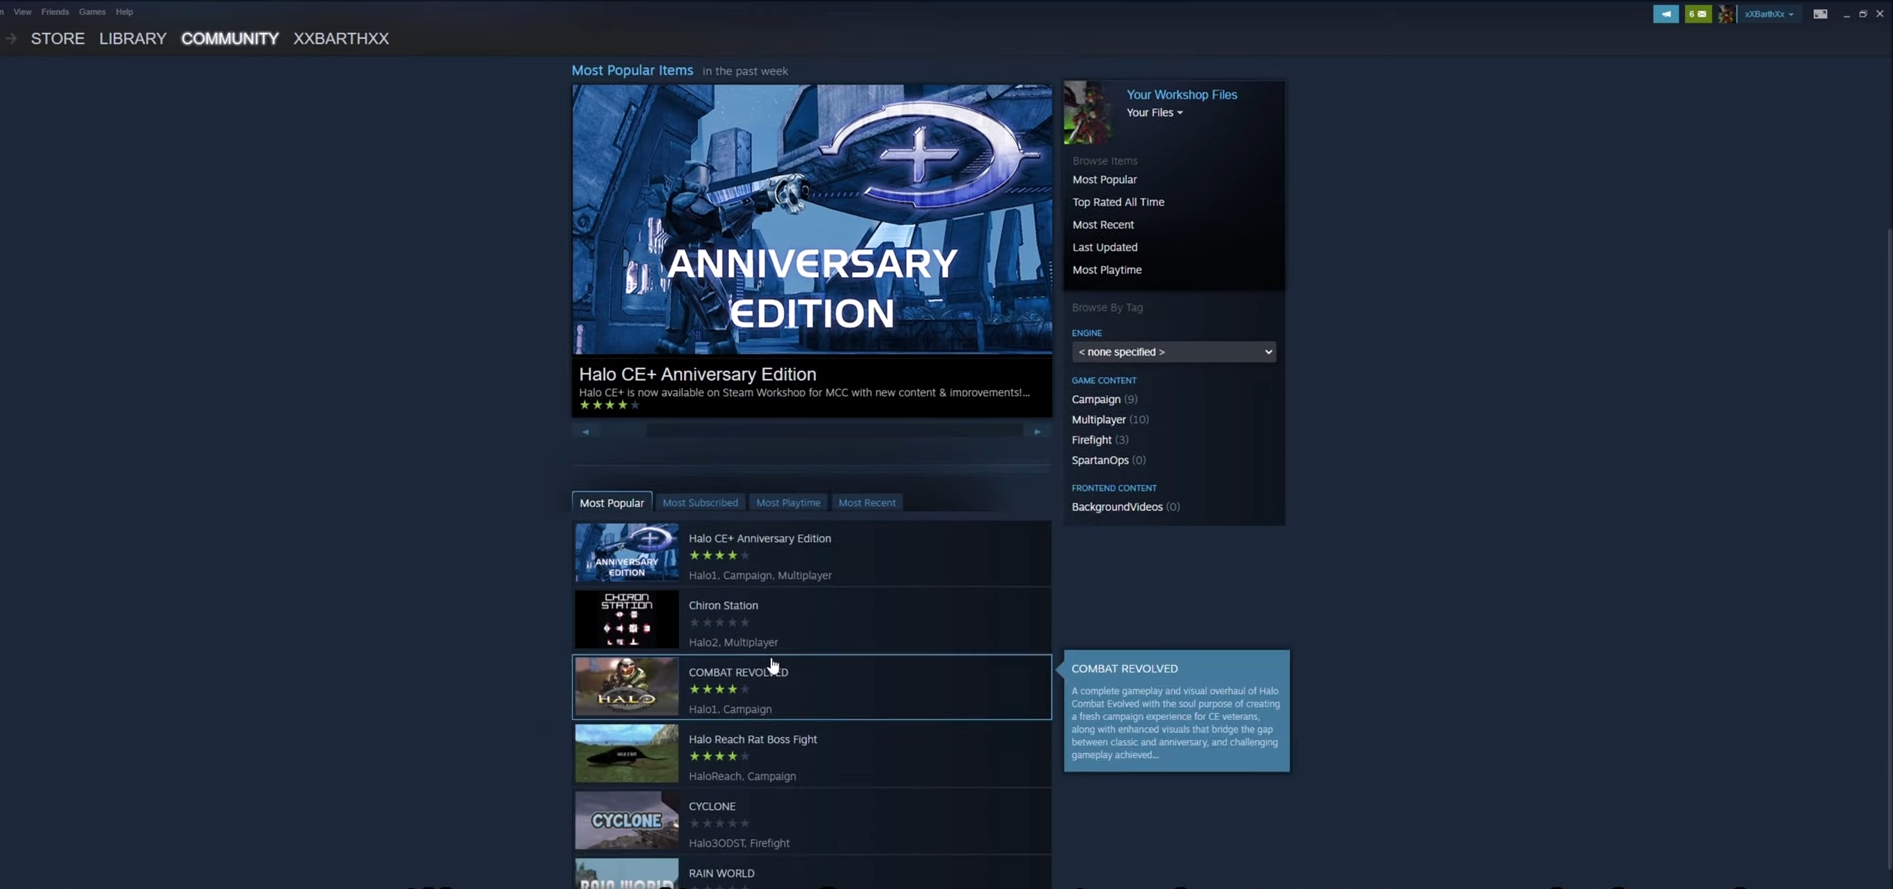
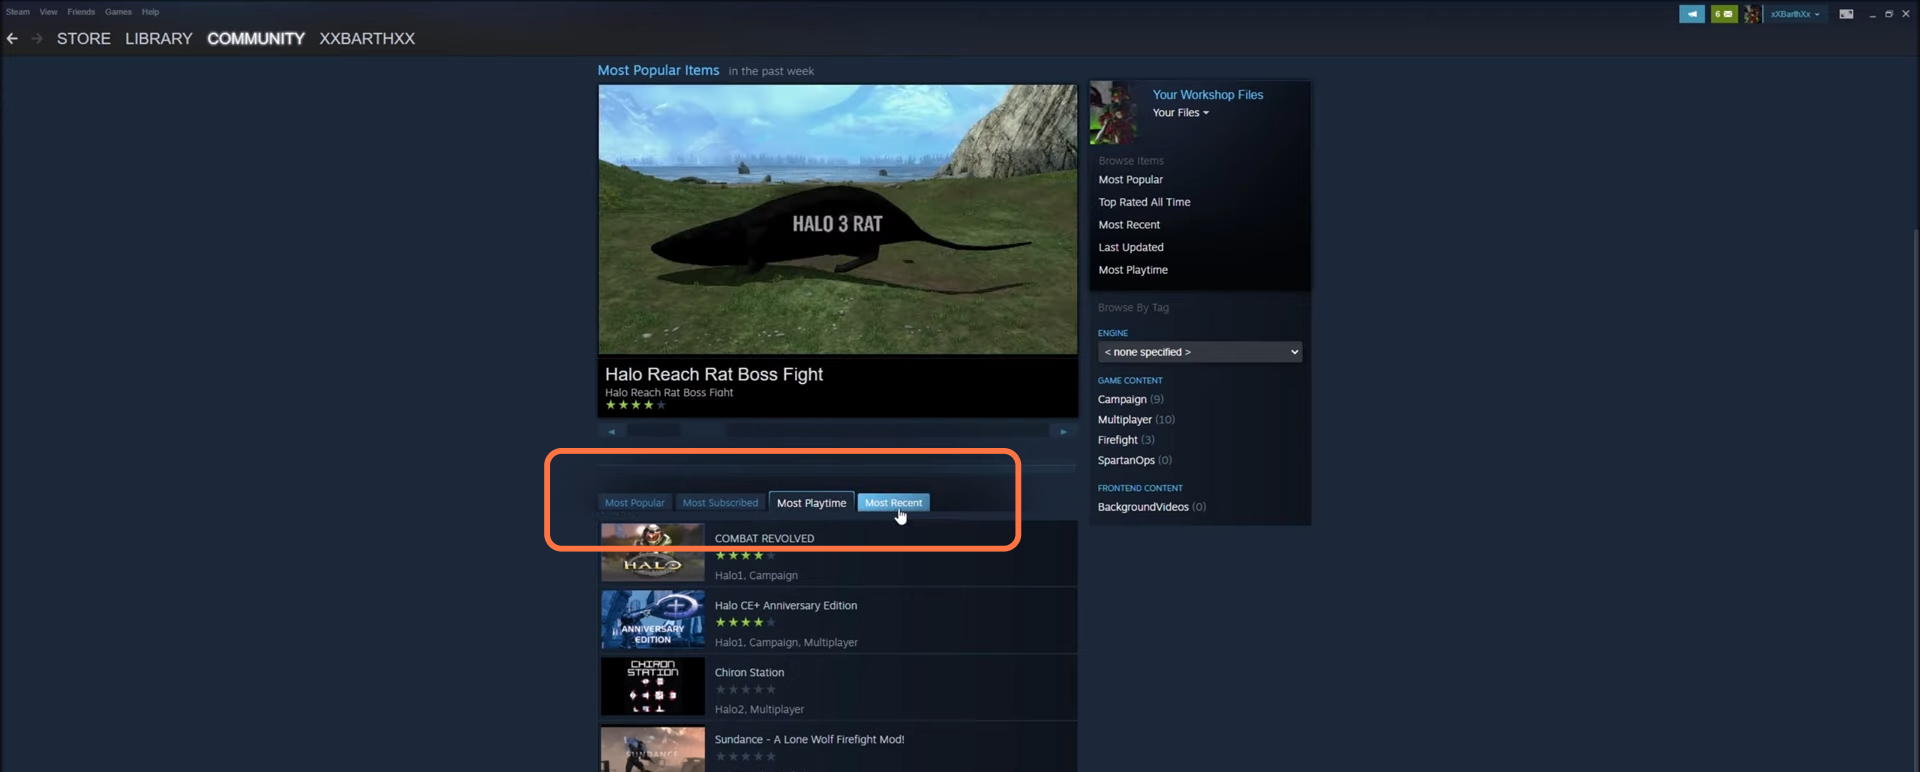
3. You can explore them by different section like “Most Popular”, “Most suncribed”, “Most playtime” or “More recent”.
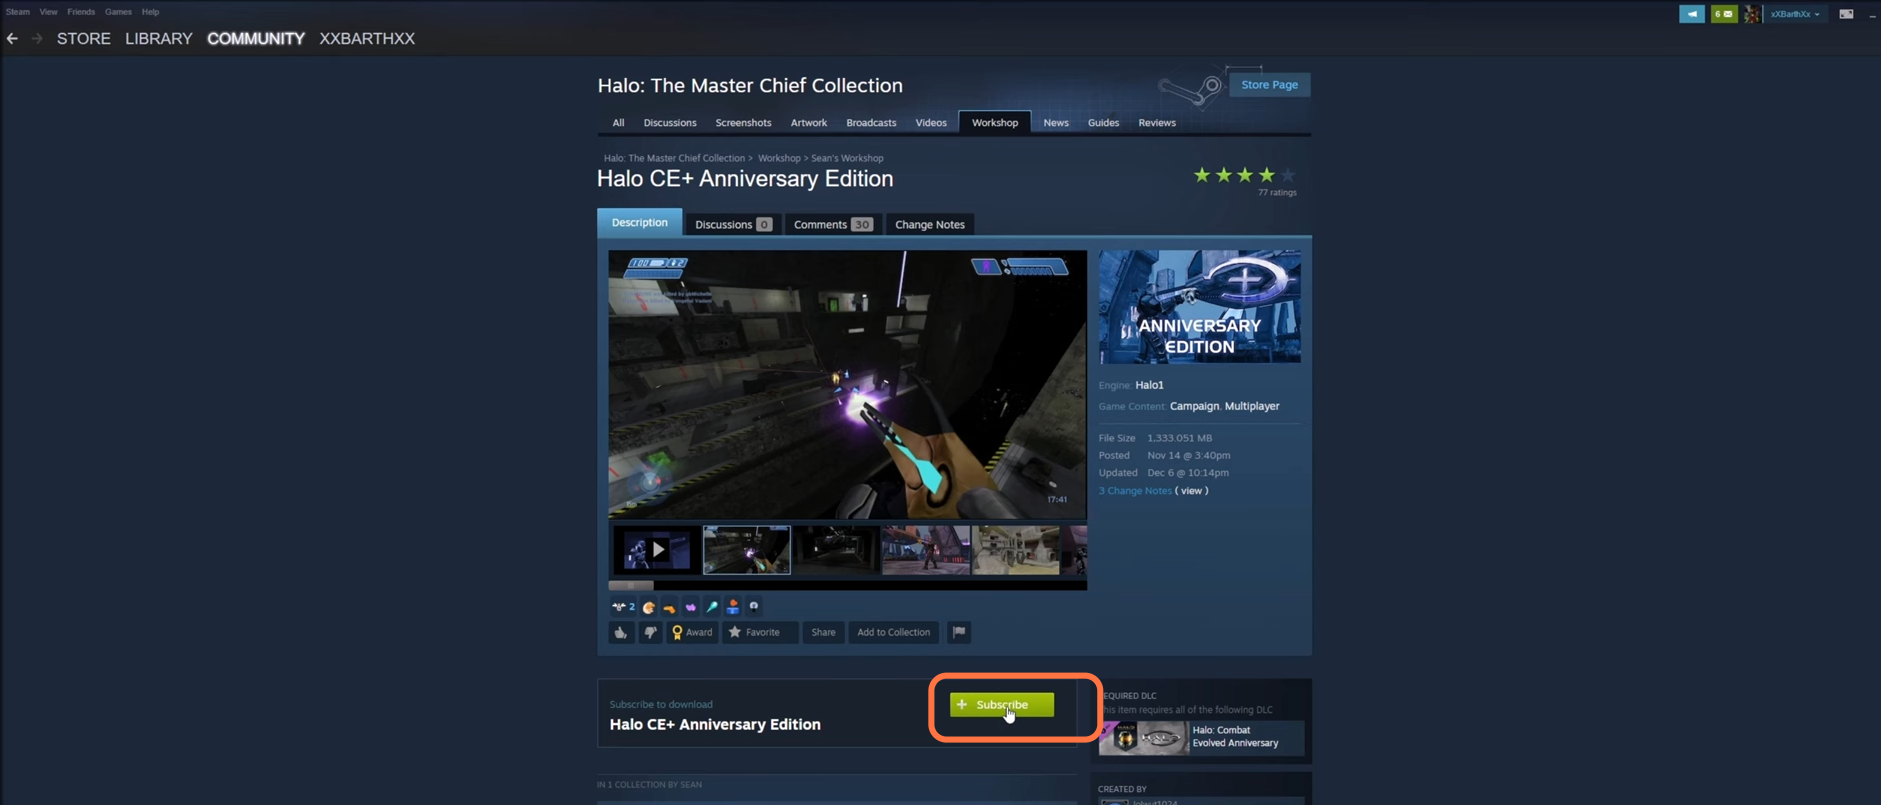
4. You can also narrow the search by selecting an “Engine” (Halo game Type) and “game content” (like Campaign, Multiplayer, Firefight, SpartenOps). As for now, you are going to use the “Halo CE+ Anniversary Edition” mod to install to MCC.
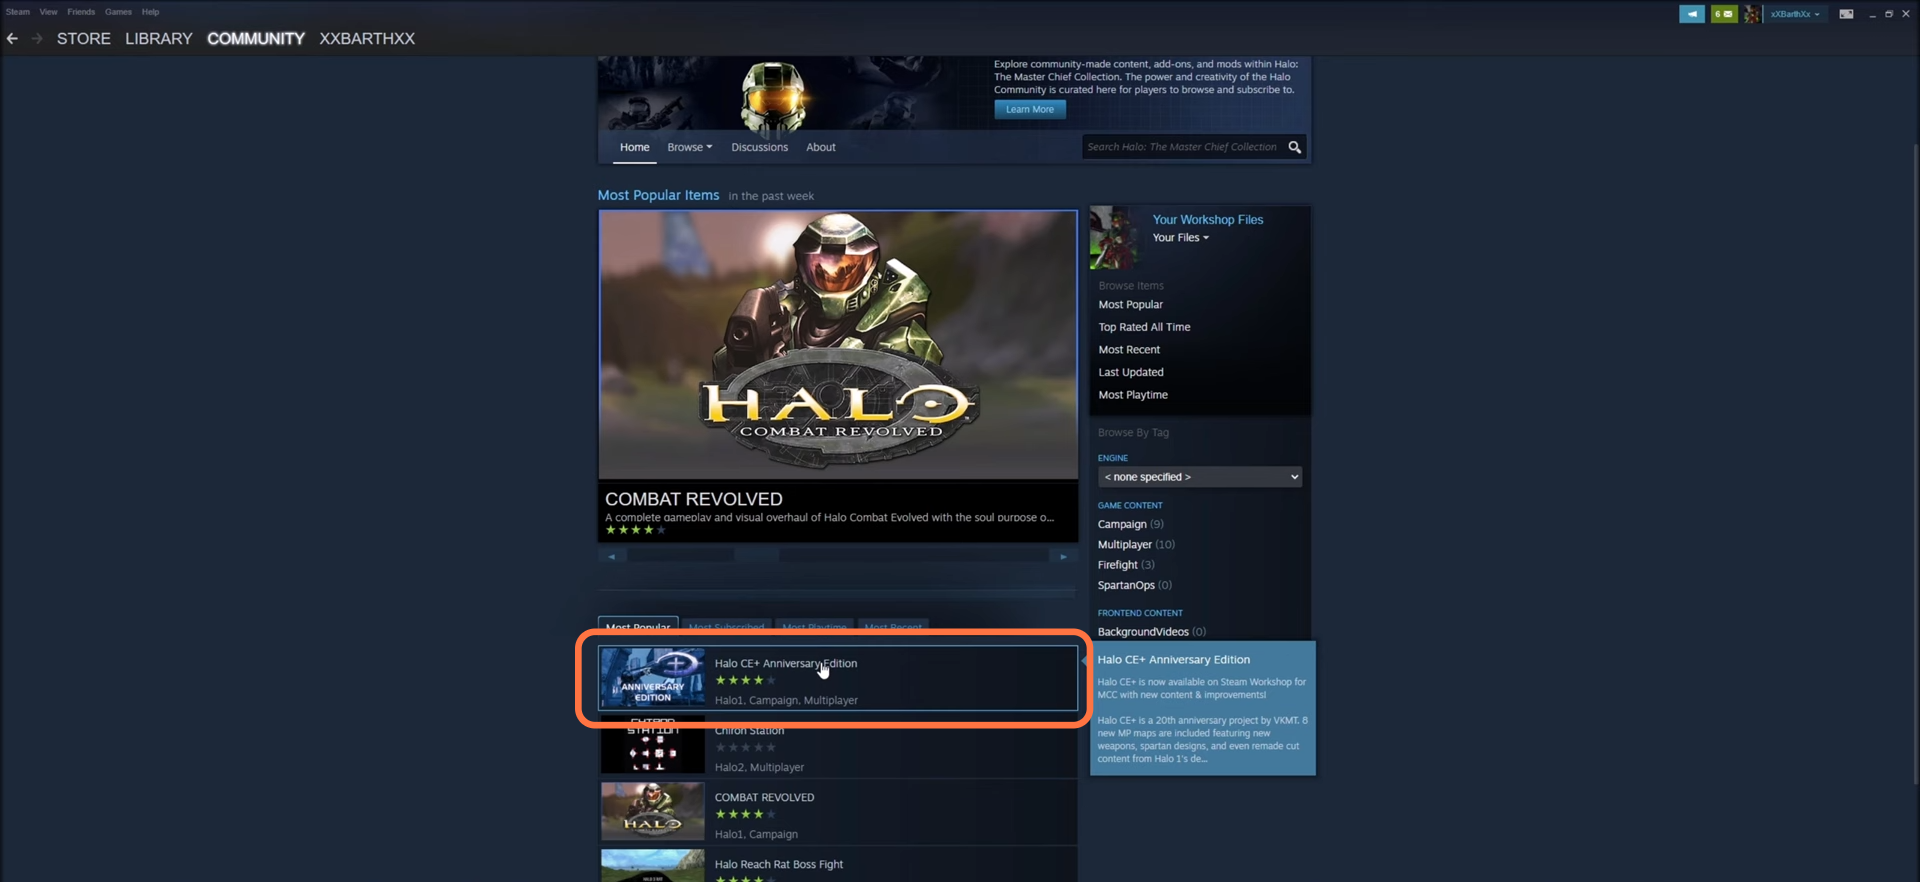
5. To install this mod, you just need to click on the “subscribe” button.
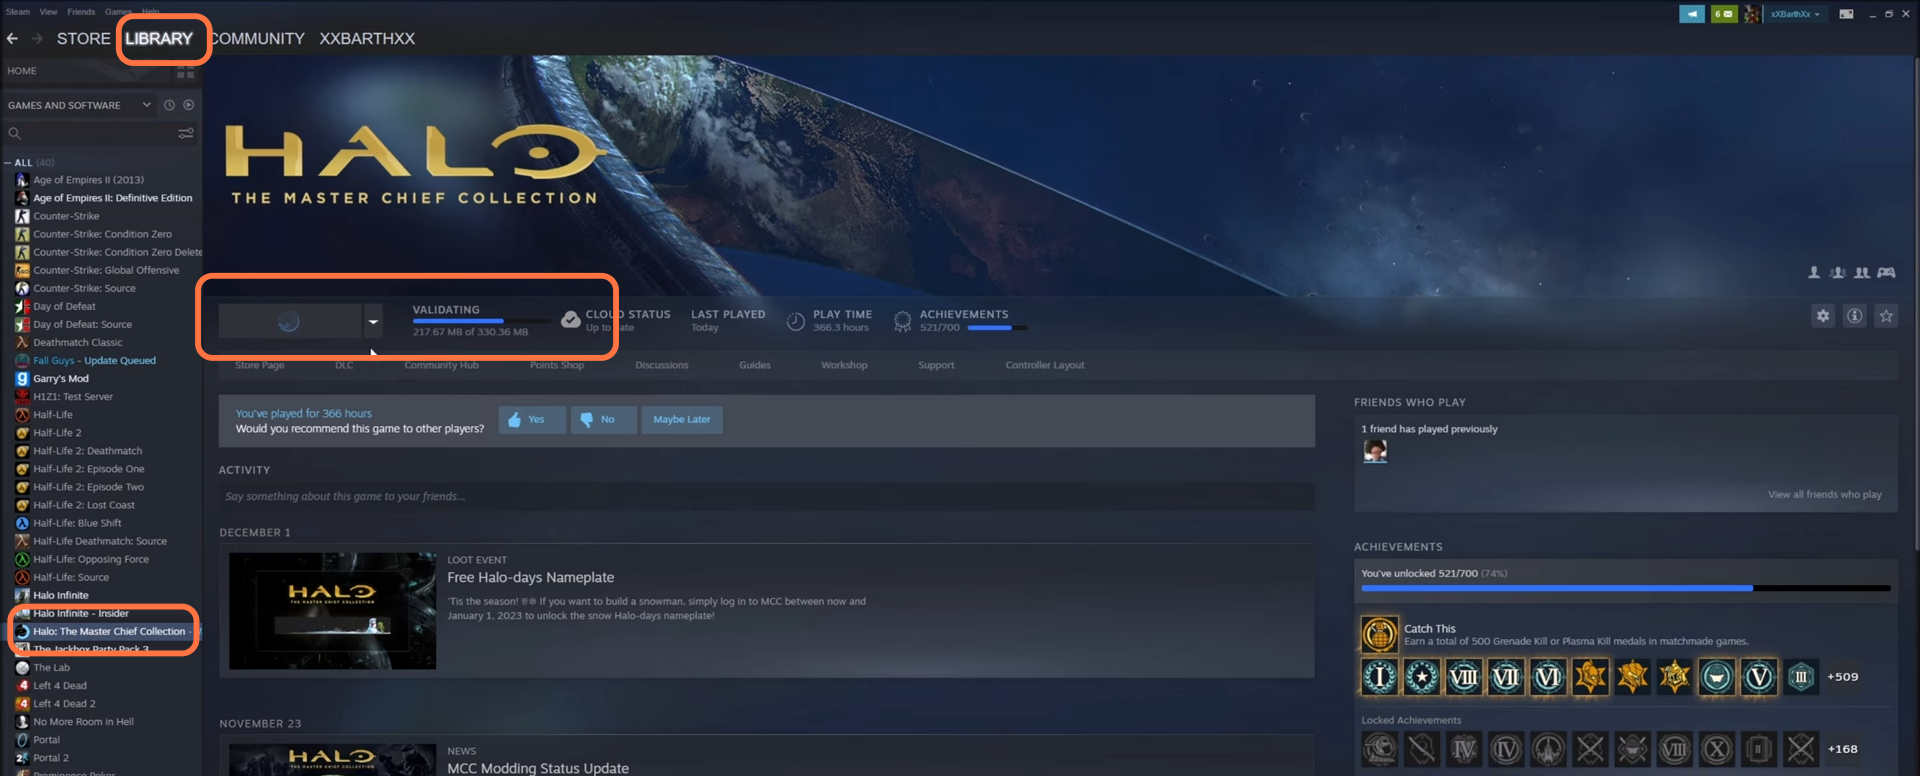
6. After that, go back to the Library and go to Halo: The Master Chief Collection again. You will find the game is validating which means it is applying the mod you just subscribed.
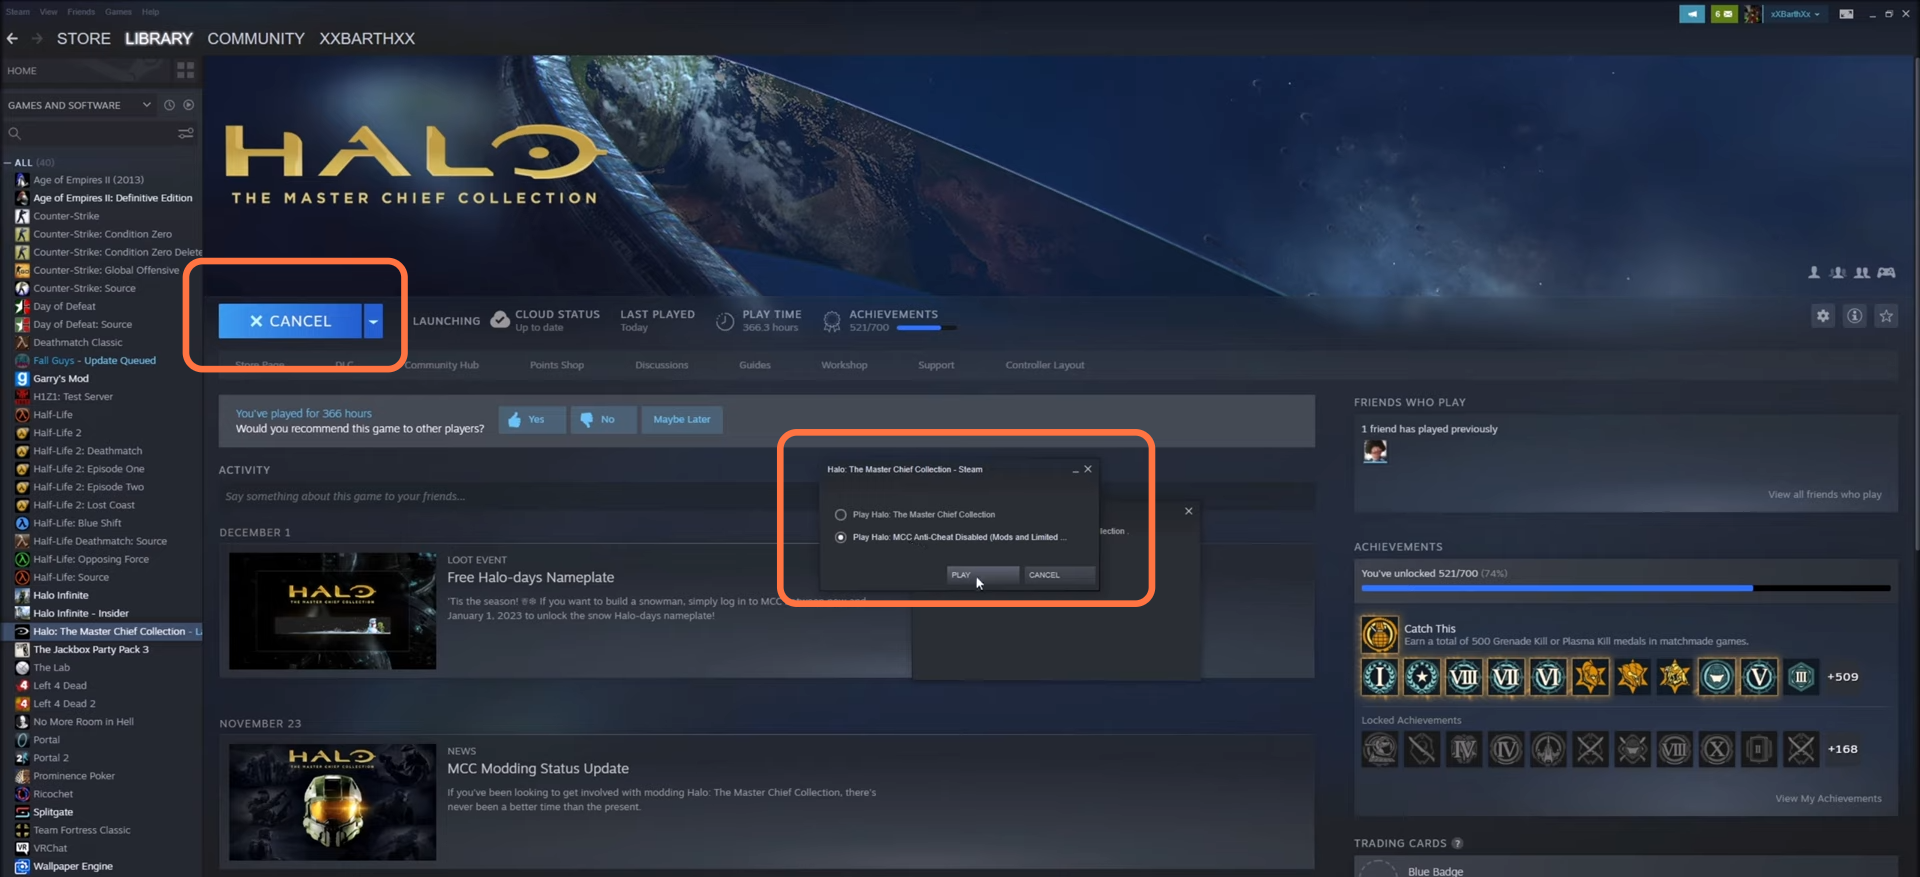
7. Once validation completes, launch the MCC with EAC turned off.
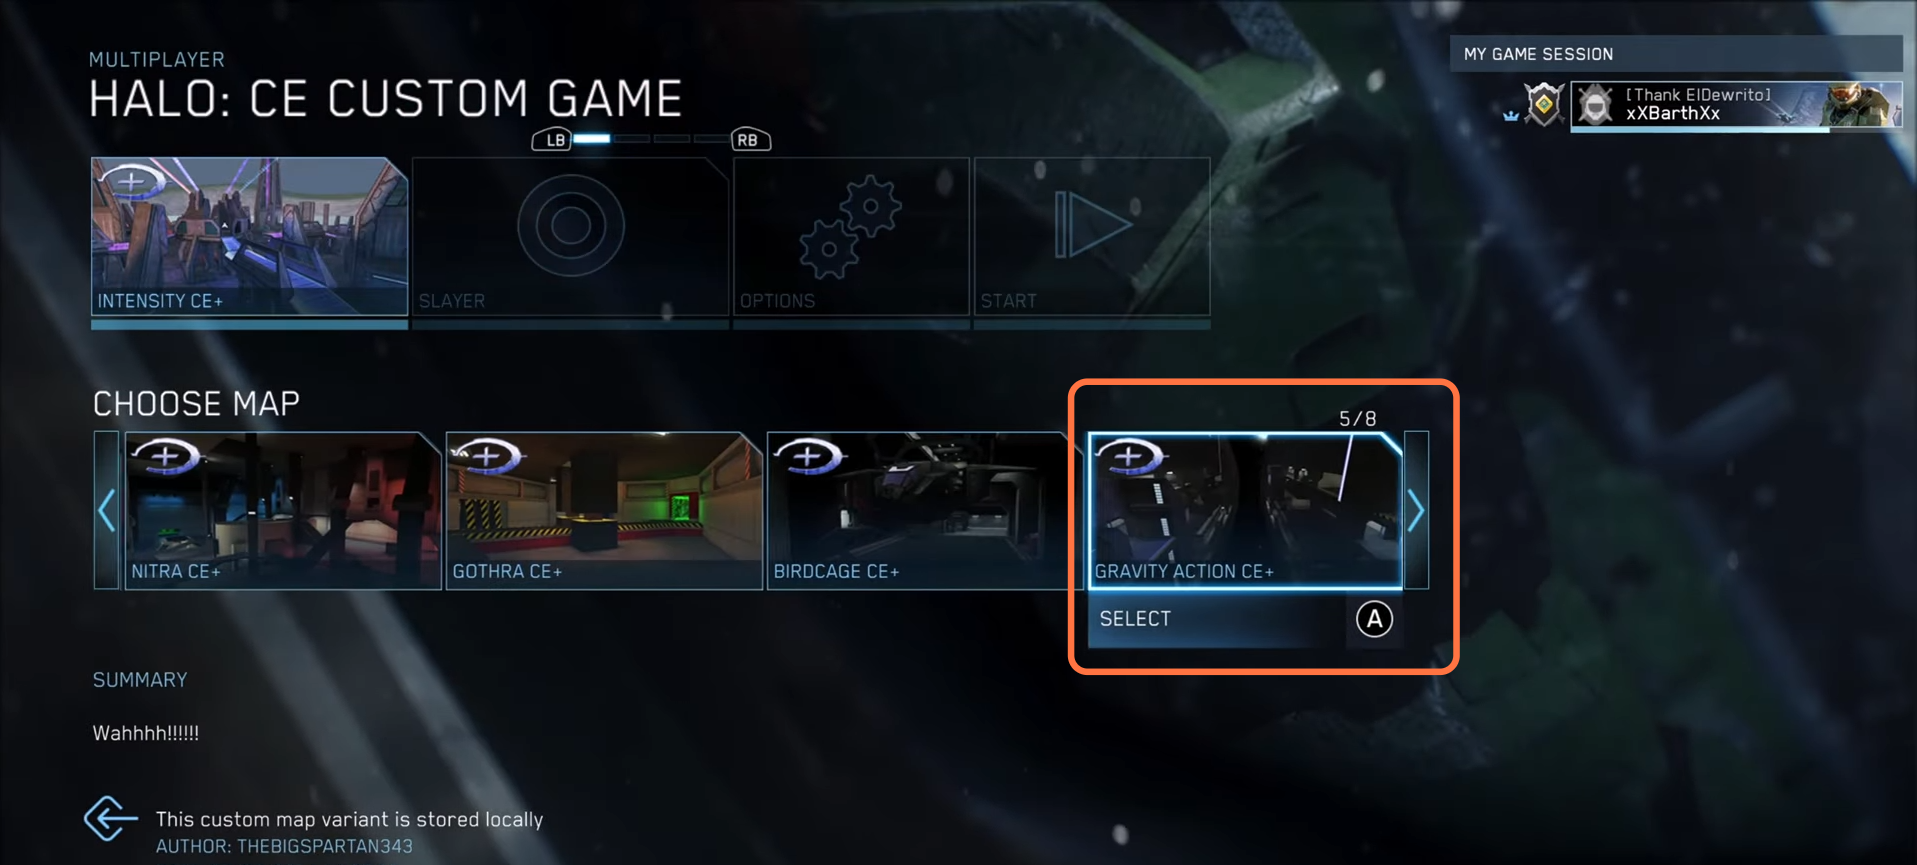
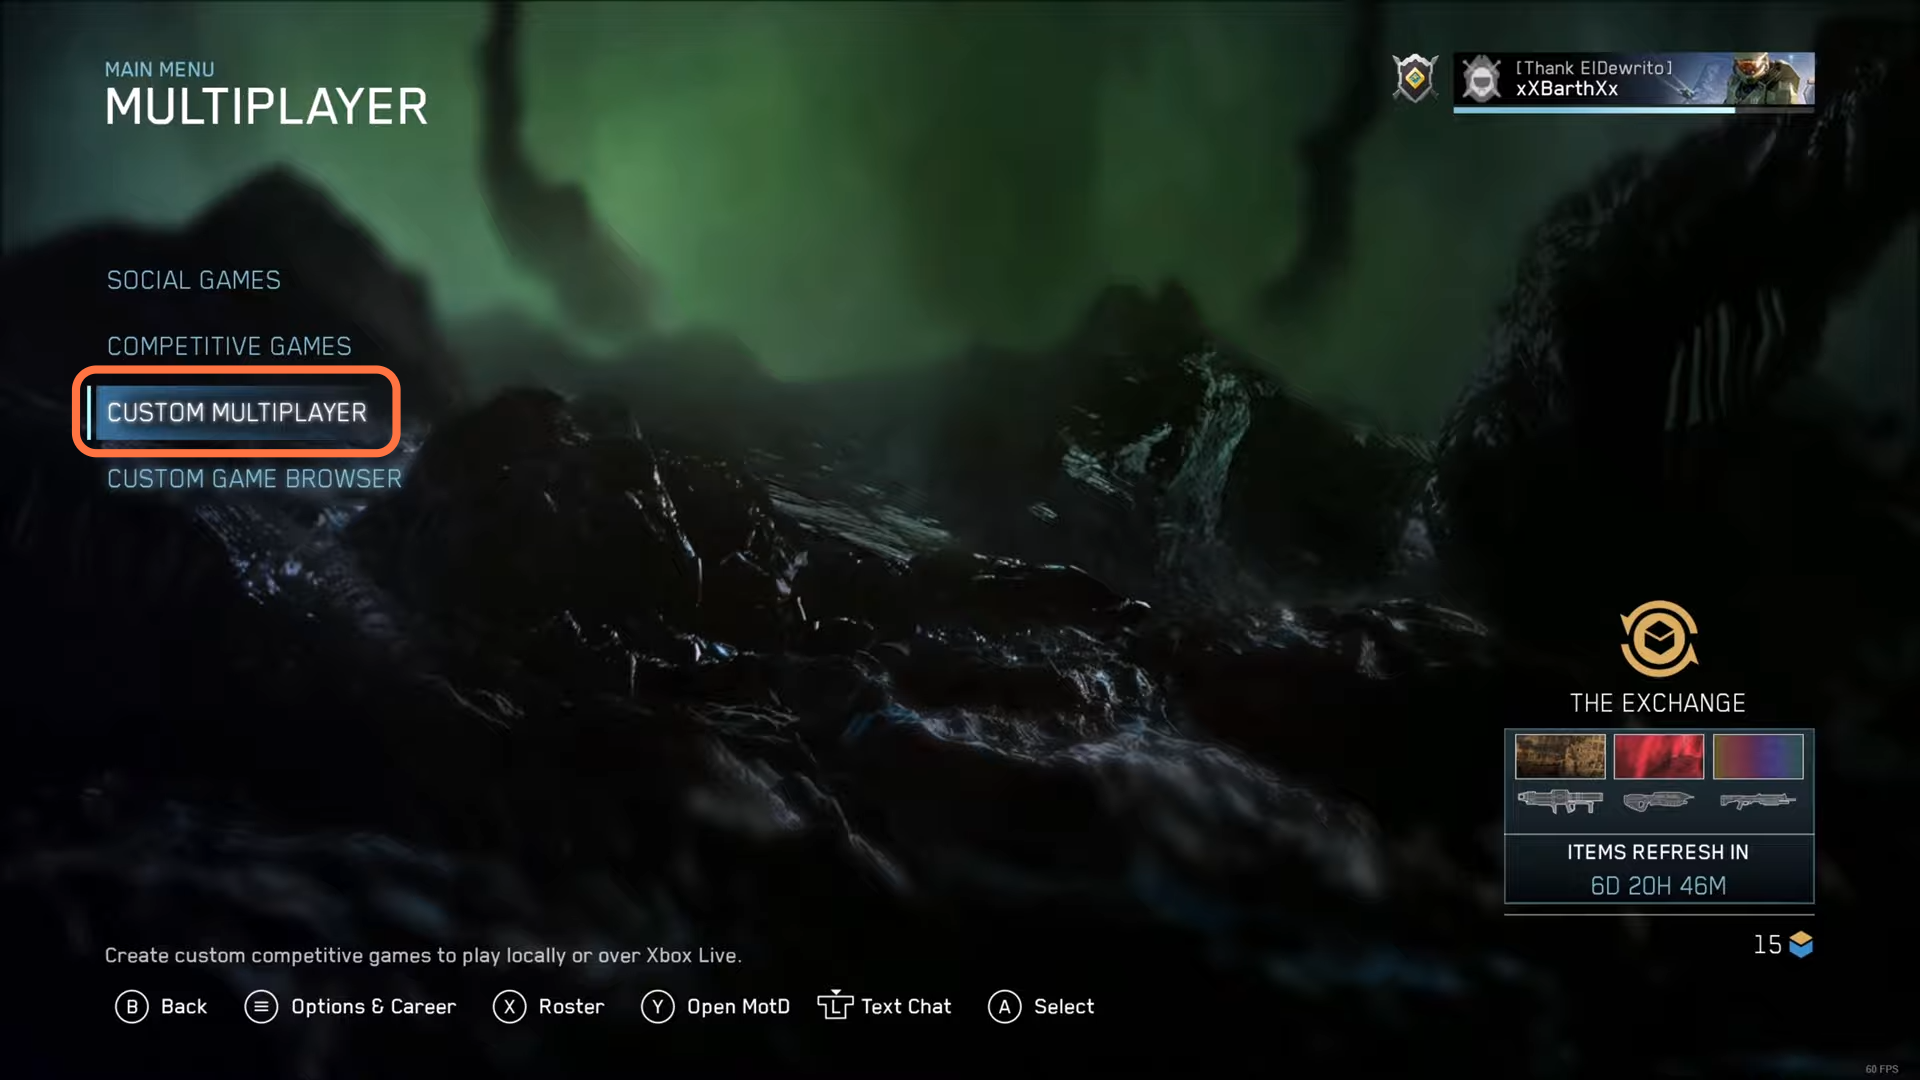
8. Since your subscribed mod was a Halo CE multiplayer mod, so you are going to load up a custom game of Halo CE. Click on the Custome multiplayer and then select Halo: CE.
9. Then you will find that you can choose from two sections the “Built-in maps” or the new “Modded Maps”.
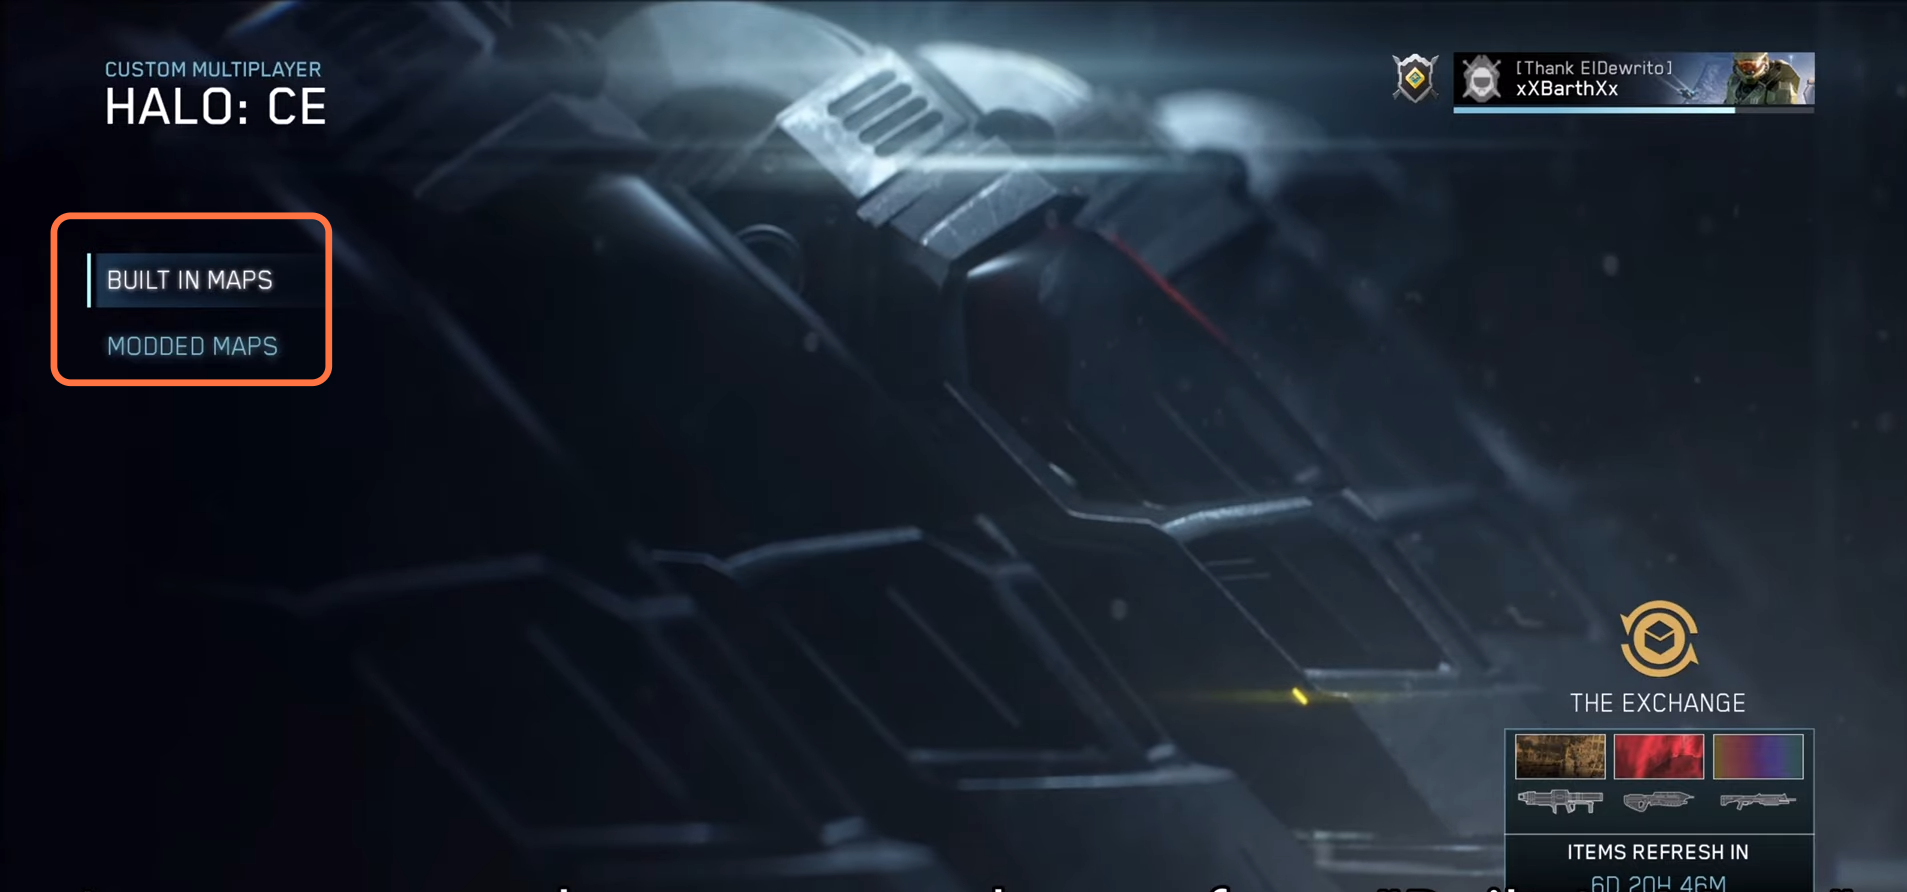
10. Inside Modded Maps, you can see the Halo CE+ Anniversary Edition maps you installed. Now select the map you want to play with and start it up.