The Slice of Life mod is an exciting addition to The Sims 4 game, offering a range of realistic features and enhancements. From lifelike reactions and emotions to a memory system and more, this mod brings a new level of depth and immersion to your gameplay experience. Now you can expect to experience a more realistic sickness system, the inclusion of periods for female sims, the ability for sims to become inebriated, get upgraded smartphones, and expanded WooHoo options. Follow the step-by-step instructions to seamlessly integrate the Slice of Life mod into your Sims 4 game and unlock a new level of excitement and authenticity.
Step 1: Downloading the Mod
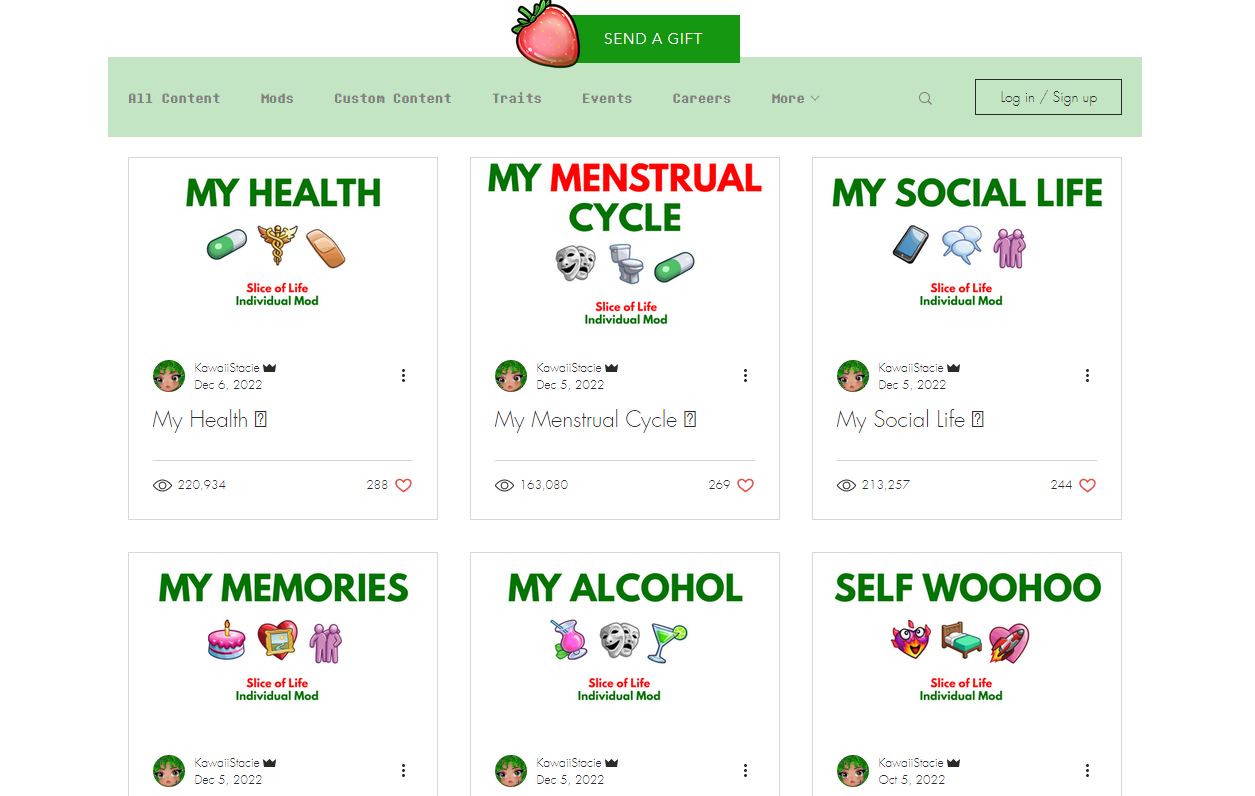
To begin, you have the option to download the Slice of Life mod either as a complete package or as individual add-ons based on your preferences. If you prefer specific features, you can visit the official website at “https://www.kawaiistaciemods.com/downloads/categories/sliceoflife” and download the separate parts accordingly. But don’t forget to install the base game, which is included in The Slice of Life Mod.
Step 2: However, if you want the full mod experience, follow the link “https://www.kawaiistaciemods.com/post/slice-of-life-mod” to download the entire mod for free. Once you’re on the download page, scroll down until you find the “Download Public Release” button. Click on it to initiate the download process.
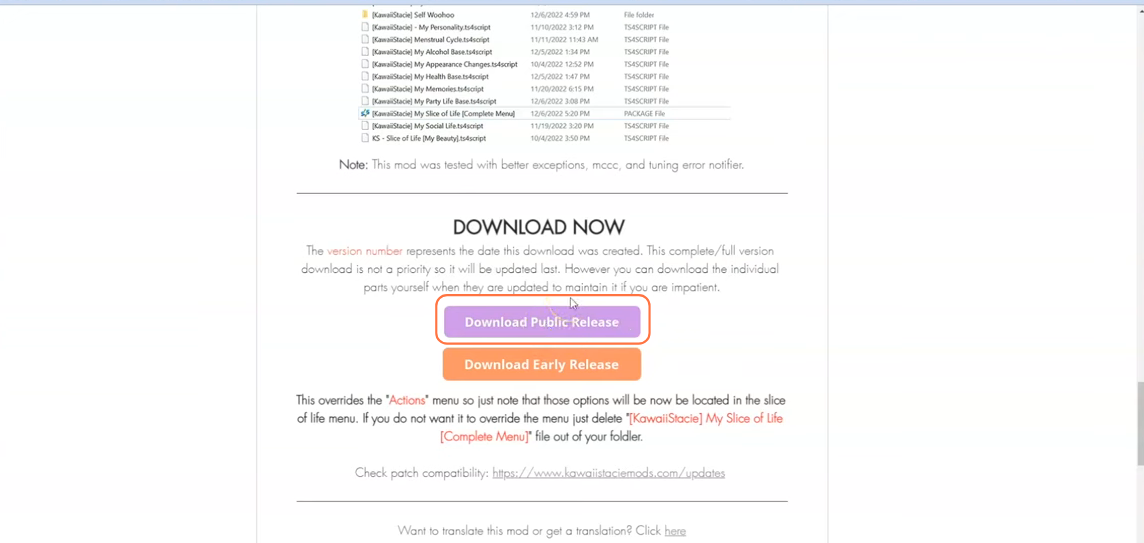
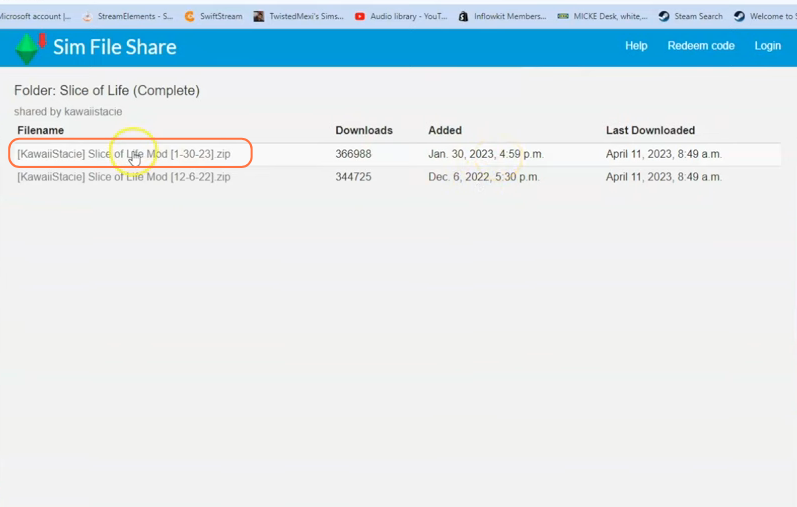
Step 3: Next you will be redirected to a new page where you can choose the latest zip file of the Mod.
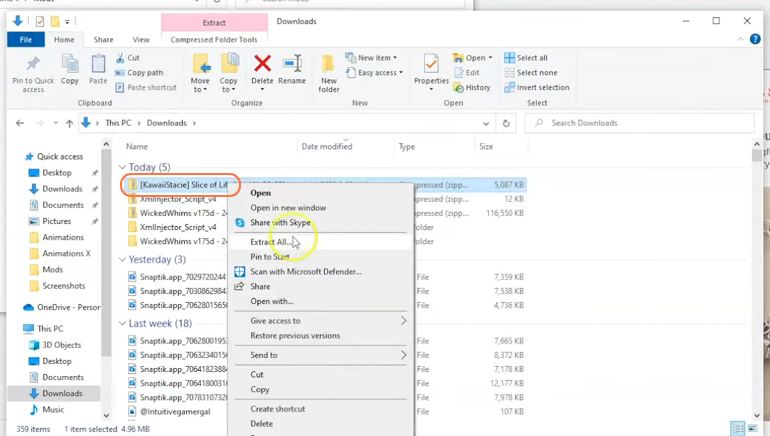
Step 4: Unpacking the Mod Files
Once the download is complete, locate the downloaded file on your computer. Typically, it will be in the Downloads folder. As the file is compressed, you will need a tool like WinRAR to extract its contents. Right-click on the compressed file and select the “Extract All” option. Mac users can simply double-click the file to unzip it.
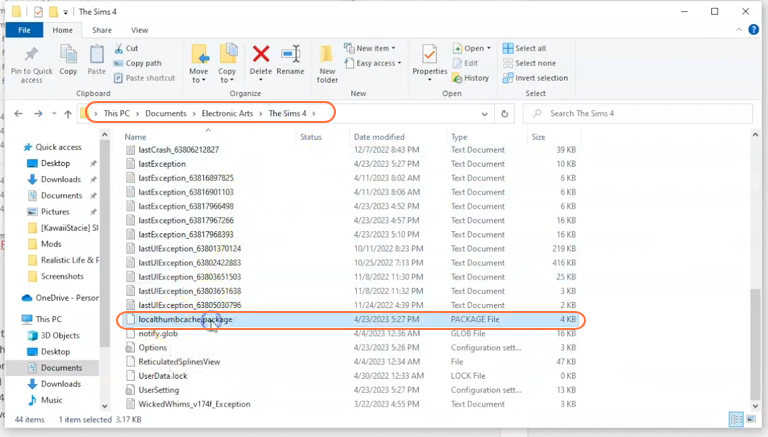
Step 5: Now, open the Mods folder from your Sims 4 game directory. Usually, the game directory can be found at Documents > Electronic Arts > The Sims 4 > Mods. This folder serves as the designated location for all custom content and mods, allowing the game to recognise and utilise them effectively. It’s also recommended to delete the “localthumbcache.package” in your Sims 4 folder. In case you don’t have a Mods folder in your game directory, you can create one yourself as it is required to store the mod files. It’s important to note that if you haven’t installed any mods before, you need to load up the game at least once and then exit to generate the necessary folders, such as Documents and Electronic Arts, for a seamless mod installation process. Additionally, ensure that the game is not running while you install the mod.
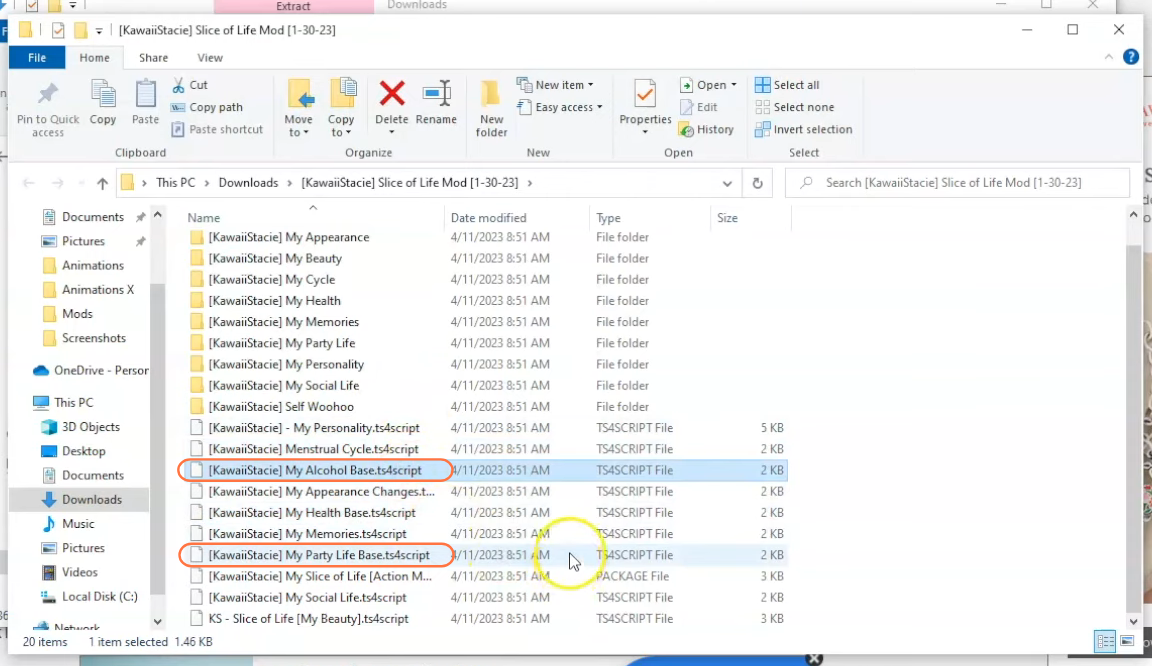
Step 6: Now that your game directory is prepared, open the extracted folder of the Slice of Life Mod. Inside, you will find the required TS4 scripts and other files for each specific mod. Fortunately, the base mod and its dependencies are already included, so you don’t have to worry about downloading them separately. You’ll find the Base files for all the add-ons like health base mod, the alcohol-based mod, and more already bundled within the Slice of Life mod. These are the base game files require to run these specific mods.
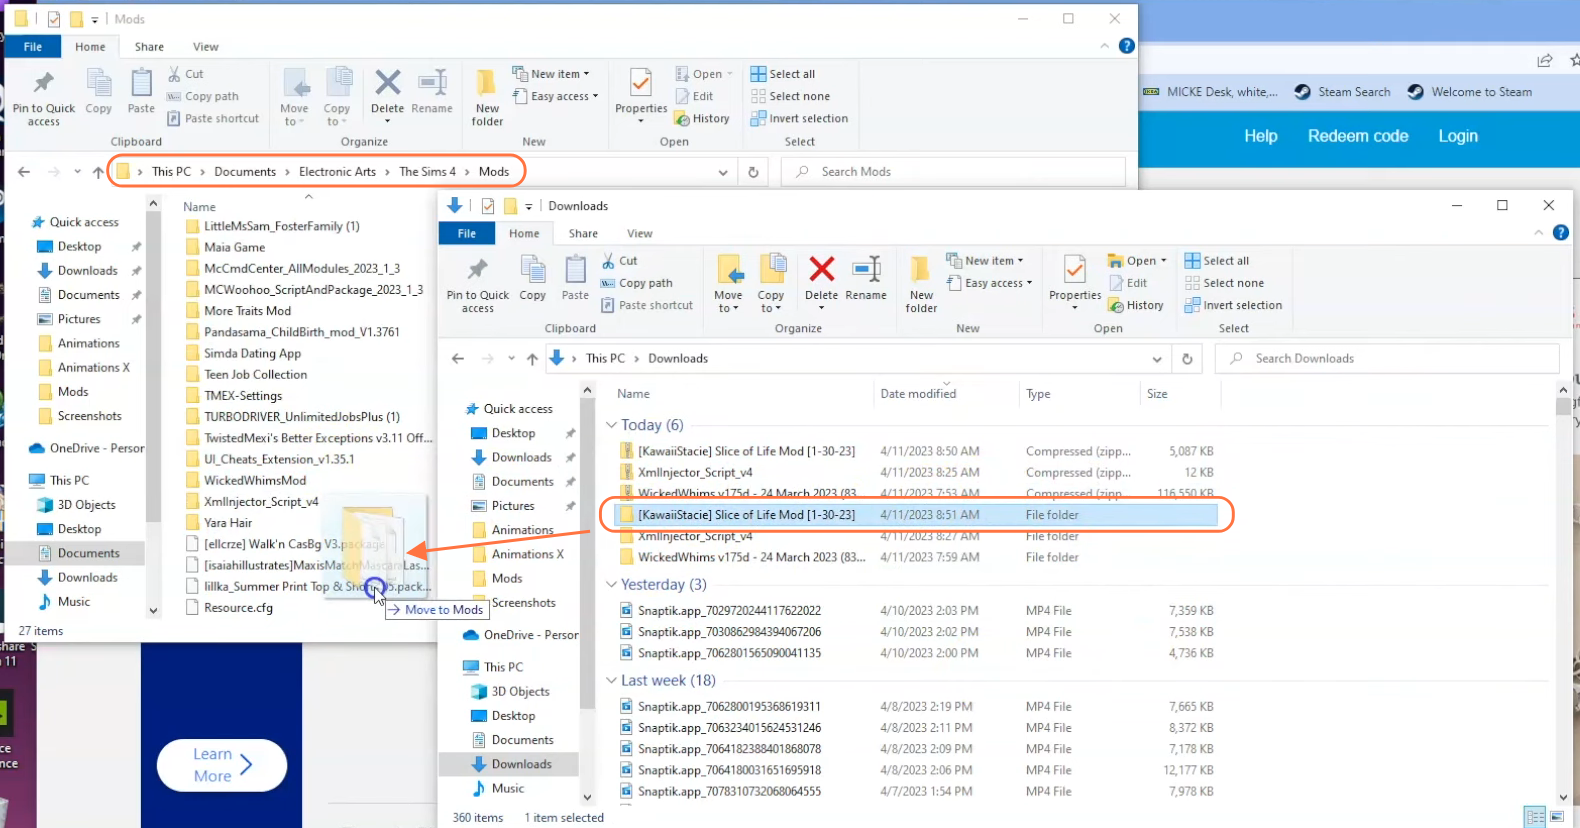
Step 7: Moving the Mod Files
Drag and drop the extracted folder of the Slice of Life Mod into the Mods folder in your Sims 4 directory. This folder contains all the necessary package, TS4 script, and Base.ts4script files. By placing the mod files in this location, you ensure that they are installed correctly and ready to be utilised in the game.
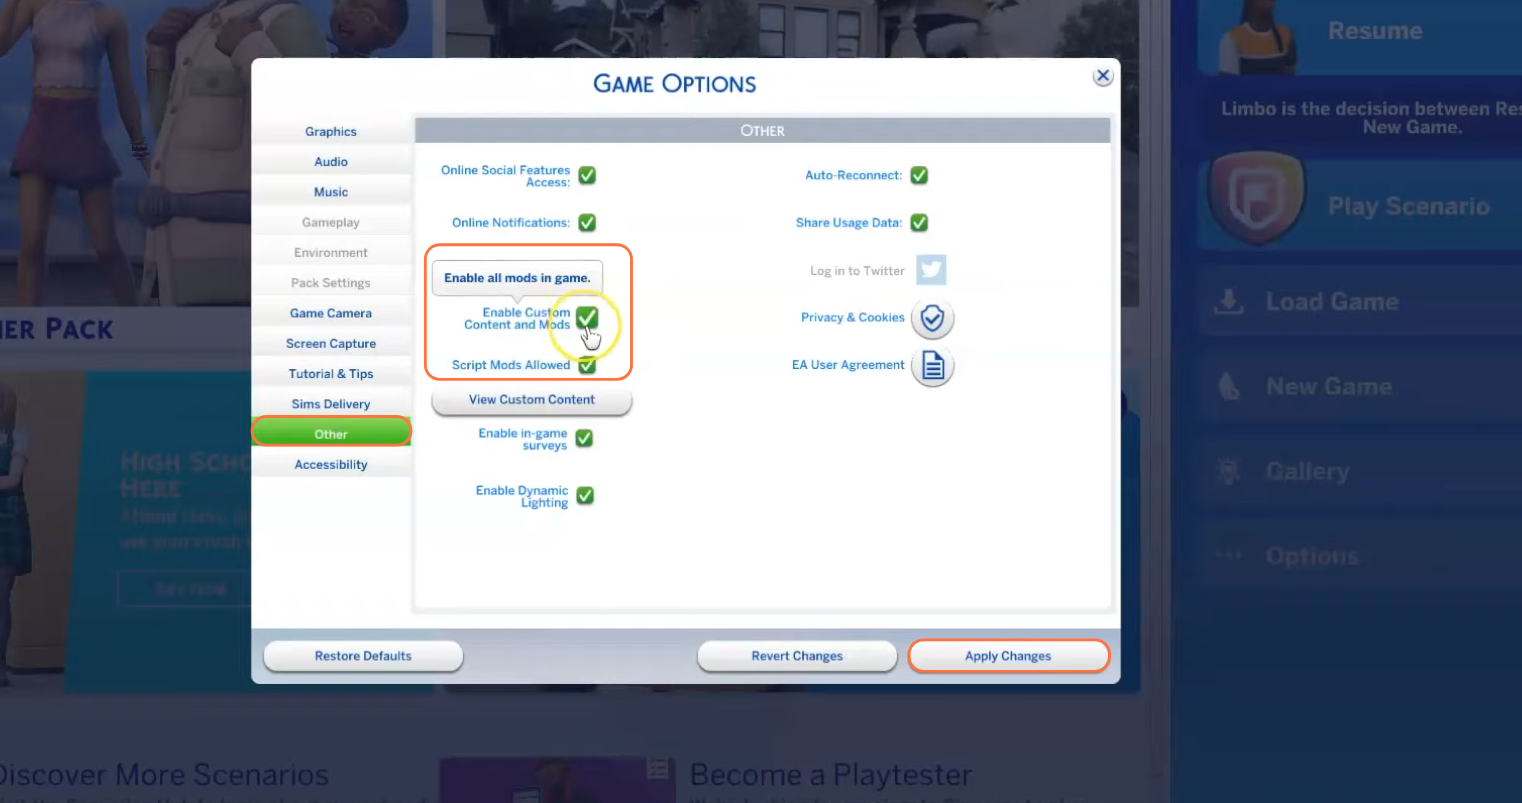
Step 8: Enabling Mods in Game Settings
To ensure the proper functioning of the mod, it’s essential to enable the “mods” and “script mods” options in The Sims 4 game settings. Launch the game and click on the “Options” tab, followed by “Game Options”. In the “Other” tab, check the boxes for “Enable Custom Content and Mods” as well as “Script Mods Allowed”. Once you’ve made these selections, remember to click the “Apply Changes” button located at the bottom right corner of the screen.