Razer Synapse is a software tool for managing Razer devices. This guide will let you know how to fix the “Razer Synapse failed” error to install in Windows 11. There are multiple methods to resolve this problem.
1.Run Razer Synapse’s installer as administrator
In this section, we will take you through the steps to run the Razer Synapse installer as an administrator on your computer. By following these steps, you can ensure a smooth installation process.
- The first thing you will need to do is locate the Razer Synapse installer on your computer and right-click on it.
This action will open a drop-down menu. - Once the drop-down menu appears, select the option “Run as administrator.”
It will enable you to install it without encountering any issues.

2. Close Razer background process
This section describes how to close the Razer background process using the Task Manager. If you are facing issues with the Razer installer and need to terminate any running Razer processes, following these steps will help you achieve that.
- You have to find the Windows button at the bottom of the screen and right-click on it.
- When the pop-up menu appears, find and select “Task Manager” from the list of options.
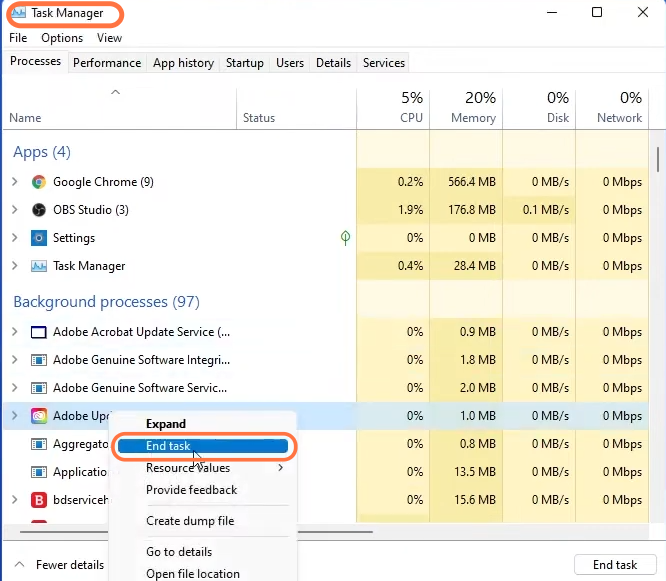
This will open the Task Manager window. - In the Task Manager window, navigate to the “Processes” tab and look for any Razer processes listed there.
- Once you have identified a Razer process, right-click on it and select the “End Task” option.
This action will close the Razer process. - After ending the Razer process, reopen the Razer installer and check if the problem you were experiencing with the installer is now resolved.
3. Install .NET Framework 4.8
This section will take you through the steps to install .NET Framework 4.8 on your computer. The .NET Framework is a software platform required to run certain applications and programs.
- You will need to open up your web browser to download the .NET Framework 4.8.
- Once you have reached the web page, navigate to the section mentioned as “Runtime” and click on the Download.NET Framework 4.8 Runtime button.
This action will initiate the download process of the .NET Framework 4.8.

- Wait for the download of the .NET Framework installer to complete and then locate the downloaded installer file on your computer.
- Double-click on the .NET Framework installer file and click on the “Continue” button. Follow the on-screen instructions provided by the installer to install it.
- Once the installation of the .NET Framework is finished, reopen the installer and check if the problem is resolved.

4. Uninstall Razer device drivers before installing Synapse
In this section, we will take you through the steps to uninstall Razer device drivers before installing Razer Synapse. By following these steps, you can ensure a clean installation of Razer Synapse and resolve any driver-related issues.
- Locate the Windows button at the bottom-left corner of your screen and right-click on it.
This action will open a pop-up menu. - From the pop-up menu, click on the option called “Device Manager.”
- Within the Device Manager window, locate the category that includes your Razer device. Click on the arrow next to the category to expand it and reveal the devices within.
It could be listed under “Keyboards,” “Mice and other pointing devices,” or another relevant category. - Once you have expanded the category, right-click on the specific Razer device that is causing problems. From the right-click menu, select the “Uninstall Device” option.
- Once the new window opens up, checkmark the “Attempt to remove the driver for this device” and hit the Uninstall button.
- After that, proceed to install the Razer Synapse software and then reconnect your Razer devices to your computer to reinstall the drivers.

Following these steps should help you address any issues with your Razer device.