In this guide, you will get to know how to increase the FPS of GTA 5 in FiveM. You have to Update Windows, apply essential Windows settings, update the GPU driver and download GTA 5 FPS pack to get the best performance.
Windows Update
In this section, we will take you through the steps to update Windows on a computer. The process involves opening the Start menu, searching for “update” in the search bar, selecting “Windows Update settings” from the search results, and checking the update status.
- You will need to open the Start menu on your computer and search “update” in the search bar.
- Among the search results, click on the option labelled “Windows Update settings.”
Windows will check for any available updates and display the current update status. - Make sure that your Windows is up-to-date by checking the update status. If there are updates available, you have to download and install them.

Essential Window settings
This section describes how to set up essential Windows settings. The user needs to apply the recommended settings for better performance.
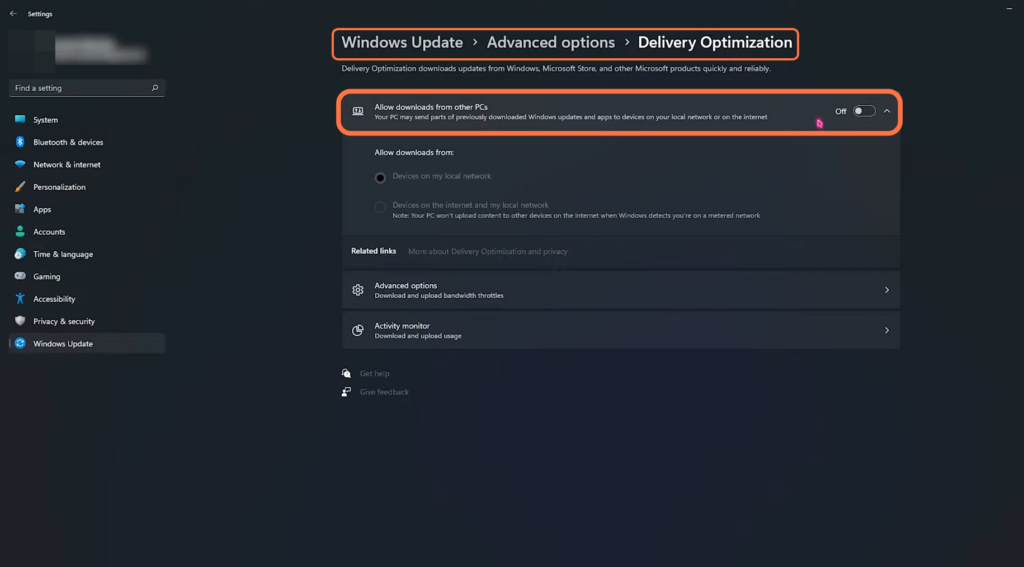
- In the Windows Update settings, you have to go to Advanced options.
Clicking on it will take you to a new screen with additional update settings. - Tap on Delivery Optimization and turn on the “Allow downloads from other PCs” option.
Enabling it will save a lot of bandwidth.
- In the search bar on the left-hand side of the Start menu, type “game mode“.
It will take you to the game mode screen. - Once there, you have to enable the Game Mode.

- After enabling Game Mode, look for the “Graphics” option located just below it and click on it.
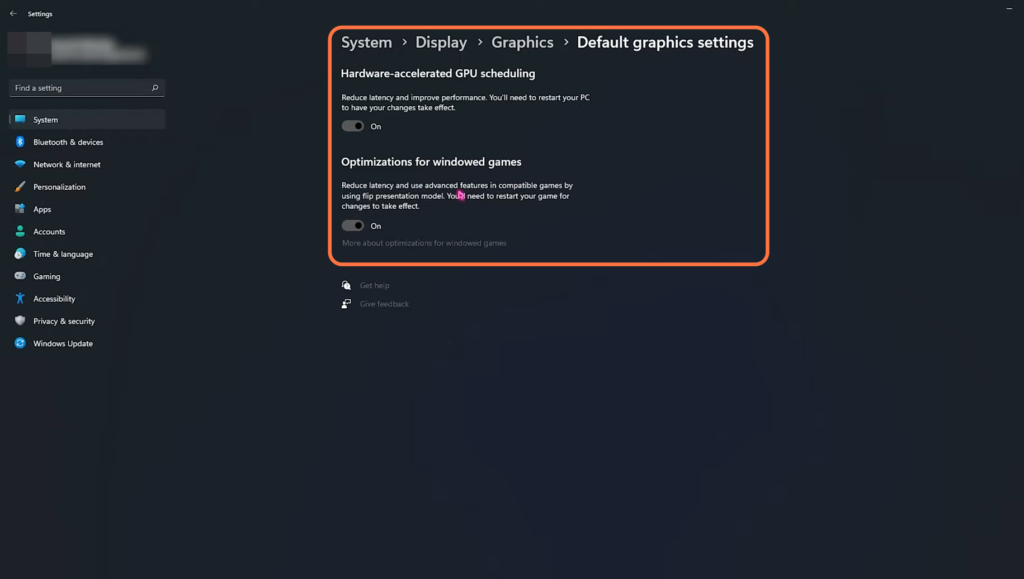
This will take you to a new screen with additional graphics settings. - On the new screen, click on the option called “Default Graphics settings“.
- You need to enable Hardware-accelerated GPU scheduling and Optimizations for windowed games.
These settings will reduce latency and improve the game.
- Now go back to the Graphics window, look for a button labelled “Browse” and click on it.
A file explorer window will open. - Use the file explorer to navigate to the installation directory of GTA 5 on your computer and select GTA 5 by clicking on it.
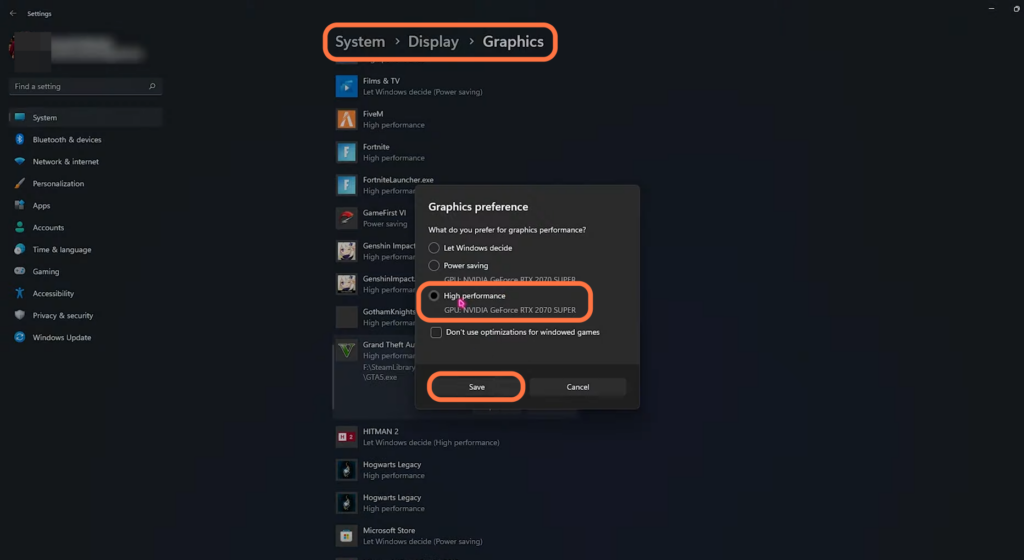
- Now, scroll down within the Graphics window until you find GTA 5 listed in the list of games and select it. Go to Options. and select “High Performance” as the Graphics preference.
This setting ensures that the game utilizes high-performance graphics settings for improved visuals and performance. - After that, hit the “Save” button.
- In the search bar on the left-hand side of the Start menu, type “storage sense“.
- Once you reach the Storage Sense screen, you need to apply the same settings as shown in the image below.
You will get better performance after applying these settings.

Update GPU driver
This section will take you through the steps to update the graphics card driver for optimal GPU performance. It is essential to ensure that the latest driver is installed for the best results.
- You have to update your graphics card driver to get the best result for the GPU. If you are using, an Nvidia graphics card, open the GeForce Experience application on your computer.
- Once the application is open, navigate to the “Drivers” tab.
The application will display information about your current driver version in this tab. - You need to make sure that you have to latest driver installed.

Nvidia Control Panel settings
In this section, we will take you through the steps to configure Nvidia Control Panel settings for optimal performance with an Nvidia graphics card.
You must configure the graphics card control panel settings to get the best possible performance.
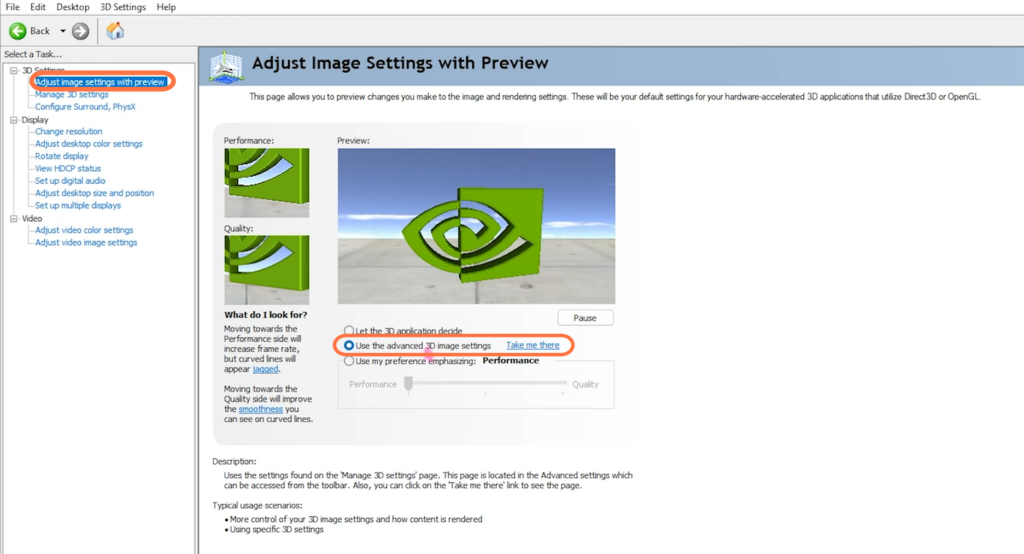
- If you are using, an Nvidia graphics card, then need to open up the Nvidia control panel and navigate to the Adjust Image Settings with Preview section.
- Select the “Use the advanced 3D image settings” option.
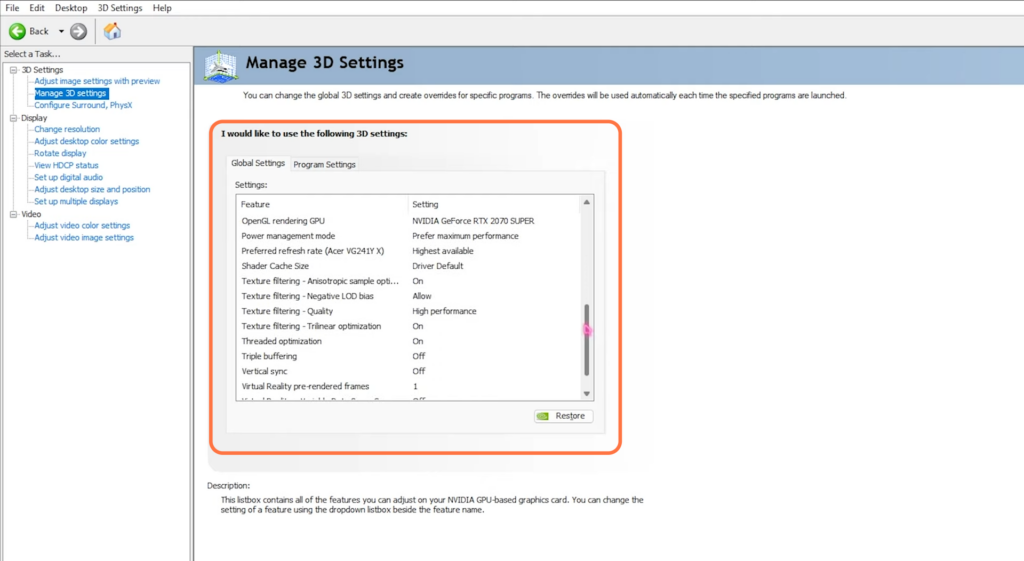
- After that, go to Manage 3D settings and apply the settings as shown in the images below.

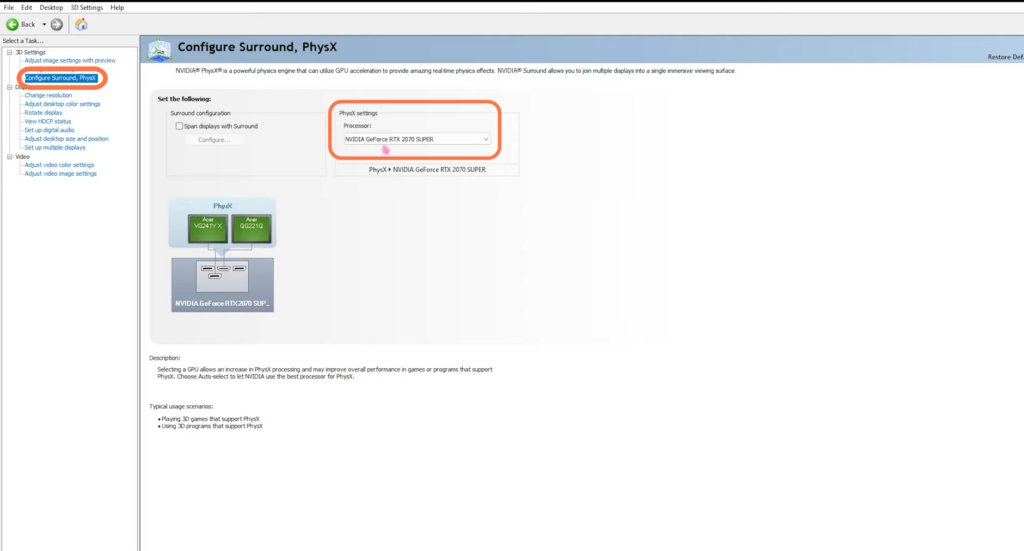
- Now navigate to Configure Surround, PhysX, and click on the drop-down menu under Processor.
- Select your graphics card from the menu.
- Look for the left-hand menu and click on the tab labelled “Display.”
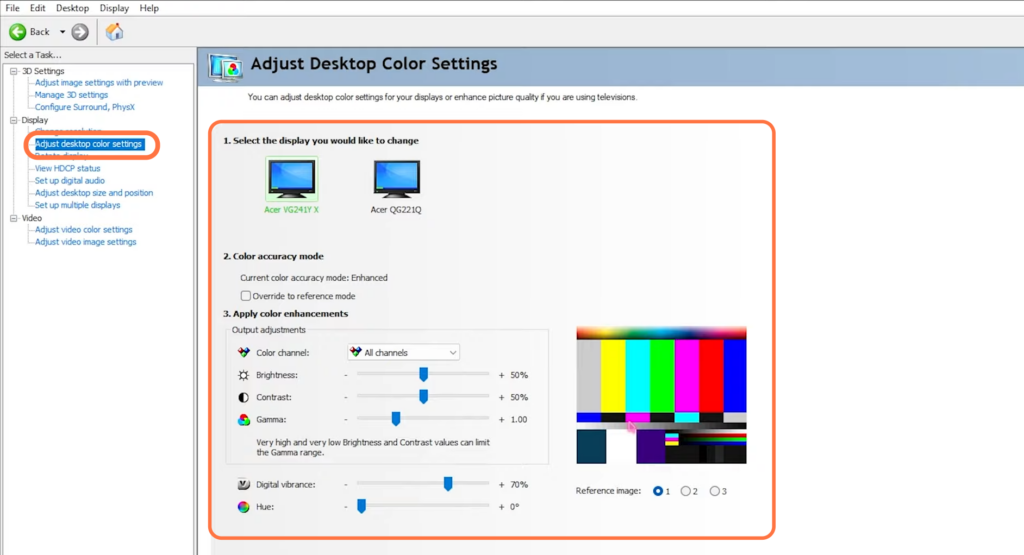
- Within the “Display” tab, click on “Adjust Desktop Color Settings” and apply the game settings as shown in the image below.
It will ensure the best possible performance.
System Configuration
This section describes how to configure your system. The users need to select the maximum number available of processors to improve FPS and booting performance.
- Open the System Configurations settings on your PC and navigate to the “Boot” tab.
- Once you are on the “Boot” tab, locate the “Advanced Options” button and click on it.
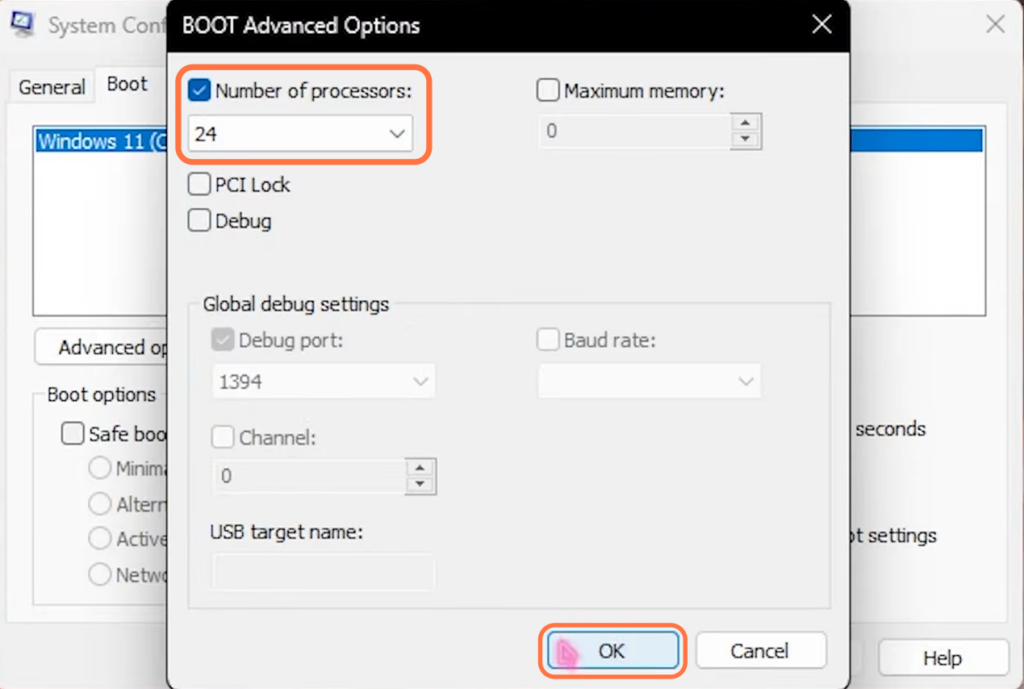
- Checkmark the “Number of processors” checkbox and select the maximum number in the drop-down menu. After that, hit the OK button.
It will increase the FPS and smoothen up your booting. - After that, go back to the System Configurations and press the Apply button.
De-Animate WIndows
This section will take you through the steps of how to de-animate Windows. Checkmarking the Smooth edges of screen fonts and Showing thumbnails instead of icon options is advised to ensure a smoother user experience.
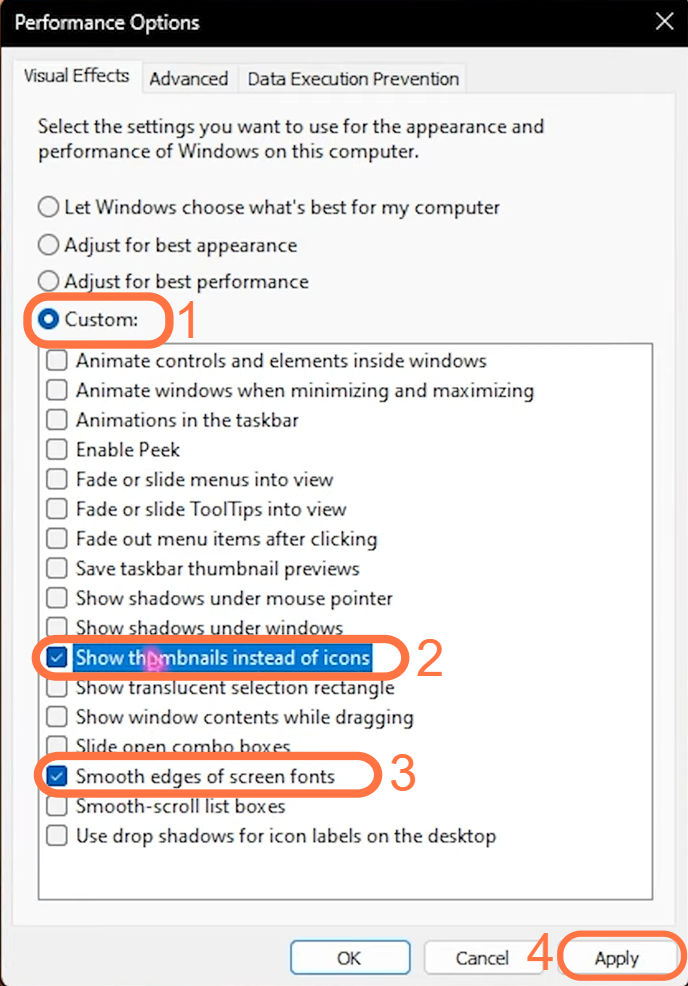
- You have to open the Start menu on your computer and go to Performance Options.
- Select the Custom option and checkmark the Smooth edges of screen fonts and Show thumbnails instead of icons options. After that, hit the Apply button.
It will ensure a smoother experience.
Create a restore point
In this section, we will take you through the steps to create a restore point for computer system protection.
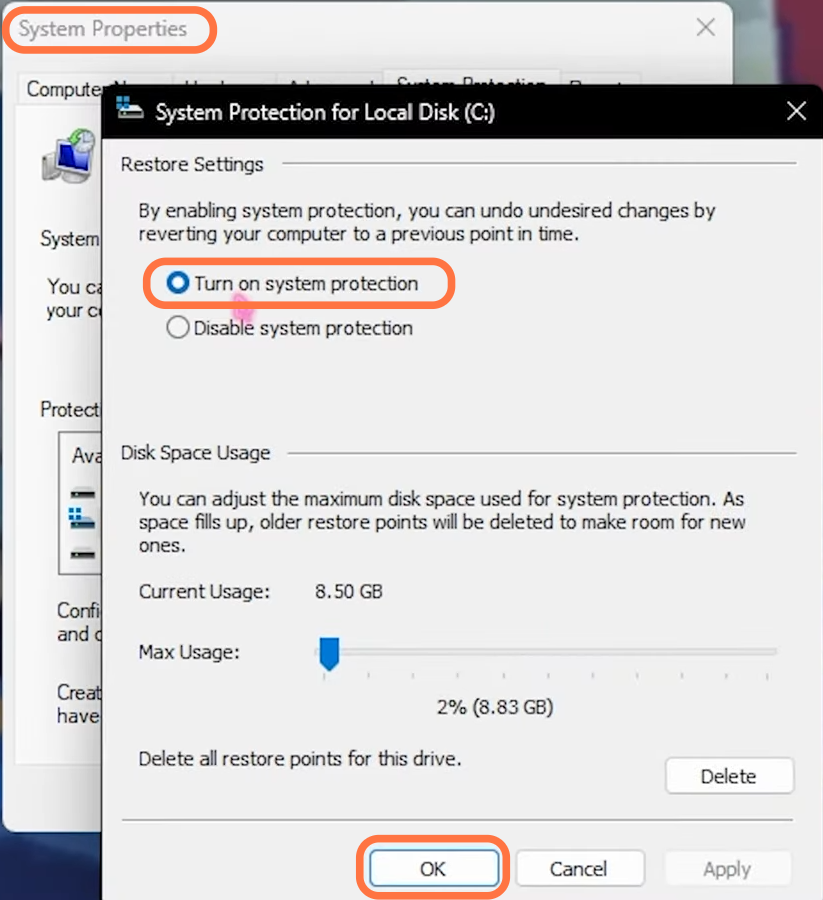
- You will need to open up your System properties and select the system drive.
- After that, press the Configure button and enable the “Turn on System protection” option, then tap on the OK button.
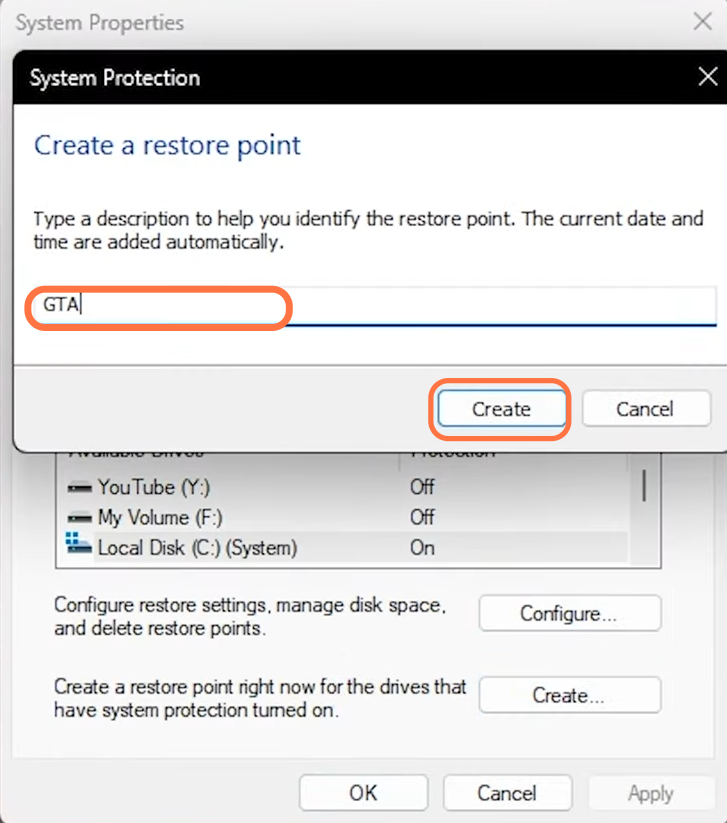
- After that, go back to the System properties window and click on the Create button.
- Set a name for the restore point and hit the Create button.
Now will have a safe place to come back to if something goes wrong with your computer.
GTA 5 FPS pack
This section describes how to download the GTA 5 FPS pack and apply all the settings to get the best performance in GTA 5.
- You will need to open your web browser and download the GTA 5 FPS pack.
- Once the download completes, open the downloads folder and extract the downloaded file.
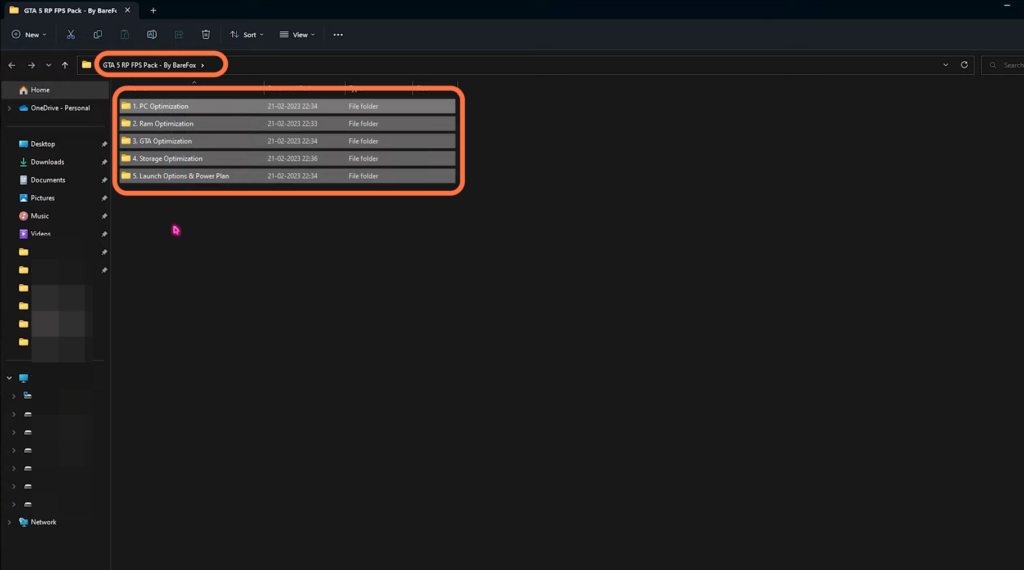
- After that, open up the extracted folder.
There will be five folders in here.
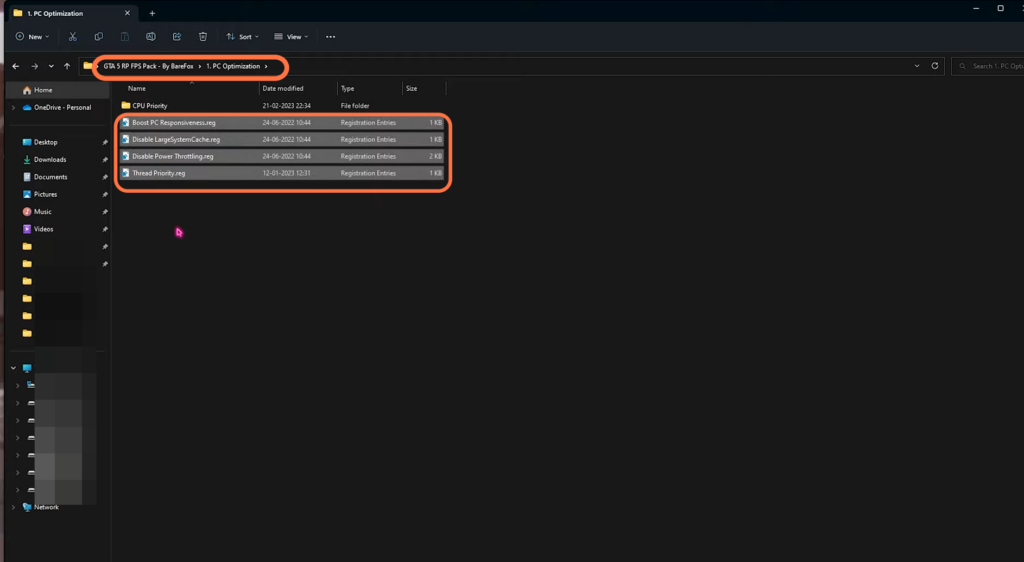
- Double-click on the PC Optimation folder to open it up and run the four files inside this folder.
It will boost your system’s responsiveness and improve thread priority.
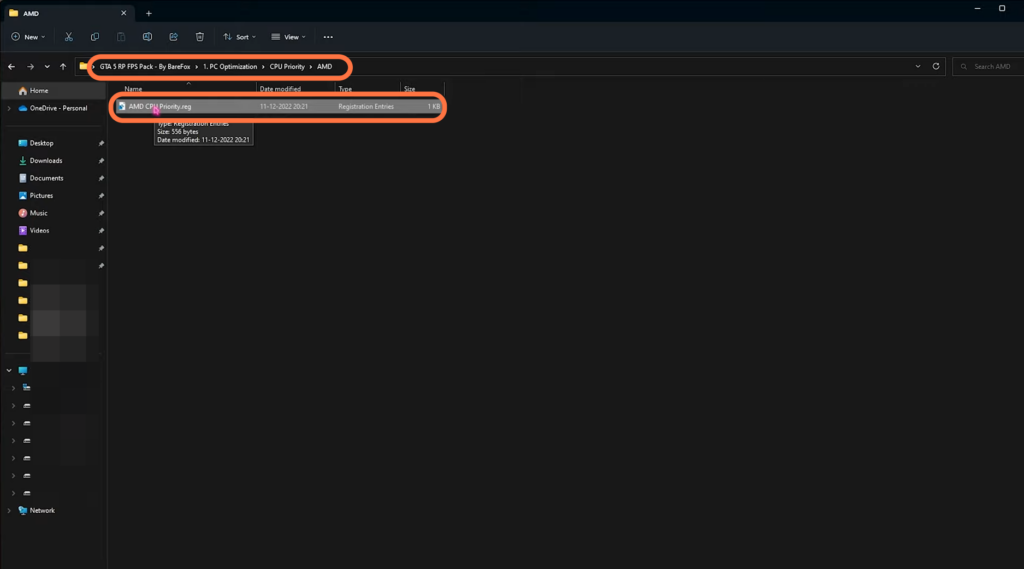
- After that, open up the CPU Priority folder.
You will find the AMD and Intell folders inside it. - Open the relevant folder depending on your CPU and run the priority. registry file inside it.
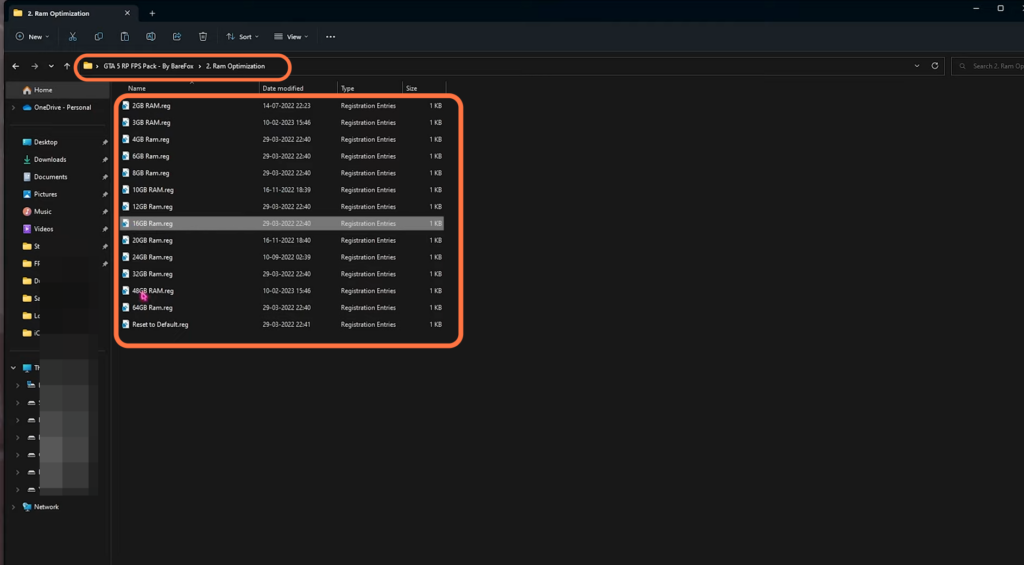
- After that, navigate to the RAM optimization folder and run the registry file depending on your RAM.
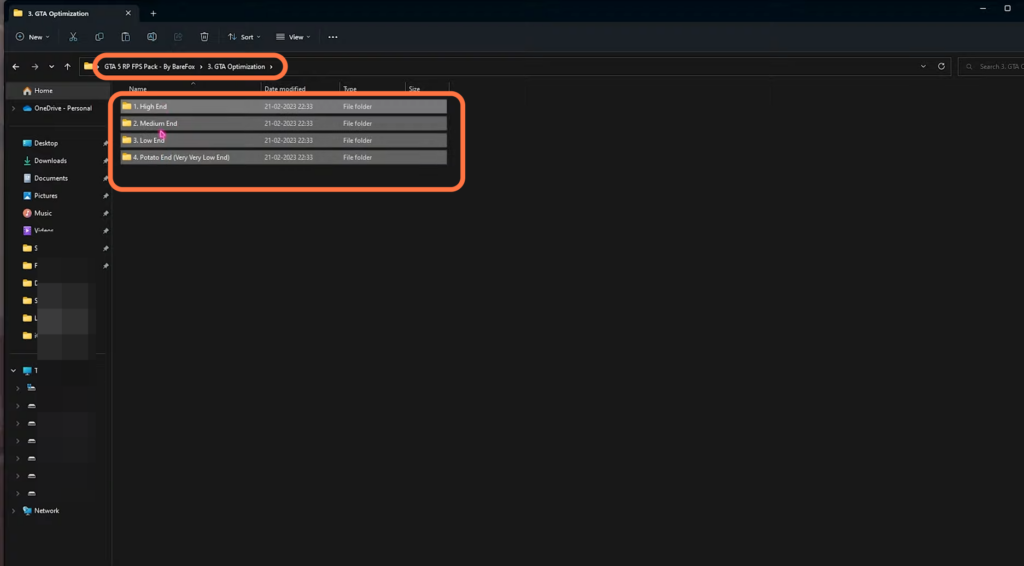
- Now go to the GTA 5 optimation folder.
You will find four folders inside it. - Open up the folder depending on your system specifications, and copy the settings.xml file.
- Navigate to the documents folder and open the Rockstar games folder. Go to the GTA 5 folder and replace the settings.xml file with the new one.
- Make sure to save a backup of the old file first.
It will change the settings to the best possible settings.
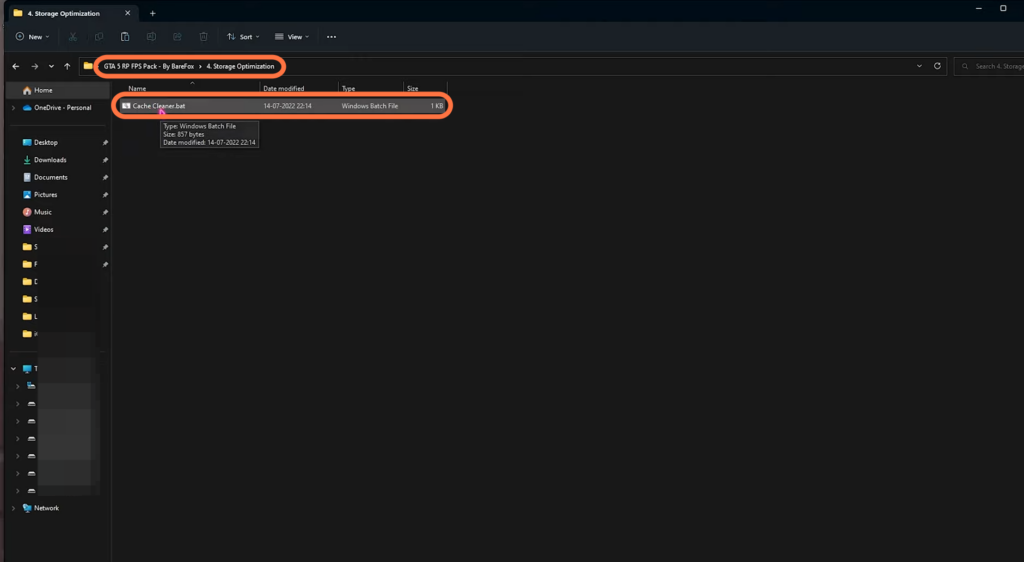
- After that, open up the Storage Optimation folder inside the pack folder and run the cache file as an administrator.
- It will delete all the necessary files and applications from your computer system.
- Finally, navigate to the Launch Options and Powerplan folder.
- Open up the Launch Options file and copy all the text inside it.
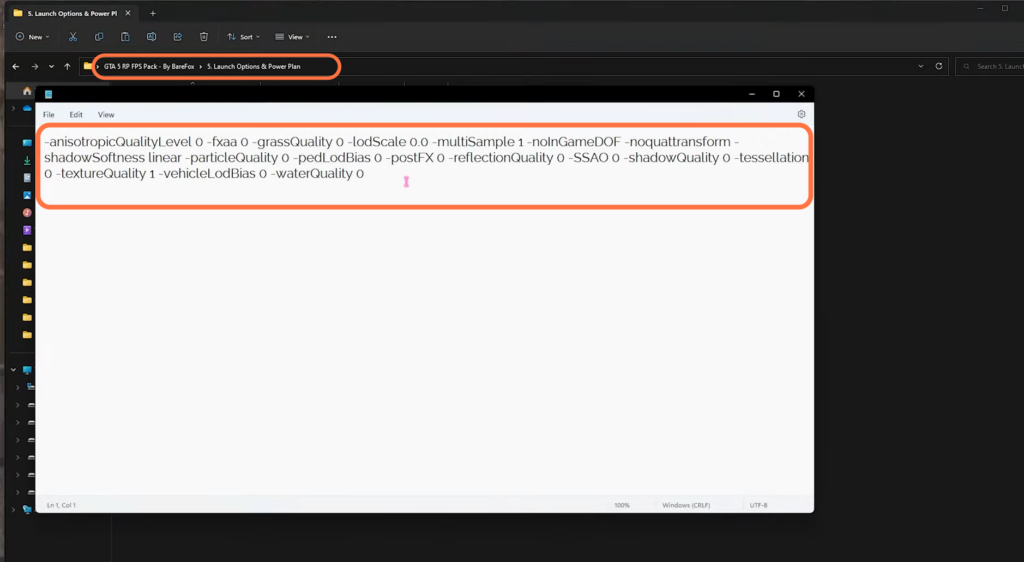
- After that, open the Steam application, right-click on the GTA 5 game and go to properties.
- Paste the text you copied earlier in the text box in the General tab.
It will optimize your game.

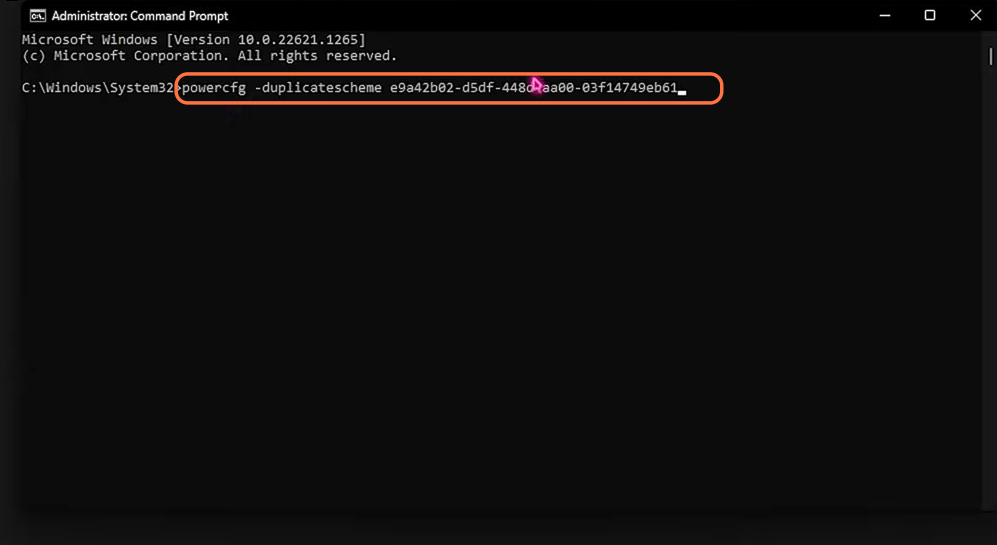
- Next, open up the power plan file and copy the power plan inside it.
- Open Command Prompt as an administrator, paste the copied text in there and hit the enter button on your keyboard.
- Open up your control panel and go to power options.
- Choose the Ultimate Performance plan, but if you using a laptop, then it is recommended to choose a Balanced or High-performance plan.
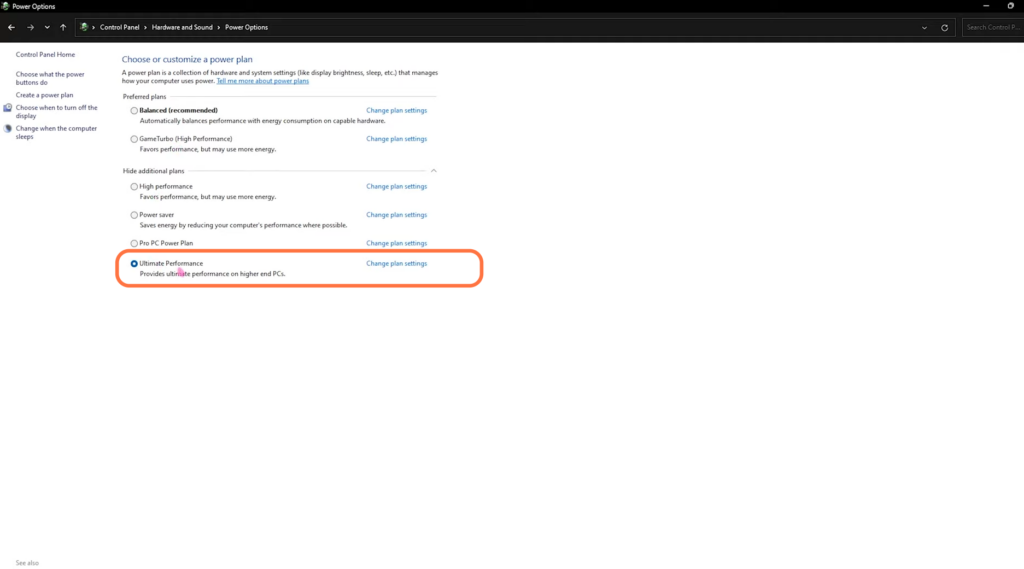
After applying all these settings, you will get the maximum FPS and optimal performance.