This guide will let you know how to fix the Armored Core 6 Fires of Rubicon Controller not working. These methods include control settings, connecting your controller using a cable, and changing default settings. You can also try to test device inputs, enable Steam input for Playstation controllers, download Easy Gamer Utility and configure game files. Turn off USB adapters for Bluetooth.
Control Settings
In this section, we will take you through the steps to fix the error by adjusting the control settings.
- Start by navigating to the system settings on your device.
This can usually be found in the device’s settings menu of Armored Core 6 Fires of Rubicon. - Within the system settings, look for an option related to Control Settings.
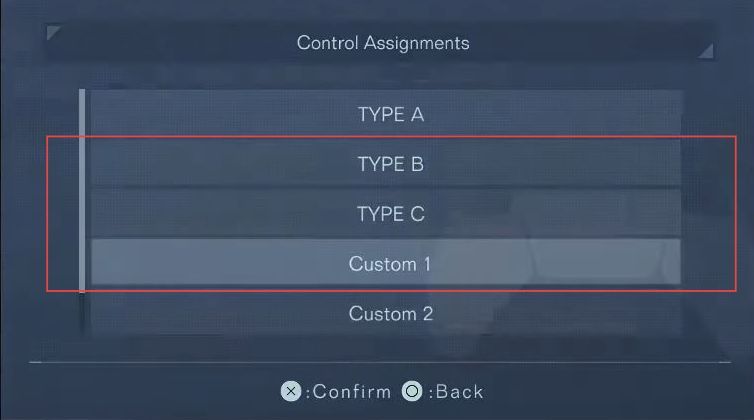
This option is typically found in the menu that deals with input devices, controllers, or peripherals. Upon entering the Control Settings menu, you may see different options related to controller configurations. In this case, there’s a mention of Controller Assignments Type A. - To adjust the controller assignments type, select the option that corresponds to your desired configuration. It’s recommended to select a specific type, possibly different from the default Type A.

- Within the control settings menu, look for an option that allows you to change the controller assignment type. In this case, there’s a mention of Type B.
- Select a different assignment type from the available options. For example, you can choose Type B or Type C.
This will change the configuration of buttons and controls. - After selecting a different assignment type, test your controller to see if it resolves the issue you were experiencing.
This change may reconfigure button layouts to better suit your preferences. - If changing the assignment type doesn’t resolve the issue or if you prefer a completely custom configuration, consider selecting the Custom option.
This allows you to manually edit and set your control mappings. - If you choose the Custom option, you’ll have the opportunity to edit and configure each button and control it according to your preferences. This is a more advanced option and gives you full control over how your controller interacts with the device or game.
Connecting your Controller using a Cable
This section describes how to connect your controller using a cable. This will help to resolve the error.
- If you are using a wireless connection for your controller, the first step is to grab a USB cable. Ensure that the cable is compatible with your controller and can be plugged into both the controller and your computer.
- Take the USB cable and plug one end into your controller. The other end of the cable should be connected to an available USB port on your computer.
This establishes a wired connection between the controller and the computer. - Once the controller is connected via the USB cable, try using it to play the game again.
Test if the controller is now functioning correctly. - If you still encounter issues with the controller, you can choose to close the game.
This can be done by exiting the game through the game’s menu or interface.
Changing Default Settings
This section will take you through the steps to fix the error by changing the default settings.
- Launch the Steam application on your computer and make sure you are signed in to your Steam account.
- In the Steam application, go to your game library.
This is where you’ll find a list of all the games you have in your Steam account. - Scroll through your game library to find Armored Core 6.
You can use the search bar or manually navigate through your games list. - Once you’ve located Armored Core 6 in your game library, right-click on its name to open a context menu with various options.
- After right-clicking, locate and click on Properties to open a dialogue box with various settings and configurations for the game.

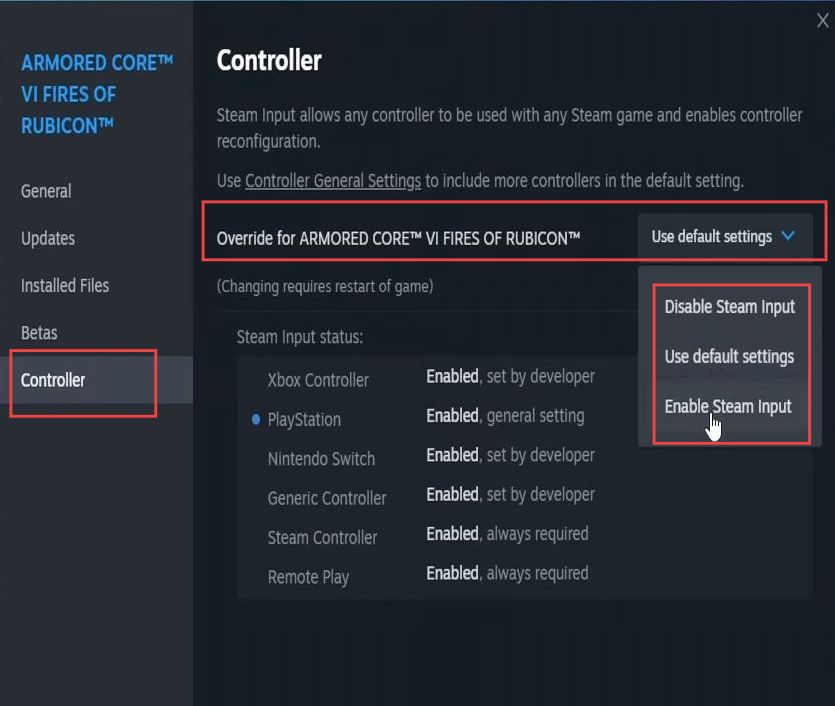
- In the game properties dialogue box, navigate to the Controller tab.
This is where you can configure controller-related settings. - Look for an option that says Use Default Settings or Enable Steam Input. If it’s set to Disable, change it to Use Default Settings or Enable Steam Input, depending on what’s available.
- After adjusting the controller settings, close the game properties dialogue box.
Steam will typically prompt you to save your changes or settings adjustments. - You need to confirm and save the changes.
- After applying the controller settings, exit Steam properties, and then launch the game Armored Core 6 again from your game library.
- Play the game with your controller and check if the issue you were experiencing has been resolved.
The changes made in the controller settings may improve controller compatibility and functionality within the game.
Test Device Inputs
This section describes how to fix the “Armored Core 6 Fires of Rubicon Controller not working” error by testing device inputs.
- Launch the Steam application on your computer and ensure that you are signed in to your Steam account.
- Click on Steam in the top-left corner of the Steam application window.
This will open a dropdown menu with various options. - From the dropdown menu, move your mouse pointer down to Settings and then further down to Controller. Click on Controller to access the controller settings in Steam.
In the Controller settings section, you will see an option that says Begin Test. - Click on this option to start the controller test.

- Ensure your controller is nearby and ready for testing. With the controller test active, press each button and move the thumbsticks and other inputs on your controller to ensure they are functioning correctly. Observe the on-screen display to see if each button press or input is registering as expected.
- If you notice that some of the buttons or inputs on your controller are not working correctly or are not registering as they should, take note of these issues.
- If you encounter problems with your controller inputs during testing, there should be an option in the controller test interface that allows you to Reset Device Inputs. You have to click on this button.
- After resetting the device inputs, go ahead and test your controller again by pressing buttons and moving inputs.
Check if the issues you observed earlier have been resolved. - If you have access to another controller, you can try using it to check if the issue is specific to the controller you’re currently using.
This step is optional but can help determine if the problem is controller-related.

Enable Steam Input for Playstation controllers
In this section, we will take you through the steps to fix the error by enabling Steam input for Playstation controllers.
- Ensure that you have the Steam application open and signed in. If it’s not already open, launch it. Keep the Steam Controller Settings window open.
- In the Steam Controller Settings window, scroll down to find the section related to controller settings.
You’ll come across an option that mentions Enable Steam input for PlayStation controllers or a similar description depending on your controller type. - Toggle the Enable Steam input option to Off and then immediately toggle it back to On.
This action essentially turns off Steam Input for your controller and then re-enables it. - After toggling the Enable Steam input option, close the Steam Controller Settings window. Launch the game again if you are having issues with your controller.
- Play the game with your controller to check if the issue has been resolved. Ensure that all buttons and inputs are functioning correctly.

Download Easy Gamer Utility and Configure Game Files
This section describes how to fix the error by downloading Easy Gamer Utility and configuring game files.
- First, you need to open your browser and visit the official webpage to download the program called Easy Gamer Utility.
- After that, install the downloaded program on your computer and open the Easy Gamer Utility program after installation.
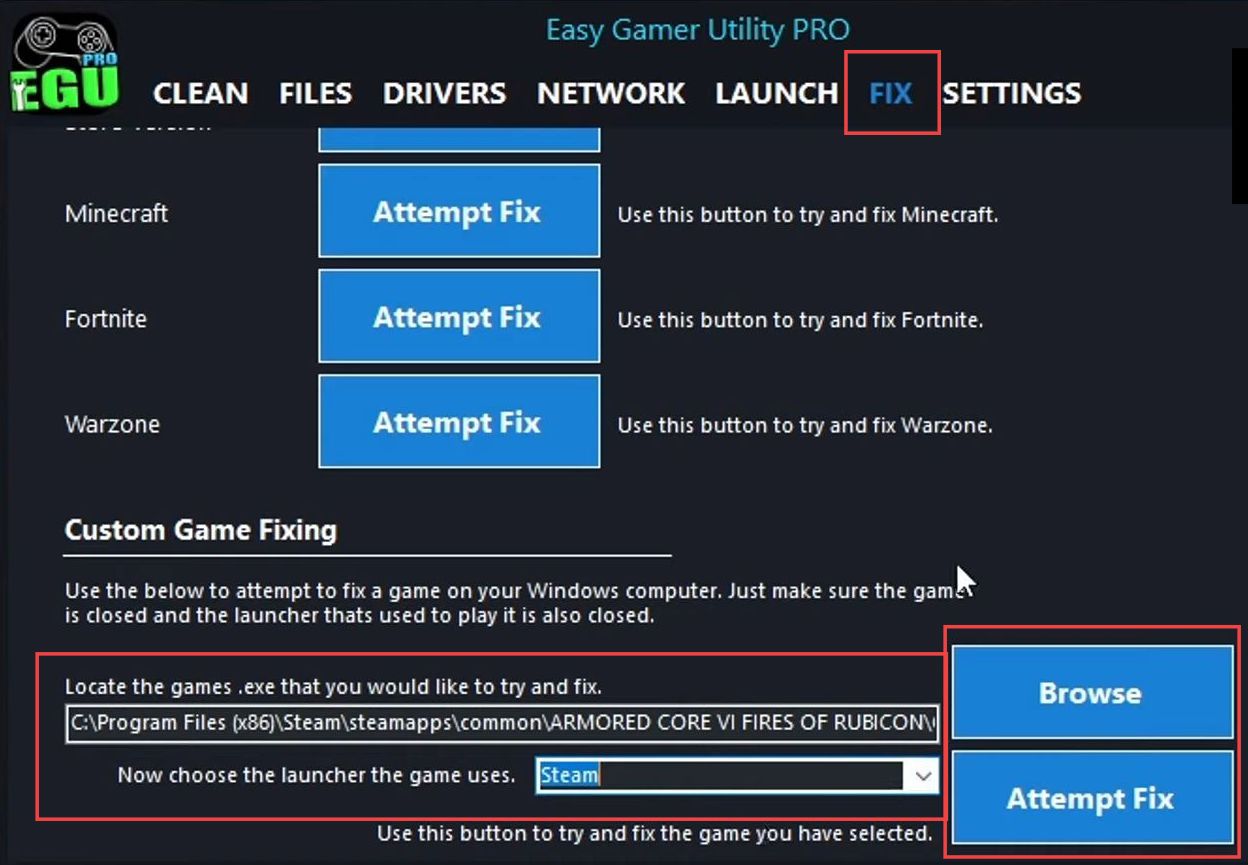
When you open the program, a window will appear. - Look for a tab labelled Fix on the quick access toolbar within the program’s window.
- Click on the Fix tab and scroll down within this tab to explore the available options. Look for an option titled Custom Game Fixing within the Fix tab.
- In the Custom Game Fixing section, there should be a Browse button, and click on it.
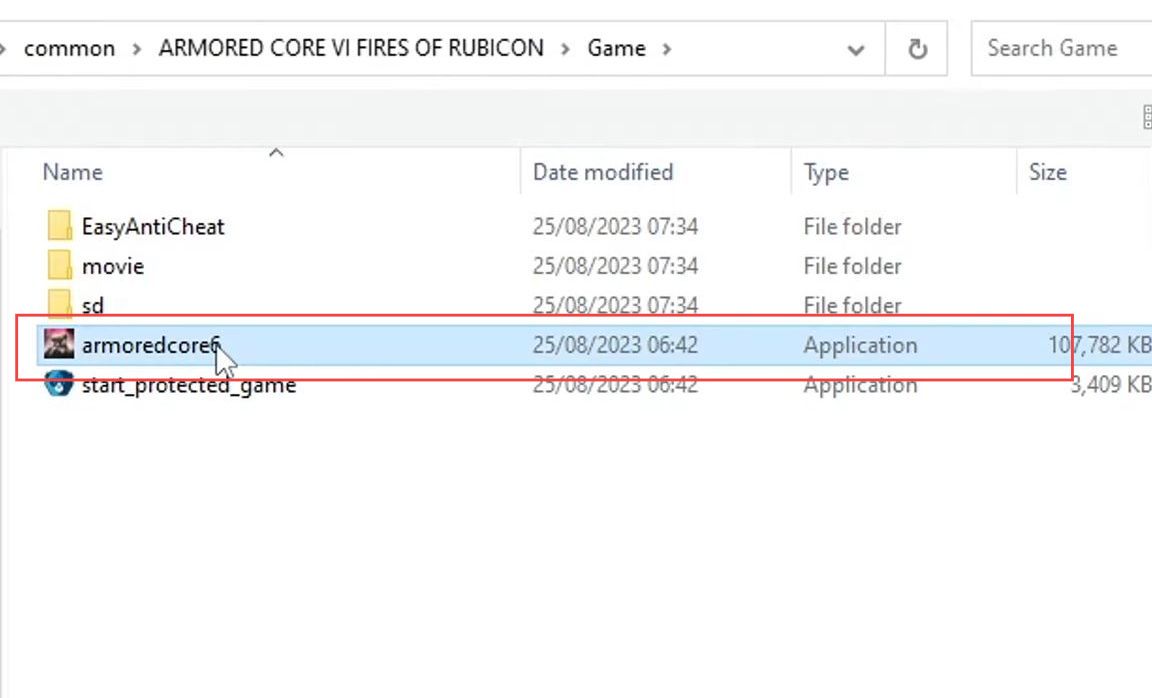
- Navigate through your computer’s directories to find the folder where the game is installed.
- Locate the executable file of the game you’re trying to fix. In this case, the example given is Armored Core 6 Fires of Rubicon.
- Once you’ve found the game e.g., Armored Core 6 Fires of Rubicon, select it by clicking on it, after selecting the game’s file, there should be an Open button, and click on it.
- Click on the drop-down menu to open it and reveal the available options.
- From the list of options in the drop-down menu, find and select the one labelled Armored Core 6 Fires of Rubicon.
- Once you’ve chosen the Armored Core 6 Fires of Rubicon option from the drop-down menu, look for a button that says attempt fix.
- Click on the attempt fix button to initiate the repair process.
- Once you’ve clicked attempt fix, the Easy Gamer Utility program will start working to resolve the issue you’re facing with the game.
The Easy Gamer Utility will attempt to fix the specific problem related to the Armored Core 6 Fires of Rubicon message that you’re encountering. - If you’re using the free version of the Easy Gamer Utility, you will have a limited number of attempts available. So try to get the pro mode to get unlimited access to the paid version.
Turn off USB adapters for Bluetooth
This section explains how to fix the “Armored Core 6 Fires of Rubicon Controller not working” error by turning off USB adapters for Bluetooth.
- Examine the USB ports on your computer to see if you have any additional devices connected, such as USB Bluetooth adapters, external hard drives, USB hubs, or other peripherals.
- If you have any USB devices or peripherals other than your controller, keyboard, and mouse connected to your computer, unplug them.
This includes USB Bluetooth adapters, headsets, external storage devices, etc. - Ensure that only the essential peripherals are connected: your gaming controller, keyboard, and mouse.
- After removing unnecessary USB devices, launch the game again and test your controller to see if it’s functioning correctly.