In this guide, we’ll introduce you to an essential mod: the Dlclist Auto Compiler. By following these step-by-step instructions, you’ll effortlessly install this mod and unlock access to an exciting new tool within the game.
Step 1: Download the Mod
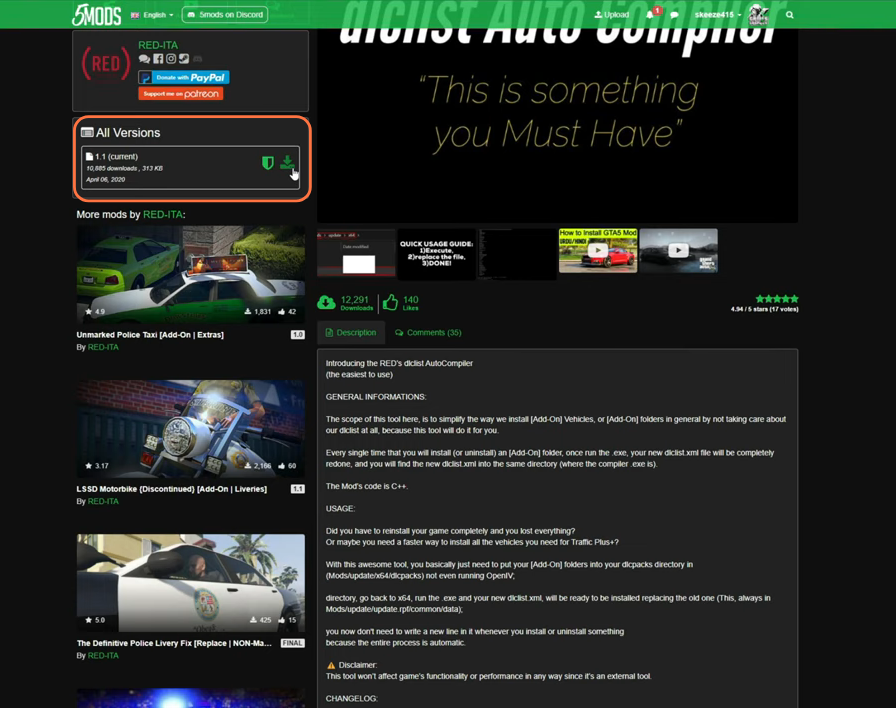
- The first step is to download the ‘Dlclist Auto Compiler’ mod from a trusted source such as gta5-mods website.
- Open the link and click on the green download arrow icon for the current version under the ‘All Versions‘ section to get the mod’s compressed zip file.
Step 2: Install Open IV
For seamless integration, we require a tool known as the Open IV archive manager. Open IV allows you to access and modify GTA V’s game files. Once you have downloaded the required files, you have to go to the downloads folder to proceed with installation.

Step 3: Accessing the mods Directory
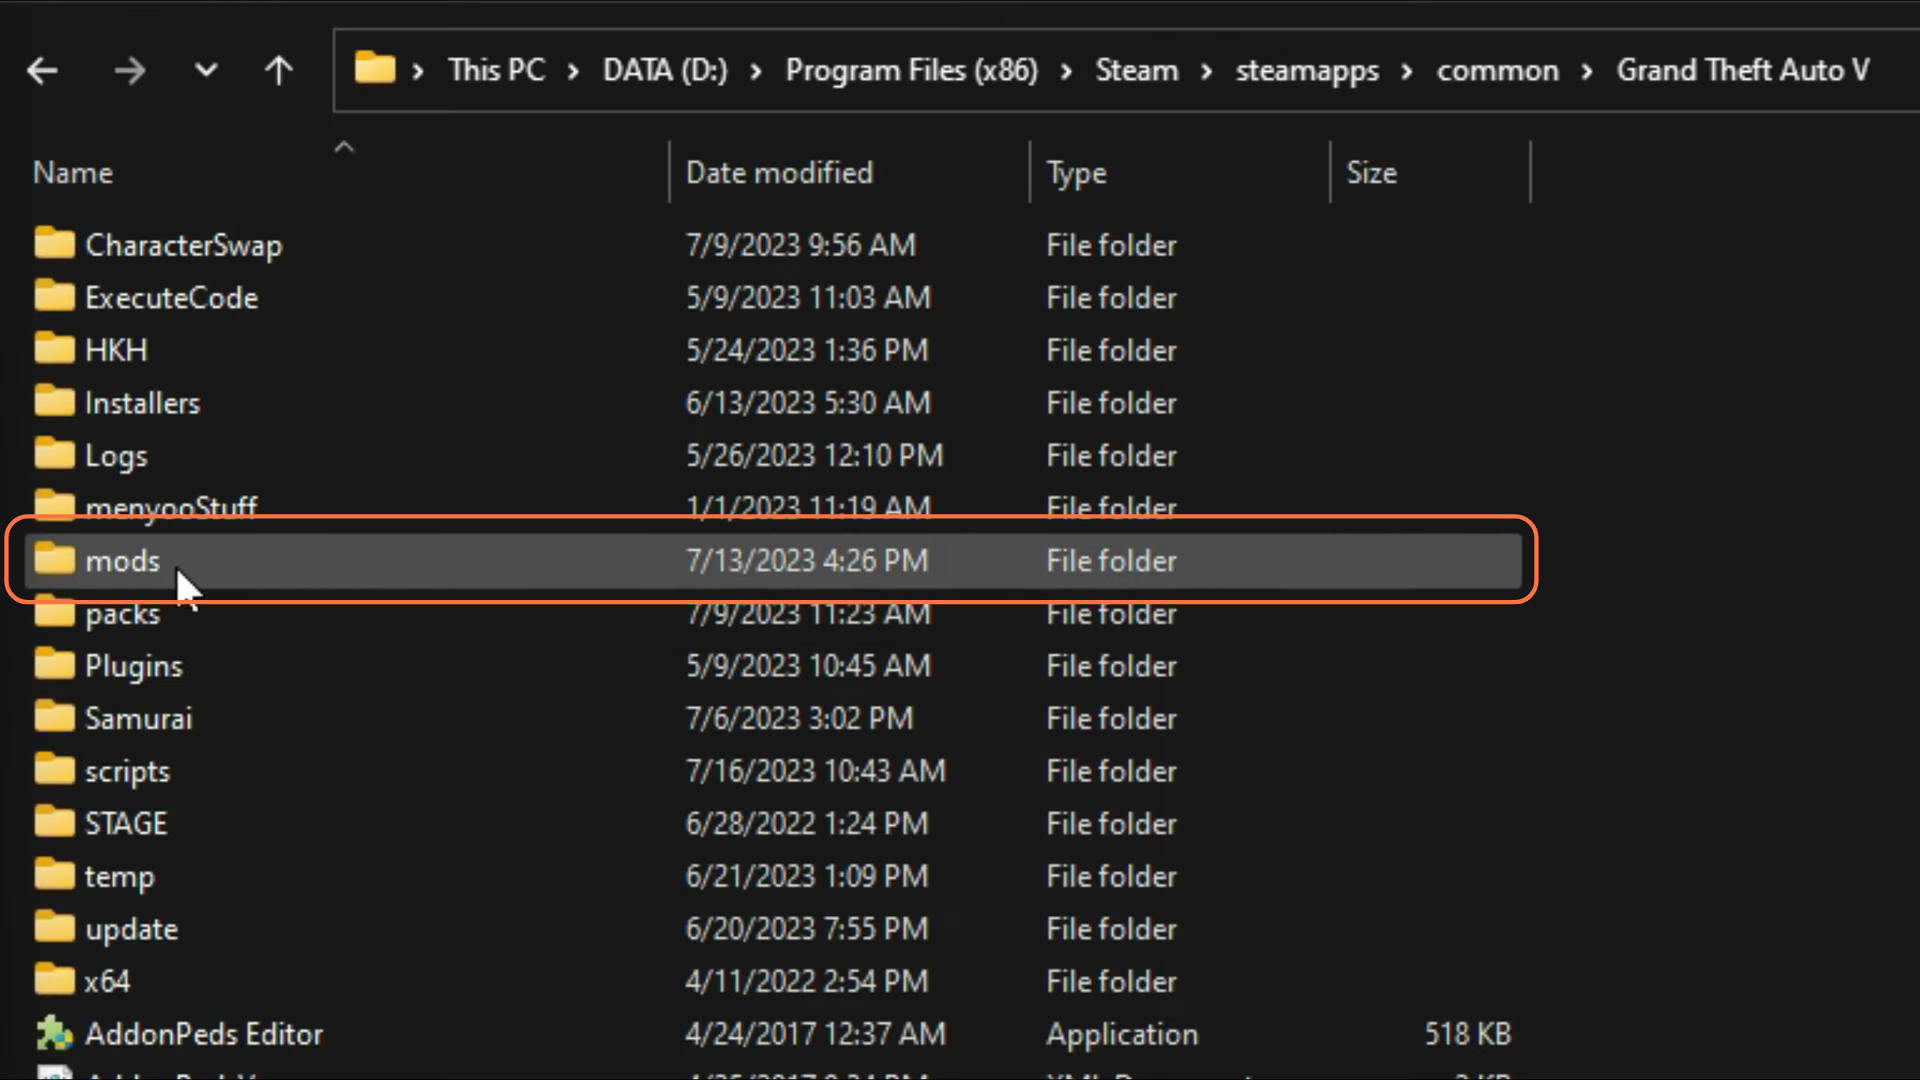
With the essential files at the ready, it’s time to delve into the core directory housing your GTA V installation. Within this context, locate or create a “mods” folder within the GTA V directory. This step is crucial for accommodating the mod’s functionalities.
Step 4: Organizing DLC List Auto Compiler Files
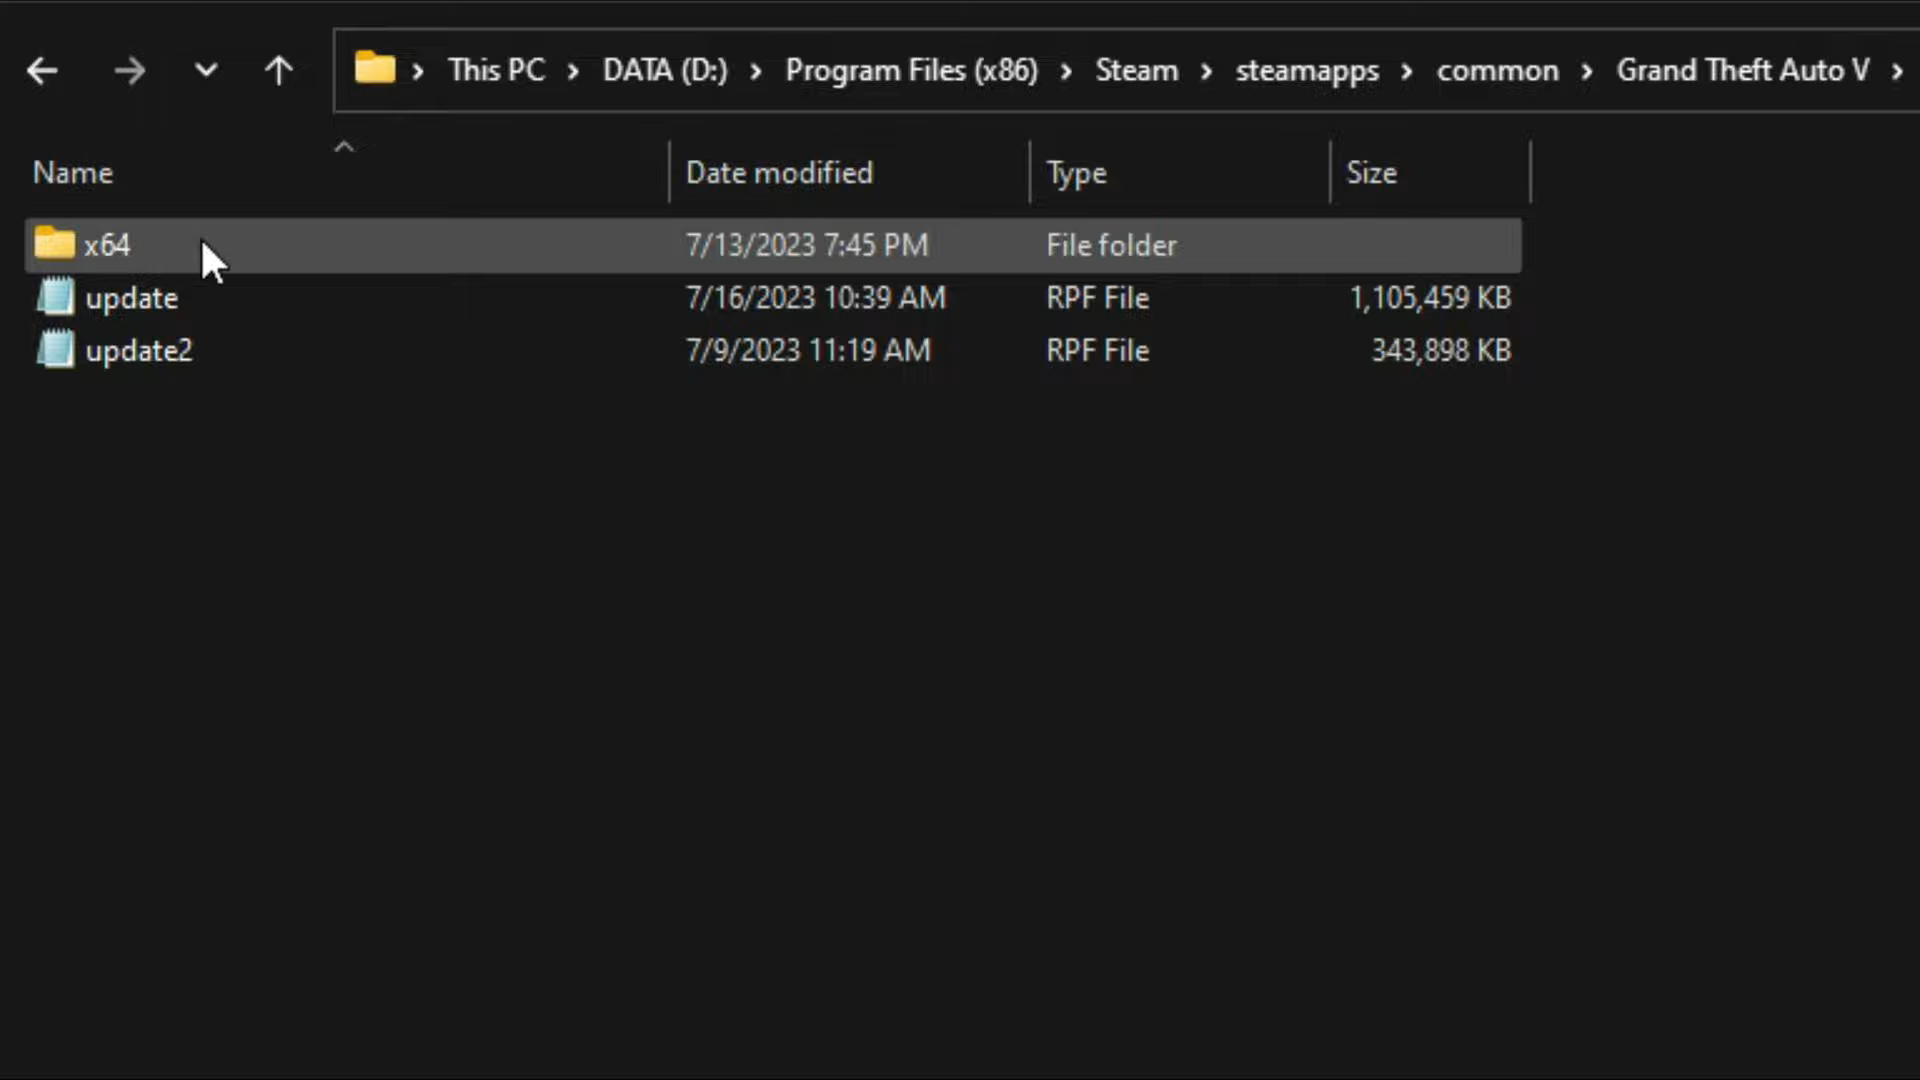
Navigate to the “mods” folder and establish a fresh directory within it. Label this new directory as ‘update’. Subsequently, generate an additional subfolder within ‘update’ and designate it as ‘x64’. This designated location will serve as the optimal destination for housing the DLC List Auto Compiler files.
Step 5: Transferring Program File to Mods Directory
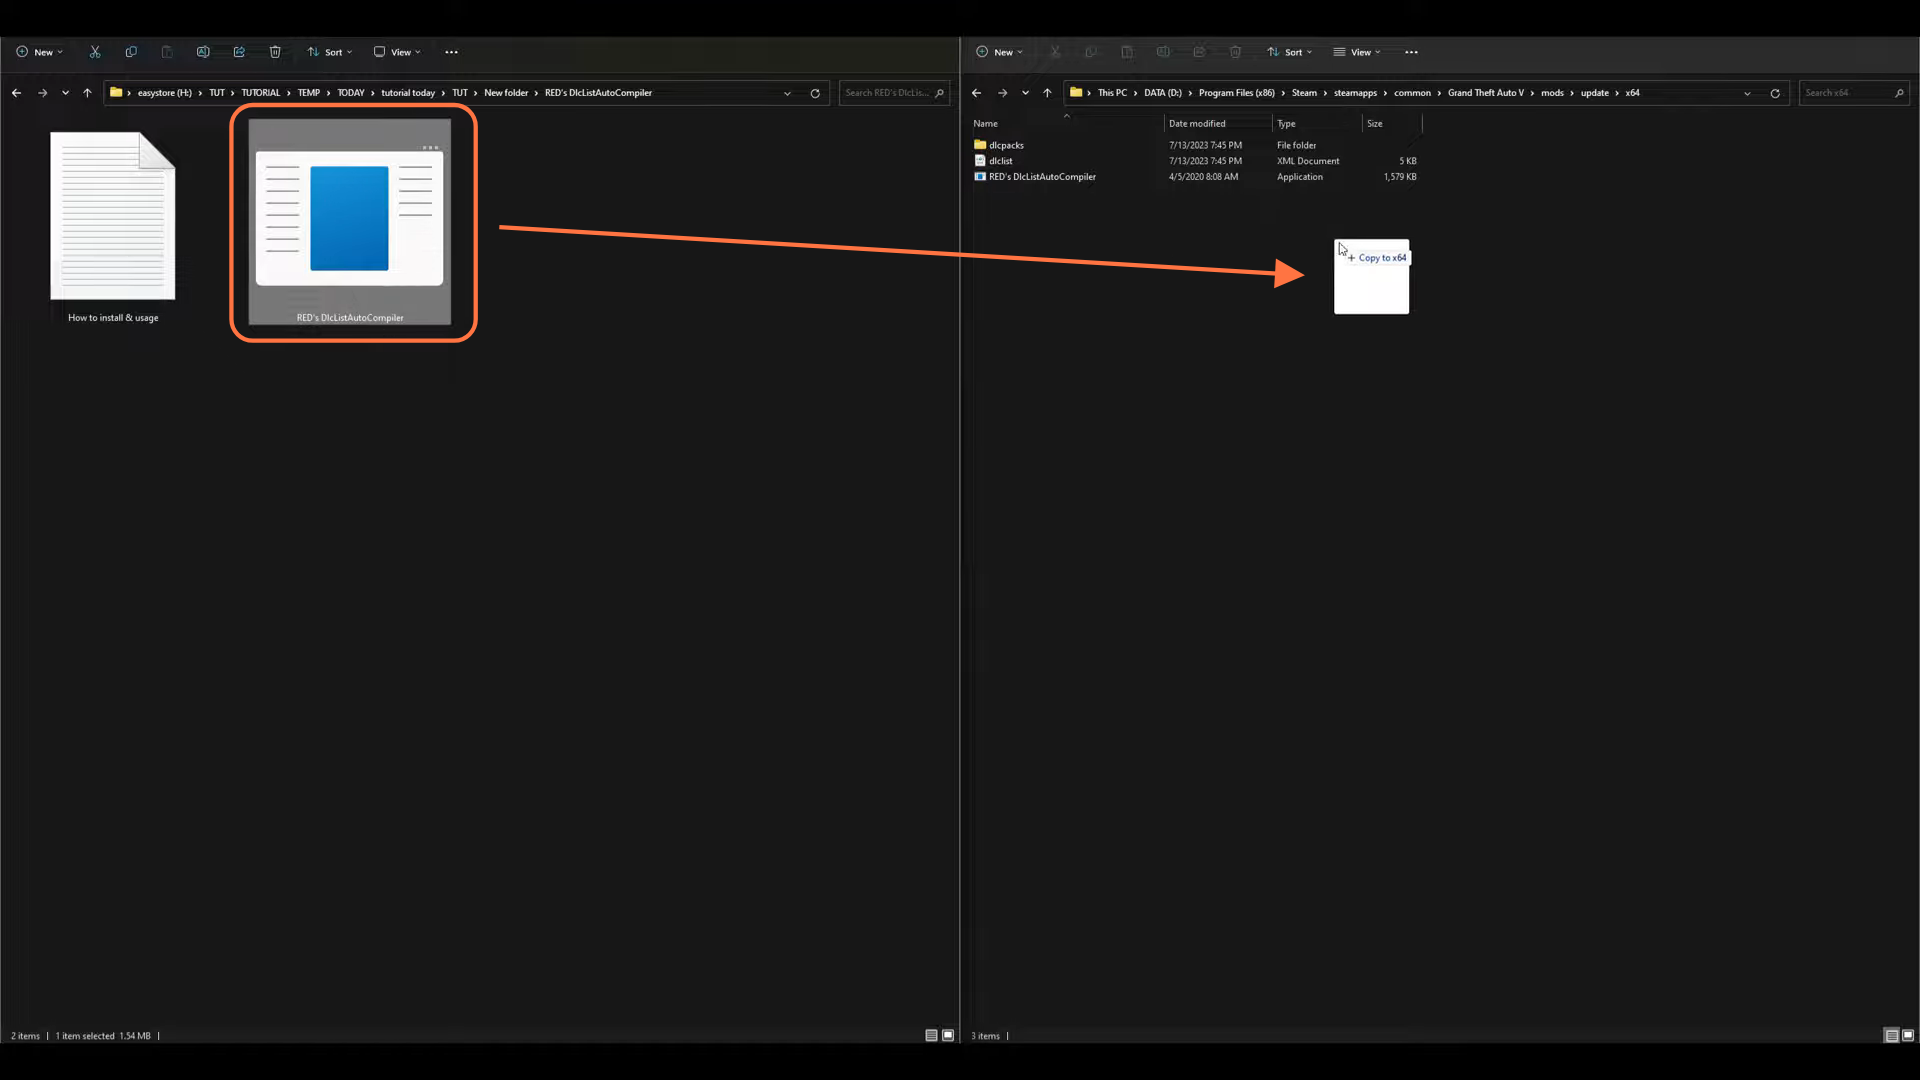
Return to the downloads folder and open the ‘DlcListAutoCompiler’ folder. Locate the program file within this directory and employ a drag-and-drop action to move it. Deposit the program file into the ‘x64’ folder situated within the ‘mods’ folder of the GTA V core directory.
Step 6: Installing DLC Pack and Setting up dlcpacks
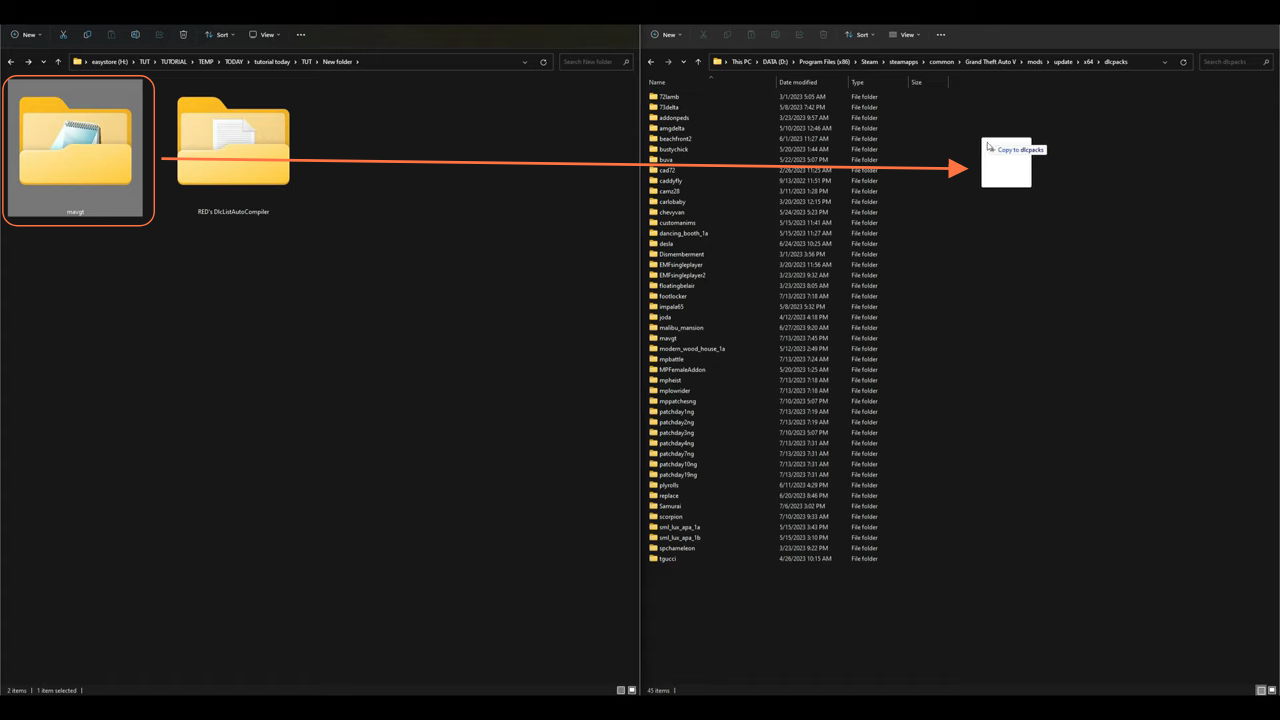
If you’re installing the DLC pack for the first time and have just established the ‘mods’ folder, proceed to create a fresh directory within ‘x64’ named ‘dlcpacks’. Upon creating this new folder, access it and arrange the placement of your desired DLC vehicle(s) within it.
Step 7: Compiling DLC List and Integrating with OpenIV
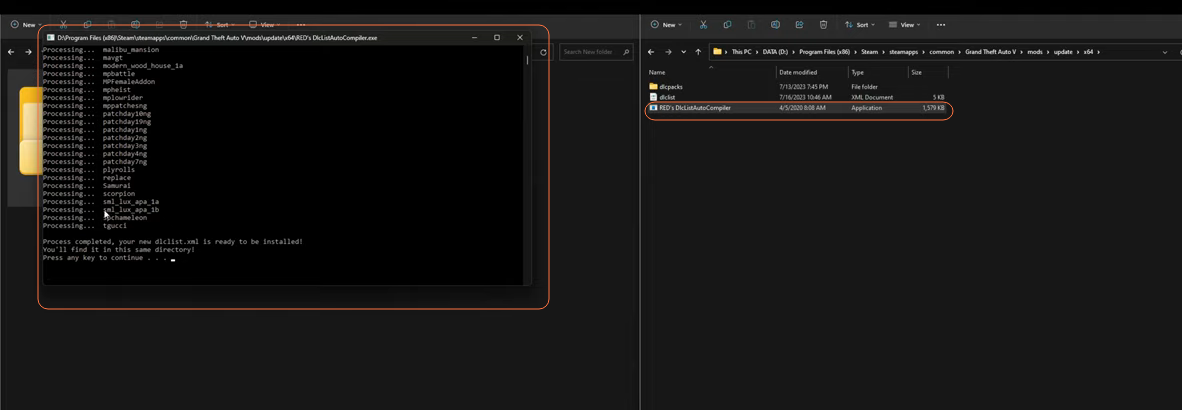
Navigate back to the ‘x64’ folder and initiate a double-click action on the ‘DlcListAutoCompiler’ program file. A compact window will emerge, displaying the content of the DLC packs slated for inclusion in the list. To dismiss this window, simply press any key on your keyboard. Subsequently, a freshly generated DLC list will be present within the ‘x64’ folder. The next step entails importing this new DLC list into OpenIV for integration.
Step 8: Open Open IV
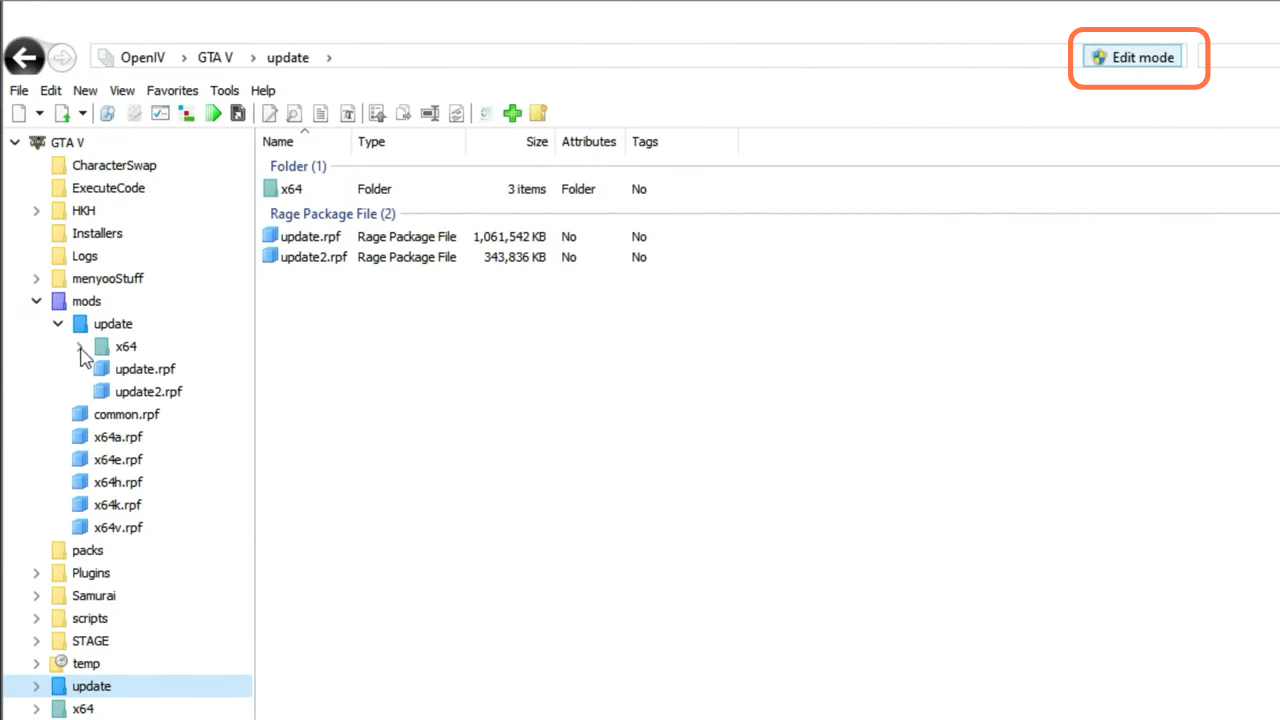
Launch the Open IV application and ensure it’s set up to work with your GTA V installation directory. Make sure to enable the Edit Mode.
Step 9: Placing the Dlc list
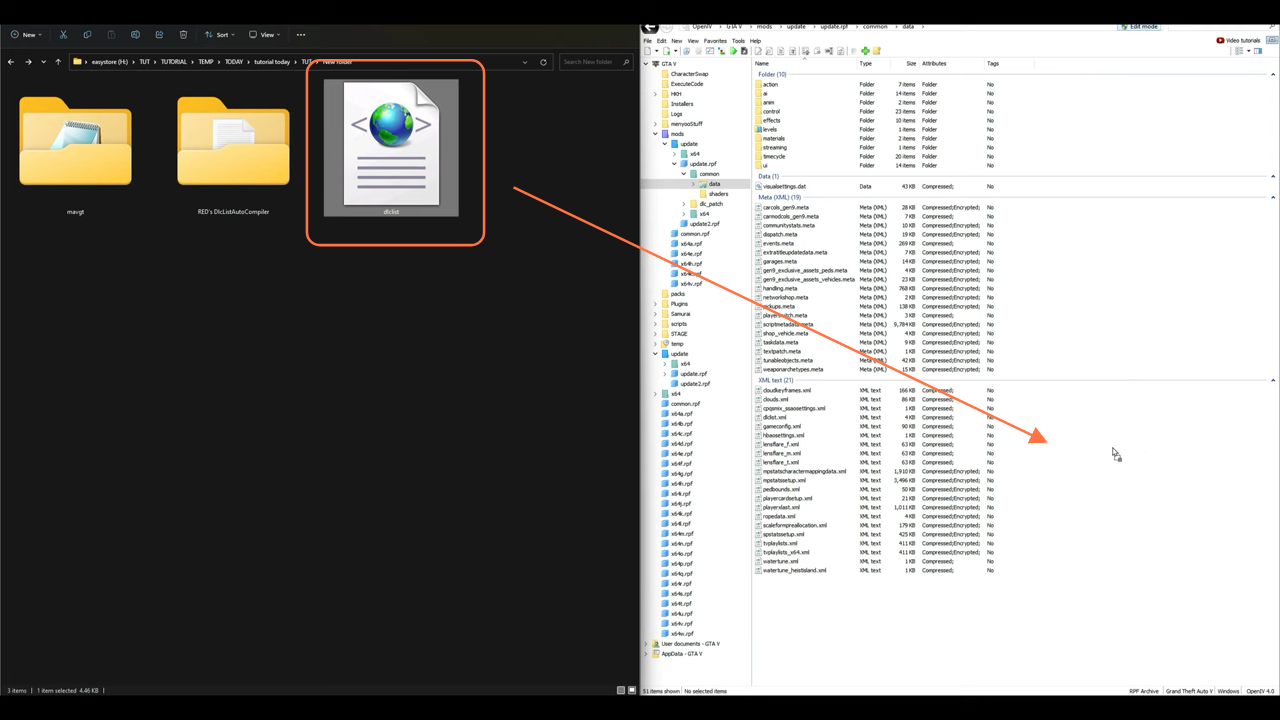
Follow these steps within Open IV application to place the Dlclist:
- Go to the side column and navigate to this path: mods > update > update.rpf > common > data
If you’re not already within the “mods” folder, a red banner might appear, prompting you to either ‘Copy to “mods” folder’ or ‘Show in “mods” folder’. This is the location where the game files are stored.
- Simply drag and drop the new Dlc list made by the auto compiler into the data folder of the Open IV.
- Access the list to view the alphabetically sorted installed DLC packs.
- Once you are done with the placement, select the ‘File’ option from the upper left corner of the Open IV and choose the ‘Close All Archives’ option.