This guide will let you know how to install the game config for GTA 5 (version 3095) to ensure compatibility with mods and new DLCs. Installing a game config for GTA 5 is crucial to maintain the game’s functionality when integrating new DLCs and mods.
To begin, we need some necessary files, such as the Gameconfig, OpenIV 4.0 program, HeapAdjuster, and Packfile Limit Adjuster.

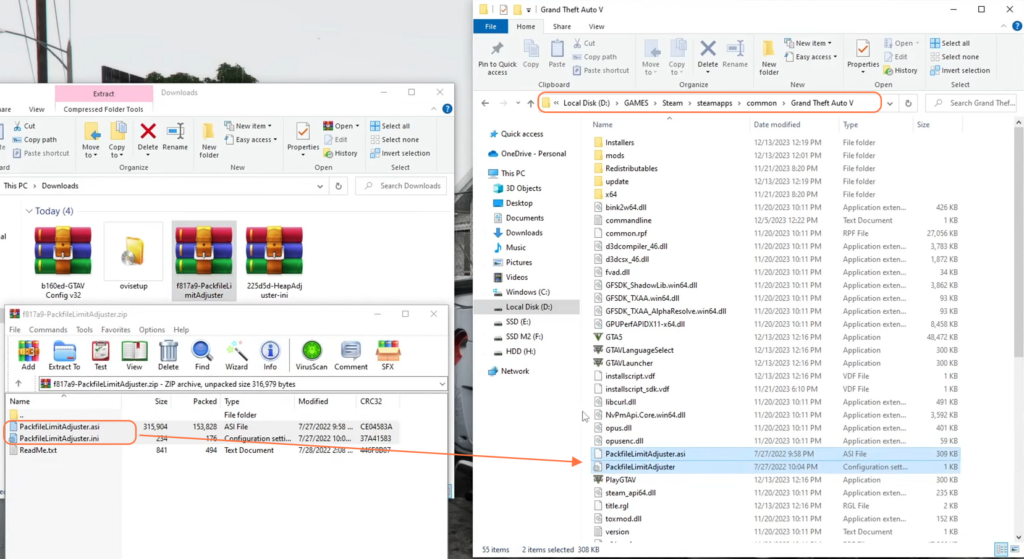
Once the required files are downloaded, initiate the installation process which involves accessing the GTA 5 game folder and copying relevant files(.asi and .ini) from the Packfile Limit Adjuster and HeapAdjuster archives, excluding text files.
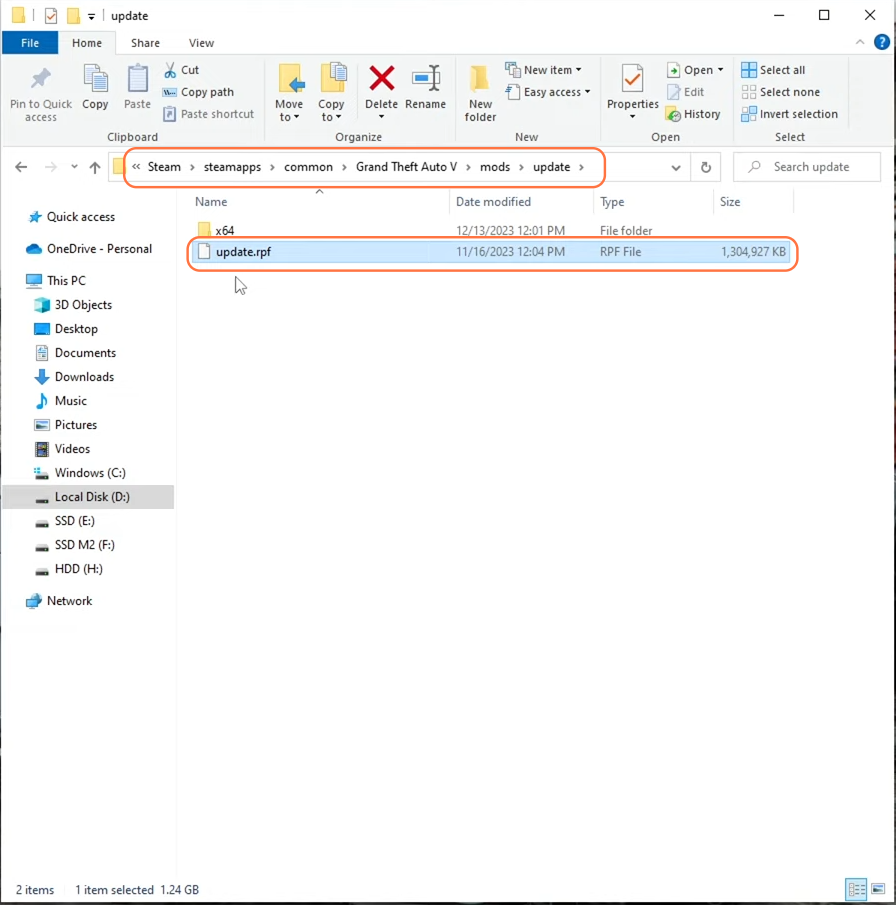
Now, if you have an existing mods folder in the GTAV directory, it’s essential to delete the outdated version of the ‘update.rpf’ file in the update folder before initiating the game config file installation.
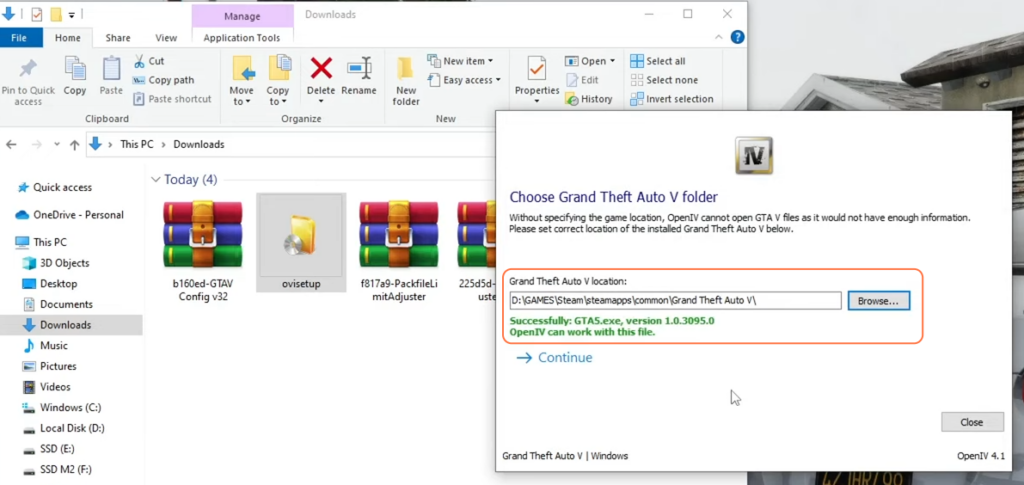
Next, the Open IV program must be installed and configured by specifying the GTA 5 game path and enabling the edit mode on the main interface of the program screen, which is crucial for successful installation.
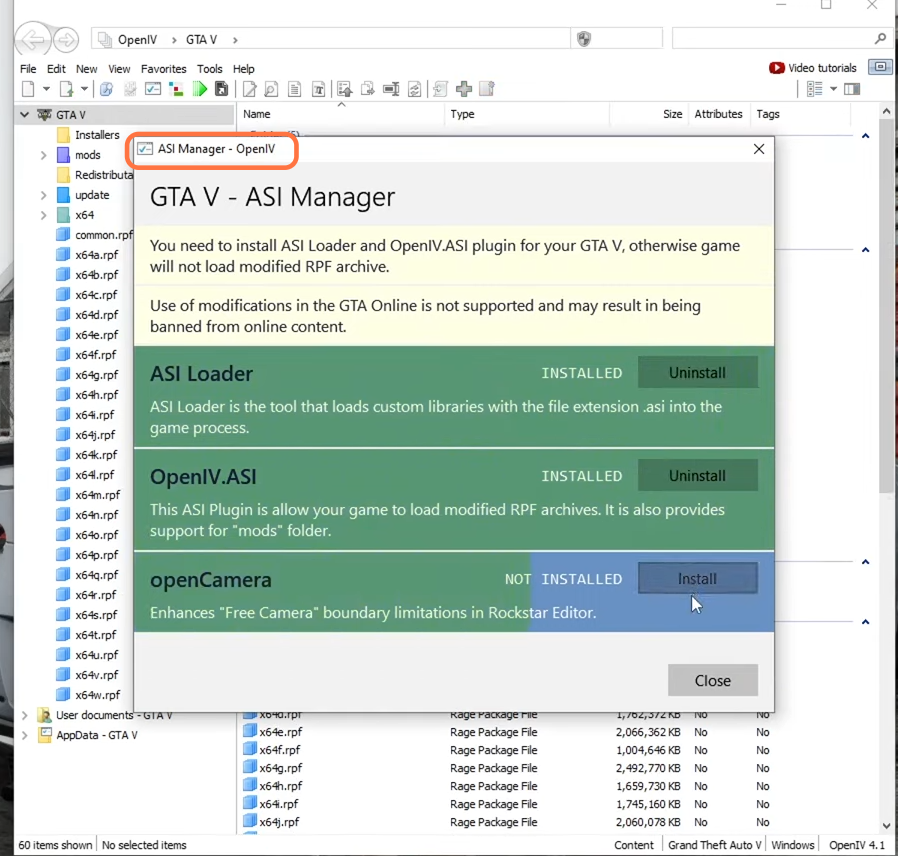
Within the Open IV program, navigating to the ASI manager allows for the installation of all required items.
Once completed, open the update folder, then update.rpf archive and copy it to the mods folder.
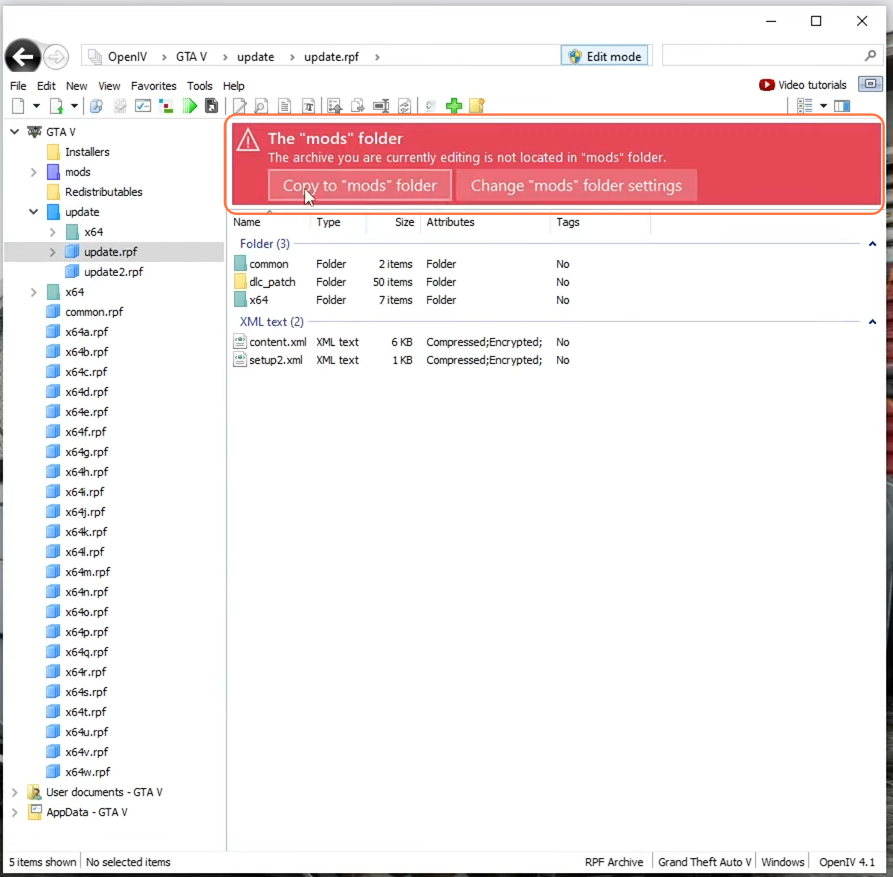
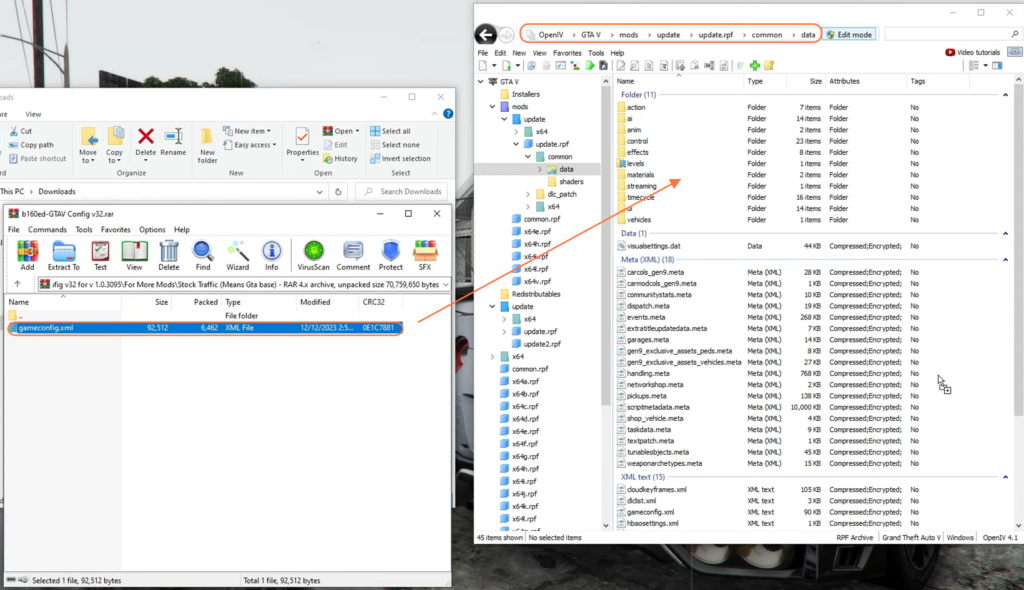
Then paste the new game config file to the following directory:
mods > update > update.rpf > common > data
It’s important to select the appropriate game config based on the specific GTA 5 version—be it through Steam, Epic Games, or Rockstar Social Club—and its update status. Ensuring edit mode remains enabled throughout this process is crucial to facilitate smooth file transfers.
Now we’ve successfully installed the game config, which will facilitate the seamless addition of DLC mods, new cars, and real estate without encountering launch errors. However, it’s imperative to note that additional mods should only be installed after updating the game config to ensure proper functionality.
By following these steps you can easily install the Gameconfig to the GTA V version 1.0.3095.0.