This guide will let you know how to install the Hulk Mod in GTA IV. Go through the guide and follow the step-by-step instructions to install it.
2. Once you have downloaded the Mod, you have to go to the downloads folder and paste it on your desktop. Extract the file using WinRAR or 7zip archiver.
3. Open the extracted folder and you will get to see an application file which is the automatic installer. Double-click this to run it and press the Yes button to continue.
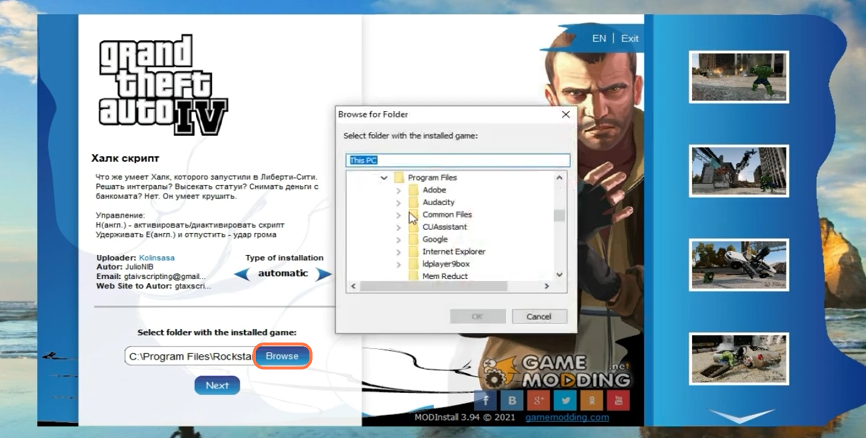
4. After that, click on the Browse button and navigate to the GTA IV game location and select it, then press OK.
5. After that, click on the Next Button.

6. Then make sure to select the Full Installation option and click on the Install button.

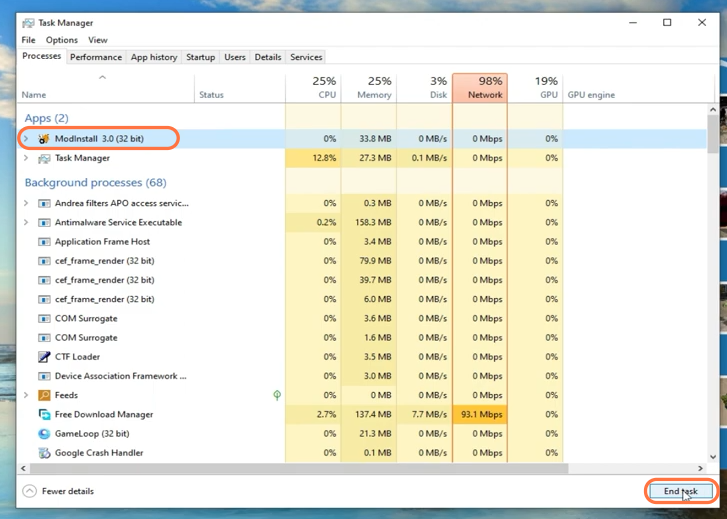
7. After installation, if the mod window doesn’t close automatically, then go to your task manager, select the mod and click on the End Task button.
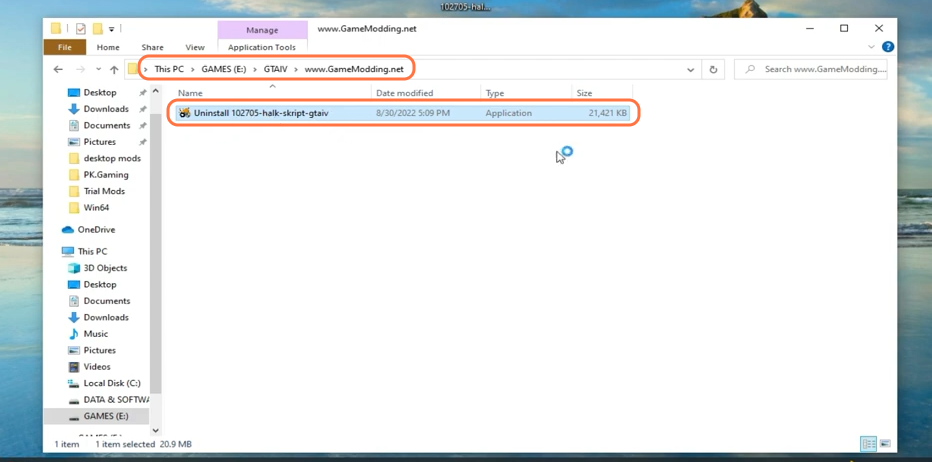
8. To uninstall this mod, you just need to go to the GTA IV file location and open the GameModing.Net folder and run the “Uninstall-hulk-script-gtaiv” application file.
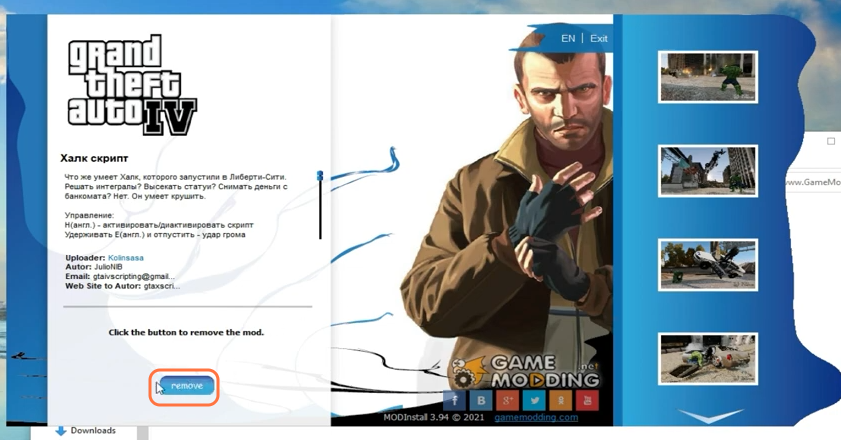
9. When the modding window opens, click on the Remove button and the mod will be removed from your PC.
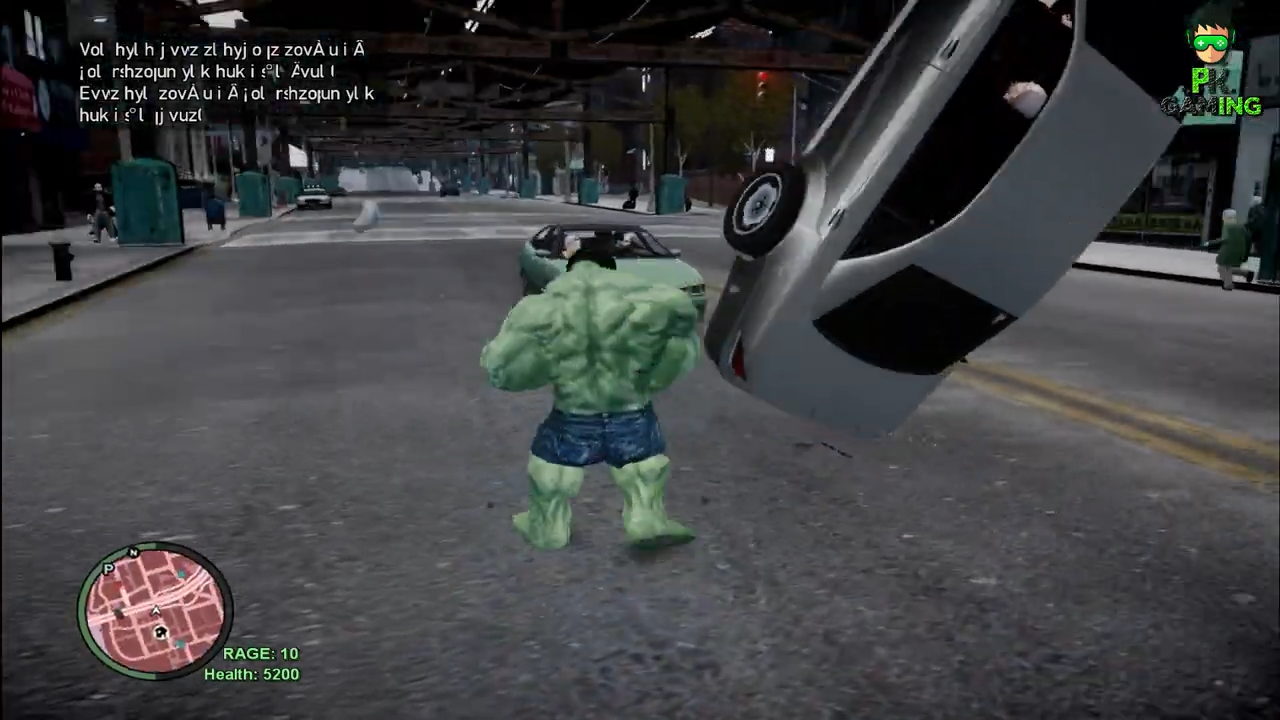
10. Now the Mod has been successfully installed in your GTA IV. Run the game and once you spawn in the game, press the “H” on your keyboard to gain powers for the hulk then you will see his power effects.