This brief guide will let you know how to install mods on the Gorilla Tag game. You have to follow all the instructions carefully to install it.
1. First, you will need to download the monkey mod manager from “https://modfiles.b-cdn.net/monke-mod-manager-1.3.0-installer_v-3RVn1.exe“. After downloading, run the Mod Manager and you will get the directory of the Gorilla Tag.

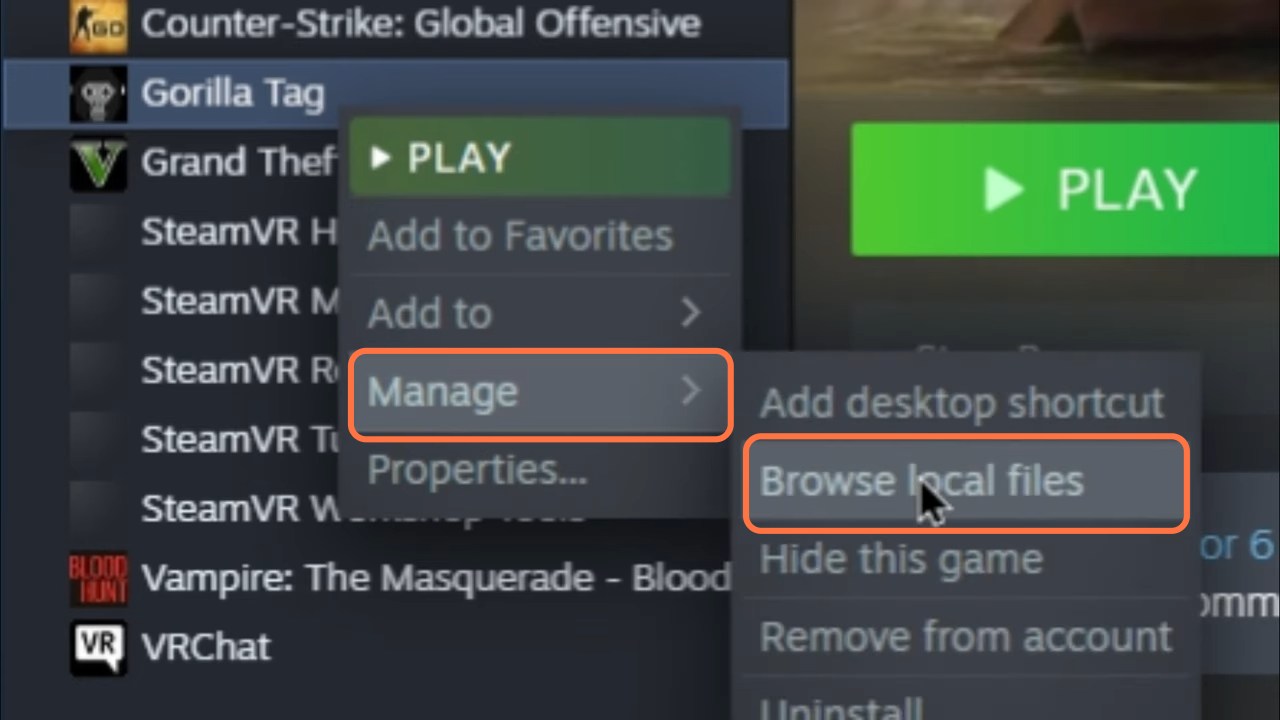
2. If you don’t get the directory of the Gorilla Tag automatically, then navigate to the root directory of the Gorilla Tag game from Steam. You have to open the steam application, go to Library and right-click on Gorilla Tag then go into Manage > Browse Local files. The game directory will open in a new window.
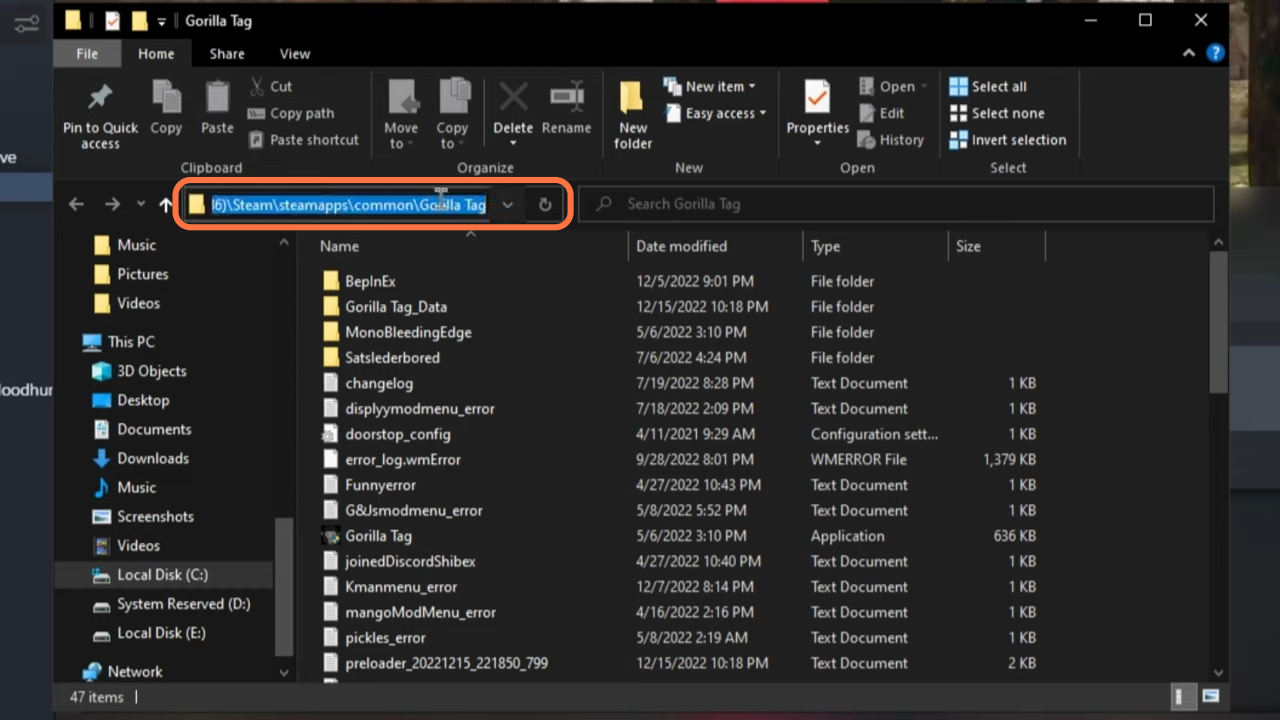
3. Once the directory opens, click on the address bar and copy the directory.
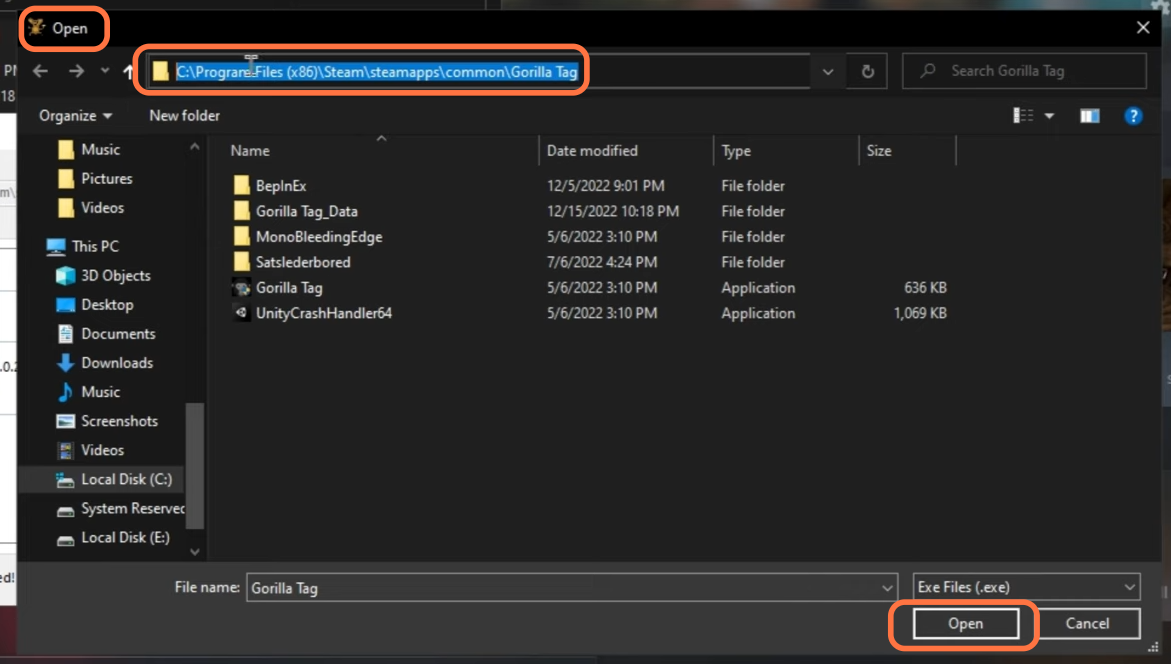
4. Go back to the monkey mod manager and click on the address bar on the top. After that, paste the directory you copied and click on the Open Button.
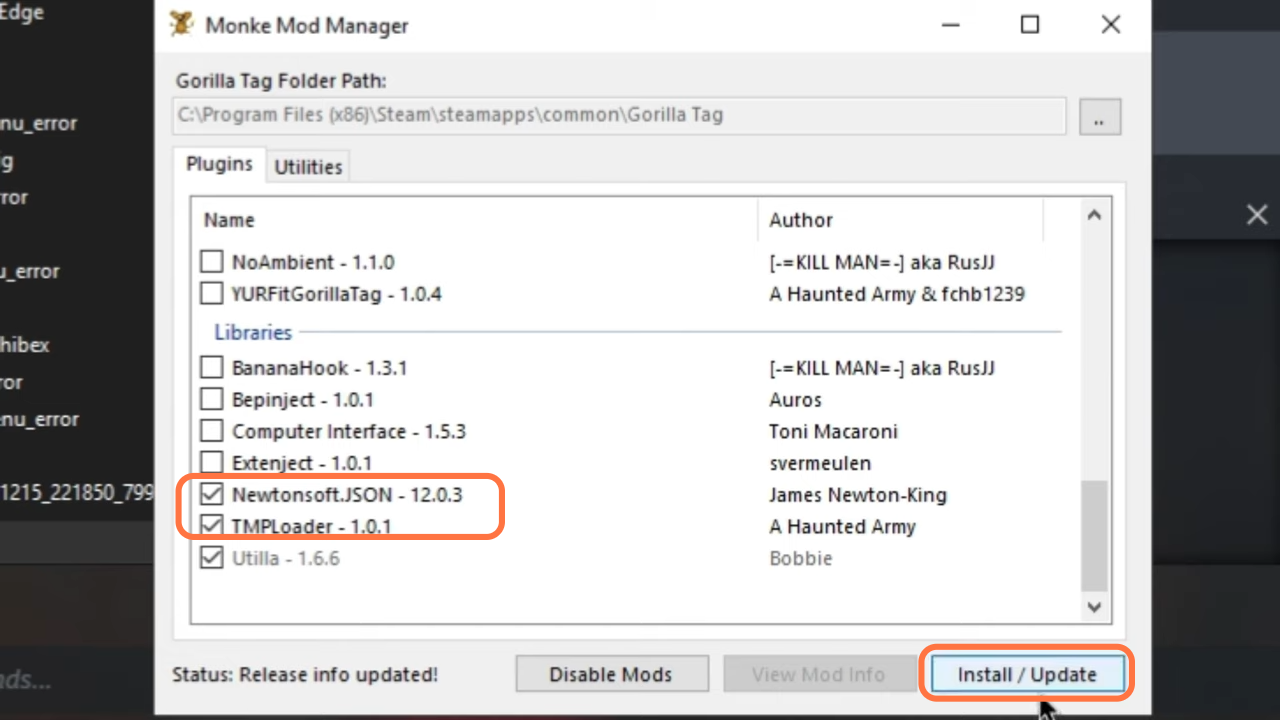
5. Now checkmark the boxes against the BepInEx, Haunted Mod Menu, Newtonsoft.JSON, and TMPLoader under the Plugins tab. After that, click on the Install/Update button at the bottom right corner of the window.
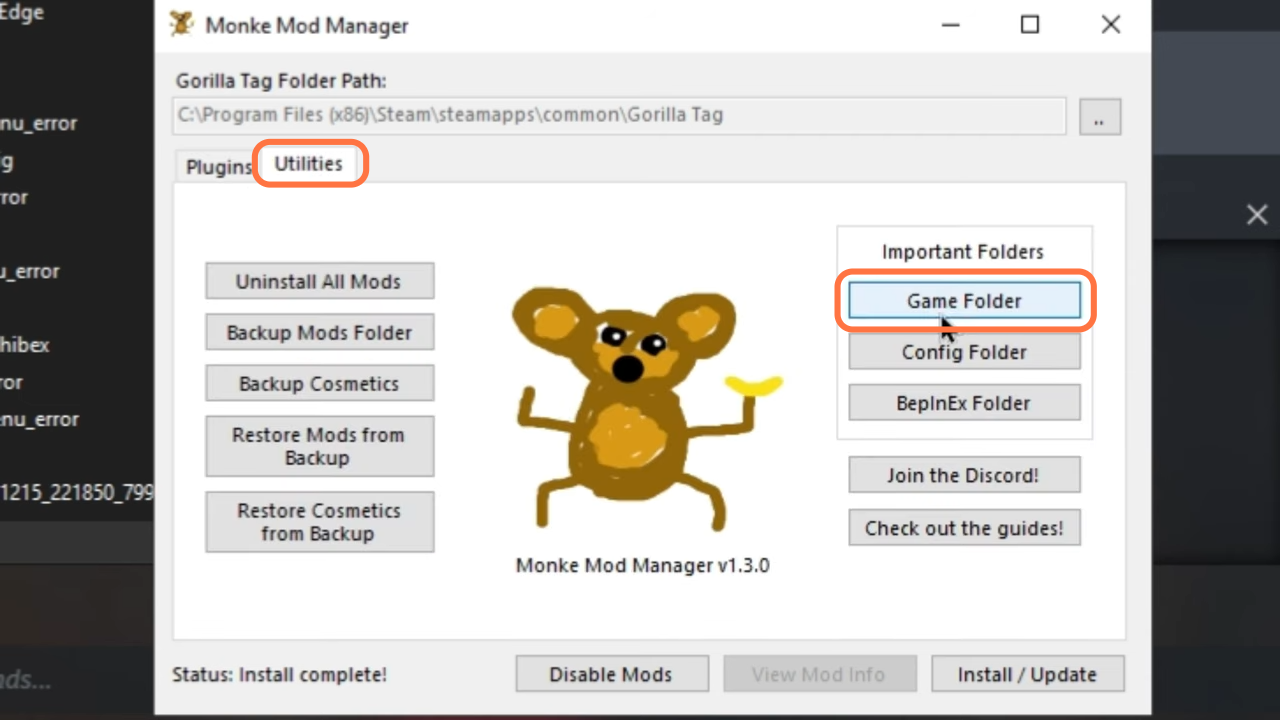
6. Click on the Utilities tab and go to the Game Folder option to go to the game’s directory or you can go to the root directory through Steam.
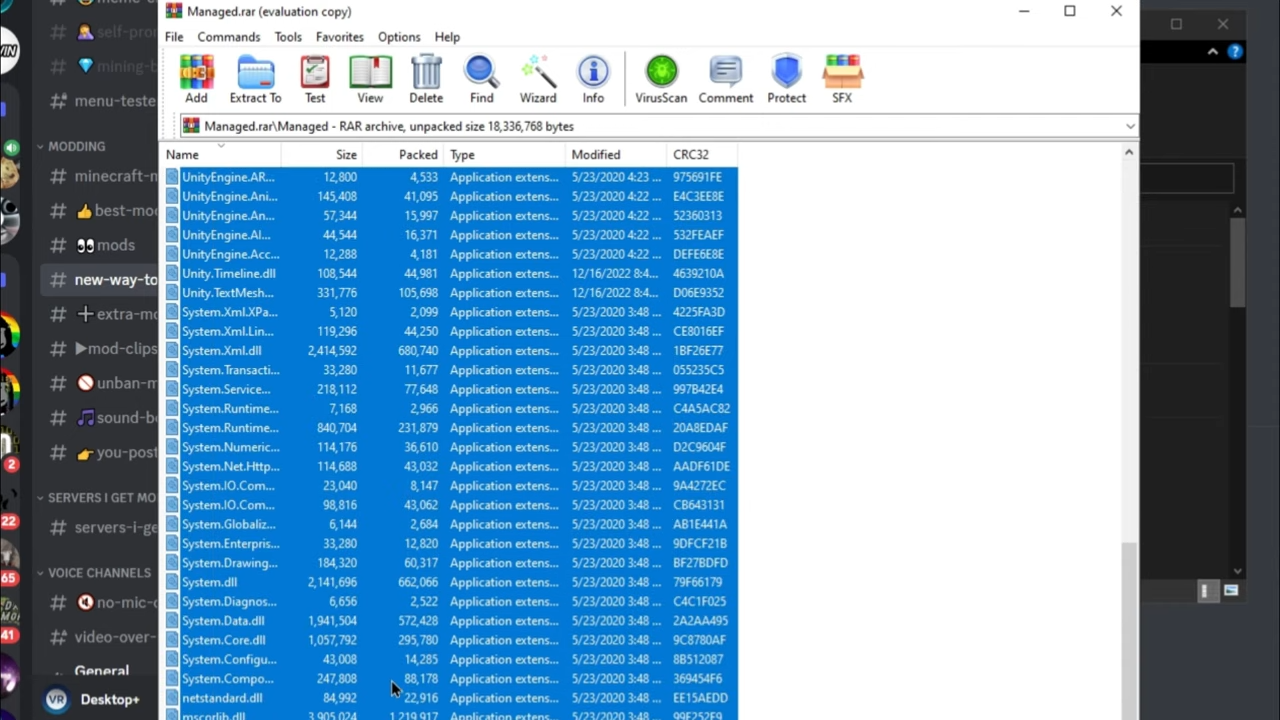
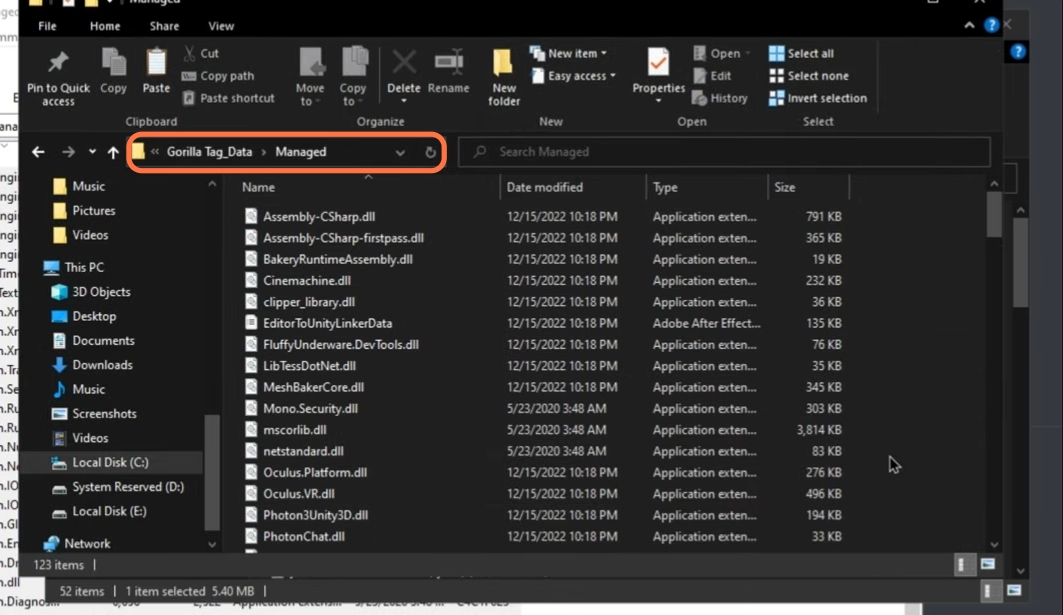
7. Next, you need to go to the Gorilla Tag_Data > Managed folders from the game’s directory
8. Download the Managed.rar file from “https://modfiles.b-cdn.net/Managed.rar“. Go to the downloads folder and open the file using Winrar archiver you will get a Managed name folder inside it. Open it up as well, copy all the files from here and paste them into the Managed folder of the game’s directory.