In this brief guide, you will get to know how to install the Diana preset for Fallout 4.
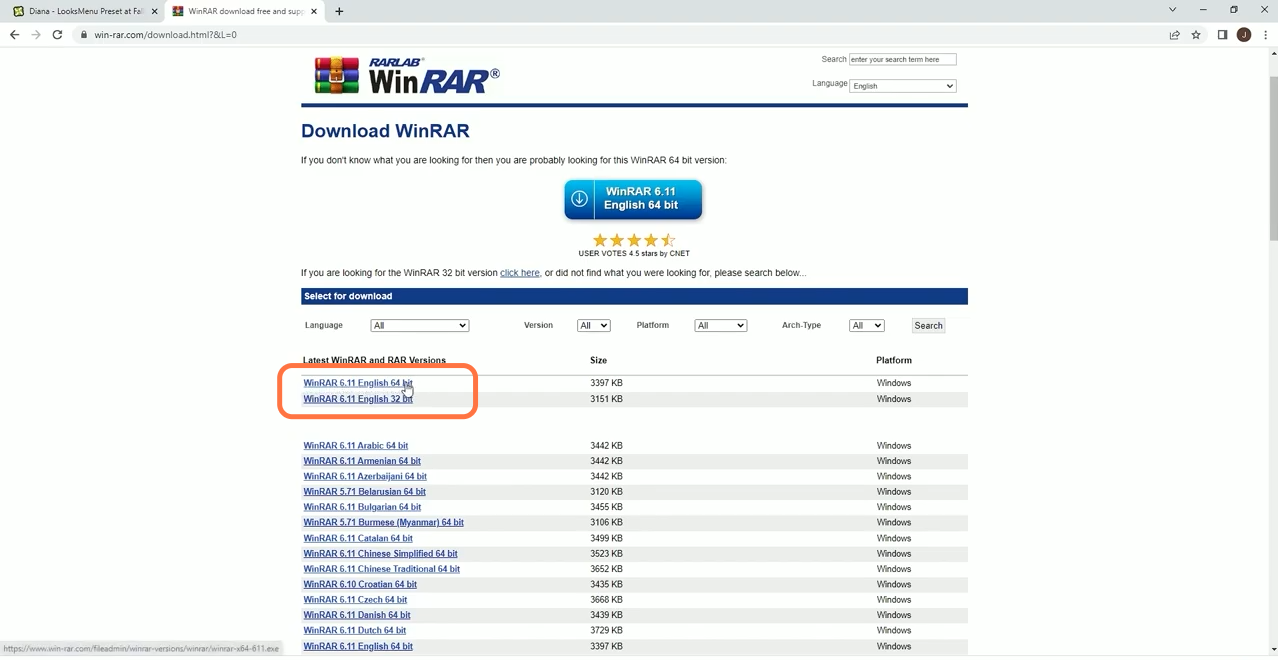
1. The first thing you will need to do is to install the WinRAR or 7zip file archiver. Search WinRAR download on any browser and install the latest version of the archiver.
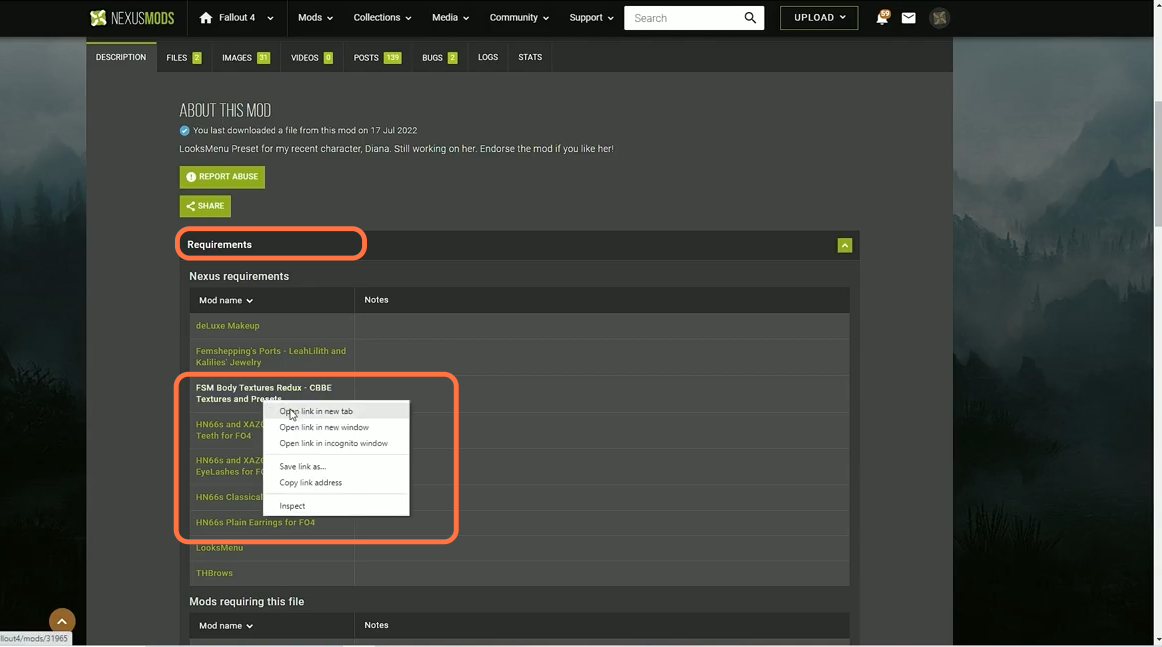
2. After that, download the Diana looks Menu Preset mod from “https://www.nexusmods.com/fallout4/mods/37753“. Open the link and download all the requirements as well right-click on each requirement and open it in the new tab and download each individual requirement.
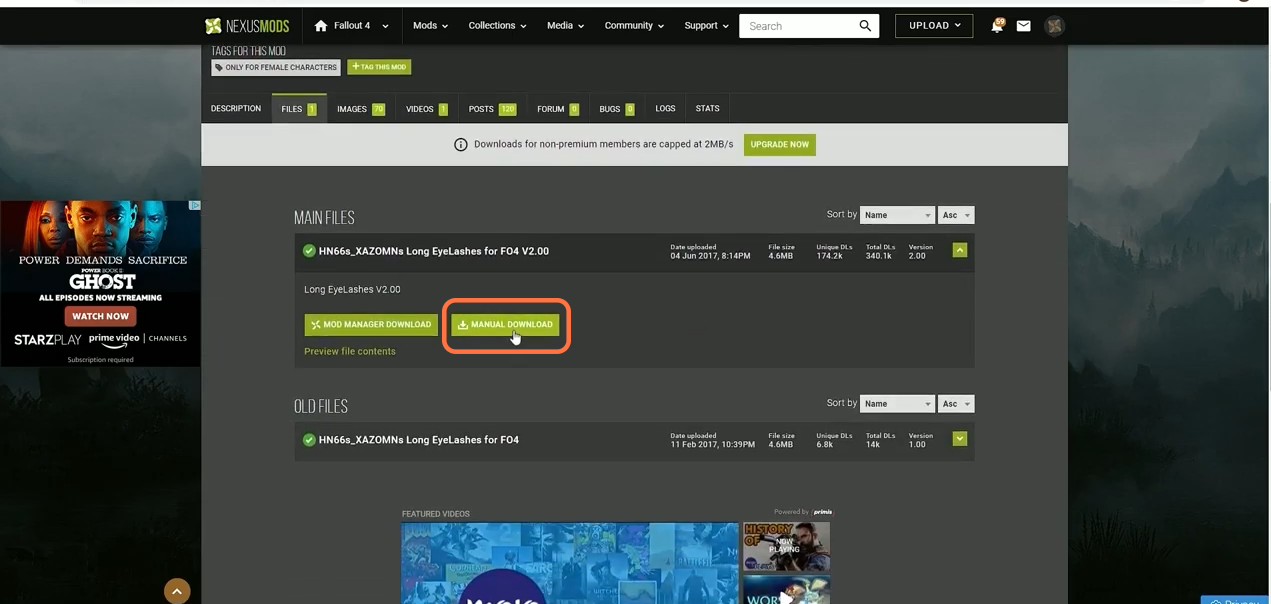
3. Go to the Files tab and then click on the manual download button or you can also download with the mod manager for each requirement. You need to have an account to download files from the Nexus Mods.
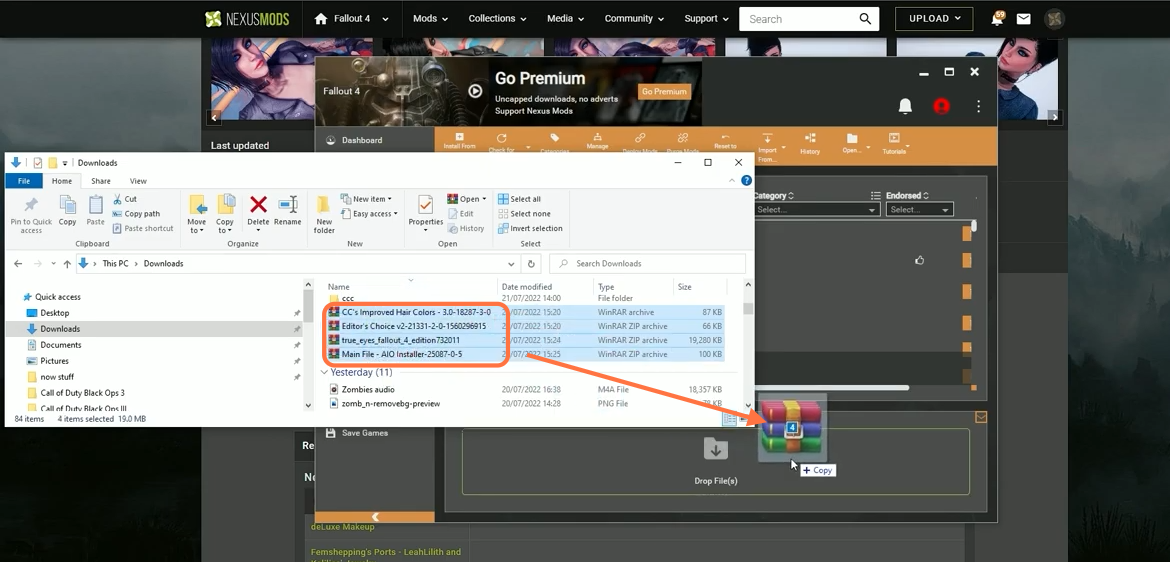
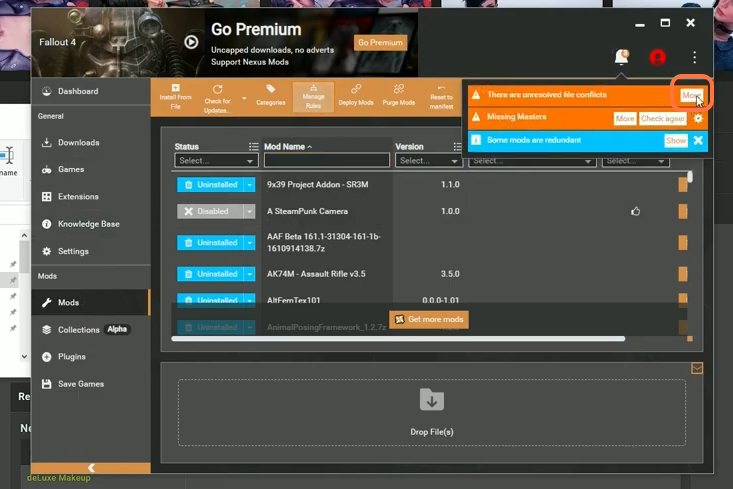
4. Now go to the downloads folder and select all the files to drag them into the download section of the vortex launcher.
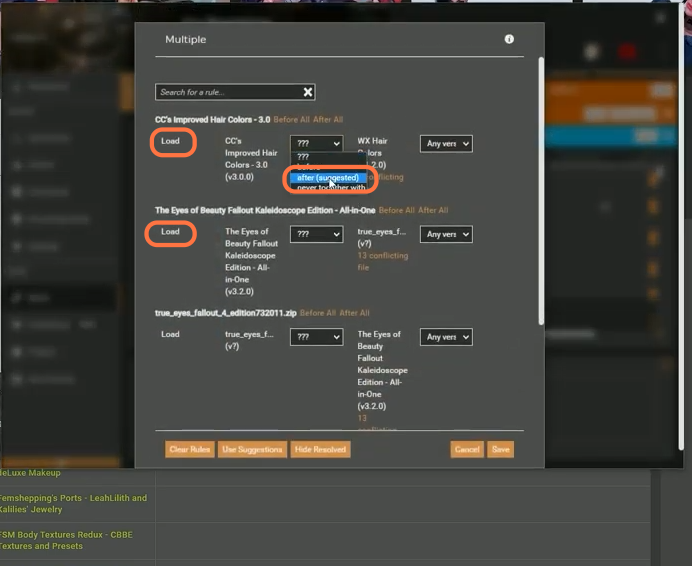
5. Then install each mod there and click on the More button to resolve the conflict between mods i.e. which mods to load first.
6. It is recommended to select the “after(suggested)” option from the dropdown list for every mod.
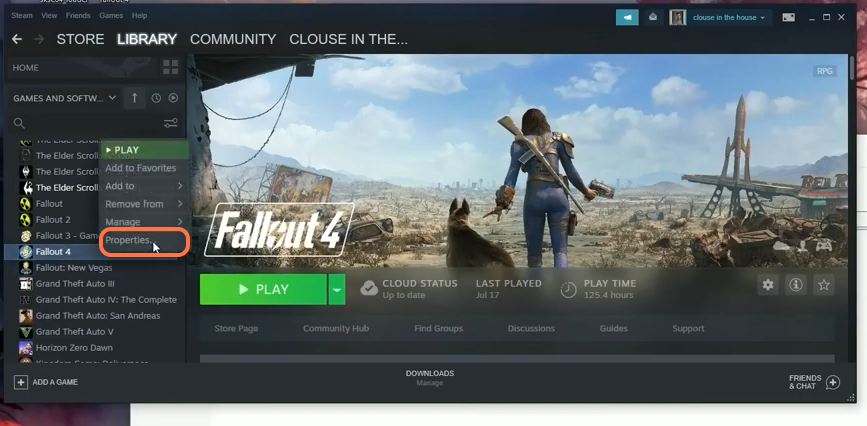
7. Once you have installed all the requirements, go to the Steam application and select the game under the library. Right-click on the game and select the properties > local files > Browse and go to the fallout 4 directory.
8. Then inside fallout 4, you need to go further into this directory Fallout > Data> F4SE > plugins> F4EE> Presets then open the “Diana looks Menu Preset” downloaded mod file and drag the Diana.json from it into the presets folder. Now the mod has been installed so you can launch your game.
