Adding mods to the game can enhance the gameplay experience by introducing new features and customization options. In this guide, you will find the process of installing the Realistic Cooking Mod in sims 4. This mod adds depth and realism to the cooking aspect of the game. You are required to install “Any Ingredient Cooking Tags Resource” and “XML Injector” Mods in order to enjoy the Cooking mod.
Step 1: Backup Your Game
Before installing any mods, it is crucial to back up your Sims 4 game files. This ensures that you have a copy of the original game in case anything goes wrong during the mod installation process. Copy the entire Sims 4 folder and paste it in a safe location, such as your desktop or an external hard drive.
Step 2: Download the Realistic Cooking Mod
To begin, you need to download the Realistic Cooking Mod from a reputable modding website like CurseForge “https://www.curseforge.com/sims4/mods/realistic-cooking-mod“. You can also look for other trusted sources that offers Sims 4 mods, such as Mod The Sims (modthesims.info) or The Sims Resource (thesimsresource.com).
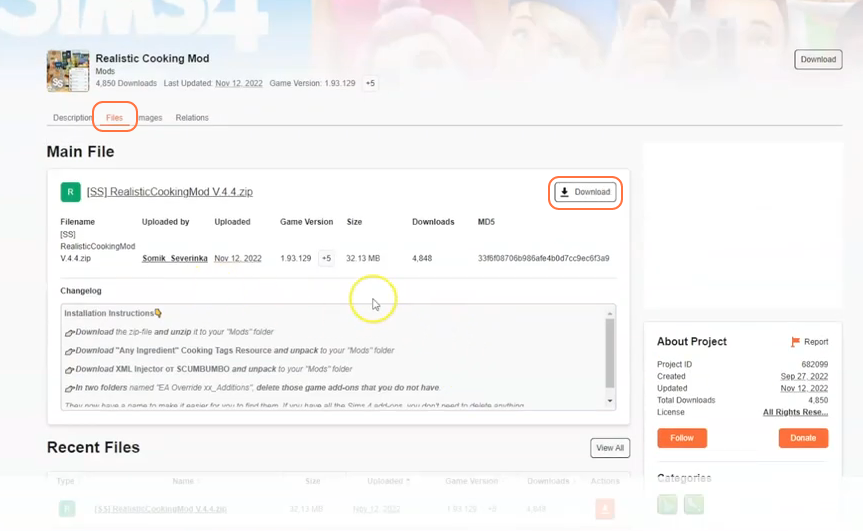
On the CurseForge website’s Mod page, click the “Files” tab then press the “Download” button under the Main File section. The mod’s zip file will start downloading in a matter of seconds, and you can monitor the progress at the bottom of your screen. There are also some additional files provided by the mod creator to incorporate the main mod. You can download these add-ons according to your preferences.
Step 3: Extract the Mod
Once the mod files are downloaded, open your File Explorer app (Windows) or Finder application (Mac) and locate the downloaded files which are typically stored in the Downloads folder.
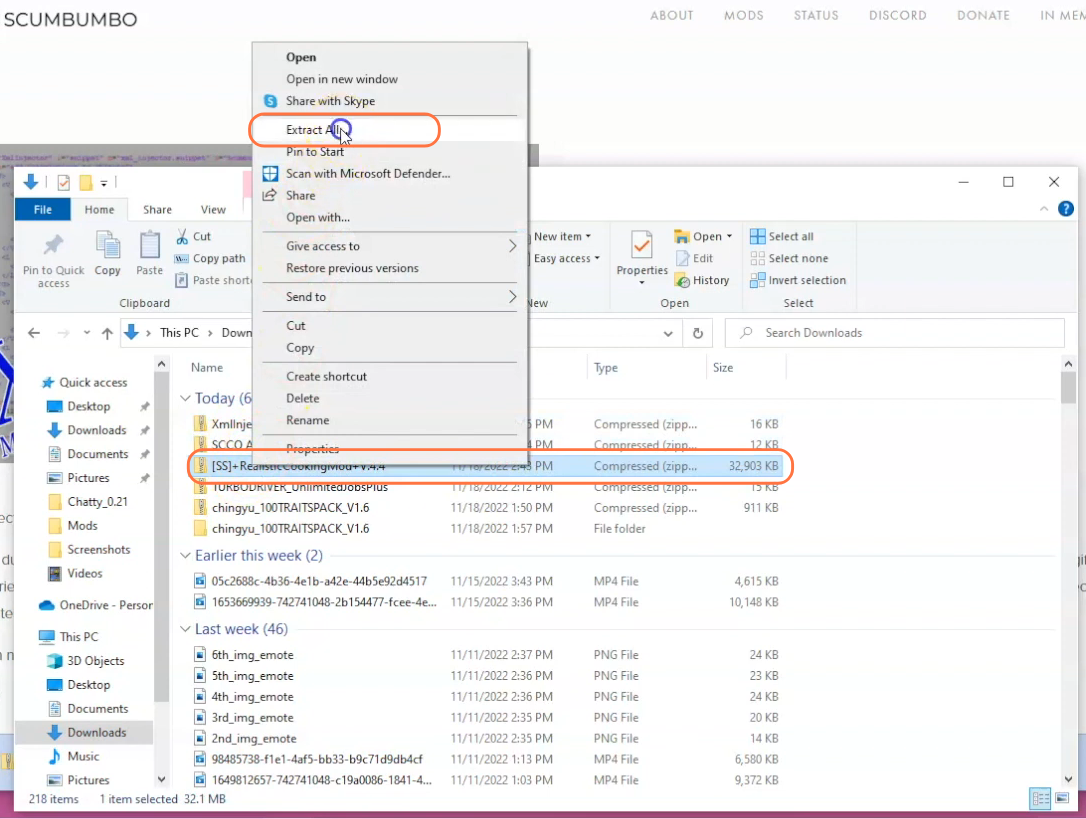
If the mod is in a compressed file format usually a .zip or .rar file, extract the files from the archive. Right-click on the downloaded file and select “Extract All” or “Extract Here“.
Choose a destination for the extracted files, and click “Extract” to proceed. Mac users can simply double-click the zip file to unzip its content.
Step 4: Exploring the Subfolder and Managing Optional Add-ons
This step involves opening the subfolder within the extracted folder, which shares the same name as the main folder. Inside the subfolder, you will find two additional folders and 2 package files. One of the folders is optional and named “EA Override (Optional)”.
This optional folder contains two more subfolders called “Additions” (Ingredients_Additions and Recipes_Additions). If you do not possess certain game add-ons, you have the choice to delete them. For those who have these add-ons, they can be moved into the Mods folder.
Additionally, the add-ons within the Optional folder now have descriptive names to simplify identification. If you own all the Sims 4 add-ons, there is no need to delete anything.

Step 5: Locate the Mods Folder
Open a File Explorer window and navigate to the Mods folder in your Sims 4 game directory. The game directory is typically found at (Username) > Documents > Electronic Arts > The Sims 4. The Mods folder serves as the central location for all custom content and mods.
If you don’t have a Mods folder in your game directory or have never installed mods before, launch the game at least once and then exit to generate the necessary folders, such as Documents, Electronic Arts and Mods, for a smooth mod installation process.
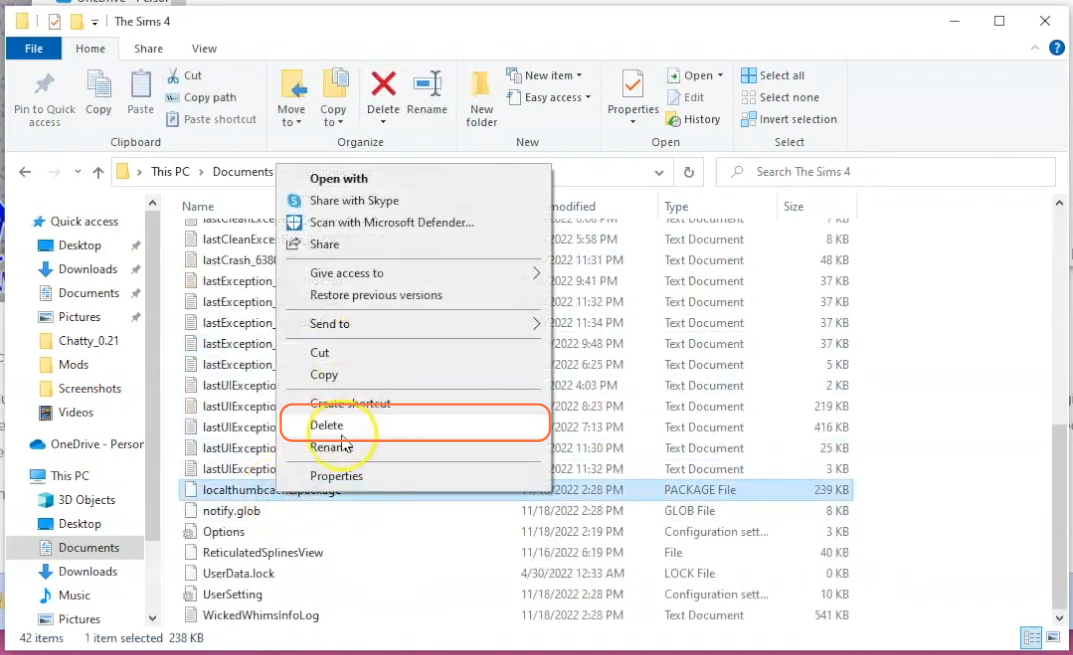
Ensure that the game is not running while you install any modifications. It is also recommended to delete the “localthumbcache.package” file from your Sims 4 folder.
Step 6: Install the Realistic Cooking Mod
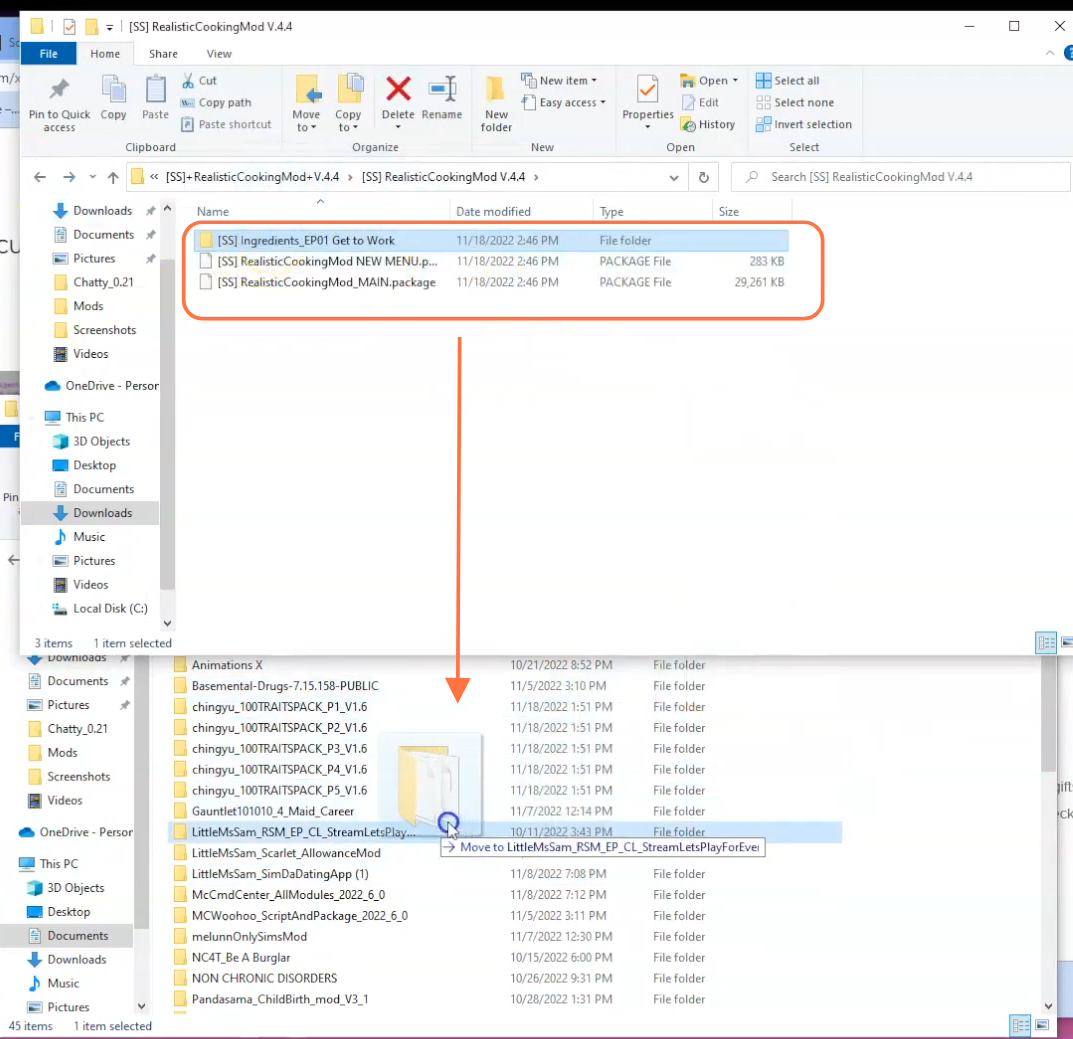
Take the “Get To Work” folder and Package files from the extracted folder and drag these three items into the Mods folder of The Sims 4 directory.
This action ensures that the mod is correctly placed for the game to recognize and activate it seamlessly. If you already have a previous version of the mod installed, be sure to delete it from the Mods folder before adding the new version.
Step 7: Disable Auto Updates for Origin or EA App
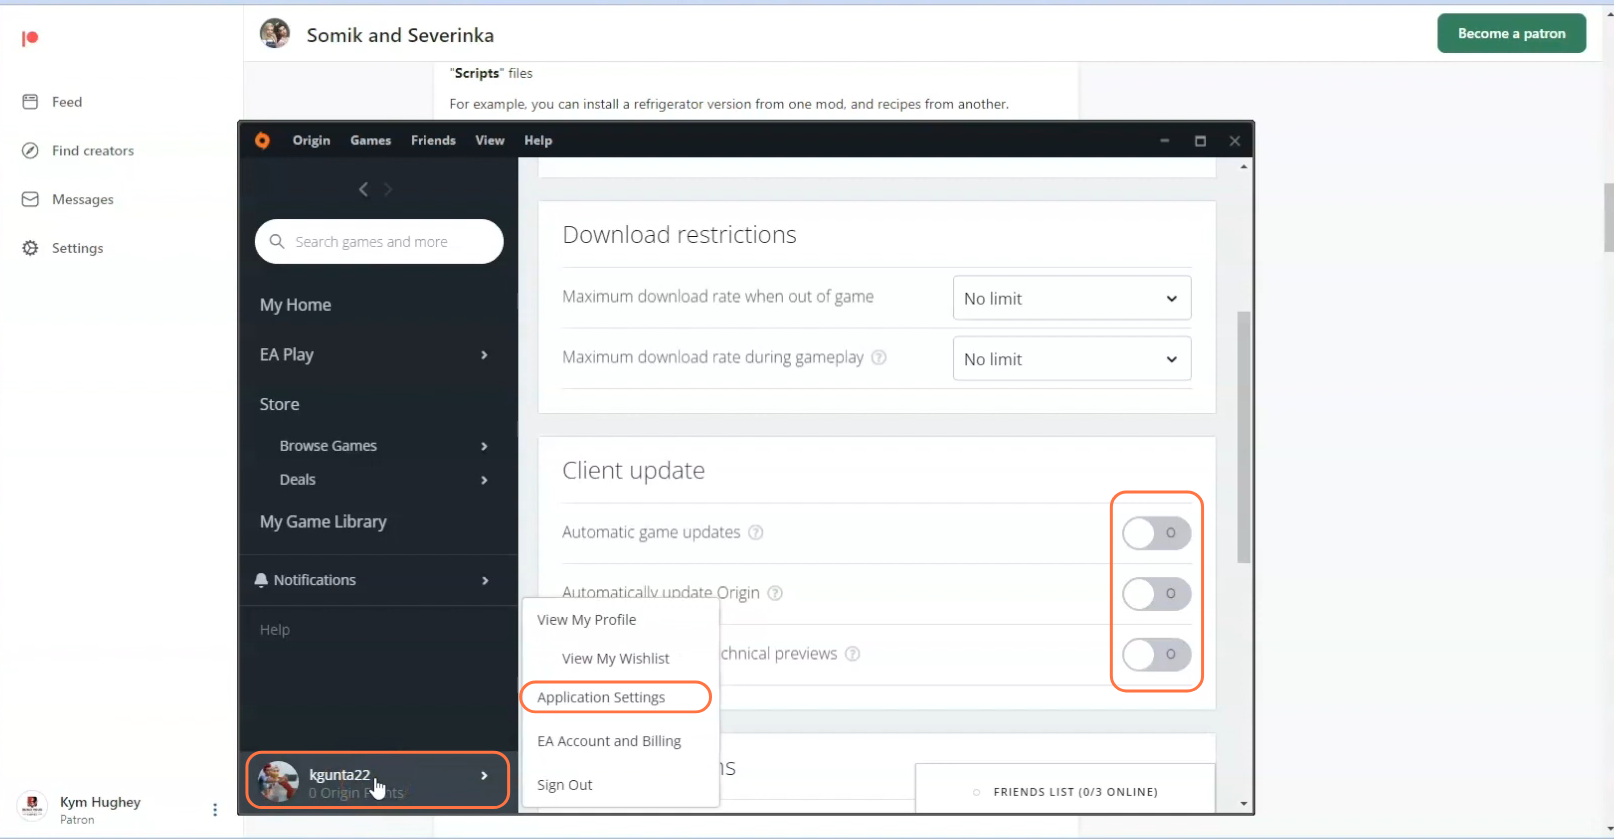
If you are using the Origin app, it is recommended to disable auto updates for both the app and the game to prevent potential issues with your mods.
Launch the Origin app, hover over your username, and select “Application Settings” option. Scroll down to the “Client Update” section and disable all the toggle buttons for automatic updates. This ensures that your mods folder won’t be affected when an update is available for the app or the Sims 4 game. If an update is released, first take out your mods folder from the Sims 4 directory and place it in a save place, update the app or game, and then reinsert the mod folder into the directory to maintain the functionality of your mods.
Step 8: Enable Mods and Script Mods in the Game
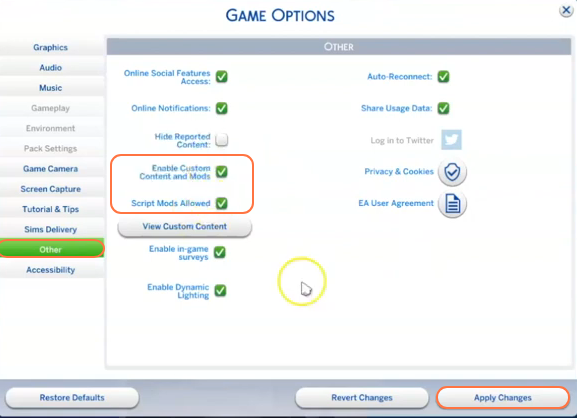
Now launch The Sims 4 game and navigate to the main menu. Click on the Options menu, then select Game Options. In the Game Options window, go to the “Other” tab. Locate the section labelled “Enable Custom Content and Mods” and make sure the box next to it is checked.
Also, enable the “Script Mods Allowed” option. Click the “Apply Changes” button at the bottom right corner of the screen to save the settings.
Step 9: Start the Game
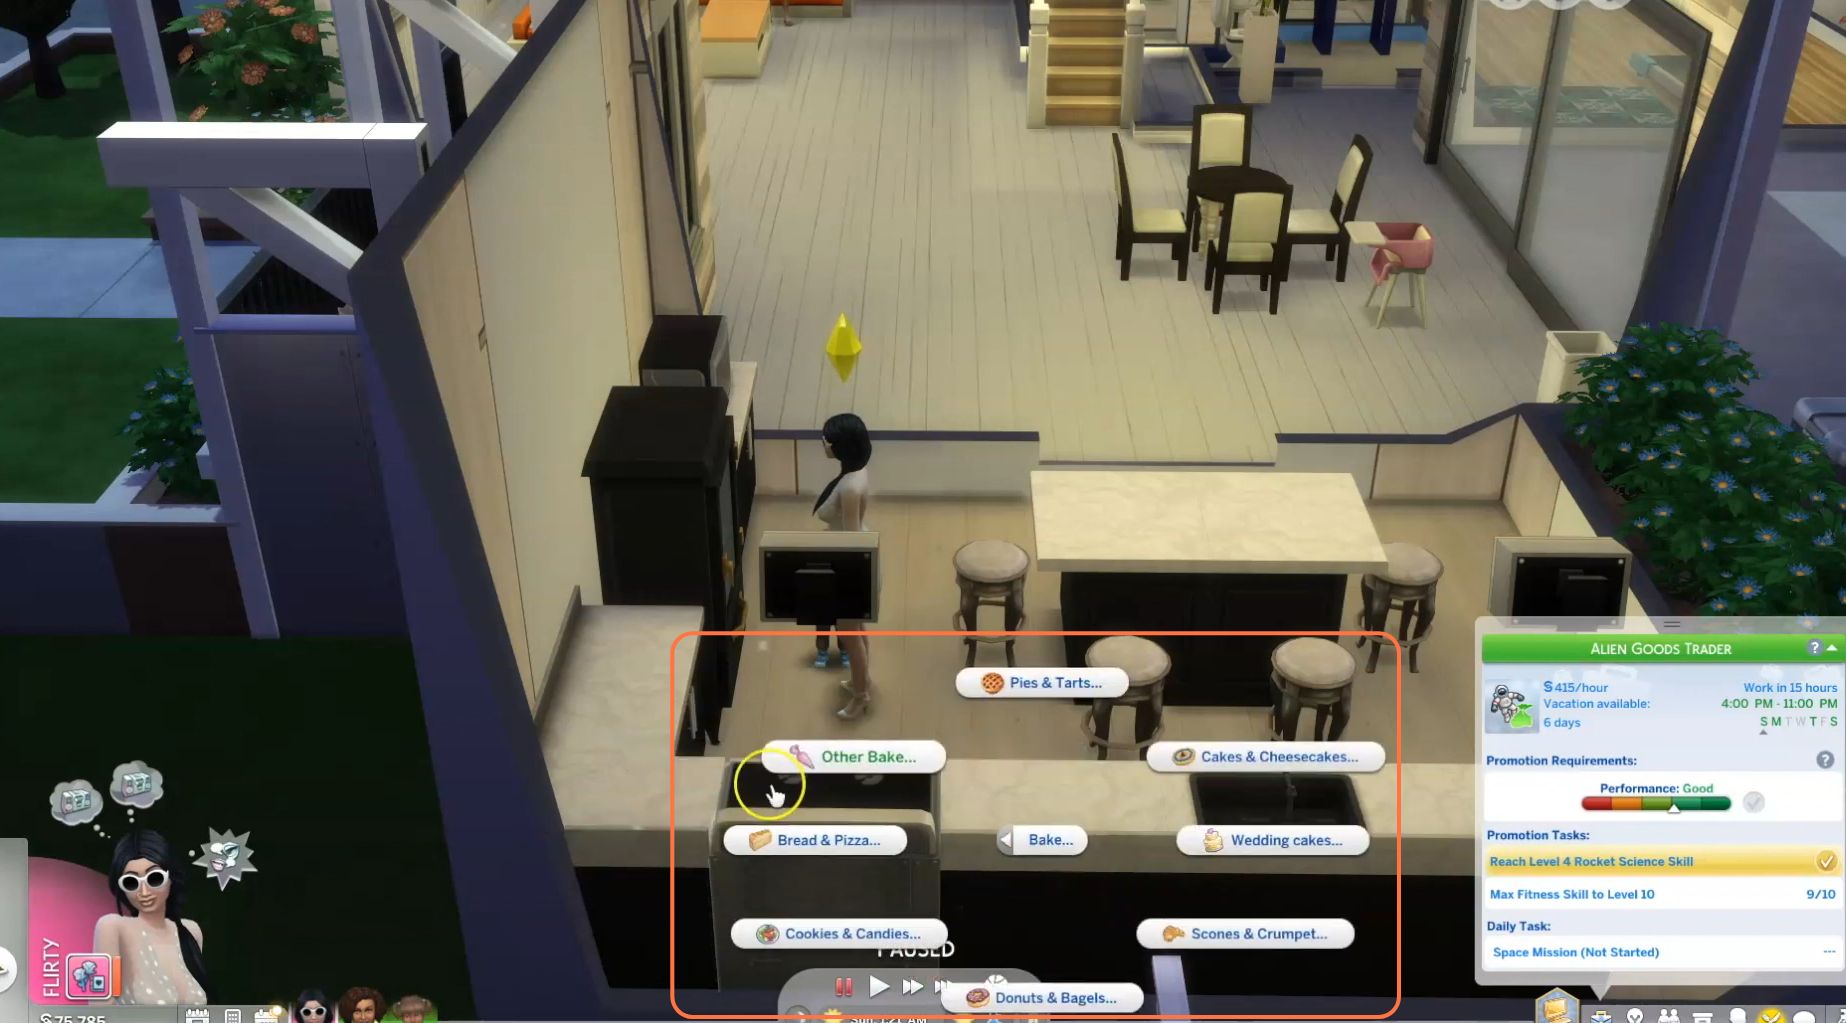
Now that you have installed the Realistic Cooking Mod and enabled script mods, you can start the game. Create a new household or load an existing one to experience the mod’s features. The Realistic Cooking Mod should now be active, enhancing the cooking mechanics in your Sims 4 gameplay. Click on the stove to check out if the mod has been installed correctly. You will see homemade and ingredients options and a menu will appear up on clicking the Homemade option which shows the mod is installed correctly.