This guide will let you know how to install the XBSX2 emulator for Xbox with developer mode. You have to register the Xbox installation package, change the game type, and then boot the USB drive for Xbox. After that, configure BIOS, cheats and covers, etc.
Registering Xbox installation package
In this section, we will take you through the steps to register Xbox installation package. First, you have to go to the remote access settings and enable the Xbox device portal. After that, upload the recently downloaded Xbsx2 file in the installation package application and start the installation package to register it successfully.
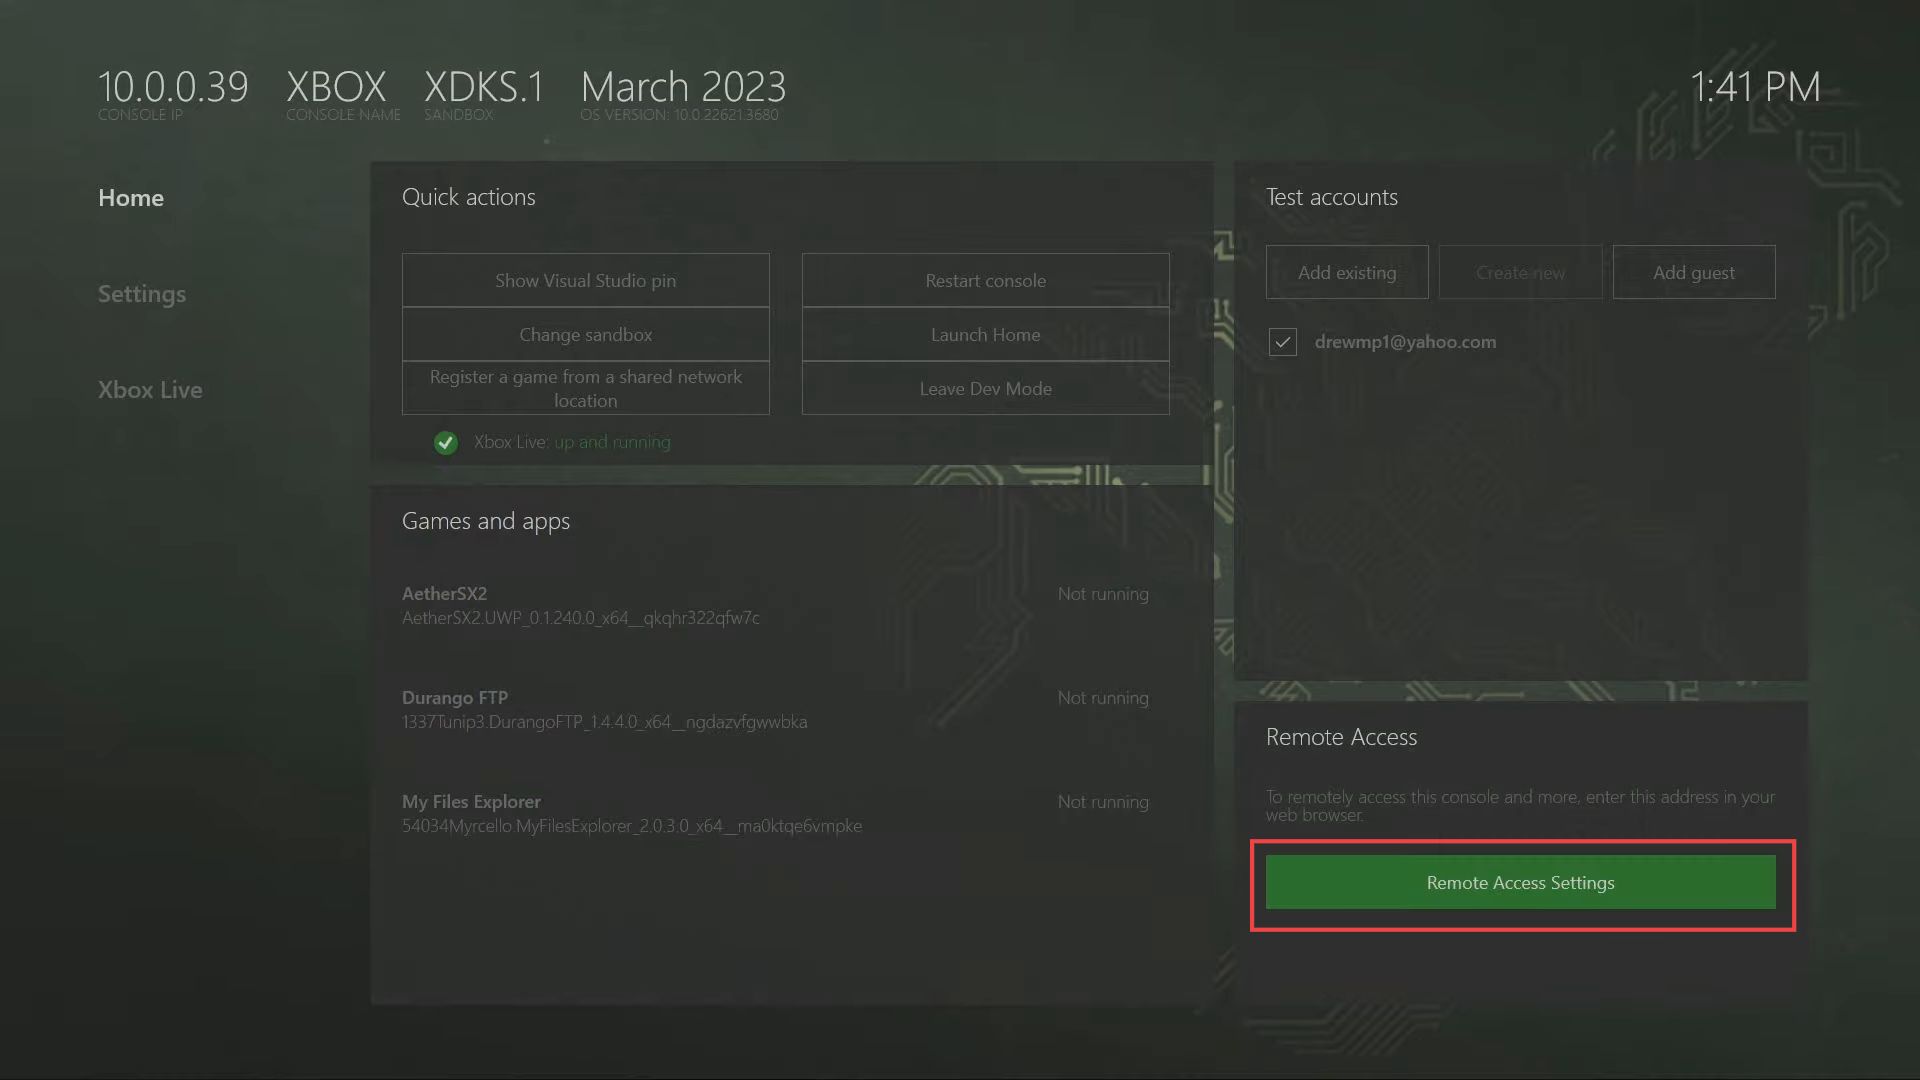
- First, you need to launch Xbox on your computer.
- Once this window is opened, click the Remote Access Settings button from the Remote Access.
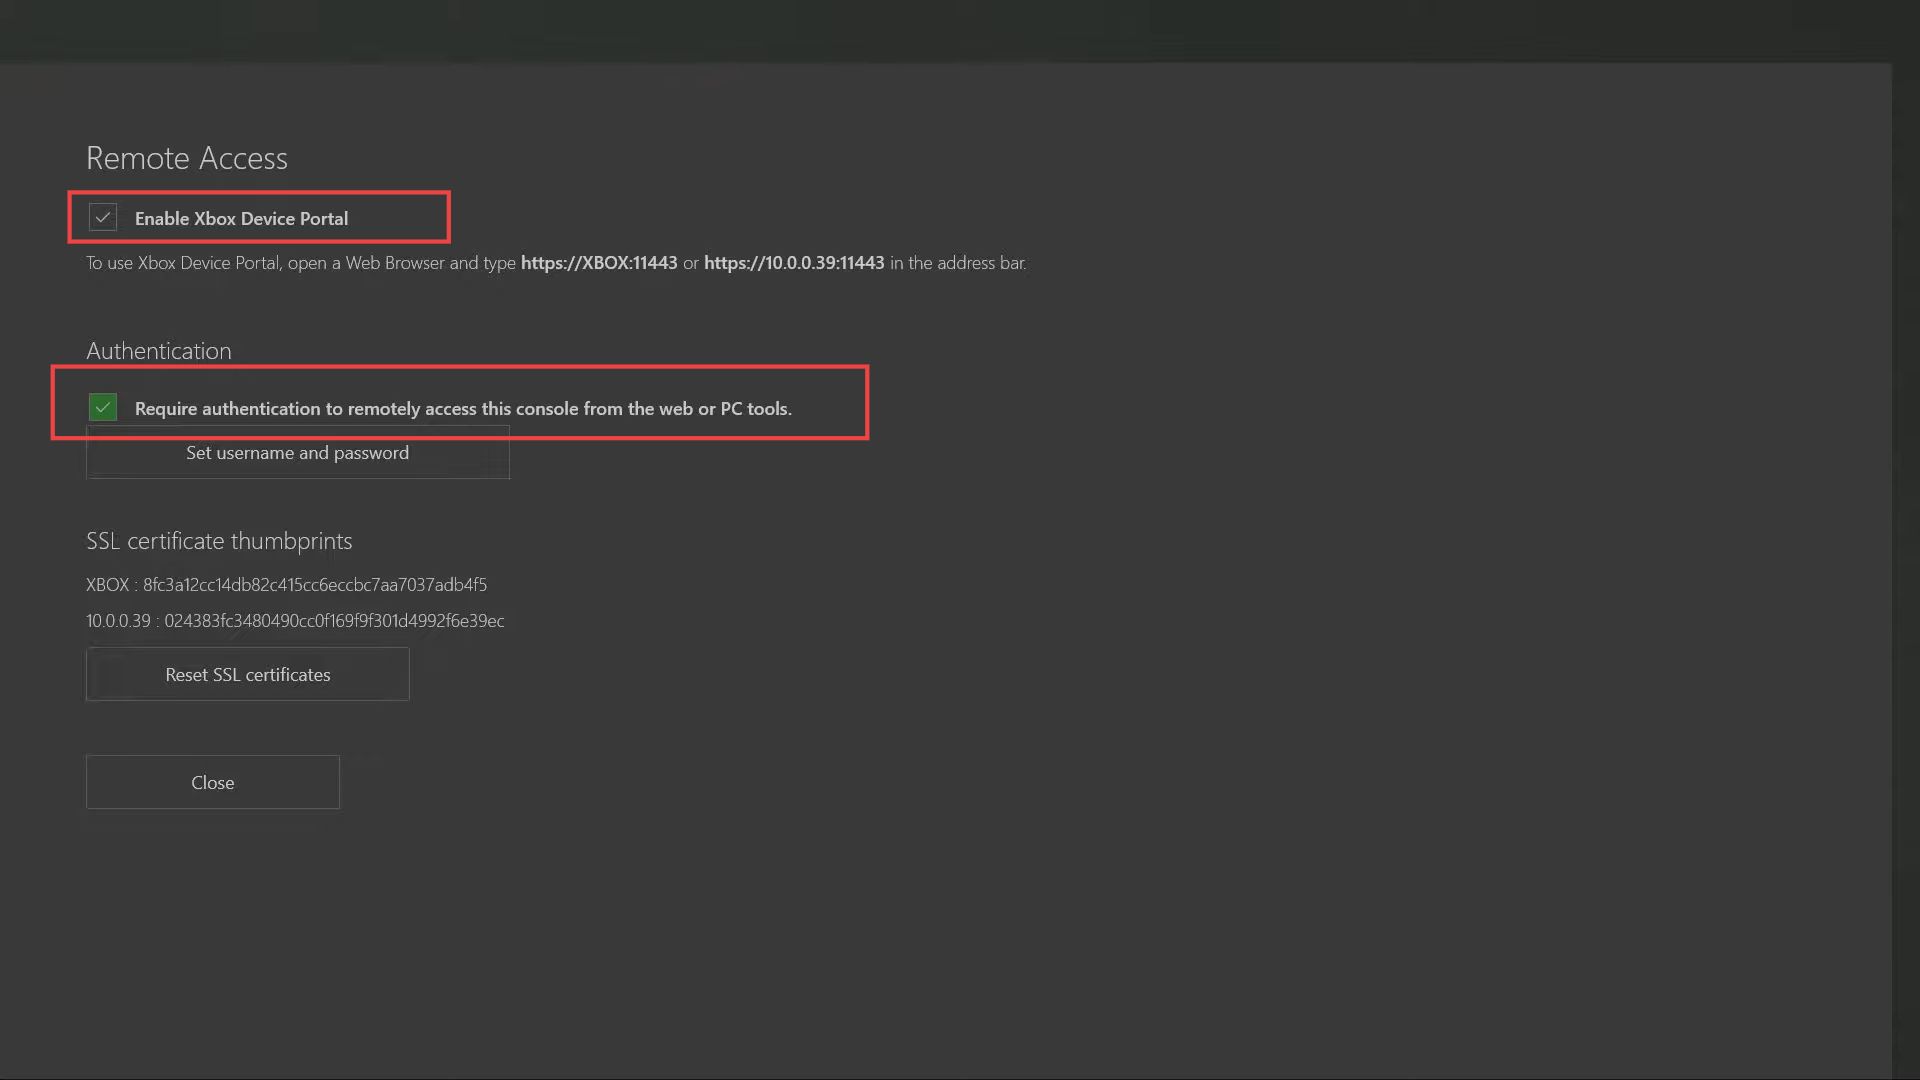
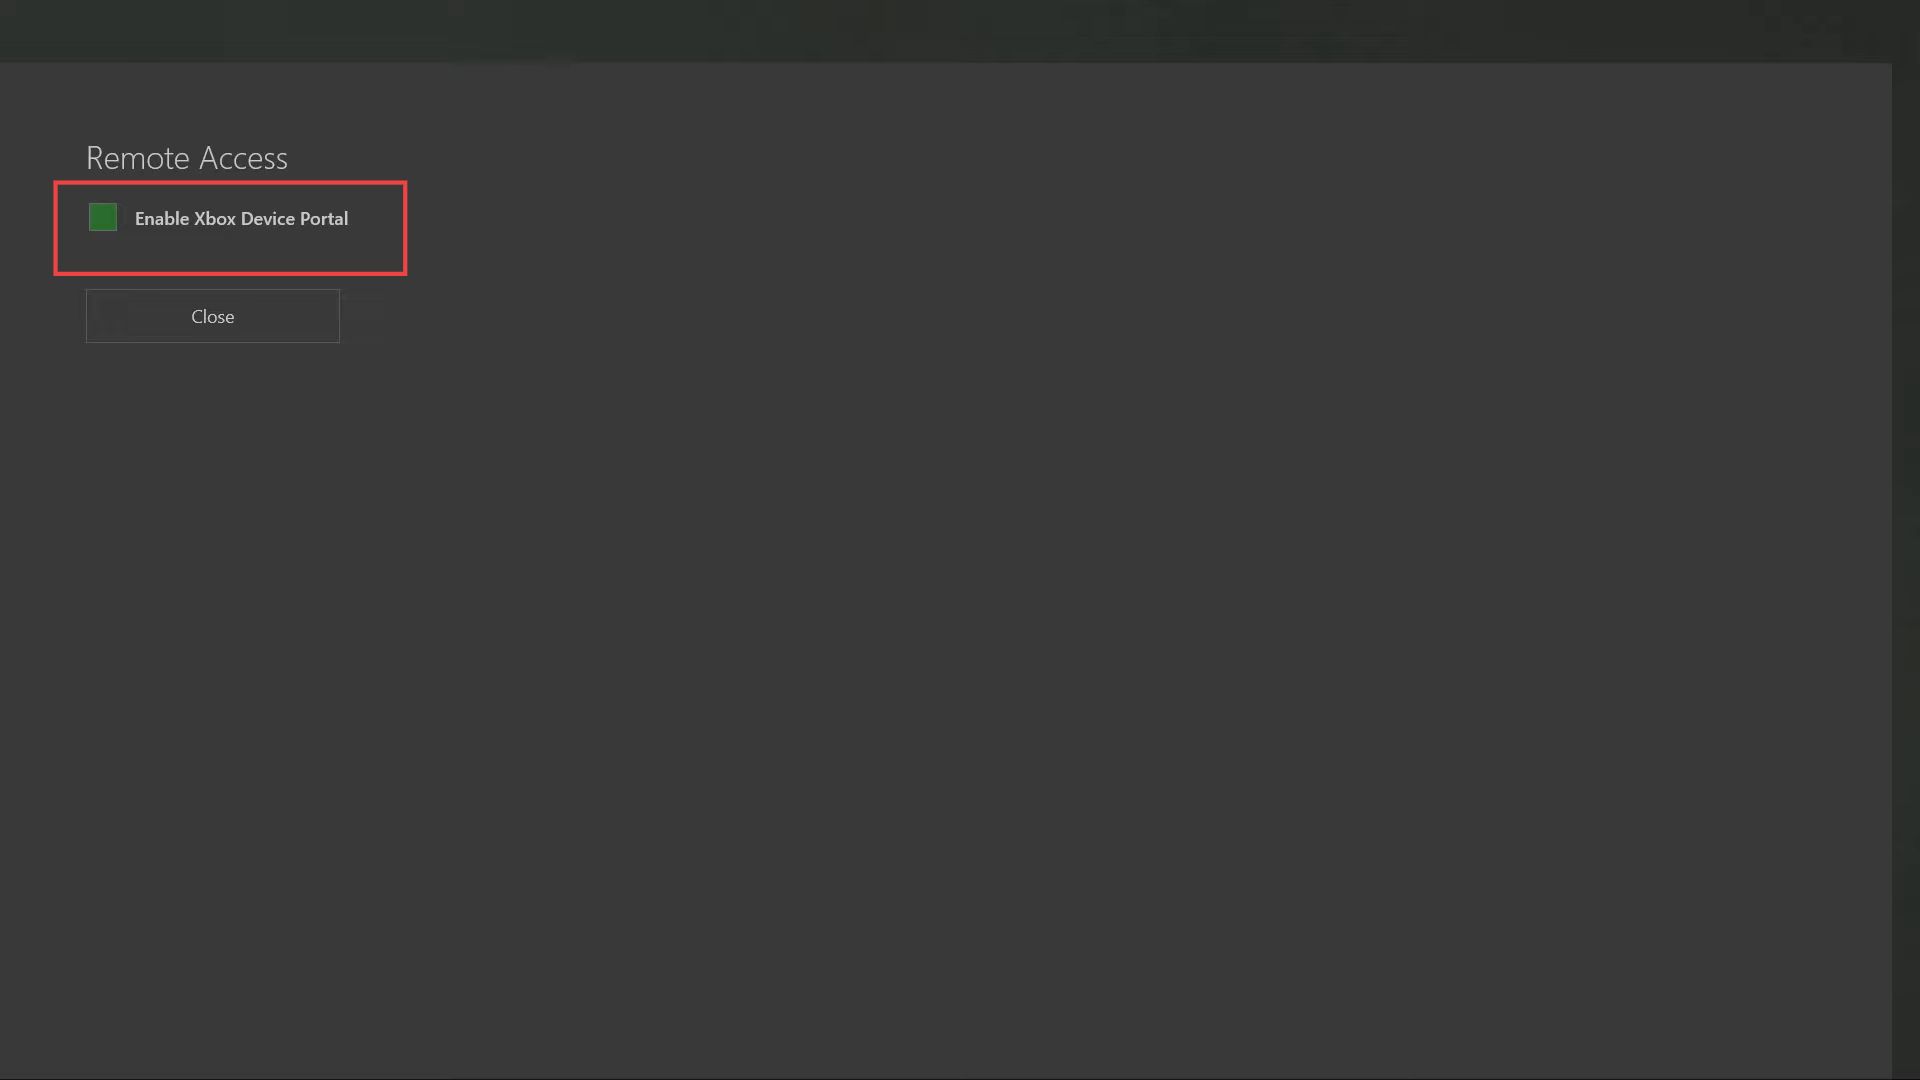
- Now ensure that the option named Enable Xbox device portal is check-marked.
- Checkmark the option named Require authentication to remotely access this console from the web or PC tools under the Authentication section.
- You need to set up a username and password to prevent any outsider to access your Xbox account.
- Open up the web browser and access the Xbox Device Portal from your browser.
- If the link doesn’t open up, click on the Advanced option from the menu.
- Scroll down and click the Proceed to 10.0.0.39 (unsafe) option from the menu.

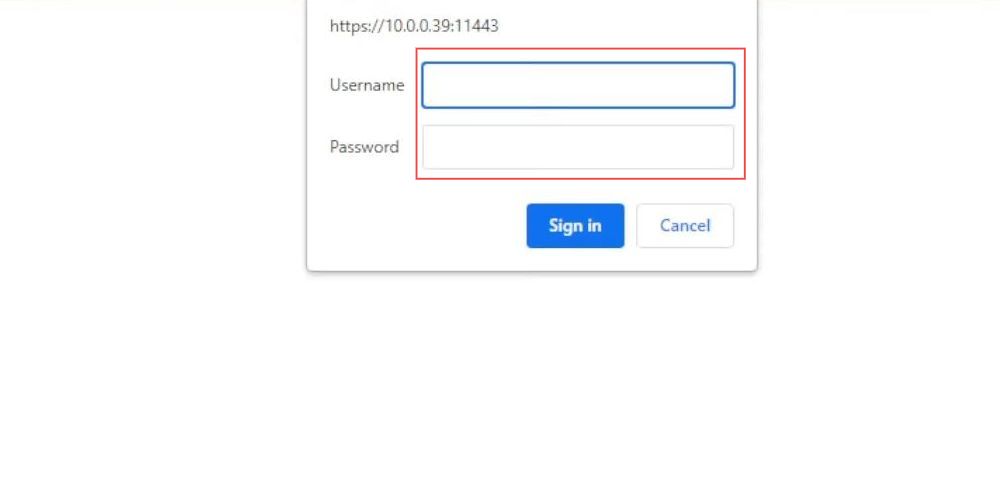
- Now if you have set an authentication password, then input your username and password in the sign-in boxes to access the web link.
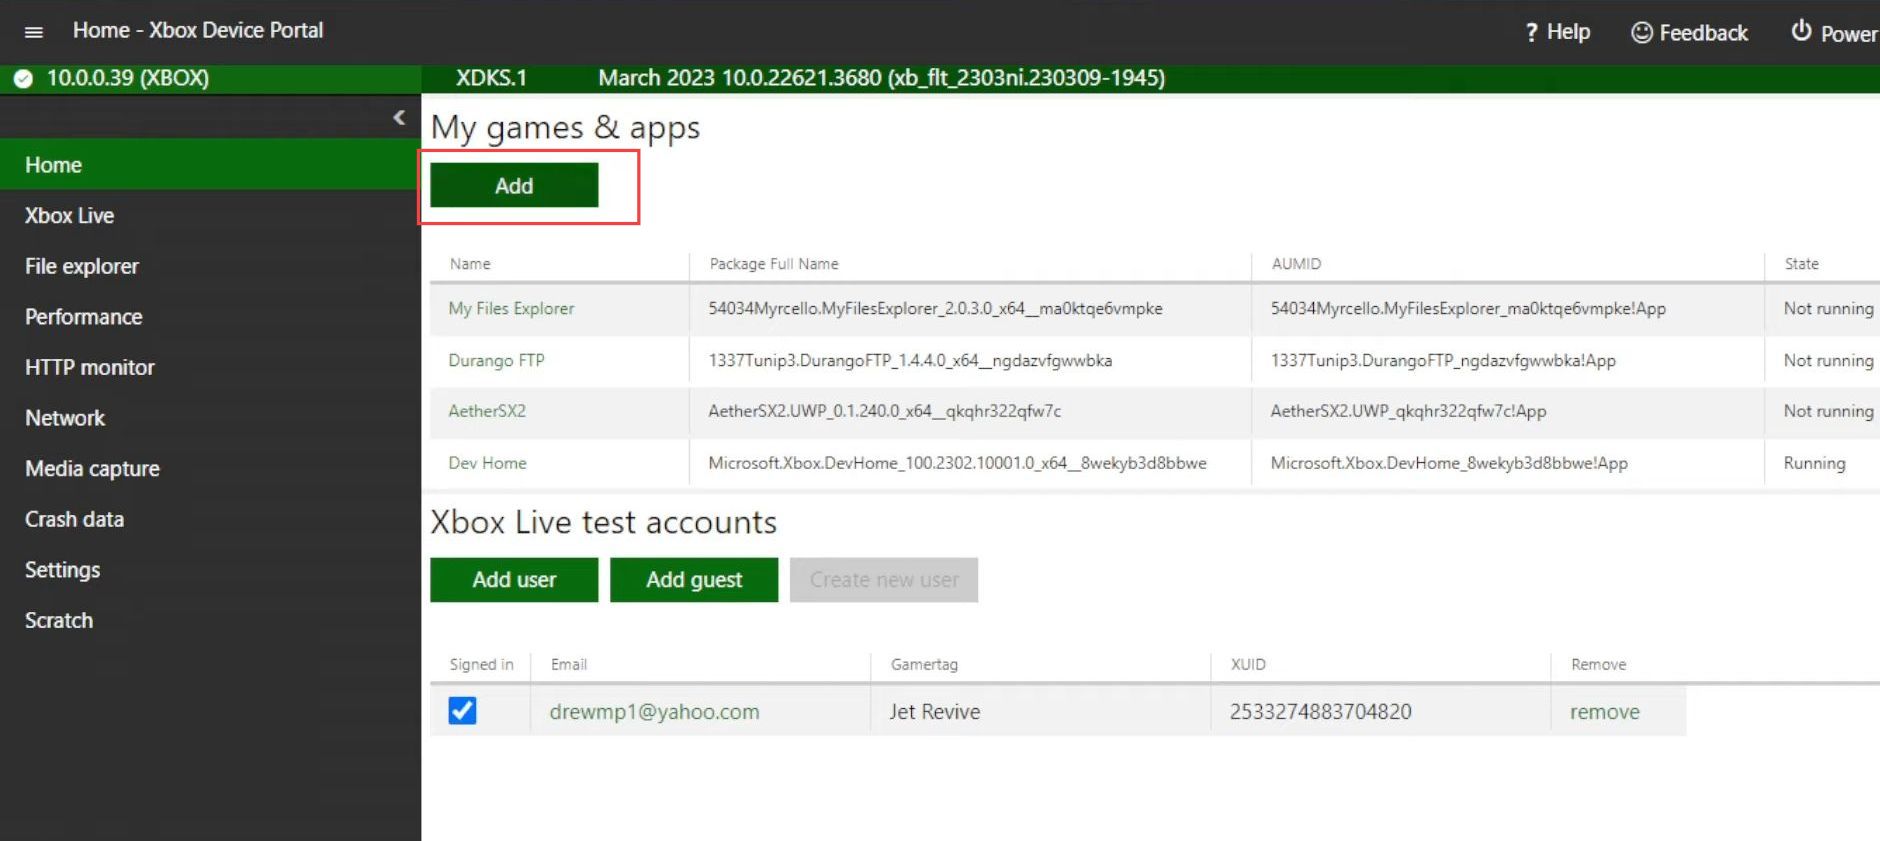
- Upon reaching this window, click the Add button from the Home section.
- Ensure that you have downloaded the XBSX2 (developer mode) and USB files from Google Drive.
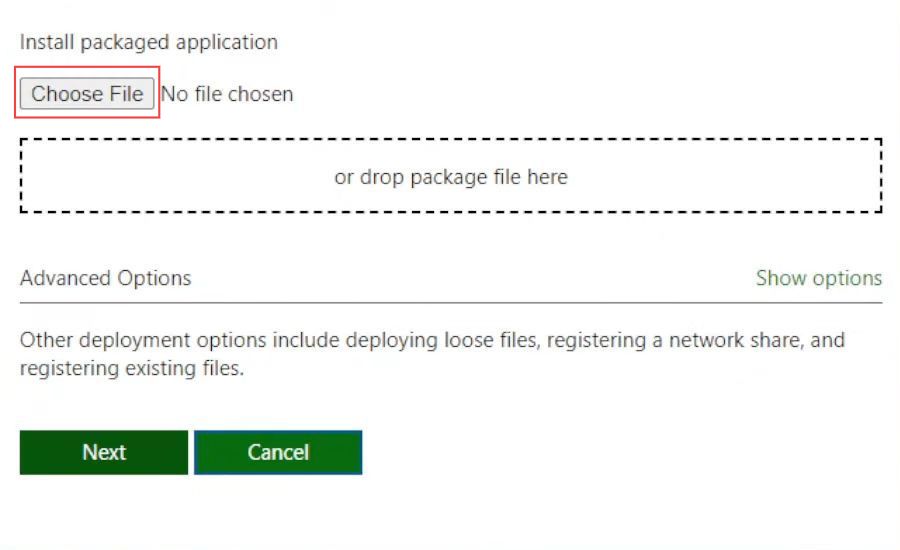
- Once this window appears, you have to click the Choose File button from the menu of the installed packages application.
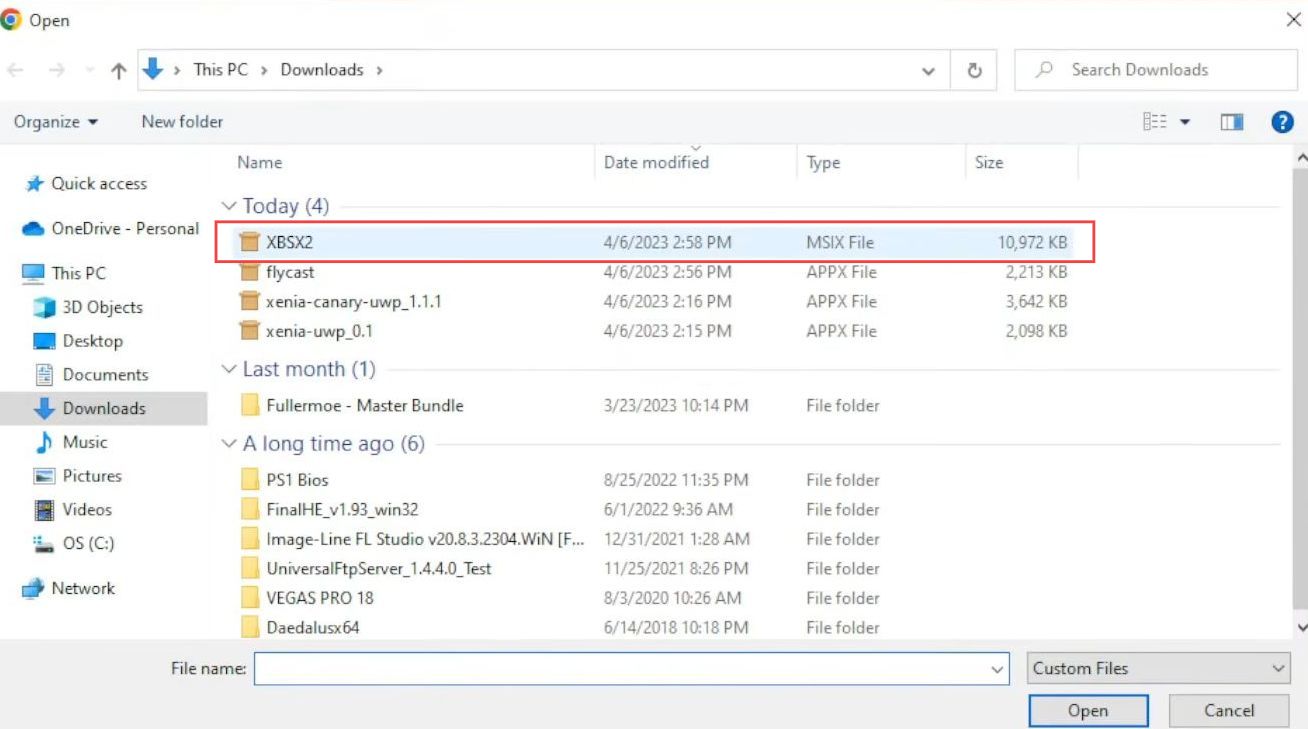
- Select the recently downloaded XBSX2 file from the download folder.
- Click the Open button from the menu.
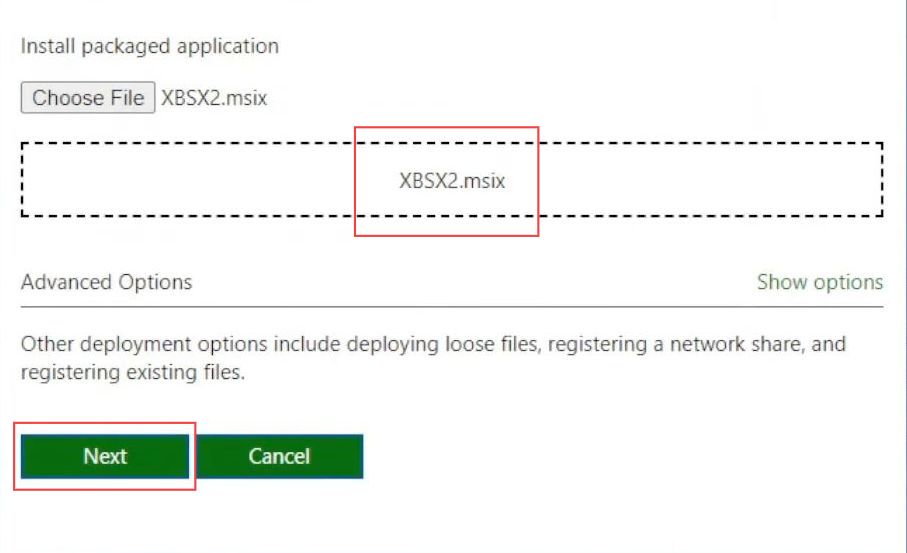
- Once the file is uploaded, click the Next button from the menu.
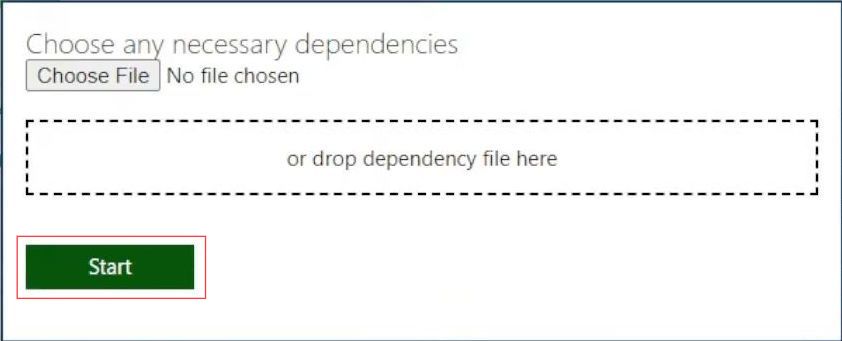
- Upon reaching this window you have to click the Start button as there is no dependency.
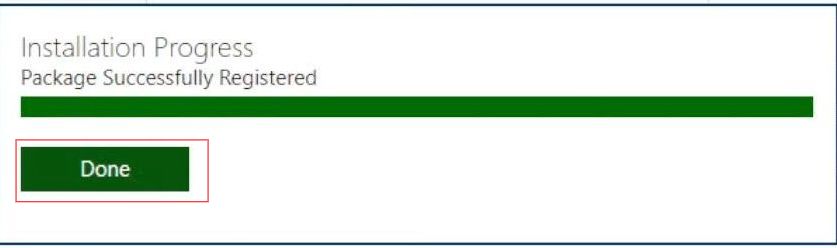
It will proceed with the package registration through the installation process.
- Once the package is registered successfully, click the Done button.
- After that, exit your browser by clicking the close button.
- Uncheck the option named Enable Xbox Device Portal from the section on remote access.
Changing Game Type
This section describes how to change the type of the game. First, you have to click the XBSX2 option from the home menu and then change the type from the application to the game.
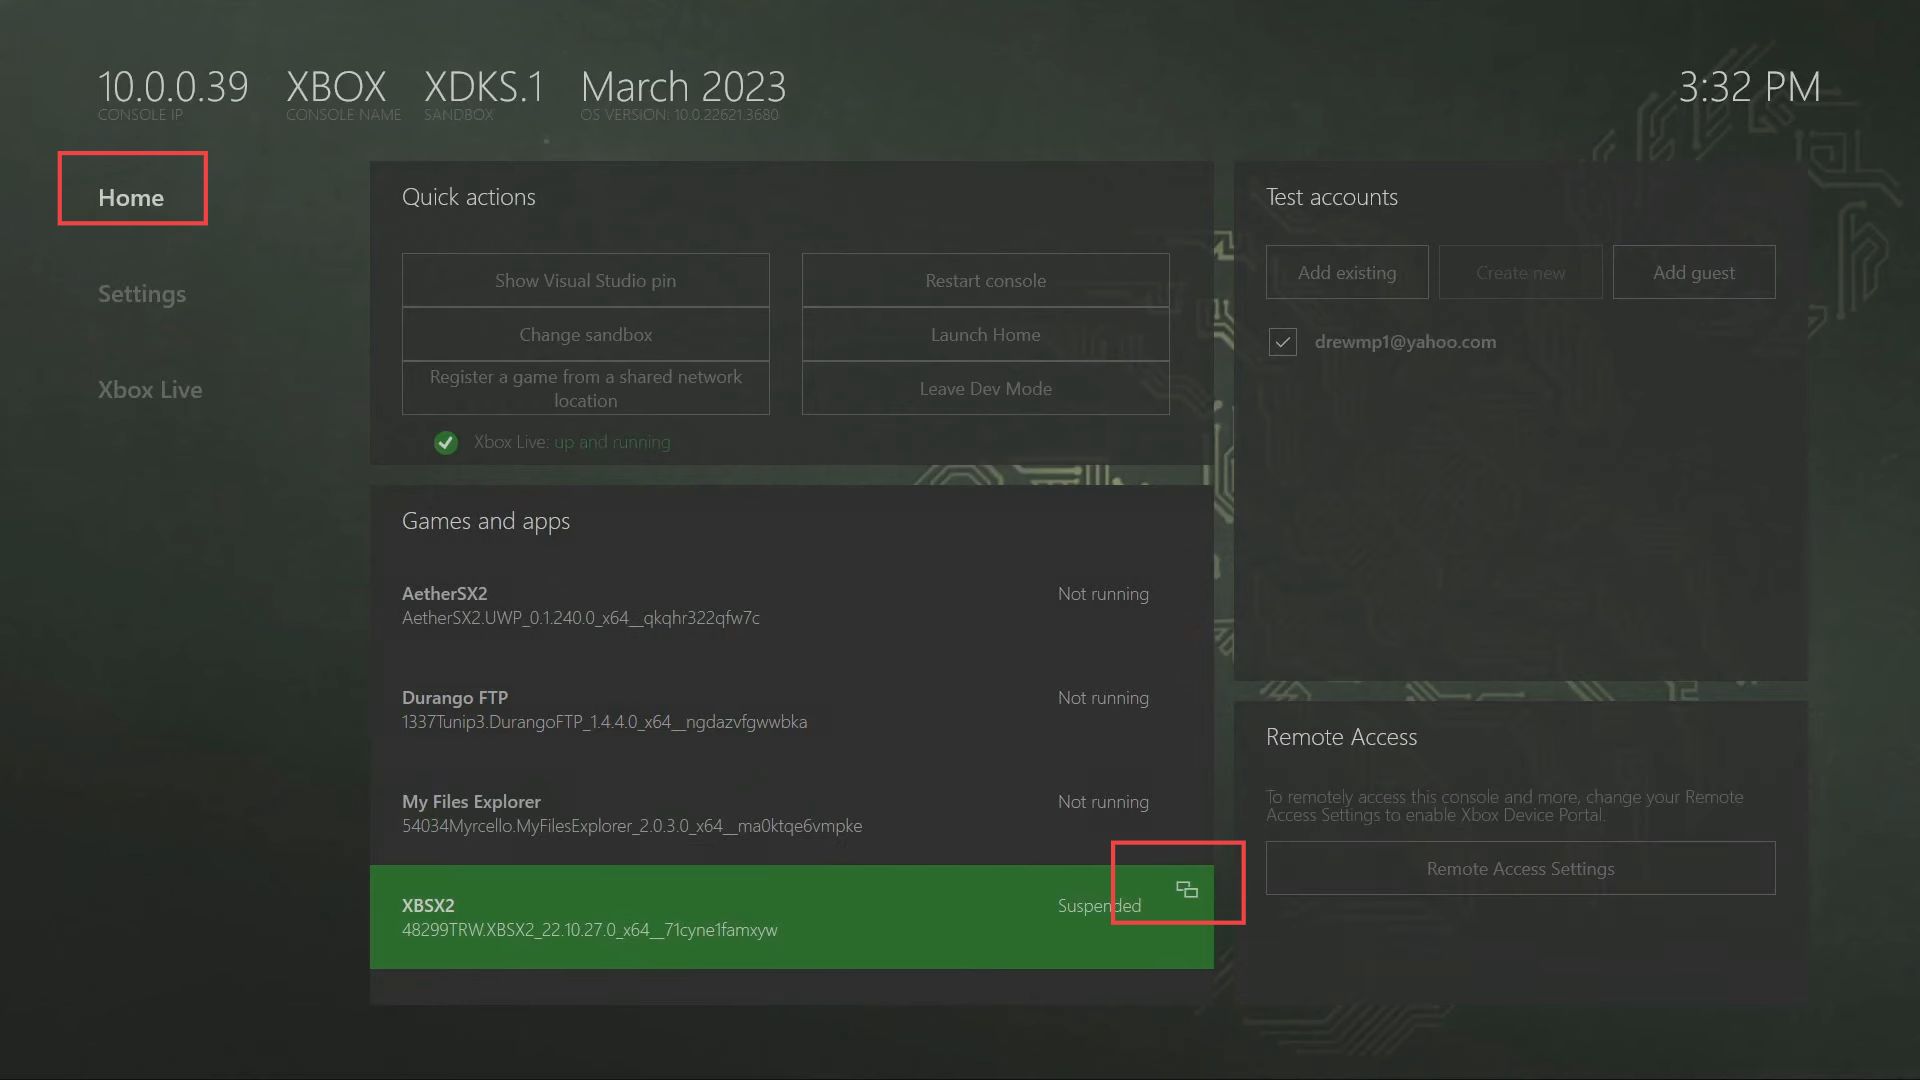
- You will need to move to the Home section of the Xbox.
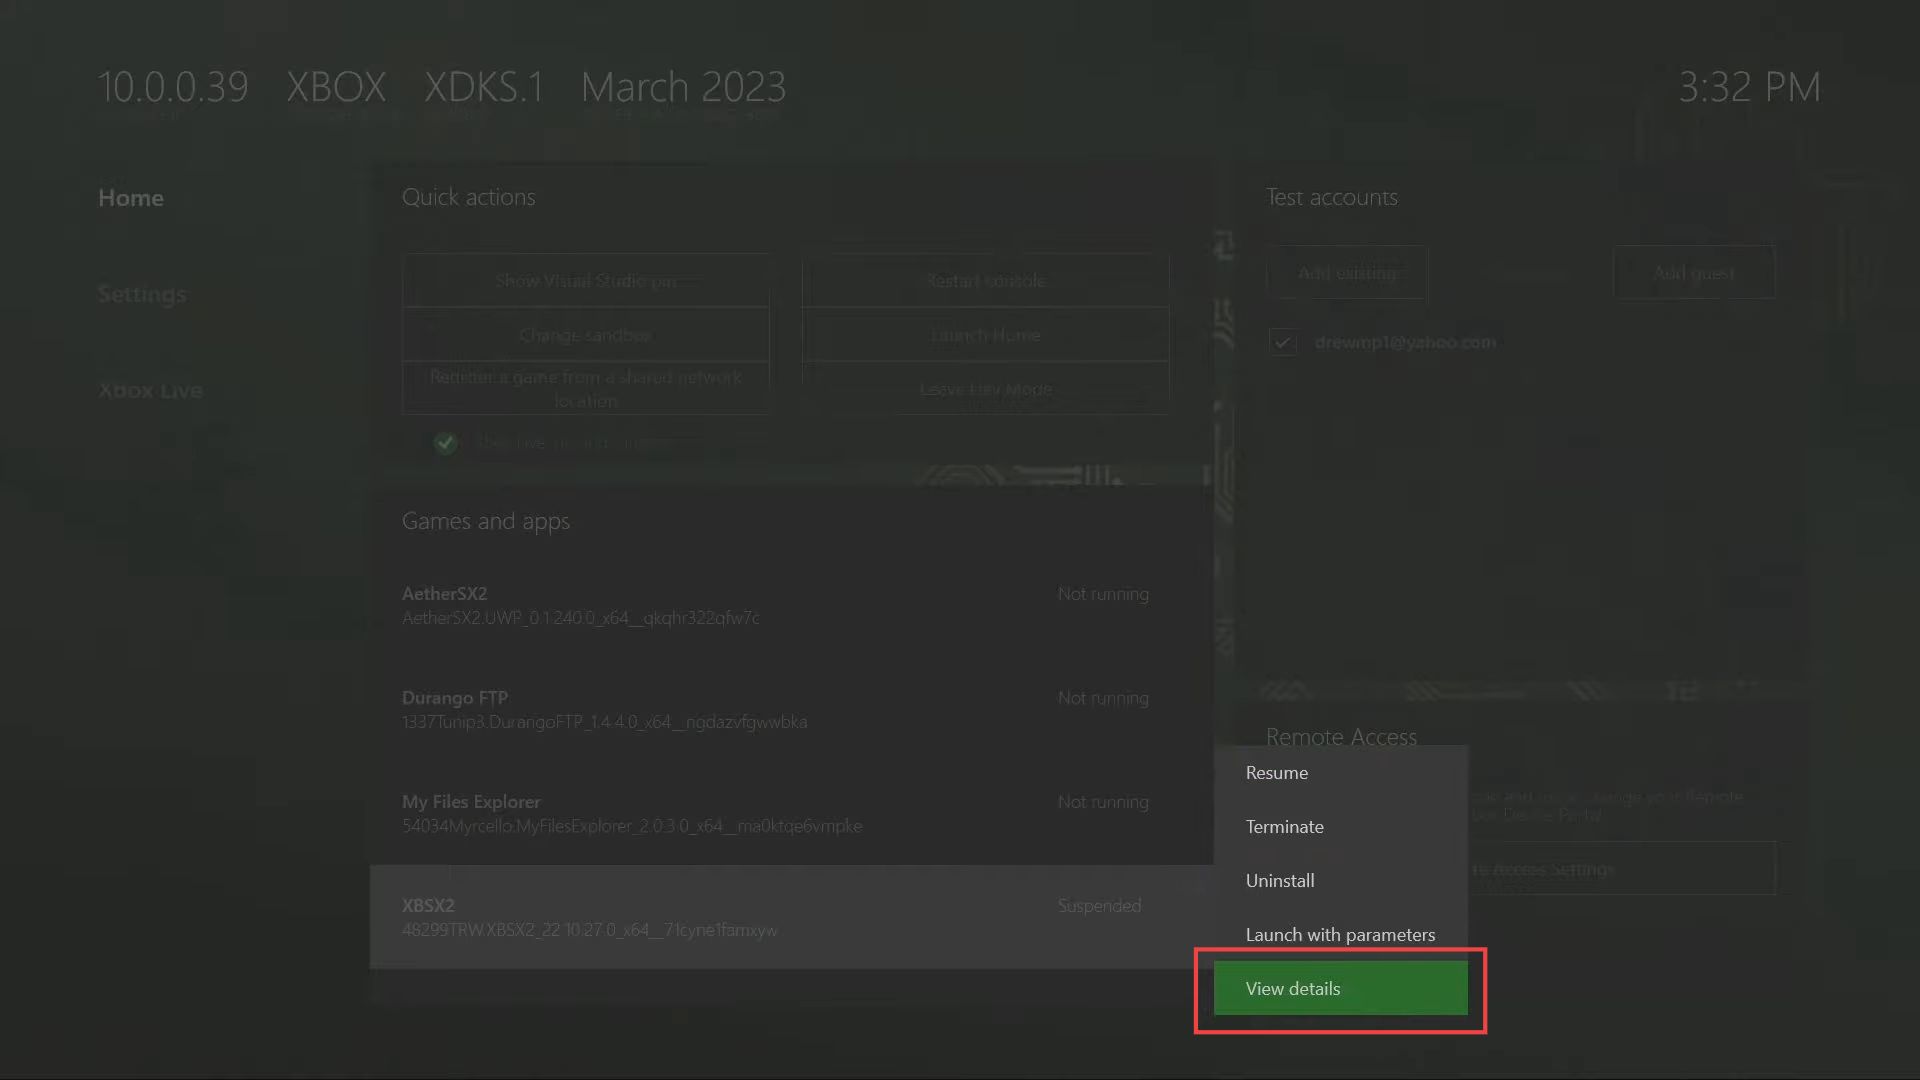
- Click on the small two boxes associated with XBSX2 under the Games and Apps section.
- Now select the View details option from the extended listings of XBSX2.
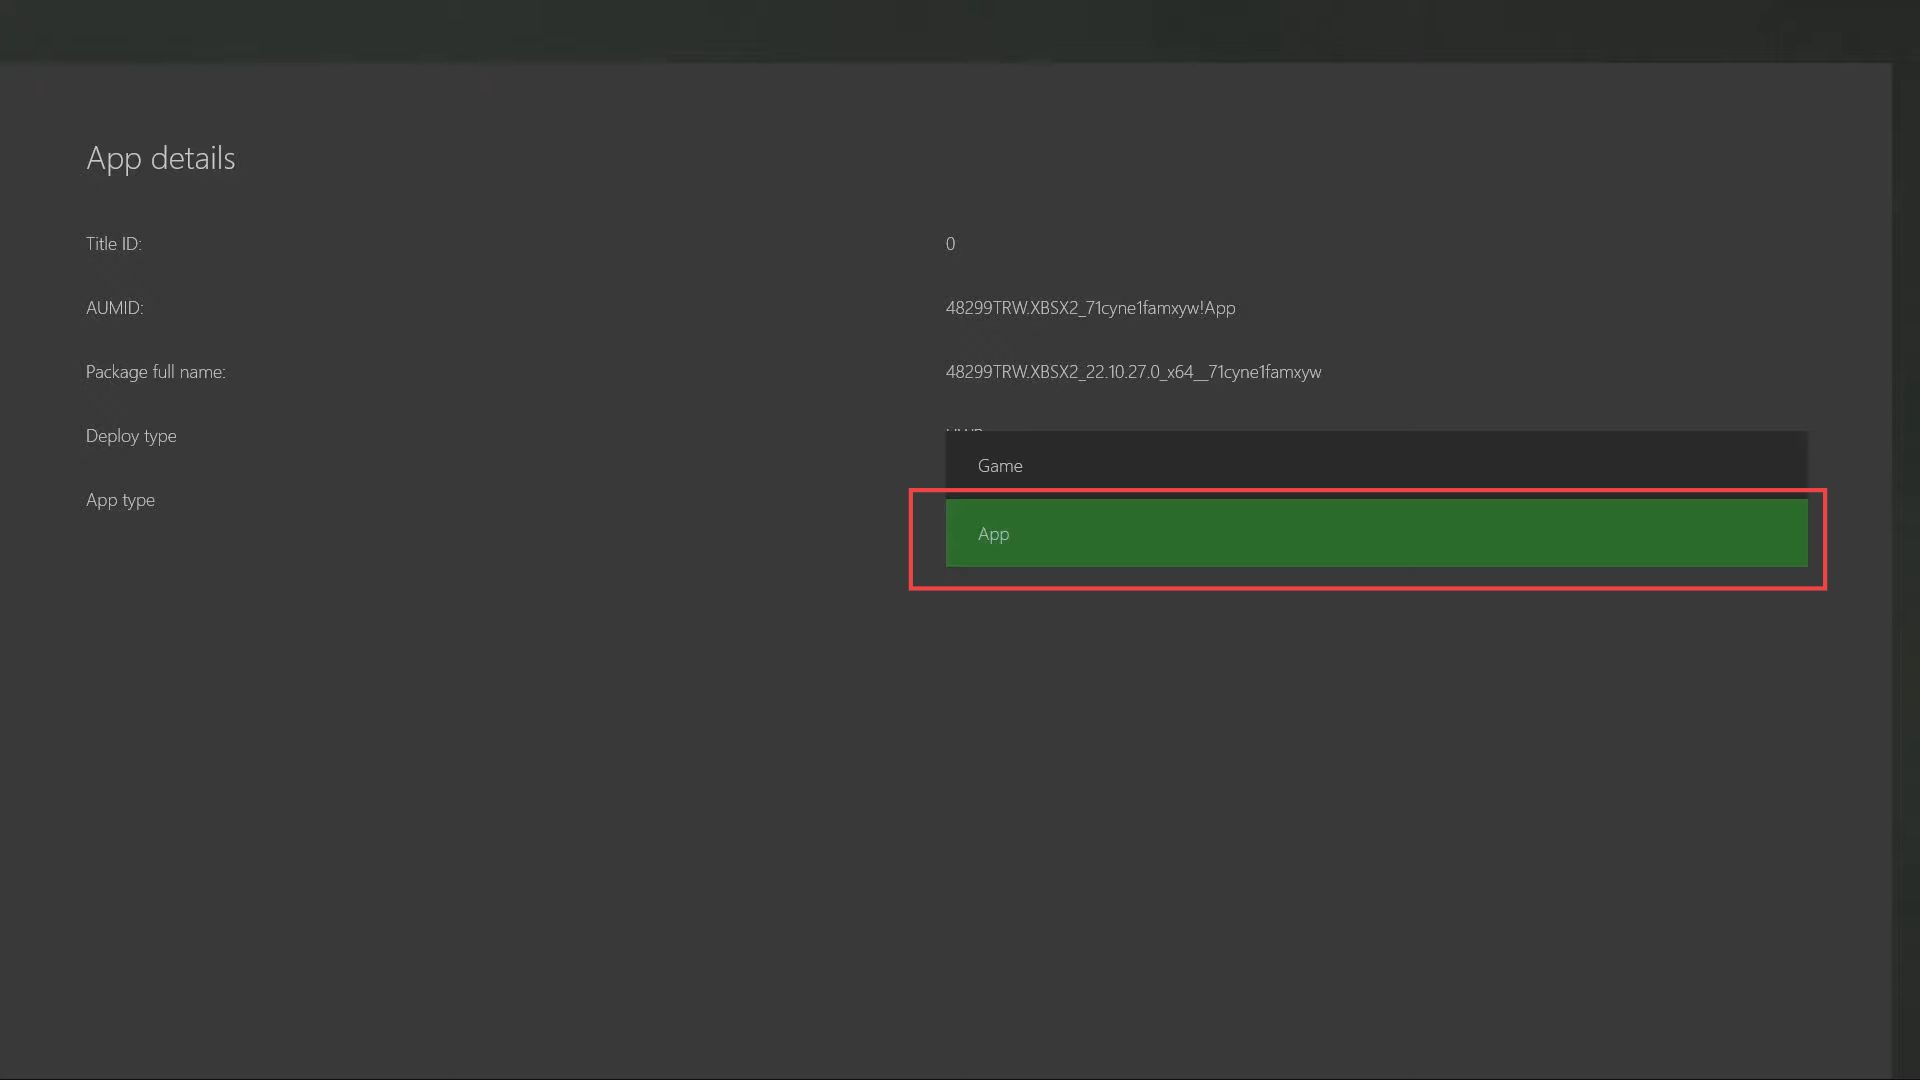
- Upon reaching the new window, change the game type from the app to the Game.
- Press the B button from the controller to exit the menu.
Booting the USB drive for Xbox
This section explains how to boot the USB drive for Xbox to launch Xbsx2. First, you have to open the Xbox Media USB application and select the USB drive option. Add permission to the USB to fully format your USB drive for the Xbox emulator.
- Click on XBSX2 under the Games and Apps section to open it up.
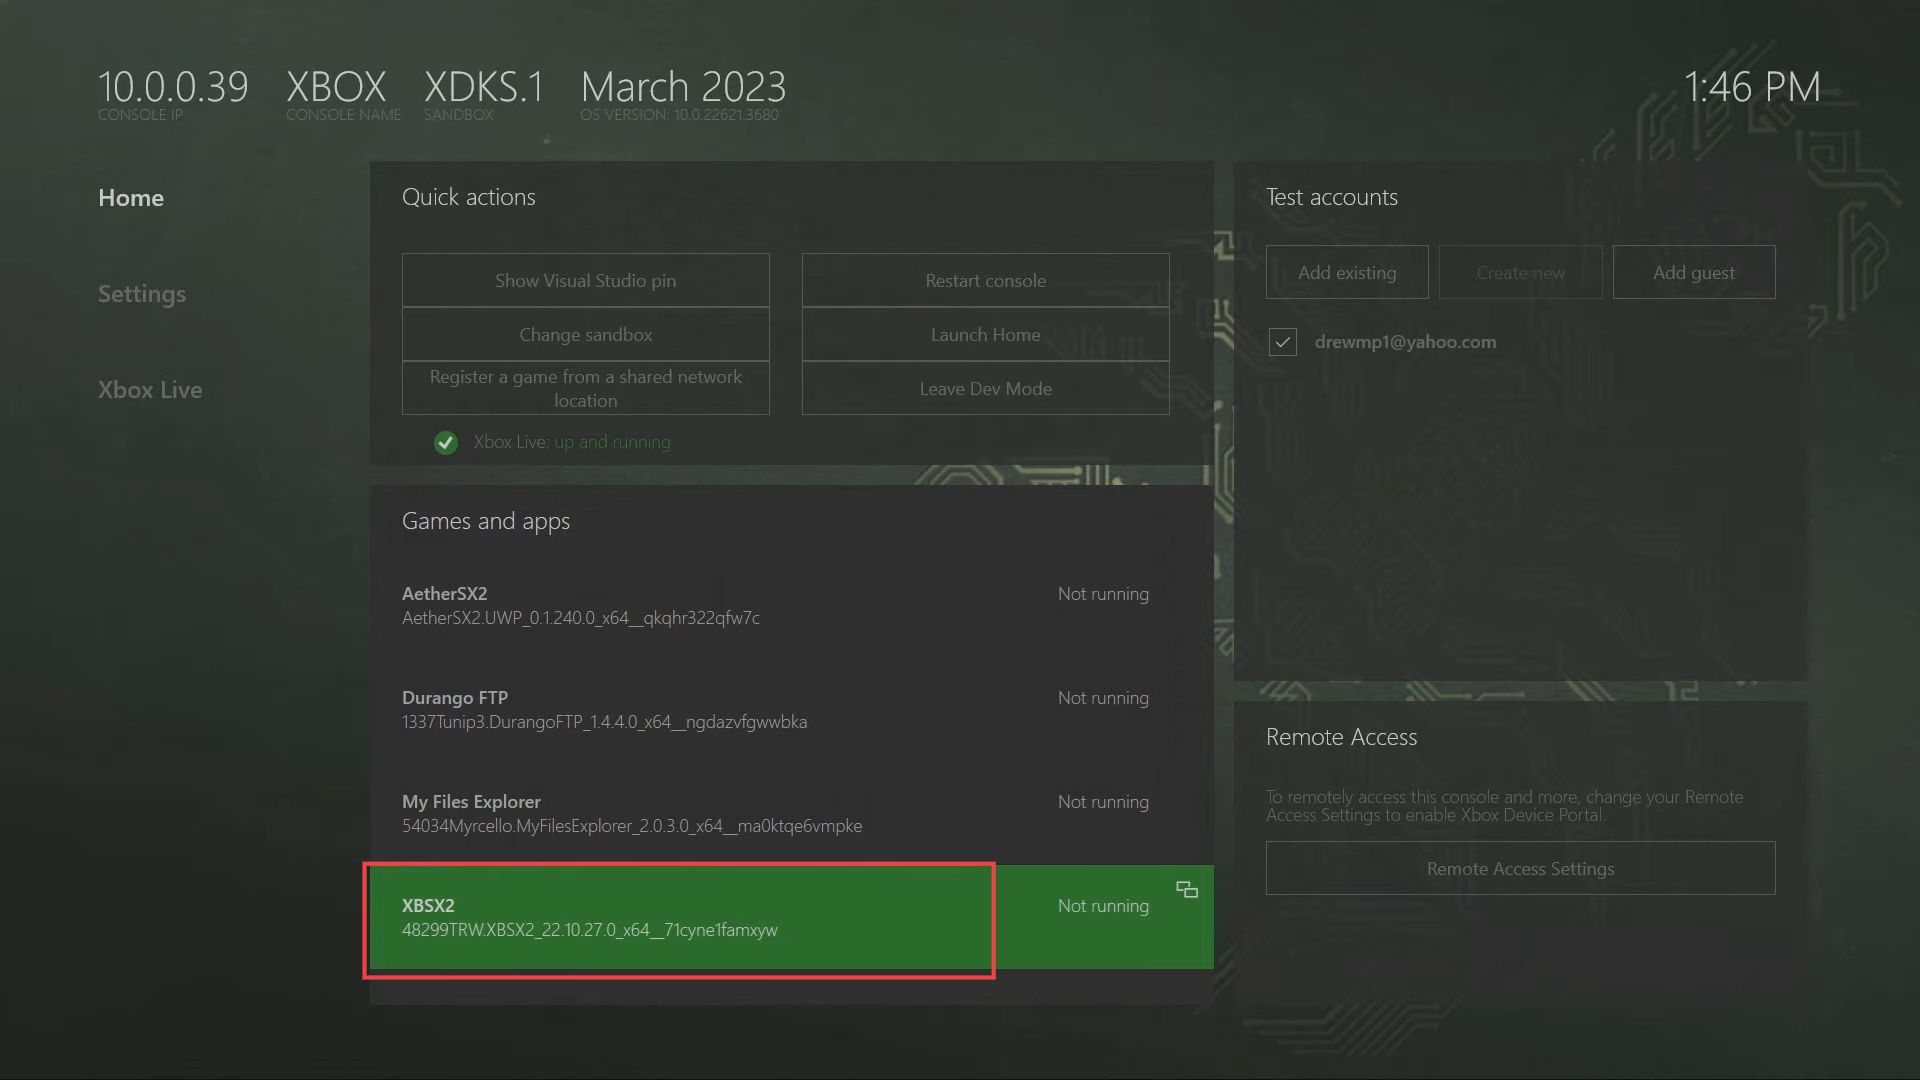
You can see that the app has been downloaded in the Developer mode.
- Now go to the Settings tab from the listings.

- You need to redo all the options from the directory configuration tab.
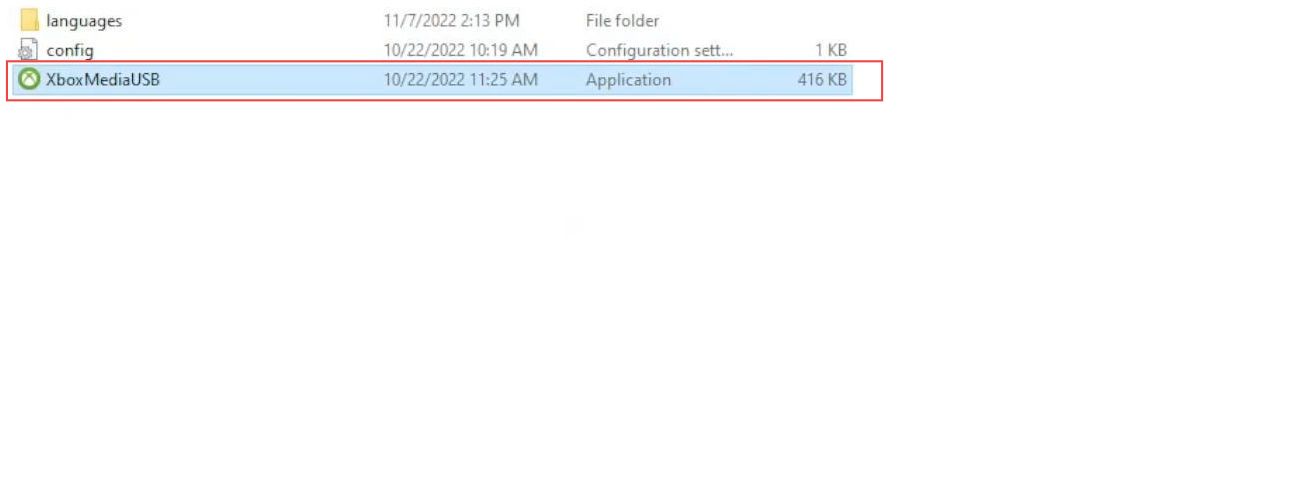
- Now unplug the USB from the Xbox and plug it into your computer and then open the recently downloaded Xbox Media USB folder.
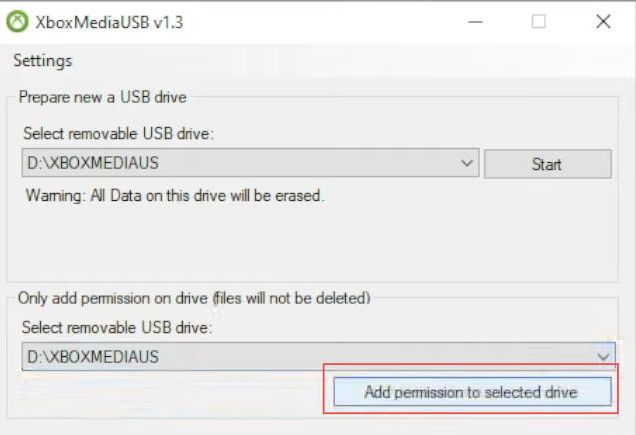
- Once the folder is opened, click the Xbox Media USB application to launch it.
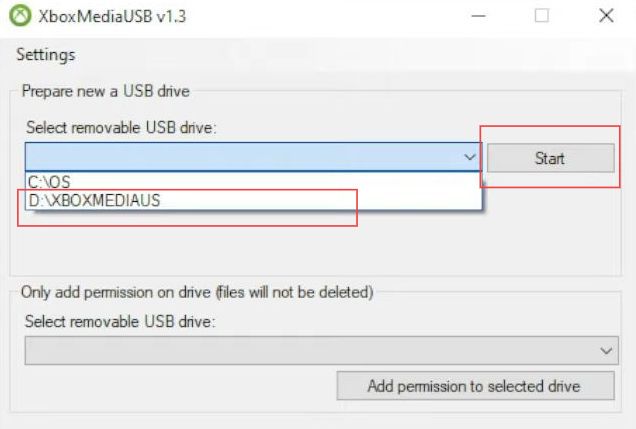
- You have to select the option named with your USB such as D:\XBOXMEDIAUSB from the drop-down menu.
- After that, click the Start button from the right side and select the Yes button if any pop-up appears.
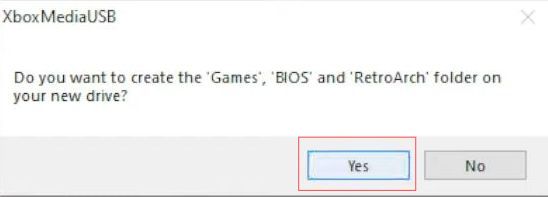
- Click the Yes button to create the games and bios folder on your new drive.
- Tap the OK button once the notification named drive is prepared for your Xbox.
- Now click the option named with your USB such as D:\XBOXMEDIAUSB from the bottom side drop-down menu.
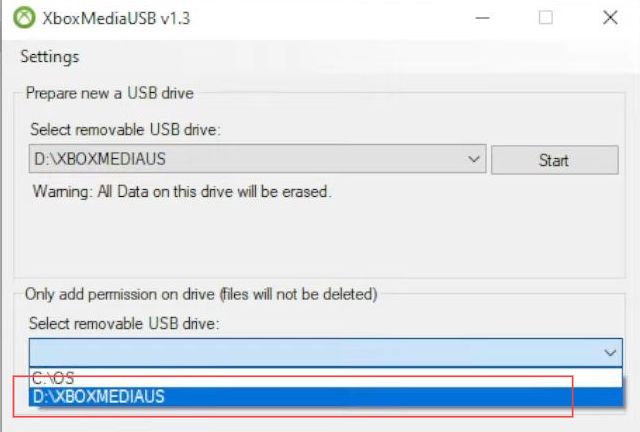
- Click the Add permission to selected drive button from the menu.
- After that, click the OK button once the notification named drive is prepared for your Xbox appears.
It will fully format your USB drive to Xbox emulation and will allow permissions to your drive.
- Now select the USB drive from the left side panel which has changed its icon to Xbox Media USB.
You can rename it as you want.
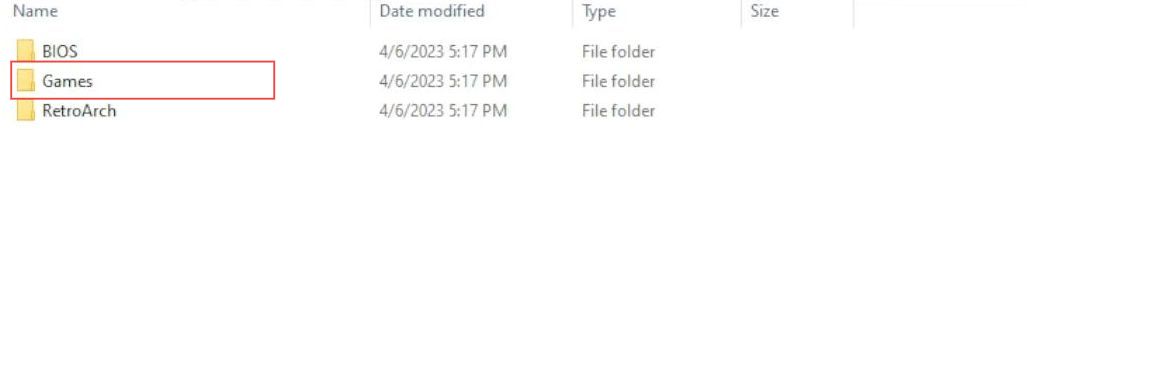
- Upon reaching this window, click the BIOS folder from the menu and then go to the Games folder.
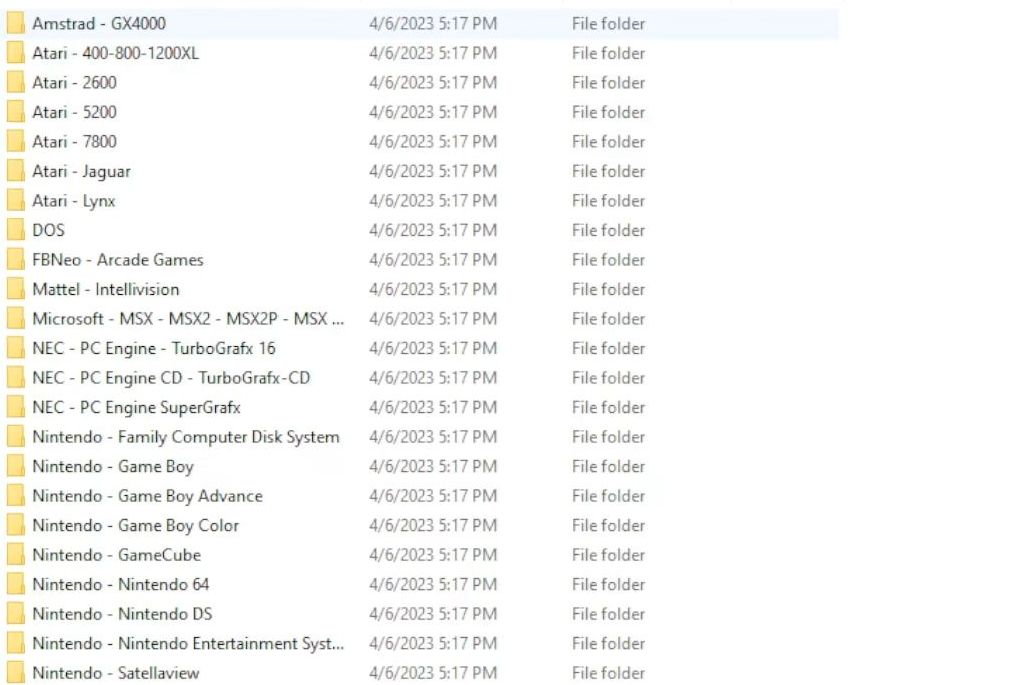
You will find all the games organized for all the consoles.
Similarly, you will also have a RetroArch folder on the USB drive.
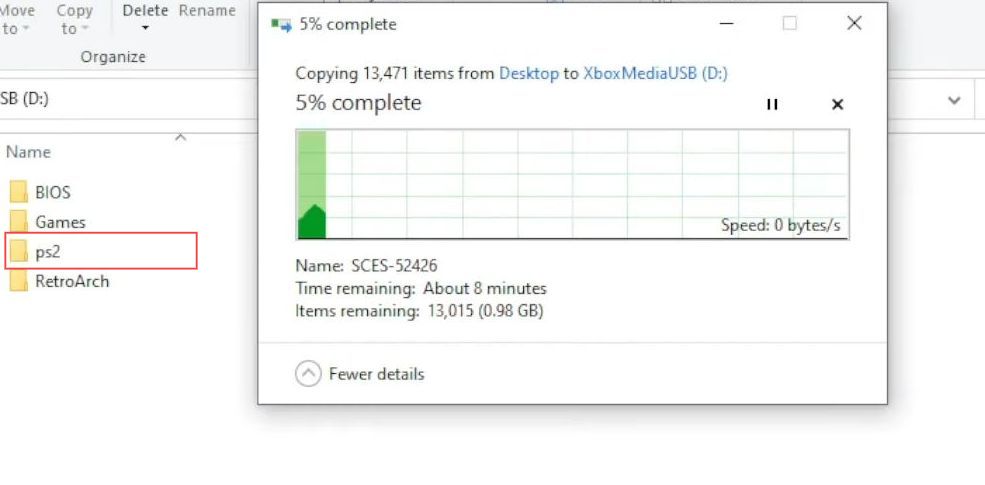
- You have to copy the recently downloaded PS2 folder into the USB drive.
- You have to wait a few times as this folder contains all the game covers.
Configuring BIOS Settings
This section explains how to configure the BIOS settings from your Xbox. First, you have to open the BIOS folder and select the parent directory. Select the USB drive folder and open the PS2 BIOS folder. After that, set the PS2 files to use as the directory.
- Now unplug the USB from your computer and connect it to your Xbox.
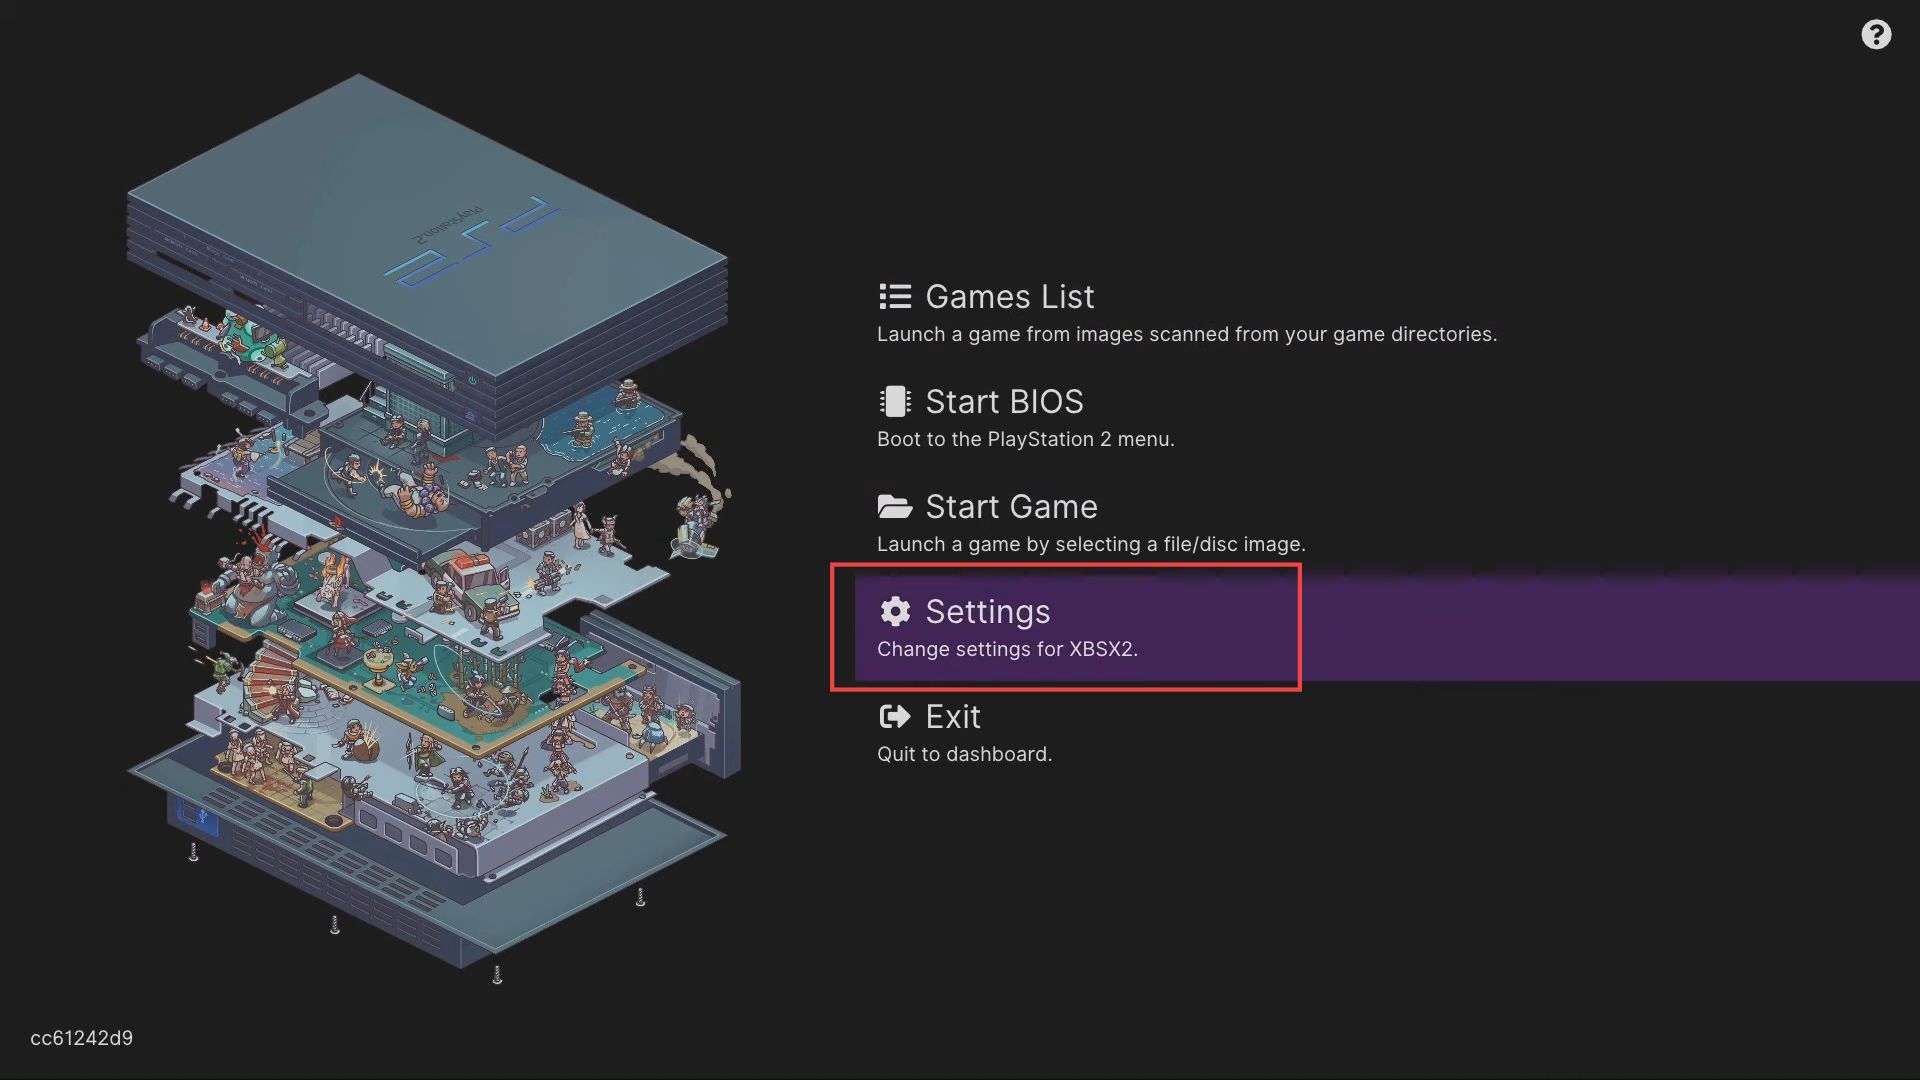
- Upon reaching the Xbox window, you need to click the Settings option from the listings.
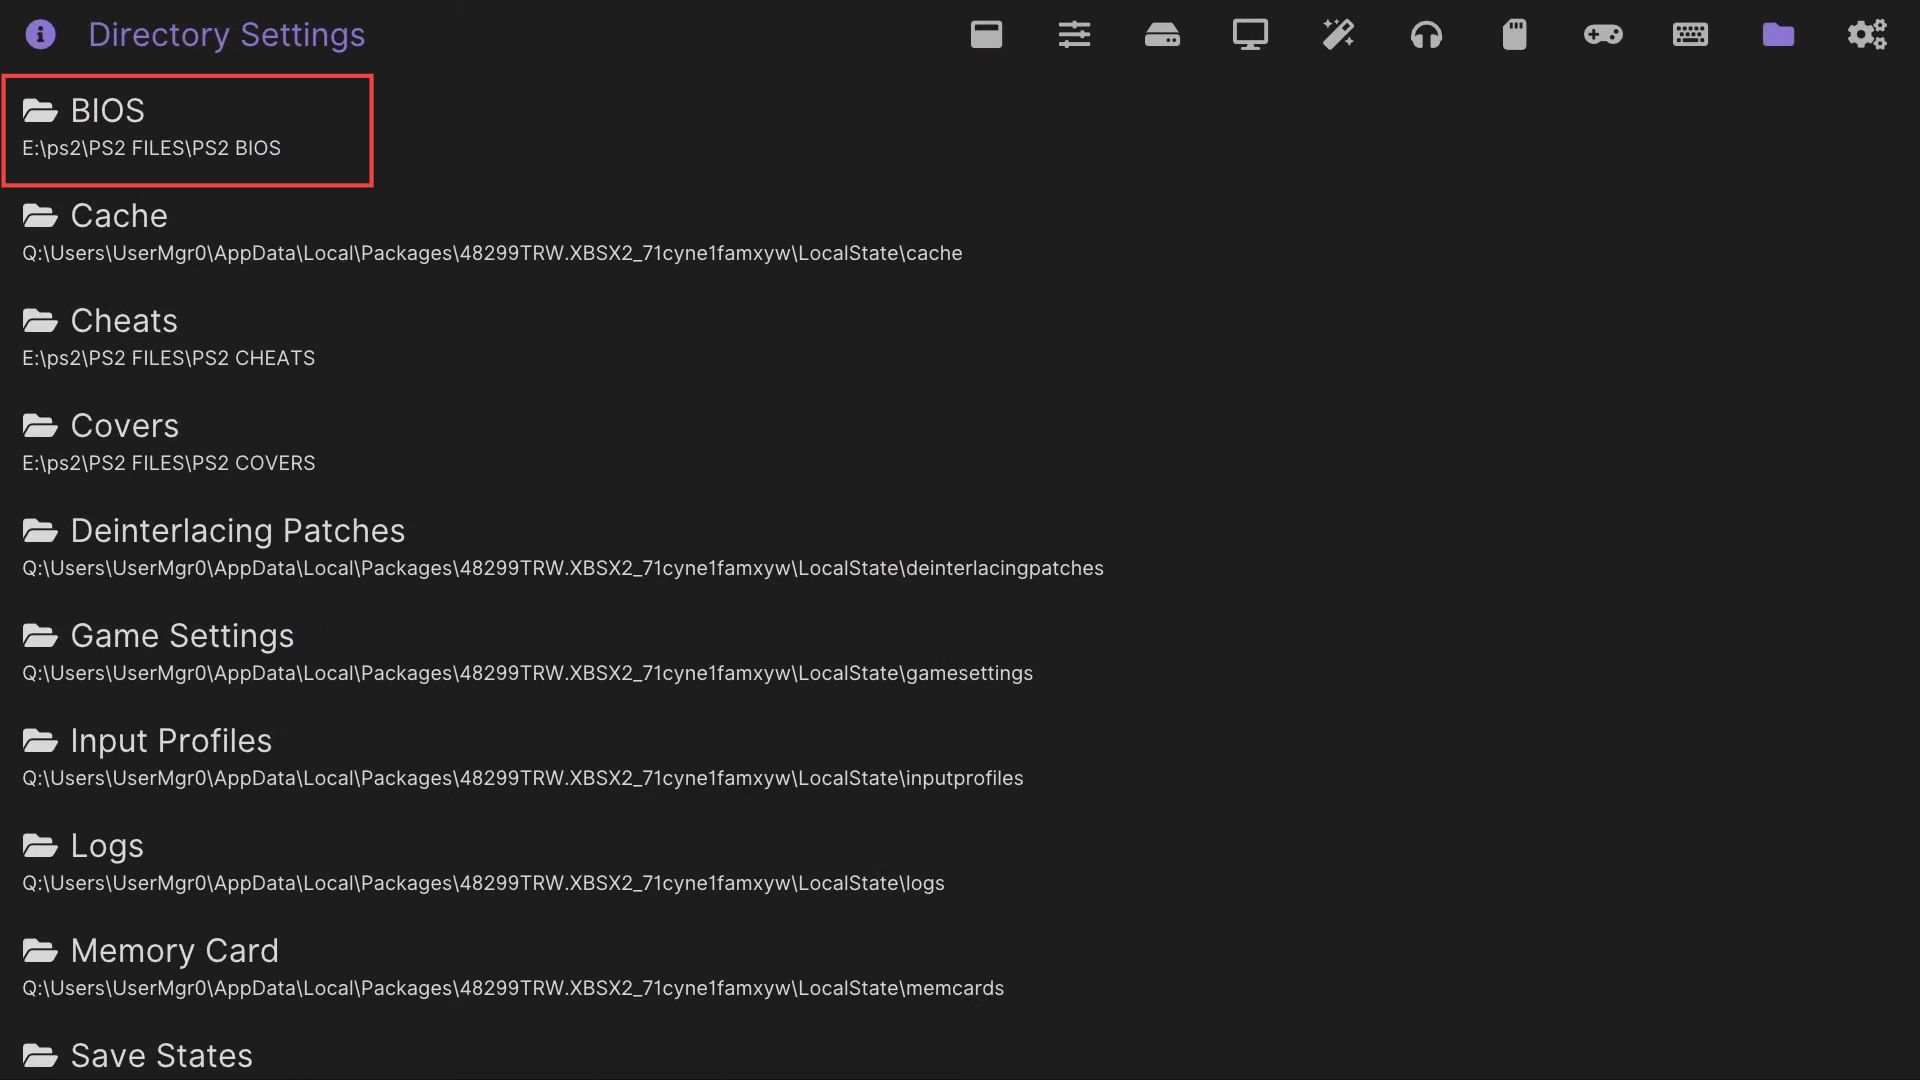
- Press the left bumper until you reach the directory settings.
- After that, click the BIOS tab from the listings.
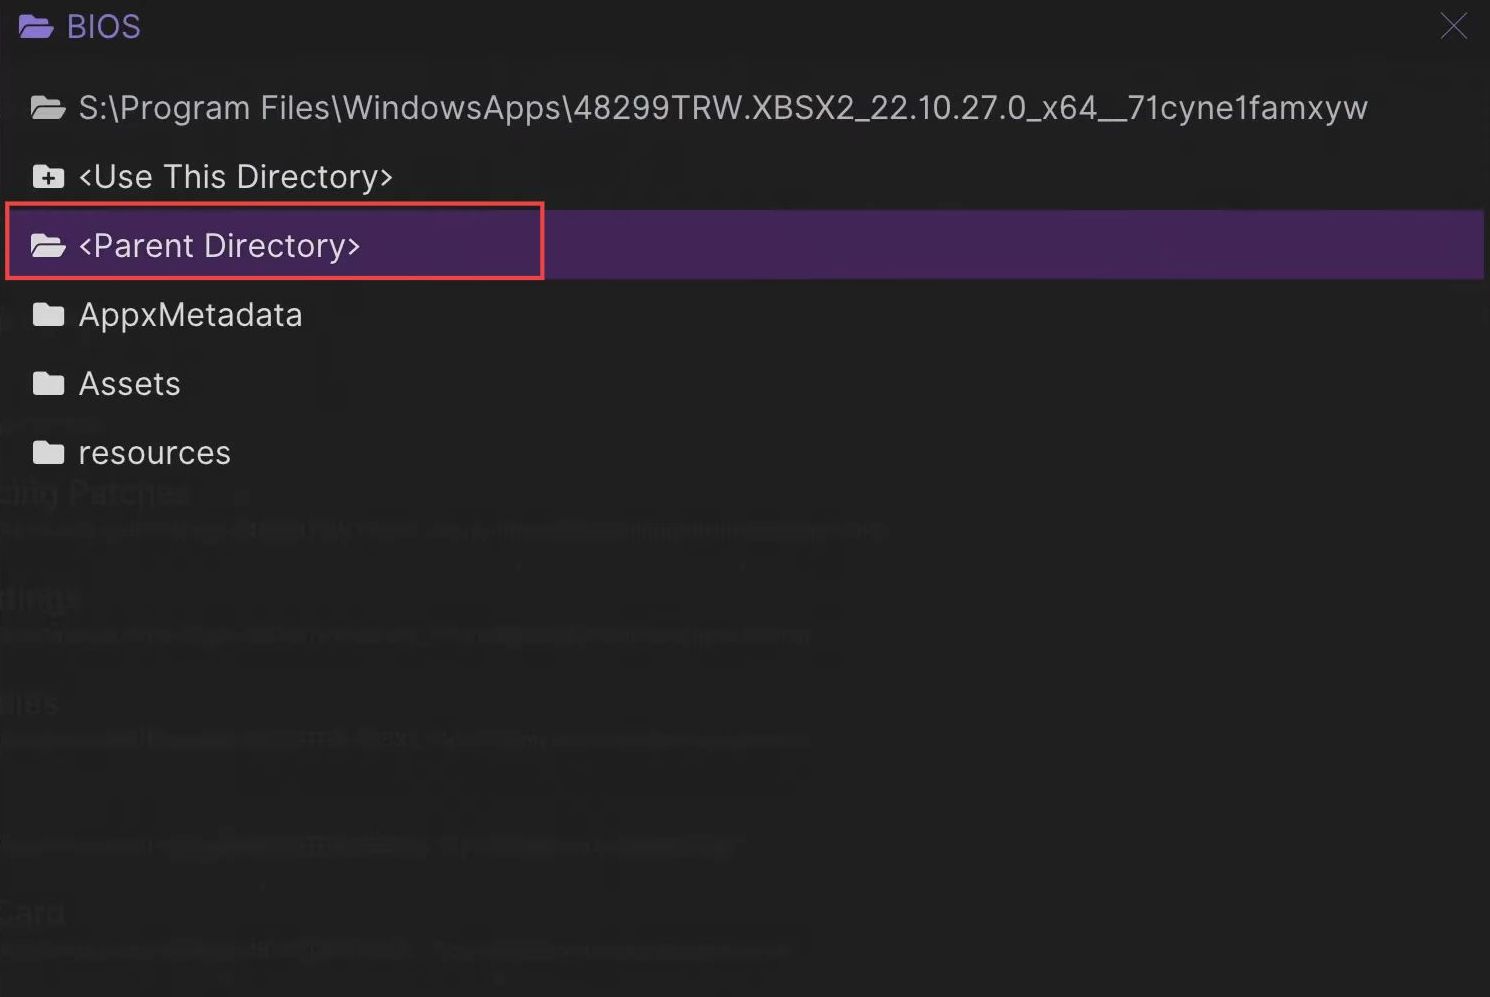
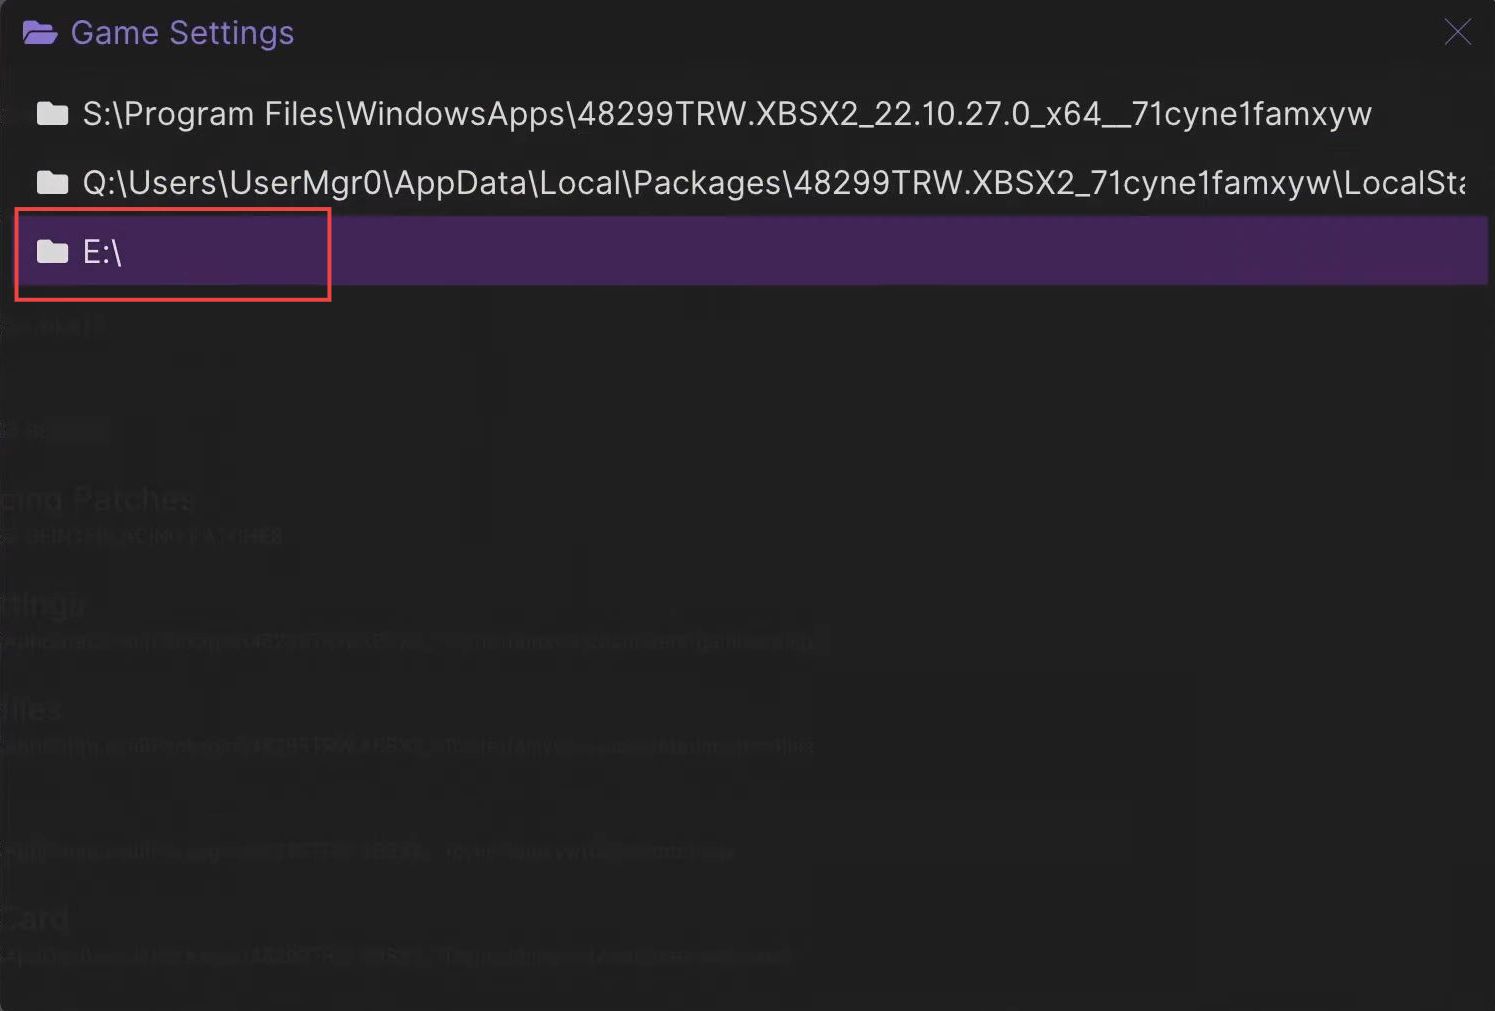
- Upon reaching this window, click on the Parent Directory.
- You need to click it consecutively until you get all the available devices.
- After that, select the E drive from the listings in which the USB or external device is located.
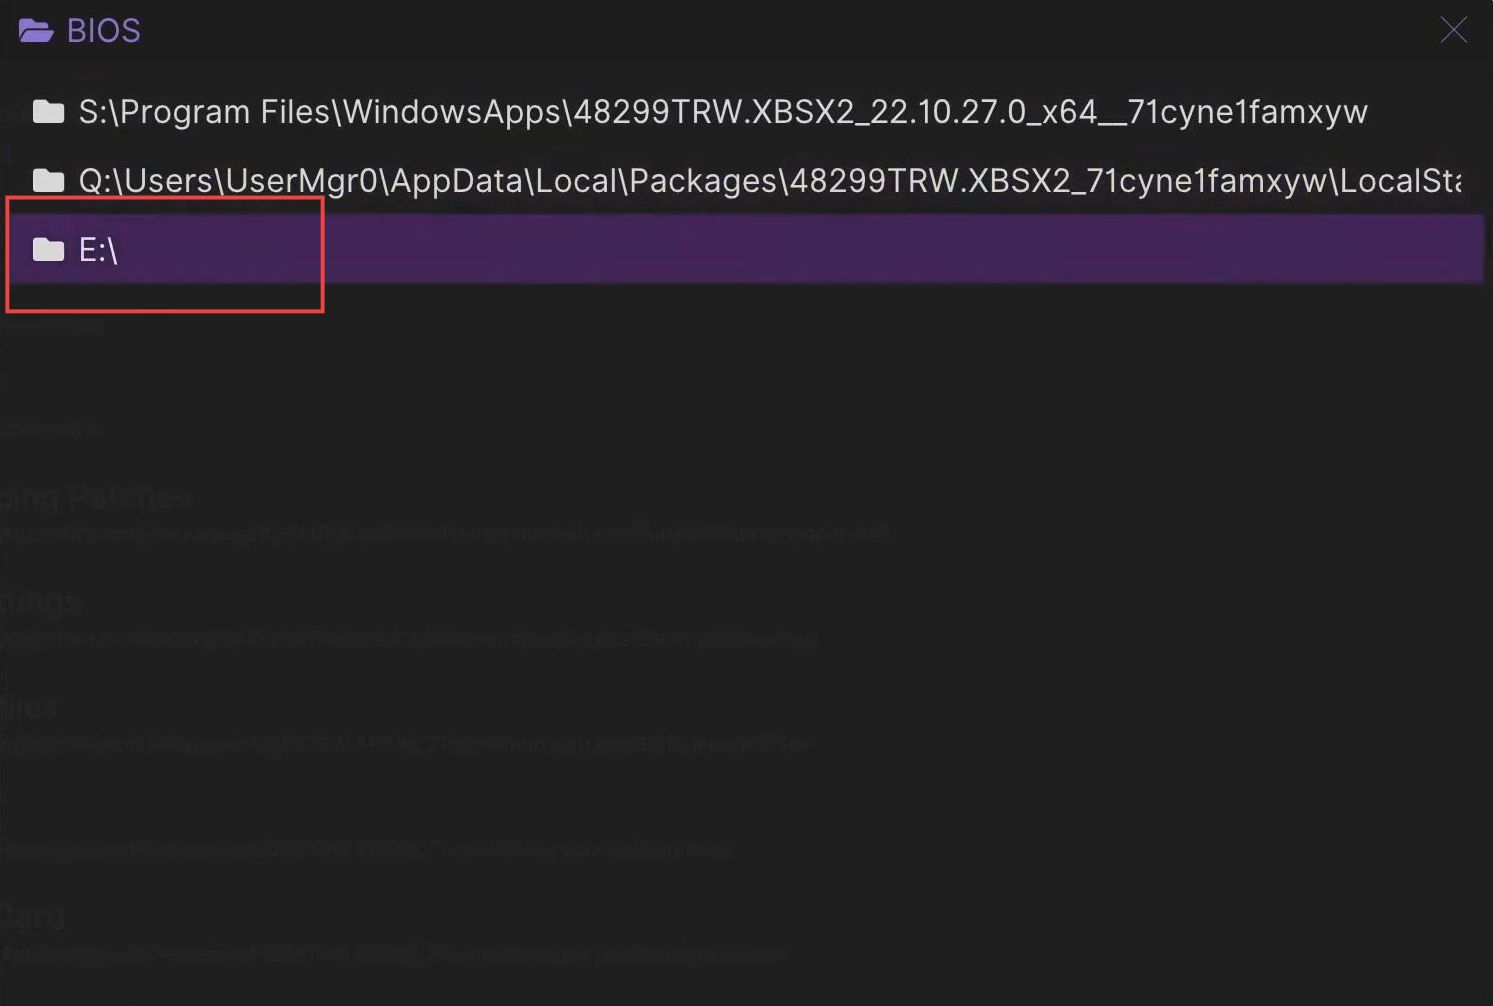
- Once this window appears, scroll down to the PS2 folder and click on it.
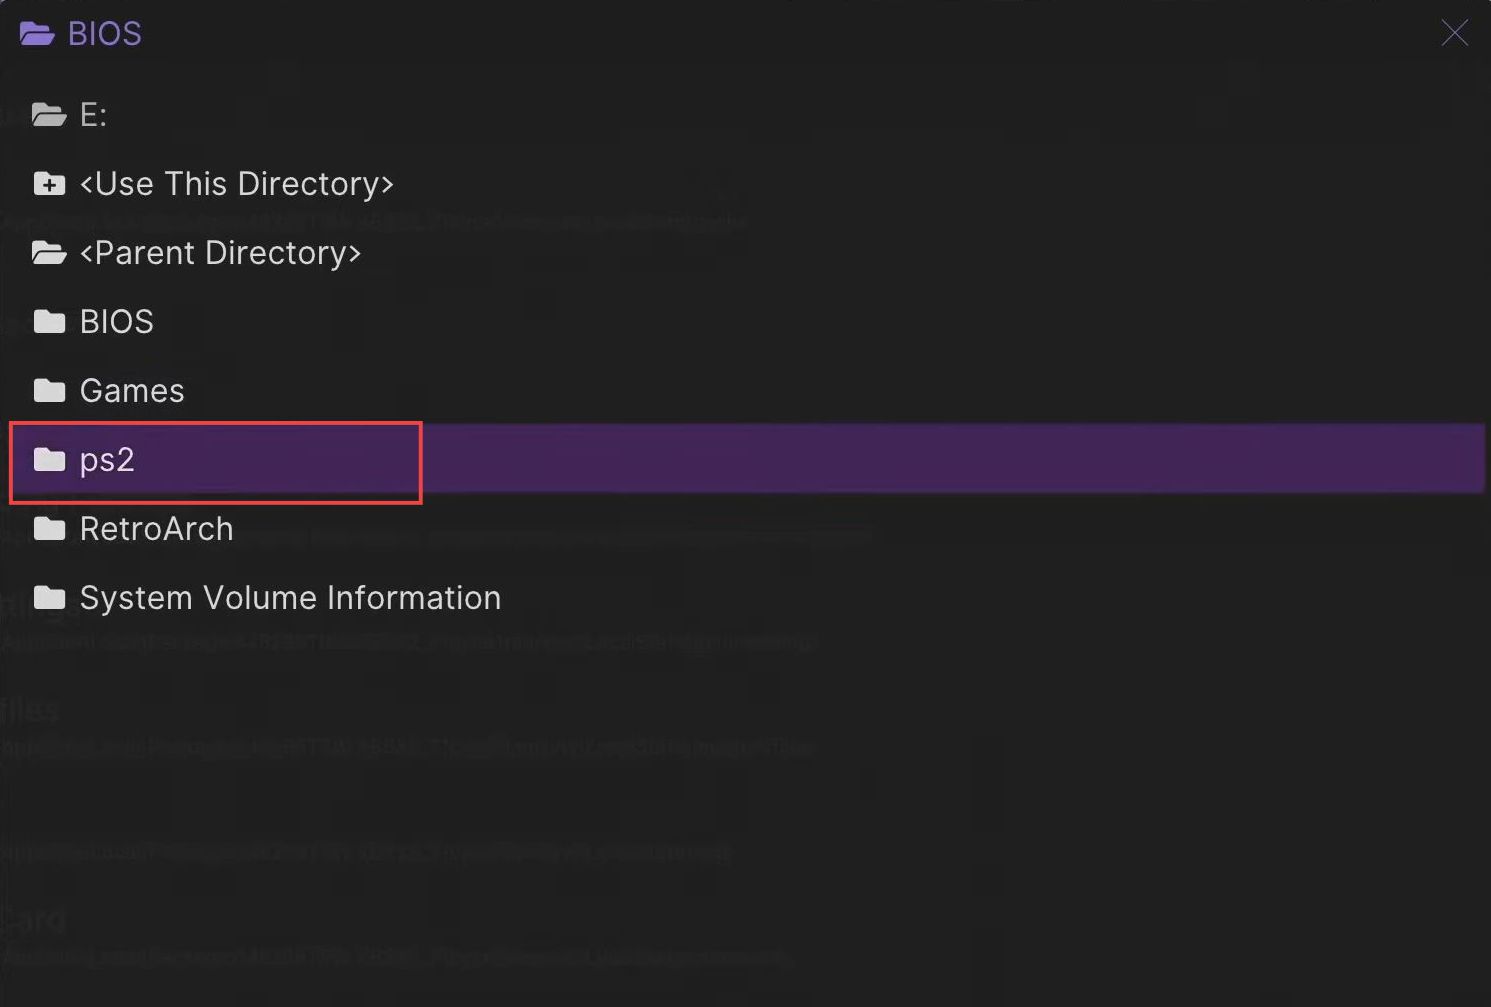
- Click the PS2 files folder to open it up.
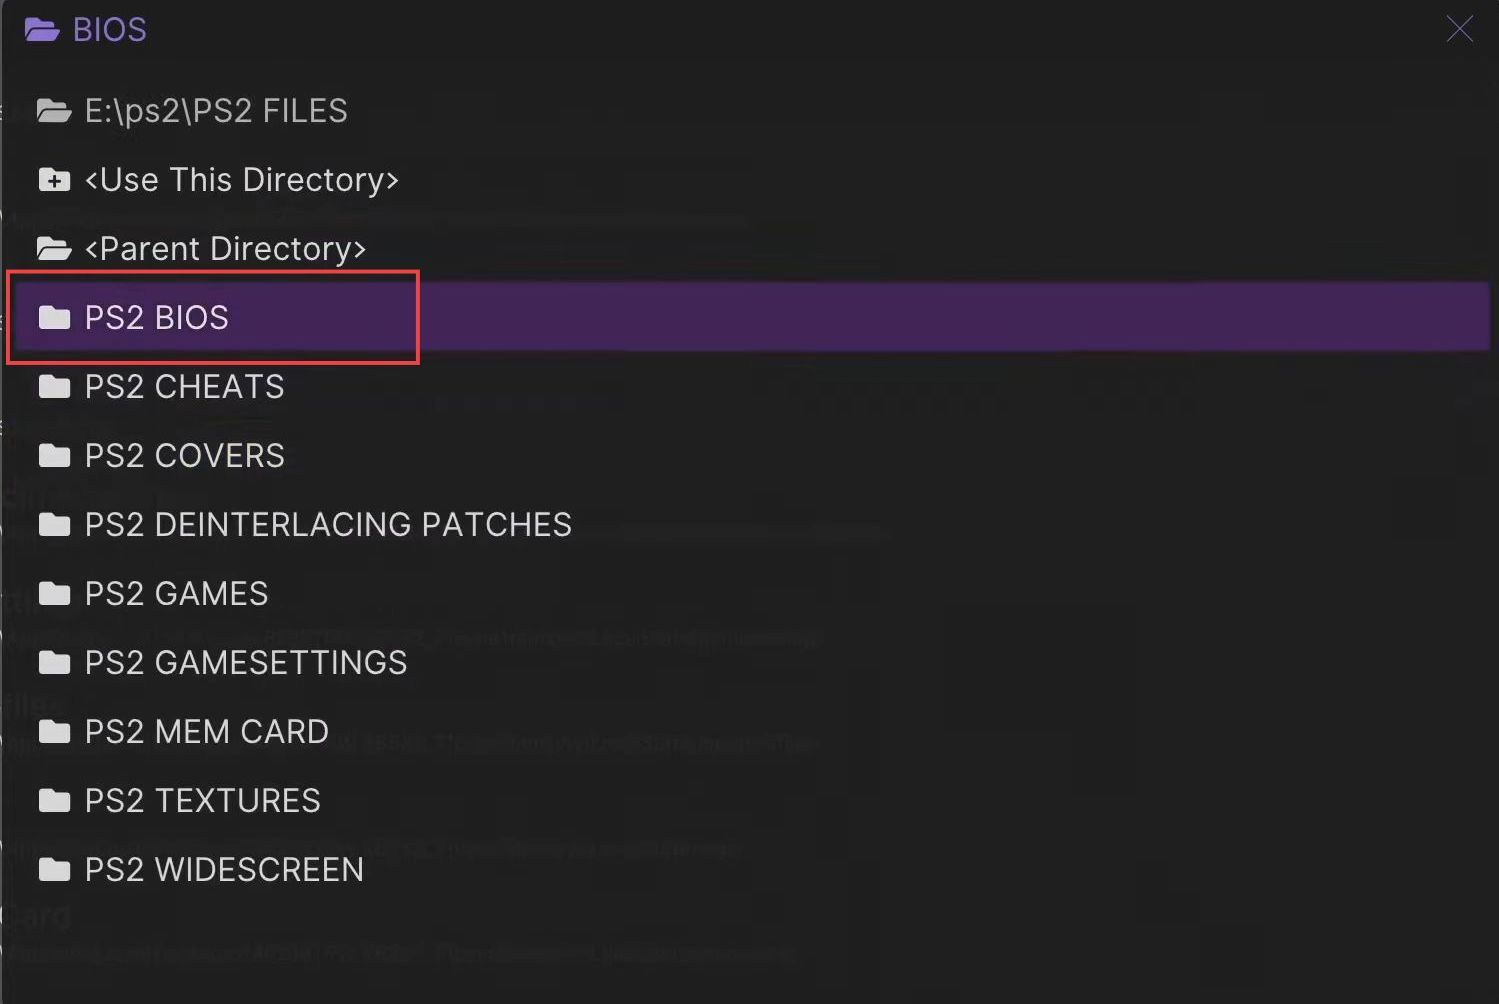
- Upon reaching the new window, click the PS2 BIOS folder to open it.
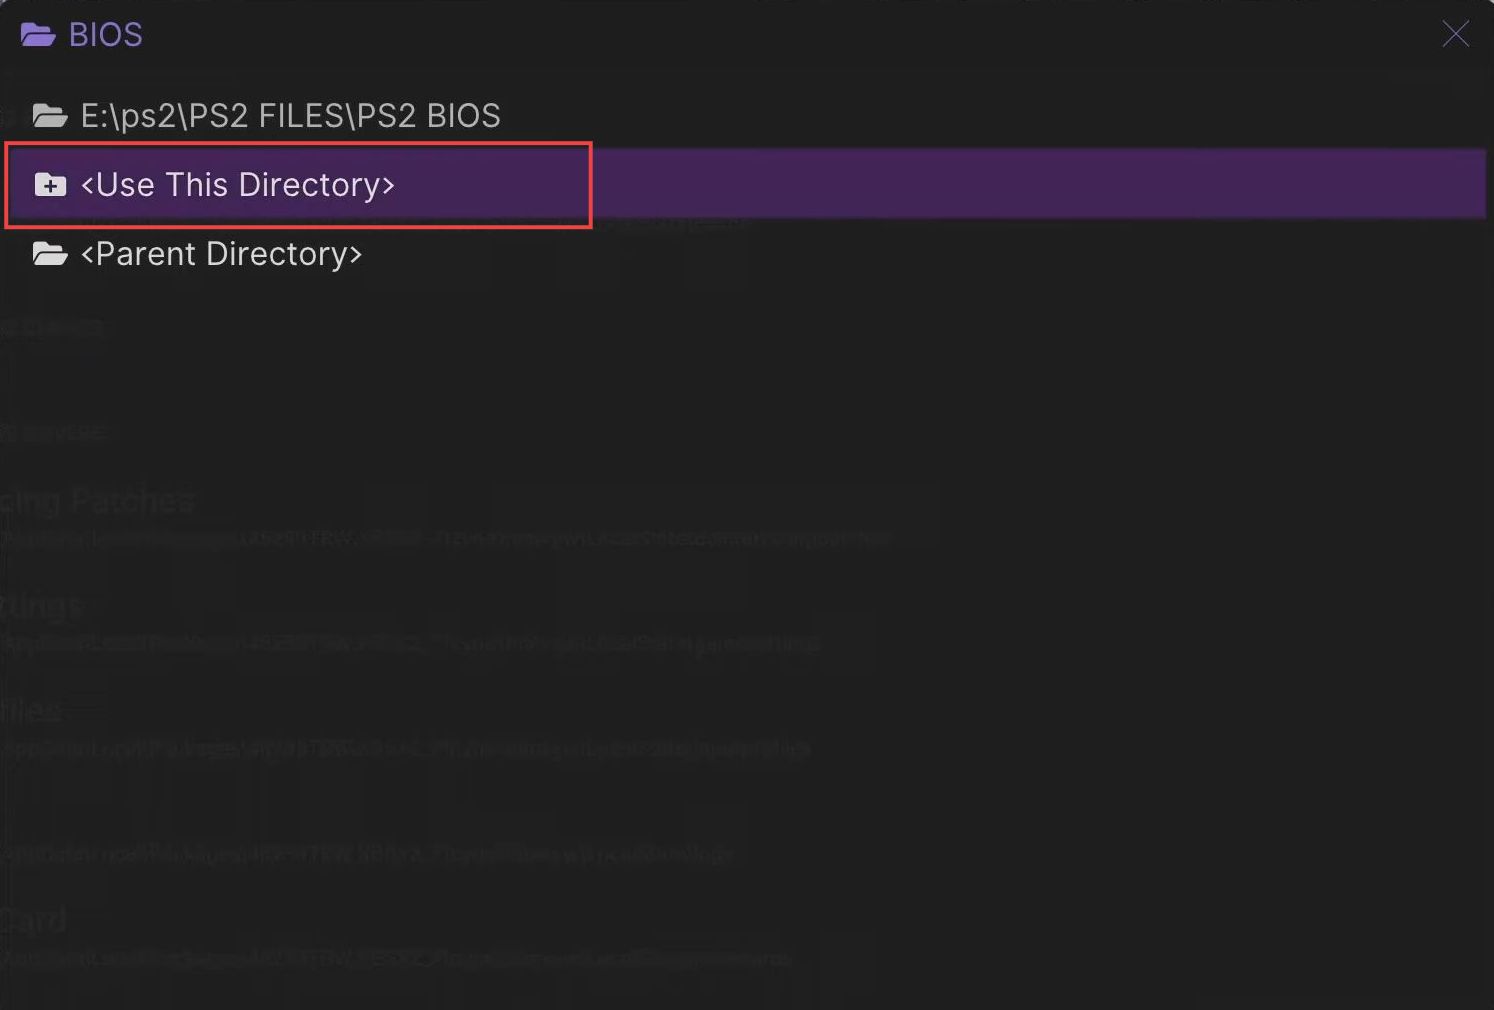
- You need to click the Use this directory option from the listings.
Configuring Cheats settings
This section describes how to configure the cheats settings from your Xbox.
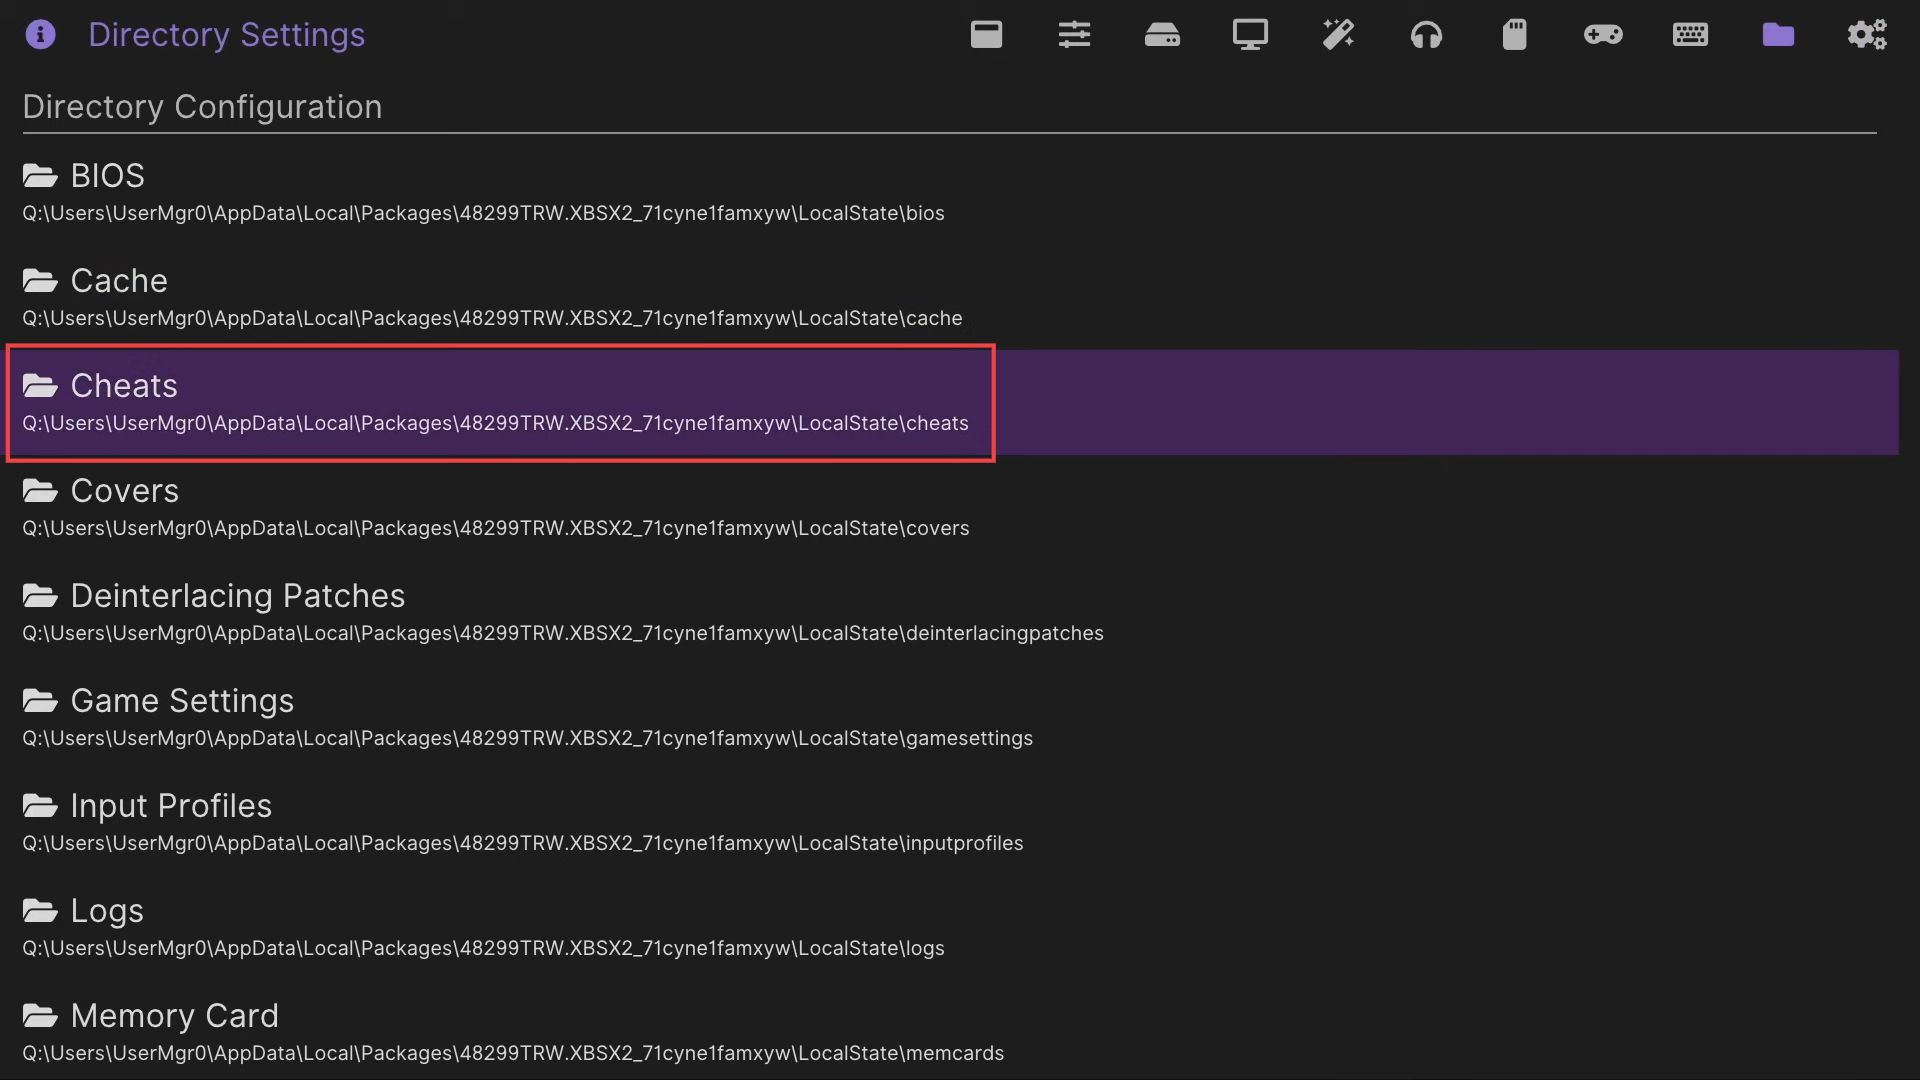
- Click the Cheats folder from the menu of Directory settings.
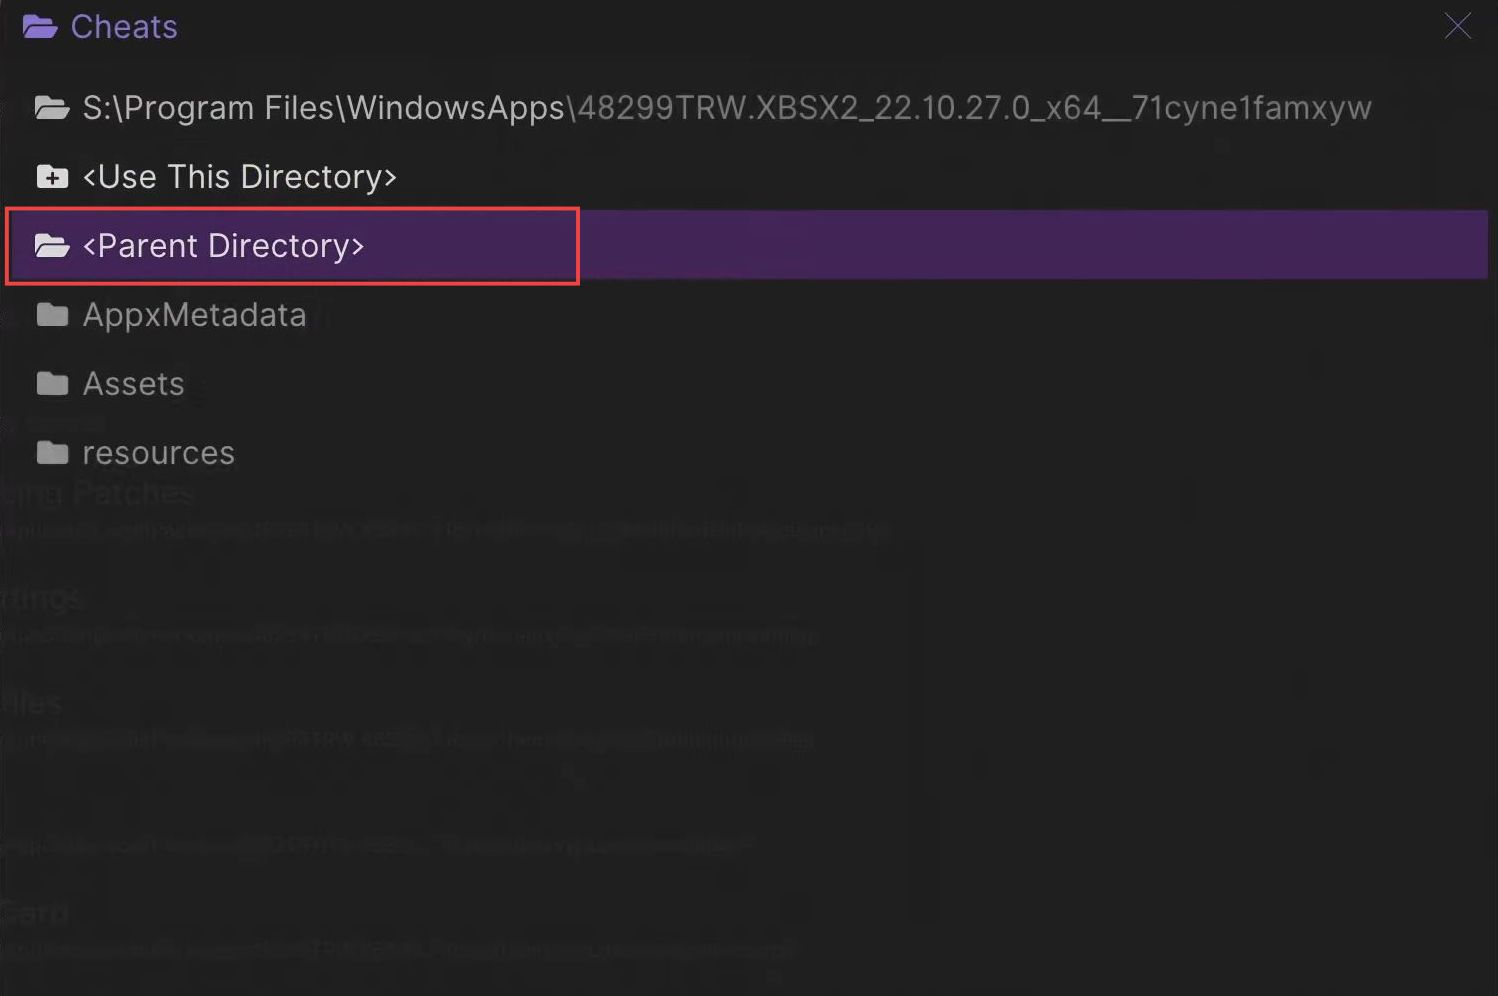
- After that, click the Parent Directory.
- Select the drive in which the USB or external device is located.
- Once this window appears, scroll down to the PS2 folder and click on it.
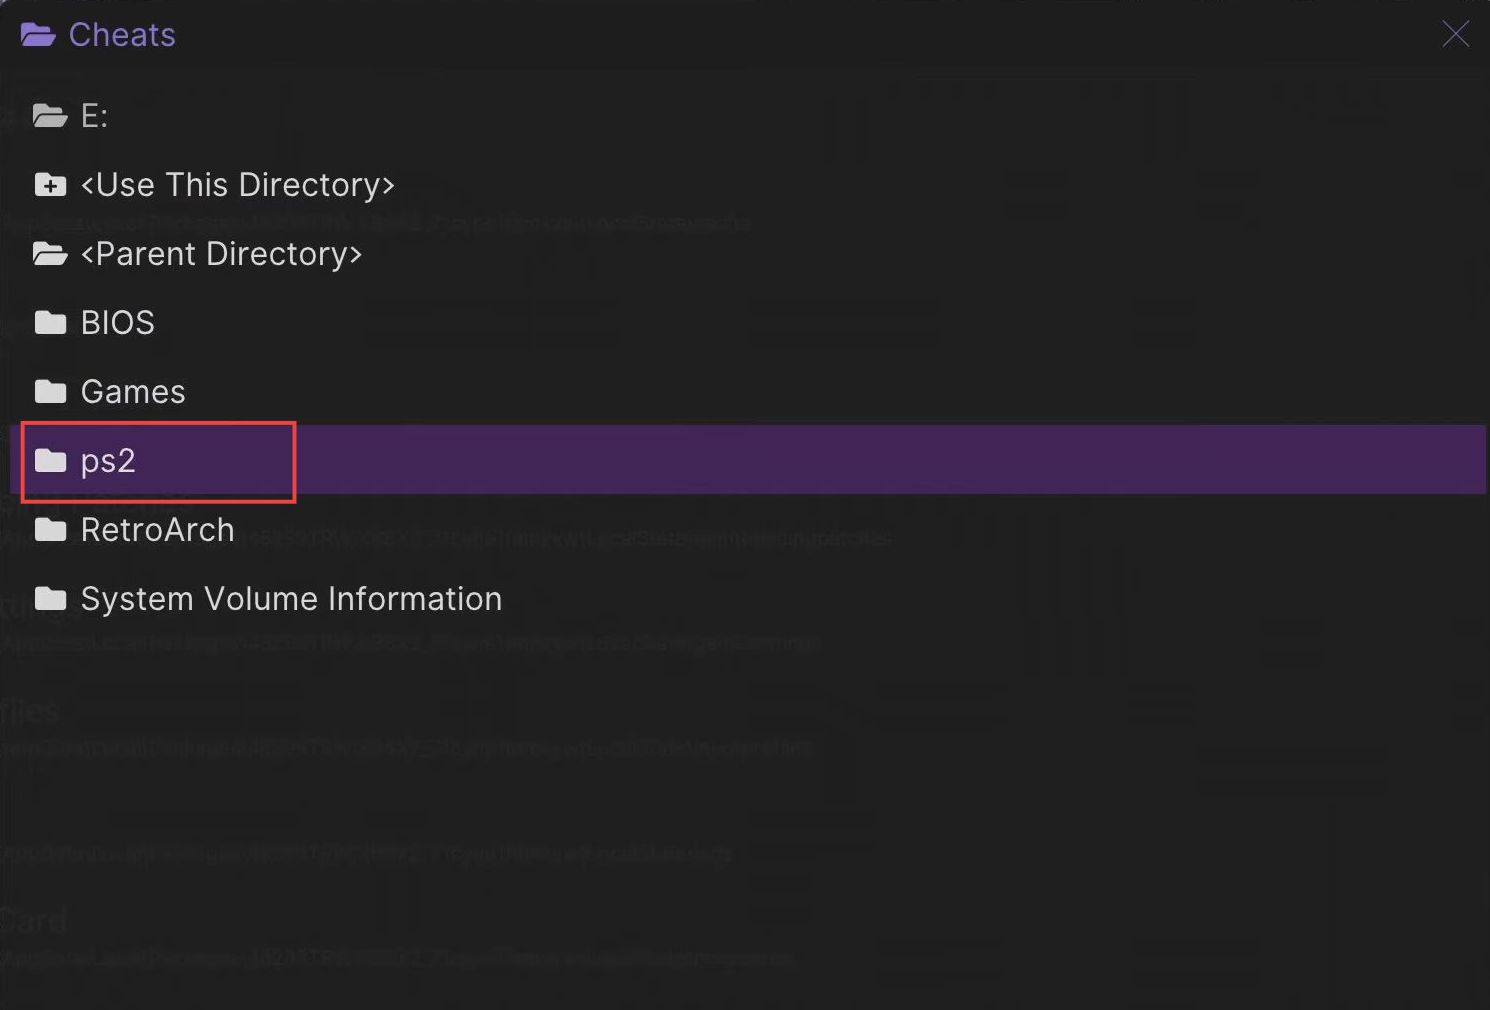
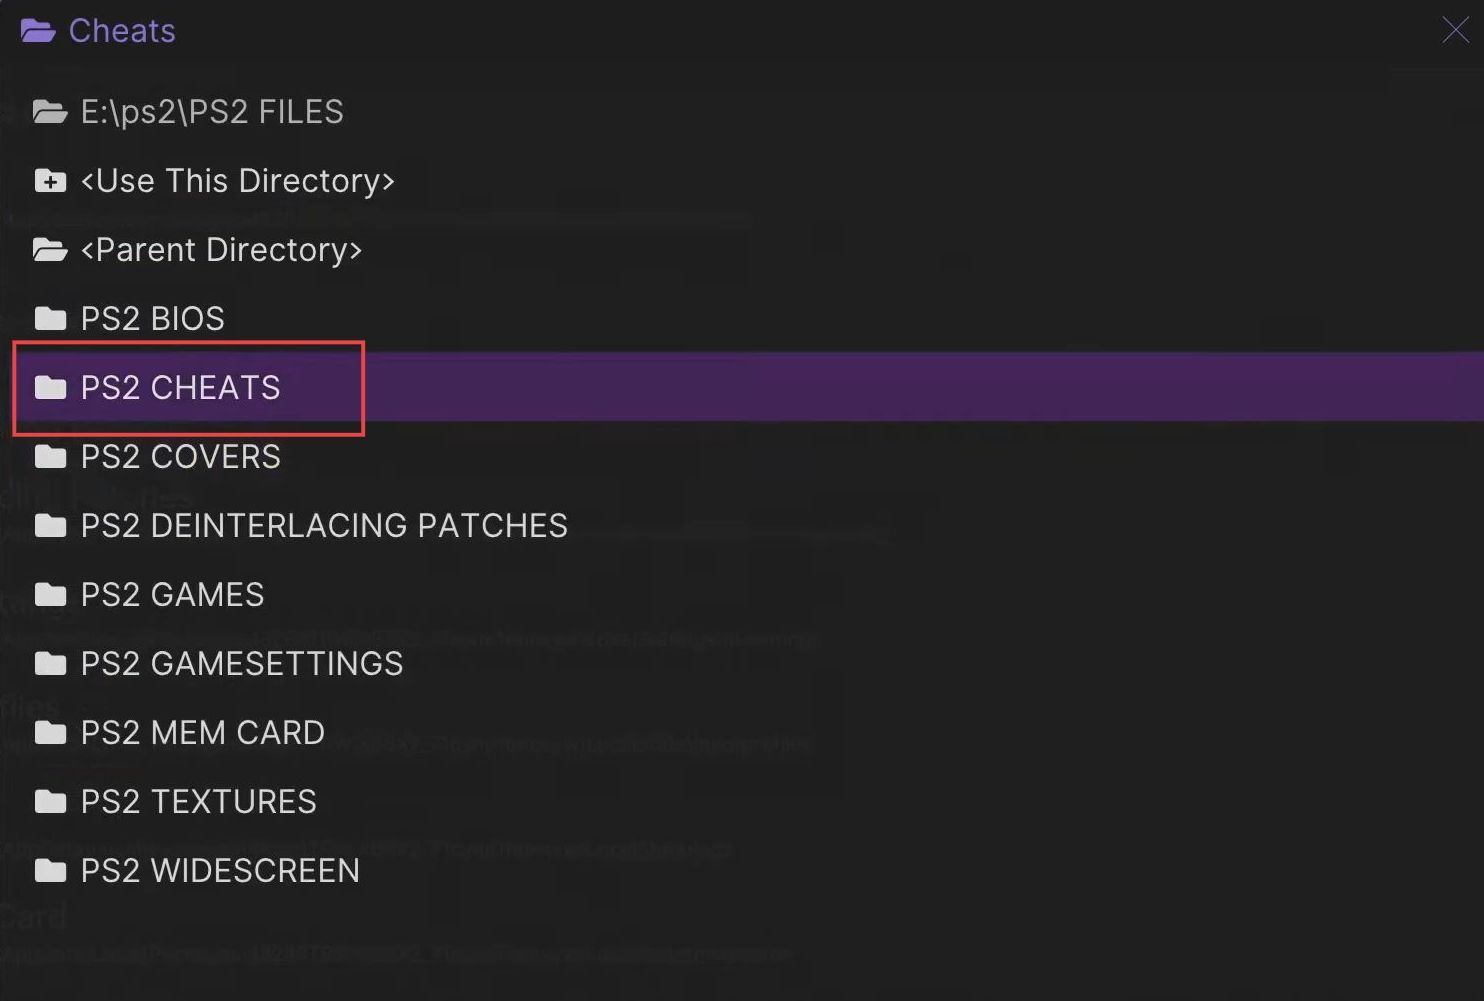
- Click the PS2 files folder from the listings to open it.
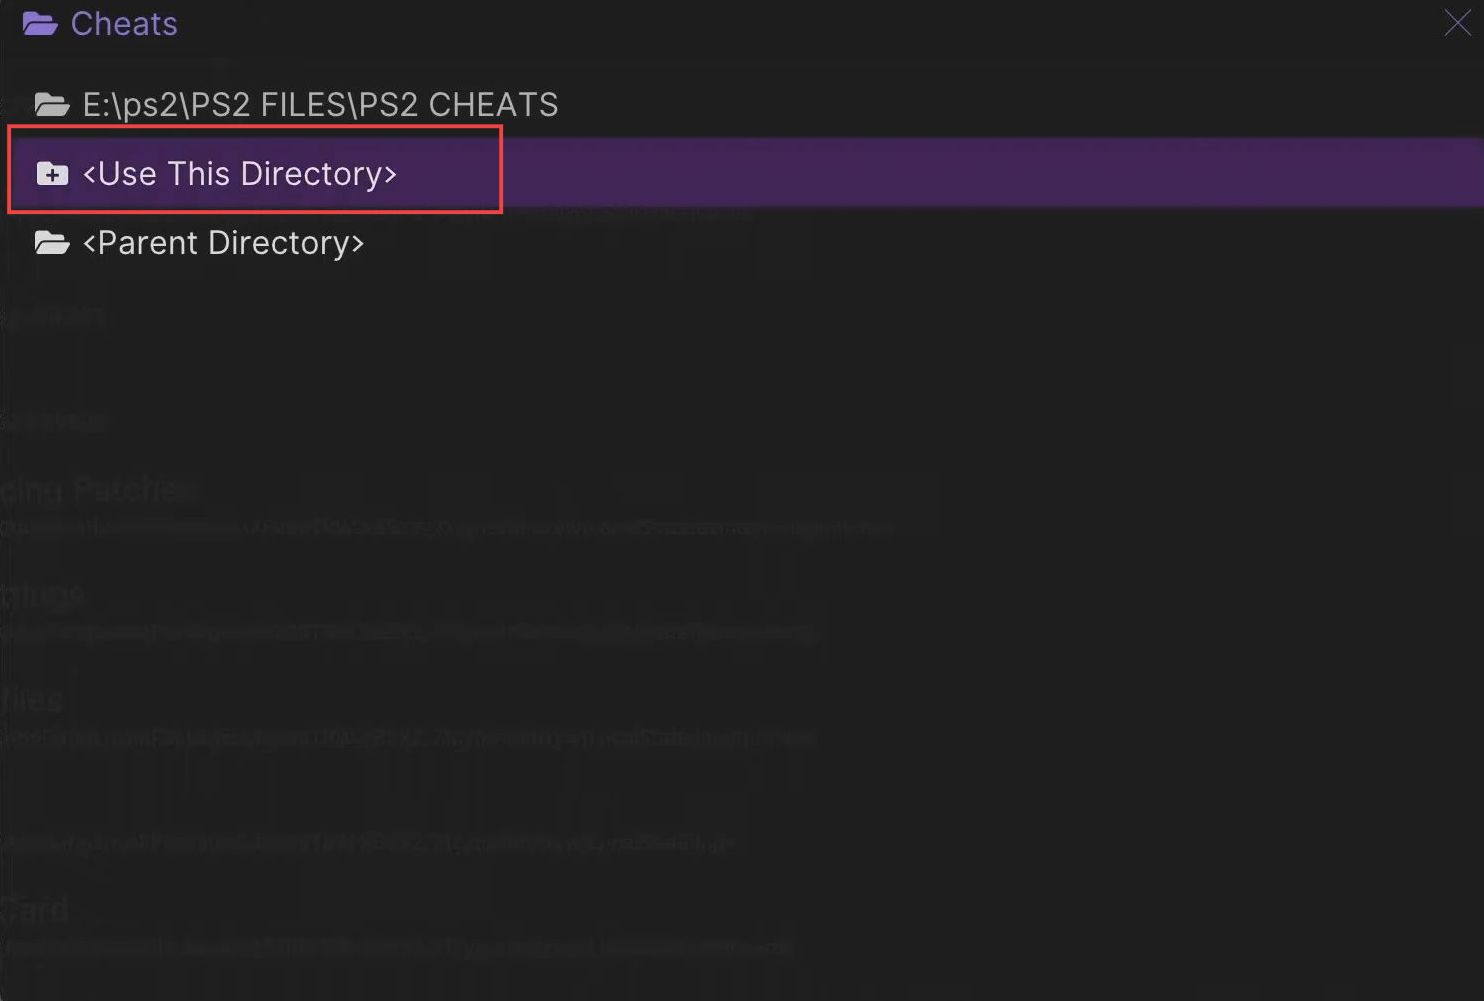
- Next, click the PS2 Cheats folder to open it.
- You have to click the Use this directory option.
Configuring Covers Settings
This section explains how to configure the cover settings from your Xbox. First, you have to open the covers folder and select the parent directory. Select the USB drive folder and open the PS2 covers folder. After that, set the PS2 files to use as the directory.
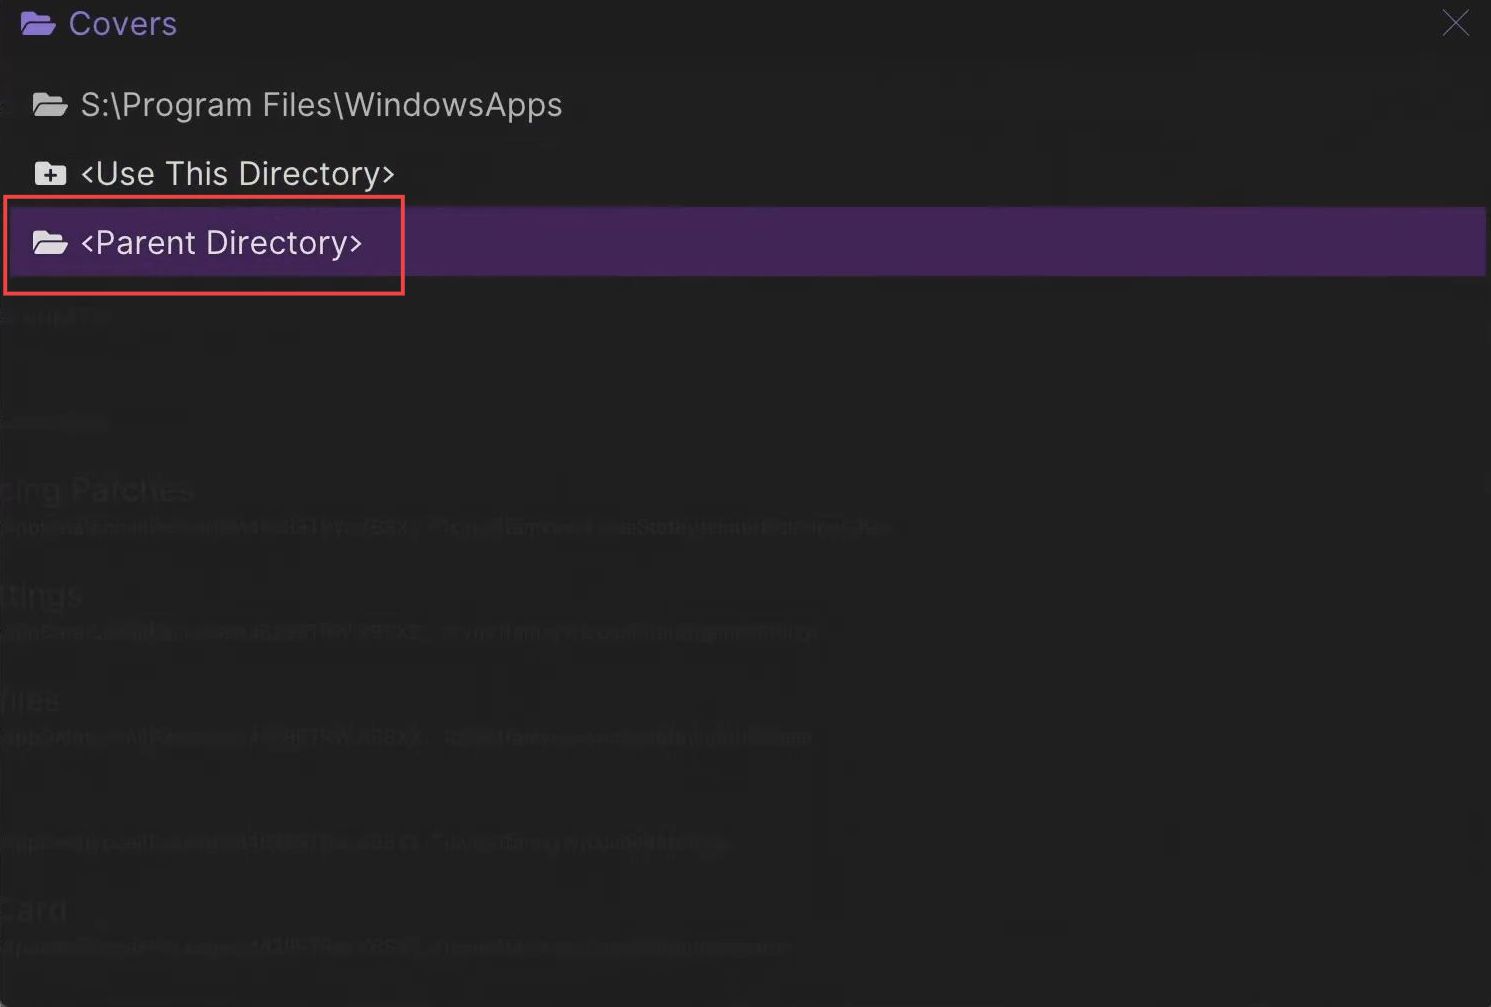
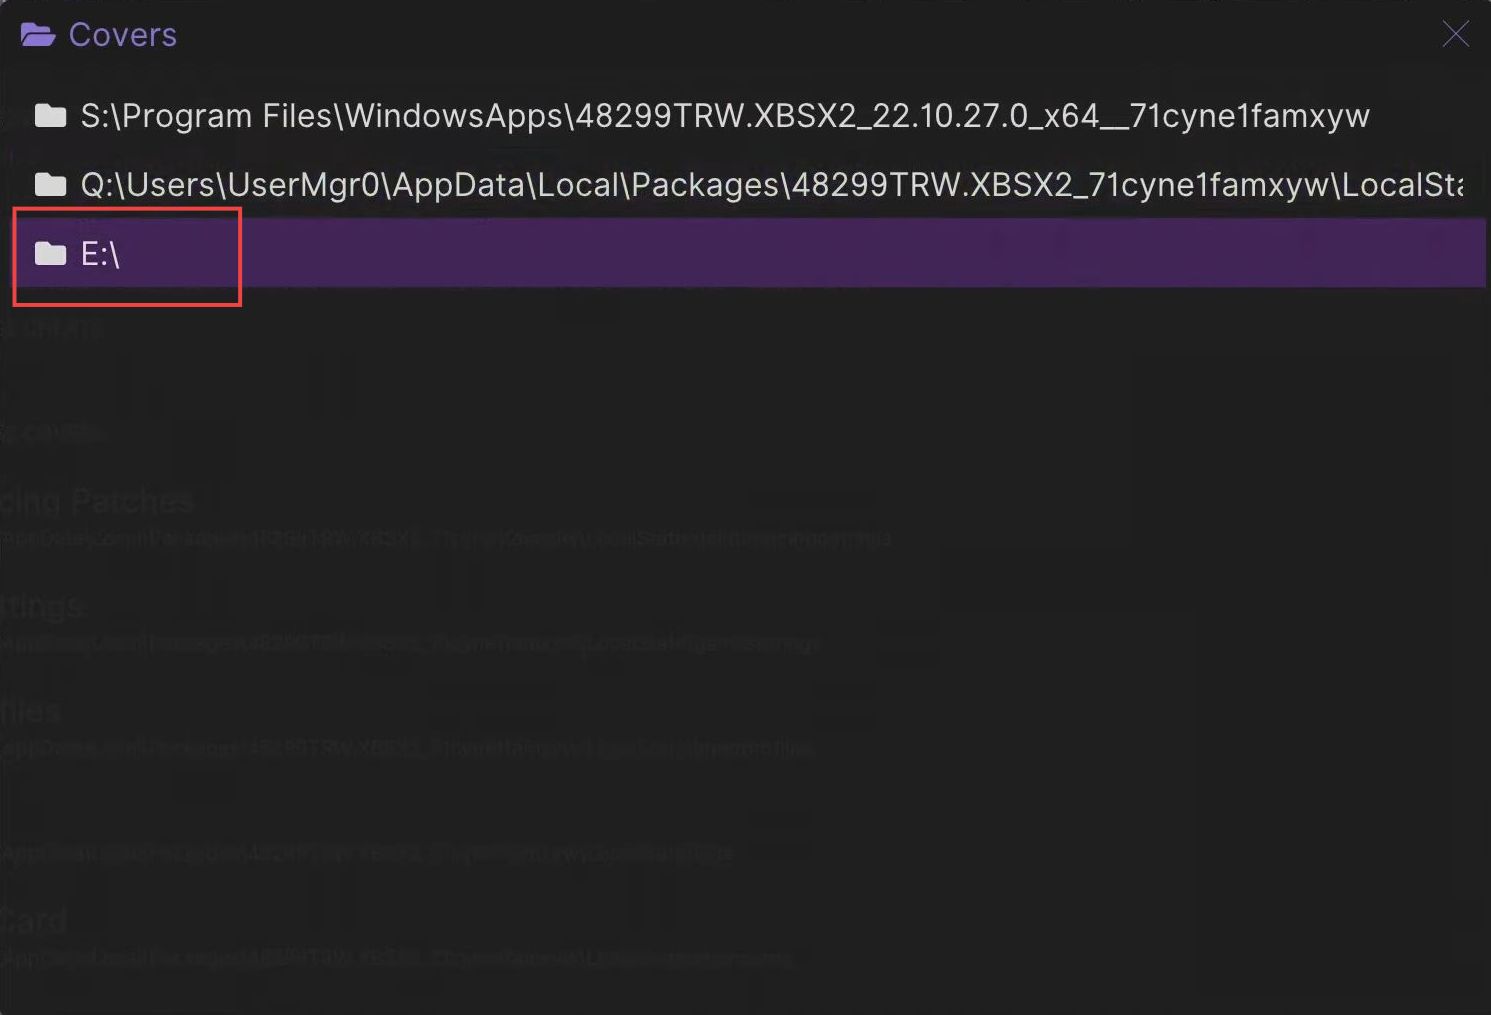
- Click the Covers folder from the menu of Directory settings and then tap on the Parent Directory.
- After that, select the drive in which the USB or external device is located.
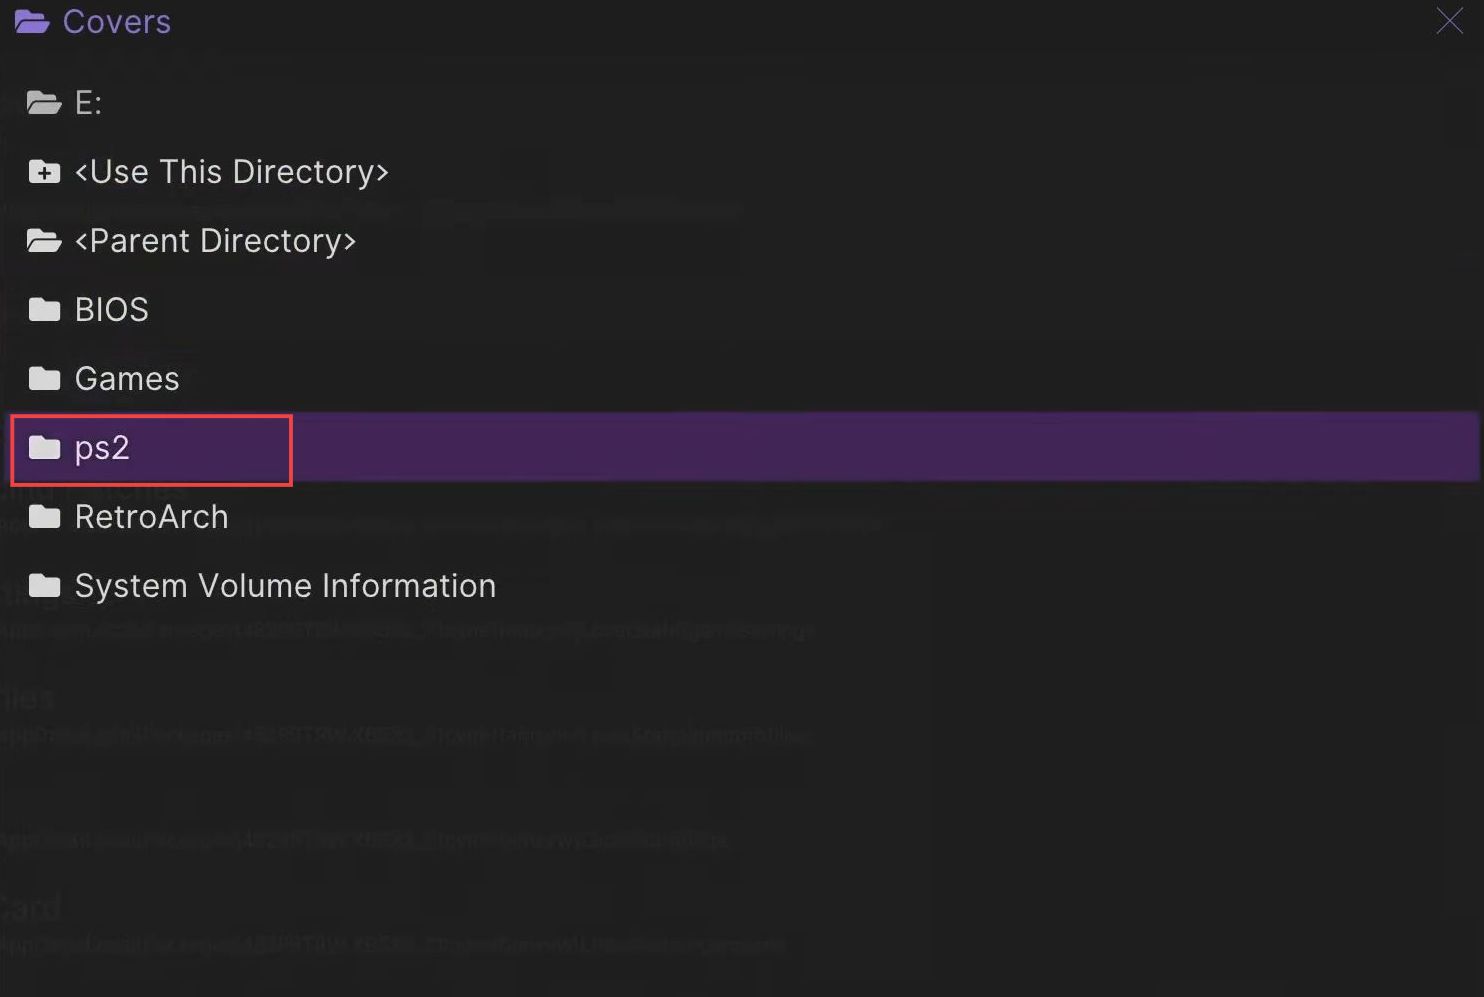
- Once this window appears, scroll down to the PS2 folder and click it from the menu.
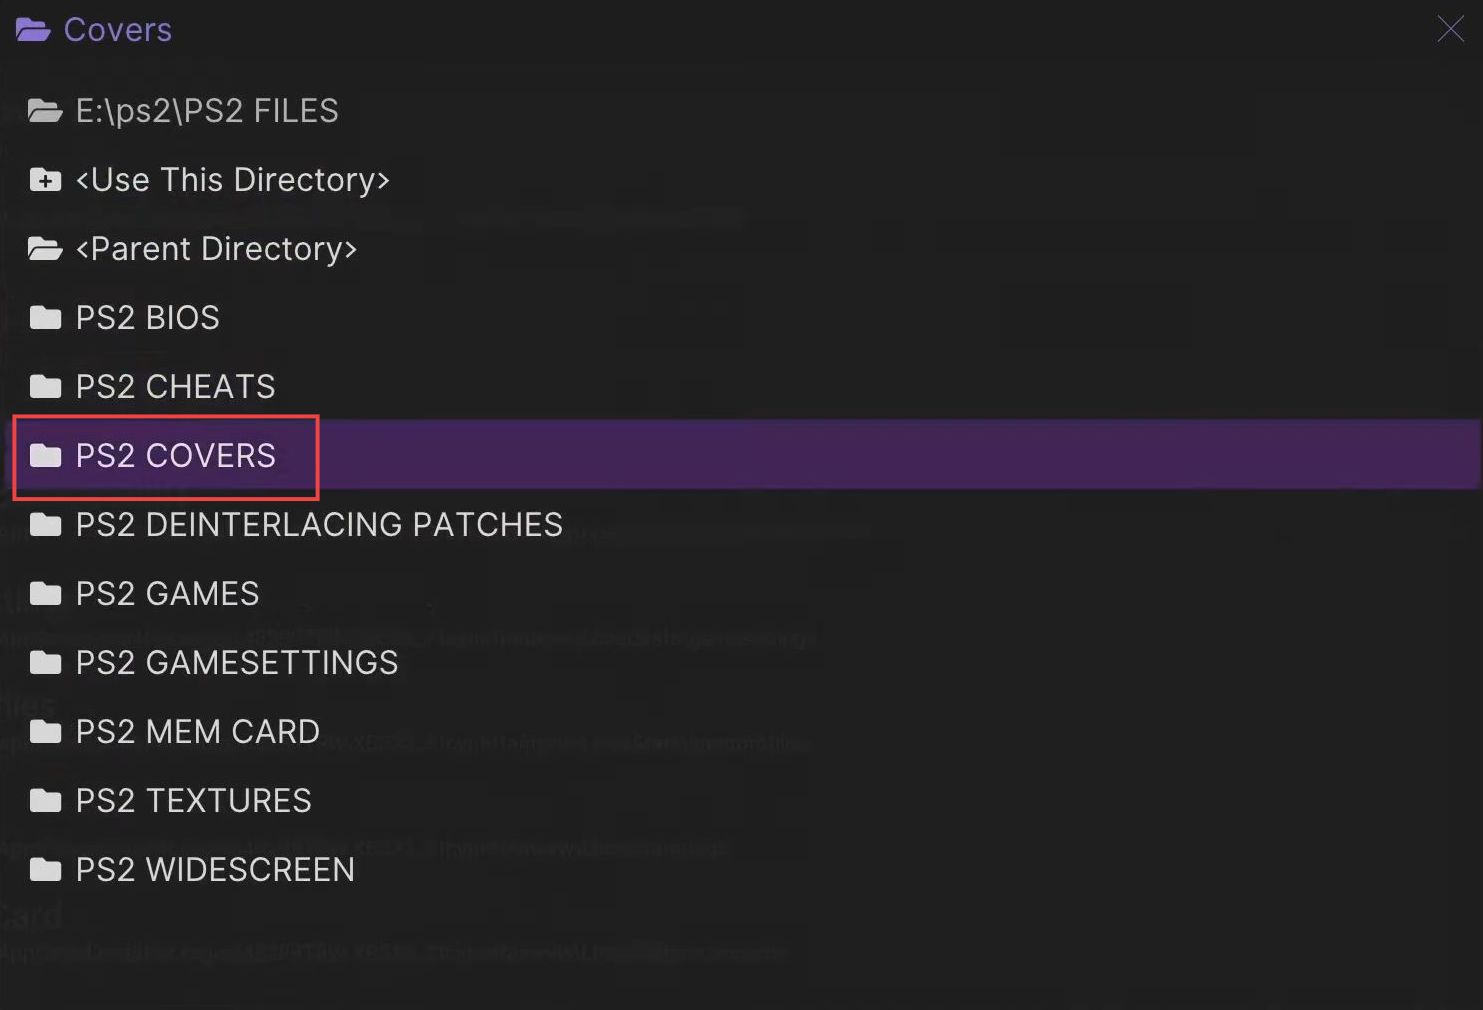
- Click the PS2 files folder from the listings to open it.
- Upon reaching the next window, click the PS2 Covers to open it up.
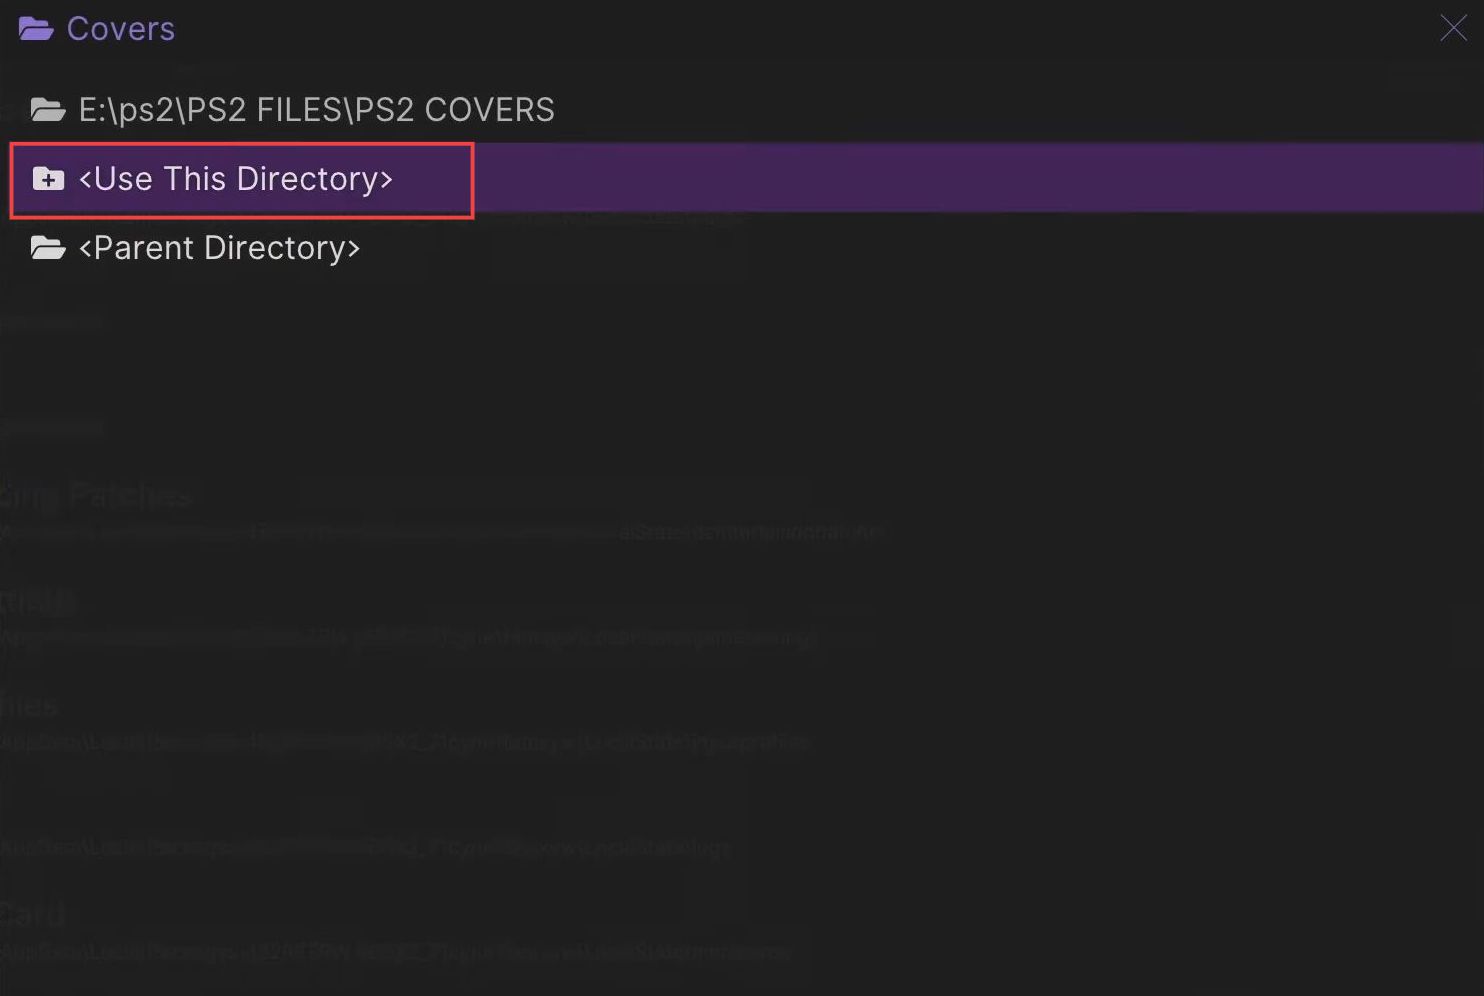
- You need to click the Use this directory option from the listings.
Configuring Deinterlacing Patches Settings
This section describes how to configure the Deinterlacing Patches settings from your Xbox.
- You have to click the Deinterlacing Patches folder from the Directory settings menu.
- Click on the Parent Directory option.
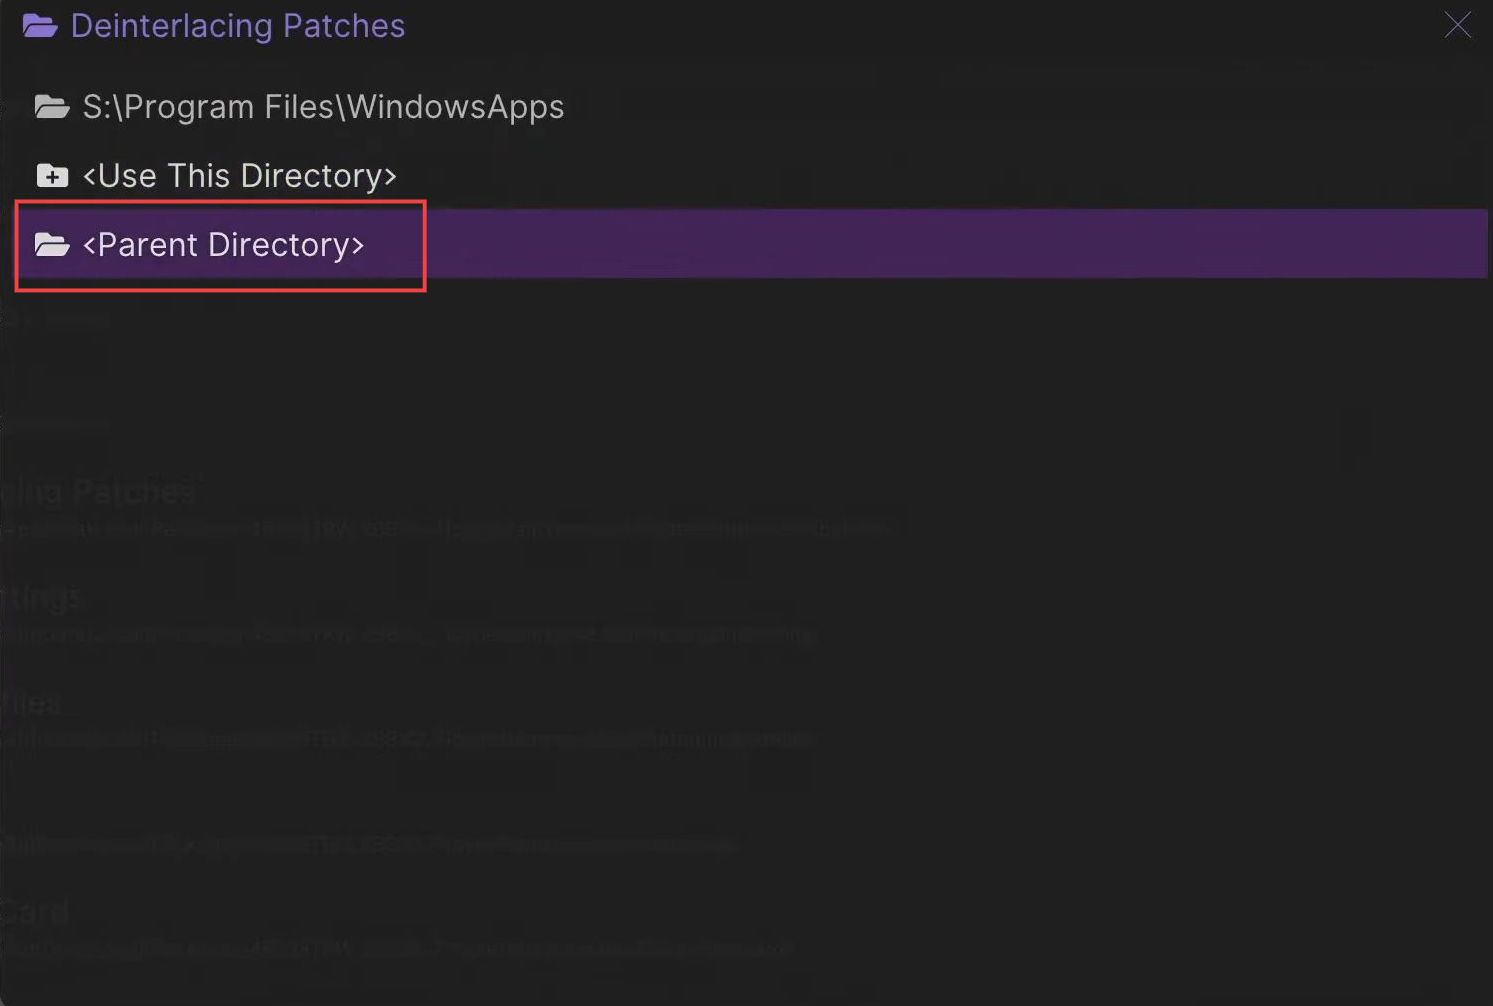
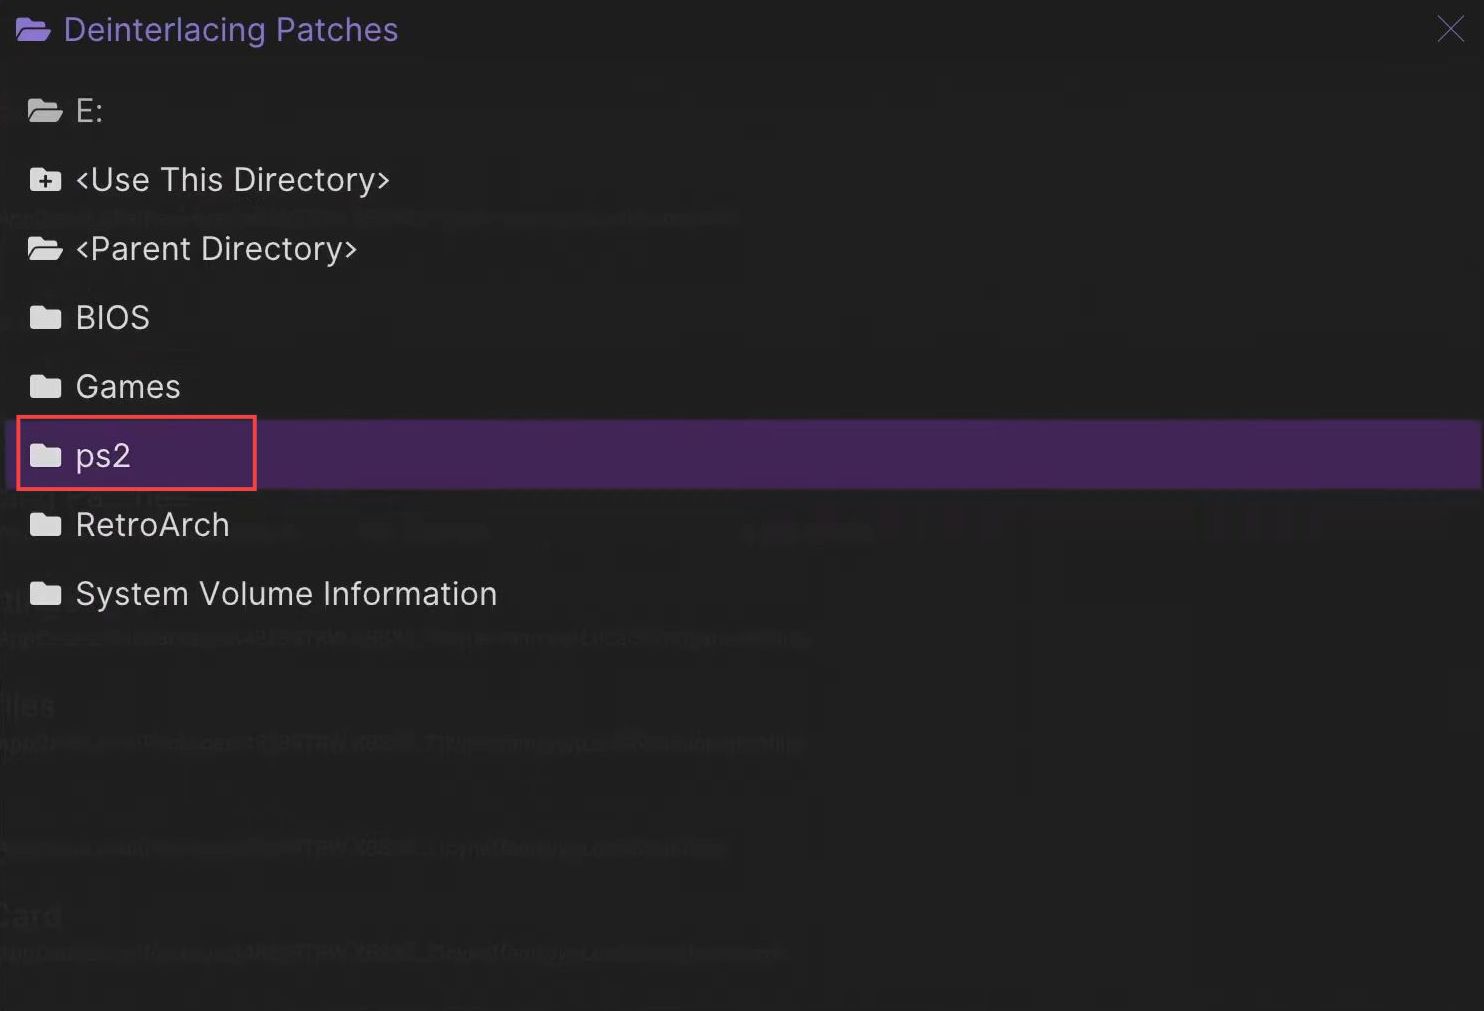
- After that, select the drive in which the USB or external device is located.
- Once this window appears, scroll down to the PS2 folder and click it from the menu.
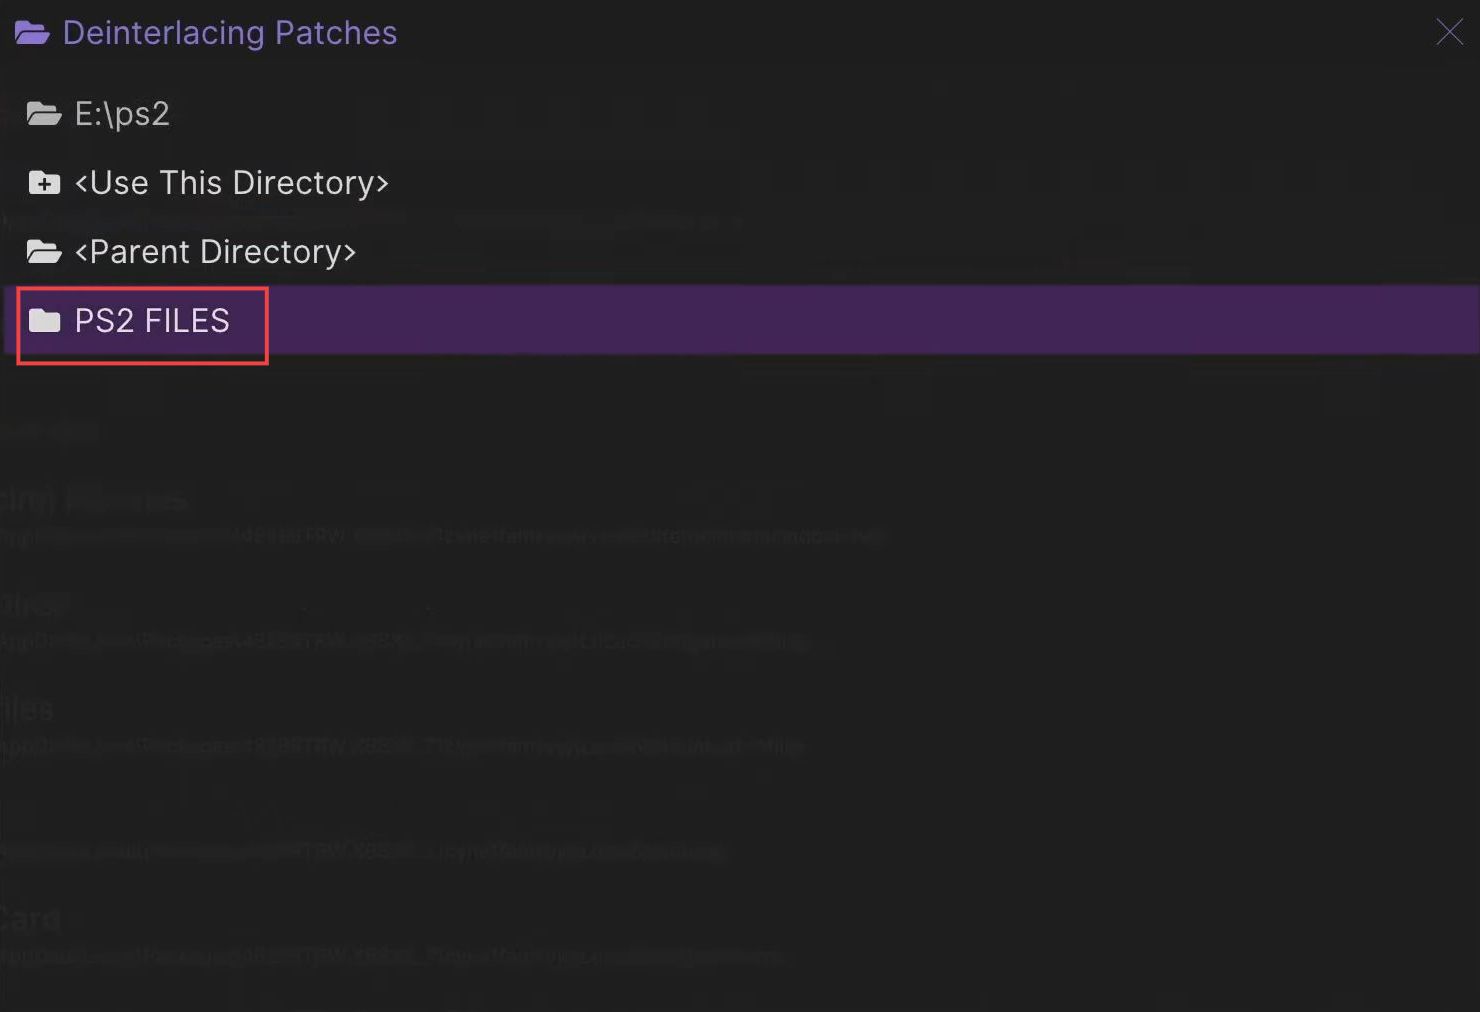
- Click the PS2 files folder from the listings to open it.
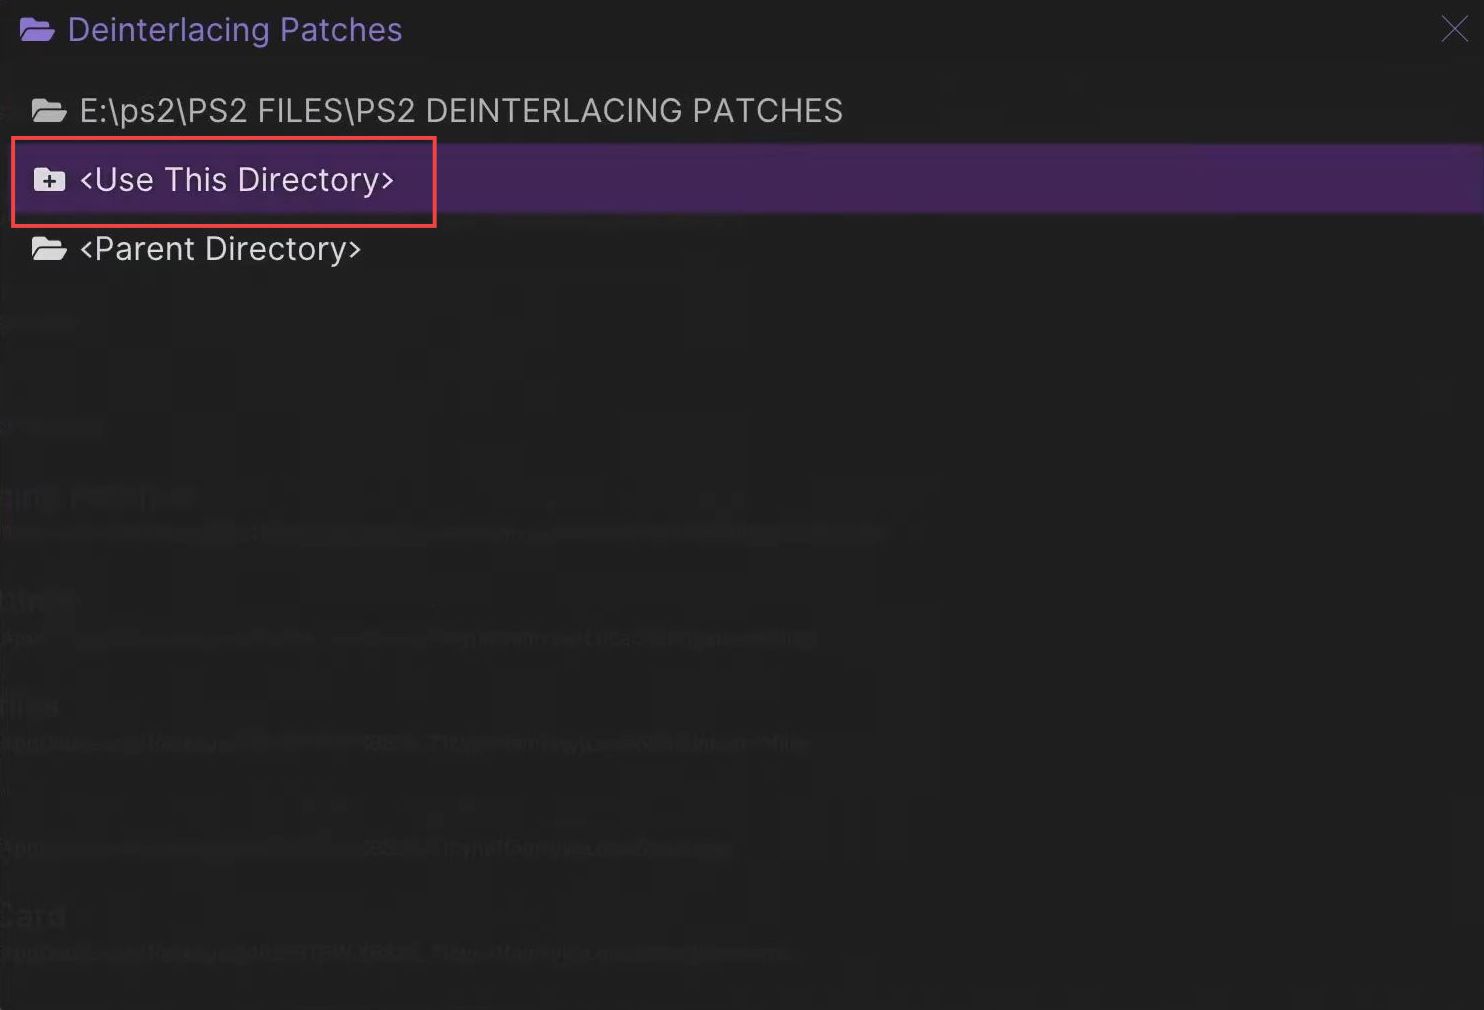
- Upon reaching this window, click the PS2 Deinterlacing Patches to open it.
- Now you need to click the Use this directory option.
Configuring Game Settings
This section explains how to configure the game settings from your Xbox. First, you have to open the game settings folder and select the parent directory. Then select the USB drive folder and open the PS2 game settings folder. After that set the PS2 files to use as the directory.
- First, click on the Games Settings folder from the menu of Directory settings.

- Upon reaching this window, click the Parent Directory option from the menu.
- After that, select the E drive in which the USB or external device is located.
- Once this window appears, scroll down to the PS2 folder and click on it.

- Click the PS2 files folder from the listings to open it.
- After that, click on the PS2 Games Settings folder to open it.
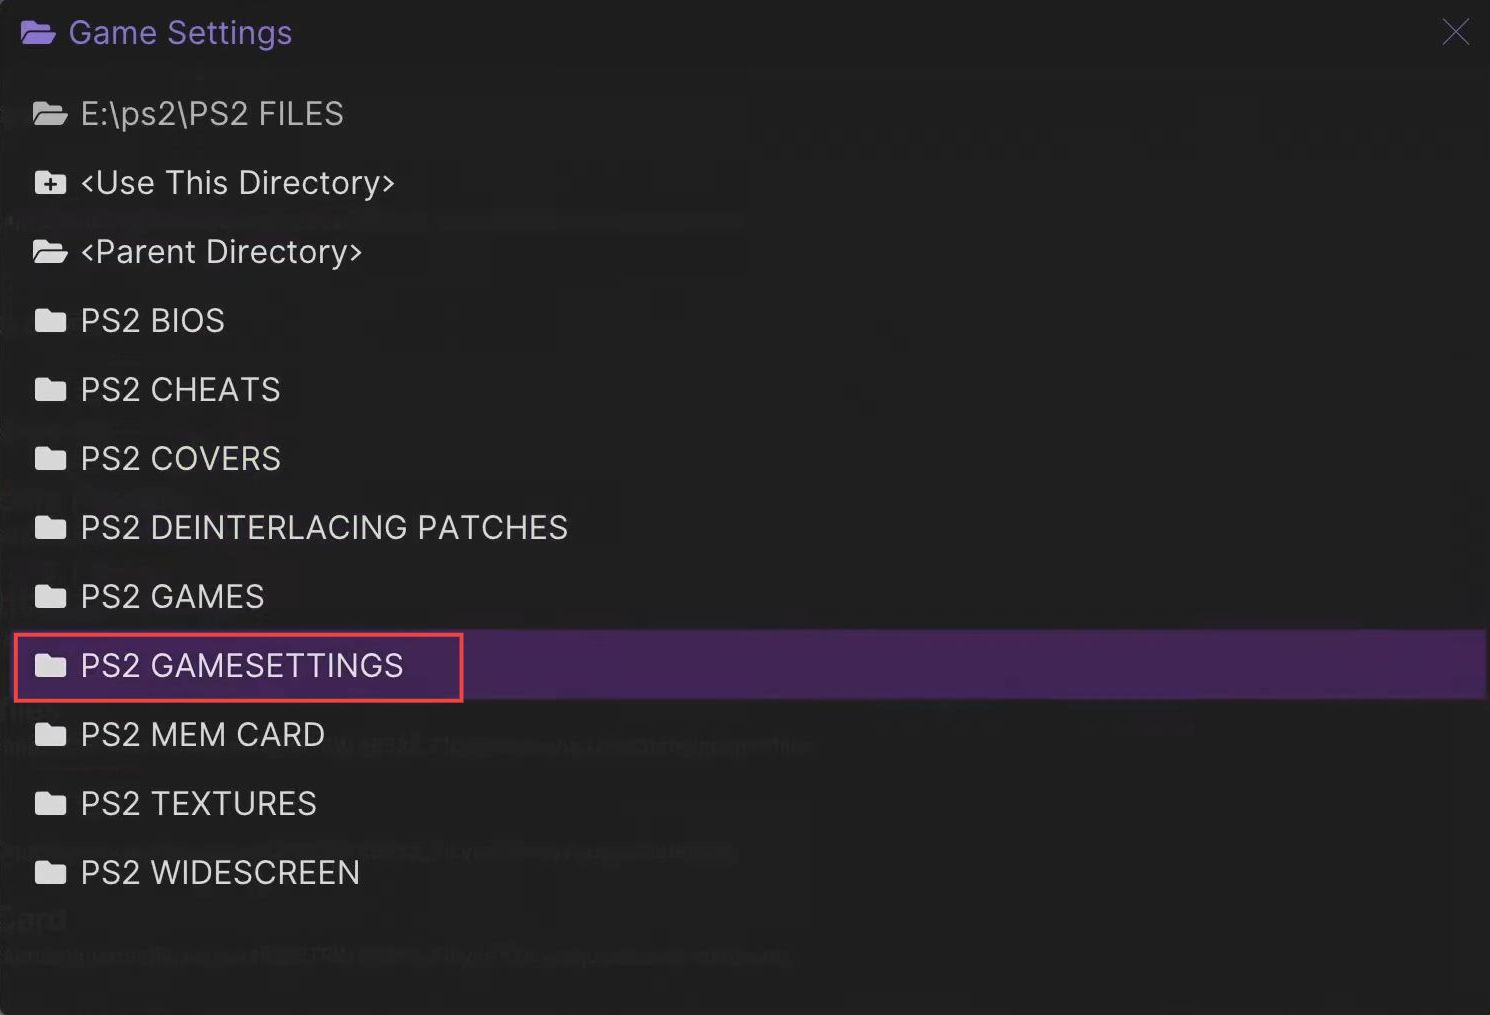
- You need to click the Use this directory option from the listings.

Configuring Memory Card Settings
This section describes how to configure the memory card settings from your Xbox. First, you have to open the memory card folder and select the parent directory.
- Click the Memory Card folder from the menu of Directory settings.
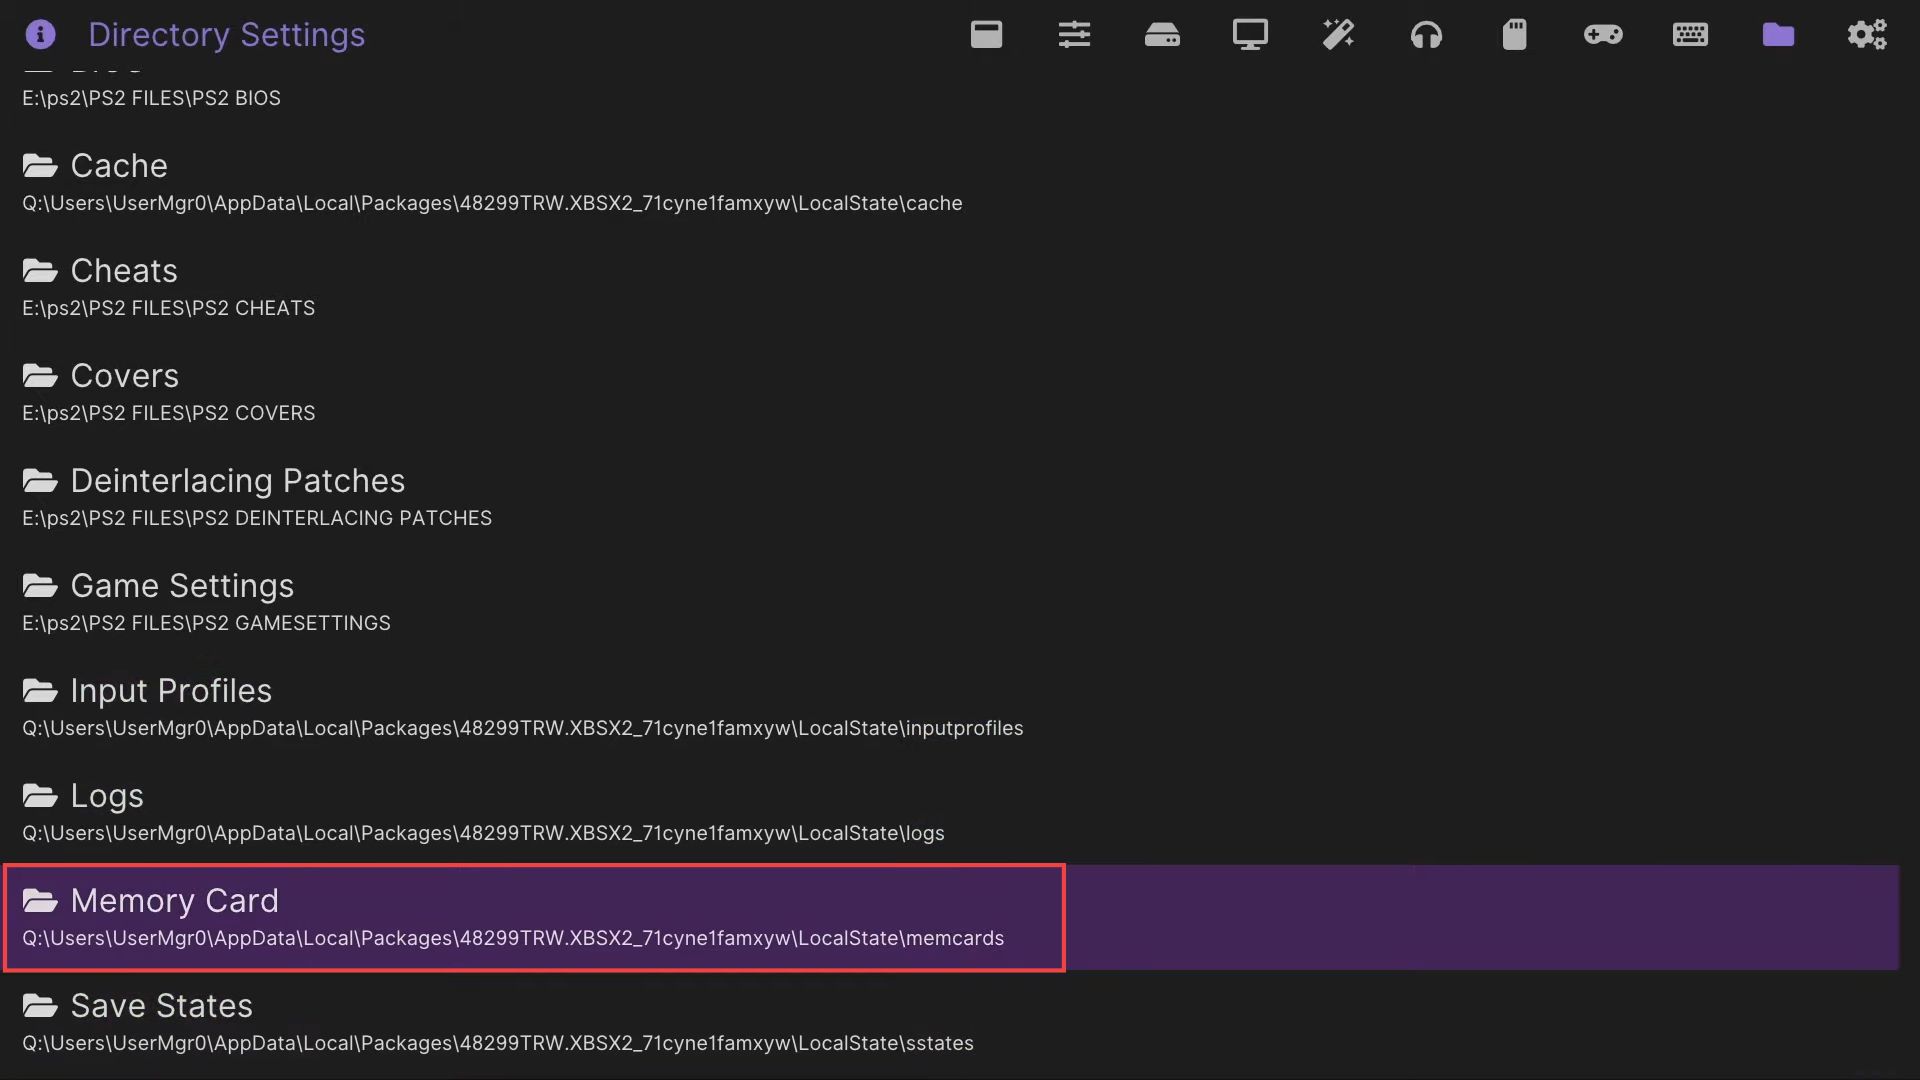
- Upon reaching this window, click the Parent Directory option from the menu.
- After that, select the E drive in which the USB or external device is located.

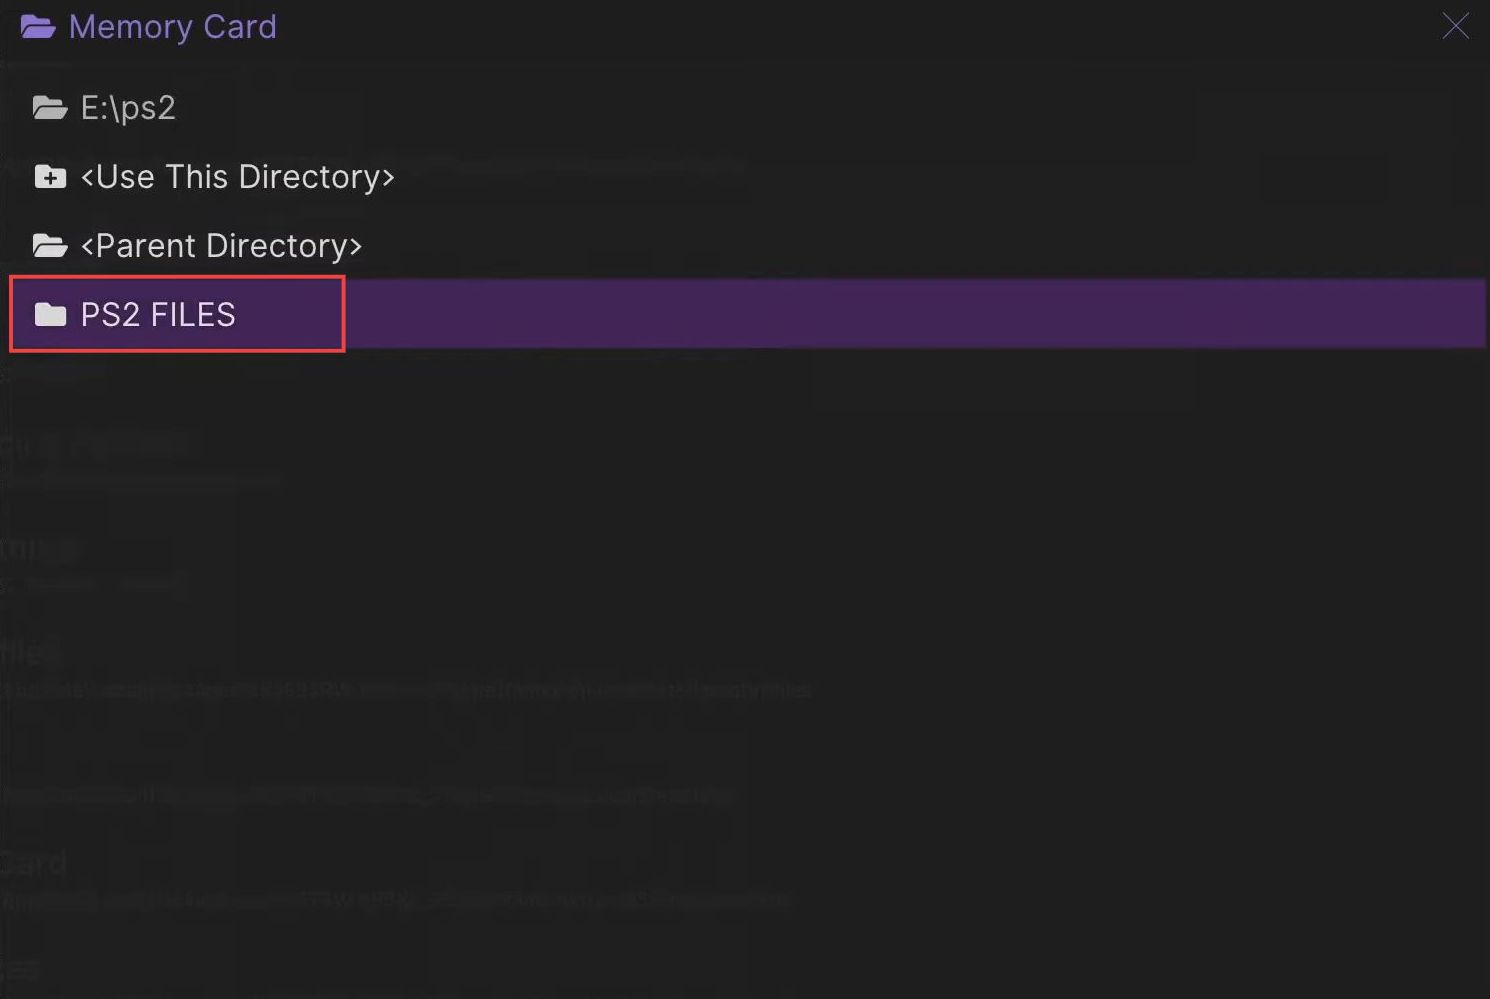
- Once this window appears, scroll down to the PS2 folder and click it from the menu.
- Click on the PS2 files folder to open it.
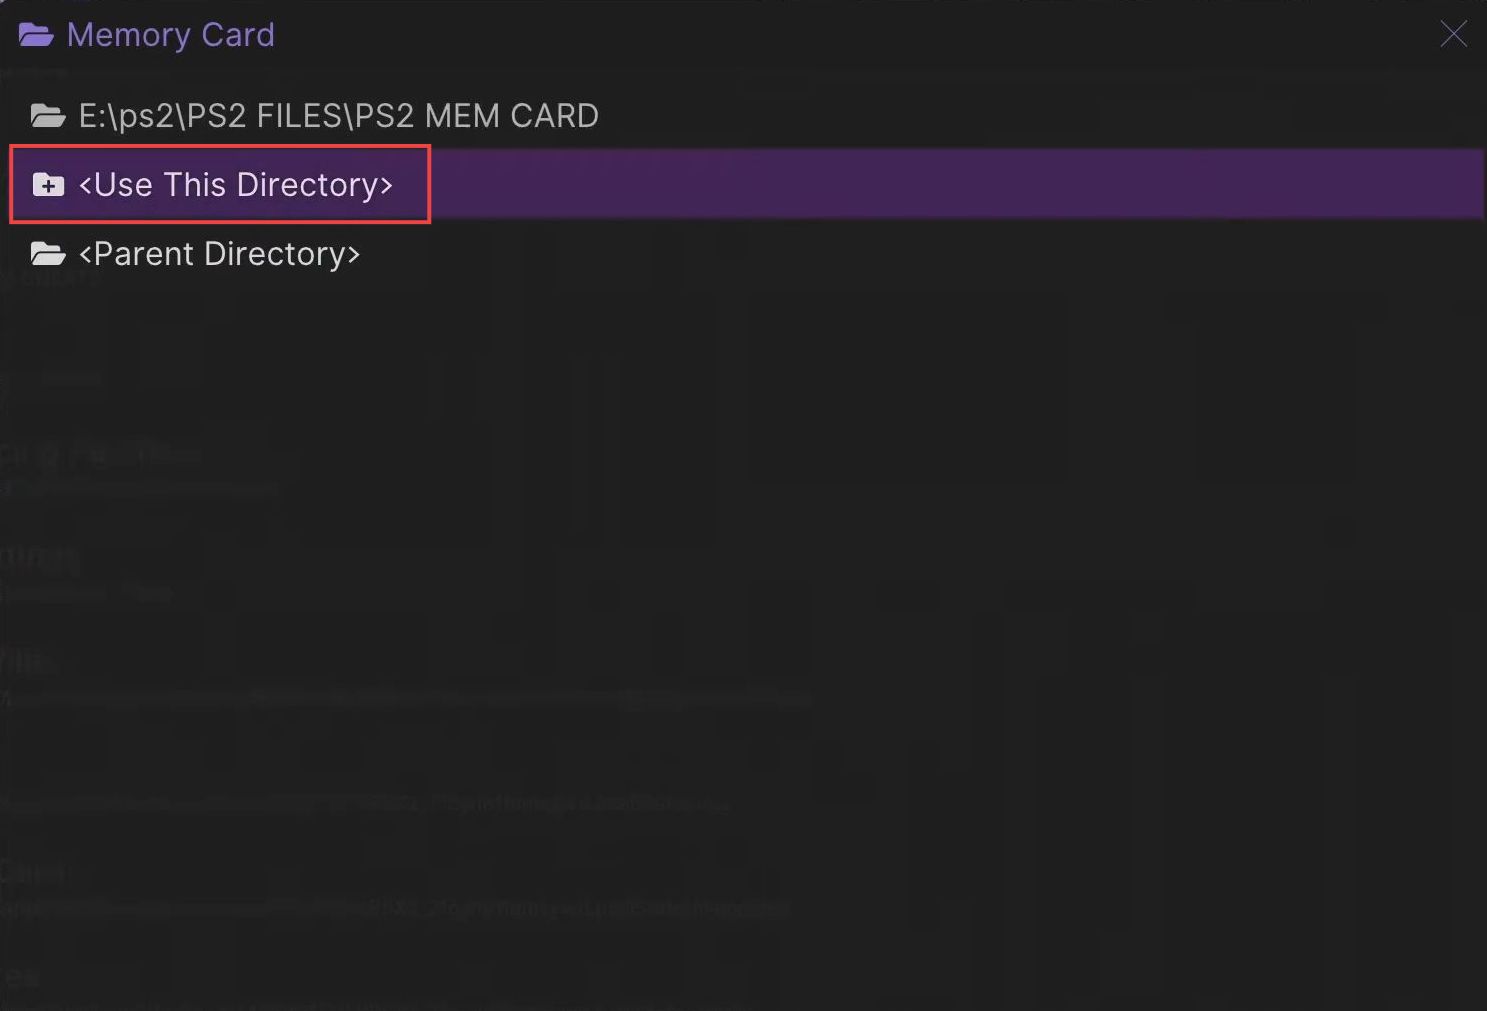
- Upon reaching this window, click the PS2 Mem Card folder to open it.
- Now you need to click on Use this directory.
Configuring Textures Settings
This section explains how to configure the texture settings from your Xbox.
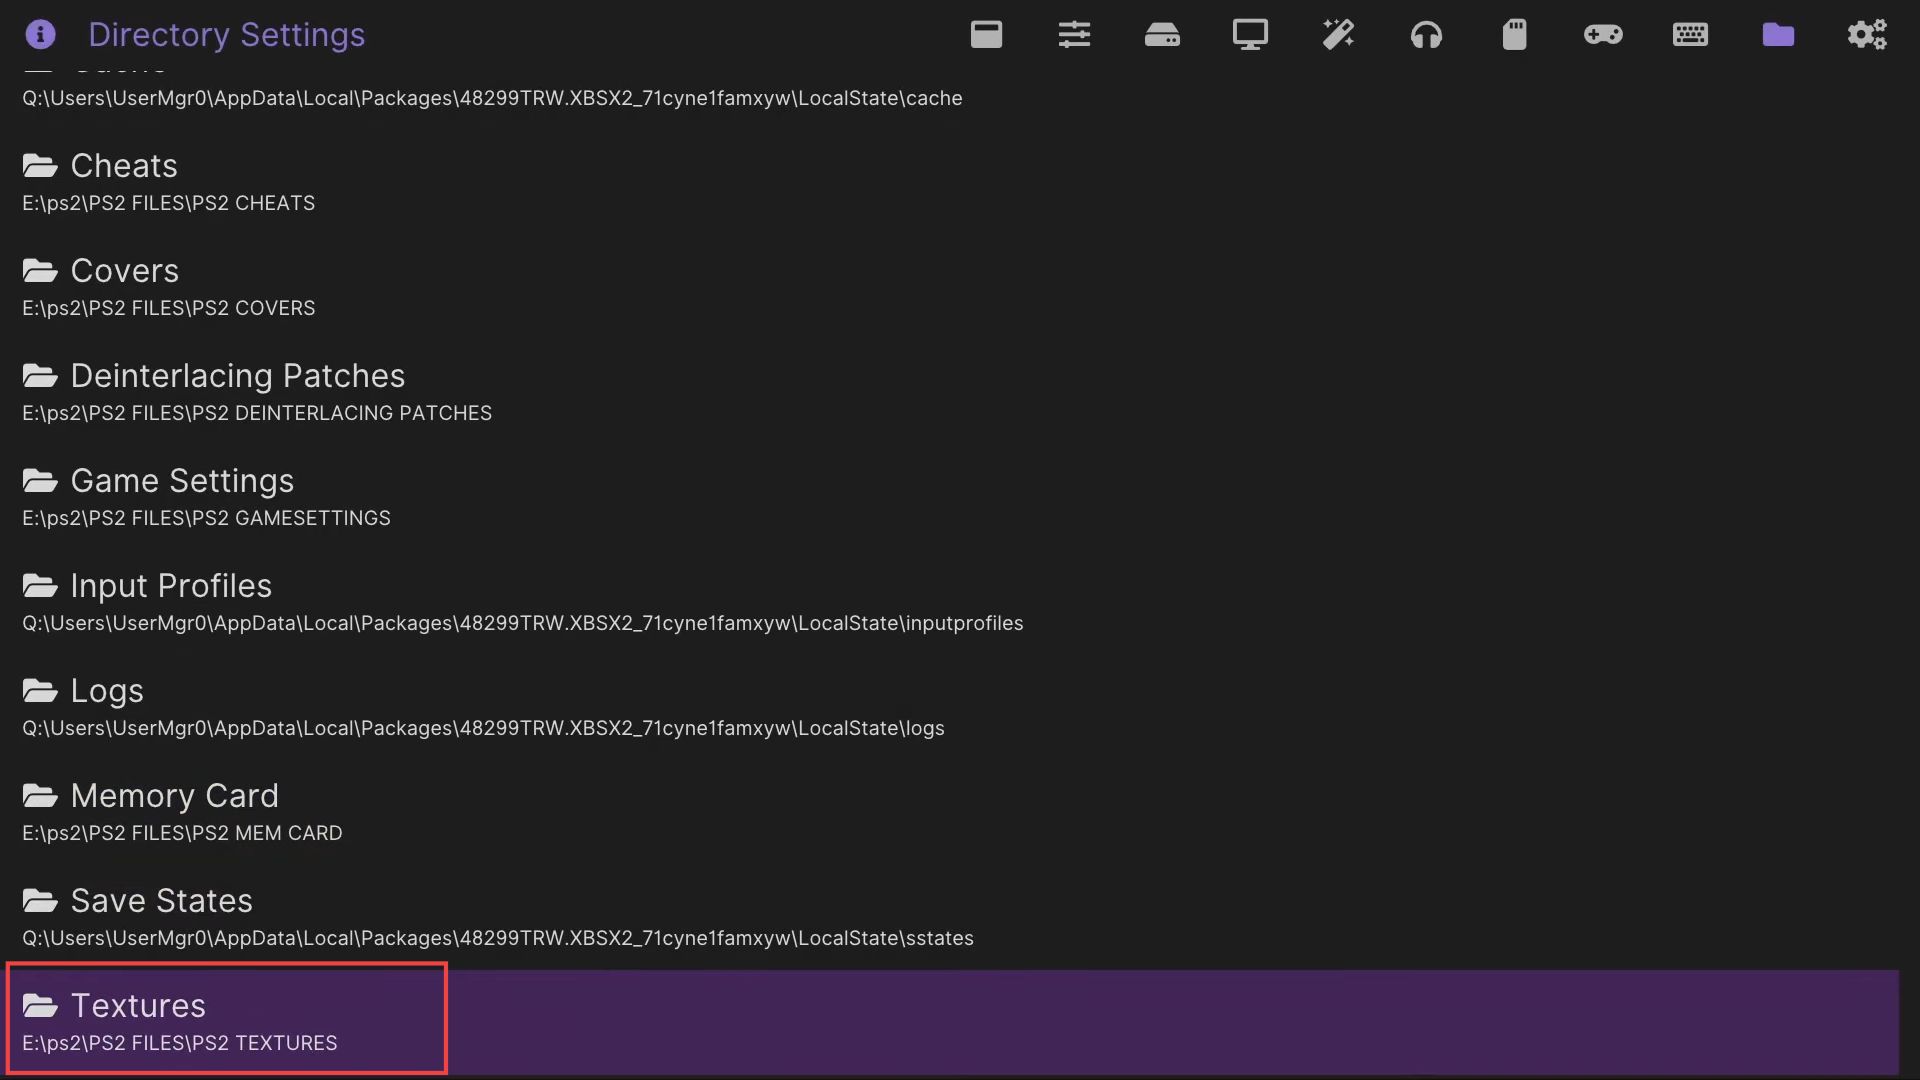
- First, click the Textures folder from the menu of Directory settings.
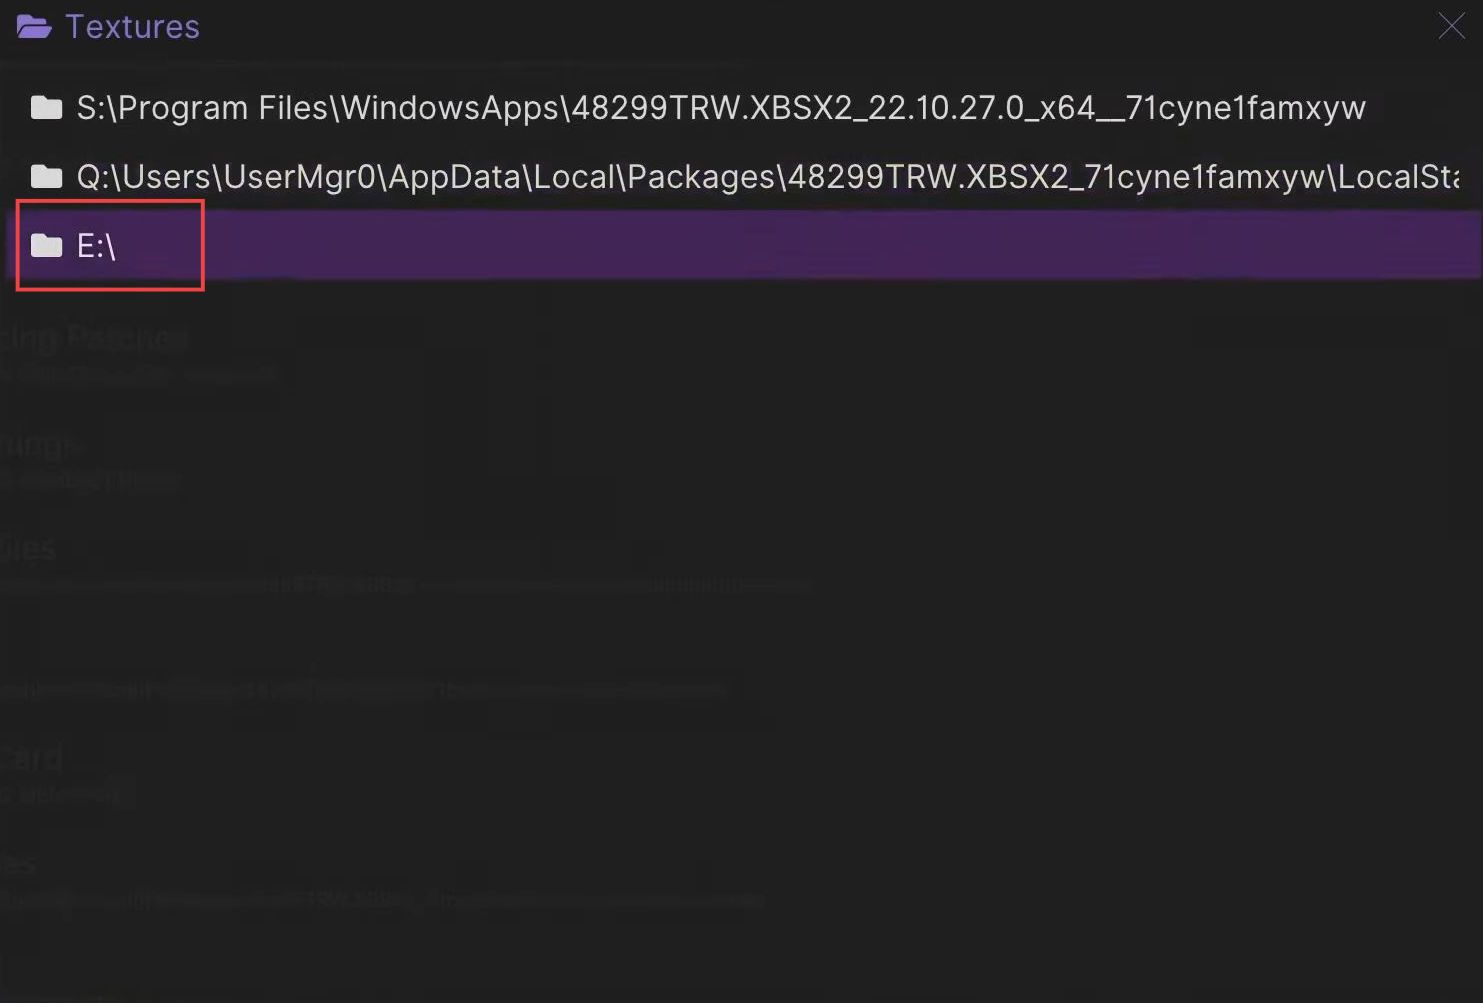
- Upon reaching this window, click the Parent Directory option from the menu.
- After that, select the E drive in which the USB or external device is located.
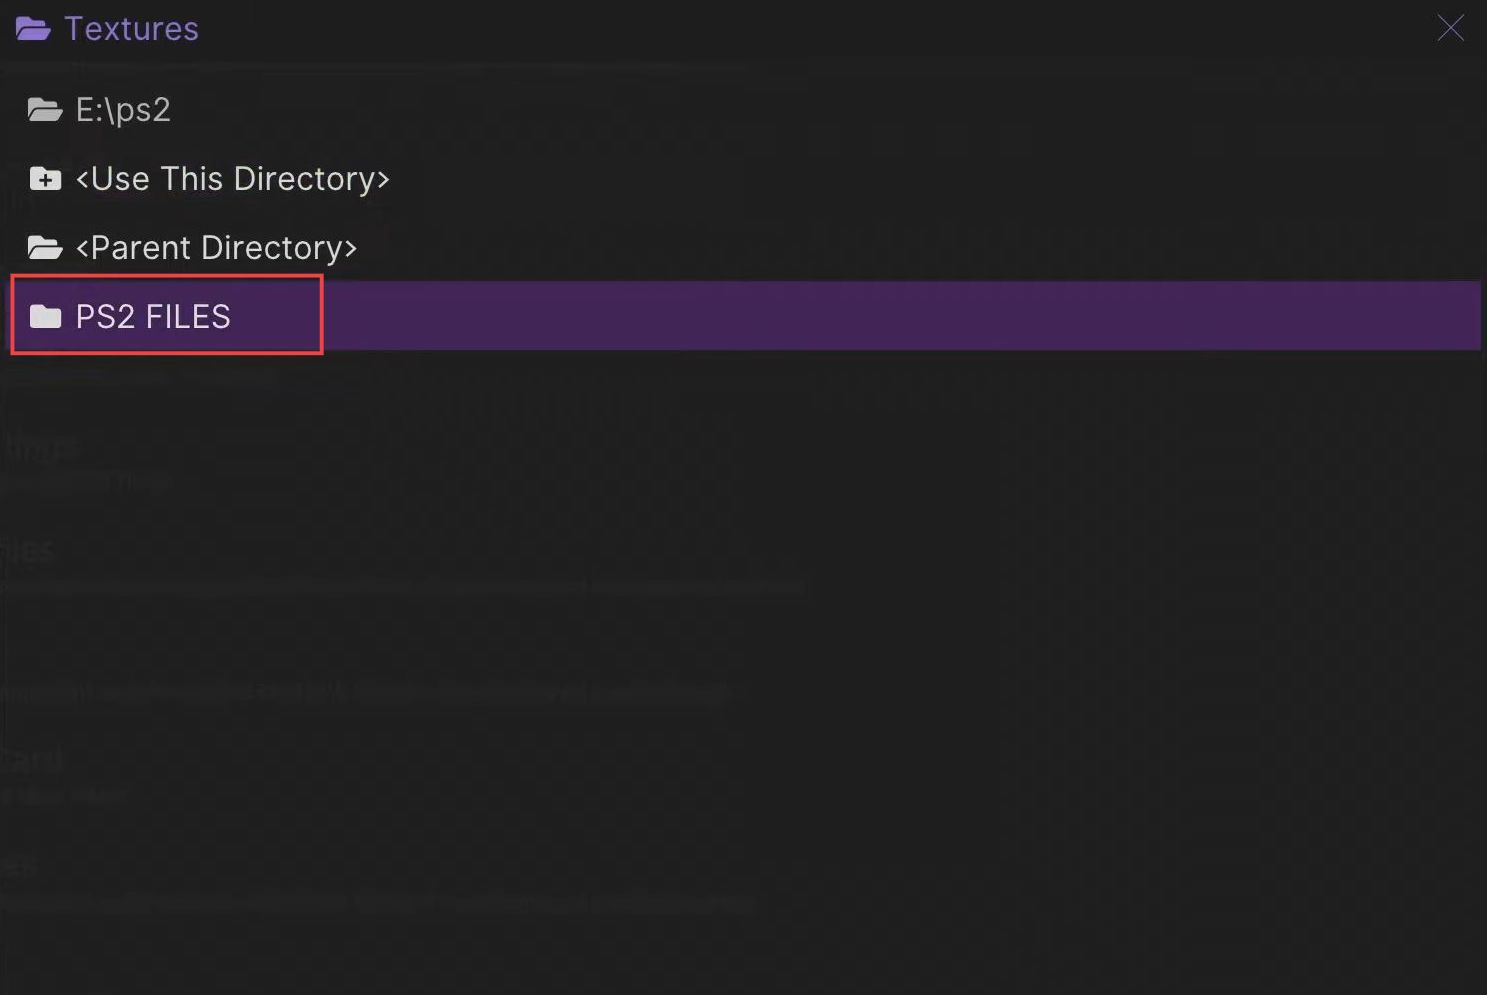
- Once this window appears, scroll down to the PS2 folder and click it from the menu.

- Click the PS2 files folder to open it up.
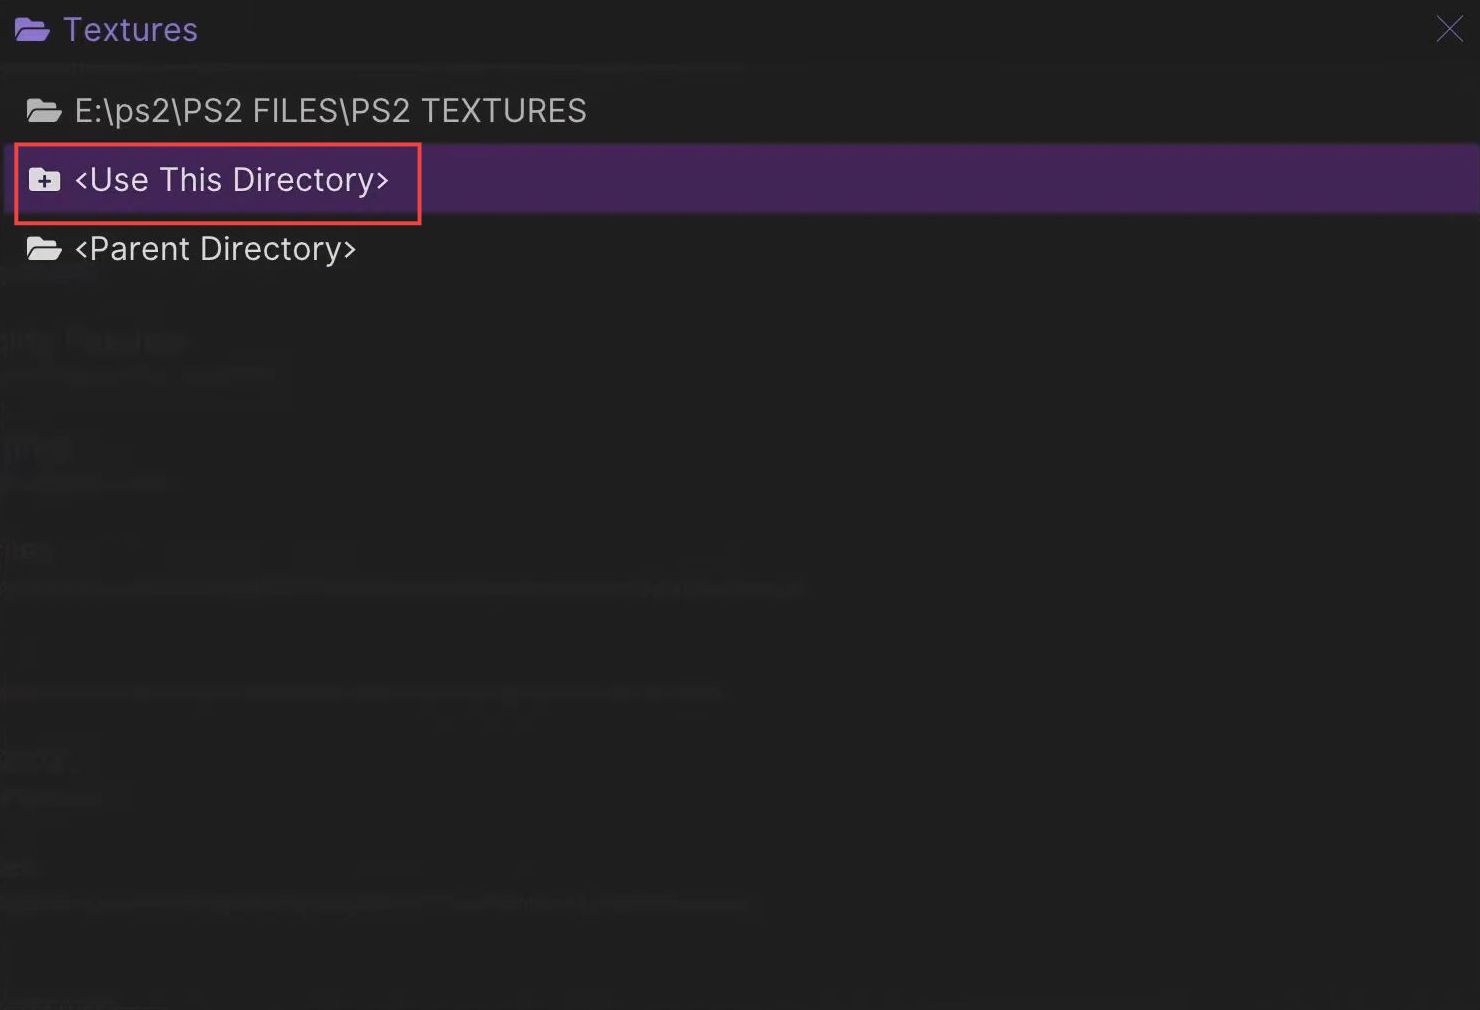
- Upon reaching this window, click the PS2 Textures folder to open it.
- You need to click the Use this directory option from the listings.
Configuring Widescreen Patches Settings
This section describes how to configure the Widescreen Patches settings from your Xbox. First, you have to open the Widescreen Patches folder and select the parent directory. Select the USB drive folder and open the PS2 Widescreen Patches folder.
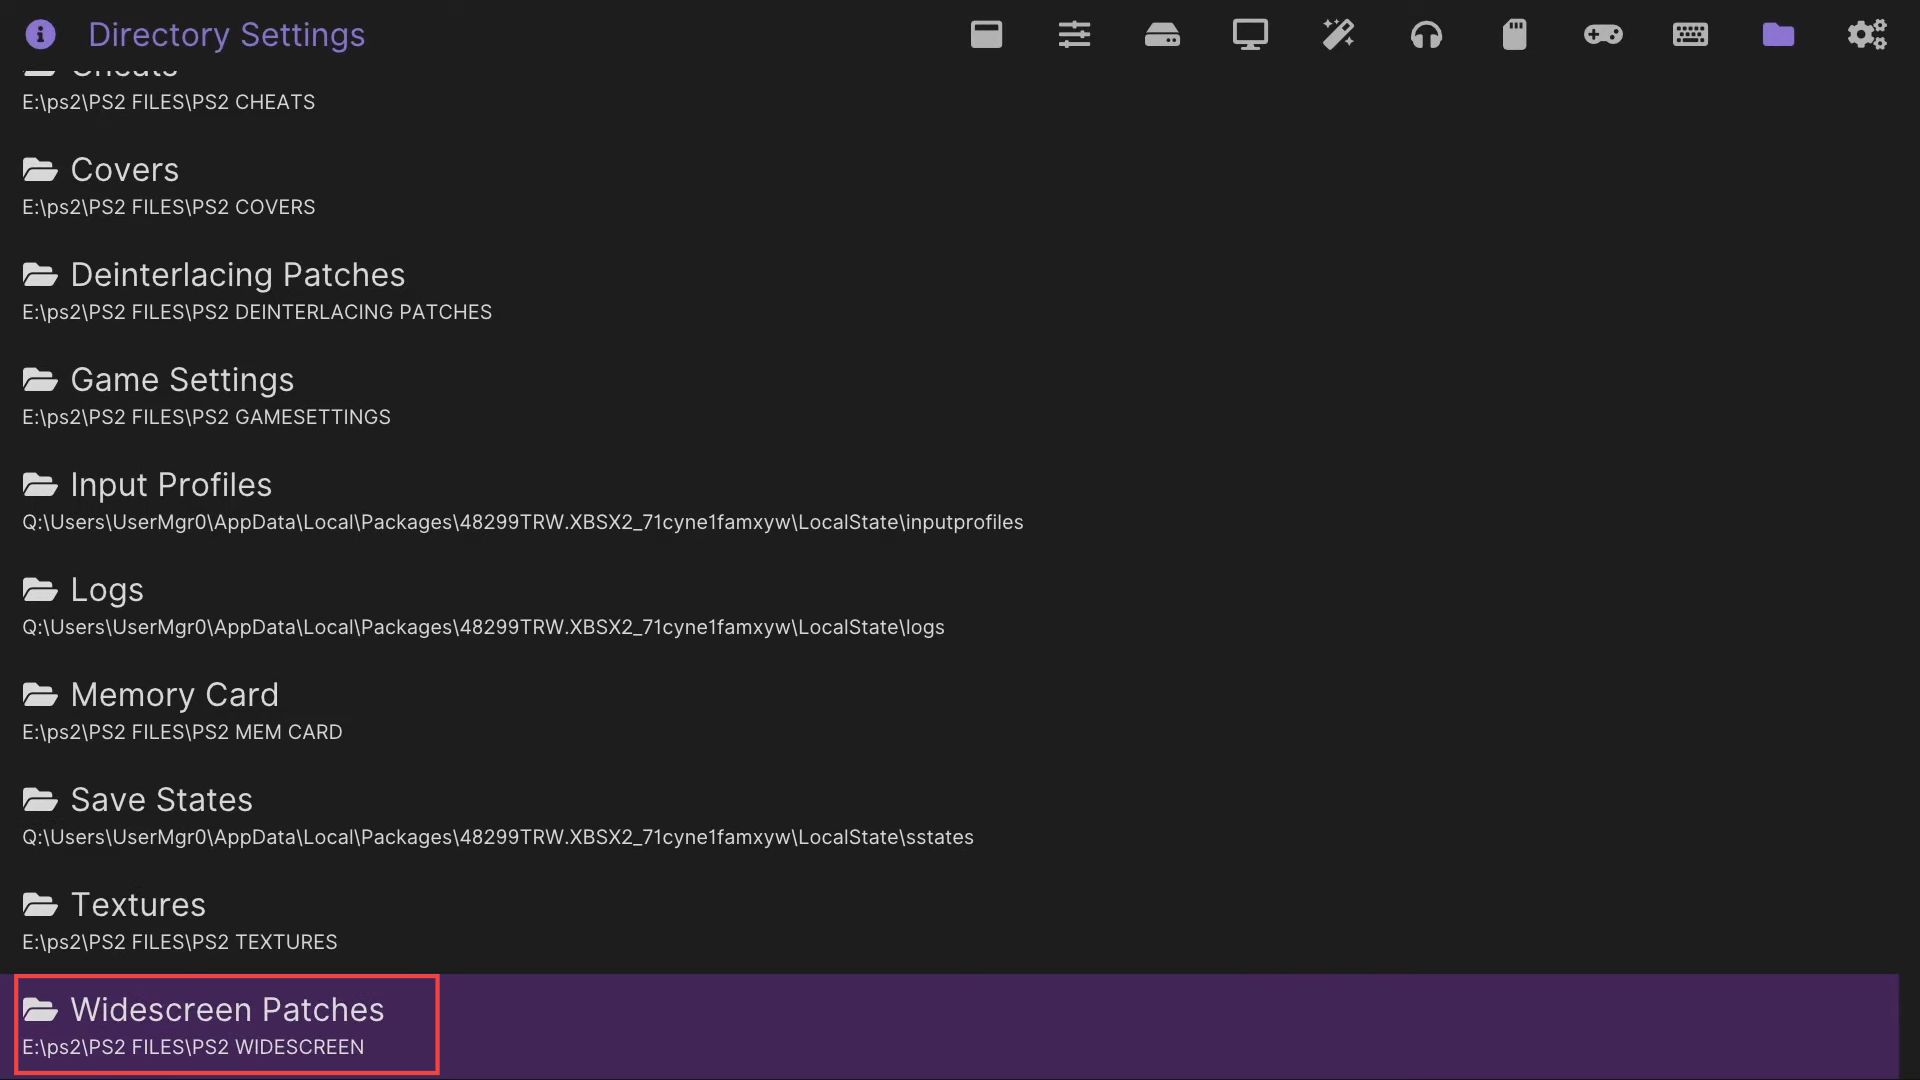
- Click the Widescreen Patches from the menu of Directory settings.
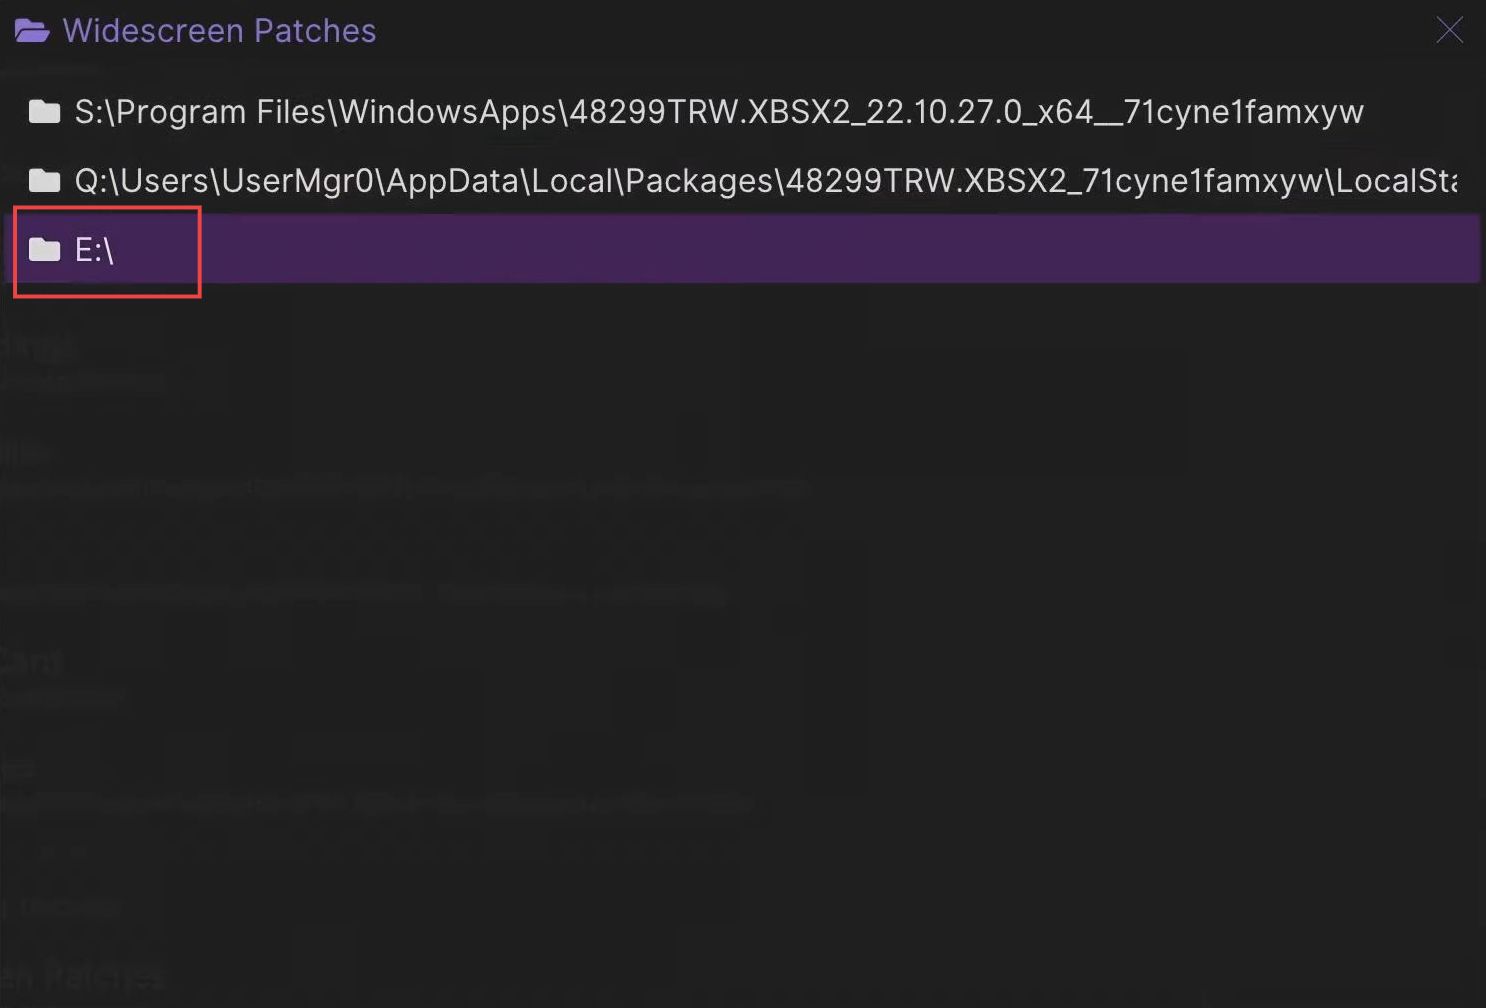
- Upon reaching this window, click the Parent Directory option from the menu.
- After that select the E drive in which the USB or external device is located.
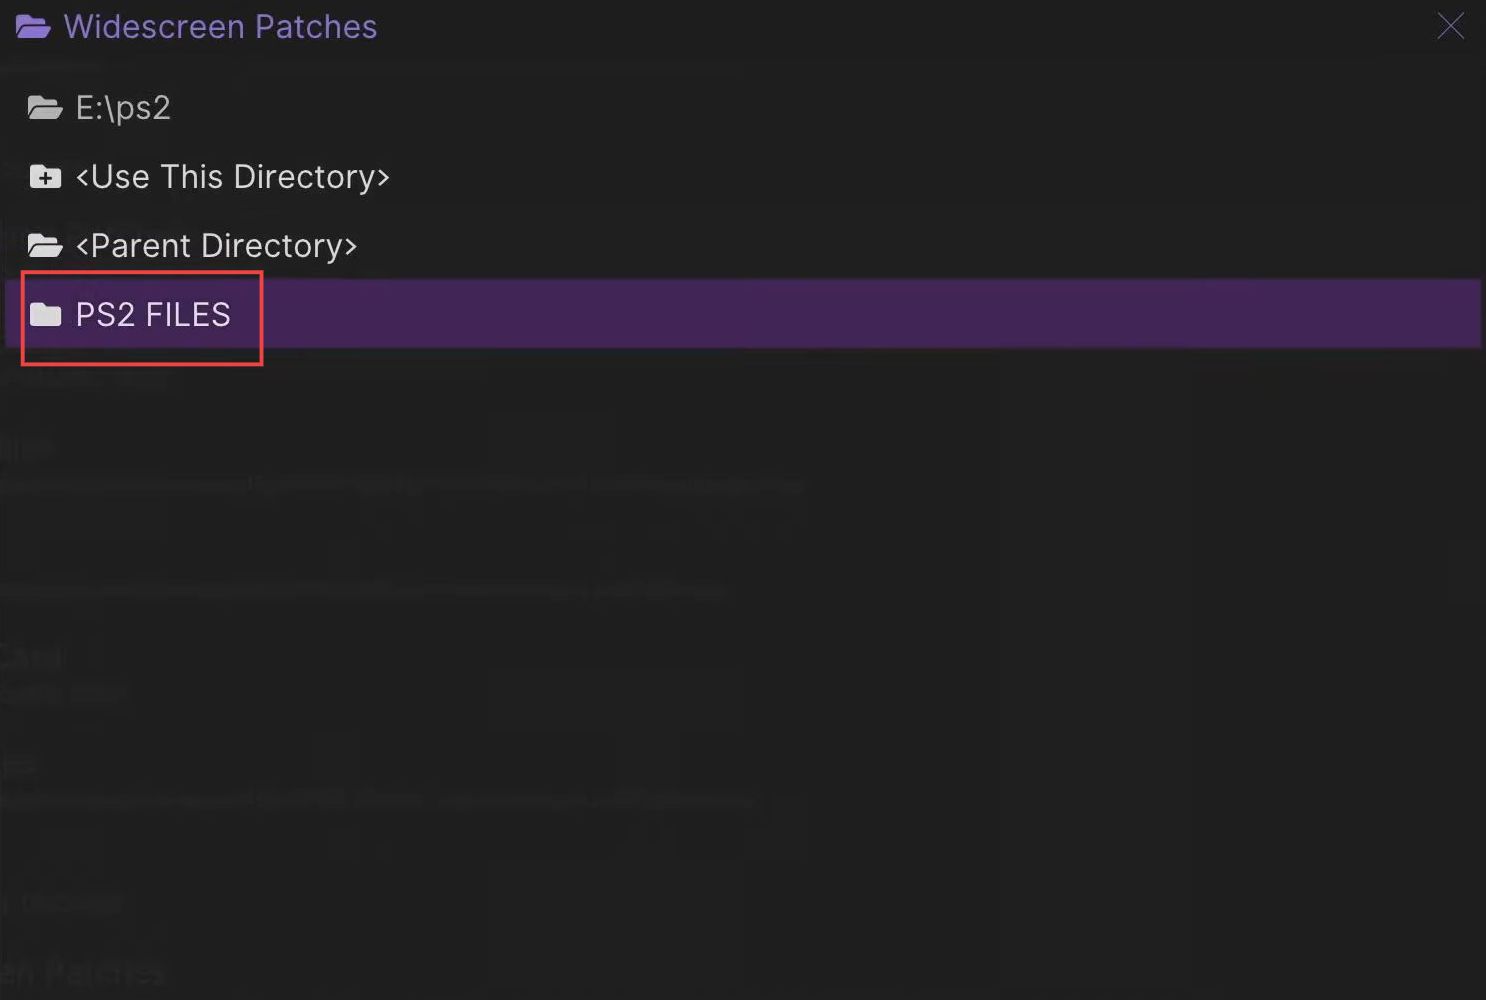
- Once this window appears, scroll down to the PS2 folder and click it from the menu.

- Click on the PS2 files folder to open it up.
- Upon reaching this window, click the PS2 Widescreen folder to open it.
- Now you need to click the Use this directory option.

Formatting PS2 Memory Cards
This section explains how to format the PS2 memory cards in Xbox. First, you have to start the BIOS and format both memory cards.
- Press the B button to exit the menu and reach the home page.
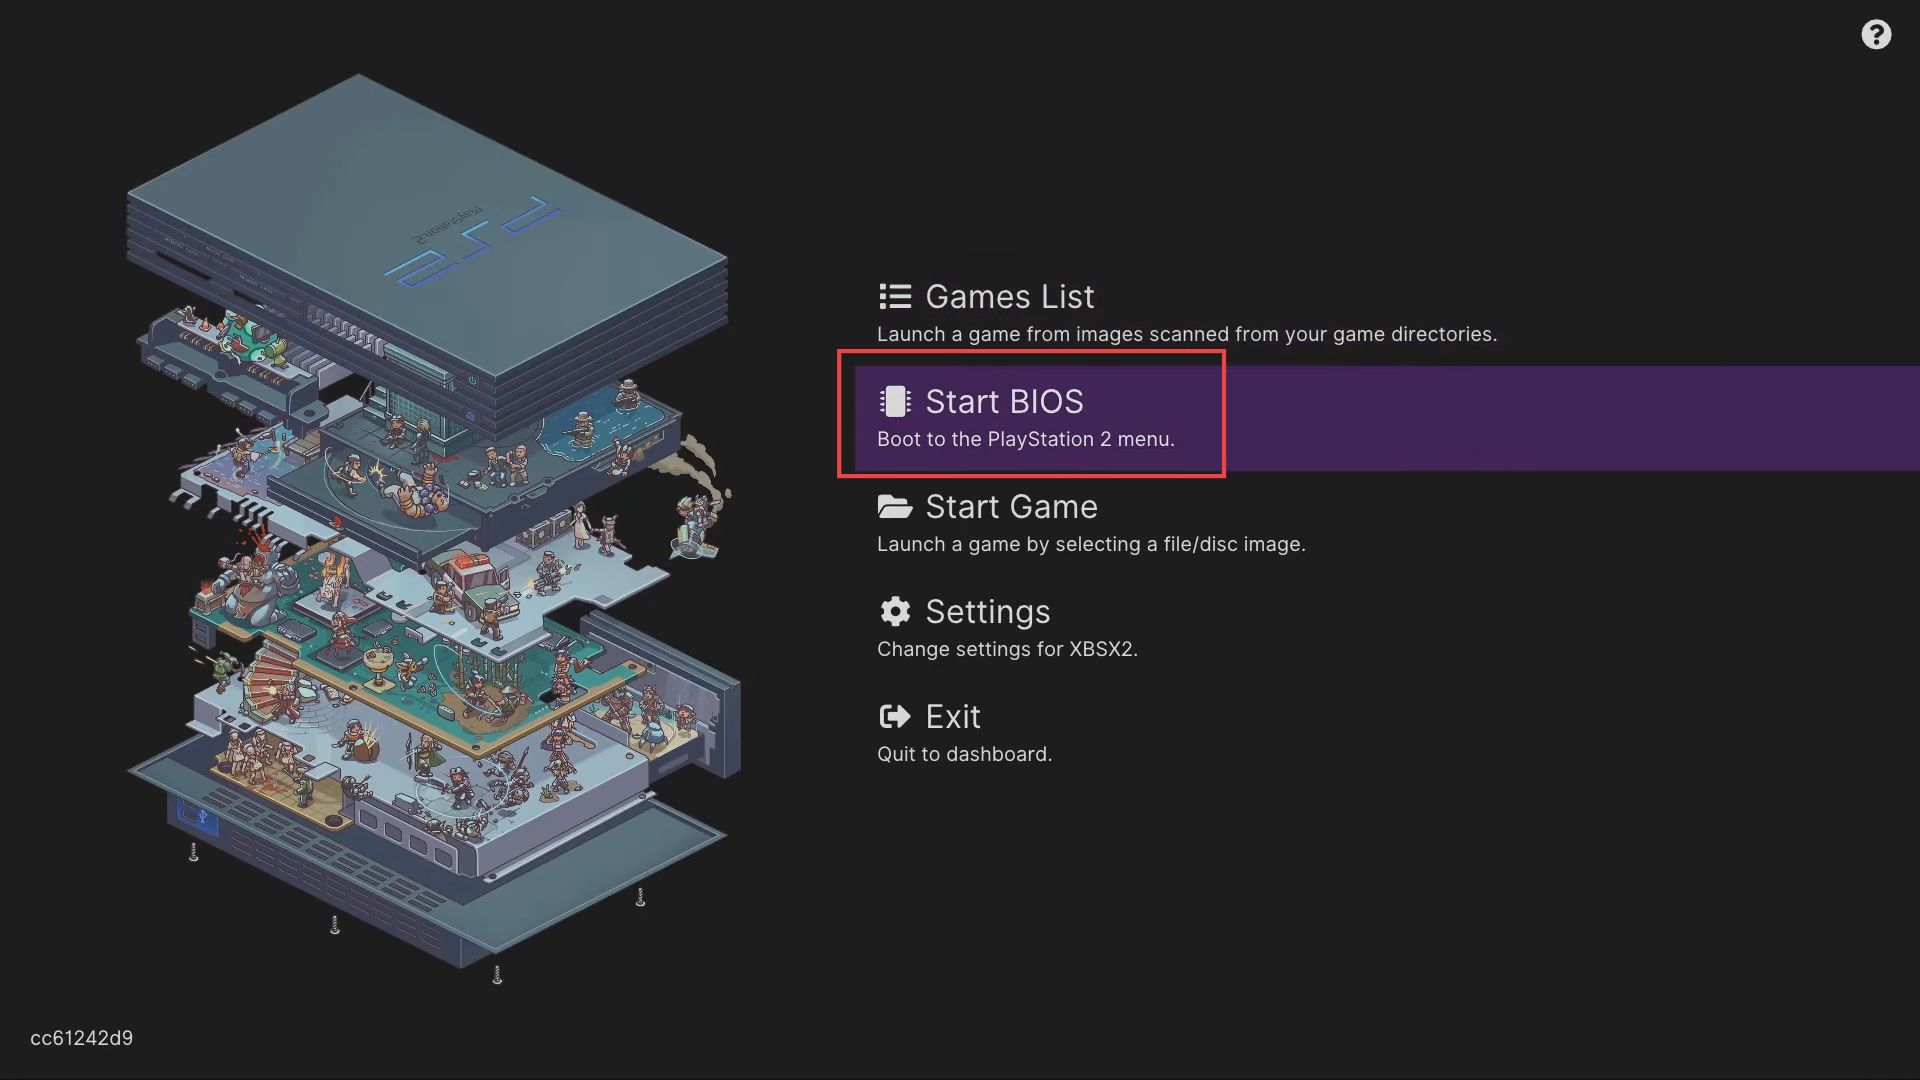
- Click the Start BIOS tab from the quick access toolbar.
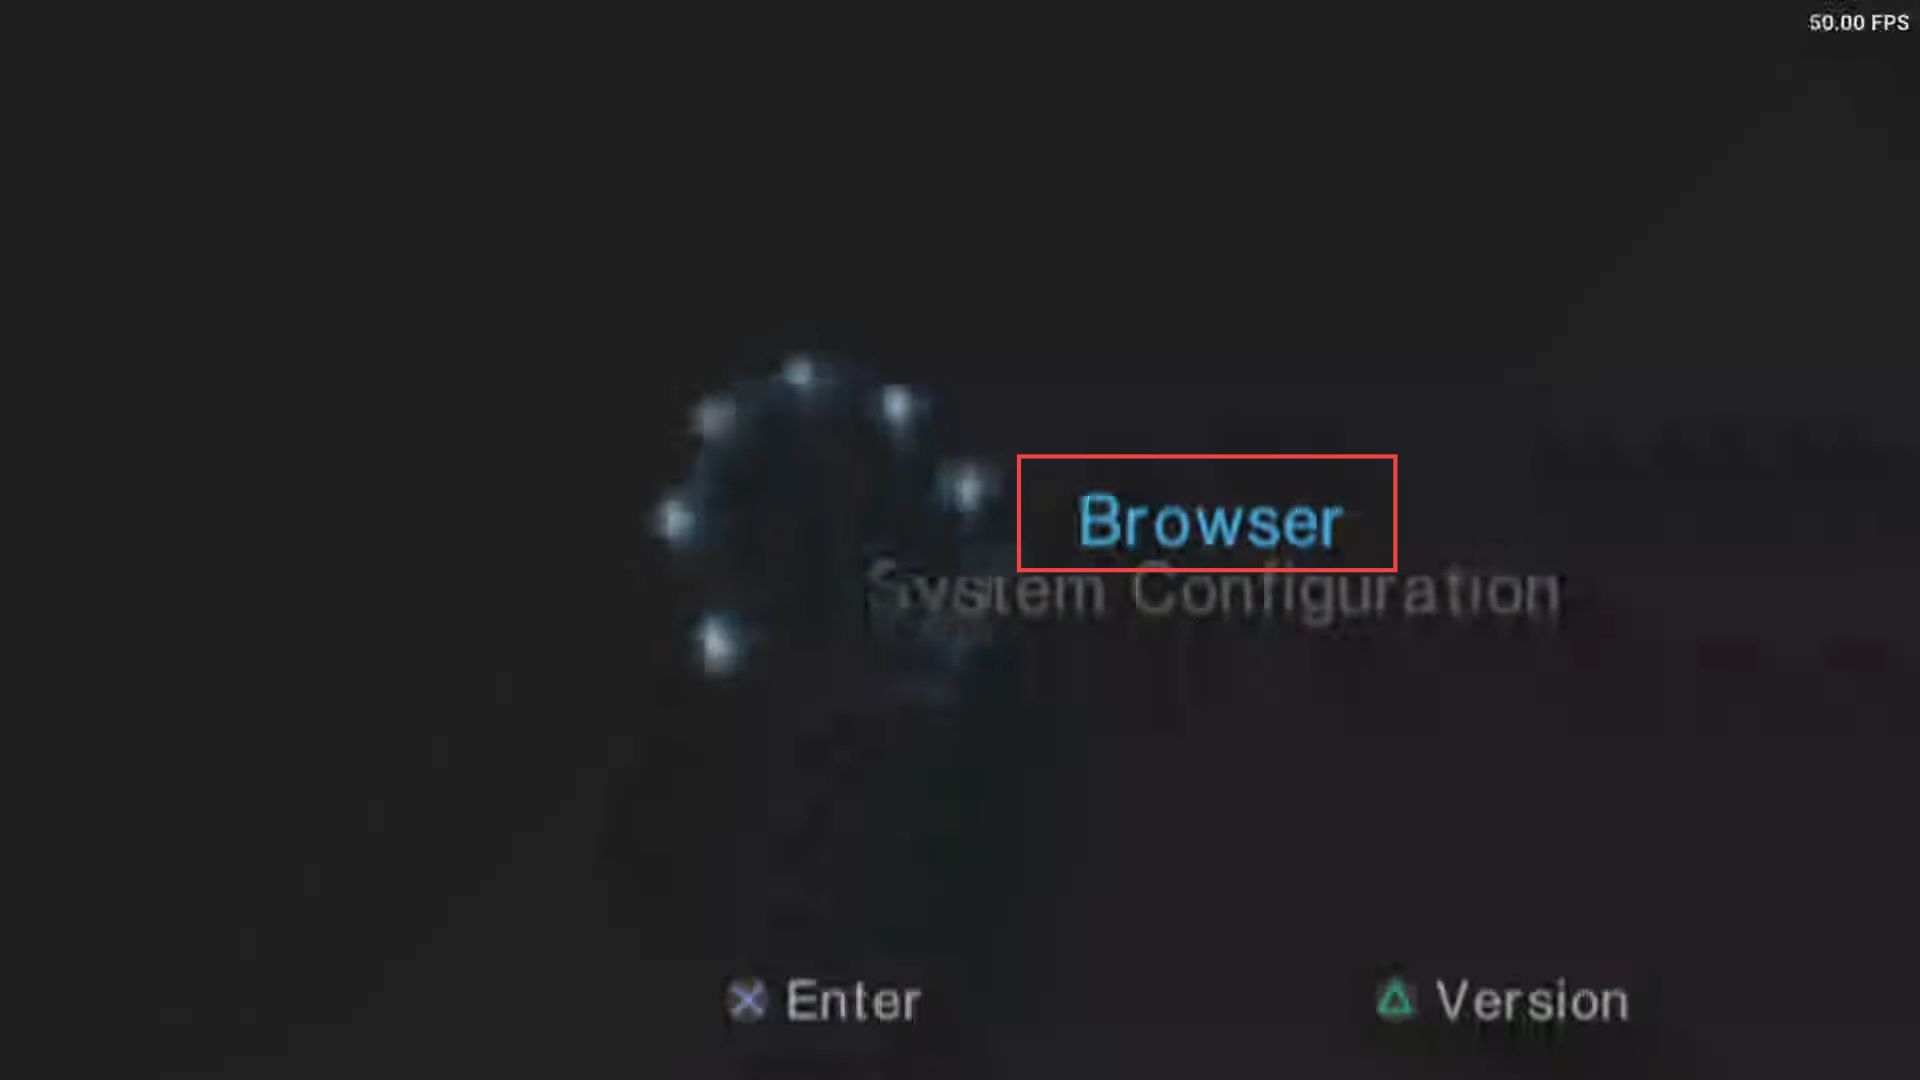
- After that, click on the A button on the browser option.
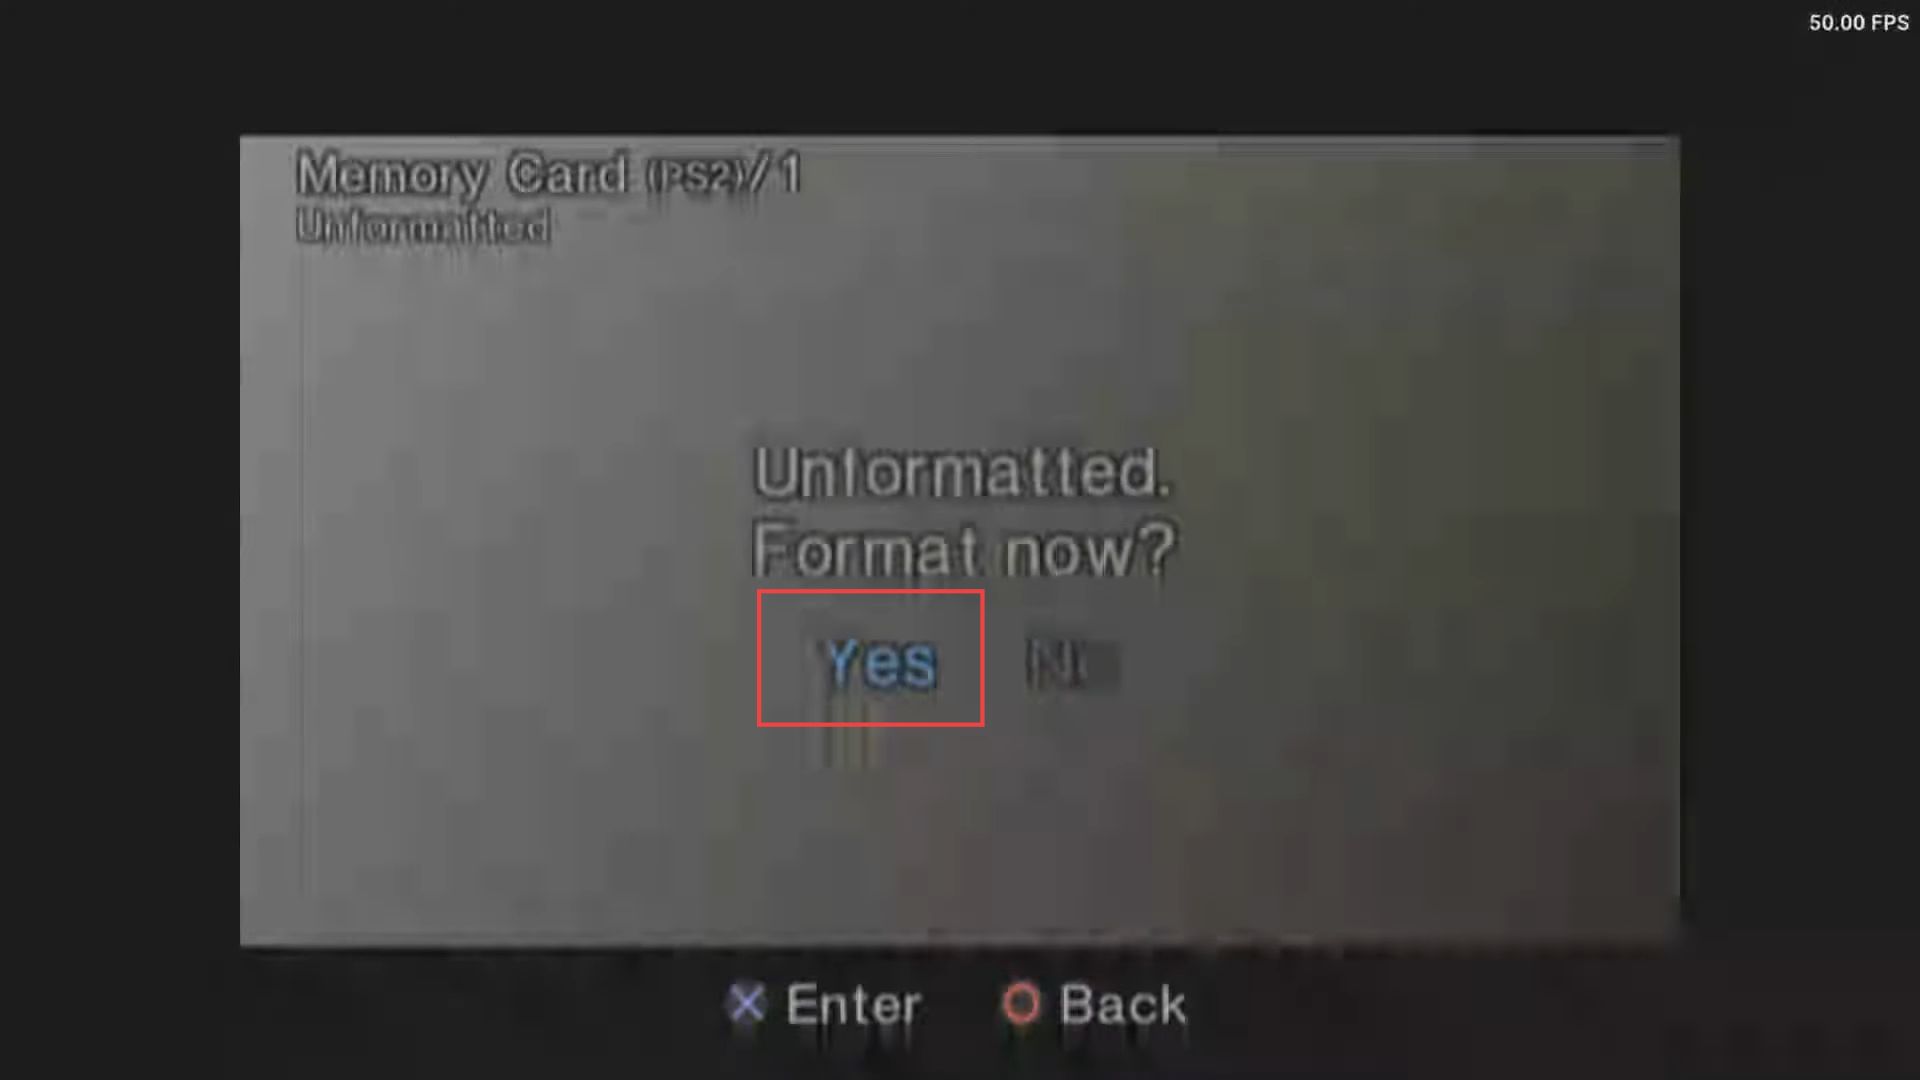
- Now you have to click the A button on both of the memory cards.
- Click the Yes button to format both of them.
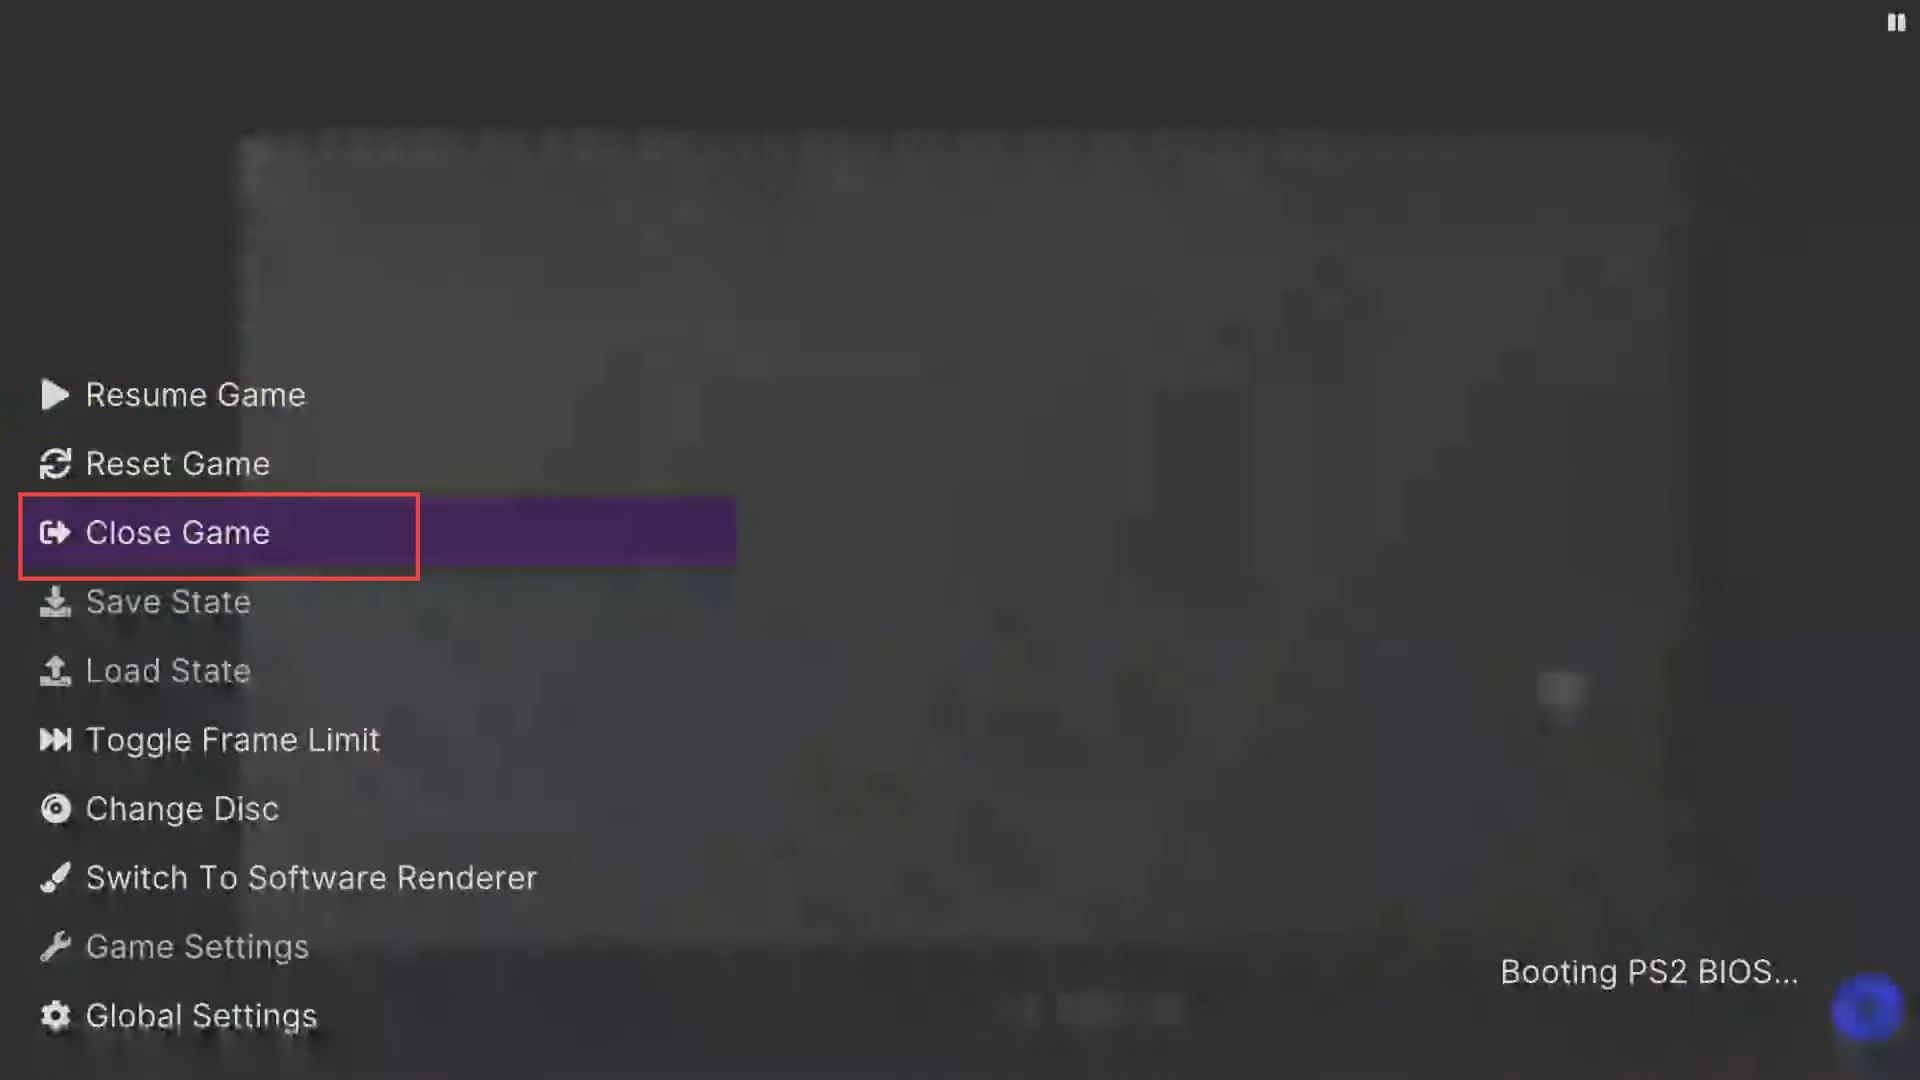
- Once the memory cards are formatted completely, press the Start and Select button simultaneously to get a menu.
- After that, select the close game option.
Configuring Add Search Directory Settings
This section describes how to configure the Add Search Directory settings from your Xbox. First, you have to open the Add Search Directory folder and select the parent directory. Then select the USB drive folder and open the PS2 Add Search Directory folder. After that set the PS2 files to use as the directory.
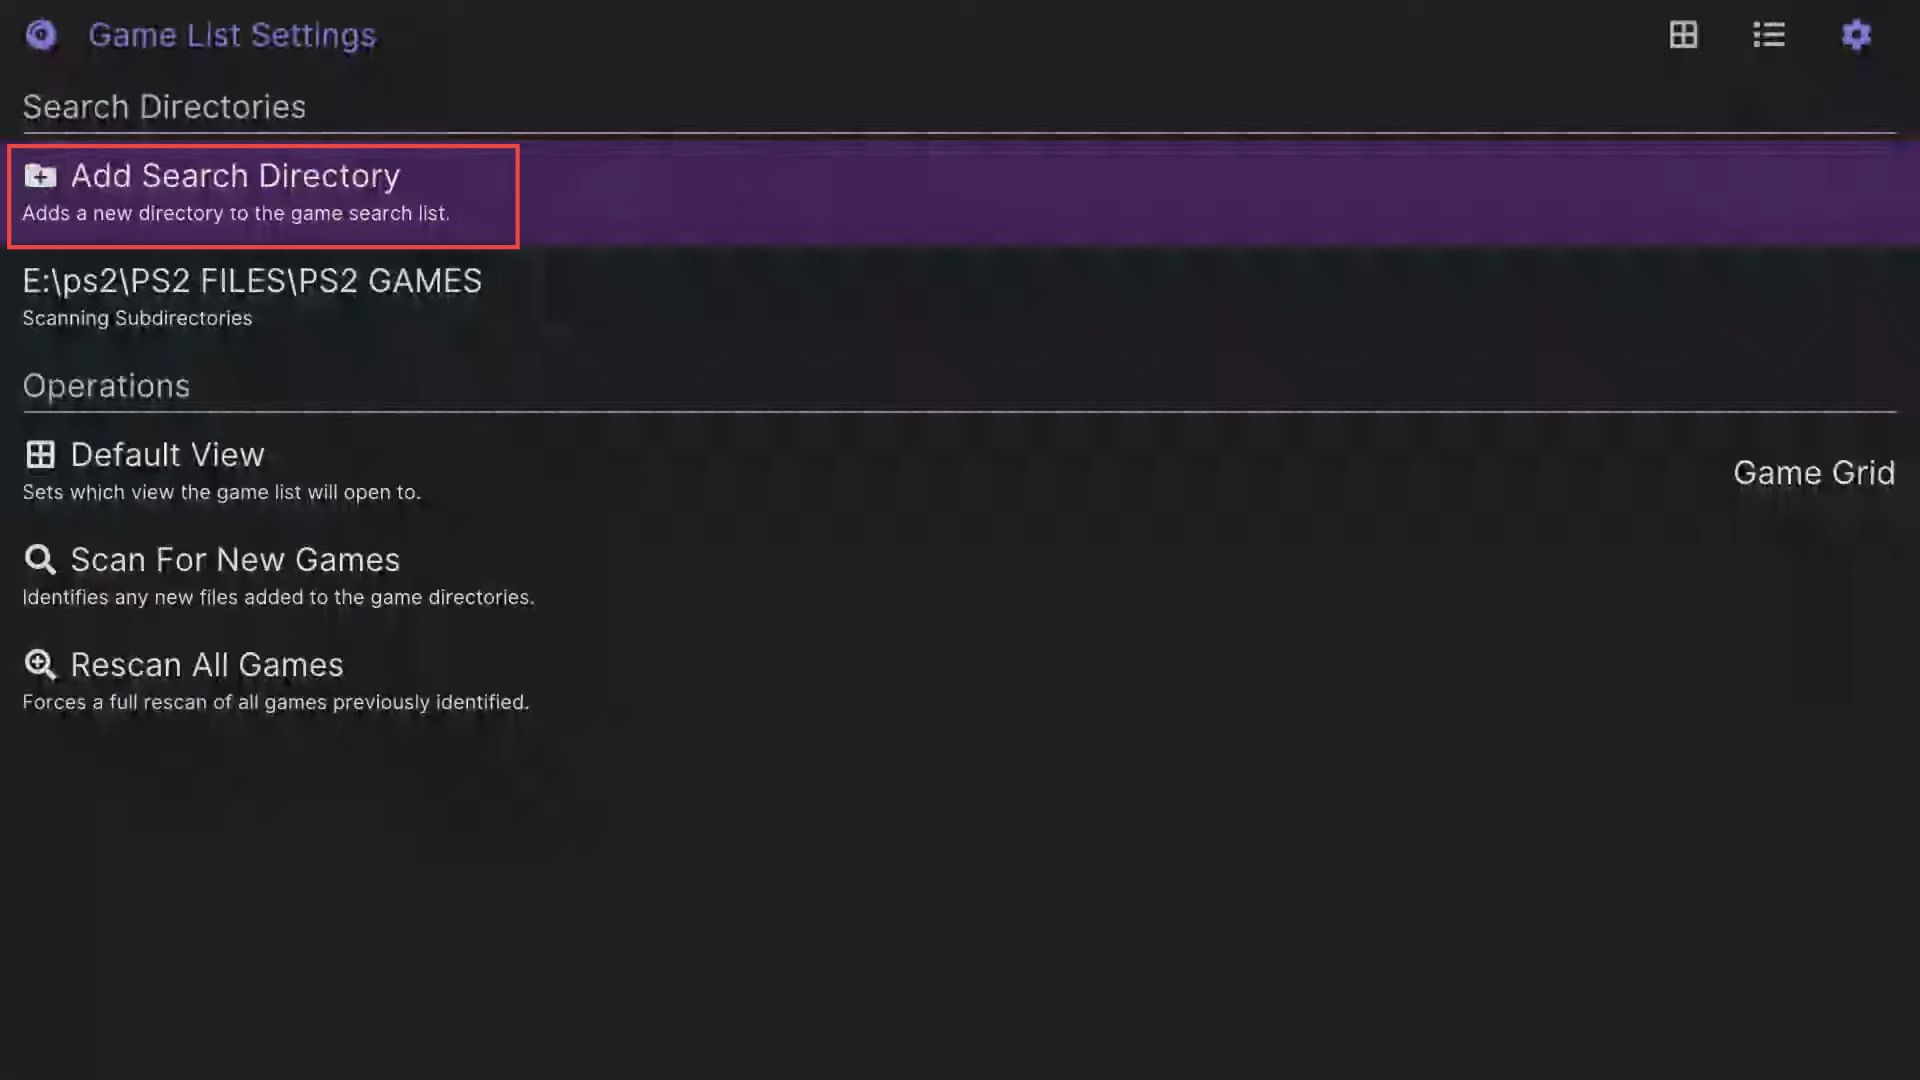
- You have to click the Game Lists option from the home menu.

- Press the right bumper until you reach the Search Directories tab.
- After that, click the Add Search Directories folder.
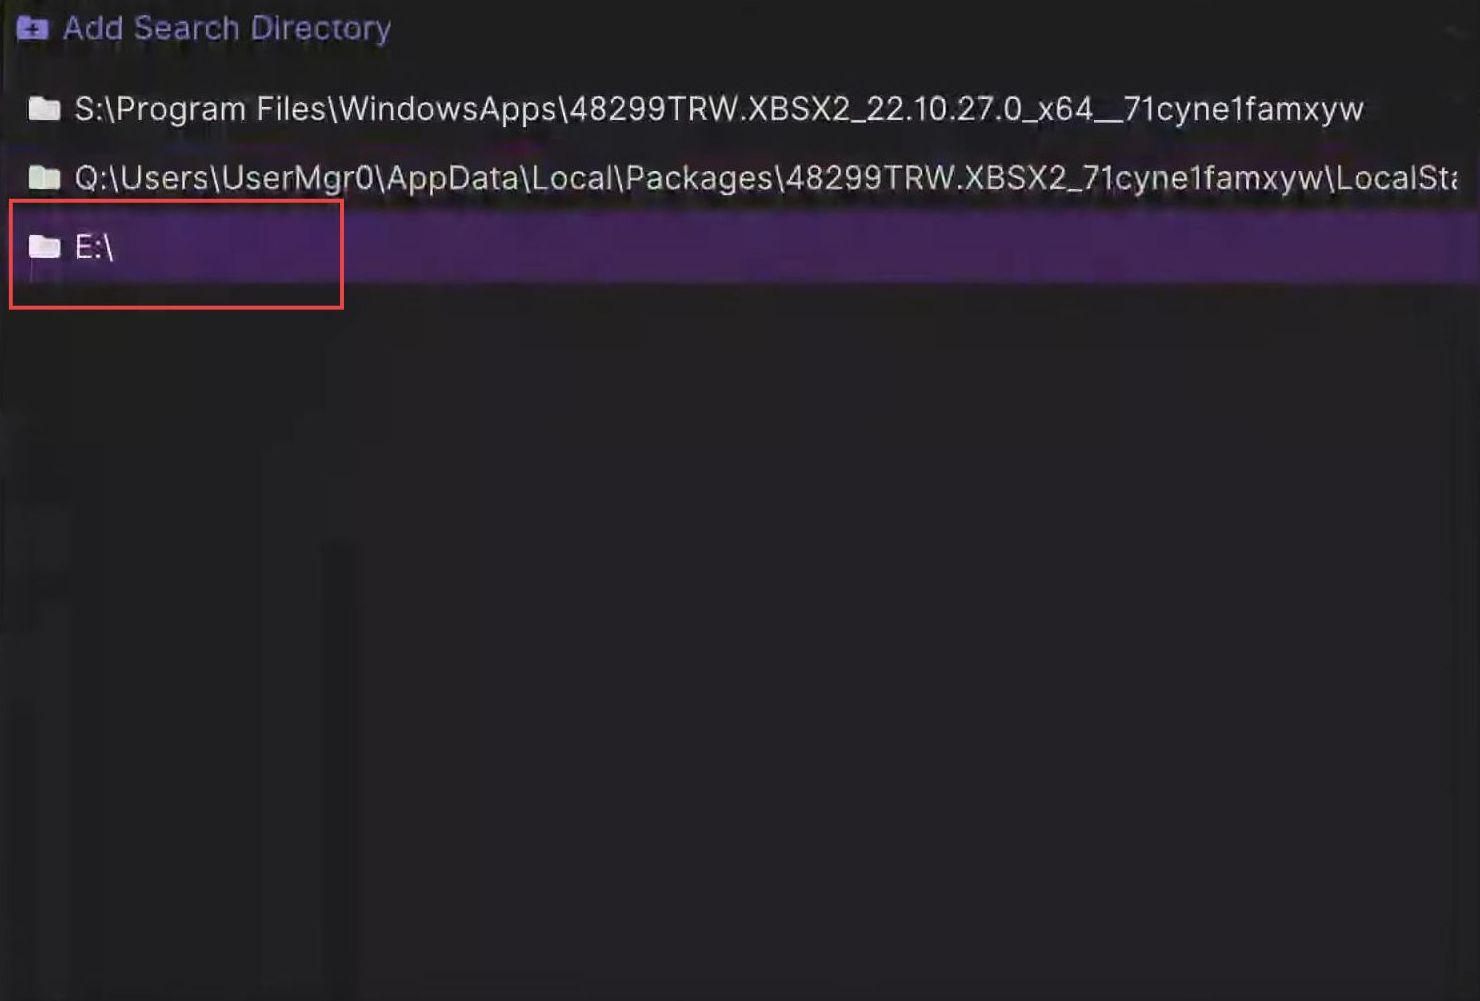
- Upon reaching this window, click the Parent Directory option.
- After that, select the E drive in which the USB or external device is located.
- Once this window appears, scroll down to the PS2 folder and click it from the menu.
- Click on the PS2 files folder from the listings to open it.

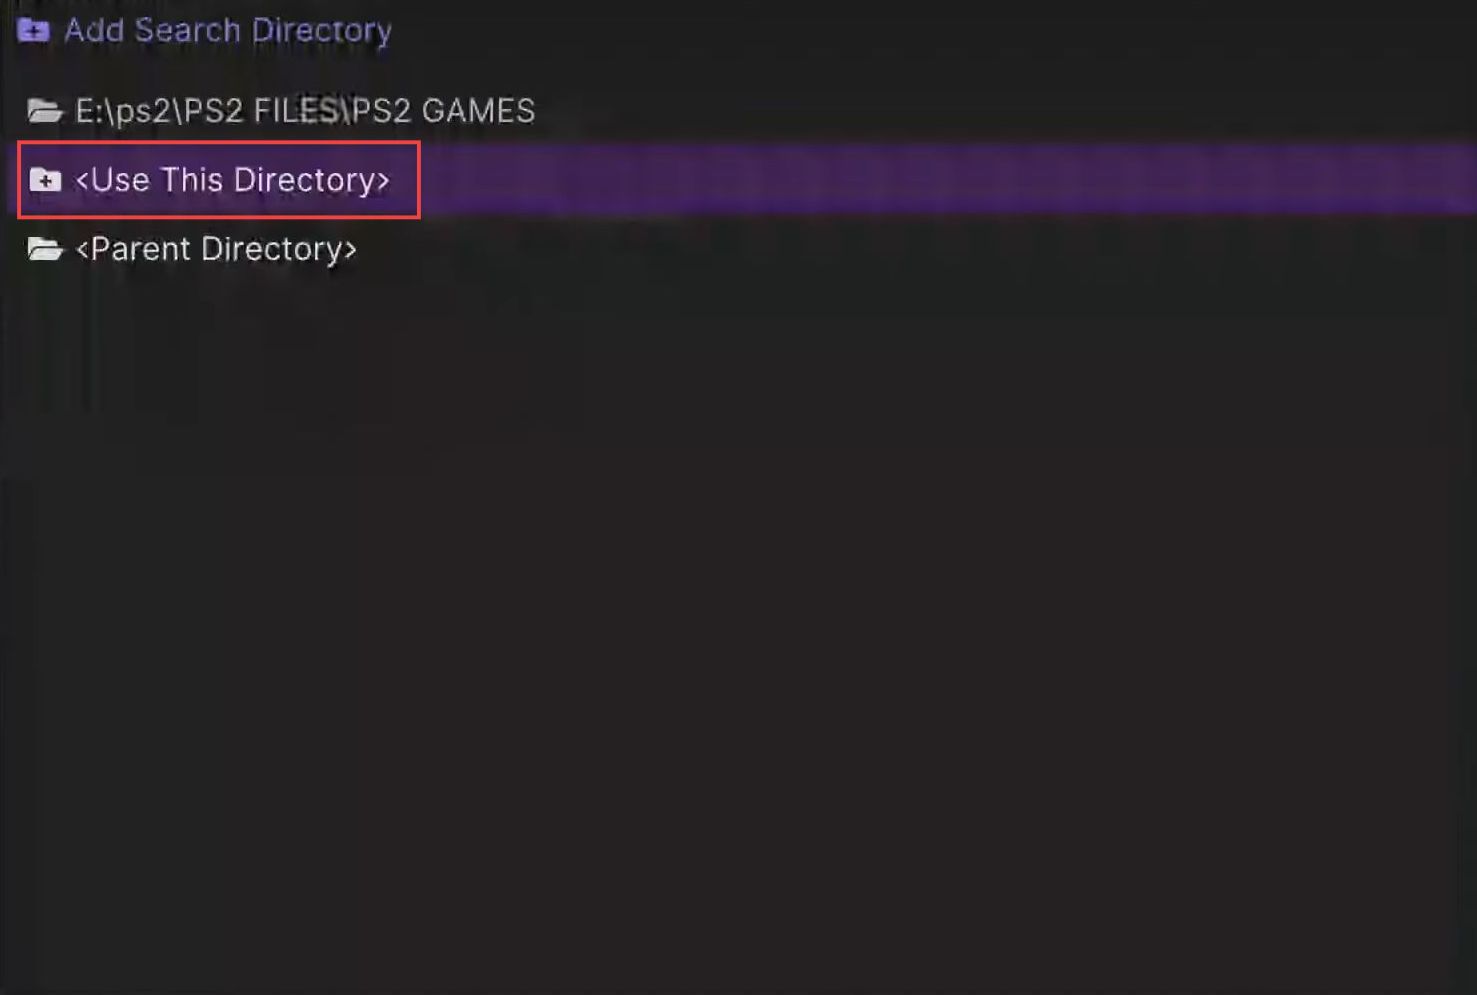
- Upon reaching this window, click the PS2 Games folder to open it.
- You need to click the Use this directory option from the listings.
Resolution Settings
This section explains how to set the resolution settings in Xbox for a better game experience. First, you have to reach the display settings tab and adjust the aspect ratio of the screen. Then you need to set the resolution based on your Xbox series such as X or S from the internal resolution.
- If you want to play the game in the best resolution, then click the Settings option from the homepage.

- Press the right bumper until you reach the Display Settings tab.
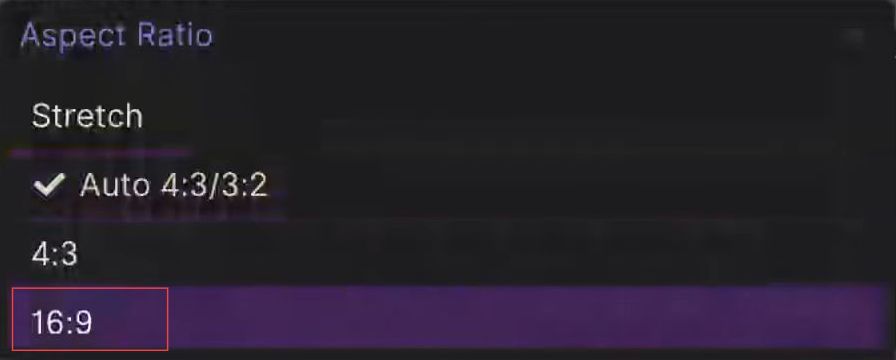
- Upon reaching this window, click the Aspect Ratio option.
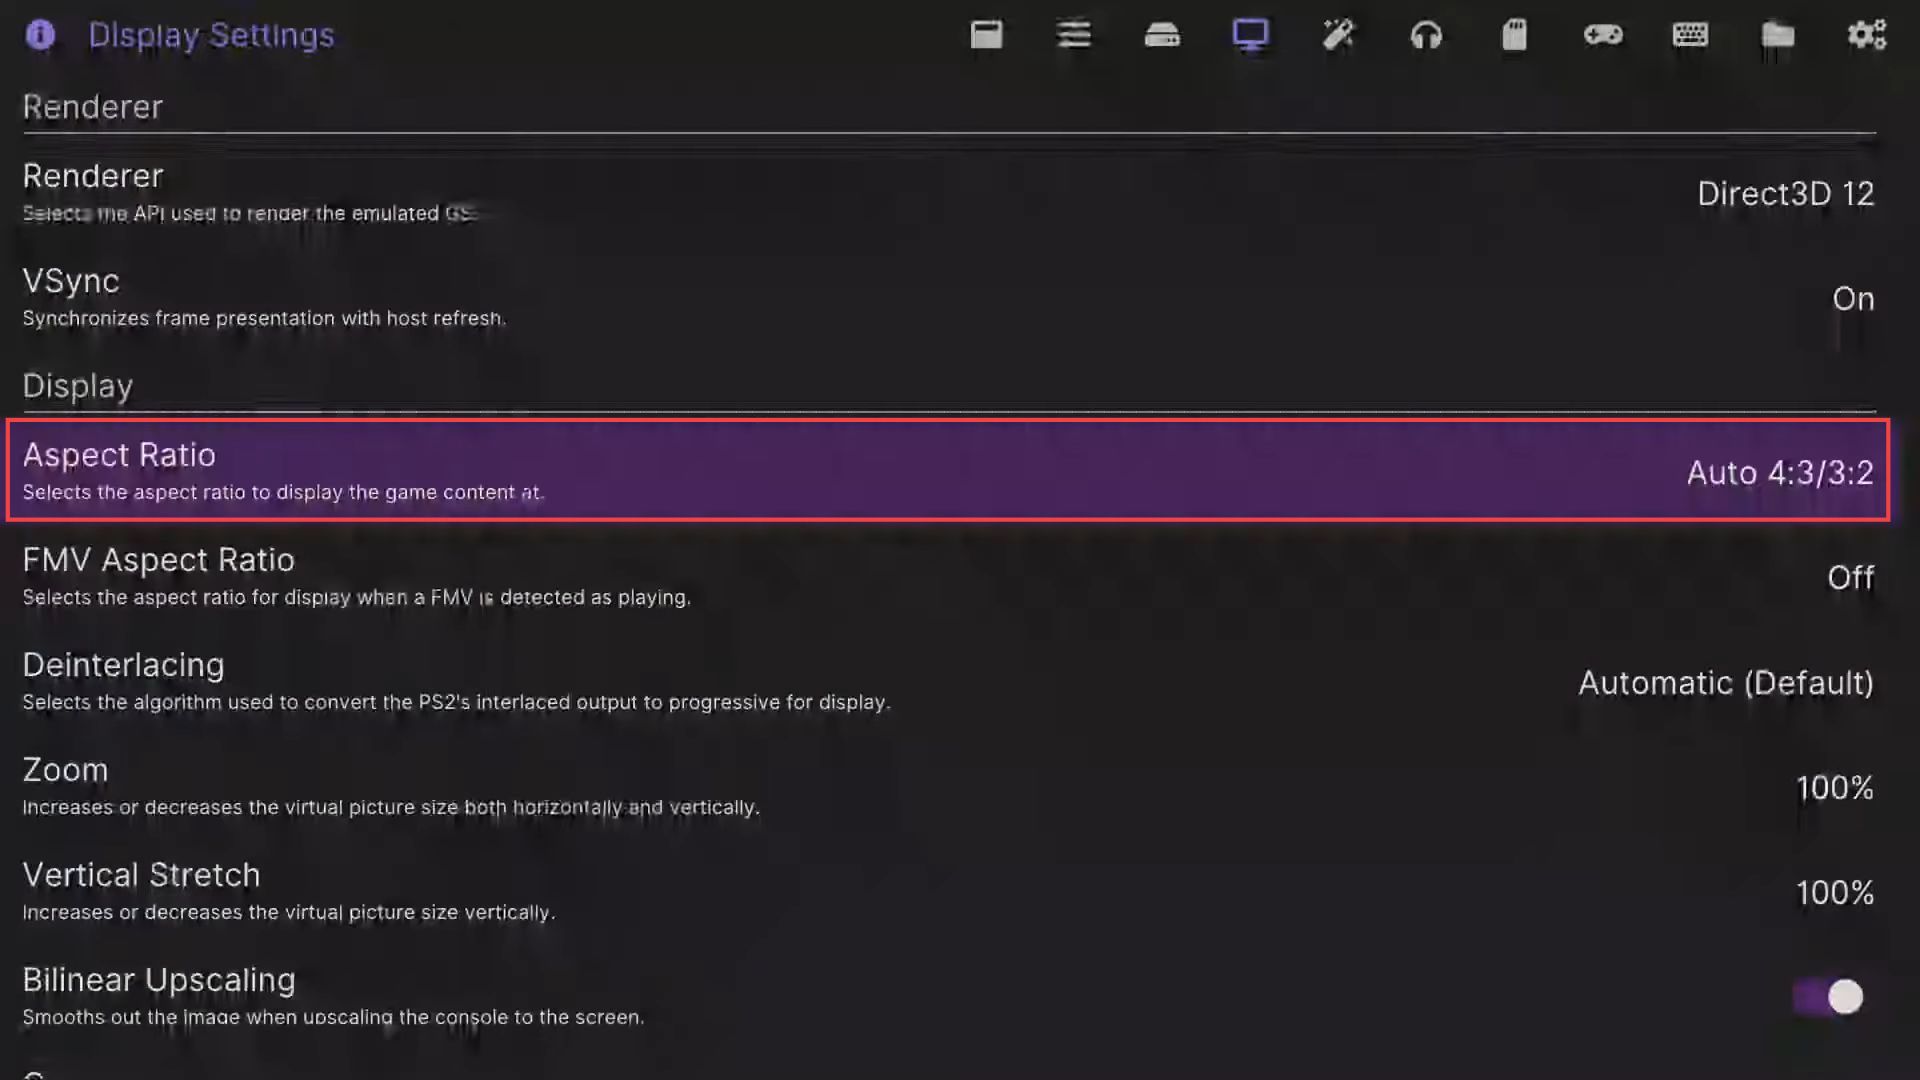
- Now click the 16:9 option from the listings to change the aspect ratio to play in full-screen mode.
- Press the right bumper until you reach the enhancement settings tab.
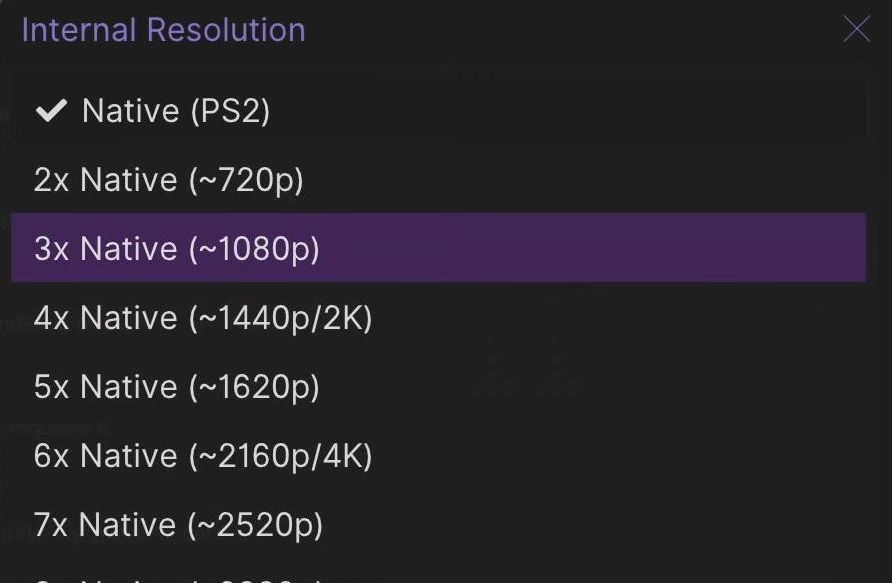
- Upon reaching this window, click on the Internal Resolution option.
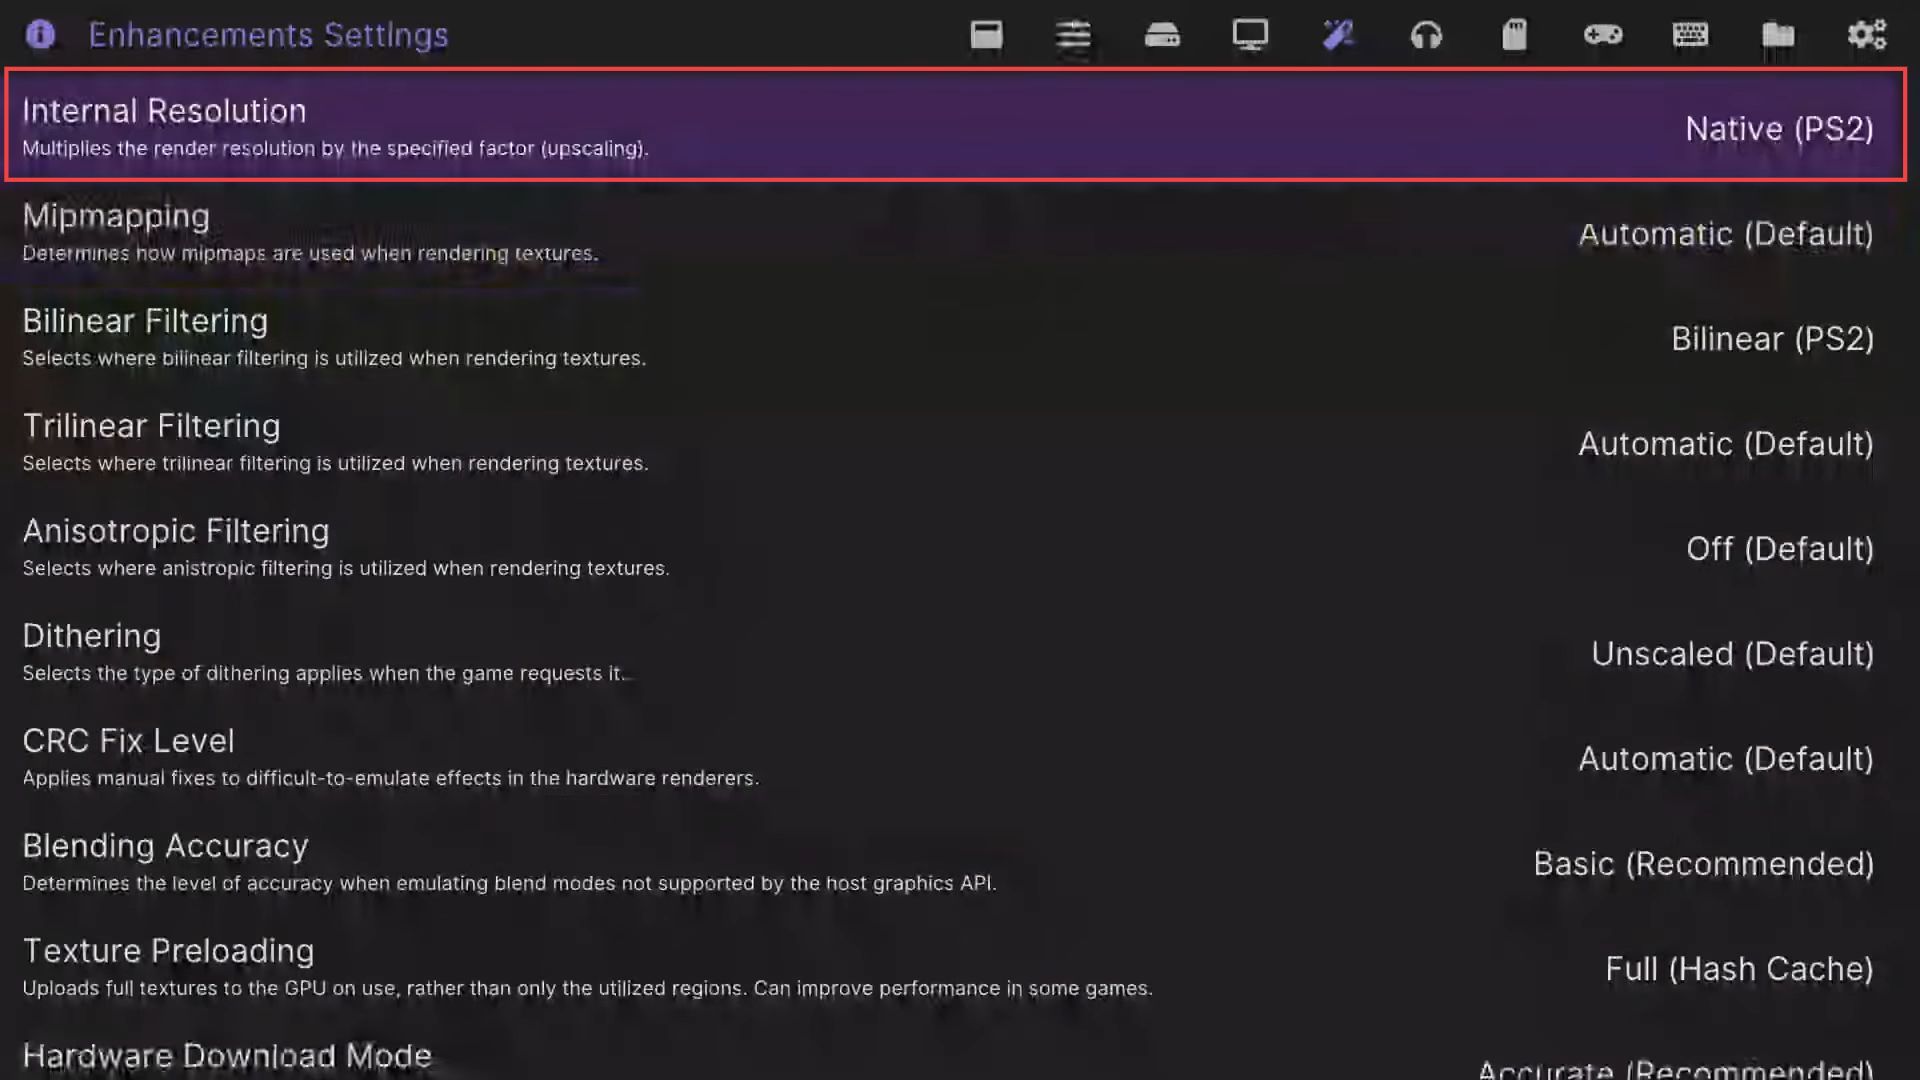
- If you are using the Xbox series X, you can change the resolution to 5x(~1620p) and play a few games.
If you get troubled, then change the resolution to 2x(~720p) or 3x(~1080p). - However, if you are using the Xbox series S, change the resolution to 4x(~1440p/2K) and play a few games.
If you get troubled, then change the resolution to 2x(~720p) or 3x(~1080p).