This guide will let you know how to make a dot Crosshair in VALORANT using the quickest and most convenient method.
Follow the instruction below to learn how to adjust the crosshair settings in a user interface.
- Locate the “Crosshair” tab located next to the “Control” tab in the user interface.
- Click on the “Crosshair” tab to access its settings.
- Look for the “Primary” option in the Crosshair settings and click on it.
- Locate the “Crosshair” and “Outer lines” sections within the “Primary” settings.
- Ensure that everything within the “Crosshair” and “Outer lines” sections is turned off or set to 0 value.

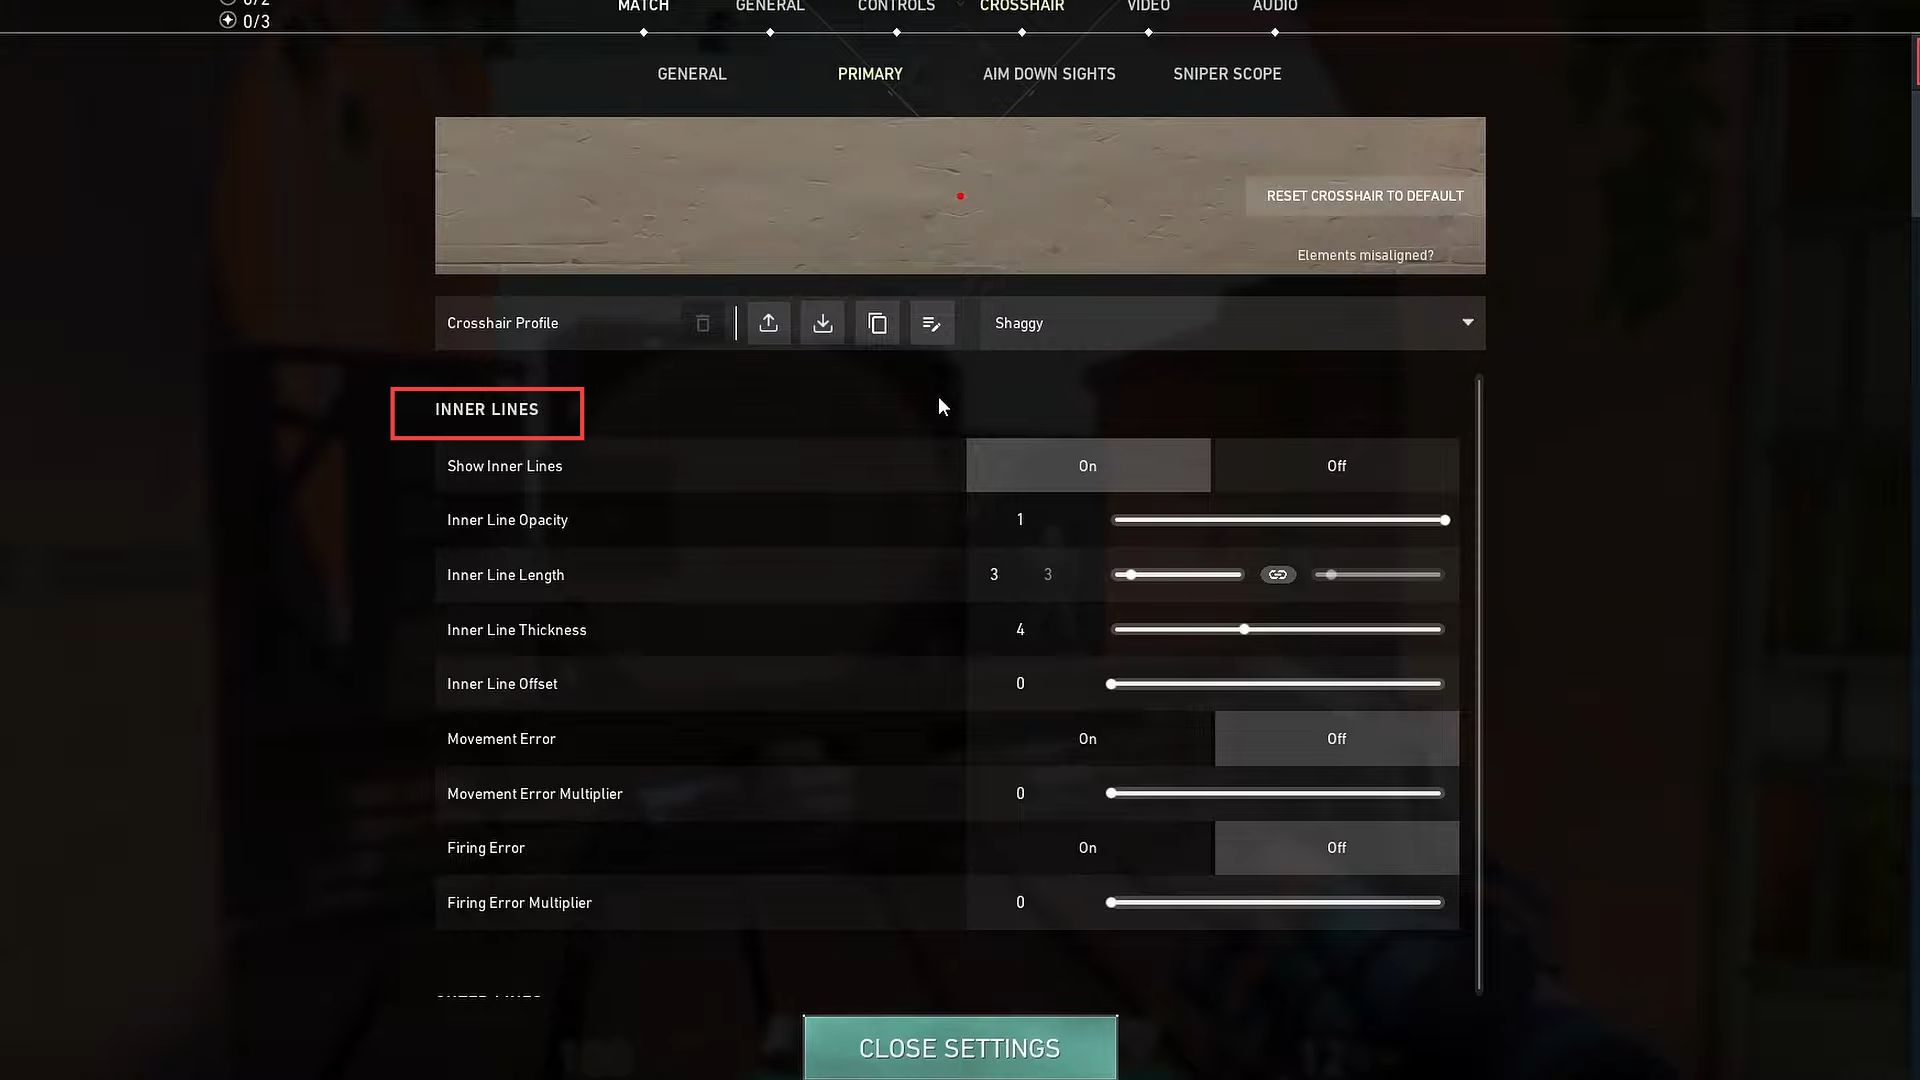
- Scroll down within the “Crosshair” settings until you find the “Inner line” section.
- Locate the “Show inner lines” option within the “Inner line” section and turn it on.
- Set the “Inner line opacity” to 1 to make the inner lines fully visible. After that, locate the “Inner line thickness” option and set it to 4.
- Navigate to the “Inner line offset” option and set it to 0. Ensure that all other options within the “Inner line” section are set to 0.