In this guide, we’ll walk you through the process of Setting up a dedicated server for Front, a thrilling first-person shooter survival game, on Windows using SteamCMD. This guide will enable you to host your own server to play the game.
Step 1: Download SteamCMD
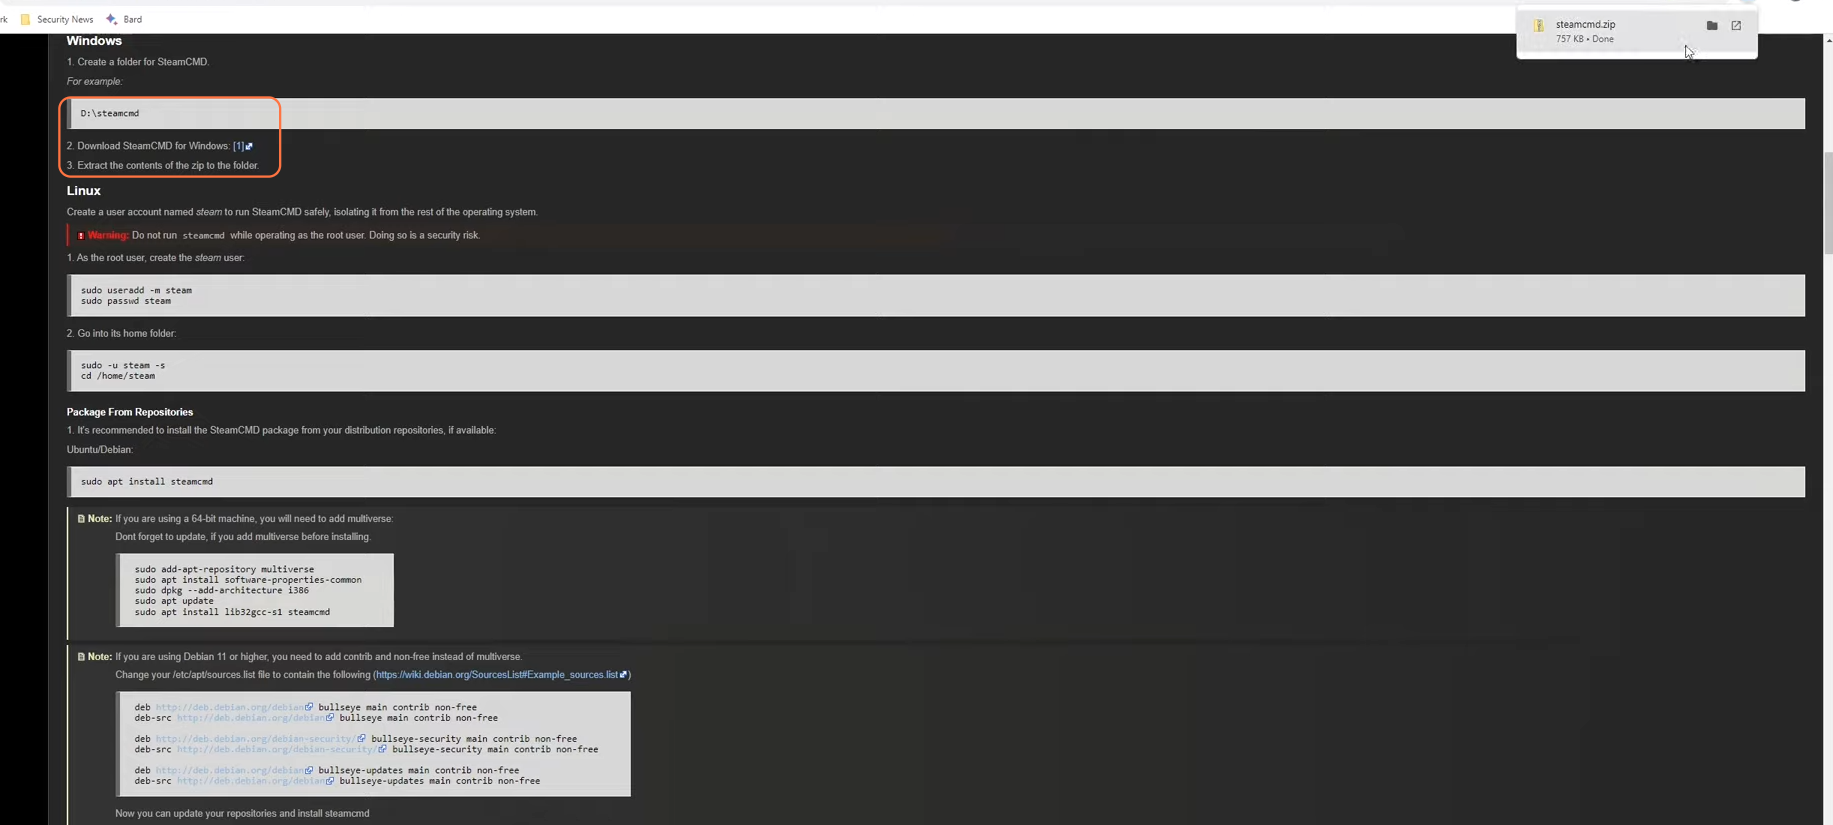
- Navigate to the SteamCMD website and download it for Windows.
- Extract the downloaded files to a convenient location (e.g., C drive). You should create a SteamCMD folder in your C drive.
Step 2: Initialization and Setup
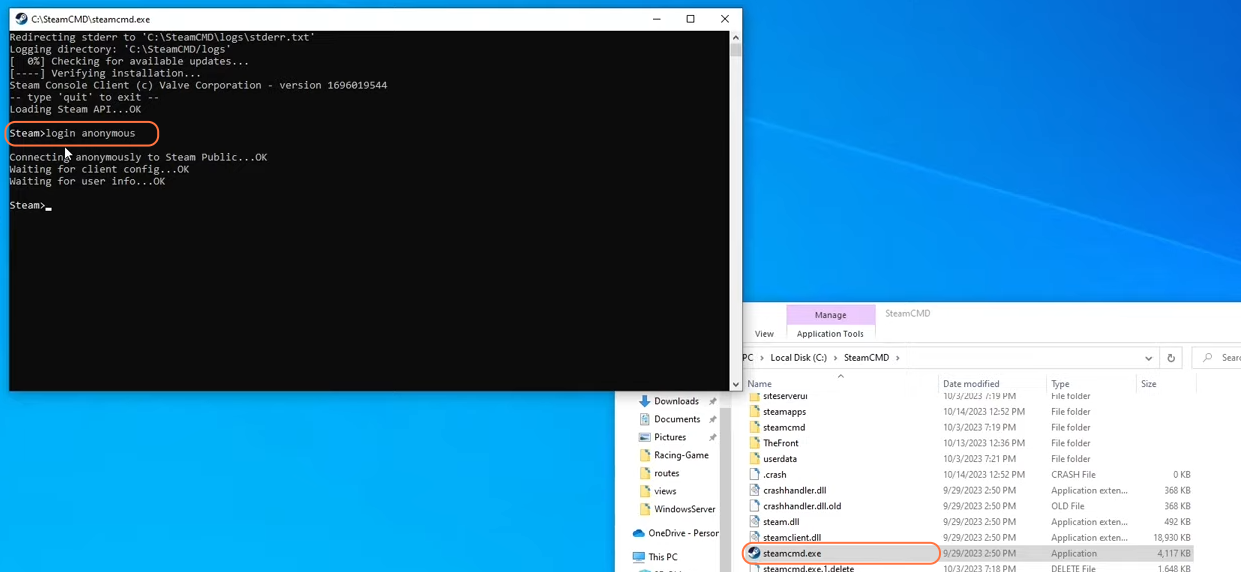
- Launch SteamCMD by executing the ‘steamcmd.exe’ file.
- Log in anonymously by entering ‘login Anonymous’.
- Update the game files using ‘app_update game_ID’.
- Exit SteamCMD once the update is complete.
Step 3: Automate Updates (Optional)
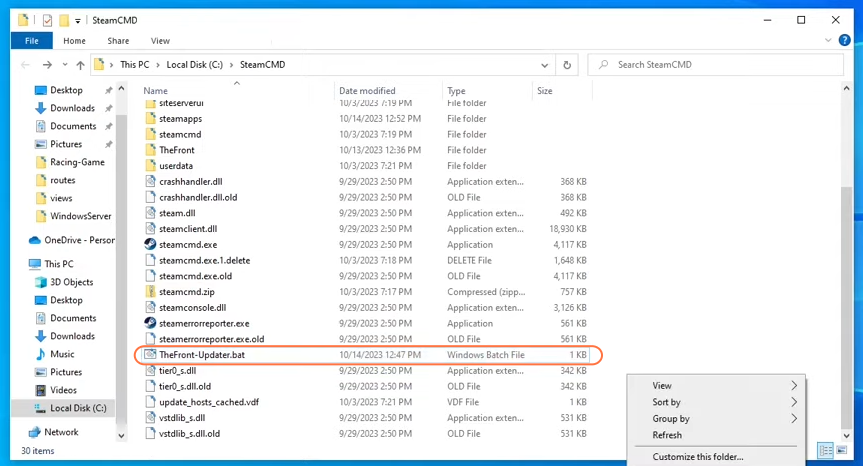
- Create a batch file named ‘TheFront_updator.bat’ and add the following code:
start "Updater" steamcmd.exe +login anonymous +app_update 2612550 validate +quit- Run this batch file to automate future server updates.
2612550 is our game’s ID.
Step 4: Server Configuration
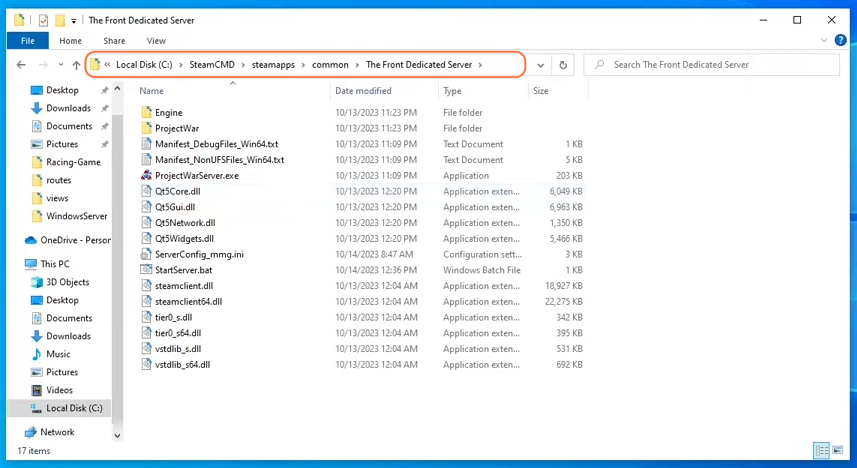
- Locate the ‘The Front Dedicated Server’ folder within ‘SteamCMD\steamapps\common’ on the server machine.
- Adjust settings like server name, ports, and passwords in the ‘start_server.bat’ file.
Step 5: Launch the game and Create a Server
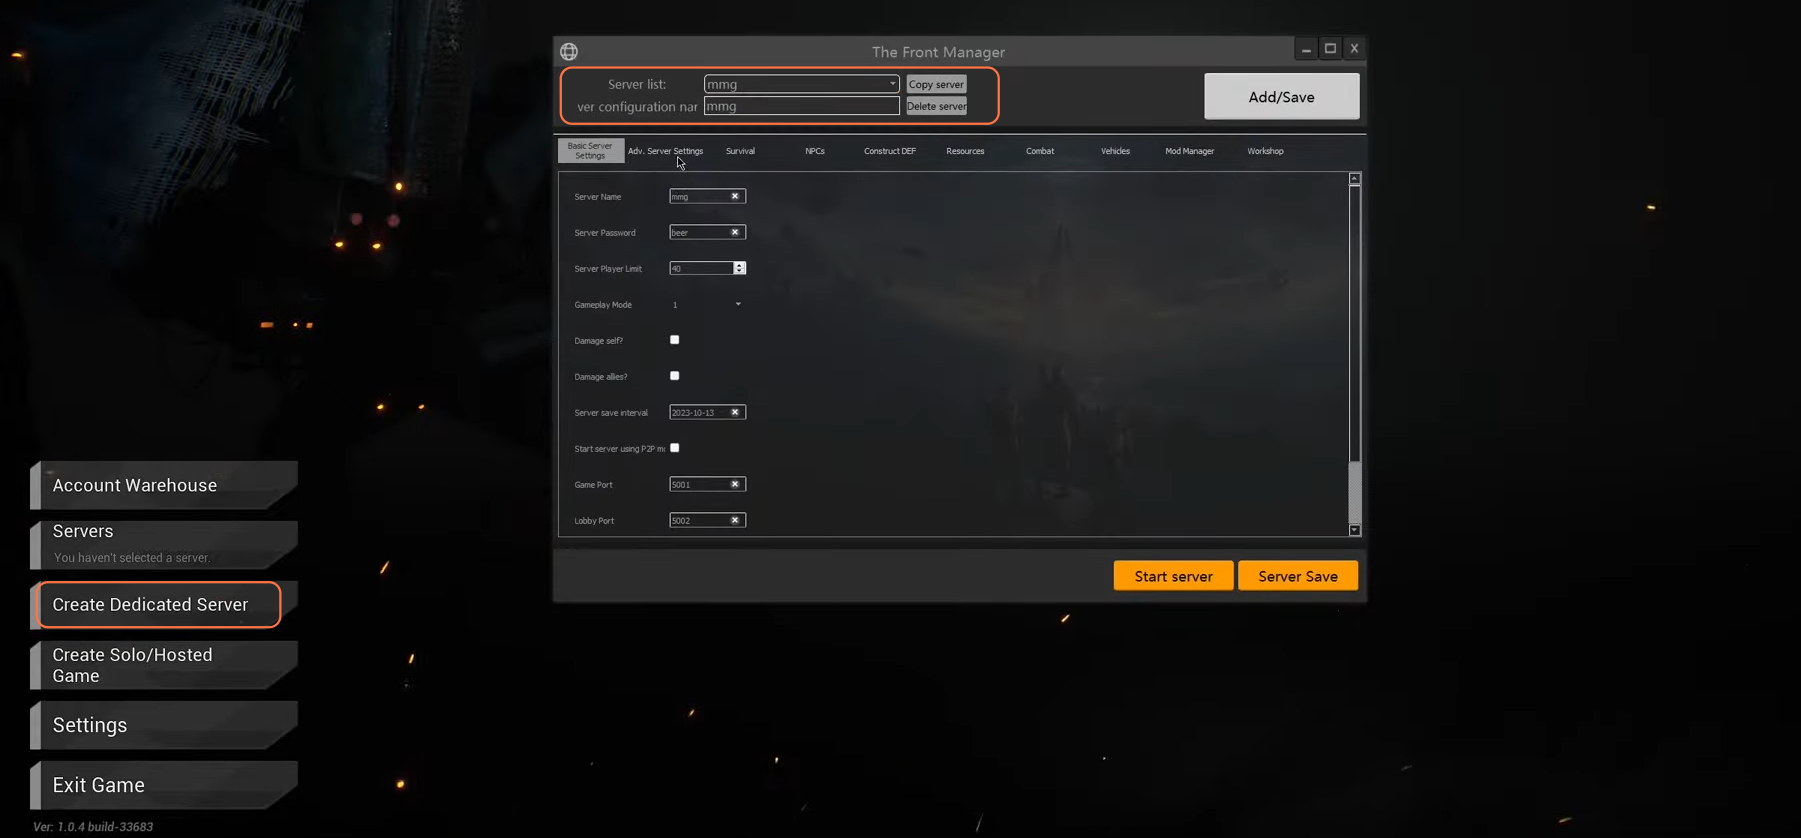
- Now go into the Machine where you want to play the game and launch ‘The Front’ game. Click the “Create Dedicated Server” option from the menu, and fill in all the fields shown under ‘The Front Manager’ window. Set all the personal server settings according to your preferences.
- Once you’ve made changes, press the “Start Server” button.
Step 6: Configure Server Settings
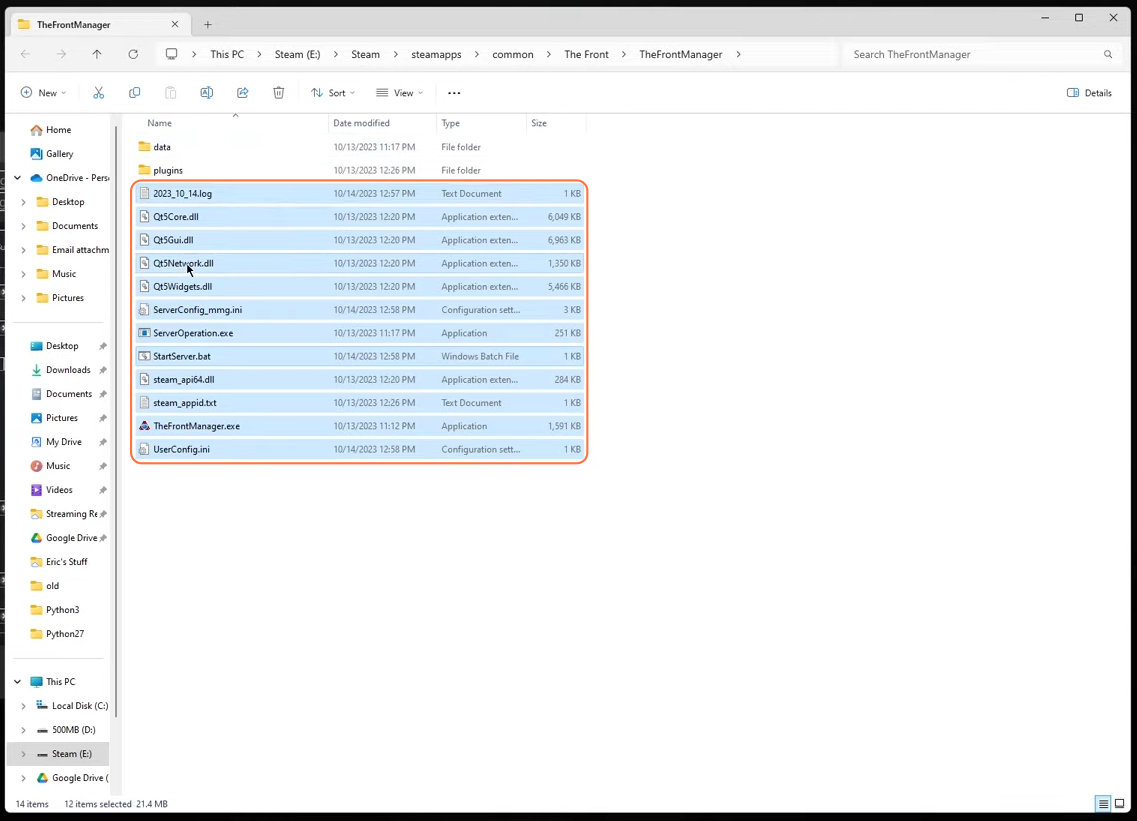
- A window will pop up to show you the actual server files including the ‘StartServer.bat’.
- Copy all the files except the “TheFrontManager.exe” file, “data” and “plugins” folders.
- Head back to the server and paste the files inside the ‘The Front Dedicated Server’ folder within the ‘SteamCMD\steamapps\common’ directory. Replace all the files if prompted.
- Edit the ‘StartServer.bat’ file to set the correct file paths for ‘TheFrontServer.exe’.
- Ensure the external IP address, user directory, server password, and ports are accurately specified. Don’t forget to save the file once you are done with the changes.
@echo off

Start "TheFront" ".\ProjectWar\Binaries\Win64\TheFrontServer.exe" ProjectWar_Start?DedicatedServer?MaxPlayers=100 -server -game -log -ConfigServerName="mmg" -EnableParallelCharacterMovementTickFunction -EnableParallelCharacterTickFunction -UseDynamicPhysicsScene -fullcrashdumpalways -Game.PhysicsVehicle=false -ansimalloc -Game.MaxFrameRate=35 -MaxQueueSize=50 -QueueValidTime=120 -OutIPAddress=External IP -UserDir="C:\SteamCMD\TheFront\TheFrontManager\mmg" -ServerName="mmg" -ServerPassword="password" -QueueThreshold=40 -ServerFightModeType=1 -IsCanSelfDamage=false -IsCanFriendDamage=false -ClearSeverTime="2023-10-13" -Port="5001" -BeaconPort="5002" -ShutDownServicePort="5003" -QueryPort="27015" -SaveWorldInterval=300 -GreenHand=true -SensitiveWords=true -UseACE=true -ServerAdminAccounts="SteamUID"
- Run the server by double-clicking the StartServer.bat file. A console window will show up and the boot process will take some time to complete.
Step 7: Connecting to the Server
- Open the game on your gaming machine.
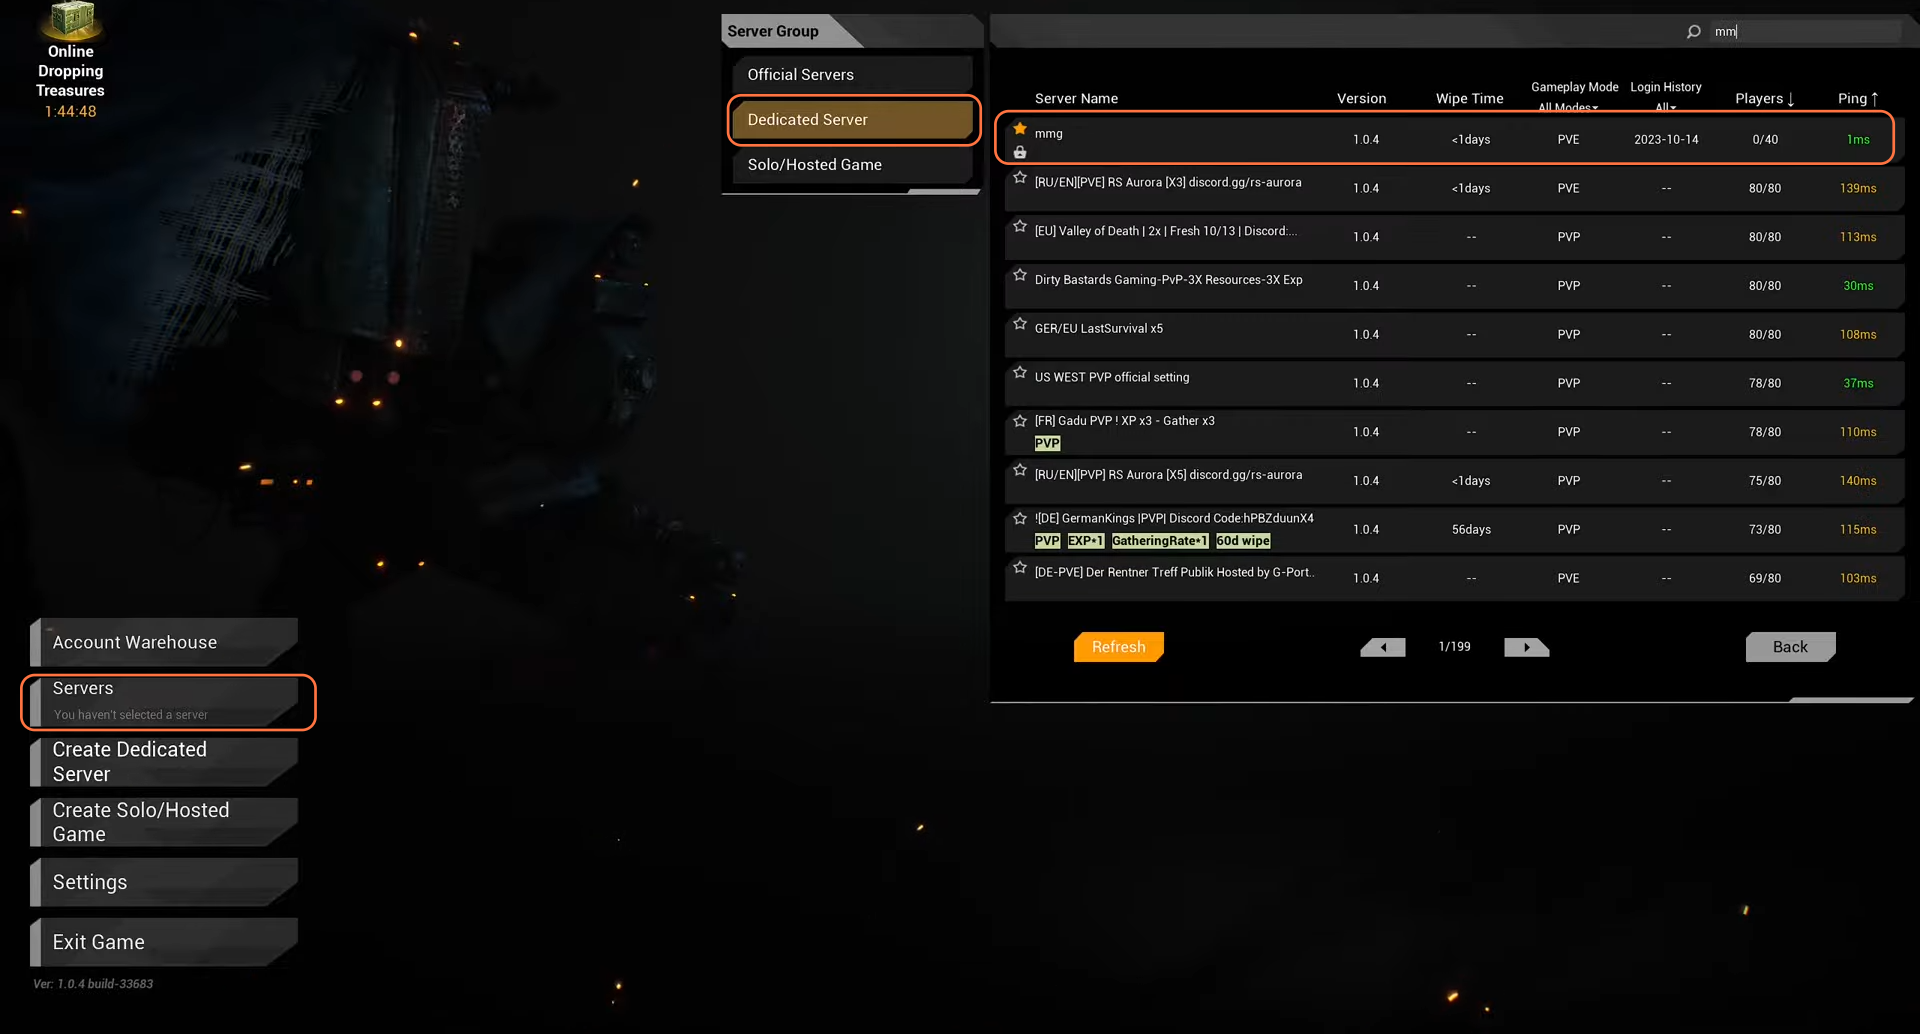
- Navigate to the ‘Servers’ tab, select ‘Dedicated Server’, and find your server by its name.
- Enter the password if set, and connect to the server to create your character.
Step 8: Troubleshooting and Shutdown
- In case of errors, verify the user directory setup.
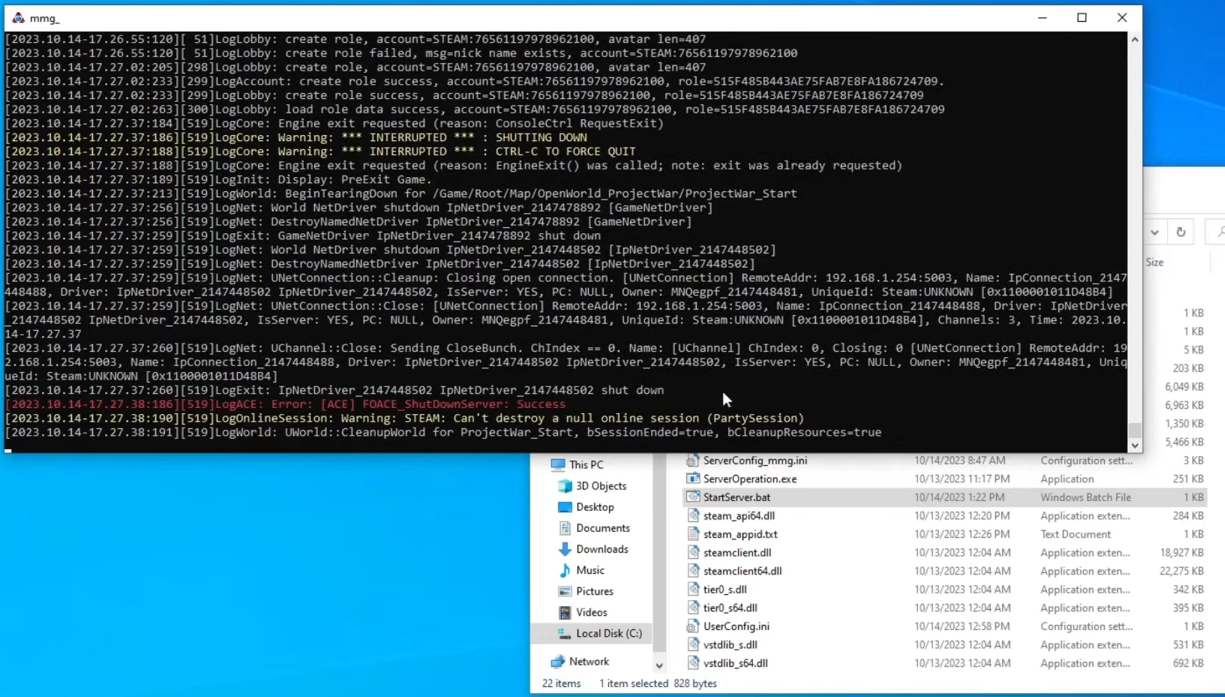
- To shut down the server, go back to the server machine, click within the command console, and press ‘Ctrl + C’ to initiate the shutdown process.
By following the above steps, one can successfully set up a dedicated server on a Windows PC using SteamCMD for The Front.