If you are facing the “Xbox controller not recognized” error in Windows 11, then you have come to the right place. This guide will provide you with multiple fixes to get rid of this error.
1.Reboot Xbox controller
In this section, we will take you through the steps to reboot an Xbox controller to address common connectivity issues. By following these steps, you can refresh the controller’s connection and establish a stable connection with your computer.
- The first thing you will need to do is unplug your Xbox controller from your computer. Disconnect it completely to ensure a fresh start.
- After disconnecting the controller, wait for a few seconds.
It will allow any residual power to dissipate. - Now, reconnect the Xbox controller to your computer by plugging it back into the USB port.
- Repeat the process of unplugging and replugging the controller into the computer several times.
This action can help resolve common difficulties and establish a stable connection. - If you encounter a notification stating “USB device not recognized“, then you have to change the USB cable in this case.
2. Update USB driver
This section describes how to update the USB driver on your computer. By following these steps, you can ensure that your USB devices are using the most up-to-date and compatible drivers for optimal performance.
- Locate the Windows button at the bottom-left corner of your screen and right-click on it.
This action will open a pop-up menu. - From the pop-up menu, click on the option called “Device Manager.”
- Within the Device Manager window, expand the Universal Serial Bus Controllers and right-click the problematic device.
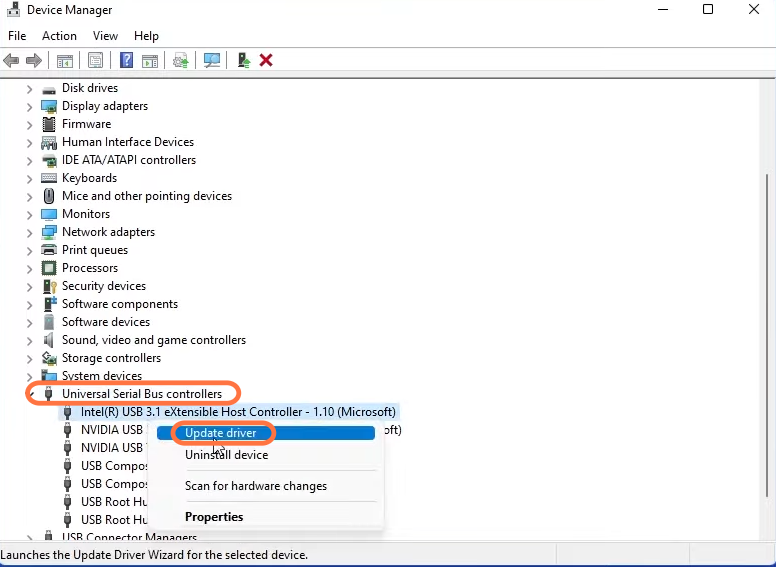
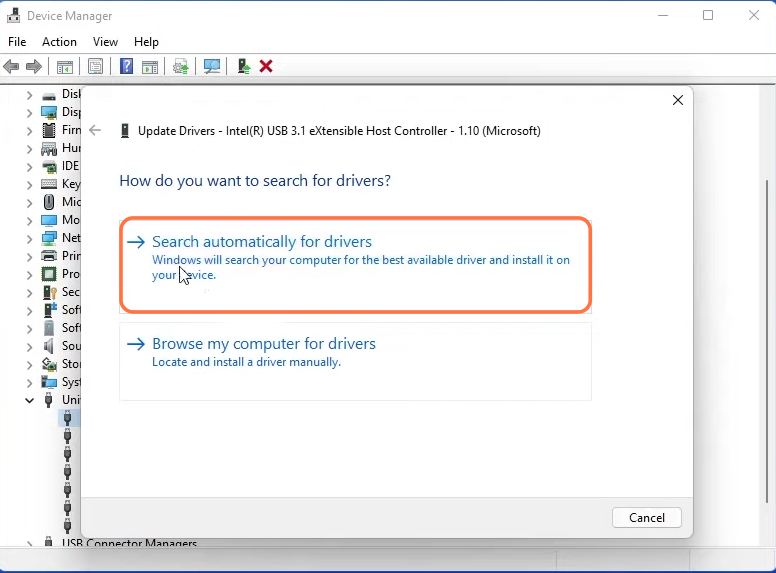
- After that, select the update driver option and click on “Search Automatically for drivers“.
Windows will find the best driver for your PC.
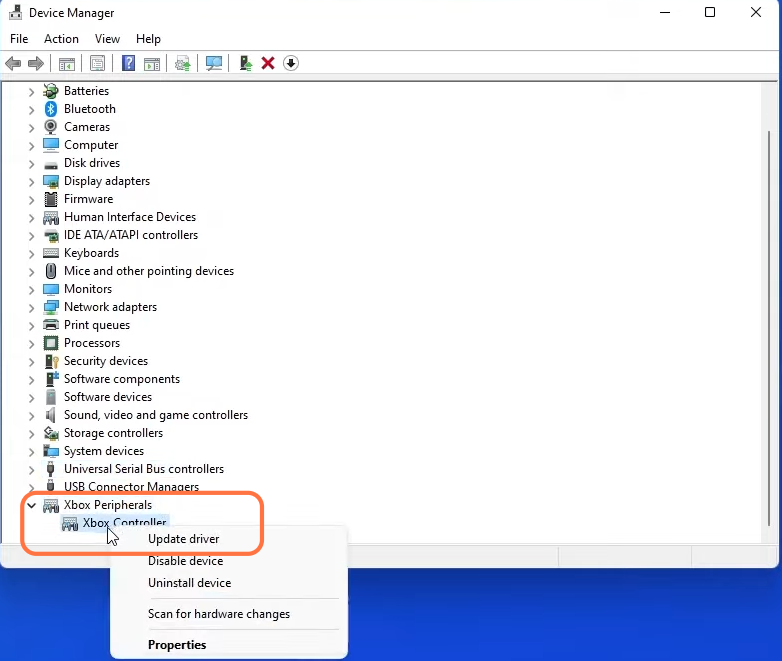
- Within the Device Manager window, locate the category labelled “Xbox Peripherals” and expand it.
- Locate your Xbox controller, and right-click on it.
A context menu will appear. - From the context menu, select the “Update Driver” option and then click on “Search Automatically for drivers” when the new screen appears.
Windows will find the best driver for your PC.
3. Reinstall the Xbox controller driver
This section will take you through the steps to reinstall the Xbox controller driver on your computer. If you are experiencing issues with your Xbox controller and updating the driver did not resolve the problem, reinstalling the driver may help.
- If the previous method didn’t work, then you have to right-click the Xbox controller and click on Uninstall Device.
It will open up a new window. - Click on the Uninstall button to confirm it and then restart your PC.

Once your PC has restarted, Windows will automatically attempt to reinstall the controller driver and then you can proceed to check if the problem with the controller has been resolved.
4. Update Windows
In this section, we will take you through the steps to update Windows on your computer. Once the updates are installed, you will need to restart your PC to apply the changes.
- Locate the Windows button at the bottom of your screen and press it. In the Start menu, click on the settings icon.
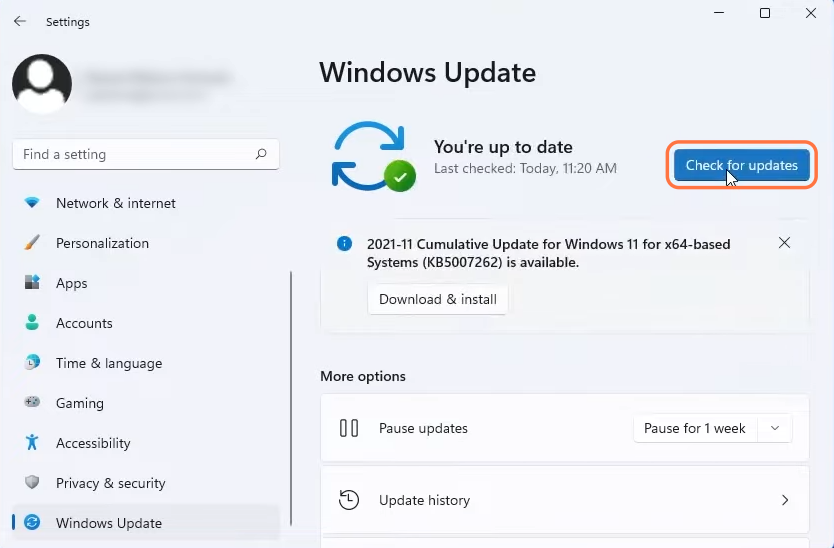
- Within the Windows Settings menu, scroll down through the categories on the left-hand side and click on “Windows Update.”
- Look for the button that says “Check for Updates” on the right side and click on it.
This action will prompt Windows to search for available updates for your PC. If any updates are found, Windows will begin downloading and installing them automatically. - Once the updates are successfully installed, restart your PC and check if the problem you were experiencing has been resolved.