There are multiple reasons of the Roblox 403 Forbidden Error Google Chrome In Windows.
- Incorrect website URL.
- Unstable internet connection.
- Chrome’s browsing history, cache and corrupted data.
- Extensions installed from third-party sources.
Follow all the instructions carefully to fix this error.
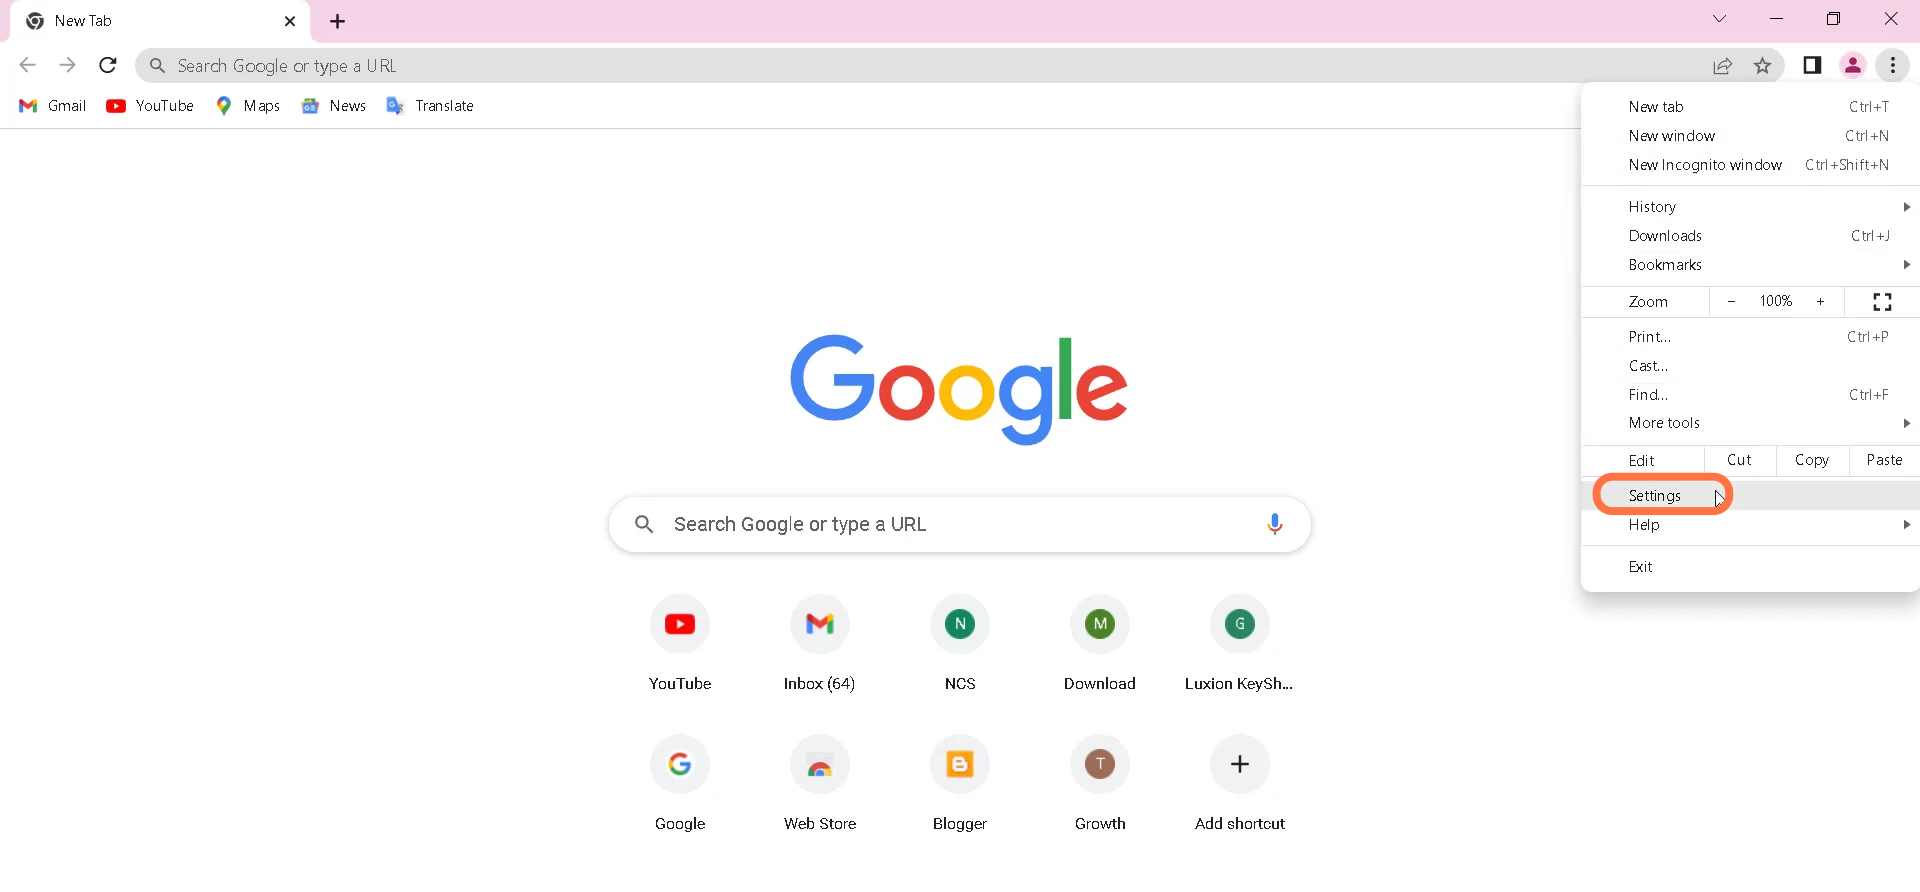
1. First, you will need to open Google Chrome and Enter into Settings by clicking on the dotted vertical bar at the top right of the browser screen.
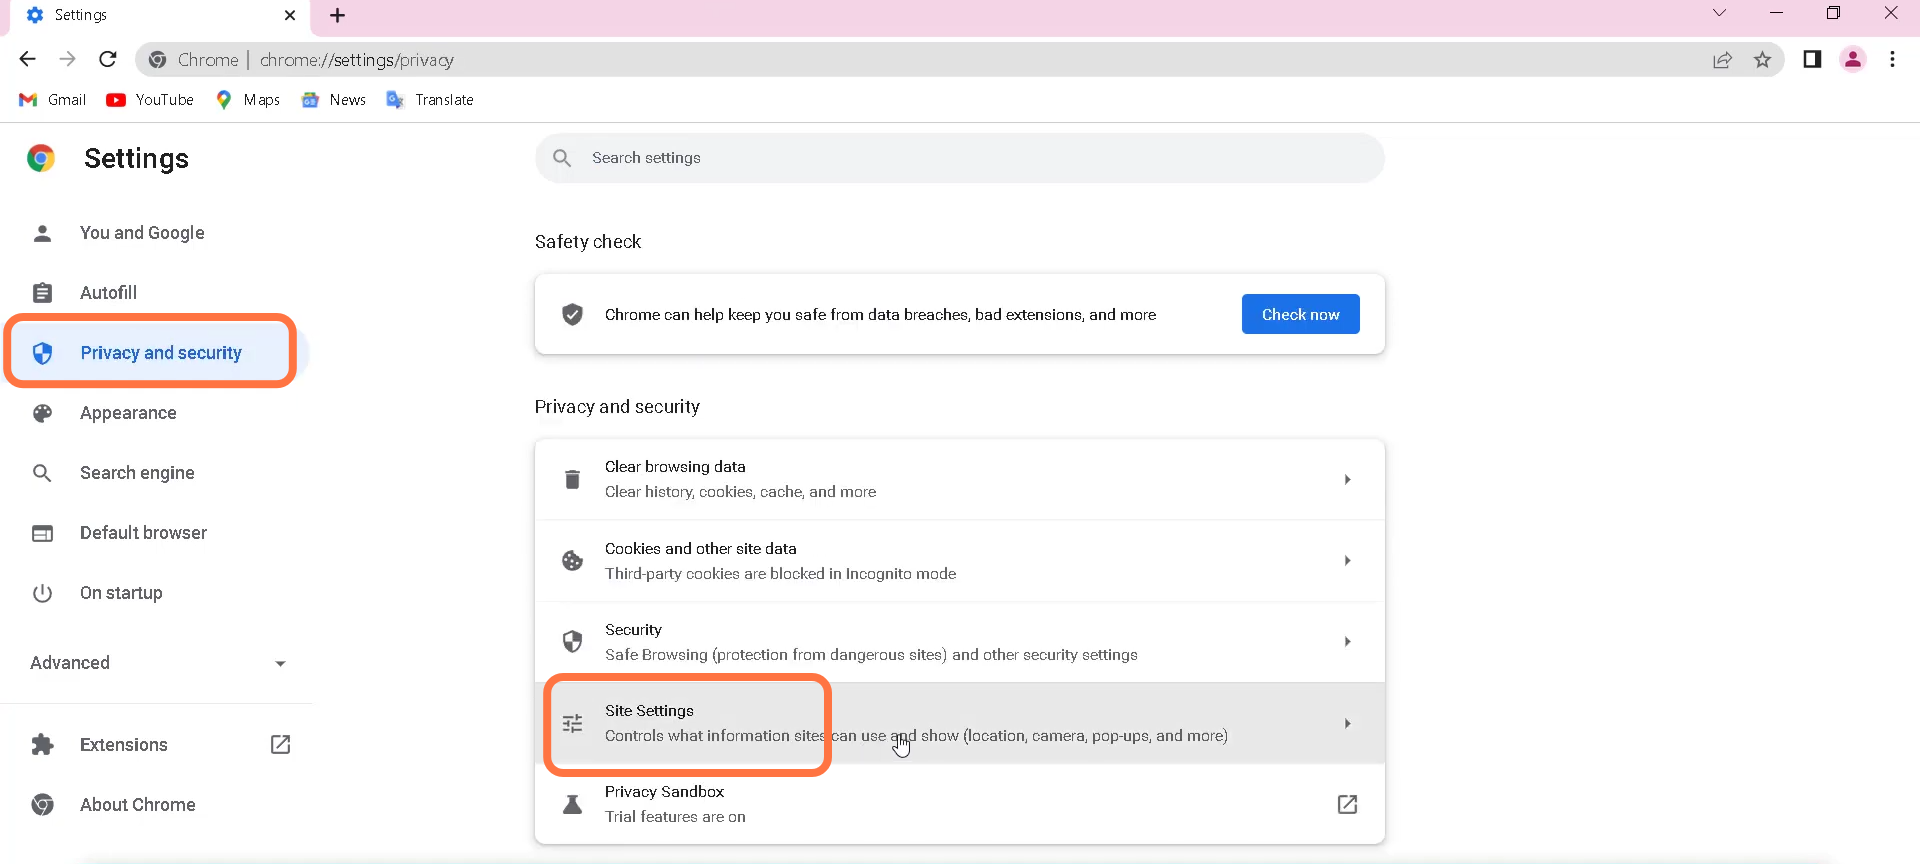
2. Enter into the privacy and security section and then click on Site Settings.
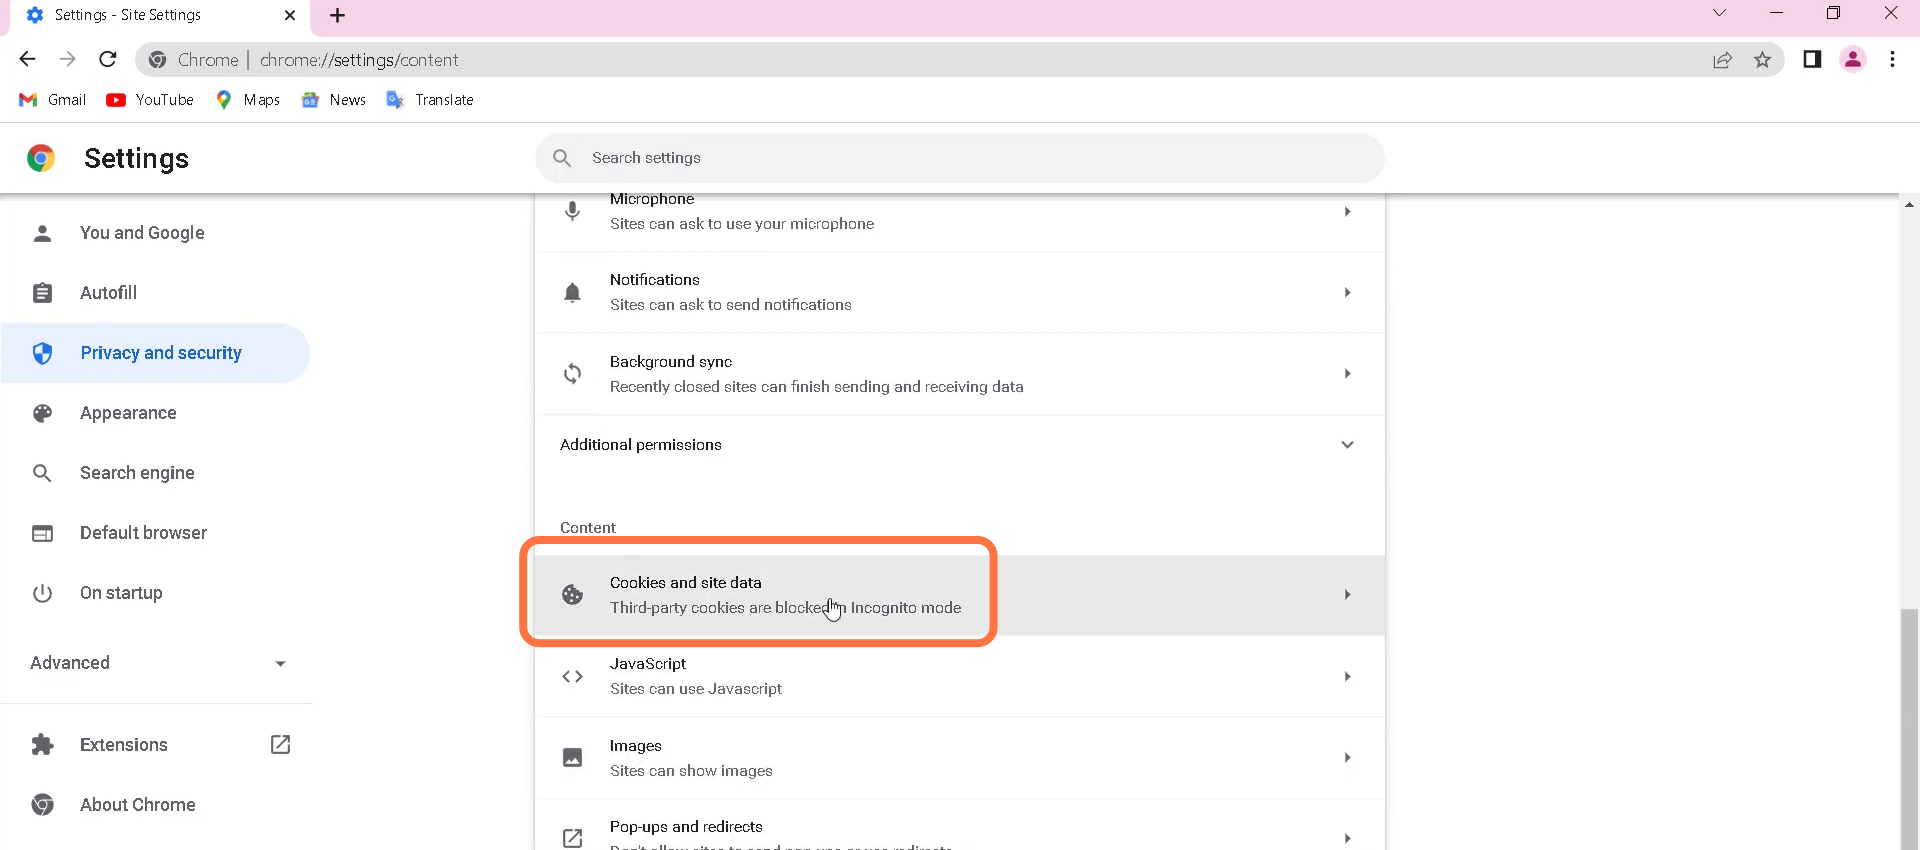
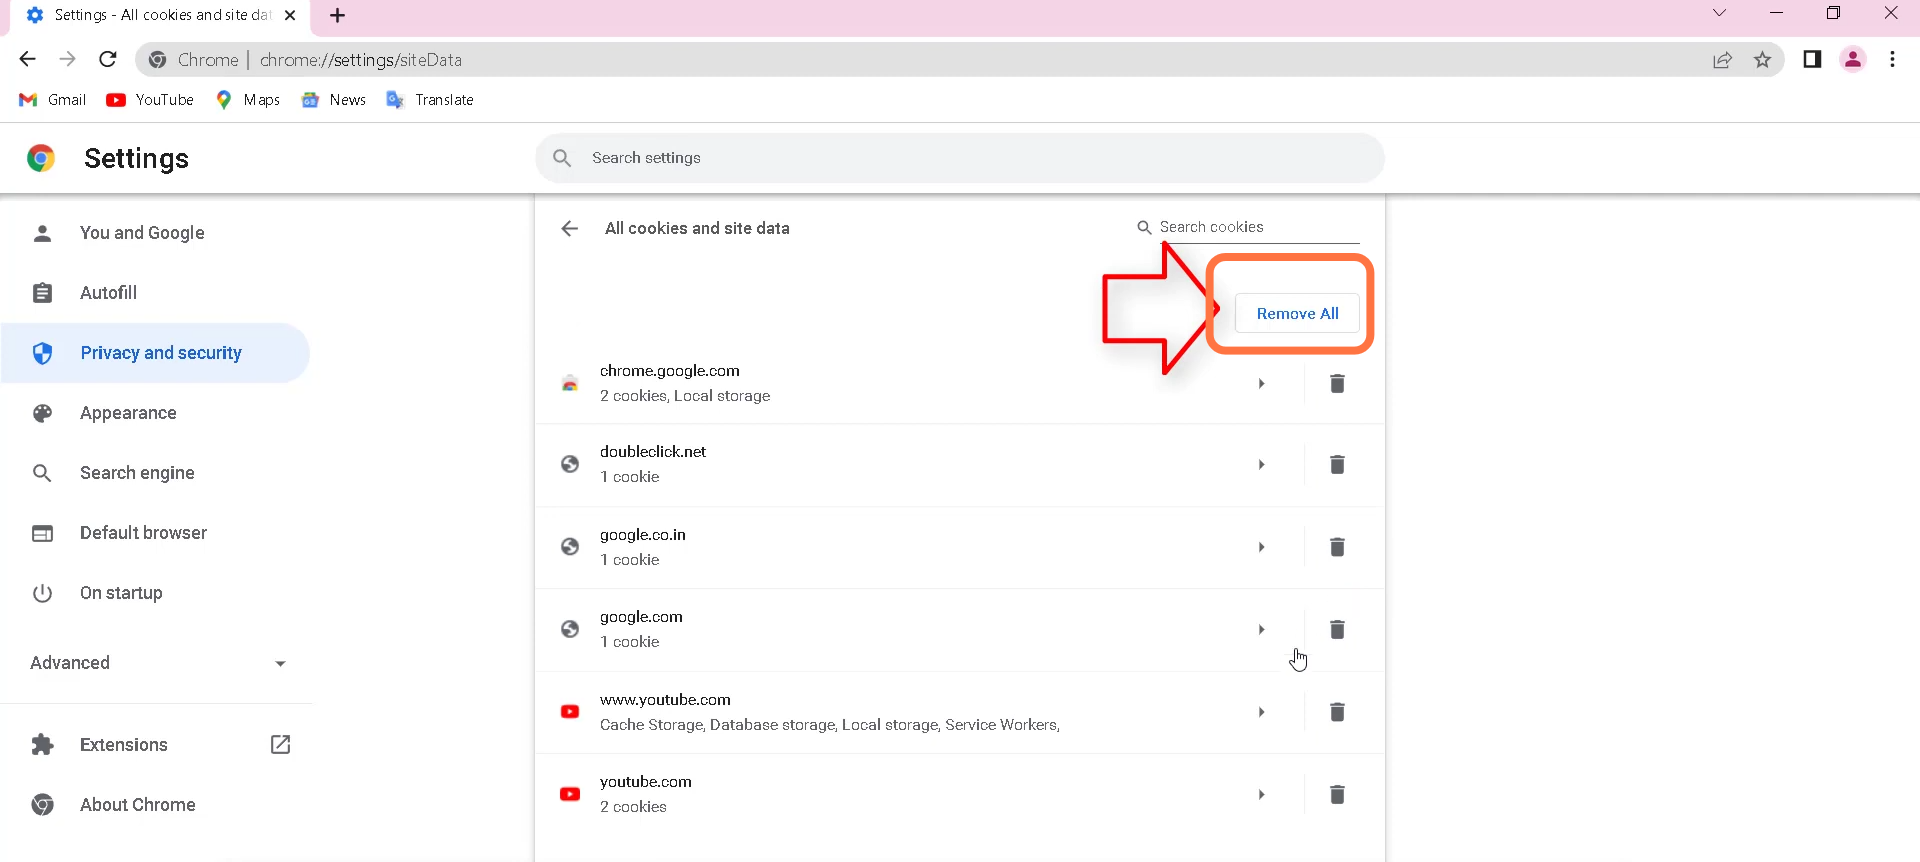
3. After that, find the ‘Cookies and site data’ option and click on it.
4. Now you need to click on Remove All button.
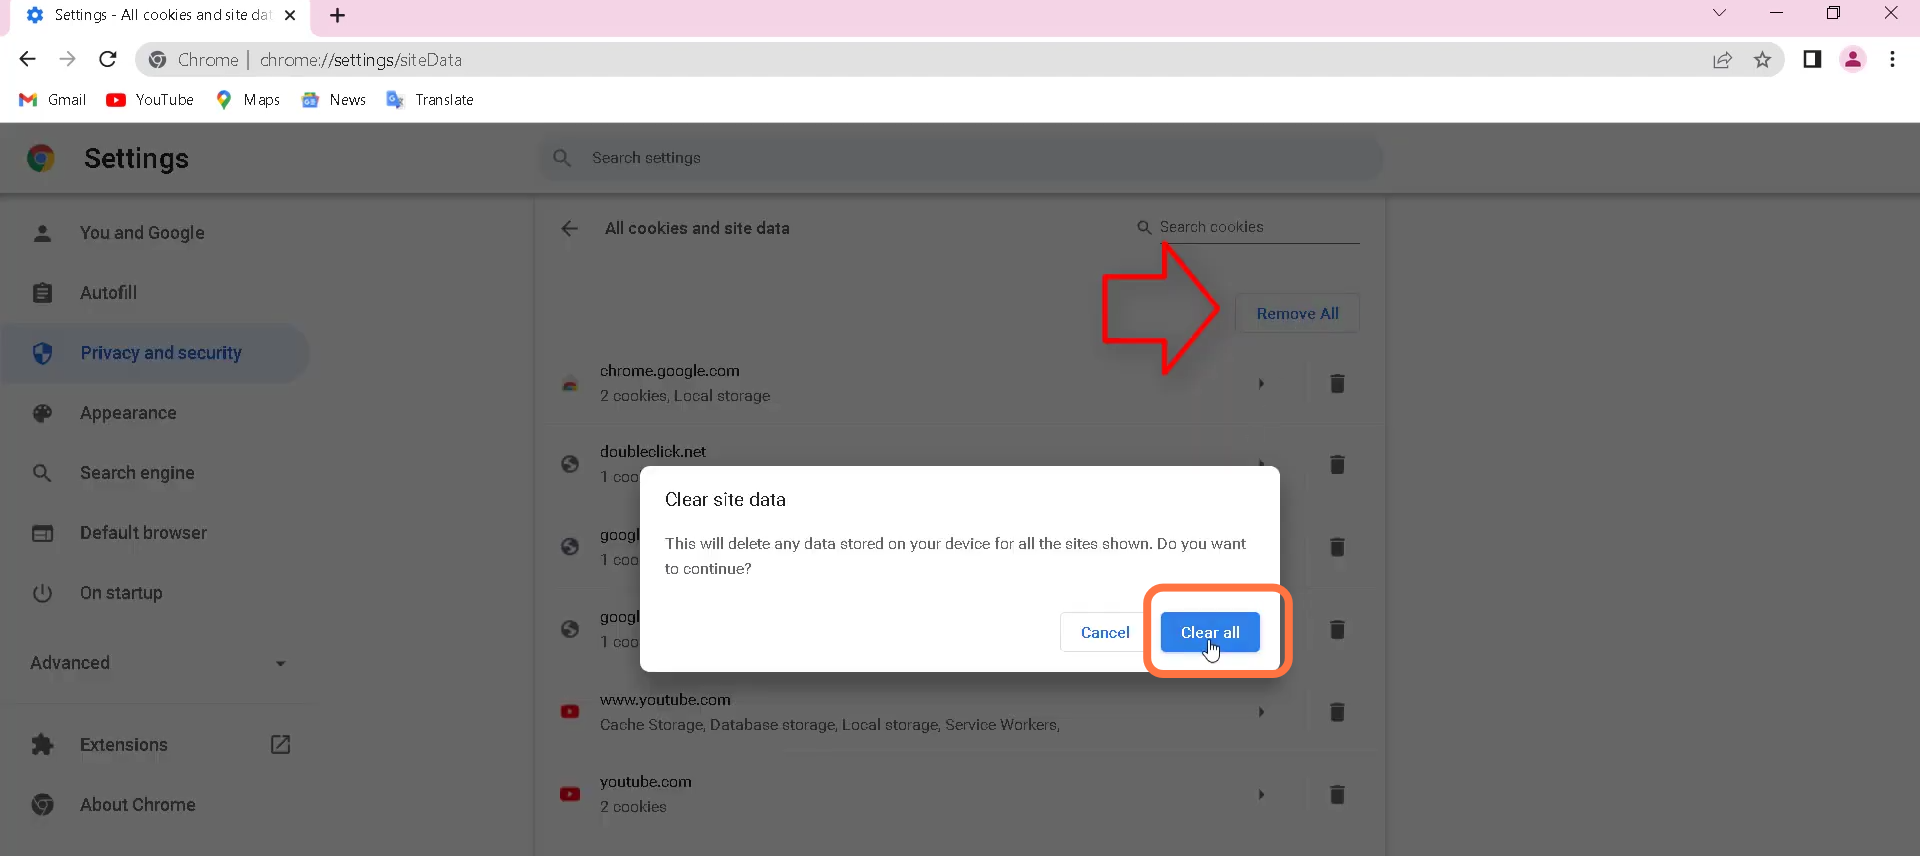
5. Just after that, click on ‘Clear all’ button.
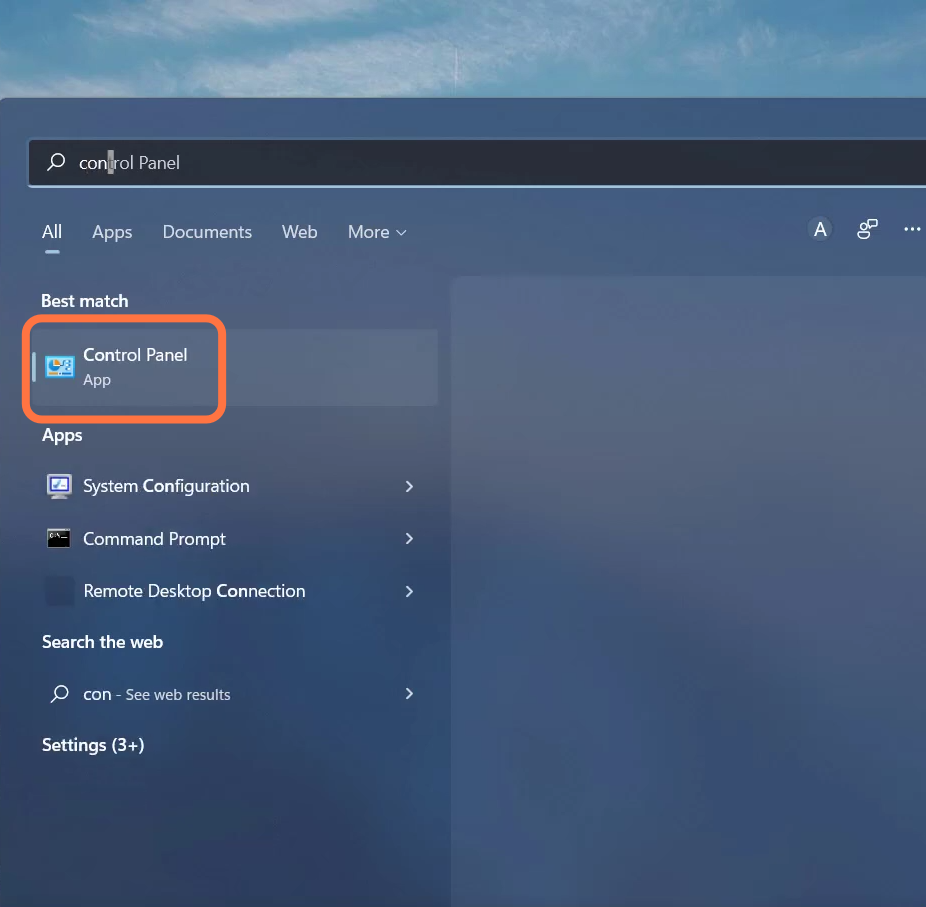
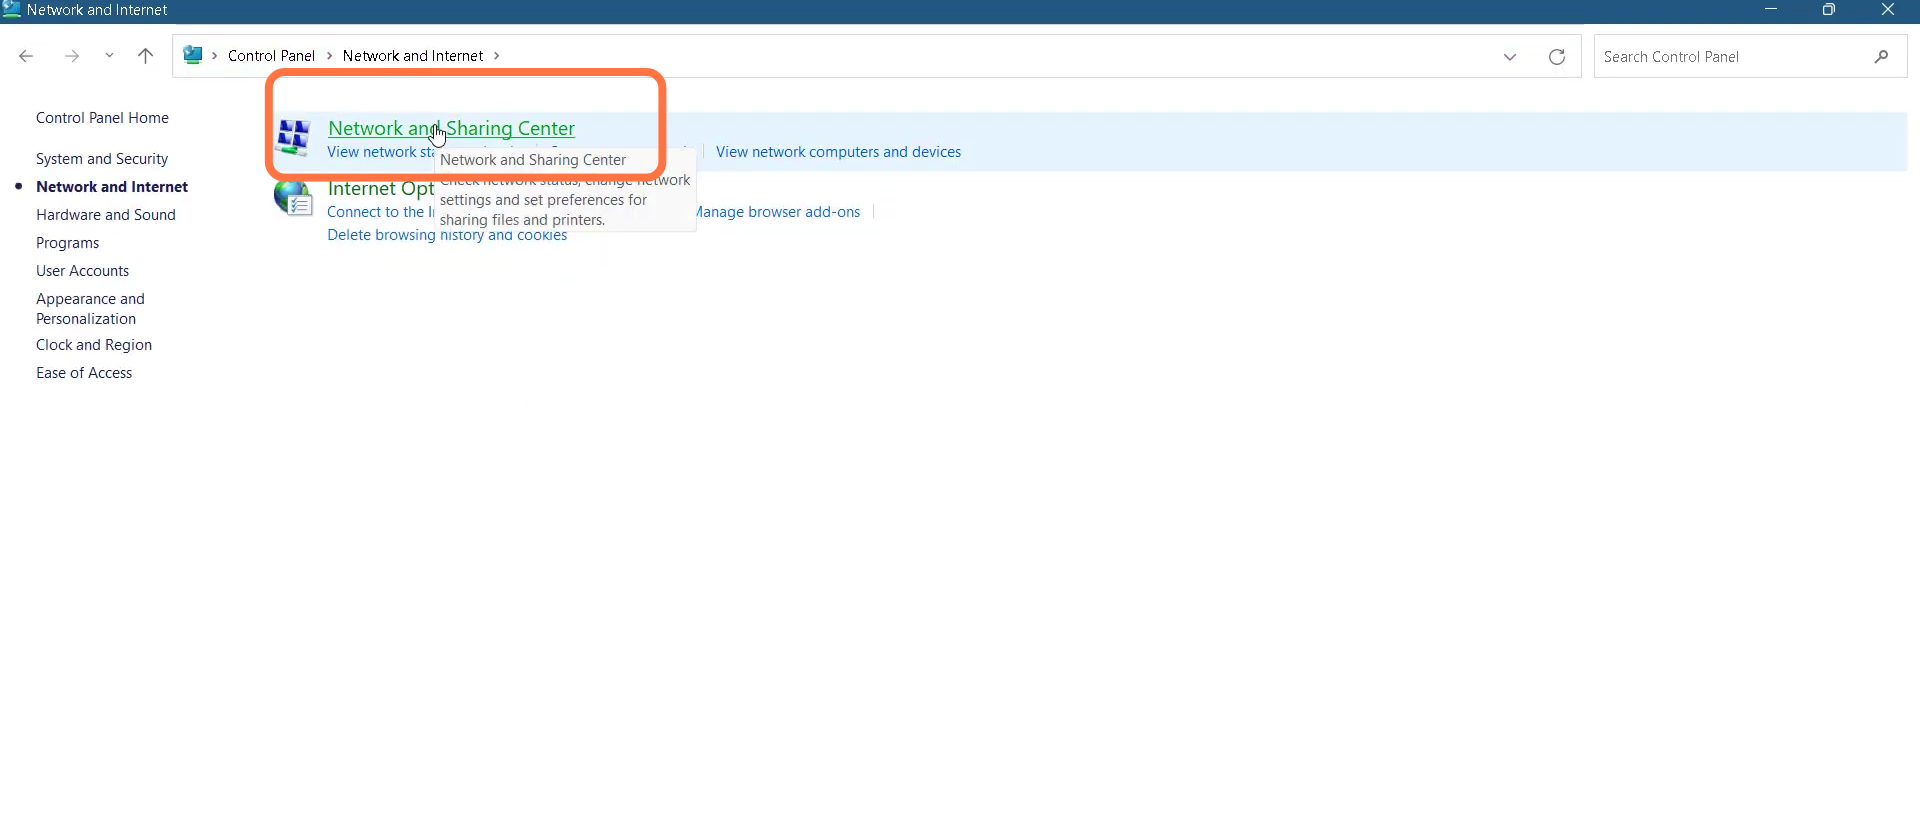
6. Next, you will need to open up the control panel.
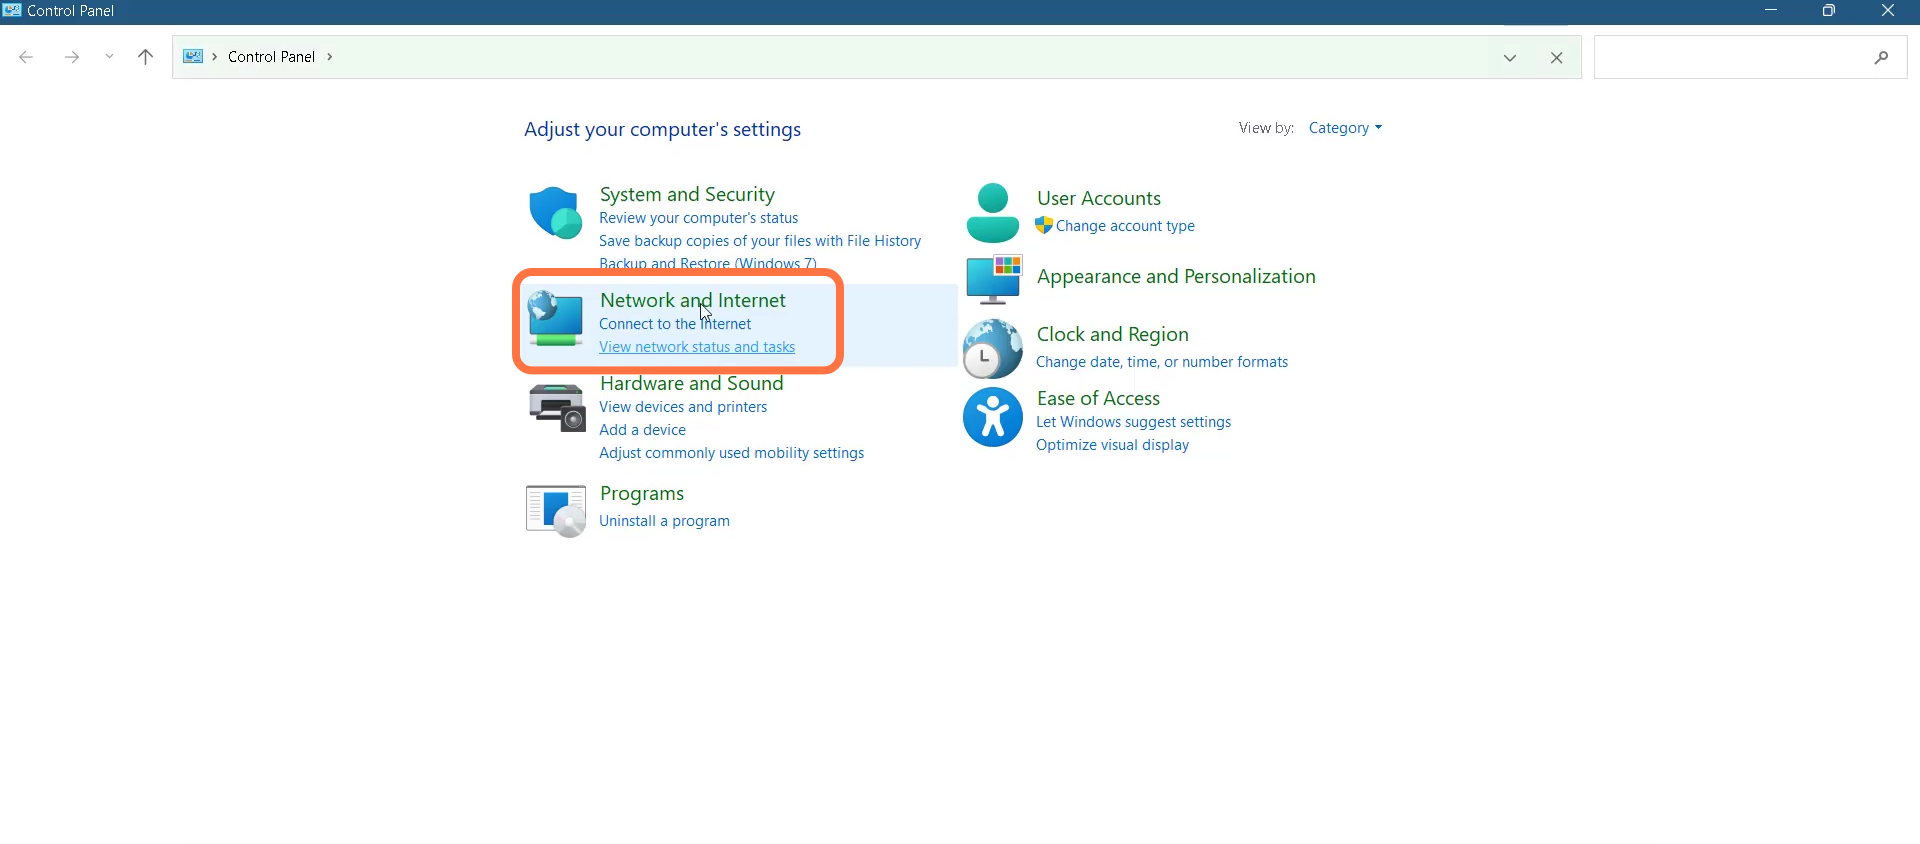
7. Click on the Network and Internet option.
8. Then enter into Network and Sharing center
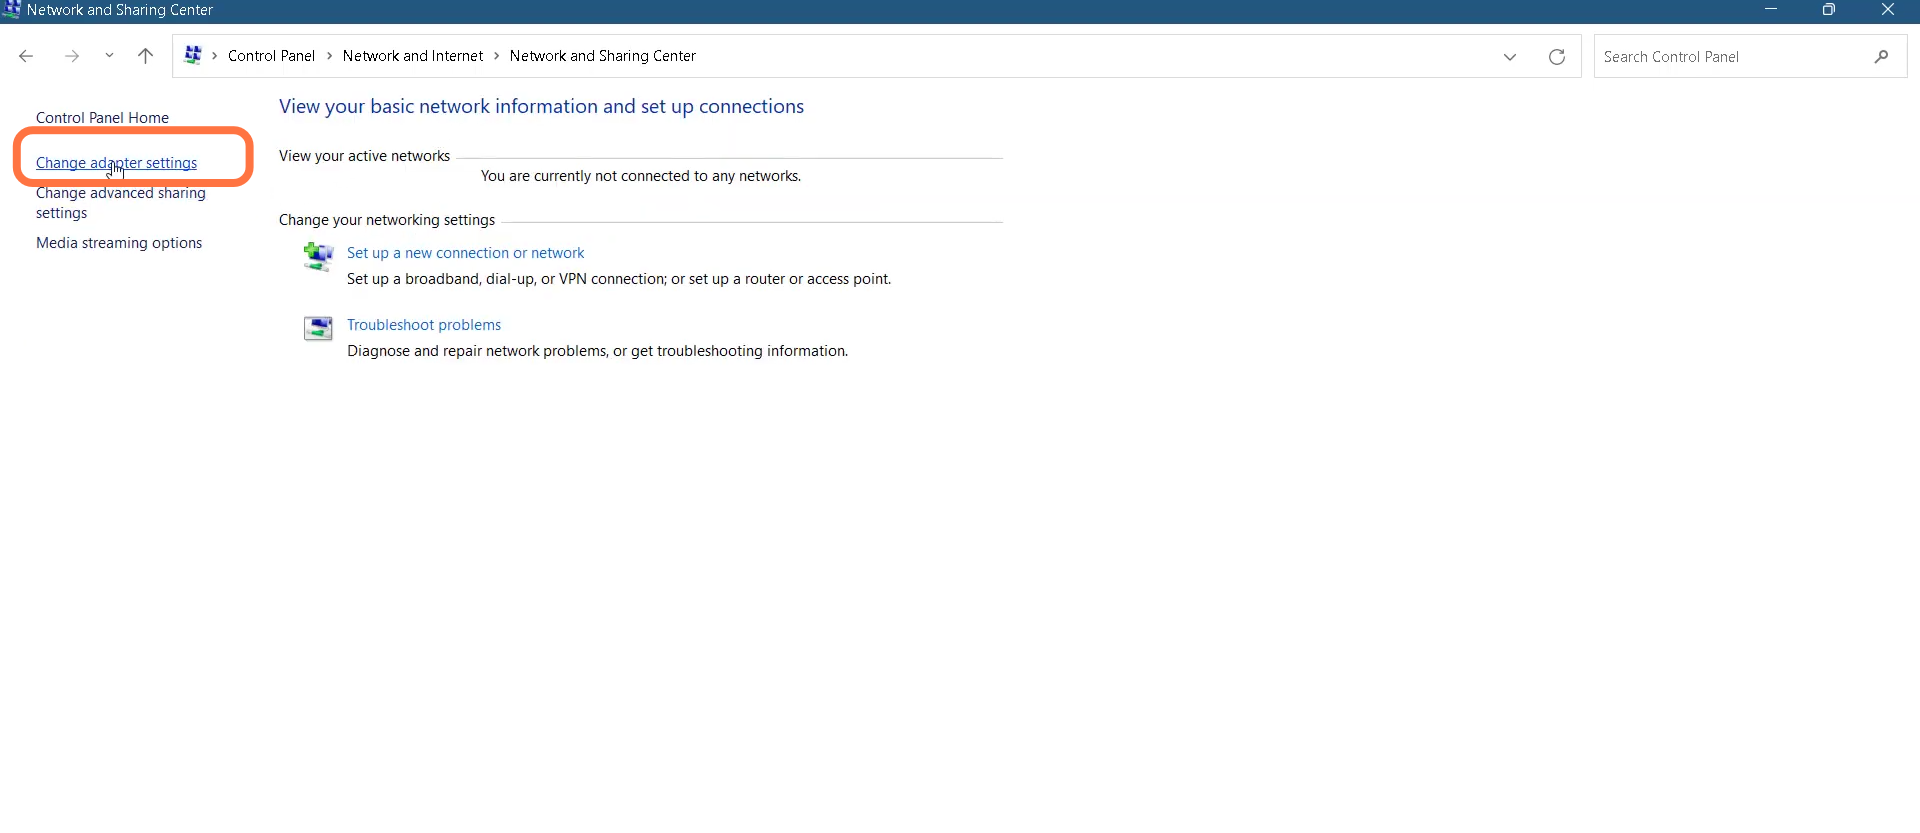
9. After that, tap on change adapter settings.
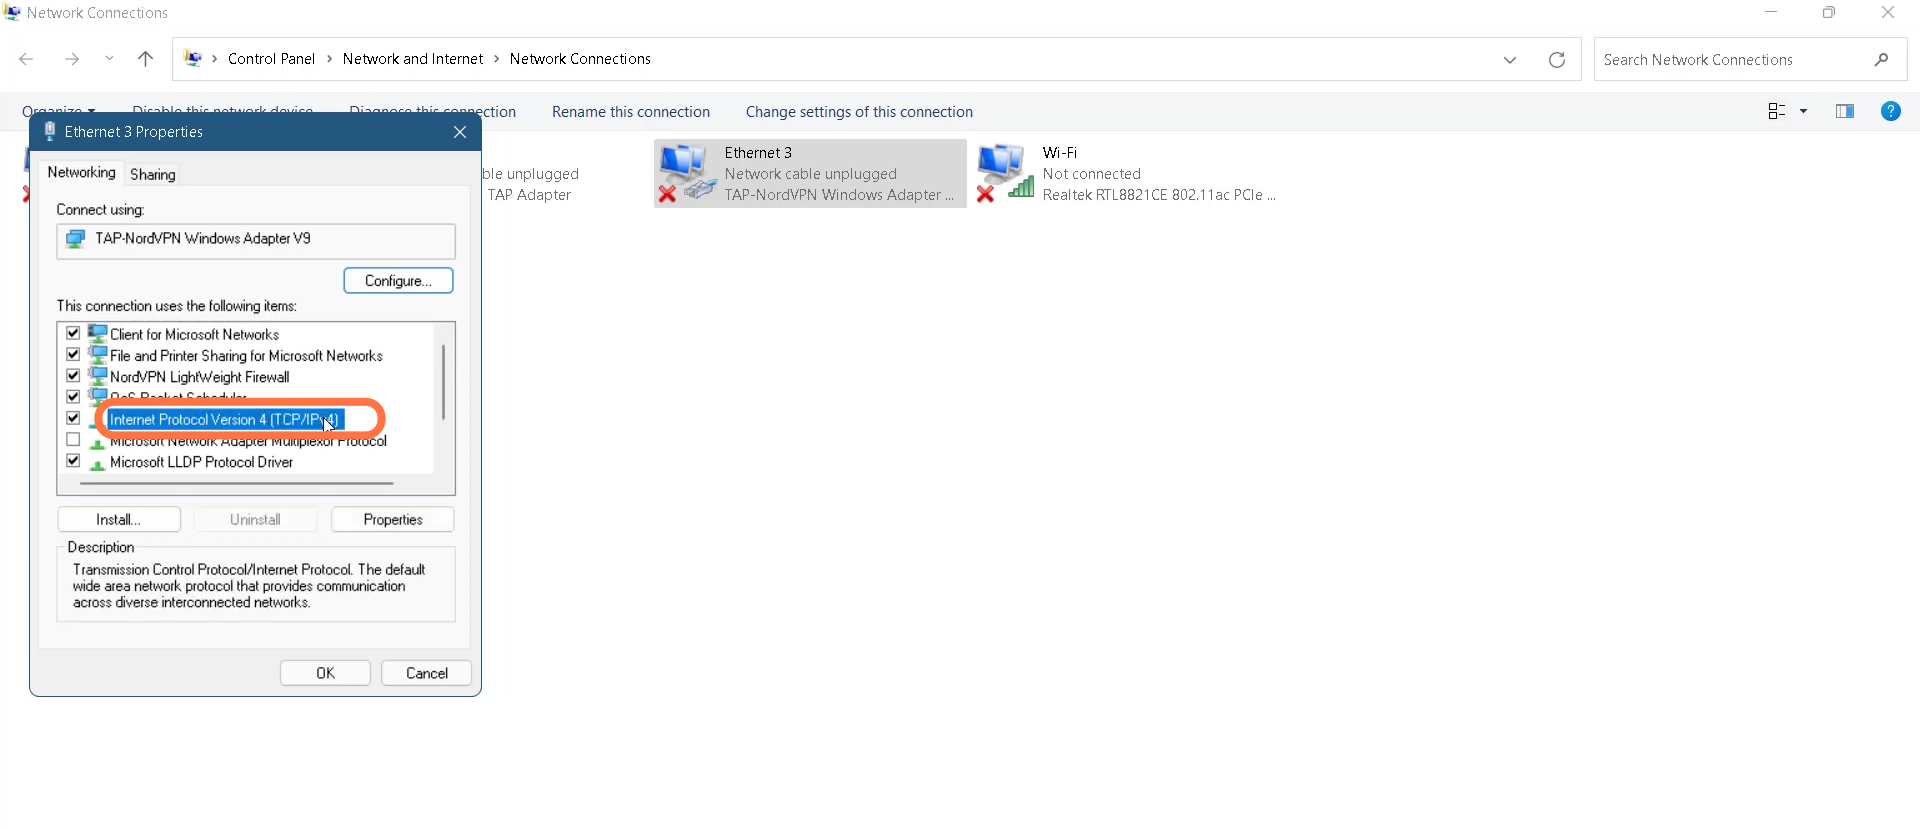
10. Now you need to right-click on Ethernet, select properties and then click on Internet protocol version 4 (TCP/IP) in the list and go into properties.
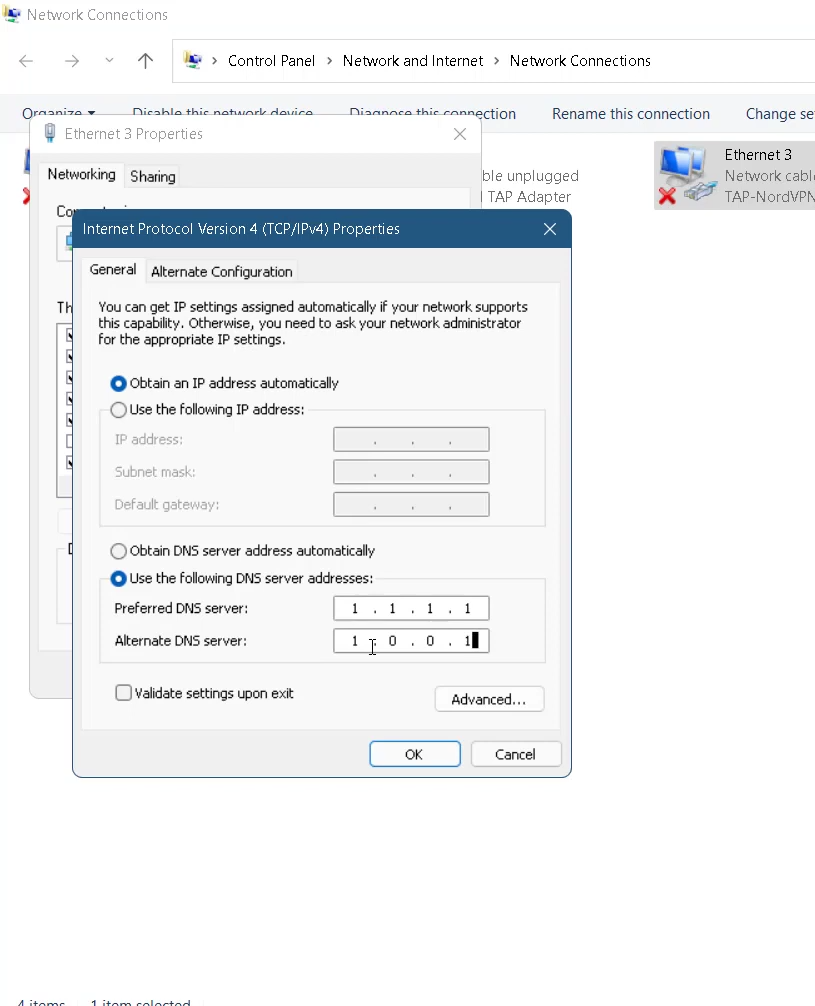
11. Enable “Use the following DNS server address”. Replace the Preferred DNS server address with 1.1.1.1 and Alternate DNS server with 1.0.0.1, tick mark ‘Validate settings upon exit’ and then click Ok.
12. Now you will need to restart your PC.