This comprehensive guide will teach you how to install the Simlish Social Bunny Mod in The Sims 4. This mod offers a unique gameplay experience by transforming Social Bunny messages into Simlish, adding an extra layer of immersion and variety to your social interactions.
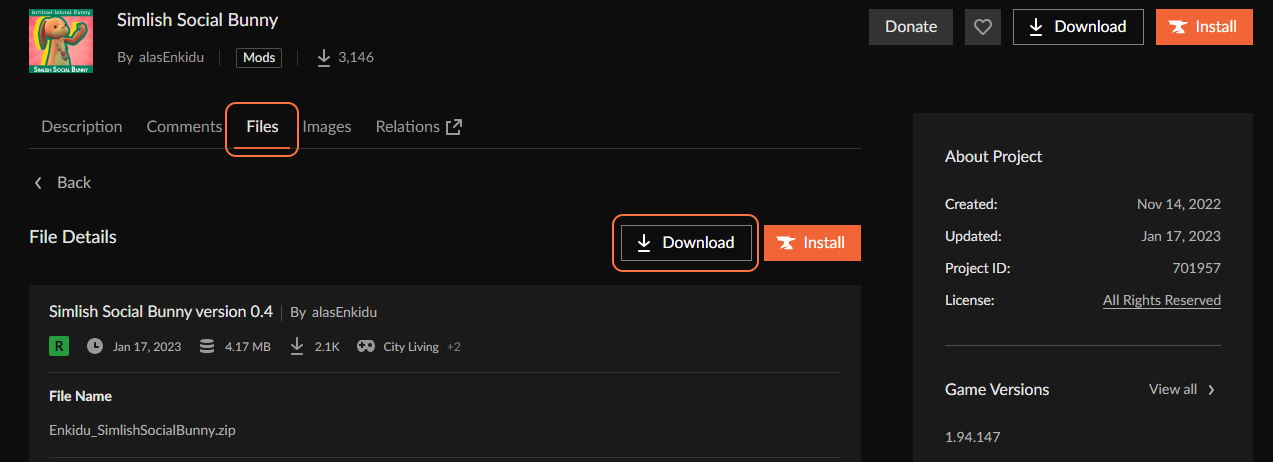
Step 1: To begin the installation process, you’ll first need to download the mod from the official source. Visit the following link: “https://www.curseforge.com/sims4/mods/simlish-social-bunny/files/4344909“. Once on the webpage, click on the “Files” tab and locate the latest version of the mod. Click on the “Download” button to initiate the download.
Depending on your internet speed, it may take a few moments to complete. For convenience, it is recommended to save the file in an easily accessible location such as your Downloads folder.
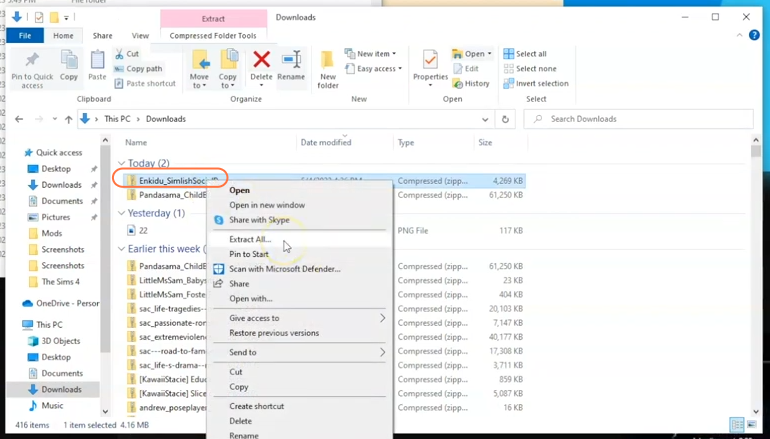
Step 2: After the download is finished, locate the downloaded file on your computer. If you are using a Mac, open the Finder application, and if you are using Windows OS, open the File Explorer. Navigate to the Downloads folder or the specific destination location where you saved the mod file. The mod file will usually be in the form of a .zip file, a compressed archive. Extract the contents of the .zip file using a decompression tool like WinRAR or any software capable of handling compressed files. Right-click on the .zip file and choose the option to extract the files. This action will create a new folder containing the extracted contents.
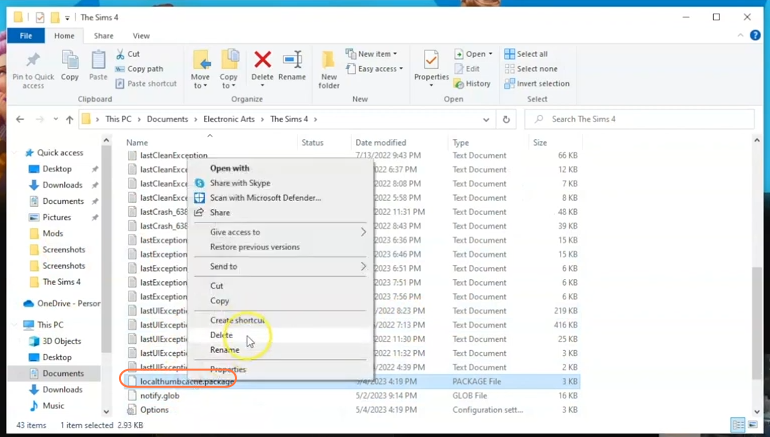
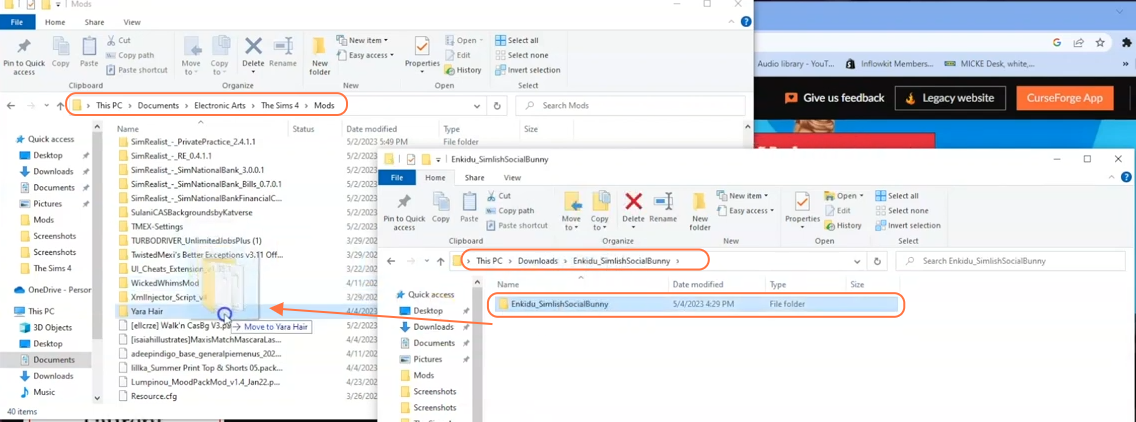
Step 3: Now it’s time to locate the Mods folder within your Sims 4 game directory. By default, the game directory can be found at Documents > Electronic Arts > The Sims 4 > Mods. This folder serves as the designated location where you need to place all custom content and mods for the game to recognize and utilize them effectively. As a precautionary step, while you’re in The Sims 4 folder, look for a file named “localthumbcache.package” and remove it. Removing this file helps ensure the smooth functioning of mods.
If you don’t already have a Mods folder in your game directory, you can create one yourself to ensure a proper installation. It’s important to note that if you haven’t installed any mods before, you must load up the game at least once and then exit to generate the necessary folders, including the Electronic Arts folder, for a seamless mod installation process.
Step 4: Next, navigate to the folder that was extracted from the compressed file. Inside this folder, you will find another folder. To install the mod, simply drag and drop this inner folder, which contains the necessary packages, into the Mods folder. By doing so, you ensure that the mod files are correctly placed and ready to be used in the game.
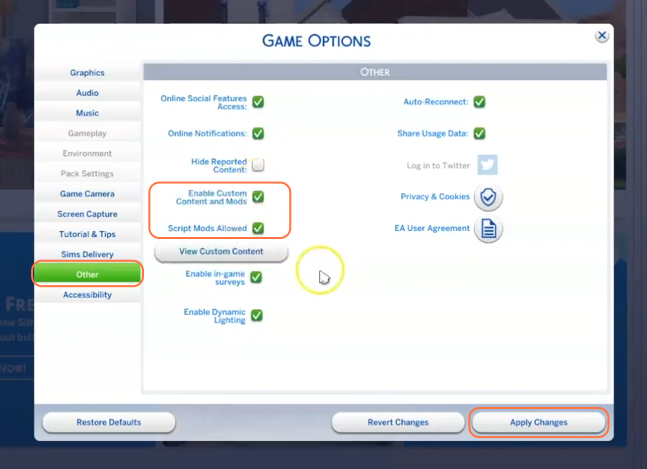
Step 5: Additionally, it’s crucial to enable the “mods” and “script mods” options in The Sims 4 game settings to ensure proper functioning of the mod. Once you are in the game, click on the “Options” tab, then select “Game Options,” and further choose the “Other” tab.
Here, check the boxes for “Enable Custom Content and Mods” as well as “Script Mods Allowed”. After making these selections, don’t forget to click the “Apply Changes” button located at the bottom right corner of the screen.
