In this guide, you will learn how to do advanced server settings for the Survive the Nights server. By following the steps below, you will be able to rent a Gportal server and then make all the necessary changes.
- First, you have to rent a Survive the Nights Gportal server. Once you reach the web page, type “survive the nights” in the search bar and order a server with ten or more slots.
- Choose the location for your server and tap on Continue. Once your server gets activated, go to the Basic Settings on the left side, set a server name, and select the number of max players.
- Select your region and set a password if you don’t want anyone to join it. Input your Steam ID in the Server owner text field and disable PvP. Turn on the Self-defense system and set the Mental Health penalties to high if you want to go into the full PVP. Set Name Tag distance to Medium, turn on Show login messages and Show death messages.

- Set the Grow rate to 2 and type “Oh God you died” as the New Life screen message. After that, set the Chat to Local. You can set the Fortifications settings and Time and Weather according to your preference.
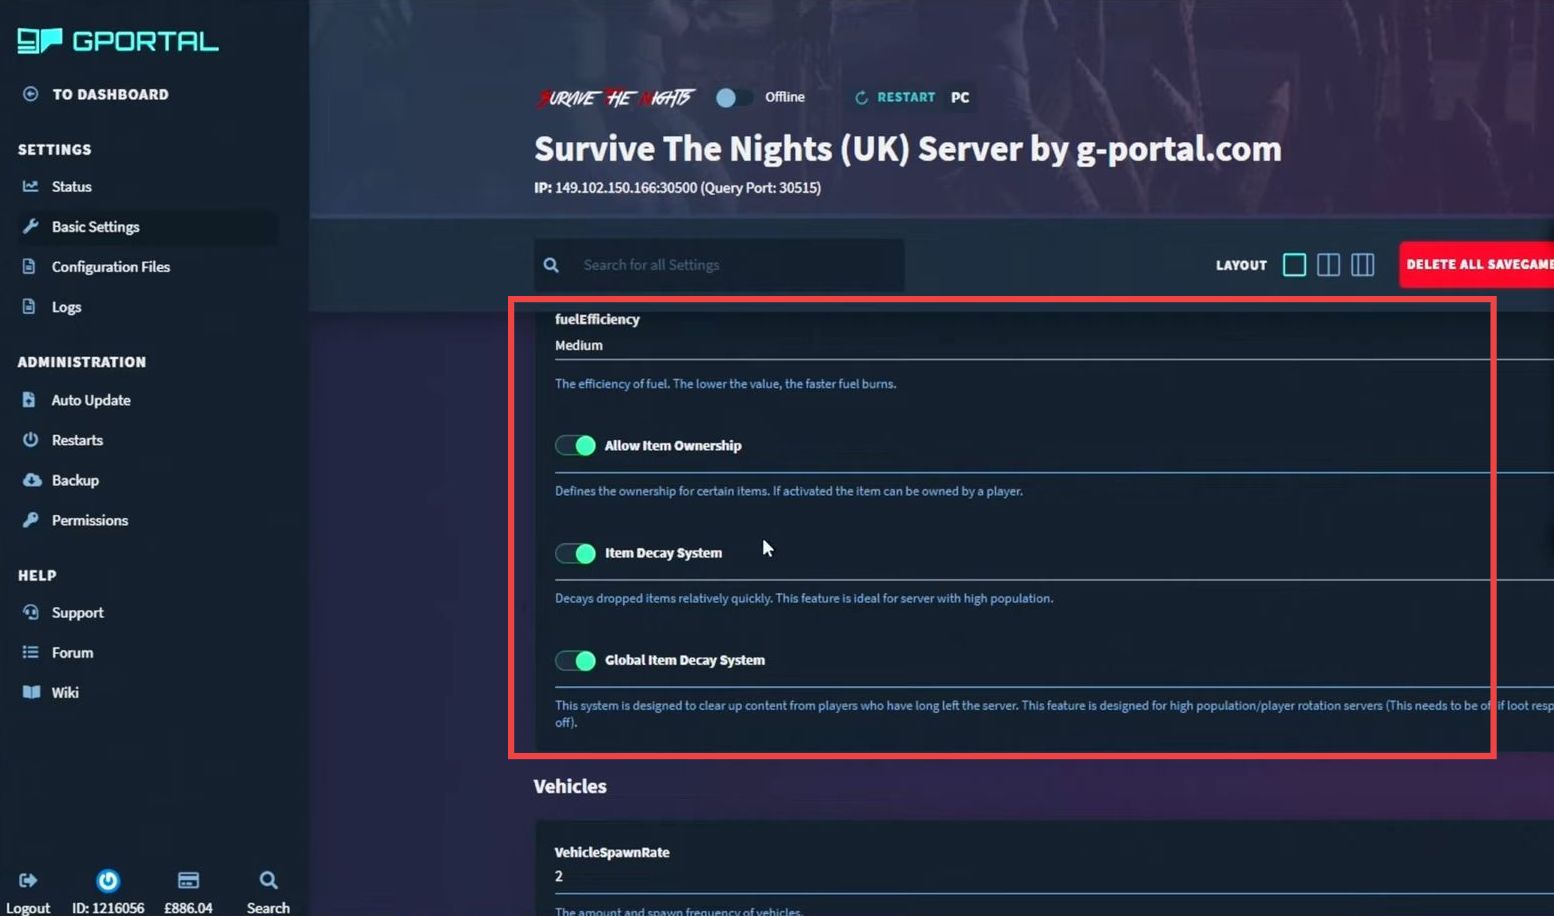
- Navigate down to the Loot section and set the Loot Spawn rate to 9 if you want loot everywhere. Set the Loot spawn condition to Medium and turn on Allow Item ownership and Item Decay system.
- It is recommended to set the Zombie Vision to High and Zombie fortification attack damage to medium. Enable Zombie headshot only and Zombie Runner Chance to none.
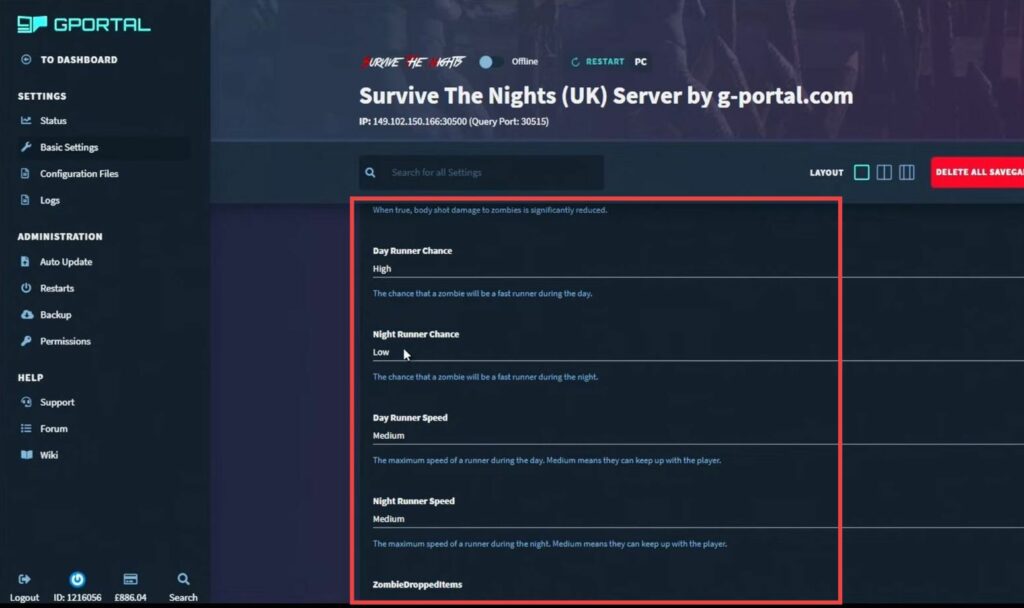
- Leave the Vehicles settings to default, then navigate down to the Zombies section and set the Zombie amount to 3 or 2. Set the Structure respawn rate to medium and set the Zombie strength to medium. Set the Day Runner chance to medium and the Night Runner chance to high.
- Move to the Hordes section and set the Horde mode to constant or nightly. Set the Horde difficulty to medium and the Horde frequency to random. Turn off Synchronized Horde nights and turn on Horde avoiding.
- After that, leave the other Horde settings to default. Go to the Animals sections, set the Chicken amount to high and the Deer amount to low. Also, set the fox amount from medium to low.
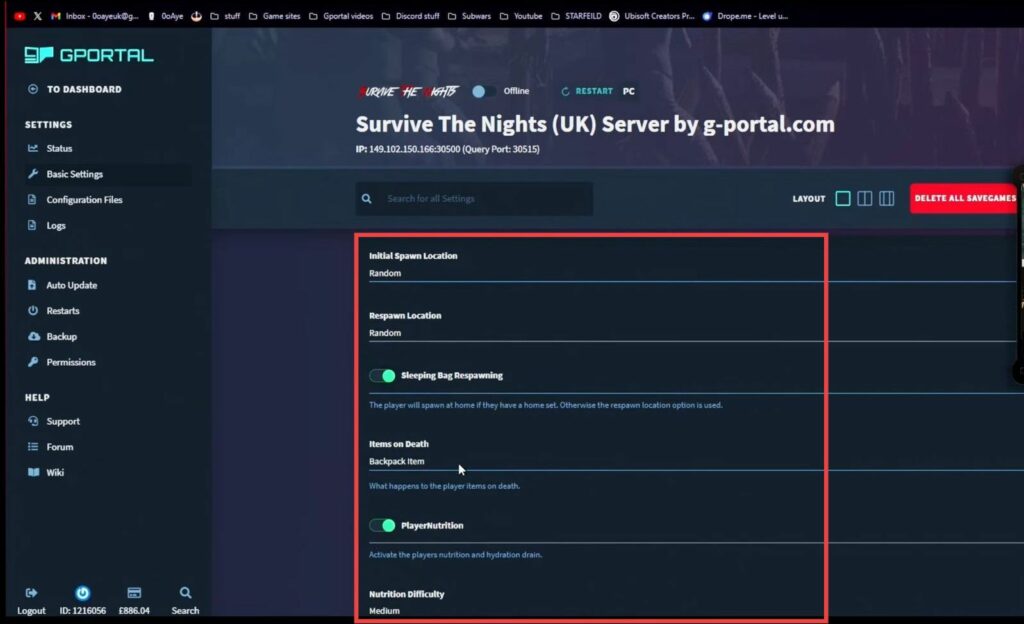
- Navigate to the Players section and set the Initial spawn location to random. Set the Respawn locations to random and then enable Sleeping bag respawning. Select backpack items as Items on Death and turn on the Player Nutrition option.
- Set the Nutrition difficulty, Stamina Recovery, and Stamina Drain to medium.
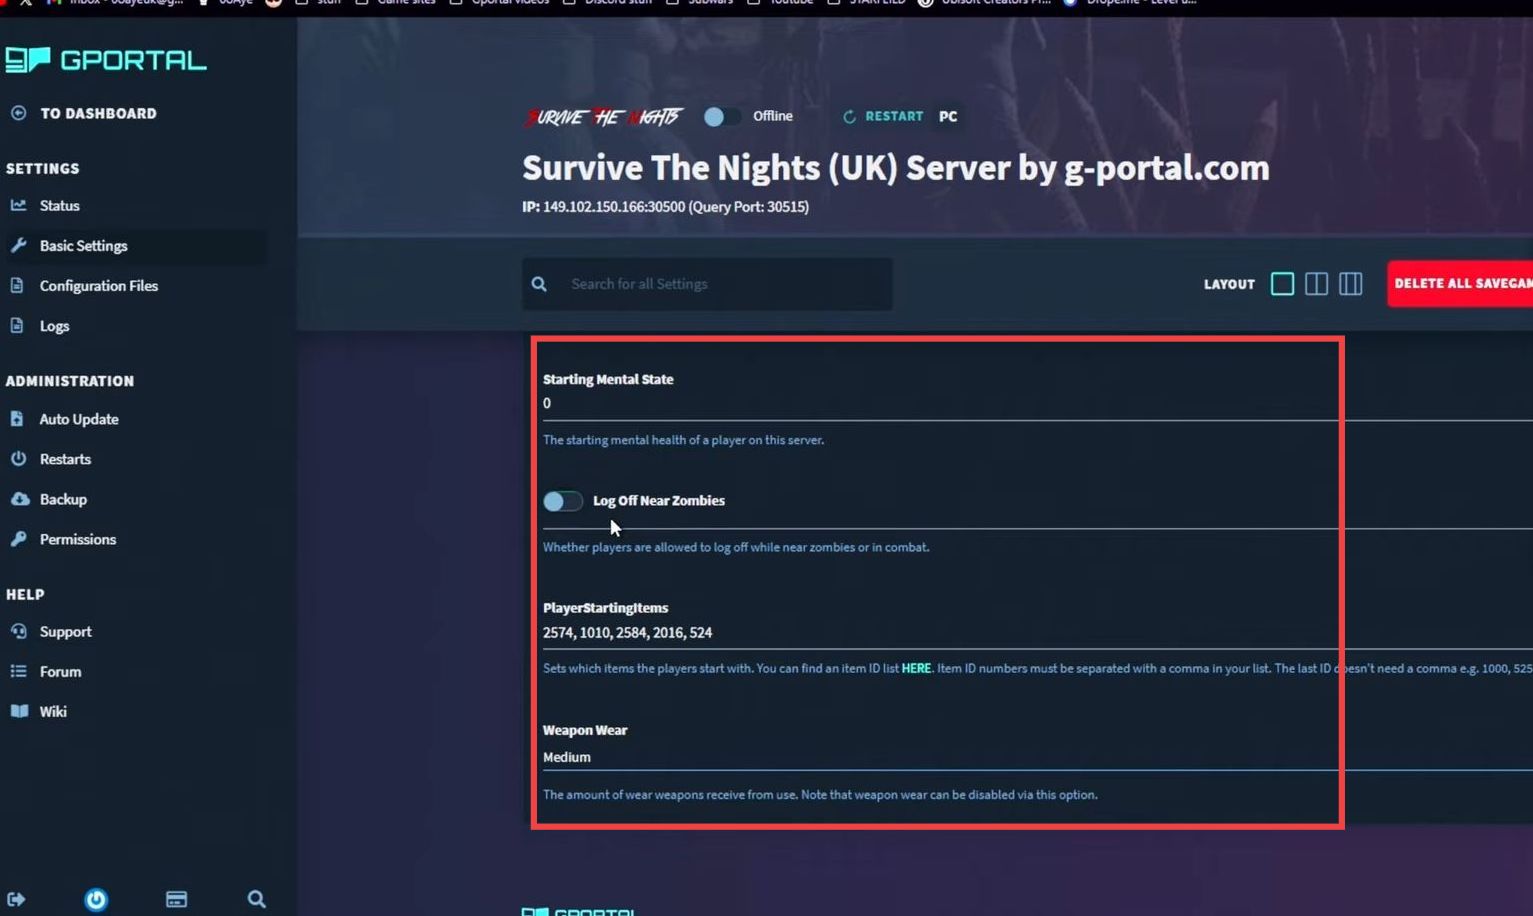
- Next, you need to set the Stamina Model to Hard. After that, leave other settings to default and turn off Log off near zombies. Finally, set the Weapon wear to medium.
- Hit the Save button to save all these changes. Navigate to the Auto Update tab under Administrations and turn on the Auto Update option.
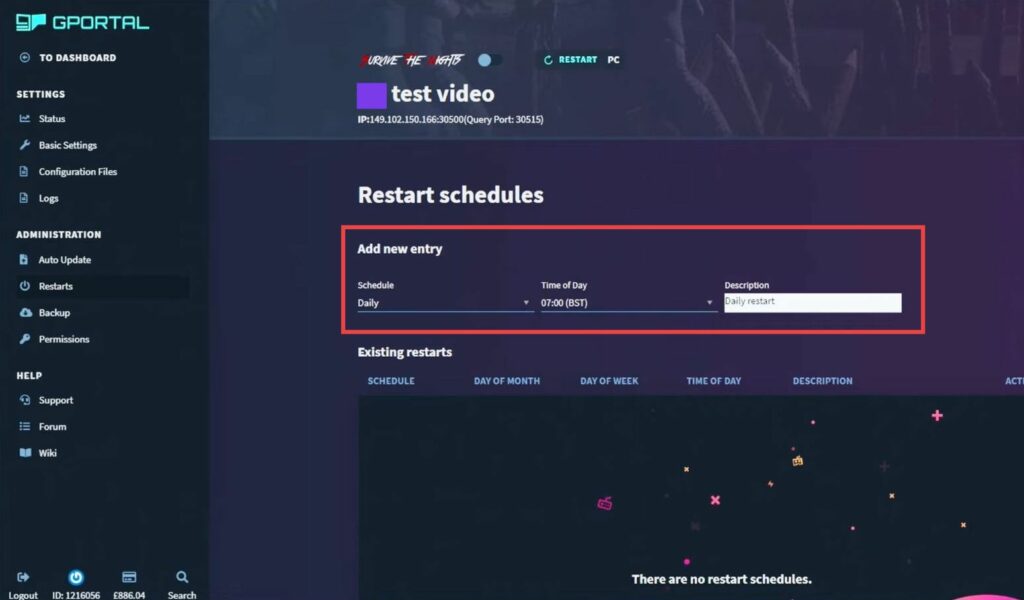
- After that, go to the Restarts section under Administration on the left side and set up a new daily restart schedule. Set the clock and hit the Save button.
It will clean up your server every day.
- Finally, navigate to the Backup tab and create a backup for your server.