This guide will let you know how to fix EAC Errors in Battlefield 2042.
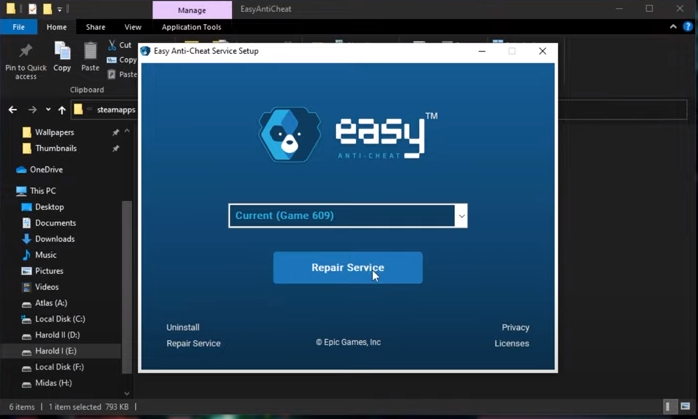
First, you will need to go to Steam and navigate Battlefield 2042, then right-click on the game from the left menu. After that, select the manage option, and click on the browse local files option. Now in the game folder, you need to go to the easy anti cheat folder, and you will find the setup.exe file there. You have to run it, and you will see a new window pop up; click on the repair service button, as shown in the image below.
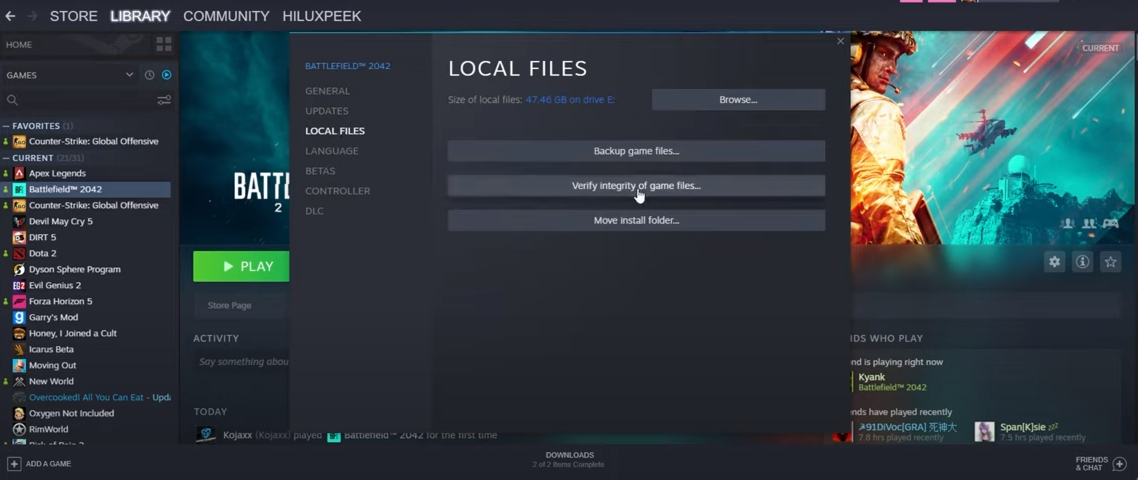
After repairing, you have to restart your system. If this method doesn’t work, you have to open Steam, right-click on the game, and select the properties option. Now from the left menu, tap over to the local files. To fix your problem, you need to click on the “Verify integrity of game files” option.
This method will only work on Steam, and if you are playing on Xbox or PlayStation, this method will not work. You have to access the files from the games folder for other platforms and then do the process manually.