How to install Designer Apartment with Garage – GTA 5 Mod

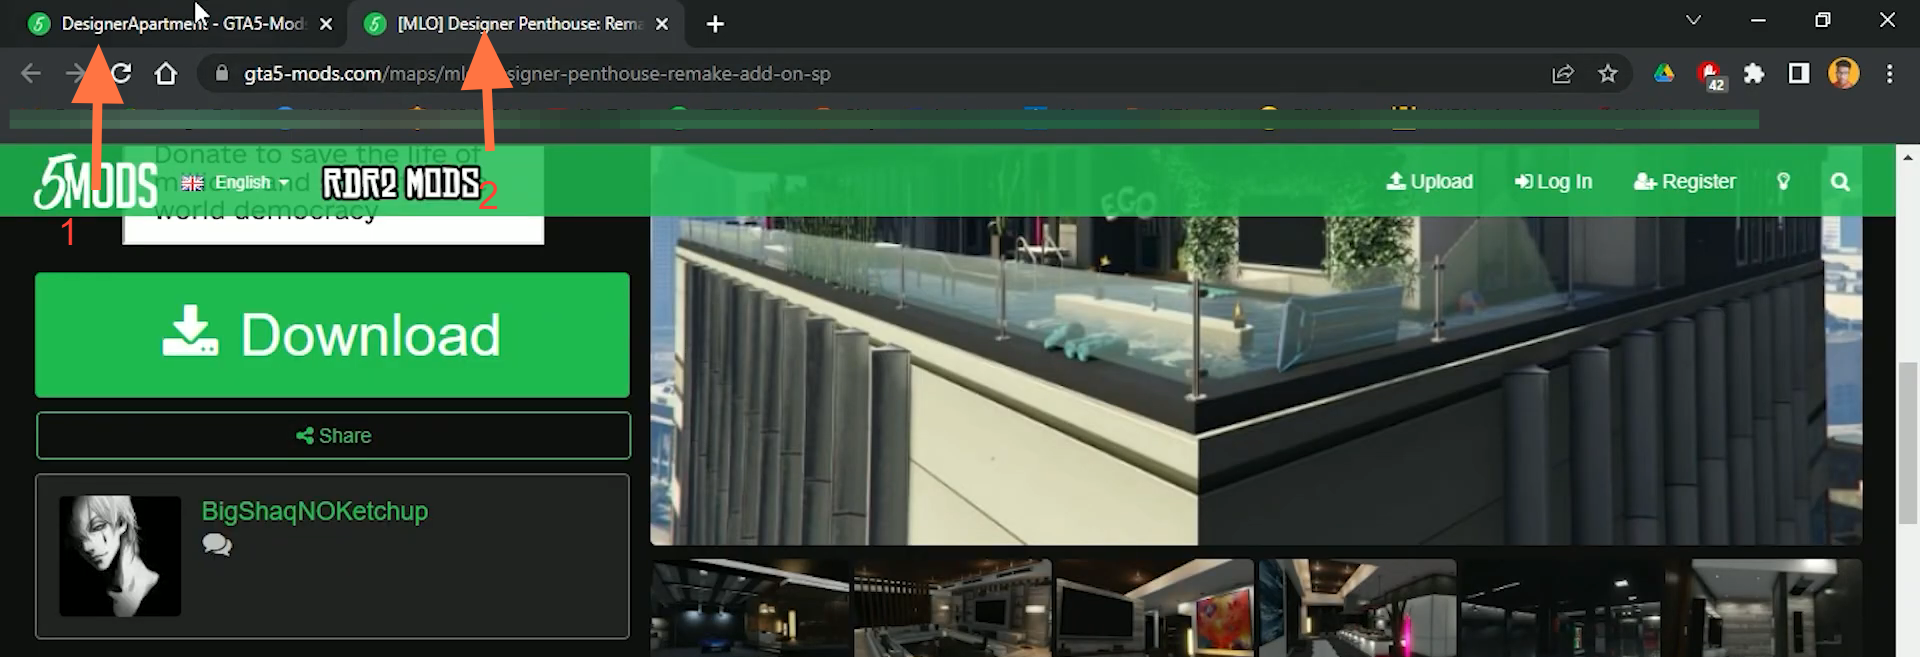
In this guide, you will find out how to install DesignerApartment with Garage in Grand Theft Auto 5.

1. You have to download two files to install DesignerApartment with garage in Grand Theft Auto 5. Download the “DesignerApartment” MOD file from “https://www.gta5-mods.com/scripts/designerapartment” and Designer Penthouse: Remake file from this link “https://www.gta5-mods.com/maps/mlo-designer-penthouse-remake-add-on-sp“.

You have to download two files to install DesignerApartment with garage in Grand Theft Auto 5. Download "DesignerApartment" MOD file from "https://bit.ly/3qjnvGL" and Designer Penthouse: Remake file from this link "https://bit.ly/3KWU8Um".

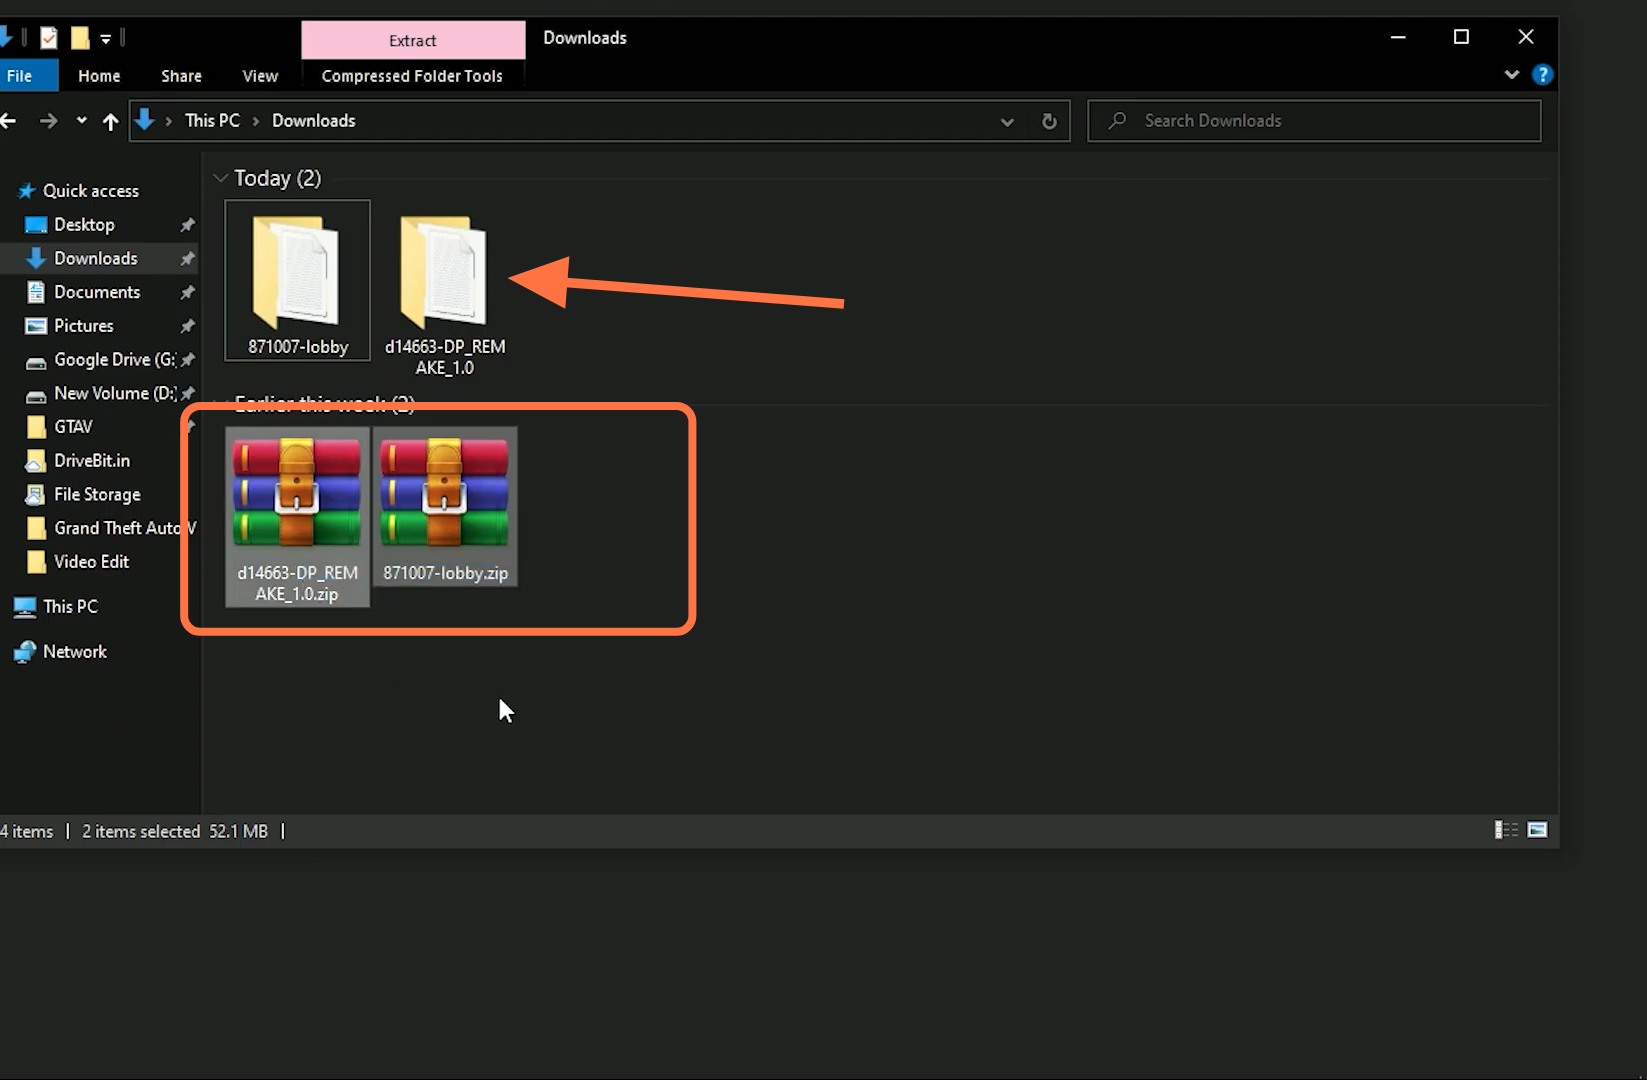
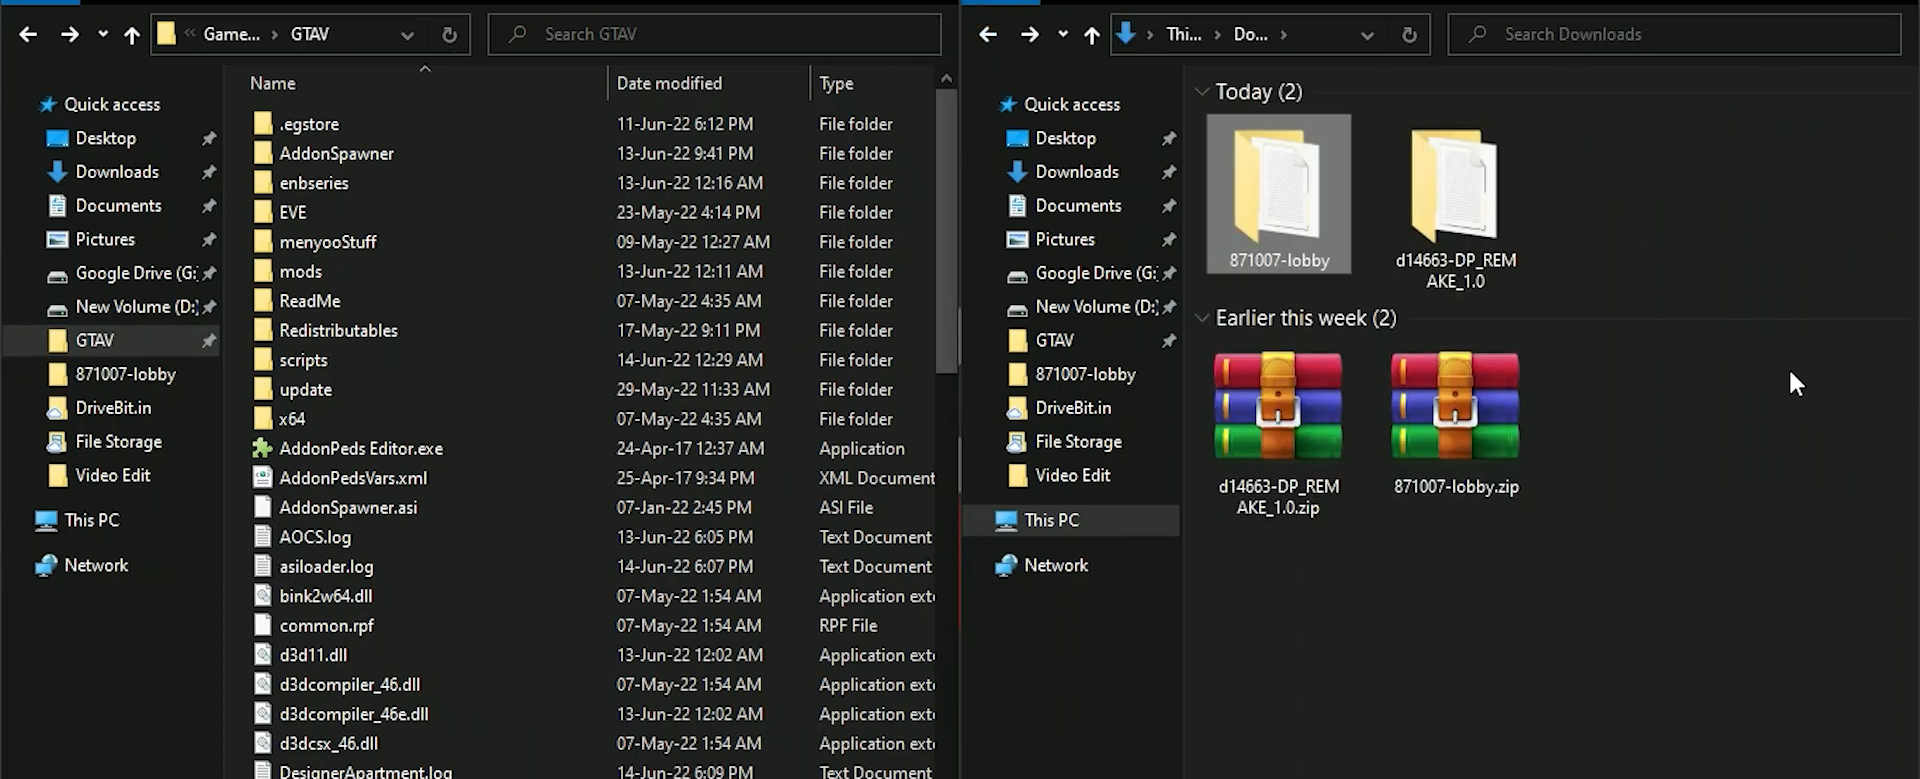
2. After that, extract the downloaded zip files.

After that, extract the downloaded zip files.

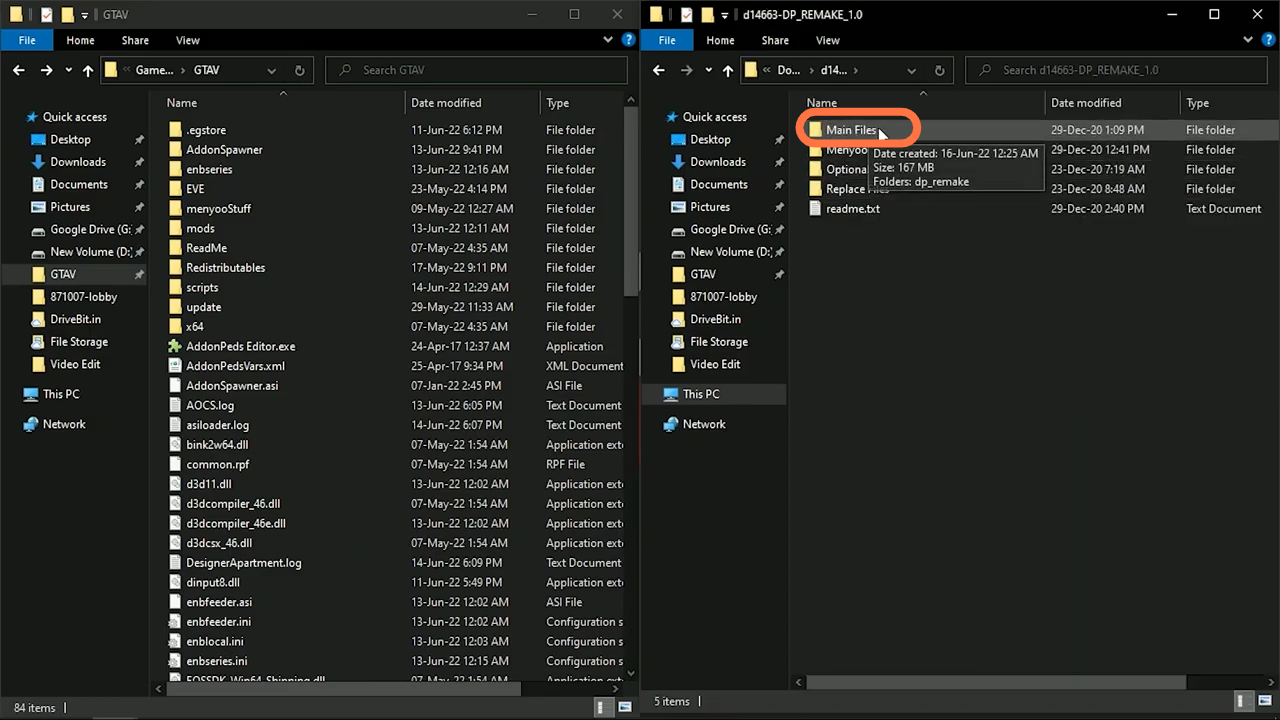
3. Open GTA V main directory and downloaded files directory windows side by side for your ease.

Open GTA V main directory and downloaded files directory windows side by side for your ease.

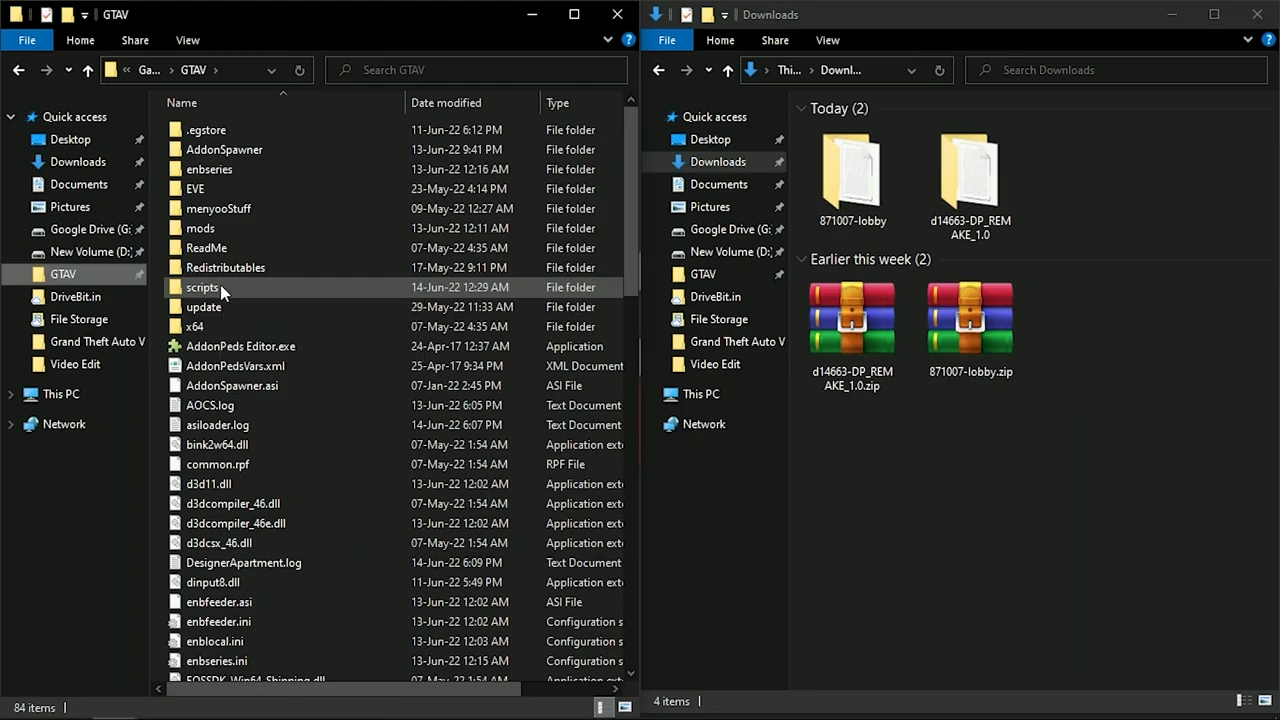
4. Now go to GTA V main directory and enter into script folder.

Now go to GTA V main directory and enter into script folder.

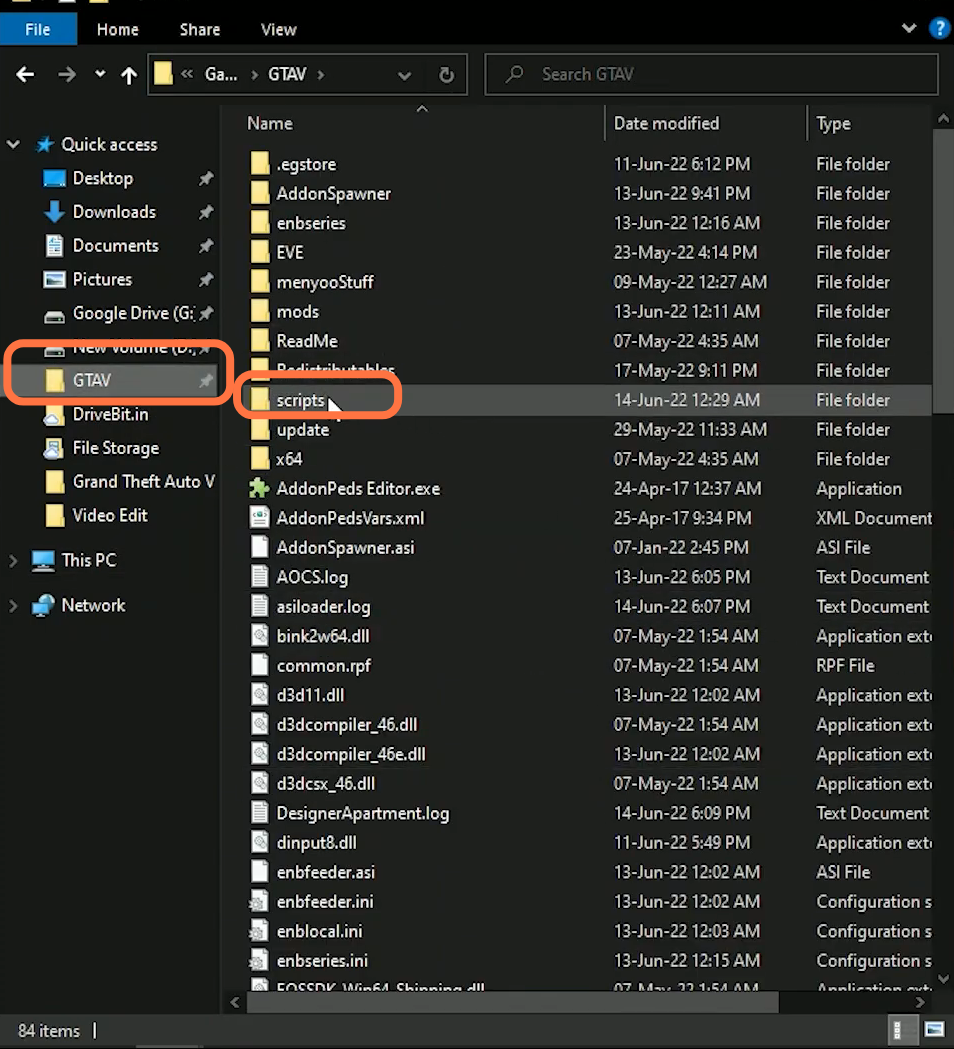
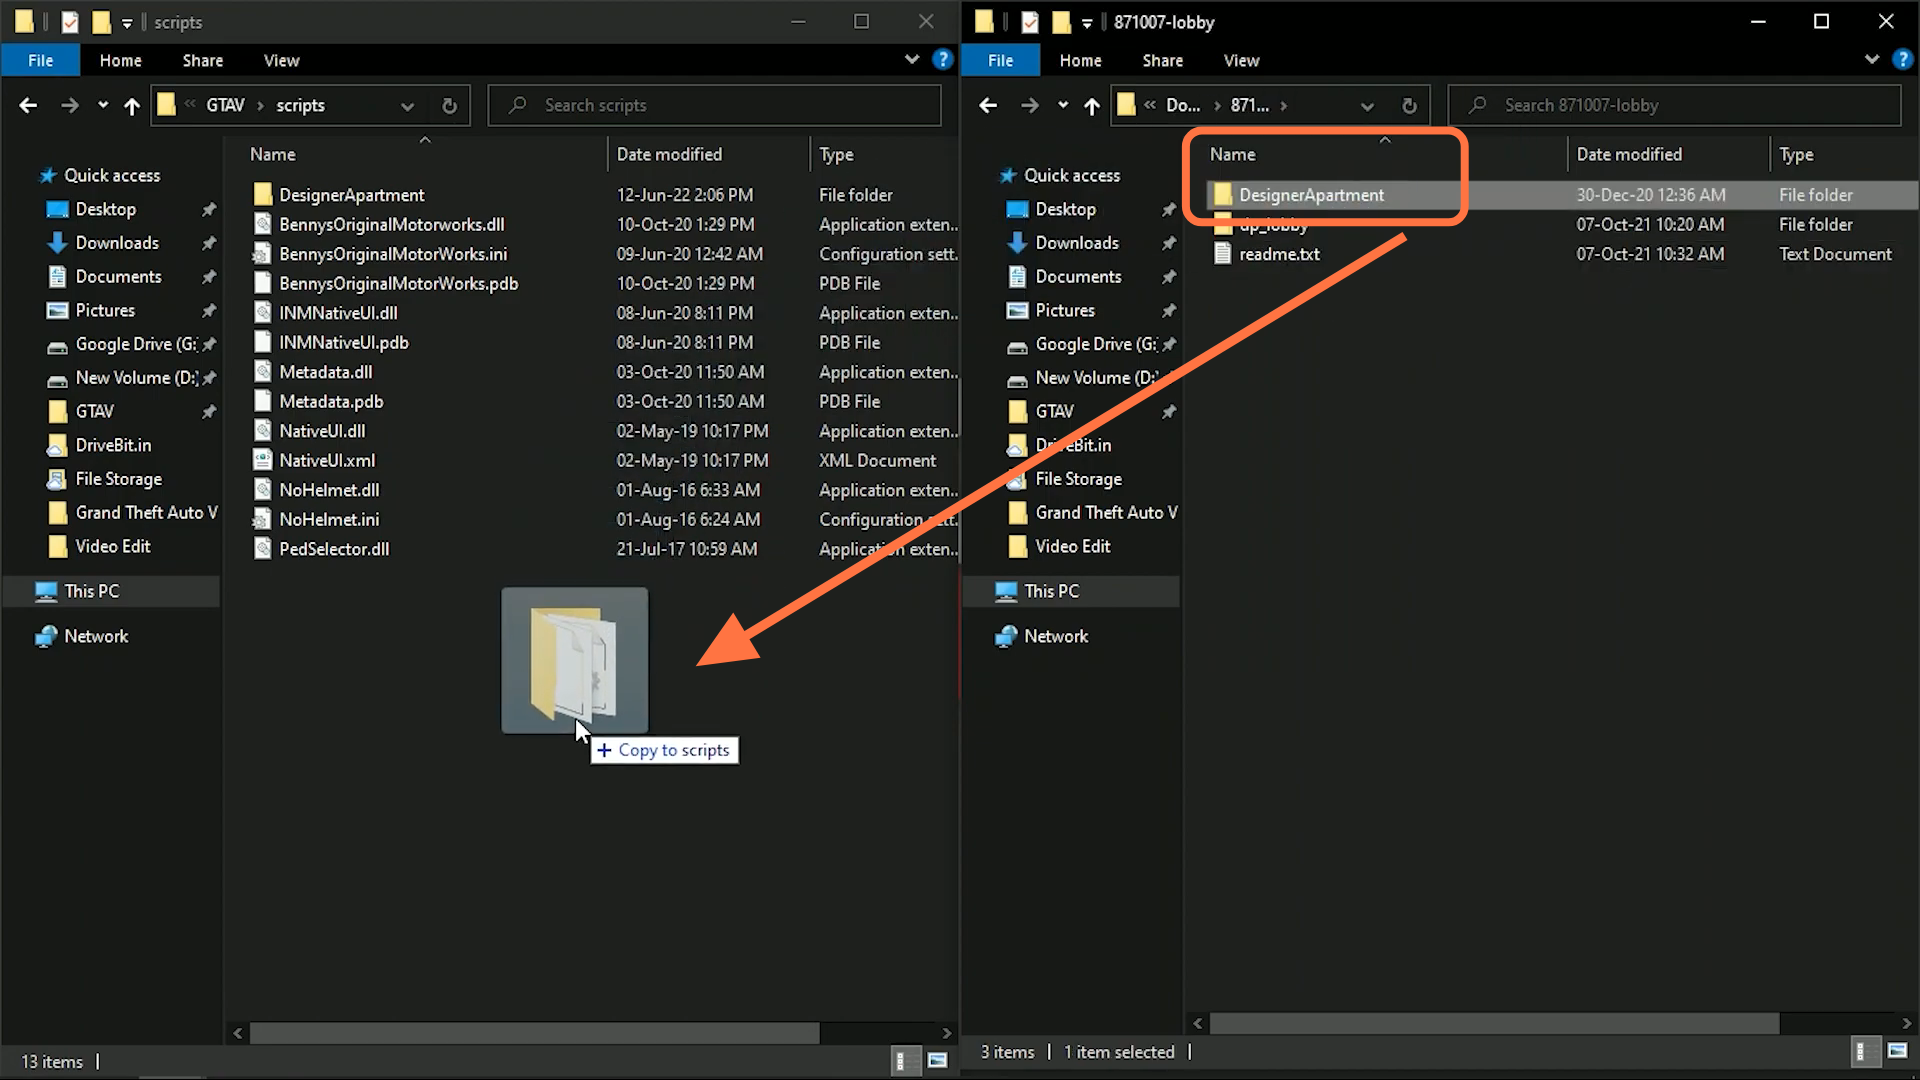
5. Then go to the downloaded “871007-lobby” folder & select the “DesignerApartment” folder to drag it into the scripts folder in GTA V main directory.

 Then go to downloaded "871007-lobby" folder & select "DesignerApartment" folder to drag it into the scripts folder in GTA V main directory.

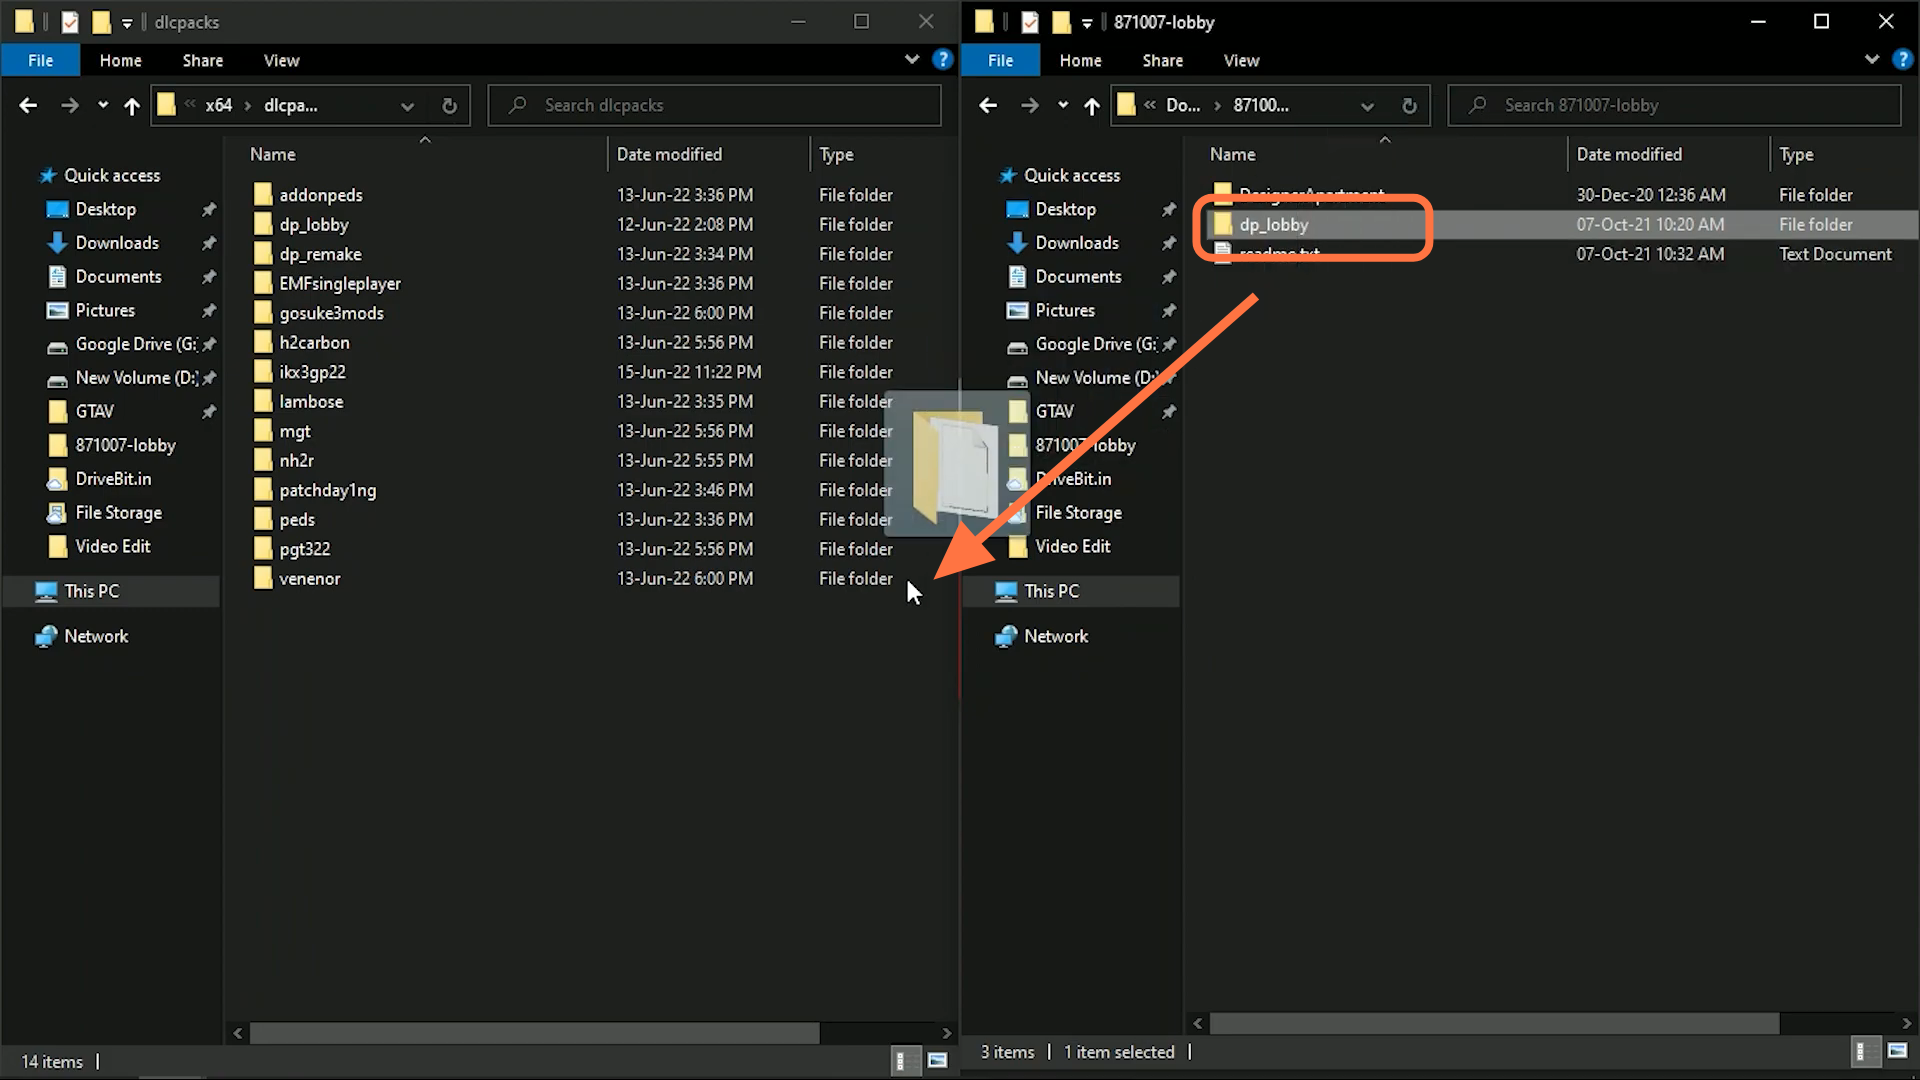
6. Within the GTA V directory, you have to enter into the mods folder and then go to update > x64 > dlcpacks. Drag the “Dp_lobby” named folder into it.

With in GTA V directory, you have to enter into mods folder and then go to update > x64 > dlcpacks. Drag the "Dp_lobby" named folder into it.

7. Now you need to go back to the main directories of both sides.

Now you need to go back to main directories of both sides.

8. Go to downloaded “d14663-Dp_REmake_1.0” folder & open “Main Files” folder.

Go to downloaded "d14663-Dp_REmake_1.0" folder & open "Main Files" folder.

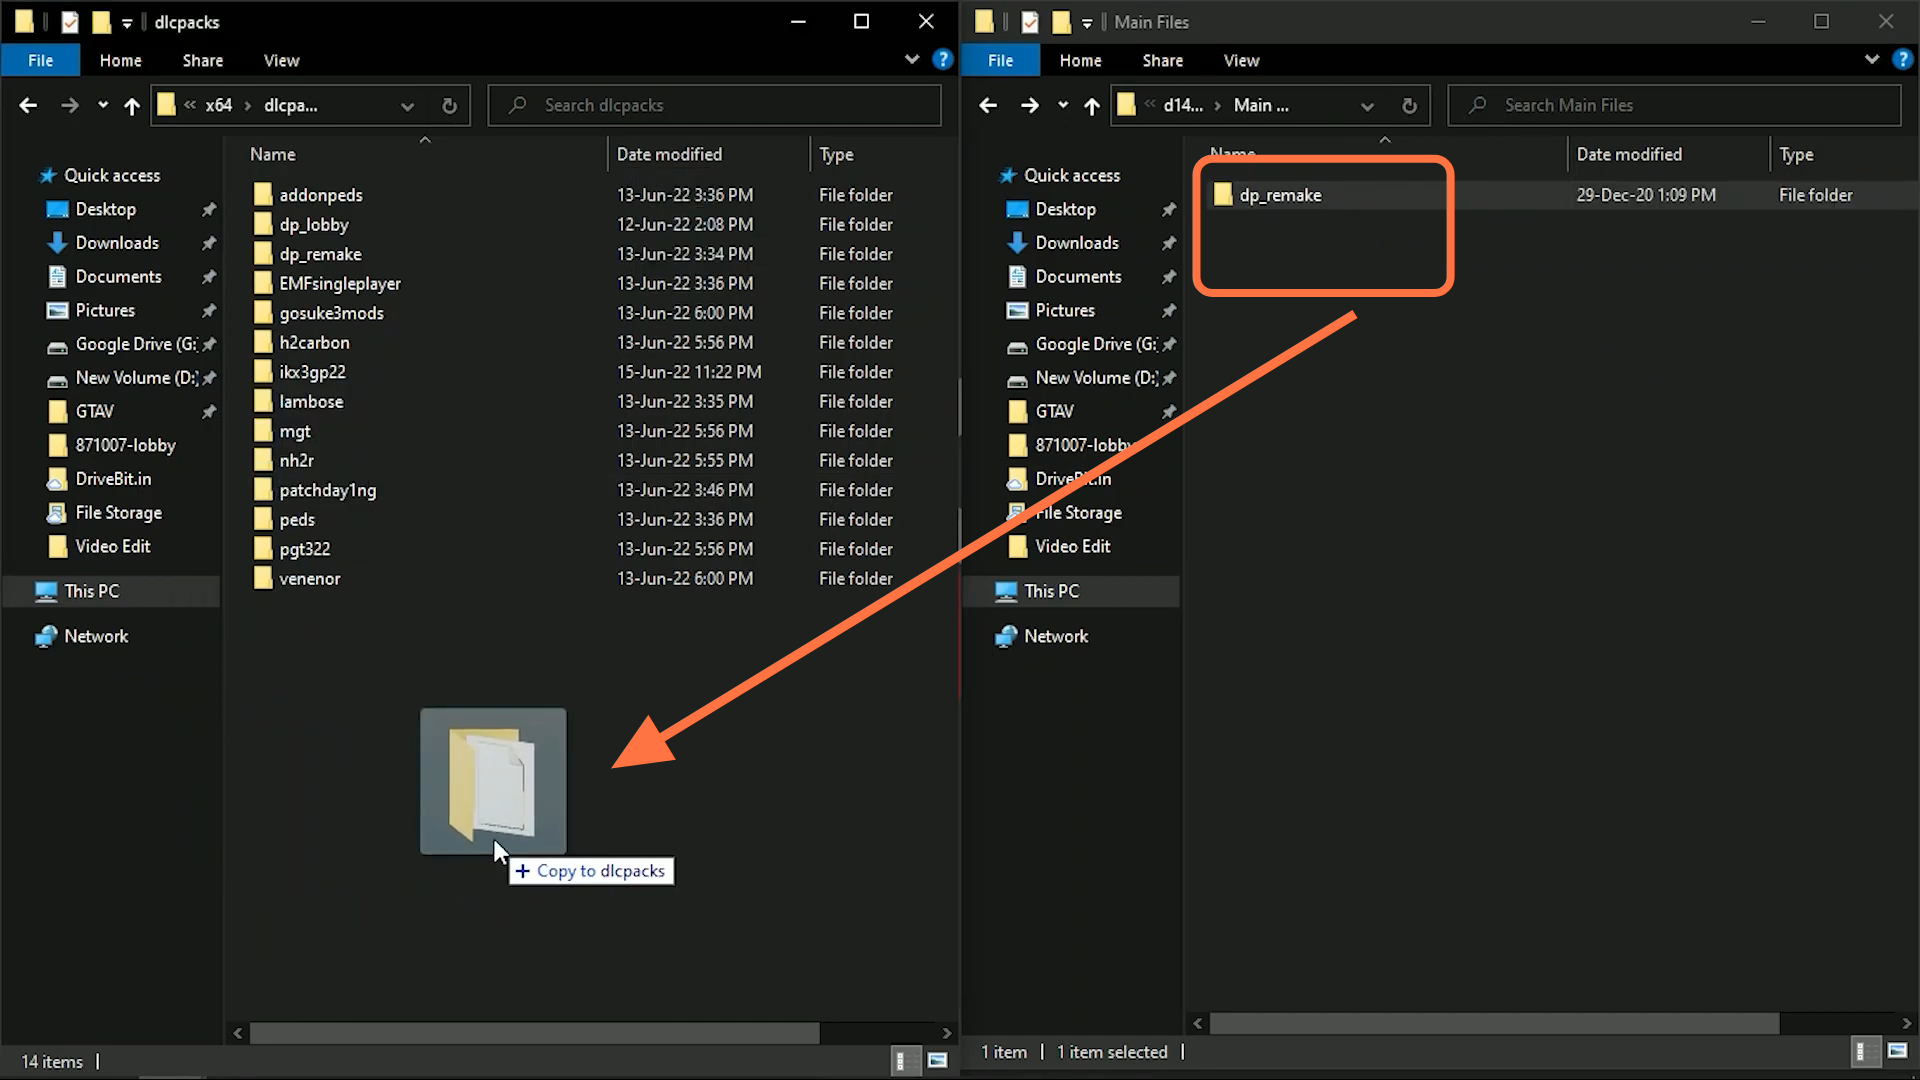
9. After that, you need to select “dp_remake” & enter it into the mods folder. Then go to update > x64 > dlcpacks and drag the “dp_remake” named folder into it.

After that, you need to select "dp_remake" & enter into mods folder. Then go to update > x64 > dlcpacks and drag the "dp_remake" named folder into it.

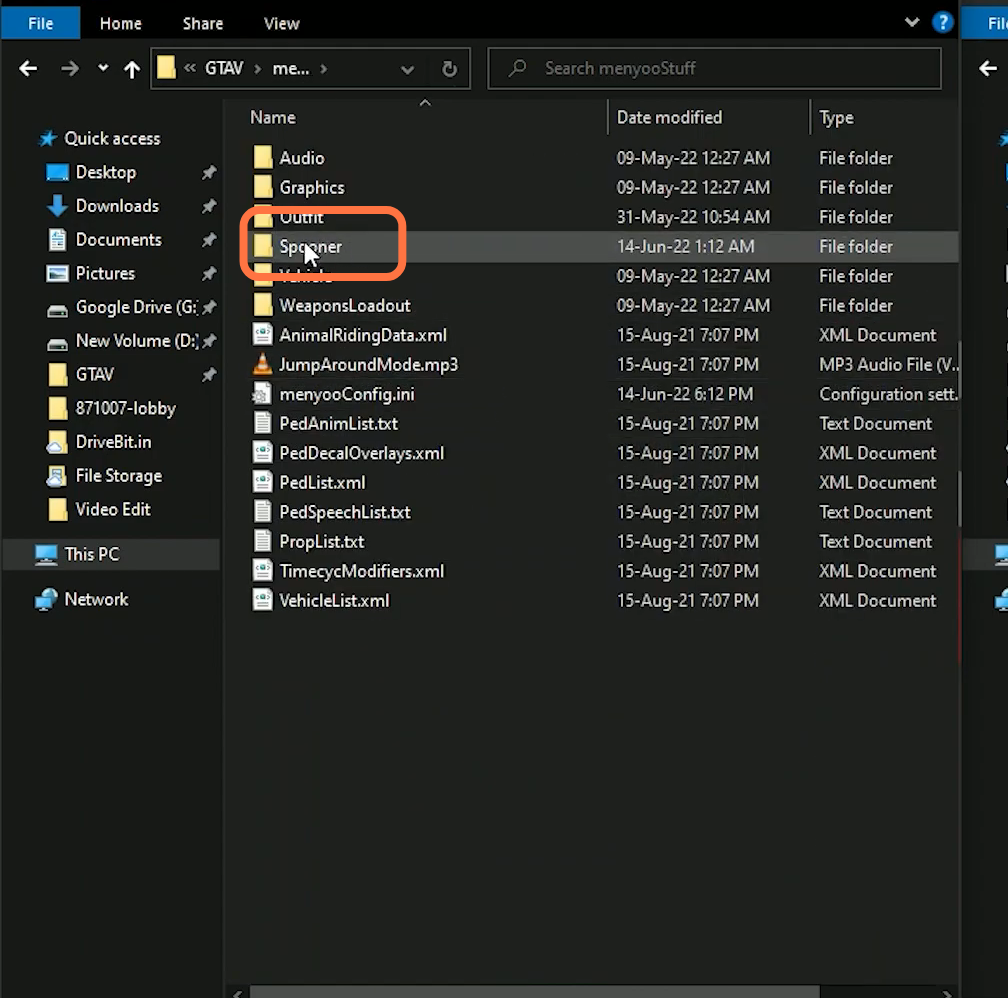
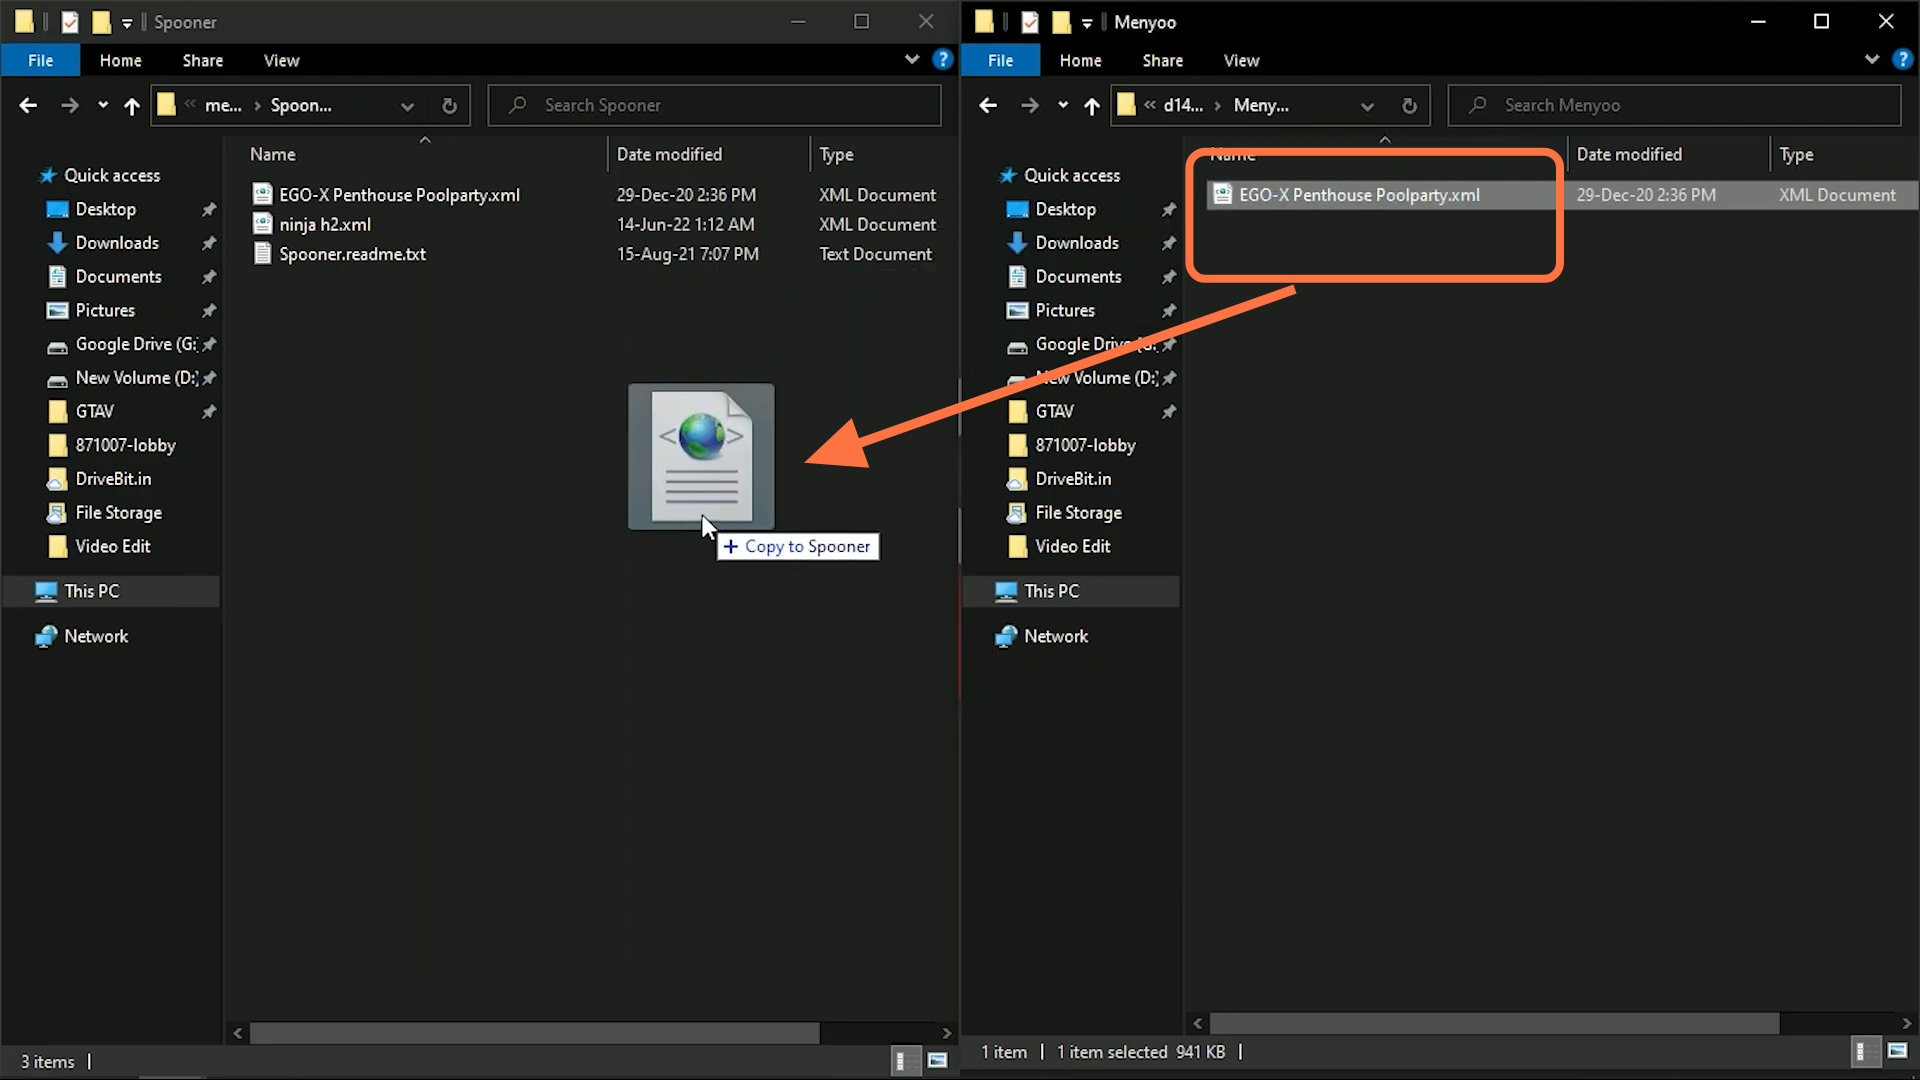
10. Now go back to GTA 5 main directory and enter into “menyoostuff” folder. After that, open the “spooner” folder.

Now go back to GTA 5 main directory and enter into "menyoostuff" folder. After that, open the "spooner" folder.

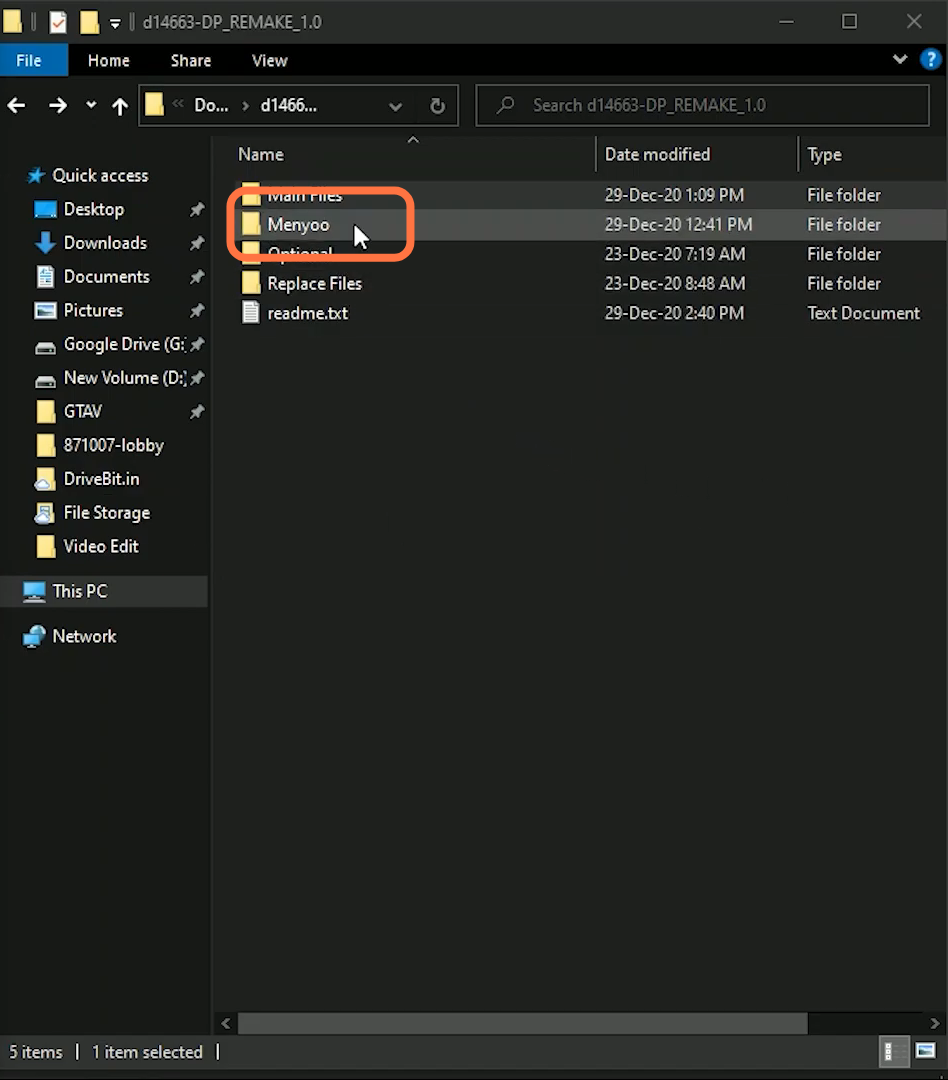
11. Next, go to the Menyoo folder in the downloaded “d14663-Dp_REmake_1.0” folder.

Next, go to Menyoo folder in downloaded "d14663-Dp_REmake_1.0" folder.

12. Drag “Ego-x panthouse poolparty.xml” file into “Spooner” folder in the GTA5 main directory.

Drag "Ego-x panthouse poolparty.xml" file into "Spooner" folder in GTA5 main directory.

13. If you want to install this optional file, you can also install it.

If you want to install this optional file, you can also install it.

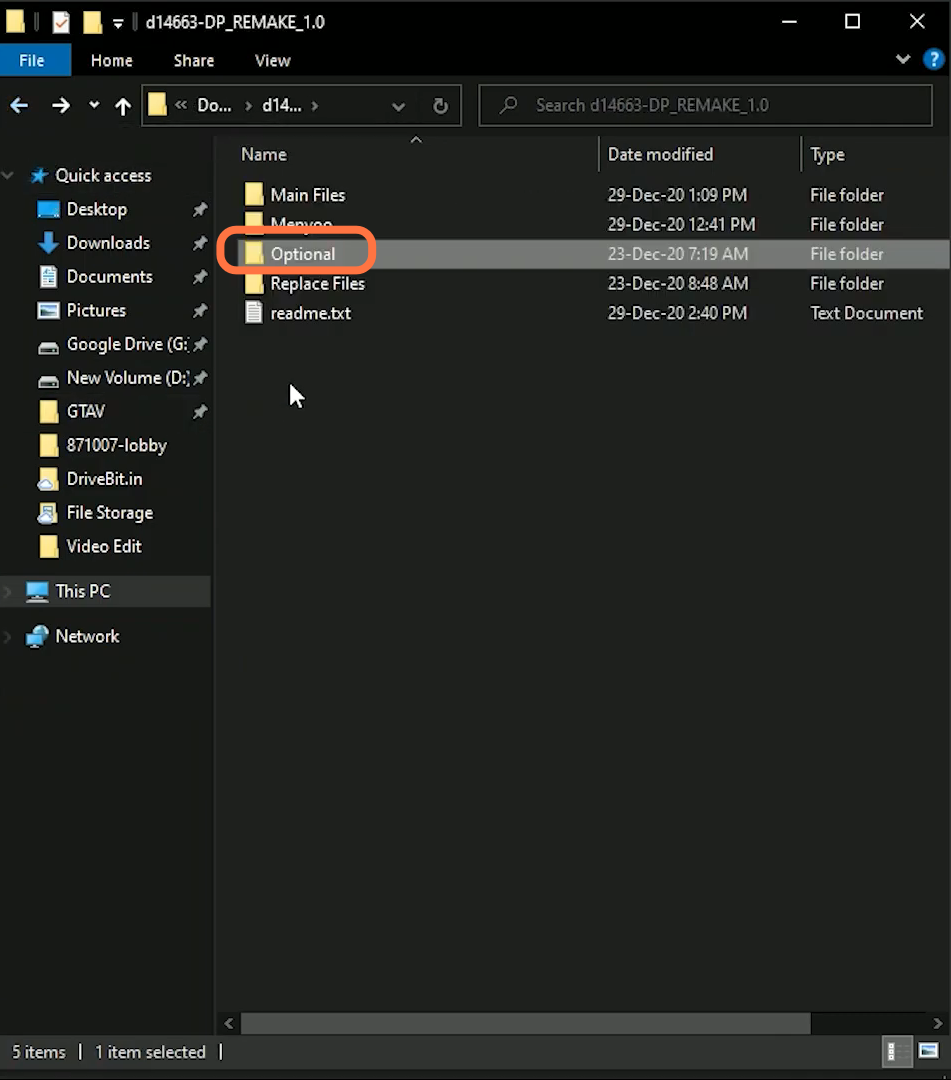
14. To install “Replace Files”, you must read the criteria in the “readme.txt” file and follow it accordingly.

To install "Replace Files", you must read the criteria in "readme.txt" file and follow it accordingly.

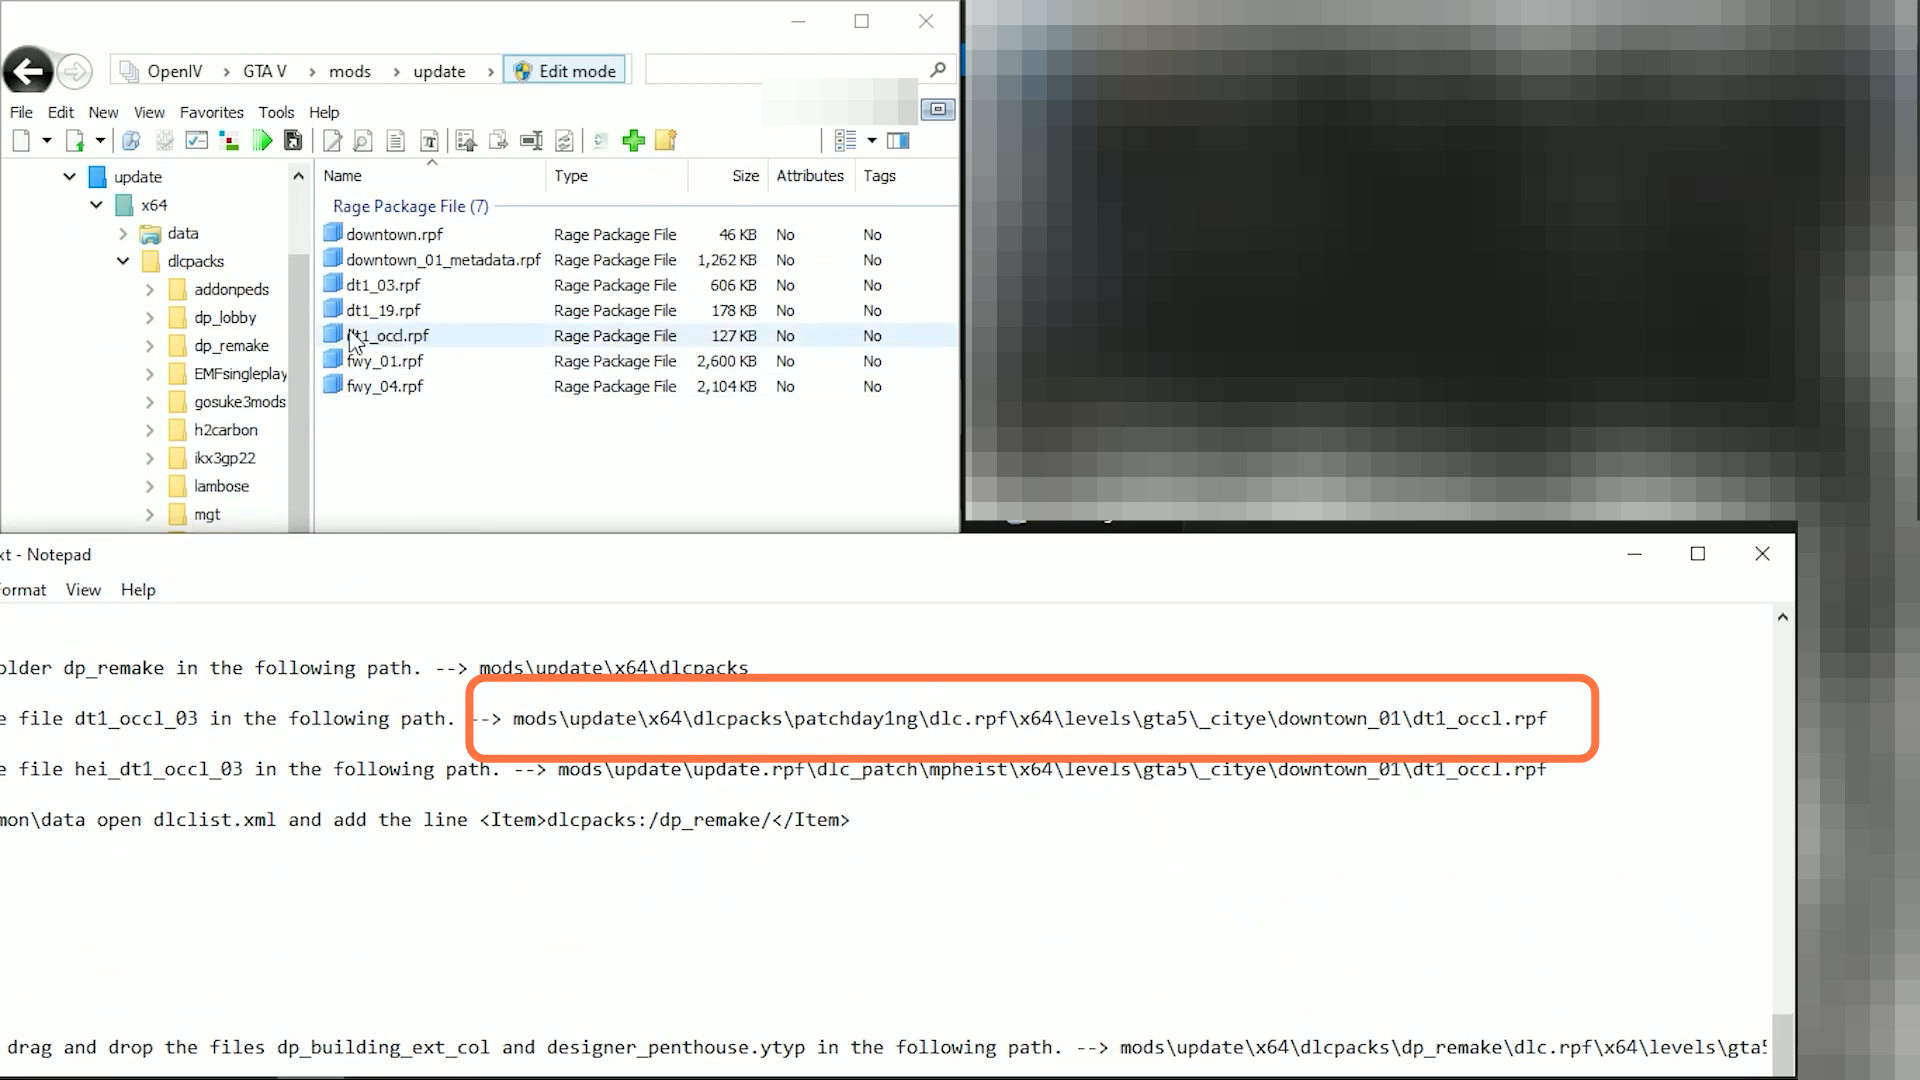
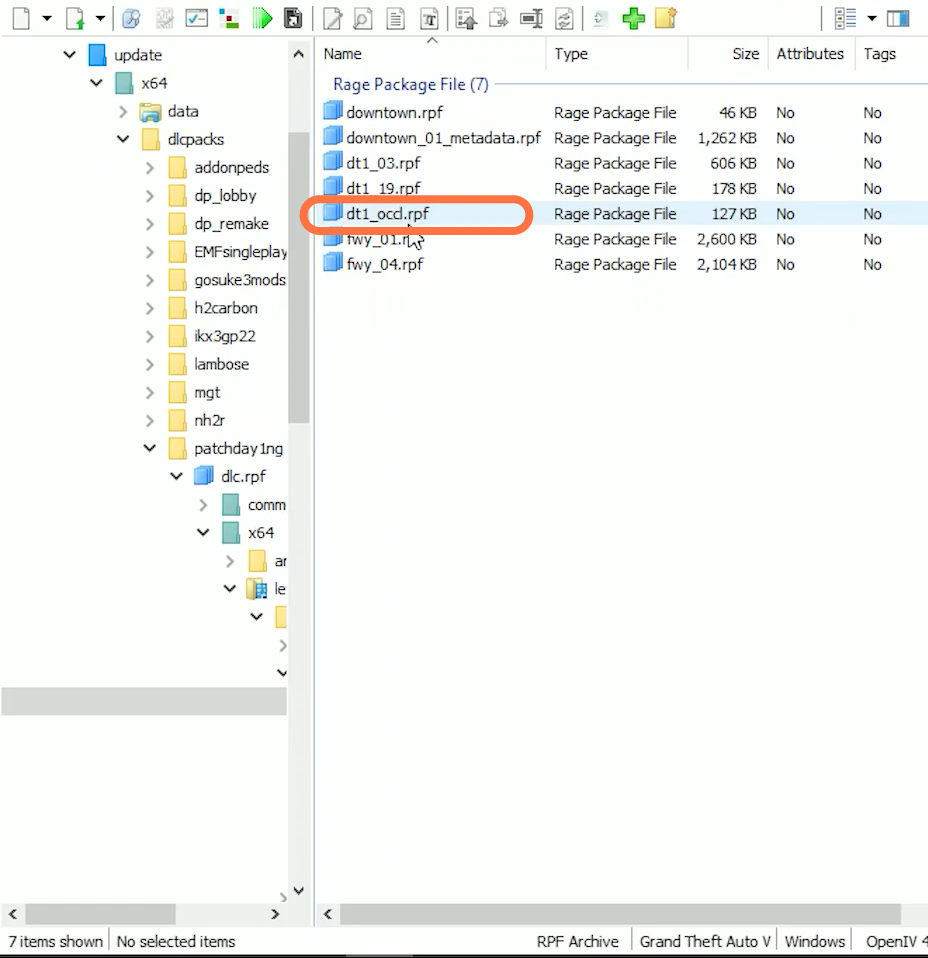
15. Then open the “Open IV” and press “Edit Mode”. Follow the path given in readme.txt file where you need to go to mods > update > x64 > dlcpacks > patchday1ng > dlc.rpf > x64> levels > GTA5> _citye > downtown_01 > dt1_occl.rpf

 Then open the "Open IV" and press "Edit Mode". Follow the path given in readme.txt file where you need to go to mods > update > x64 > dlcpacks > patchday1ng > dlc.rpf > x64> levels > GTA5> _citye > downtown_01 > dt1_occl.rpf

16. Then click on into “dt1_ocd.rpf” file.

Then click on into "dt1_ocd.rpf" file.

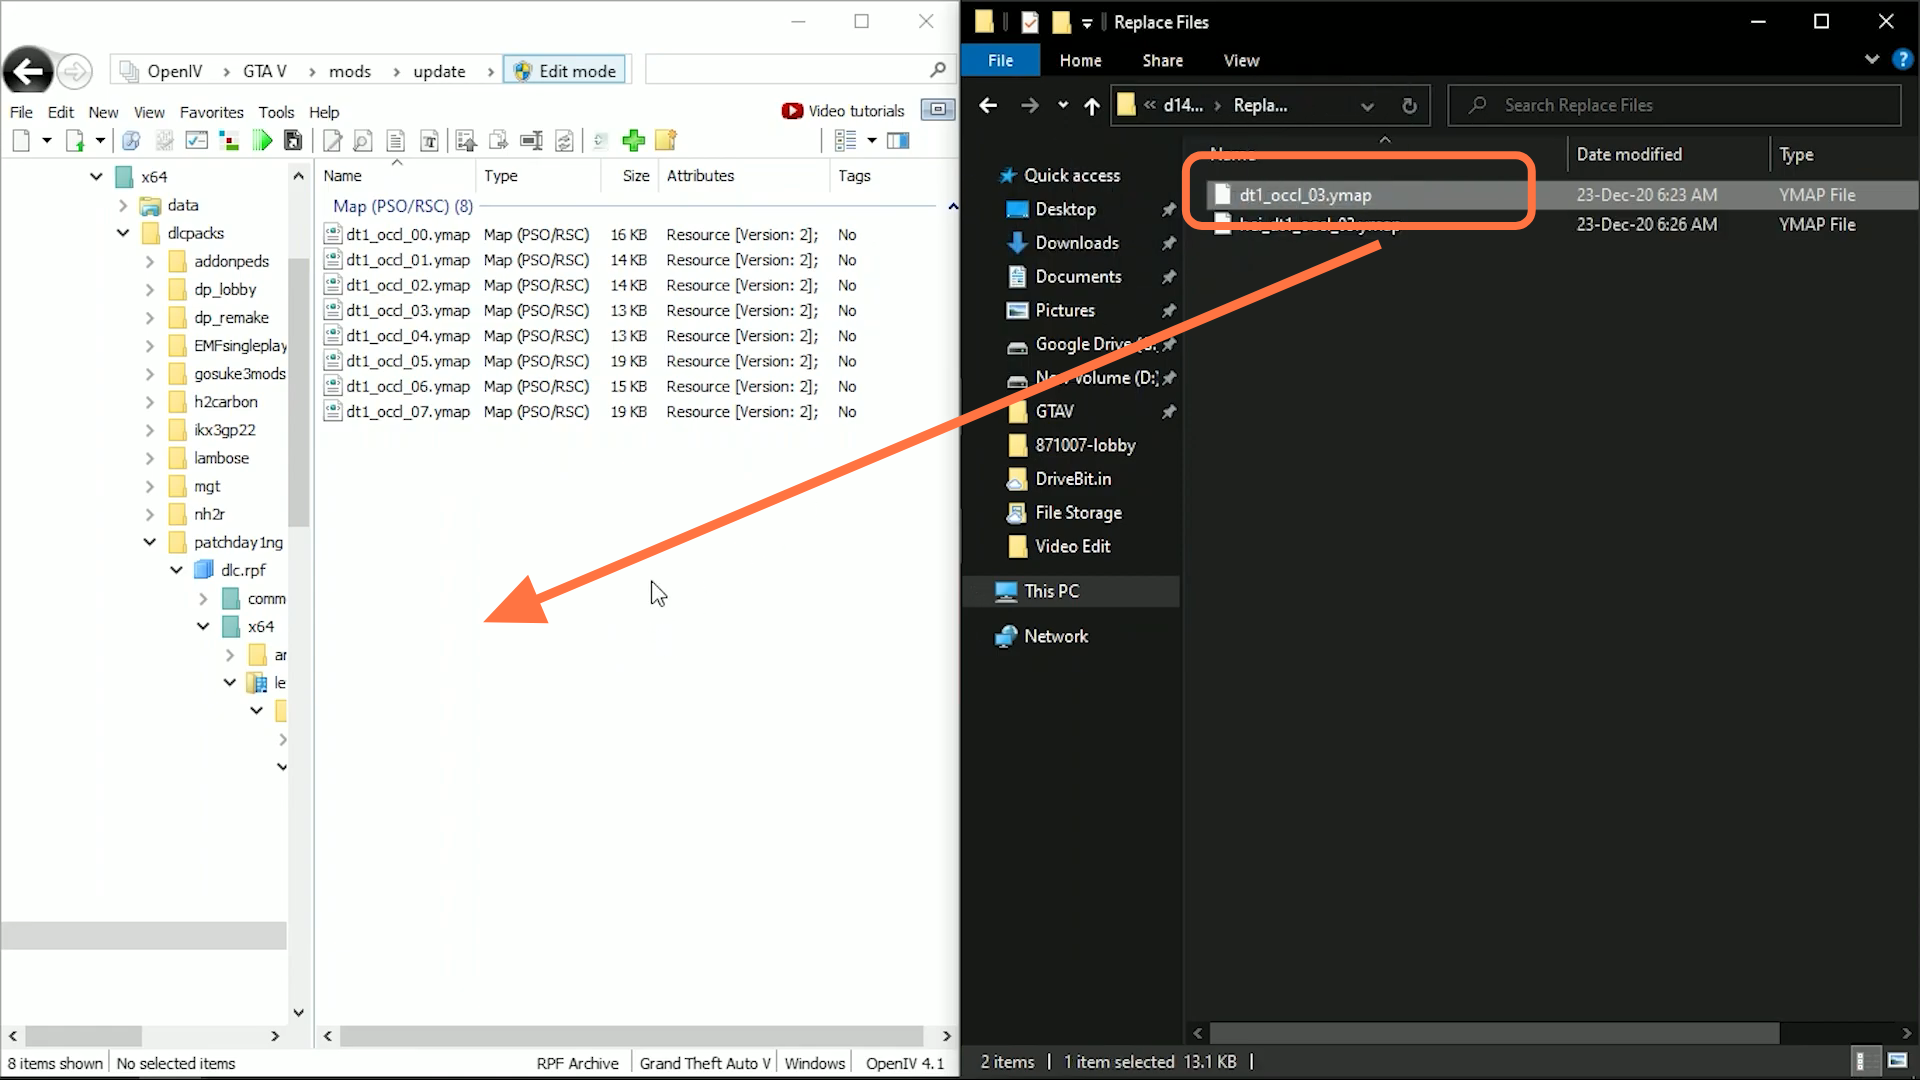
17. Open the “Replace Files” folder and drag the “dt1_occl_03.ymap” file into this directory.

Open "Replace Files" folder and drag "dt1_occl_03.ymap" file into the this directory.

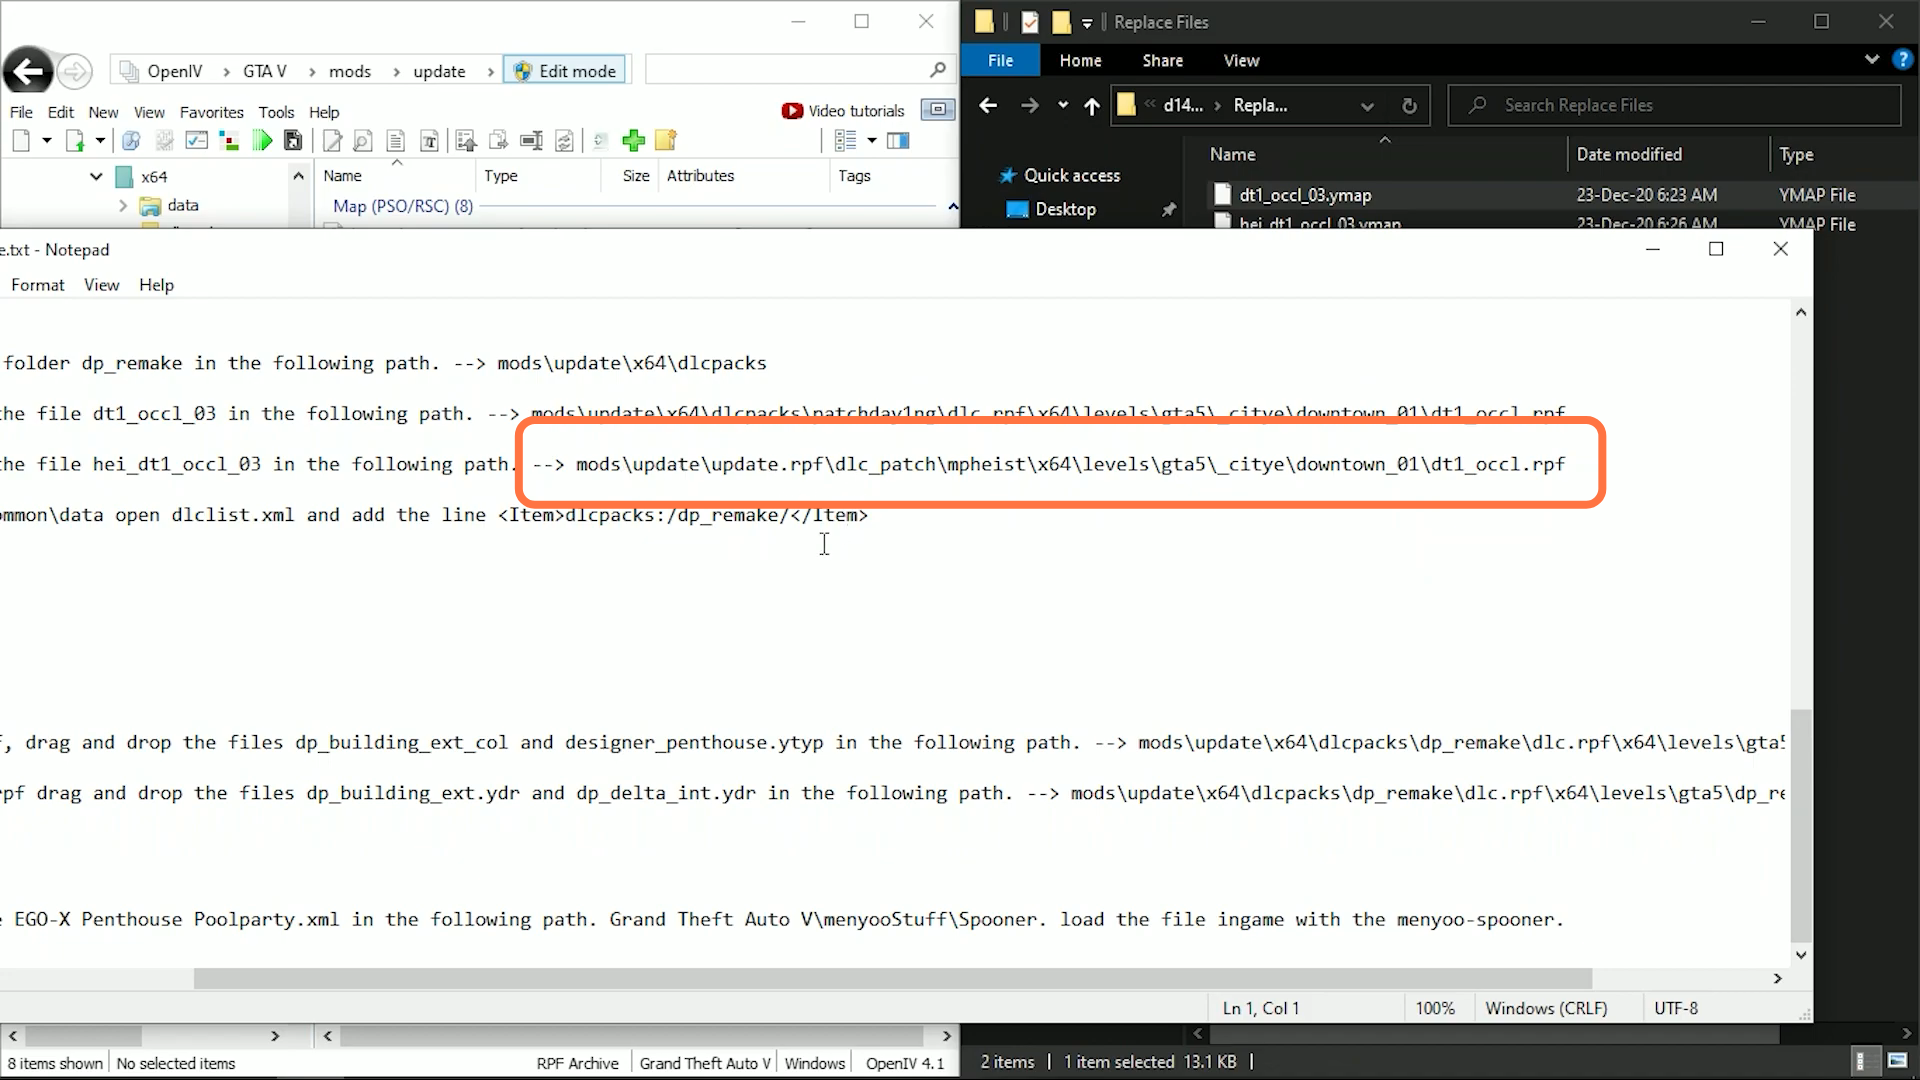
18. Now for the second file, you need to follow the path accordingly: mods > update > update.rpf > dlc_patch > mpheist > x64 > levels > gta5 > _citye > downtown_01 > dt1_occl.rpf.

 Now for the second file, you need to follow the path accordingly: mods > update > update.rpf > dlc_patch > mpheist > x64 > levels > gta5 > _citye > downtown_01 > dt1_occl.rpf.

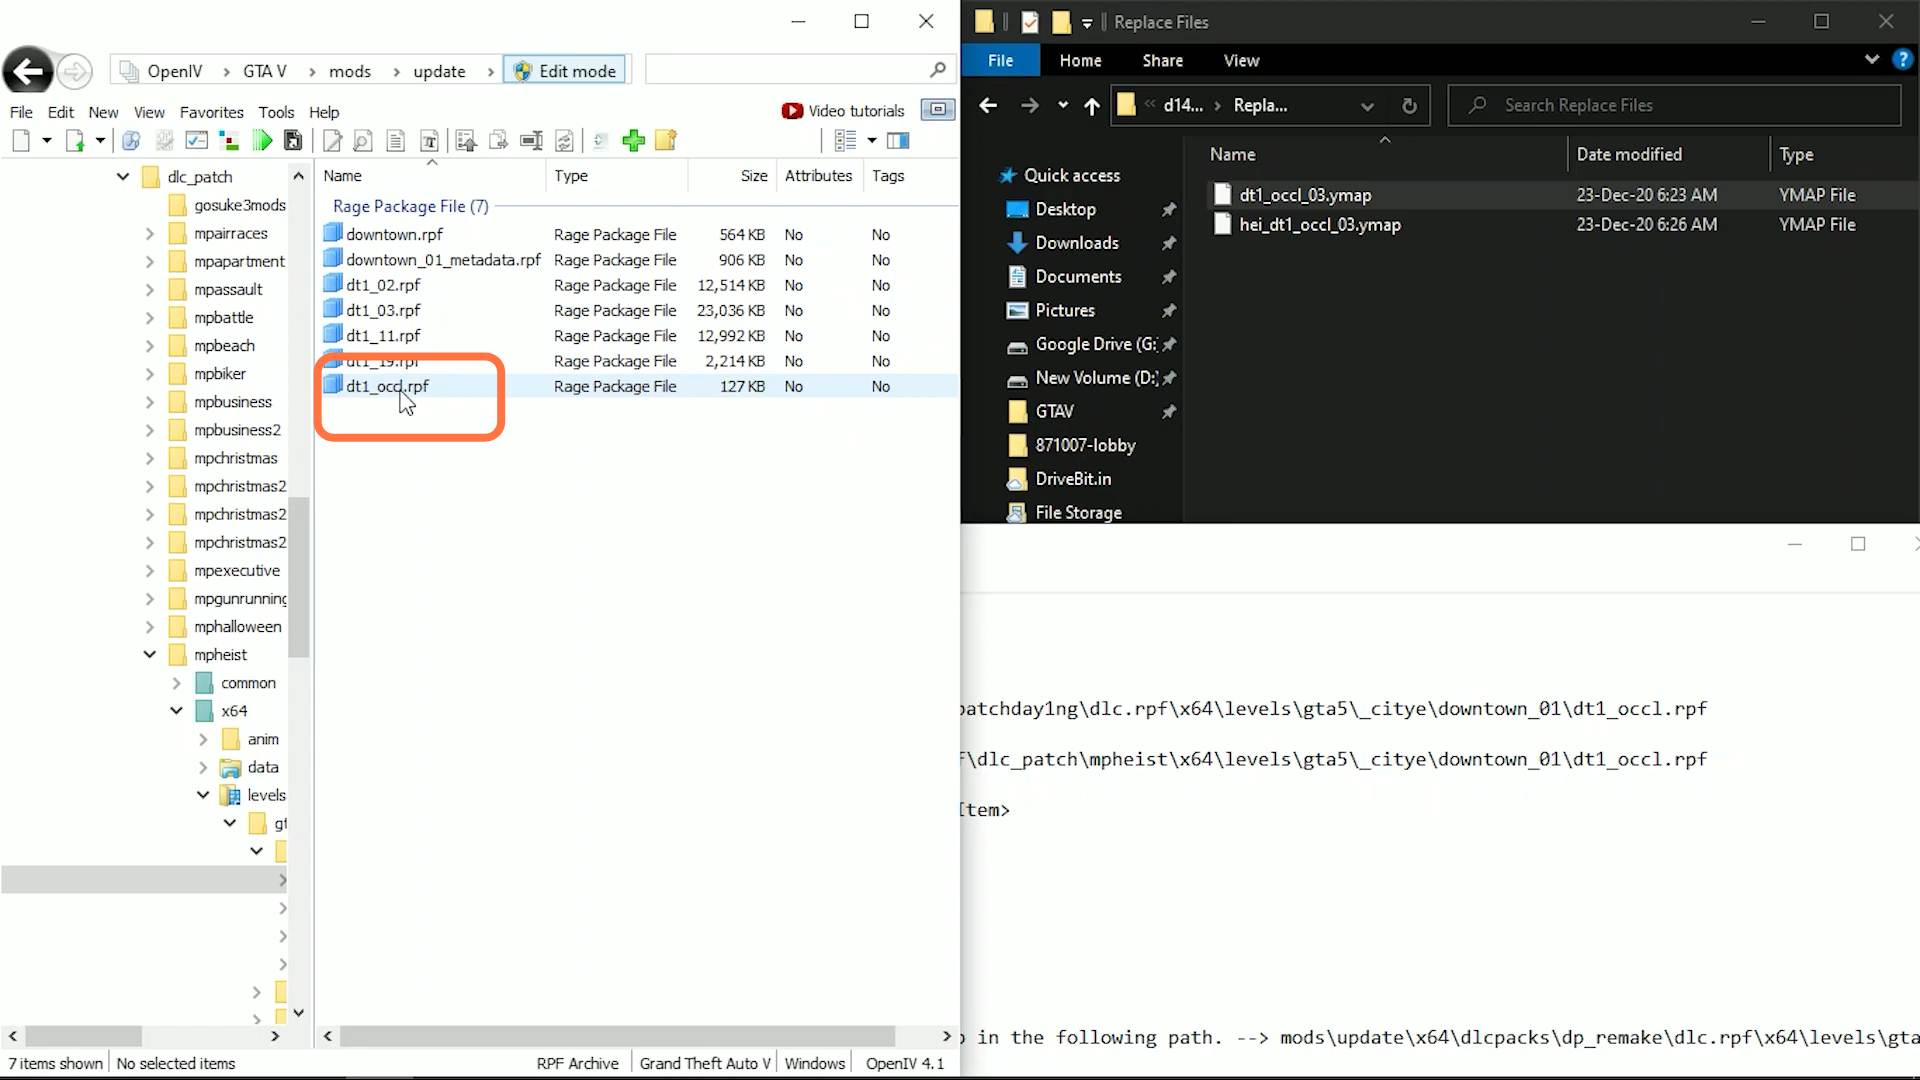
19. And double-click on “dtl_occl.rpf” file.

And double-click on "dtl_occl.rpf" file.

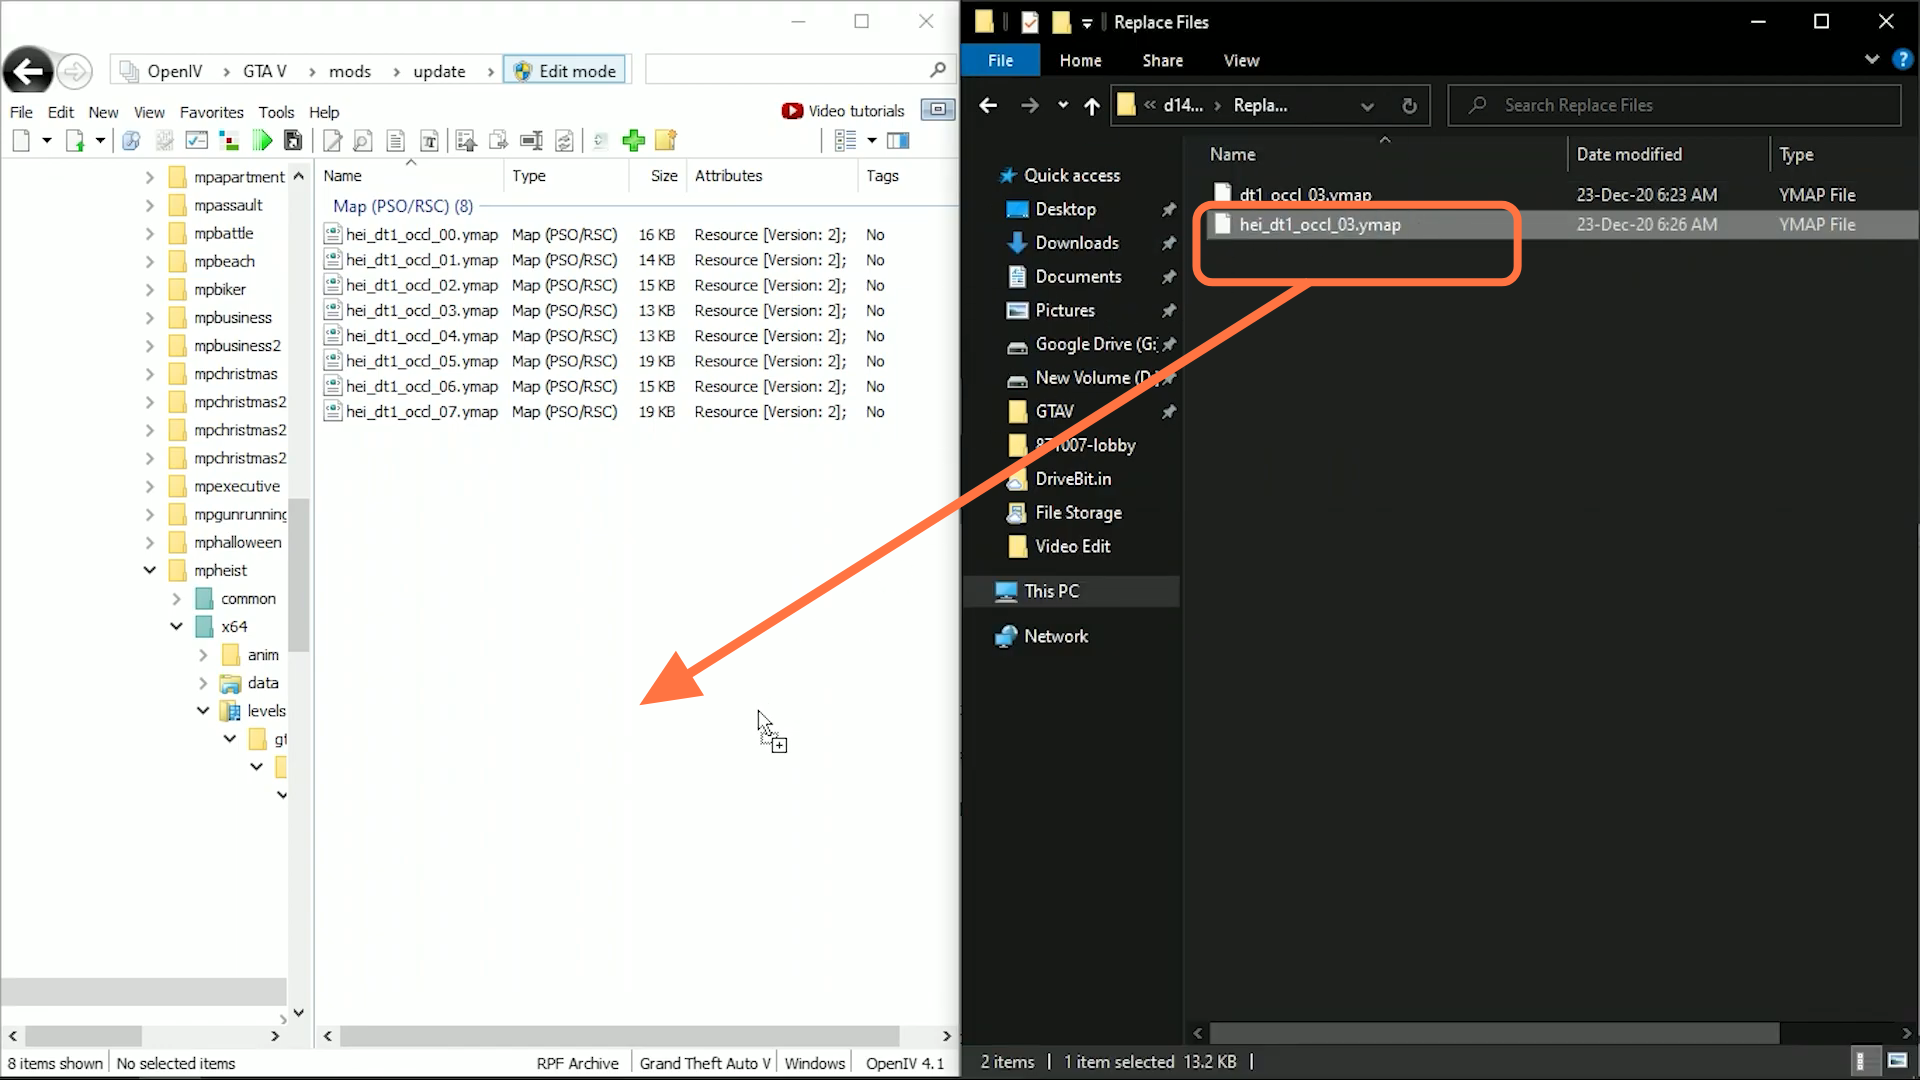
20. You need to drag the second file “hei_dt1_occl_03.ymap” file there.

You need to drag the second file "hei_dt1_occl_03.ymap" file there.

21. Now both the files are successfully installed on your PC. Now you can open the game to check the Garage & Apartment.

Now both the files are successfully installed on your PC. Now you can open the game to check Garage & Apartment.

Leave a Reply

Your email address will not be published.