Honkai Impact 3 is a role-playing action game. As you can see the title of the game, it is the third addition in the Honkai game series. Honkai Impact 3 revolves around a group of girls who have to survive in a land full of zombies and beasts. They have to fight for their survival. All the characters of the previous games are right there in this addition. You can customize the equipment and weapons of the characters. You have to make a team of three in order to battle against the zombies and beasts.
Every character has got fighting skills for the battle. During the battle, you can replace the characters with one another. Along with the battle you also have to explore and find some collectible things. You have to achieve all the objectives given to you.
In the multiplayer mode of Honkai Impact 3, you can play with your friends. Try to win and unlock some weapons and equipment. Honkai Impact 3 is a free-to-download game available on the Google play store and Apple app store. Go download and enjoy this interesting role-playing game.
The characters of the Honkai Impact 3 game are categorized into five groups.
The leading characters in group S are Kiana (Nether Herrscher) and Fu Hua (Shadow Knight). They are excellent and really damaging for the enemy. The most prominent characters in group A are Fu Hua (Phoenix) and Kiana (Knight Moon Ray). These characters can cause strong fire damage. The main heroes in group B are Kallen (Sixth serenade) and Murata Himeko (Bloody rose). They are very easy to play with and have some good equipment.
Some of the main characters in group C are Yae Sakura (Miko Gyakushinn) and Murata himeko (Scarlet fusion). The most prominent heroes in group D are Murata Himeko (Battle storm) and Mei (Scarlet pulse). These are the weakest on the list.
Honkai Impact 3 (Version 5.0)

<img style="max-width: 100%;" src="https://gamkeys.b-cdn.net/uploads/2021/08/Honkai-Impact-3-Tier-List-Ver-5.0-2-min-1.png" alt="Honkai Impact 3 (Version 5.0)"</img>
Tier S

| Character |
| Kiana (Nether Herrscher) |
| Fu Hua (Shadow Knight) |
| Theresa (Heavenly hymn) |
| Bronya (Dimensional Breaker) |
Tier A

| Character |
| Fu Hua (Nocturnal squire) |
| Kiana (Knight Moon Ray) |
| Fu Hua (Phoenix) |
| Bronya (Valkyrie’s chariot) |
| Bronya (Dark Core) |
| Bronya (Snowy sniper) |
| Rita (Phantom iron) |
| Rita (Moonsoul) |
Tier B

| Character |
| Kallen (Sixth serenade) |
| Murata Himeko (Bloody rose) |
| Murata Himeko (Eclipse vermilion knight) |
| Fu Hua (Accipiter Valkyrie) |
| Rita (Umbrella Rose) |
| Yae Sakura (Gushinnso Memento) |
| Yae Sakura (Flaming Sakitama) |
Tier C

| Character |
| Yae Sakura (Miko Gyakushinn) |
| Murata himeko (Scarlet fusion) |
| Murata himeko (Valkyrie’s Triumph) |
| Murata himeko (Kriegsmesser) |
| Kallen (Sundenjager) |
| Kallen (Imayoh ritual) |
| Mei (Shadow haste) |
| Theresa (Violet Executor) |
| Theresa (Sakuno rondo) |
| Theresa (Luna kindred) |
Tier D

| Character |
| Murata Himeko (Battle storm) |
| Mei (Scarlet pulse) |
| Mei (Valkyrie Bladestrike) |
| Kiana (White comet) |
Sixth Serenade Character Guide
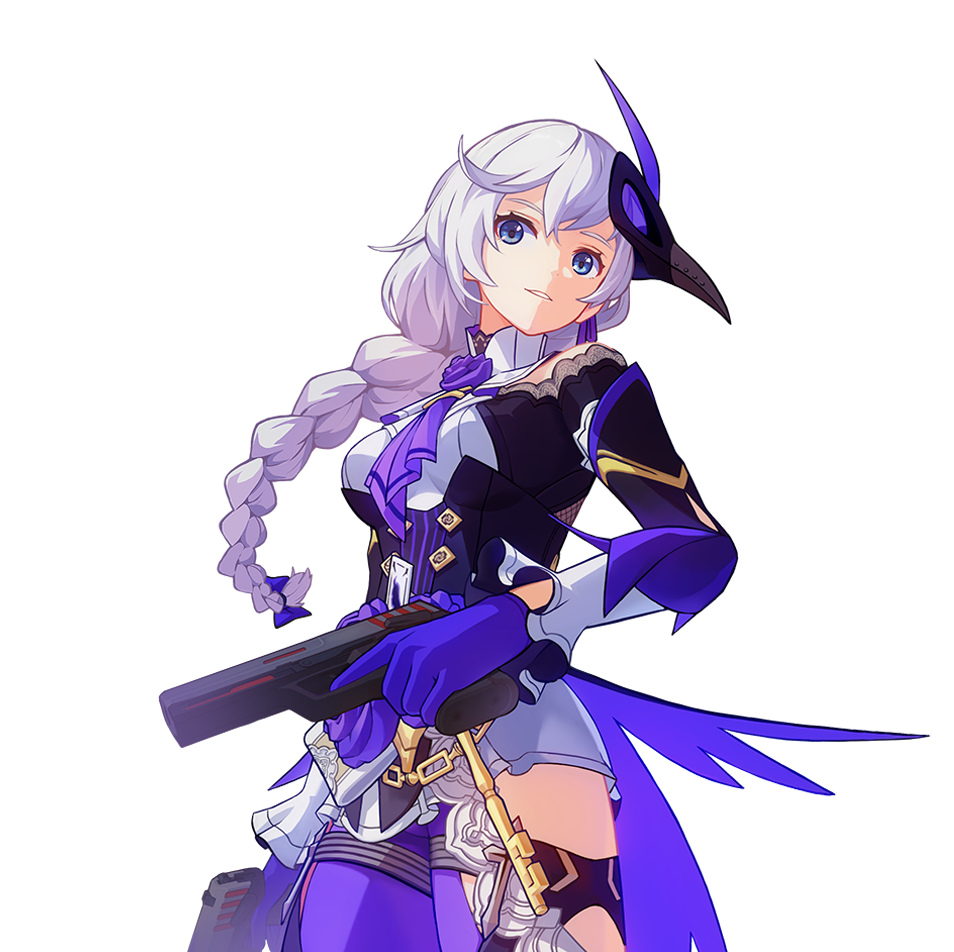
Sixth Serenade Kallen, AKA Ice Kallen or 6S, is the awakened form of Divine Prayer. Shei is a psychic type damage dealer, specializes in fighting large groups of enemies.
In the current meta, 6S is the strongest psychic type character in the game. She has many advantages, but one of her biggest strengths is that she is the easiest character to play. Due to this reason, she is super popular among players using touch control on a phone.
Raven Mark
6s have a special mechanic, I will just call it the Raven Mark. The Raven mark shows up as a black dot on the enemy. After 5 seconds, the Raven mark will explode dealing Ice Damage based on your ATK.
Reapplying the Raven Mark on the same target will enhance the mark, at 3 stacks the mark will instantly explode, dealing 600% of ATK as Tce Damage to the target and 200% of ATK as Ice Damage in a small area. At 3 stacks, the Raven Mark Explosion will also time-slow the target for 2 seconds.
To put it simply, if you stack a large group of the enemy in abyss, let’s say there are 10 units on the field, 10 Raven mark on 3 stacks will deal 600%+ (200%xI0)=2600% Ice damage to all 10 enemies on the field, The more targets you stacked, the more damage.
Applying Raven mark
Here are the few ways 6S can apply Raven Mark.
1. Using ultimate applies 3 stacks of Raven Mark instantly.
2. QTE will apply 2 stacks of Raven Mark.
3. Combo attack applies 1 stack of Raven Mark.
4. Evasion Skill applies 1 stack of Raven Mark.
So you want to enter the battle with QTE, and you can chain 1 combo attack for free after the QTE, getting 3 stacks of Raven Mark to explode immediately. After that, use the ultimate will cause another 3 stacks of Raven Mark to explode.
If you do this correctly, each time 6S enters the field, you are effectively detonating a Nuke, instantly wiping out large groups of enemy with just 2 buttons.
The Combo Attack
6S has one of the most powerful combo attacks in the game. This combo attack will pass through the enemy, hitting them with Ice damage, and apply 1 stack of Raven Mark.
You can use 1 combo attack for free after the QTE or the last hit of your normal attack. If you have 1 bar of the Special Meter, you can press the attack button to consume the special meter and use another combo attack right away.
After using the ultimate, your special meter will regenerate rapidly, so you can chain multiple combo attacks in a short amount of time, stacking even more Raven Marks for massive damage.
Note that you are completely Invincible to direct damage from start to finish when you use the combo attack. Since you can use it so often, about half of the time 6S is actually invincible towards enemy attacks, making her the easiest character to play.
Full Nohime set+Tranquil Arias is the best build in Abyss. Note that the weapon Tranquil Arias is completely broken, so having it is much more important than having good stigma. 6S absolutely needs this pistol to be OP!
General boss fight build. For F2P stigma, just use Shigure Kira set. Stigma for 6S is not that important, having Tranquil Arias gives her the biggest power boost.
Other weapon choices. Note that even the 2nd best choice Thunder Kikaku is still far worse than Tranquil Arias. For F2P option just level your Shamash to Lv50.
Abyss Team
The best team for 6S. The basic idea is to stack all 3 waves of the enemy (the last wave spawns at around 1 min 50s), gather them up, freeze with Snowy to trigger Nohime set’s full benefit, break shield with Tyr on Snowy and clean up with 6S QTE+Ultimate. Probably the easiest team to play and very effective. This team only fears Jonin and nothing else.
A different variant of the first team. The idea is to gather mobs, stun them with Eliudnir or Ranger with a stun gun, QTE with Chariot and Tyr for shield break, and clean up with 6S. This team is probably one of the strongest teams for Gluttony Abyss because Chariot QTE has knock-up that can trigger the Gluttony buff, followed by massive damage from 6S.
The Conclusion
In conclusion, 6S is one of the best characters in the game. Since she is completely free if you play during the event period, I strongly suggest you spend crystals on her weapon, the Tranquil Arias.
If you have some extra cash, pulling 1 extra copy of 65 character cards will put you a lot closer to SS rank 6S. Her fragments can be farmed in both old and new Openworld.
Goushinnso Memento Sakura
Memento Sakura is the awakening form of Shadow Dash, an S-rank Valk who specializes in dealing massive Ice Damage in quick bursts. She was very powerful when released, but after years of service, Mihoyo gradually changed the game environment so she is no longer a top-tier character.
All the information in this guide is updated to the patch 2.5 meta. Since Memento is unlikely to receive any major buffs or support from new stigmata, this guide will probably be the final version.
You can find the following in this guide.
– How to play Memento Effectively.
– Her best team comp/best gears
– Her end game performance.
Memento’s Special Meter

Memento Sakura has a special meter above her HP bar. Each bar represents 200 KP for a maximum of 1000. Using her combo attack will consume 200 KP each slash and do massive AOE Ice Damage.
Note that this combo meter can go negative. For example, if you use the combo slash at 100 KP, after the slash your meter will be empty and the actual value will be -100.
There are several ways you can recover the meter.
- The switch-in skill recovers 205 KP. (Her main source of KP Regen)
- Using ultimate recovers 250 KP (200 more on SS rank)
- Each normal attack recovers 40 KP, the normal attack is a 5 hit combo so 200 total.
- The evasion skill recovers 120 KP
- The SS rank passive skill recovers 10 KP per second when Memento is not on field.
Ice Epiphyllum
Since you need 200 KP per combo slash, Memento’s build-in KP regen is just garbage. This is why you need her Signature weapon, the Zce Epiphyllum.
Ice Epiphyllum not only gives Memento a massive Ice Damage boost, more importantly, it provides her with a lot of KP regen which makes her playable.
Every 5 seconds Tce Epi gives you 200 KP on any attack you do, Ideally, you want mementos to stay on the field for 5 seconds each time she enters so you get 400 KP over that 5 second period (once from entering and once before switching to another character).
Without this sword, you will have 400 less KP each switch, Needless to say, Memento without Ice Epiphyllum is just unplayable, one of the worst characters in the game.
Schrodinger Top
The most effective way to play Memento is to pair her with Schrodinger Top. When you switch in, make sure to dash back your first attack doesn’t hit. Schrodinger Top procs on the first normal/ combo attack you did. So make sure the first hit misses to have all your combo slash enjoy schrodinger top’s benefit.
Under 60 FPS, you can use 4 combo slashes during schrodinger top’s duration.
Abyss Team comp/ Gear
This is currently the best abyss team set-up for Memento. The playstyle is simple, gather with a Ranger and freeze them. Then extend freezing with Dimension Break. Switch in Memento, do a few combo slashes, hit until Ice Epiphyllum is off Cooldown and switches back to Ranger, and restarts the cycle.
Other Gear Suggestions

Nohime full set is an okay alternative. In practice, it is a LOT worse than the Schrodinger Top build.
Best F2P build. Or you can just run full Shigure Kira Set, the difference is very small.
You can fully ignore Memento if you don’t have Ice Epiphyllum, but if you really want to play her without Ice Epi, the Crystal Edge is your best choice.
The freeze you get from this is a LOT better than Plasma Kagehide, and Memento does +40% all damage against Frozen Enemy.
Memorial Performance
If you can fully gear her, Memento can do okay in Memorial Arena. However, due to other better/cheaper options being available, Memento is mostly outdated. She can get a good score on the following bosses.

All of the top scores involve using Schrodinger Top and gamble for that 205%. She is very RNG heavy so expect a lot of resets if you want a top score.
Abyss Performance
Now the real question is “Is Memento still viable after the abyss rework?” The answer is it depends on the temperature. With the current 150K Temp on JP Red Lotus Abyss, Memento just isn’t viable. With the absolute best build she can barely clear 20+ floors with all Creature type elite enemy spawns. The abyss rework really screwed her over as the enemy has way too much HP, doing 150k damage per switch just isn’t good enough anymore.
Memento can still do okay on the last floor against Ganesha/Bronya. However with the rising temperature, at 150k it’s getting really close.
She will do fine in Lower temperature servers, but on JP/CN Server where the abyss is a lot more competitive, Memento is in full retirement mode.
The Final Verdict
So is Memento still a good character to invest in right now? The answer is a solid NO. Her end-game performance is just too bad to justify her special set of weapons/stigma.
Night Squire
Night Squire (AKA Butler Fuhua) is currently one of the STRONGEST characters in the game for both F2P and P2W end. She does a ridiculous amount of physical damage, has both good sustain damage and burst damage. Her ultimate is probably the strongest ult in the entire game, doing a ridiculous amount of damage and makes you invulnerable for the entire duration. Night Squire is actually so OP, if you don’t invest in her, you will be at a very big disadvantage compared to other players. So in other words, she is a MUST HAVE for everyone.
Her fragments are easily farmable so start farming her the moment she is available, you won’t regret it!
The basic mechanics of Night Squire is a bit complicated, to avoid any confusion, I will try to summarize everything to make it simple. First, let’s call the normal attack button A and the ultimate button B. When you use a combination of A and B, the attack is considered a combo attack.

Night Squire has a special meter, and EVERYTHING she does revolves around this meter.
When you use ANY 1 of her 4 combo attacks, it will consume 1 bar of the special meter and give you the following benefits.
– Night Squire gains +40% physical damage, lasts 4 seconds.
– The last hit of that combo attack does an extra 300% of ATK’s physical damage.
You can replenish the special meter in 3 ways.
1. Normal attacks (AAA or BBB) gives you 1 bar after landing the last hit.
2. When using ultimate, it will automatically do a cycle of moves which will give you 1 bar of a special meter every cycle. Using Ult also gives you a full special meter instantly.
3. When not deployed, regenerates 1 bar of a special meter every 2.5 seconds. Unlocked at SS rank.
The Combo Attacks
Night Squire has a special marking mechanic on all her combo attacks.
-The combo attacks that start with A (AAB or ABB) will mark the enemy.-The combo attacks that start with B (BAA or BBA) will clear the mark and do 200% of ATK as physical damage.
So, in order to maximize damage, you should always cycle between A combo and B combo. Night Squire has 6 total moves, AAA, BBB, AAB, ABB, BBA, and BAA. Out of all 6 moves, only 4 are actually useful!
The A combo
Between AAB and ABB, AAB is the better choice. AAB gives you this uppercut which can knock up an enemy and the overall damage/speed is way better than ABB.
Also, the last hit of AAB has a very very big hit radius, so against a large group of enemies, AAB is great!
Currently, I found no merit in using ABB, so always use AAB when you need to do the A combo.
The B combo
Between BBA and BAA, BBA is clearly the better choice.
BBA gives you this multi-kick attack, it can easily build up a combo and it is a LOT faster than BAA. This move is the best at gathering SP.
So, out of 4 combo moves, you should always cycle between AAB and BBA.
Find a stage and practice it, build up that muscle memory so you don’t use the wrong move.
The Normal Attack
For the normal attack, both AAA and BBB have some merit. AAA is the triple punch and BBB is the triple kick.
AAA is a bit slower but lunges you towards the target, making it excellent at gap closing.
BBB is a bit faster, but you are mostly stationary.
Both AAA and BBB are very important for regenerating the special meter!
The Ideal Move Cycle
There are two types of playstyle for Night Squire.
1. After SS rank, she gets the ability to regenerate the Special meter in the back-line, and if she leaves the field with an empty special meter, the other party members get 15% all damage bonus for 10 seconds.
So if you have a well-built team, you can just cycle between AAB and BBA to dump all your special meters as fast as possible, switch to the other team member with QTE, and let the passive skill regenerate the meter for you. This is the ideal playstyle.
2. If you don’t have the SS rank skill or wish to run Night Squire solo, you need to fit in a set of normal attacks every time you cycle through the A-B Combo. So you can do AAB-BBA-(AAA OR BBB) and repeat. This makes sure you always have 1 bar of the special meter so you can have the 40% bonus physical damage buff active throughout the fight.
The ultimate
At 100 SP, you can hold the ultimate button to activate it. You enter burst mode and by tapping the attack button you will automatically cycle through your combo moves. The ultimate also replenish your special meter to full, so make sure you use all your special meters before ult. The ultimate gives you 80% attack speed, lasts 8 seconds. However, due to hit lag and the massive attack speed bonus, the ultimate lasts about 12 seconds in real-time.
The ultimate get significantly stronger every time you rank up Night Squire, at SSS with the optimal gear she can delete most Memorial Bosses with just 1 ult.
Ranking up Night Squire
Night Squire is SUPER dependent on her ranking. Each rank-up gives her A LOT of power boost.
A-Rank NS
A rank night squire is Yamcha tier, 90 percent of her skills are locked so she is absolutely worthless.
S Rank NS
At S rank, NS starts to shine. Most of her skill is unlocked, she can already tackle some of the bosses in Memorial Arena and get a decent score.
Ranking up Night Squire
SS Rank NS
SS rank gives passive regen on your special meter. The ultimate also causes constant bleeding, which is a HUGE boost against bosses because NS gets a 30% all damage bonus against bleeding/slowed/burning enemy.
SSS Rank NS
At SSS rank, NS can make enemies take 40% extra physical damage when ultimate is active. Increased physical damage taken is a super rare multiplier and is often undiluted, so it’s a straight 40% DPS increase. This basically allows her to delete most bosses with 1 ult.
Best Teammate

The best teammate for Night Squire is KMB. Night Squire has a very high Crit rate, but her stigma build usually doesn’t have Crit Damage. NS can also trigger KMB’s QTE easily.

God Kiana with her OP leader skill makes her the best friend for any physical damage dealer.

CH is the best support for any physical damage dealer, so Night Squire obviously pairs well with her.

DP, Yamabuki, and Wolf are all great physical boosters and Night Squire can achieve an almost 100% Crit rate with Yamabuki/Wolf lead.
Abyss Performance
Night Squire is like duct tape for an abyss. Due to her insane single target damage output, she can be used in any team to take care of Honkai beasts. Her 1v1 is very powerful due to the very high shield break+perma knock-up. She shines even more on Gluttony Abyss.
Starting at Ver 2.5, you can see what type of monster is the last spawn of each floor before the battle. You can easily switch in Night Squire if you see a Shield Guard. She is very widely used as a secondary DPS to clean up any Honkai Beast elite left on the field
Night Squire is also one of the easiest strat against Floor 25 boss.

Pair NS with CH, and with DP or Triumph as a healer, she can easily destroy the last floor. Since her ultimate has no cooldown, you can easily use Vitality Potion and spam her ult and just watch her decimate bosses.
Weapon Selection

Pretty much all the physical damage gauntlets are good for NS. I do not recommend Cygnus, even though the bonus SP regen is great, NS ultimate already gives a ton of attack speed, so the attack speed you get from Cygnus is almost useless.

The best weapon being Alpha Wolves, her signature weapon. But Stellar Vortex is only slightly worse.
Stigma Selection

Ryuunosuke set is the best early game option. Note that Attack speed helps A LOT on NS, faster attack=more SP gained, so you will need some form of attack speed.

Picasso TB+Elizabeth Mid is the best f2p option. Switch top to Jingwei Top for a boss fight.

Schrodinger Band TB+Ekat M is the best build for now. Schrodinger Band Bot is especially important due to the added SP regen. Ekat Mid because of the unrestricted physical damage, NS uses burst mode so Planck Mid doesn’t work.

Zorro TM + Celine Ascended B will probably be the best set in the future, but this is purely my prediction. Zorro set just landed on the CN server and it has HUGE potential.
Conclusion
In conclusion, Night Squire is an OP character. It has amazing performance on ALL end-game content. She is a MUST HAVE for everyone.
NS is a lot more reliant on ranking than gear. Her best gears are mostly there for SP regeneration so she can use ultimately it faster. The f2p options for NS are also amazing, so she will probably end up as the strongest valk for any f2p player by far.
So start farming her the moment she is available to you, she will pay you back tenfold!
Celestial Hymn
Celestial Hymn is a base S rank creature type character. She is currently the strongest support character in the game. She has the unique ability to impair a large group of enemies, reducing their DEF value for a long period.
Celestial Hymn can also gather monsters in a large area together with her ultimate. Due to her gathering ability and damage boosting potential, you will find her in every single top-tier Abyss team.
Character Perks
One of CH’s key features is that she really does not need ANY gear to function. All her functionalities are built-in to her skill set, here is the list of things she can do.
- Ultimate is a map wide Attract that hits 50 times, so she can gather mobs
- together and build up combo at the same time, also applies a 75% impair for 10 seconds.
- Built-in long duration impair, she can reduce enemy DEF by 50% with charge
- attack and QTE.
- Her normal attacks grants the entire party 2SP, ona 1 second cooldown.
- Her passive provides 30% Crit Damage towards impaired enemies.
- Upon deploying Cross, increases the entire party’s physical damage by 25% for 7.5 seconds.
- Her evasion skill creates 2 spinning blades round the character much like Raikiri effect, providing even more combo building.
CH as a Judah Carrier
Being Theresa meaning CH is also a good candidate for carrying Judah. Especially in Abyss, deploying Judah roots all enemy in place, so using Judah after ultimate ensures no monster can escape your ultimate’s gathering. After the abyss rework, you can also run lightning damage stigmas on CH and make her do significant single-target damage. This made her even stronger after the abyss rework because she can be a semi-damage dealer with Judah.
Best Abyss Duo
While Celestial Hymn can be run in every single Abyss team with great effect, there is one character she pairs really well, and that character is Dimension Break. Dimension Break’s switch skill applies time-lock to a large area, extending the impair duration from CH. DB can also equip Tyr+Schrodinger Top and become a mech-type damage dealer. The CH+DB duo spawned many different top-tier abyss teams.
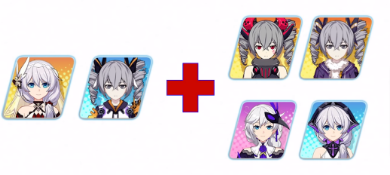
All 4 of these characters can be the 3rd member of the CH+DB Duo, and the list is only growing as more and more characters are introduced
The CH+DB Duo just offers too much utility, you can run pretty much any DPS with the duo and be very effective.
Disadvantages
Believe it or not, CH does have a few flaws. Most notably is her high-cost ultimate and long cooldown. Her ultimate cost is 125 SP and has an extremely long cooldown, and the attraction only lasts 3 seconds. So you really need someone to keep the enemies in place after you use ultimately. You can use Judah for this or Snowy/DB to CC the mobs.
CH is also useless against easier content, lower temperature abyss mobs have very little DEF value so you will barely see an increase in damage output, and her long cooldown just makes her very slow to play. Use Ranger or Chariot as the attractor when clearing lower floors/zones of abyss is MUCH faster.
CH is a character that thrives on end-game difficult content, if you are early in the game you will find CH to be very underwhelming.
Stigma Choice
CH really does not need any stigma to function, so you can just build survivability on her to tank the abyss bleeding.

The general use set provides more support and healing, not the best in any field so it’s more of a luxury set.

Highest survivability set, Lier Scarlet 2 set+Massive healing from Kepler Bot allows her to tank abyss bleeding for days.

Picasso Mid+Bot is the F2P version of the previous set, it provides an insane amount of survivability similar to the previous set.

Theresa Origin full set is a very good f2p set for general support, but not usable in high-temperature abyss due to lack of bleeding resistance.

The cheapest Abyss option, Zhuge Liang Bot provides a massive boost to DEF stats will make you reasonably tanky in high temperature, Rowland Top for healing, and Teri Origin Mid for cross-spam.
Other Builds

General Judah built for Abyss, Schrodinger Band Bot provides extra SP regen for more ultimate/Judah usage. Better than survivability build after the abyss rework.

General Memorial Arena builds to buff up other character’s damage output.

Einstein mid is a great option for some extra sustain if you need it an abyss.
Weapons

Best choice for abyss due to CC ability and extra damage output.

Blood Embrace is mostly used in Gluttony abyss where you gain bonus damage against a floating target. Also used to break shields bars in the Memorial arena and give a bit more extra burst damage.

11th Relic is mostly used to do more burst damage in Memorial Arena. In the abyss, it is far worse than Judah. The healing it provides is just too little and after the abyss rework, the healing is even less relevant.
Special Mention

CH using the Stun Cross when paired with Chariot+Tyr+Schrodinger Top can deal a nasty amount of damage. Gather up the mobs, hit them with the stunning cross and QTE+Tyr from Chariot for some nuclear explosions.
210k Crit against a type disadvantageous enemy in Gluttony Abyss. Although this CH+Chariot team is somewhat niche, it is very powerful if you have this Stun Cross. Do not salvage it if you get it by accident!
Conclusion
While Celestial Hymn is the most valuable character in the game, at the end of the day she is just a support. She can boost your entire team’s damage output but if you have nothing to boost, she won’t be effective.
Having Celestial Hymn will make some of the end-game content easier for you, but she isn’t a very powerful early game. If you aim to just play casually and do not ever want to touch Red Lotus Abyss, then Celestial Hymn won’t help you much. However, if you do want to play the harder content and be somewhat competitive, having CH is a MUST.
Flame Saitama
Flame Sakitama is the awakening form of Bladestrike, she is a creature-type character capable of doing massive fire damage.
Flame Sakitama holds a very special place in the meta, being the ONLY creature-type elemental damage dealer. Because of her excellent damage output and no other option available, Flame Sakitama is a must-have for every single player.
FS has a few unique moves unlike any other character, so mastering her requires some practice. She is also very agile and has a very powerful ultimate, this makes her very versatile on all the end game contents.
Normal Finisher
After the 4th hit of your normal attacks, a red ring will pop out. If you hit the attack button during this red ring you will perform a special finish move instead of the last normal slash.
The normal finisher move deals massive fire damage and will build up your special meter. This normal finisher is your primary way of dealing damage.
This finisher move is most of your damage output, so in order to do damage with flame Sakitama, you will have to master this finisher and use it whenever possible.
Combo Finisher
Similar to the normal attack, before the last hit of your combo attack, you can hit the attack button when the red ring pops up and does a special combo finisher. The combo finisher does less damage than your normal finisher, but it has 2 KEY functions.
First, the combo attack lunges you forward, making it excellent for closing gaps between you and the enemy. Use this move to chase the escaping enemy.
Second, the combo finisher will mark the enemy and make them receive 25% more fire damage. This mark significantly increases your damage output, so always do a combo finisher to mark the enemy before using the ultimate.
Evasion
Unlike any other character, Flame Sakitama can use evasion ONCE after each normal attack and not break the combo chain.
Because your normal finisher can only happen after the 4th normal attack, dodging enemy attacks while maintaining a combo chain to use the finisher is crucial for this character.
Special Meter

At SS rank, FS unlocks a special meter, you can also unlock this meter with SS rank Bladestrike. This meter goes up by 1.2 bar every time you land a normal finisher on the enemy, and the meter depletes overtime if Flame Sakitama is ON THE FIELD. Each bar of the meter increases all damage done by Flame Sakitama by 17%, the maximum bonus is 68%. Just to compare Jingwei Top gives a 31% unrestricted all damage bonus. Needless to say, this SS rank skill increases your damage output by a lot!
Ranking UP
Flame Sakitama gets a significant upgrade every time you rank her up, ranking for FS is more important than gear!
SS Rank
-After ultimate, all damage increase by 19% for 10 seconds
– Time fracture upon switch-in.
The basic requirement for using Fire sakura.
SS Rank
-Unlocks the special meter (can be unlocked Via SS rank blade strike).
-Gain 3.5 SP after normal finisher
The desired rank for Flame Sakitama, lots of SP regen allows you spam ultimately
SSS Rank
– Increase normal finisher’s damage percentage 650% to 726%.
A decent damage boost, 600 fragments for SSS is a long grind.
Weapon Choice

Void Blade provides a safe space for you to do damage, the active skill can also trigger your passive damage bonus against time-slowed enemies.

Raikiri provides bleeding resistance, also a decent choice for the abyss.
Both Fairy Sword and the Red Stick provide the most damage output. The damage increase from these two is very similar. Use them for Memorial Arena or when you need more damage output.
Stigma Choice

Nuwa Mid provides +102% fire damage which absolutely destroys any other stigma, the
most important stigma for FS.

Lier Scarlet T+B for abyss, the bleeding reduction is necessary for an on-field DPS like FS.

Planck T/B is a good choice in memorial arena boss fights. The 2 set effect prevents enemy attacks from interrupting your combo.

F2P boss fight set, swap out Jingwei Top to Shigure Kira Top for non-boss fight situations.
Abyss Team Comp

The ideal team comp before the abyss rework, Snowy and Celestial Hymn both support Flame Sakitama to do damage. This comp is no longer viable after abyss rework.
After the abyss rework, Flame Sakitama becomes an excellent secondary DPS. She is very good at 1vling the last elite enemy of each floor. Due to her special status as the only elemental damage creature type, she is widely used in many teams to cover the main damage dealer’s weakness. I personally use Flame Sakitama with Shadow Knight, she covers Shadow Knight’s weakness to Psychic-type very well.
Memorial Arena

Flame Sakitama became a lot better after Shadow Knight’s release. Flame Sakitama can already kill the boss with 1 ultimate+Blood Dance, however, getting 125 SP for the ultimate is very slow.

Shadow Knight’s leader skill not only provides a bonus starting SP for both Flame Sakitama and Blood Dance, the leader skill also provides a bonus elemental damage to the entire team. SK is just excellent support for FS in the memorial.
FS is also one of the best budget boss fighters. She can solo all the bosses without elemental resistance due to her extreme agility. So having a highly ranked Flame Sakitama gives you an option to deal with 1 of the 3 Memorial Boss each week.
However, due to her ultimate requiring too much SP to use, she won’t be getting any extremely high score in Memorial.
Conclusion
In conclusion, Flame Sakitama is an excellent character. She has very good performance across all the end-game content. She is more reliant on ranking than gear, and her F2P set works decently well.
FS comes with Celestial Hymn during the expansion, pulling in this expansion gives you a lot more value compared to other expansions. Both CH and FS are very useful if you want to tackle the end-game content.
Black Nucleus/Wolf Dawn
Wolf Dawn is the awakened form of Yamabuki. She shares the exact same OP leader skill as Yamabuki. She has absolutely no damage potential so don’t try to build her as a damage dealer. WD is pure support, and she excels in Memorial Arena. WD provides the following:
1. Team wide barrier against elemental damage (at SS rank this barrier also gives the entire team +30% elemental damage)
2. When WD enters the battle she summons an armor bunny with her. The armor Bunny has a multi-hit attack so it can do some serious damage with Judah.
3. Short cooldown evasion skill with global time-fracture.
4. At SS rank evading an attack grants the entire team +4 bonus SP. Against some bosses with multi-hit attacks, she can just evade many times and quickly fill up the entire team’s SP bar.
Not much to say about WD, she is a very useful support character. Due to skill sharing, I strongly recommend you farm Wolf to SS and leave Yamabuki at S rank. Wolf’s team elemental damage skill is not shared so you really want that SS rank on her.
Black Nucleus is a difficult topic. If you want a short answer I will say it here. At the current patch, I don’t think BN is worth getting if you are F2P or Light Spender.
Especially after Butler Fuhua’s release, S rank Black Nucleus is pretty much obsolete. BN is the awakening form of Snowy Sniper, and she does only one thing, the highest single target physical burst damage in the game. However, she has almost no sustained damage output so you usually just do 1-2 shots after entering the field with QTE and switch out.
Because of her insane burst, you can stack many debuffs and buff up her damage output to an absurd degree. With the correct team setup, she can often take out end-game bosses with 2-3 shots. However, if you don’t have the correct team build, she is very underwhelming.
BN’s best teammates are all base S rank, making her a very expensive character to use. Without the proper team/equipment, her performance is just not worth the price.
The only real P2W character in this game
Unlike every other character, Black Nucleus is the only real P2W character in this game. Each time you rank her up she gains a very significant increase and because her base damage is so high, any increase you get will be very noticeable.
For example with the exact same team and gear, S rank BN will kill a boss with 3 shots. With SS rank you have a chance to kill the same boss with 2 shots. With SSS rank you have a greater chance to kill the same boss with 2 shots and a small chance to 1 shot the boss.
The difference cannot be made up via gear and skill, so it is by definition the true P2W character.
RNG Based Character
Unlike what most people believe, BN actually does not 1 shot everything that easily. Most of her damage output is dependent on LUCK.
Schrodinger Top, Crit rate, passive bonus damage that only works 40% of the time. To get everything right you often have to retry a fight hundreds of times to get a good result. So playing her really feels like spinning a slot machine.
Best Gear/Team
Sanada+Schrodinger Top+Planck Mid is the best gear set for her without any debate. If you use any subpar substitute her performance will drop quite a bit.
For both, you have 2 choices. Lier B or Sin B. Sin B provides a +25% crit rate after you QTE. However, with enough retries, you can technically crit more so if you feel like retrying thousands of times Lier B will give you more damage output.
Moonbeam is a must-have if you want to run BN in Memorial. Celestial Hymn is also very good on the team. However, if you have SSS Moonbeam you can replace Celestial Hymn with Triumph/BattleStorm + Black Xuanyuan Sword. Usually, you just use KMB+CH+BN.
Black vs White
So why do I say S rank BN is obsolete? Currently, White Night Envoy (aka ButlerFuhua) does the exact same thing as BN and better. SSS rank Butler Fuhua already surpasses S rank BN in many bosses and she can kill a few extra bosses BN cannot.
After I got my Butler Fuhua to SS rank I only used BN twice, Butler Fuhua requires less gear to achieve the same result. With the same gear, she often gets the same or better results. And most important of all, Butler Fuhua requires almost O luck. For example, the boss Jizo Mitama, Butler Fuhua can get 36800+ points with about 10 minutes of play. To get the same 36800 points you have to retry with BN for 2-3 hours assuming you play perfect every single time.
While it is true that BN still holds many high score records on many different bosses, you need a higher rank BN and more time invested to achieve those scores.
In conclusion, using BN is like throwing dice, For S rank BN you need to throw 3 dice and roll three 6 for a good result. For SSS rank BN you only need to roll two 6 for good results.
BN is also an okay abyss character after the rework. She replaces Snowy in the CH+DB team. She is also one of the best Wrath abyss characters (Wrath abyss got closed down for rework recently).
‘Whether or not she is worth getting is really up to you, Personally, I don’t like playing BN at all, She eliminates all skill requirements for each boss fight and turns the fight into a dice throw. With the proper team, she will secure your top places in Memorial Arena.
Support Characters
First, let’s understand why a supporting character is necessary to optimize a team. As you know, you can deploy 3 characters in Honkai Impact 3, and in most situations, you can only have 1 of them on the field. So having 3 damage dealers isn’t very useful considering you can only have 1 of them dealing damage. Having support that makes your other 2 damage dealers do more damage is the optimal way of playing.
Let’s talk about abyss support first. After the abyss rework, running full support characters that only boost other character’s damage are no longer optimal. Now abyss support is simply a character that gathers monsters together. If your attack hits 5 monsters instead of 1, you do 5 times the damage output, so running a gatherer is necessary. There are only 3 characters in the game for this role.
Ranger gathers mob upon evasion. The cheapest option for gathering mobs, and also the fastest. Due to some monster’s attacks doesn’t trigger evasion skills, she is not very popular on Lotus abyss. Still, she is the best option for Agony and lowers due to her flexibility. She can also freeze/float/impair with different pistols.
Celestial Hymn has the weakest gather among the 3 but can boost the entire team’s physical damage. She is the most popular choice in Lotus due to the damage buffs but I wouldn’t use her on Agony or lower due to slow gather.
Chariot has the strongest gathering but has almost no supporting ability. The least popular of the 3, but she can also be a semi-damage dealer in the early game so she is your best option before you get S rank Ranger or Celestial Hymn.
Next, let’s talk about Memorial Arena Supports (or just boss fight supports in general). To understand the support role in Memorial Arena, we first have to discuss how the score is calculated.
In memorial, a SS rank boss in the expert bracket starts with 32000 points, for each in-game second pass you lose 53 points until you kill the boss. However, if you trigger global time-fracture (when the entire screen turns dark), you will slow down the in-game timer which effectively creates more time for you. All supporters in the memorial arena do at least 1 (if not more) of these jobs.
1. Trigger as much time-fracture as possible to buy you more time.
2. Increase your damage dealer’s damage output to kill the boss faster.
3. Trigger QTE, most QTEs come with time-fracture, so they buy you more time and do extra damage.
Now I will go over all the common support characters 1 by 1 and explain their roles in the team composition.
Wolf’s Dawn
Role: Elemental damage support
Abilities:
-Low cooldown time-fracture on evasion (3 seconds duration, 11 seconds cooldown)
-When the elemental barrier is up increase the entire team’s elemental damage by
30%/(Unlocked at SS rank)
-When successfully dodge an attack (doesn’t matter if evasion skill is on cooldown or not) give the entire team 5 SP. (Unlocked at SS rank)
-High hit count, from both the character with laser-equipped and the summoned unit, makes her the main damage dealer in Judah Team.
-QTE triggers via time fracture, very easy to trigger and the QTE itself has time-fracture too.
Wolf’s Dawn is probably the best memorial arena support, she is made for this environment. She has a lot of time-fracture and team-boosting abilities that make her a must-have in the Judah Team. She can also be used in any elemental damage team.
Lightning Empress
Role: Lightning damage Support
Abilities:
-Normal attack can cause the enemy to take 70% extra lightning damage for 6 seconds, extendable via time-fracture.
-Leader skill gives the entire team +50 starting SP which is extremely helpful to use your ultimates earlier, results in a faster kill.
-Can carry Raikiri.
LE is Judah’s partner in crime, capable of shredding most bosses in this game. Judah just isn’t that powerful without her. Just for this reason alone I highly suggest you choose LE when the wishing well hits your server.
All Theresa Character
Role: Carries Judah
Abilities:
-Give Judah typing advantage over whatever boss you are fighting.
-Some Theresa has time-fracture, which can extend Judah’s Duration.
-Trigger other party member’s QTE for more damage output.
One common misconception is that Theresa needs to have a high hit count to use Judah Properly. In fact, most of the hits in the Judah Team come from Wolf’s.
Laser+Summon and Raikiri, Theresa is just there to apply the mark and add some extra utility.
Pledge is the only exception because her ultimate hits many times in a short time, making her the overall best Judah carrier. But having typing advantage is more important against most bosses so on Bosses like Parvati it is better to use a creature type Theresa.
Divine Prayer
Role: General Support
Abilities:
-Reduces 80% DEF of an enemy for 6 seconds every 10 seconds in the backline.
-Long time-lock upon evasion.
-Ultimate gives the longest time-fracture.
-Ultimate gives the entire team +30% attack speed.
-Best healer in the game (healing isn’t very useful late game).
-Leader Skill gives the entire team +32% elemental damage when maxed.
-Can use Thunder Kikaku to further boost Judah’s damage. Divine Prayer is a must-have for everyone. Her evasion skill will destroy early game bosses like Ganesha/Dark Bronya, and her healing ability is somewhat useful in the Abyss.
In Memorial Arena, she is mostly used as physical support due to her defense reduction. With Thunder Kikaku she can replace Wolf’s role in the Judah team on some bosses.
Yamabuki
Role: Physical Support
Abilities:
-Reduces 30% DEF with her non-charge attack.
-Second Longest time-fracture on evasion skill (5 seconds duration, 15 seconds cooldown).
-When successfully counter an attack (doesn’t matter if evasion skill is on cooldown or not) give the entire team 4 SP. (Unlocked at SS rank, shared with Wolf)
-Gives shield to everyone on the team, blocking some physical damage.
-OP leader skill, giving the entire team +26% Crit rate when the combo is over 30.
-QTE can be canceled after the trigger to give you more time-fracture.
-Can heal the entire team with ultimate.
Yamabuki is another must-have for everyone. Her skill set is just too good and can be abused in many ways. However, don’t count on her shield as late-game mobs will easily destroy it with one hit.
Yamabuki+divine Prayer+l physical damage dealer is one of the most commonly used budget teams in the memorial arena. Her most important skill is shared with Wolf so I strongly suggest you rank Wolf to SS and leave Yamabuki at S rank.
Celestial Hymn
Role: Physical Support
Abilities:
-Long duration impair, reduces 50% DEF with her charge attack and QTE.
-Various team buffs, including +30% crit damage against the impaired enemy, after cross deploy team physical damage +25% when the combo is over 45, normal attack regenerates 2 SP for the team with a 1-second cooldown.
-Easy to trigger QTE and the QTE also comes with time-fracture.
Celestial Hymn is the strongest physical support character in the game. Her skill set includes many team buffs and long-duration impair which is super useful in the late game. Entering the battlefield with QTE causes time-fracture which means you don’t even lose any time on applying the debuffs and buffing the entire team.
With CH’s support, physical damage team has a chance to compete against the elemental damage team late game. A very impactful character.
Phoenix Fuhua
Role: Elemental Support?
Abilities:
-Combo attack leaves an ember mark on the enemy which lasts 20 seconds. Anytime
if the enemy is hit it will take massive amounts of fire damage. This damage has a 1.5-second cooldown.
-High elemental damage boost for the entire team when using specific attacks.
-Normal attacks against enemies with ember mark will drop 1 SP pack, 20 seconds cooldown.
A very unique support character, her ember mark is very similar to Judah (except longer duration and has a built-in cooldown). She plays like a damage dealer but she has a lot of team-wide damage boosts.
To say she is supportive is weird because her damage output is extremely high. But it is not ideal to play her as the main damage dealer. Unlike other supports which are not dependent on gear, Phoenix Fuhua is EXTREMELY dependent on gear.
In case you haven’t noticed the pattern, almost all the good supporters are psychic types. This is possibly due to LE and Yamabuki leader skills being too strong, so there is no good physical psychic type character in the game.
The above-listed valkyries are just pure supports, a lot of other characters like DB can be both a support and a damage dealer.
In conclusion, having the right support in your team will help the team function better. ALL The top meta team has at least 1 support. Team synergy is a lot more important than gears in this game!
Sakuno Rondo
Since Rondo got so many buffs I won’t go over all of them in detail. The main buff is the reduced SP cost from her ultimate, and bursting a brand regenerates 5 SP.
Rondo Theresa is a really good character, but she is super expensive to build and not worth it for 99.99% of the player base. For the same investment, you can get a lot more power from other characters.
Note that this does not mean she is weak, but even for medium spenders you still have very limited resources so she really isn’t worth all that resources. I will explain more in the following slides, but for now, let’s go over her advantages first.
Rondo’s Strength
- Top tier damage output with ideal gear.
- Easy to play.
- One of the only 2 Psychic types good at AOE clearing mobs.
- Uses generic fire damage stigma, so fully gearing her will also gear 3 other characters.
- Is a magic girl!!
Rondo’s Weakness
-Fragment is in 5 and 6, this fragment costs 60 stamina. This makes her the most expensive character to farm •n the entire
-Most important skills are locked on SS and SSS rank, she is really weak before
SS rank.
-EXTREMELY dependant. You need her Signature weapon.
-Too dependent on the ultimate, this makes her playstyle very inflexible.
-Terrible against a single target, which is her biggest problem in the abyss.
Weapon Choice
This weapon is absolute trash for so many reasons that I don’t even feel like explaining. The weapon design made absolutely no sense and doesn’t fit Rondo’s playstyle at all.
First of all, the active skill costs 20 SP! For a character that depends entirely on her ultimate, you DO NOT want to waste 20 SP. The passive skill cooldown is way too long, and it does physical damage..when Rondo usually builds pure fire damage.
Best Stigma build:
Her best build is the very generic fire damage build. You can also use Higokumaru B, but I find Schrodinger Band B helps a lot to reduce the downtime when she’s out of SP.
The conclusion
In conclusion, Rondo is a very interesting case. She is really strong in her own niche, but there is just no place for her in the game.
If you want a psychic type AOE clearer, go for Ice Kallen, she is free and takes a lot fewer resources. When there is another character who fills pretty much the same role but is exponentially cheaper to build, why bother with the more expensive option that is only slightly better.
Farming Rondo fragments will cost you 180 stamina every day, let’s be generous and say you get a 3.5 fragment drops per day, you will need 350 fragments to rank her from A to SSS. That is 100 days worth of resources that you have to dump into her. And for 99.99% of the players (including myself), that’s just not worth it.
Dimension Break
Dimension Break is one of the most powerful characters in the game. I rank her on the Highest tier in my tier list. This character is really easy to understand, she acts as a team enabler in many top-tier teams. In other words, many top-tier teams cannot function without her.
In Honkai Impact 3, support characters are much more important than DPS characters. In most teams, you can switch to different damage dealers and the team would still work, but if you switch out the support the team will fall apart.
Dimension Break is one of the strongest support and one of the strongest damage dealers at the same time. Having her is highly valuable and she is farmable through an open-world shop/memorial arena.
DB has the best switch skill in the game, if you are not utilizing the switch skill you are playing her wrong.
The switch skill time locks the target and all units around the target (about 3m radius) for 7 seconds. The time lock also applies to bleed for the duration and lift them to the air if they have no shield bar.
In practice. This switch skill can proc QTE (through time-fracture or lift). apply_ bleeding to enable many other valkyrie’s passive. Apply any on-hit effect like Newton Bot and extend the duration of debuffs that are already on the target for the time-lock duration.
Since the switch skill is so quick (you can use the block to cancel the backswing), you can immediately switch to your damage dealer via QTE, so you don’t waste any time on the debuff you just applied.
DB’s switch skill also enables many other characters to make them perform better. Here is a list of valkyries who performs way better with DB:
DB can trigger their QTE or their passives with the switch skill, and control them for the duration of the time-lock, making a safe space for them to do damage. Almost every single top-tier damage dealer in the game plays a lot better with DB in the team.
Since there are so many top-tier abyss teams with DB, I won’t go over them 1 by 1. I will just list some of them with their best gear setup.
Currently one of the strongest meta teams is DB+Snowy+CH. DB can extend the freezing of Snowy’s ultimate for a long time and cover
Snowy’s weakness as a secondary DPS.
You can also chain DB’s switch with Snowy’s QTE for instance CC or CH’s QTE for AOE impairment.
DB also has one of the easiest 33-floor teams. Since the switch skill is AOE, you can easily control both bosses with your switch skill, creating a safe space for Memento to do damage.
Running double CC with DB+DP is one of the easiest strategies for 33 floors.
The key to this strategy is to force Bronya to move closer to Ganesha, so you can grab both bosses with DB’s switch skill making this fight very easy.
Unfortunately, Dimension Break’s Memorial Arena performance isn’t great. Most of the bosses have extremely high time-slow resistance. So DB’s switch skill will only lock them in for 1 second at most. Currently, DB isn’t in any of the top memorial teams.
On the other hand, DB’s co-op performance is just amazing. Her team skill can lock one enemy for a very long time and the locked enemy takes extra damage. This combined with Shadow Dash’s team skill can be abused to kill Armada’s boss/Raid boss.
Conclusion
In conclusion, Dimension Break is an amazing Abyss character. Many teams just cannot function without her.
Damage dealing characters can easily fall off but support characters are always going to be good. DB has been a top-tier character for more than 16 months at this point, and I don’t see her falling off anytime soon.
At patch 2.3 they added a feature where you can choose from Moonbeam, Lightning Empress, and Dimension Break for 6000 crystals. If you don’t have all 3 1 strongly recommend DB, she is far more useful than the other 2.
Valkyrie Accipiter
Valkyrie Accipiter is one of the most unfortunate characters in the game. There is a lack of good physical damage psychic type characters currently, and Accipiter is supposed to be the chosen one. To bring balance to the 3 types.
Her best weapon is given for free and she even got a signature set, everything was looking bright until the dark age suddenly arrived. Accipiter got the hardest nerf any valkyrie has ever gotten. She went from Tier 1 best F2P character to straight up dumpster tier.
I was originally planning to do an in-depth character guide on her, but given her current state, she just isn’t worth it.
The Move Set
Accipiter has 3 combo moves. Let’s say that the normal attack is A and the combo attack is B. Your normal attack is a 5 hit combo.
Combo 1: ABB or AABB, straight ground punch, can stun the enemy and has the highest DPS.
Combo 2: AAABB or AAAAABB, uppercut into ground punch. Gives a buff of all damage for a few seconds and heals you.
Combo 3: Hold B, charged Ki-Blast. Used for ranged AOE damage.
The ultimate
At any of the 3 combos, if you have 25 SP you can hold the B button and consume 25 SP to make the combo move more powerful. The combo moves will do more damage and have an added effect.
Combo 1: Longer Stun time.
Combo 2: All damage buff and heal to the entire team.
Combo 3: Entire party does bonus damage to the shield bar.
The Deadly Nerfs
So Valkyrie Accipiter can heal, and she heals for A LOT. She is basically Divine Prayer with great damage output. This made her very powerful for the abyss as she can easily outheal the abyss bleeding while doing okay damage.
However 2 heavy nerfs hit her. First, the charged Ki-Blast ultimate got nerfed so it cannot multi-hit. Before you can stack 2 waves of monsters in the abyss and unleash 3-4 ultimate Ki-Blasts to clear them instantly. Now it does fixed damage to each unit, this effectively decreased her AOE damage by 80% or more.
The second nerf is even worse, due to the 2.3 abyss change, now bleeding scales with time. You can no longer take 10 minutes with
Accipiter and slowly clear each floor anymore. The bleeding after 5 minutes is significantly stronger, so healing is completely useless if you don’t have enough damage. These 2 nerfs combined is just a death sentence for this character.
After the nerf
Now Accipiter is just an average character. She has some niche usage in Memorial to break the shield, but that’s about it. Her damage output is okay and she is fairly cheap to gear. As a boss fighter, she is great, but there aren’t too many Mech-Type bosses for her to shine.
Her best gear set consists of mostly Free gears, so she is a very good budget boss fighter for Memorial.
Imayoh Ritual Character
Imayo Kallen is the awakening form of White Comet. She is not strong enough for me to do a long guide, but many people have misunderstandings about this character.
Understanding The Character
Imayo Kallen is like a combination of Miko and Meme to. Her core mechanic is the KP bar. Using her combo attack will use all the KP vert have and with each bar of KP used, the combo attack gets stronger.
Each bar of KP is 300, and the combo attack gets stronger in an increment of 300. The combo attack has 4 stages depends on how much KP is used.
Stage 1: O KP used, 120% of Atk
Stage 2: 1 to 300 KP used, 510% of Atk
Stage 3: 301 to 600 KP used, 1000% of Atk
Stage 4: 601 to 900 KP used, 2000% of Atk
Using 601 KP and 900 KP will do exactly the same amount of damage. But your KP bar can go negative. So if you use a combo attack at 601 KP, your KP will be 601-900=-299 KP.
How to regenerate KP
The KP bar slowly regenerates over time, there are 3 active ways you can regenerate KP.
1. Dodging an attack will give you 80 KP
2. Using ultimate will give you 300 KP (exactly 1 bar)
3. When your normal attack Crits it regenerates 20 KP, since your normal attack has a very high hit count, this is your main way to fill up the KP bar.
Note that you only regenerate KP when you Crit.
Optimal way of playing
Imayo Kallen is extremely easy to use. You just spam your normal attack until your KP bar is above 2 bars, then unleash a combo attack by tap and holding the attack button.
You can also use ultimate multiple times because the ultimate has no cooldown and only costs 60 EP. What you do against bosses usually is you save up 180 EP, and 2+ Bar of KP. Switch out to other valks to debuff the boss, then switch back, combo attack and ult 3 times, and combo attack again for maximum burst.
Imayo’s Strength
Imayo Kallen is one of the strongest early game characters you can find. She is already powerful at A rank, and she can time-fracture/float/combo attack so she can do most MISSION OBJECTIVE just by herself. I always pick her when doing new stages so I can get all the missions done in 1 try.
She is very similar to Miko, very agile, has one of the best dodge animations, and lots of I-frames. This means she is an excellent boss fighter. Her main use is in Memorial Arena and that is pretty much it.
She is an early game valk that falls off extremely hard midgame and once you gear her up she can be a great late-game boss fighter,
How do you gear her?
Imayo Kallen falls in a very interesting niche. She is like Miko, one of the cheapest boss fighters you can build.
The Keyword is CHEAP. She does not need any gacha gear to beat a lot of the bosses. But she doesn’t get too much better with Gacha gear.
Her signature set is the Schrodinger Band set. But turns out this set is completely OP and many other characters use it far better than Imayo Kallen. You do not need this set to make her work, but if you have this set you wouldn’t want to use her because there are better options.
Conclusion
In conclusion, Imayo Kallen is a very cheap and effective boss fighter late game. You are not going to get high scores with her, but she will kill a lot of the bosses easily and you don’t need to invest crystals in her.
Her performance in the abyss is just bad, she generally sucks against multiple enemies. Her agility is her biggest strength and that makes her very strong 1v1. I strongly recommend at least get her to S rank and get Jingwei Gun for her if you are F2P, she is totally worth it. For medium+ Spenders just don’t bother, there are better options to spend money on.
- More Tier Lists